
Still scrolling through Christmas craft photos at 11 p.m. without a single idea saved? Same here. And here’s the thing nobody tells you: the crafts that actually get finished are the small ones — one felt ornament, a ribbon tied onto a wreath, marshmallows glued to a foam cone before dinner.
We spent serious time browsing Etsy, Michaels, Target, Anthropologie, and Amazon to bring you only what’s worth your attention this year — 31 ideas you can realistically finish before December 24, priced from about $4 to $450. You’ll find rustic natural projects built from pinecones and dried orange slices, whimsical maximalist displays, modern metallic finishes, and cozy neutral vignettes, with budget and luxury versions compared side by side.
Slow, finish-it-in-an-evening crafting is what’s driving 2026 — Pinterest has tilted hard toward pastel palettes and handmade objects over the usual red-and-green rush.
And stay until the end — we break down the most common mistakes that can ruin these looks.
📌 Save this to Pinterest for later — you’ll want to revisit these ideas.
1. A Silver Tinsel Wreath Over a Gold-Stocked Bar
The silver tinsel wreath is doing two jobs at once — it reads as ornament, but it also bounces light around the room the way a mirror would. Against a plain white wall, those metallic strands finally get something quiet to sit on, which is why the gold cocktail shaker, the gold taper candles, and the miniature bottle brush trees feel placed rather than crowded. Fresh white flowers and a single fern stop the whole setup from tipping into all-shiny-everything territory.
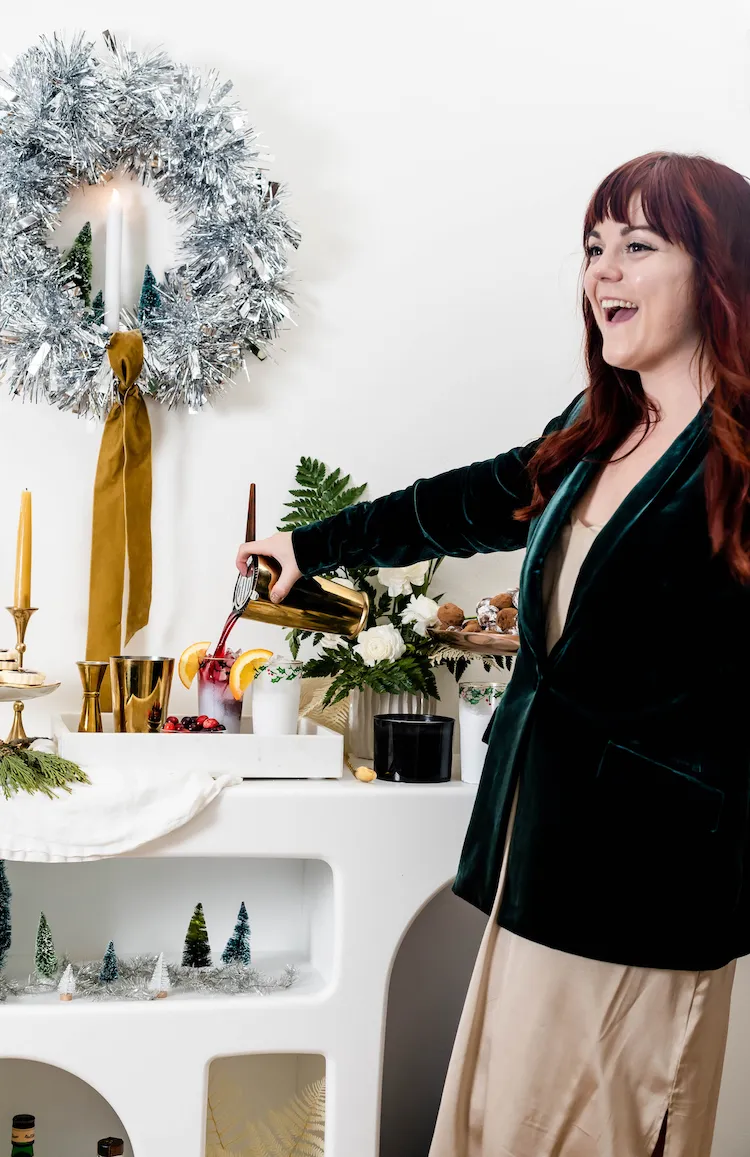
- Bar cart or console table: $150–$400
- Silver tinsel wreath: $25–$60
- Gold shaker, jigger, strainer: $40–$120
- Bottle brush trees, set of six: $12–$30
- Gold taper candles, marble tray, fresh greenery: $35–$70
Total: roughly $262–$680. Budget alternative: a Facebook Marketplace cart plus thrifted bar tools lands the same look near $120, and nobody pouring the drinks will ever notice.
2. Rose Gold Ribbons and Oversized Ornaments on the Entry Steps
Run the numbers on this entry and you get roughly 55% evergreen, 30% metallic gold and rose gold, 15% pink satin ribbon. The greenery carries the visual weight, the metals catch whatever light the street gives you, and the pink is what makes it feel current instead of 1998. Swap rose gold for matte black and the identical percentages turn moody and modern; swap it for warm copper and you land somewhere softer and more traditional.

Cluster entry ornaments in threes and keep each one between 4 and 6 inches across — odd numbers read as collected, while evenly spaced baubles read as shipped straight from the store. Fasten every cluster to the garland’s wire spine with a zip tie, because ribbon alone won’t survive a windy week. Burlap-wrapped nursery pots hide ugly plastic for about $8 each, and the boxwood shrubs carry the whole arrangement into January.
3. A Tall Tree With Rose Gold Ornaments and a Witch’s Leg
The black-and-green striped witch’s boot and the flat green cutout leg tucked into the branches. Pull those out and you have a perfectly nice, perfectly forgettable rose gold tree. Leave them in and the room gets a sense of humor — which is exactly why the gifts underneath lean pink and green instead of red. One odd object can license an entire color story. Compare with Idea #5: same pink-and-green palette, completely different energy.
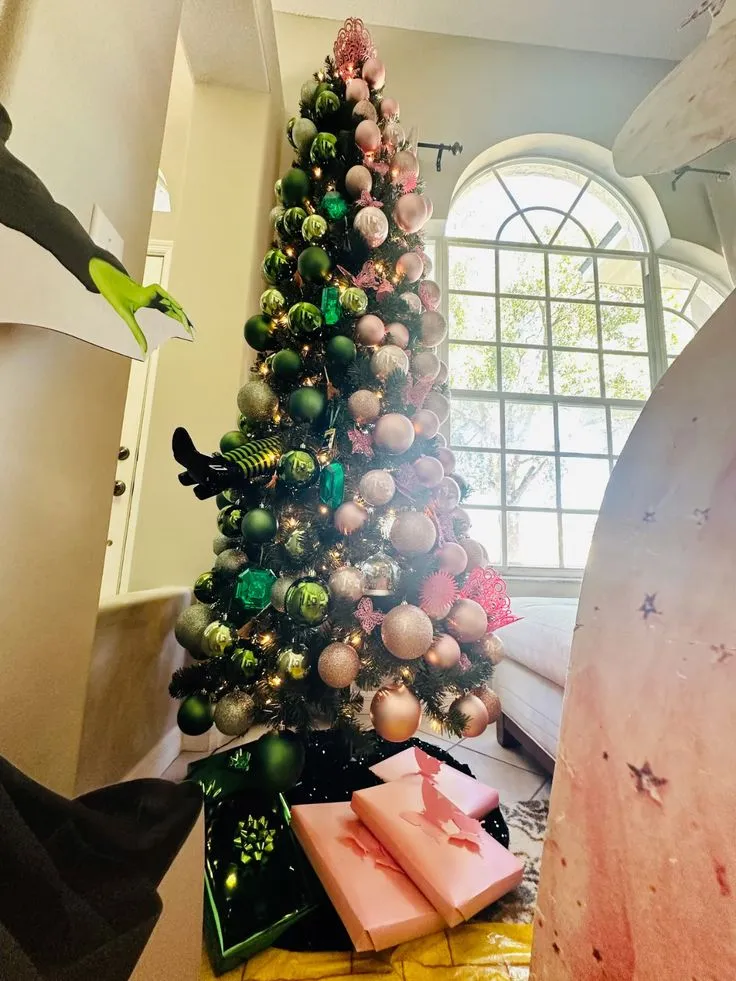
Novelty accents need somewhere to live the other eleven months, so decide on storage before you buy the boot. A tree this heavily loaded also takes two people and about three hours, so block the evening or you’ll be hanging ornaments at midnight. If small kids share the room, keep the cutout leg above knee height — it gets tripped over every single year.
4. A Tiered Metal Frame Loaded With Mixed-Finish Ornaments
- Set your conical metal frame on a level floor — a wobbly base is the only real failure point here.
- Sort ornaments into three piles: glossy, matte, glitter. Mixing finishes is what keeps the display from looking flat.
- Hang the heaviest pieces on the lowest tiers, then work upward with lighter ones.
- Weave warm white string lights through the frame last so the cord hides behind the ornaments.
- Step back every few minutes — density like this is a slow build, not one pass.
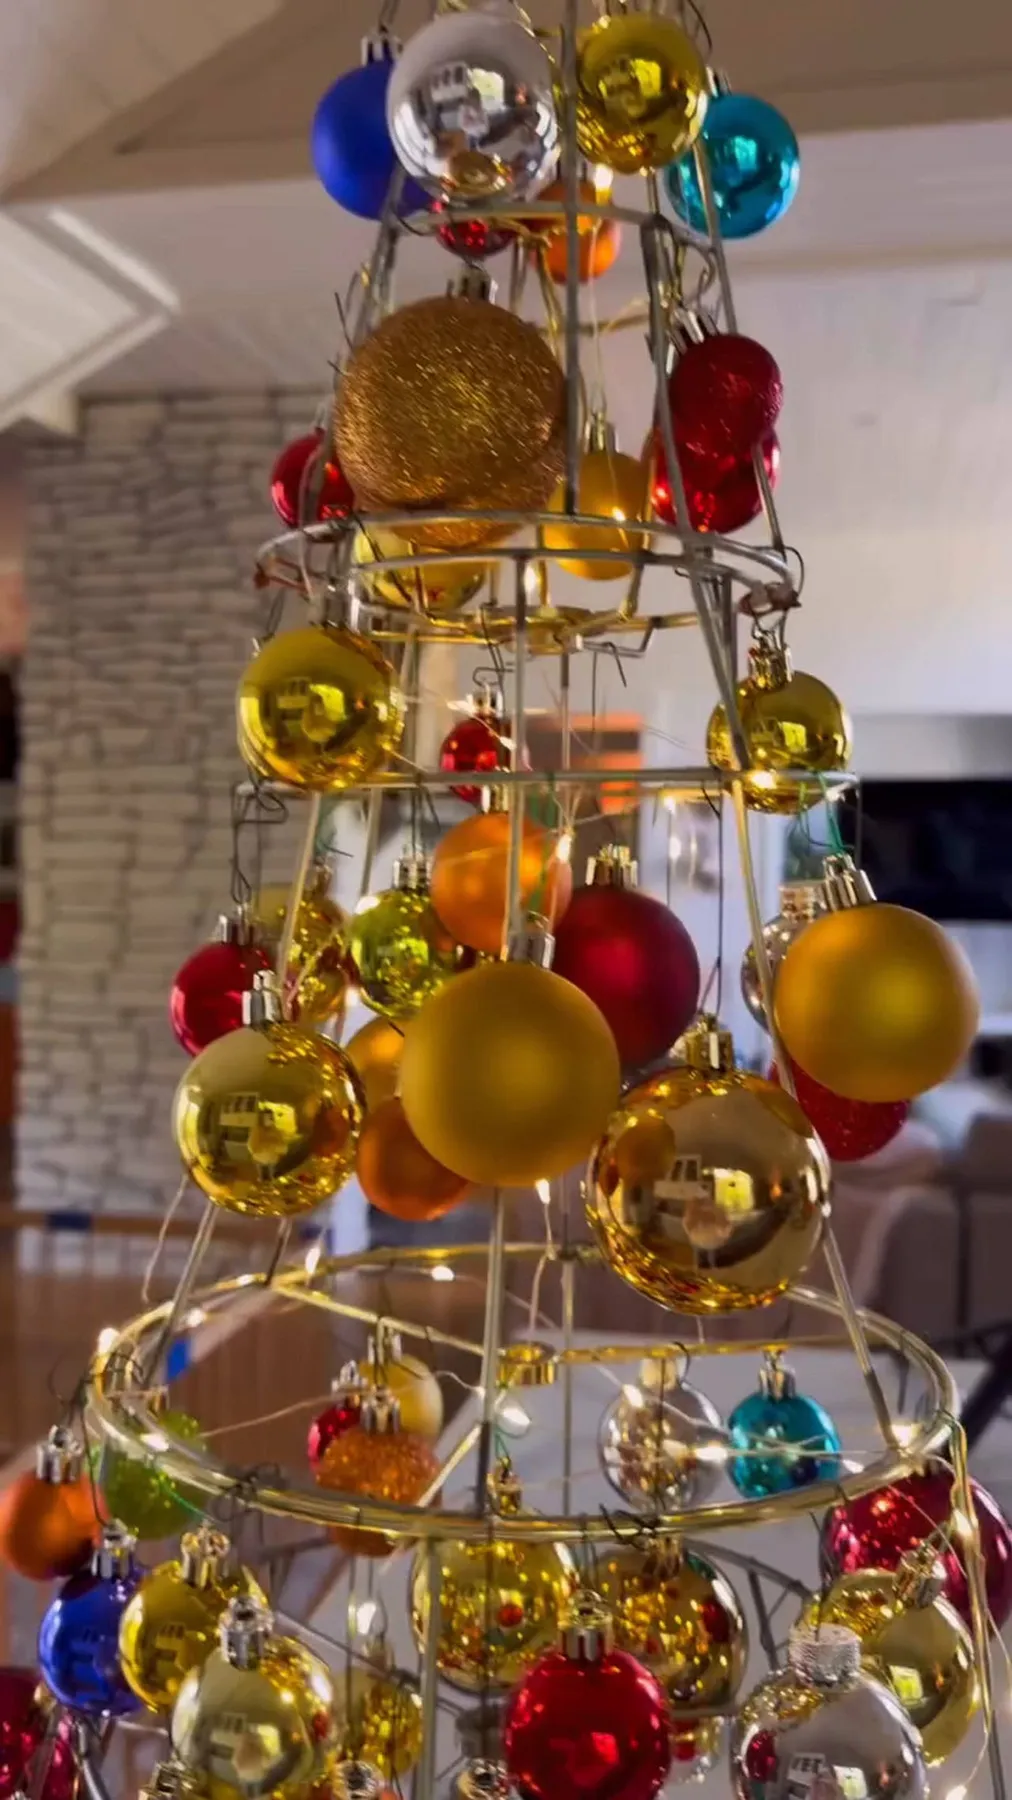
Time: about 90 minutes. A good mixed ornament set runs $40–$90.
The frame is the only real expense, and it’s the easiest thing to fake. A wire tomato cage, an upside-down IKEA plant stand, or a $10 Marketplace find all do the same job once ornaments cover them. Shop thrift stores for ornaments by the bag — $3 to $6 for a mixed dozen beats $18 for a curated set of six, and the mismatched finishes are the entire point. Total done cheaply: about $75.
5. Hot Pink Glitter Cone Trees on a White Mantel
Cone trees are the easiest thing on this list to make from scratch, and the shape does all the work. Roll a 6-inch circle of cardstock into a cone, brush on two coats of white glue, then roll it in fine glitter over a paper plate. Budget about $4 per tree and 20 minutes of drying time. Group them in threes at different heights — 4, 6, and 8 inches — so the mantel reads as a collection rather than a lineup.
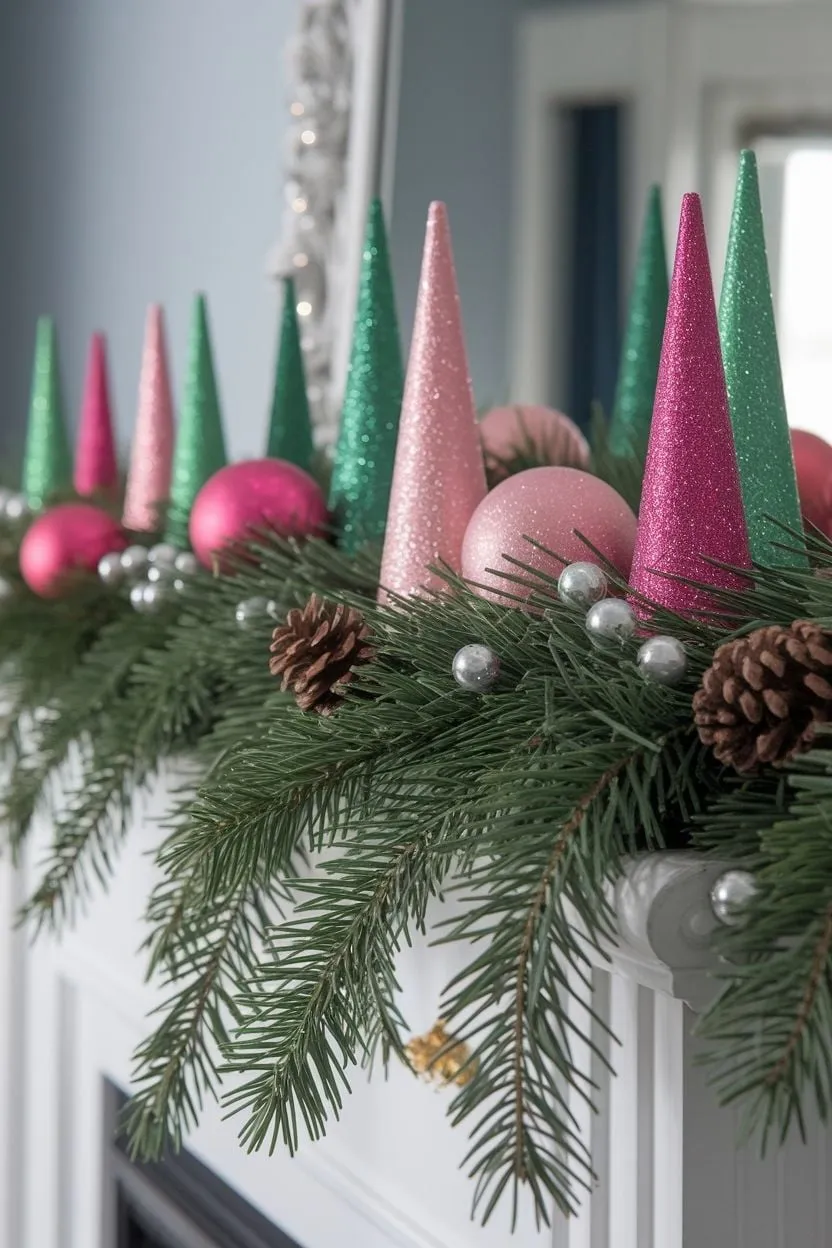
Pink Christmas has been building for a few seasons, but 2026 is the year it shook off the novelty label. Blame the color confidence of the last few years and a Pinterest-wide appetite for palettes that photograph well against white walls — hot pink and deep green hold up in a phone camera better than red ever did. The interspersed pinecones and silver beads are what keep it from floating off into candy land, and that balance is what gives pink staying power.
6. A Frosted Miniature Tree Styled in a Wooden Tray
- Miniature frosted tree: $12–$30
- Clear star topper: $6–$14
- Twine-wrapped pinecones: $8–$18 (free if you forage)
- Dried orange slices: $6–$12
- Light wood tray: $15–$35

Total: $47–$109. Thrift the tray and dry your own oranges at 200°F for three hours and this drops under $30.
The clear star topper is the one thing holding this together. A tiny tree doesn’t ask for much, but without a topper it reads as a tabletop shrub rather than a tree — the star tells your eye what you’re looking at. Keep it clear or frosted instead of metallic, because on a miniature tree a shiny star would visually outweigh everything and pull focus off the twine and dried orange slices that make the arrangement feel handmade.
7. Fabric Leaf Ornaments With Wooden Beads and Red Twine
- Cut two matching leaf shapes from checked cotton, roughly 4 inches long.
- Run a thin bead of white glue around the edge of one piece and press the second on top, leaving the top quarter open.
- Slip a 3-inch loop of red twine into the opening and glue it in place.
- Thread a small wooden bead onto the twine above the leaf as a finishing detail.
- Dry flat for an hour, then fluff the edges with your fingers so they don’t look pressed.
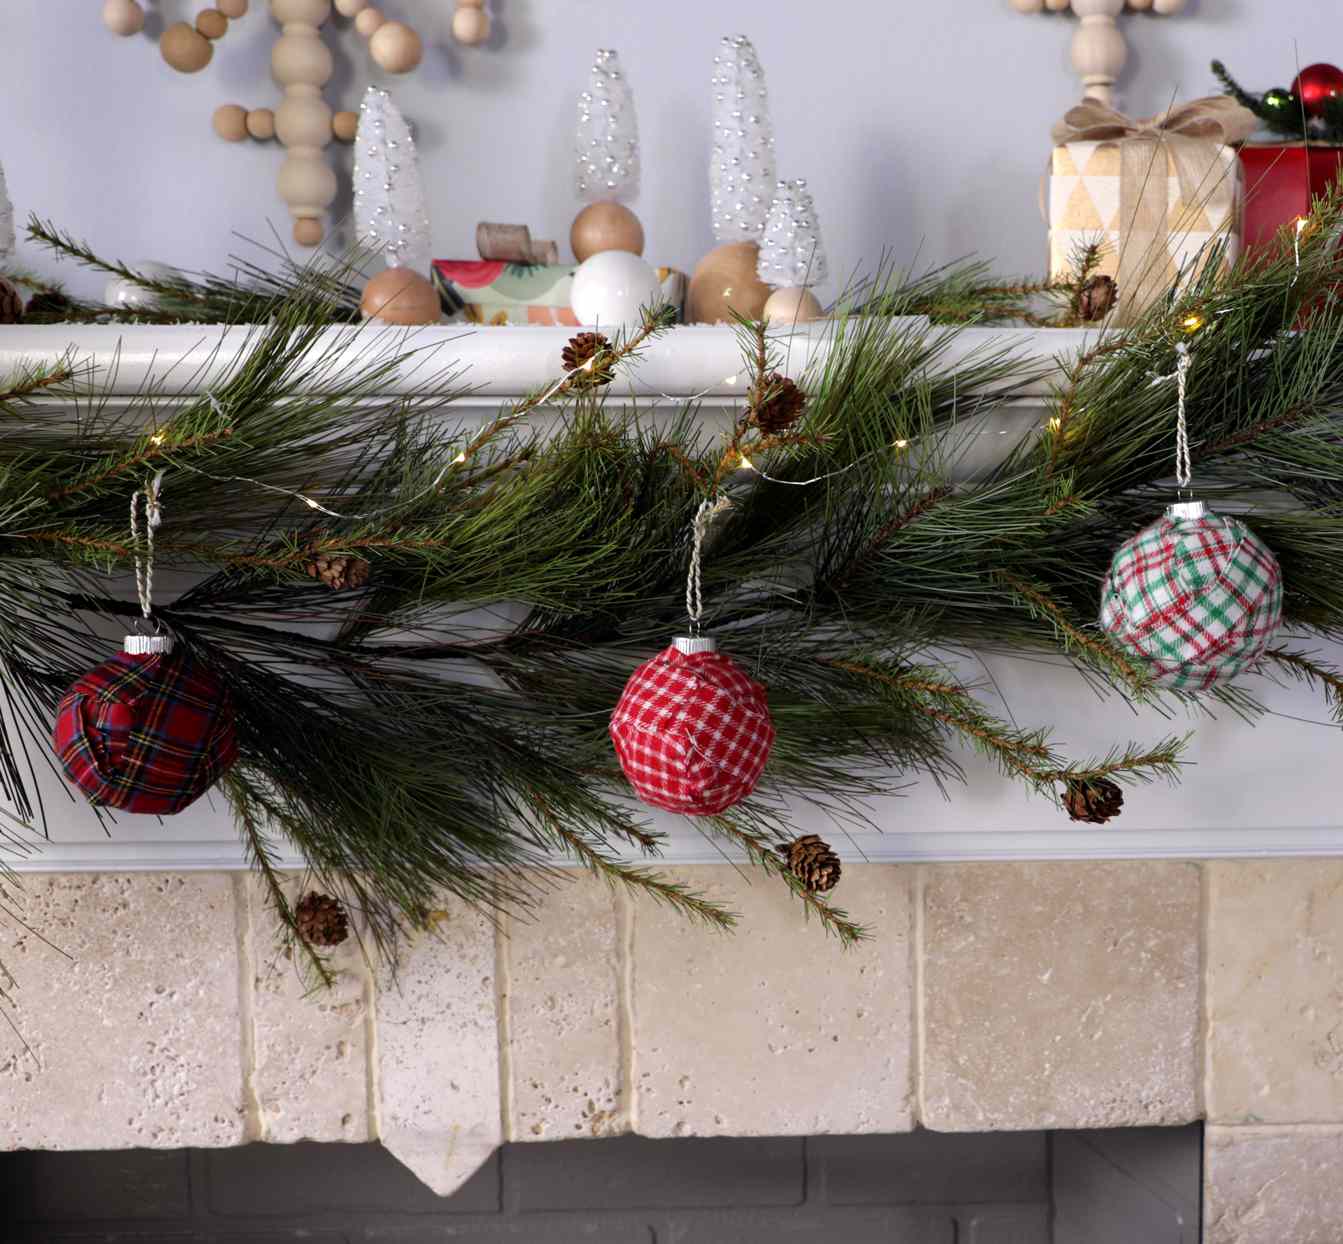
Materials run about $15 for a dozen; each one takes under ten minutes once you find a rhythm.
Cotton and linen scraps fray beautifully, but only if you cut them on the grain — cutting on the bias makes the leaf curl while it dries. And go light on the glue, because a heavy bead soaks through checked fabric and leaves a dark ring that shows up in every photo you take. A $2 glue pen gives you accuracy a squeeze bottle can’t.
8. A Layered Deer Silhouette Ornament With a Plaid Bow
Three layers do the work here: a natural wood-toned base, a white deer cutout, and a small cluster of berries with pine sprigs. That stacking is what gives a flat ornament depth — the deer casts a soft shadow onto the base, so it reads almost like a shadowbox from across the room. The red plaid bow and twine hanger then repeat the rustic palette, the same ribbon logic we lean on in Idea #15.
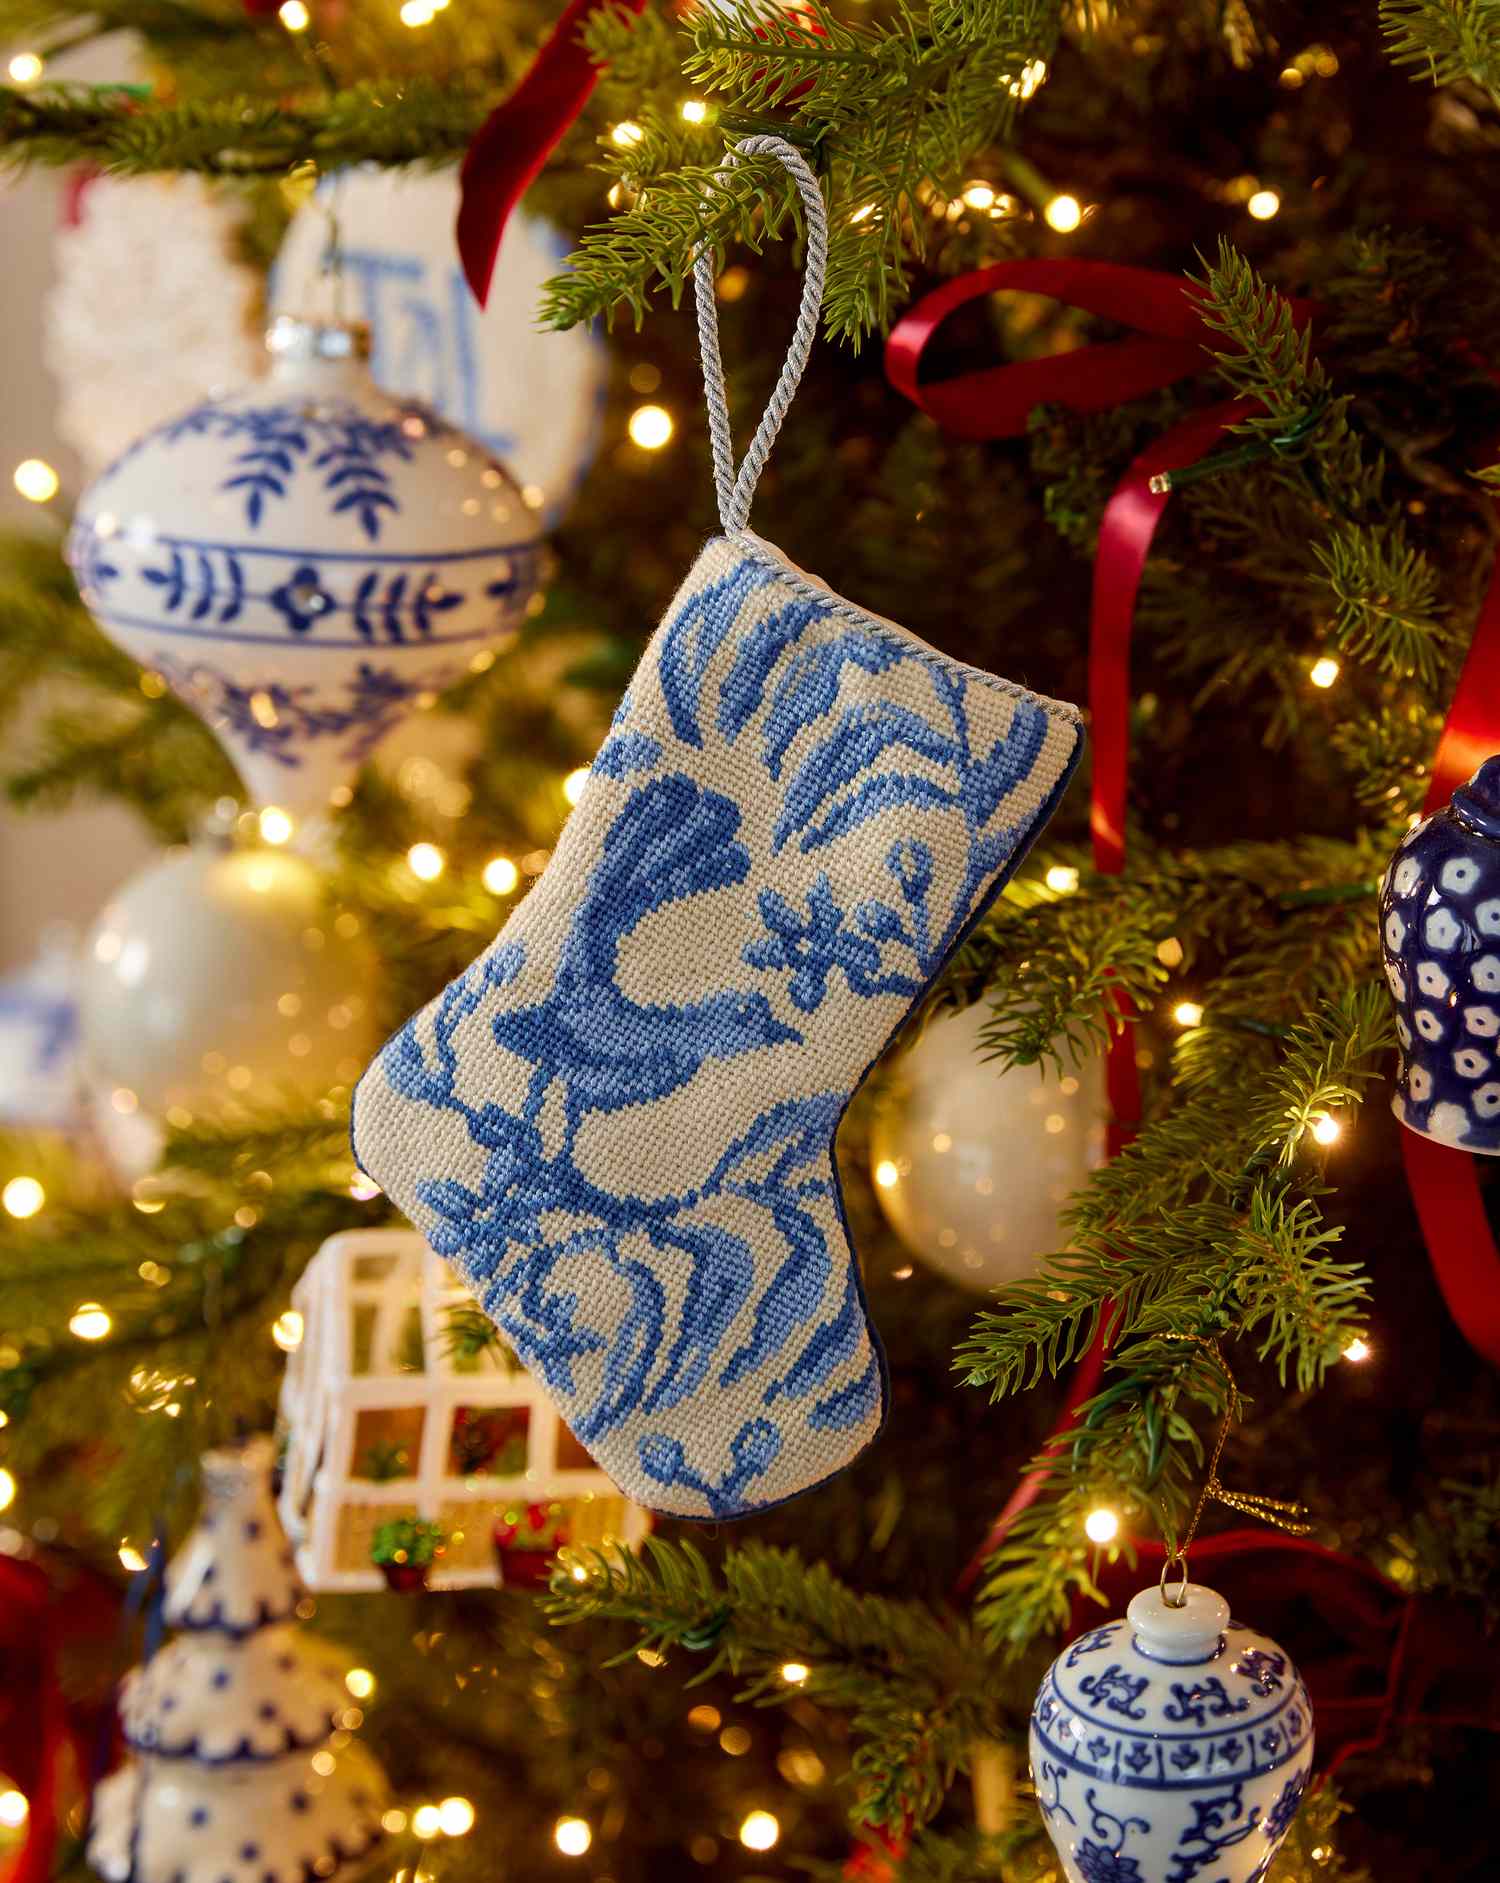
Layered ornaments are heavier than they look, and a 4-inch one with real pine sprigs can push three ounces — too much for a flimsy wire hook on a dry branch. Hang it on a sturdy inner branch near the trunk, and glue the berries rather than wiring them, because hot glue is the only thing that keeps small faux fruit from quietly disappearing by year two.
9. A Silver ‘DREAM’ Ornament and Clear Beaded Garland
The clear beaded garland. The crystal-studded DREAM ornament is the headline, but the beaded strand is what makes the tree look expensive — it echoes those stones without competing with them, and it filters warm string lights into hundreds of tiny highlights along the branches. Take it away and the whole tree flattens out and darkens instantly, which is a lot of visual weight for a strand that costs less than the ornament.

Mercury glass and rhinestone ornaments show every fingerprint, and paper-wrapped storage rubs the silver finish off within a couple of seasons — wrap each one in tissue and store it in a single layer. Clear beaded garlands also tangle into a knot that eats an hour every December, so coil them around a cardboard tube before they go back in the box.
10. A Beaded Botanical Branch Ornament With Dark Berries
Call it 70% green, 20% dark purple, 10% brown. The beads handle the foliage, the berries supply the purple, and the fabric-wrapped stem grounds both. That’s a formula you can reskin endlessly: swap the purple berries for red and the ornament turns traditional, switch to white beads and it reads winter-neutral. Keep the third color under 15% or it stops looking botanical and starts looking random.
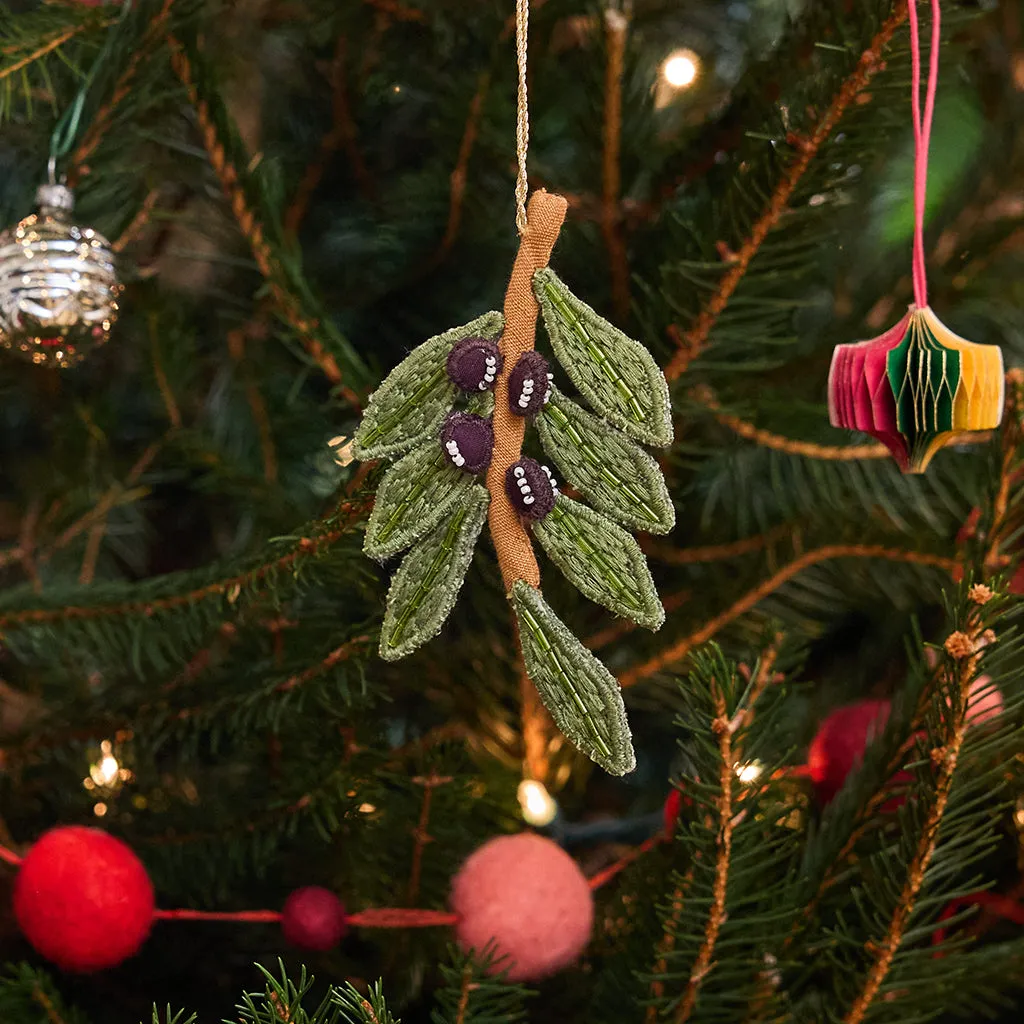
This works because it borrows a real plant’s proportions — a long stem, leaves spaced along it, berries clustered at the ends. Because it’s the same scale as an actual sprig, it disappears into the branches and reads as growth rather than decoration. It also sits happily beside a silver ribbed bauble and a colorful pleated paper ornament without clashing, which is the best test a neutral handmade piece can pass.
11. Hand-Painted Swirled Glass Ornaments in Pink and Teal
Paint inside the ornament, not on it. Swirl two or three colors of acrylic into a clear glass ball, roll it slowly so the paint coats the interior walls, then set it upside down in a paper cup to drain overnight. You get depth no brush can fake, and zero risk of chipped paint down the road. Expect to use about a tablespoon of paint per ornament, with plenty left over for the next batch.
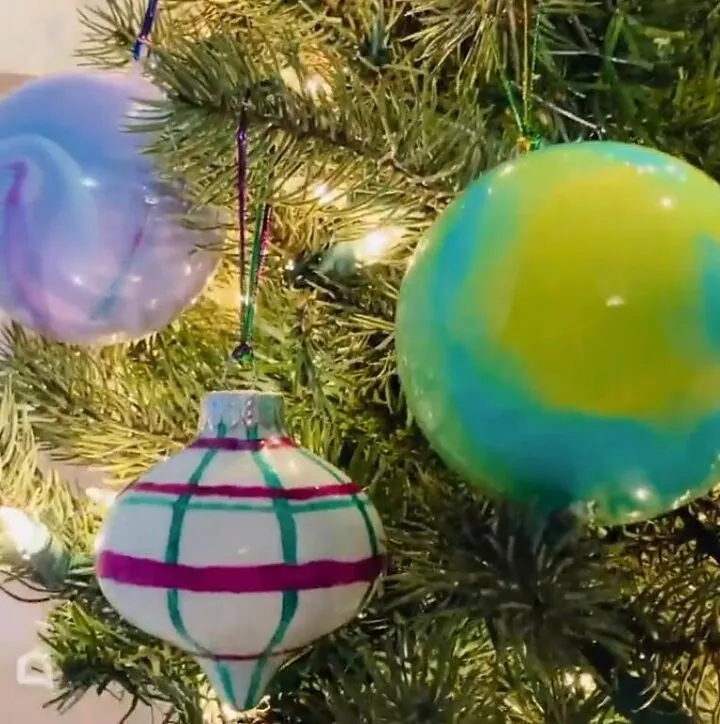
- Buy clear glass or plastic ornaments with removable metal caps — some are glued shut.
- Check your paint: acrylic sticks, craft enamel flows better but needs 24 hours to cure.
- Cover the work surface, because tinted paint drips and stains wood.
- Plan drying space — each ornament needs its own cup for at least 8 hours.
- Set a budget of $20–$35 for paints and a dozen blanks.
12. Candles, Brush Trees, and Pinecones on an Etched Wood Board
The formula is 50% white, 30% green, 15% red, 5% wood tone. Two white pillar candles hold the center, pale green candles on either side repeat the color, and the red arrives only in berries and snowflake ribbon — small enough to feel like a wink. Scale it down and it works on a coffee table; scale it up and it moves to a sideboard. Same ratios either way, which is why it’s so easy to adapt.
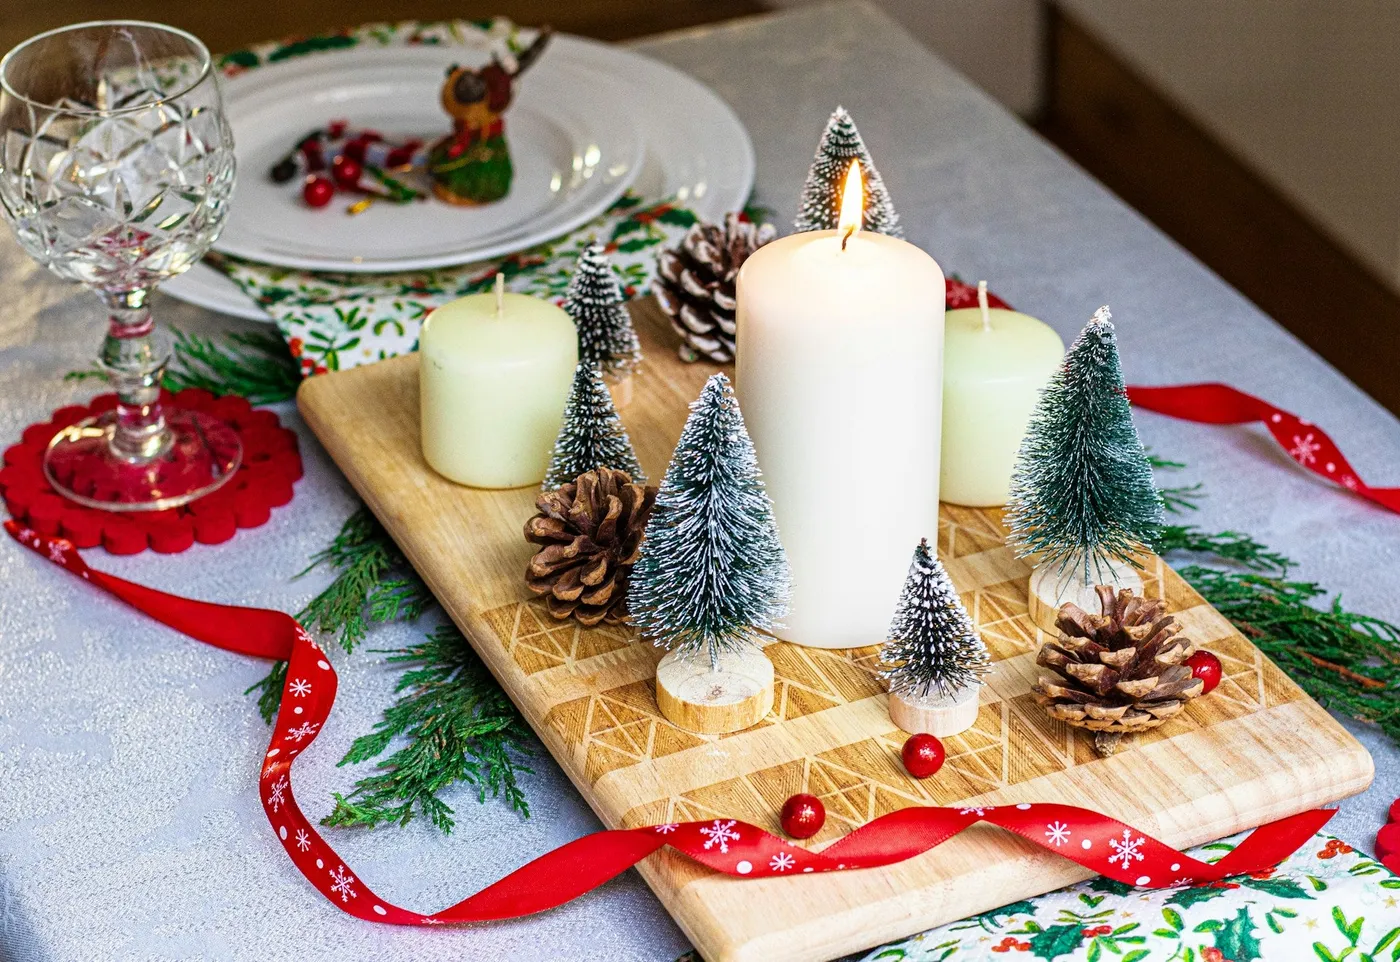
- Etched wooden board: $20–$45 (or use a cutting board you own)
- Pillar candles, set of three: $18–$40
- Miniature bottle brush trees: $12–$30
- Pinecones and faux red berries: $10–$20
- Snowflake ribbon and loose greenery: $8–$18
Total: $68–$153. Buy the candles at 50% off after Christmas and keep the board in the kitchen the rest of the year. Compare with Idea #6, which swaps the board for a tray.
13. Marshmallow Christmas Trees in Terracotta Pots
- Push a foam cone into a small terracotta pot and weight the base with dry beans or rice.
- Start at the bottom and attach marshmallows with a dot of white glue, overlapping each row by half.
- Tuck small faux greenery sprigs between rows and press red berries into the gaps.
- Build upward, shrinking the marshmallow size as the cone narrows.
- Let it cure overnight before moving it — one nudge and the whole thing shifts.
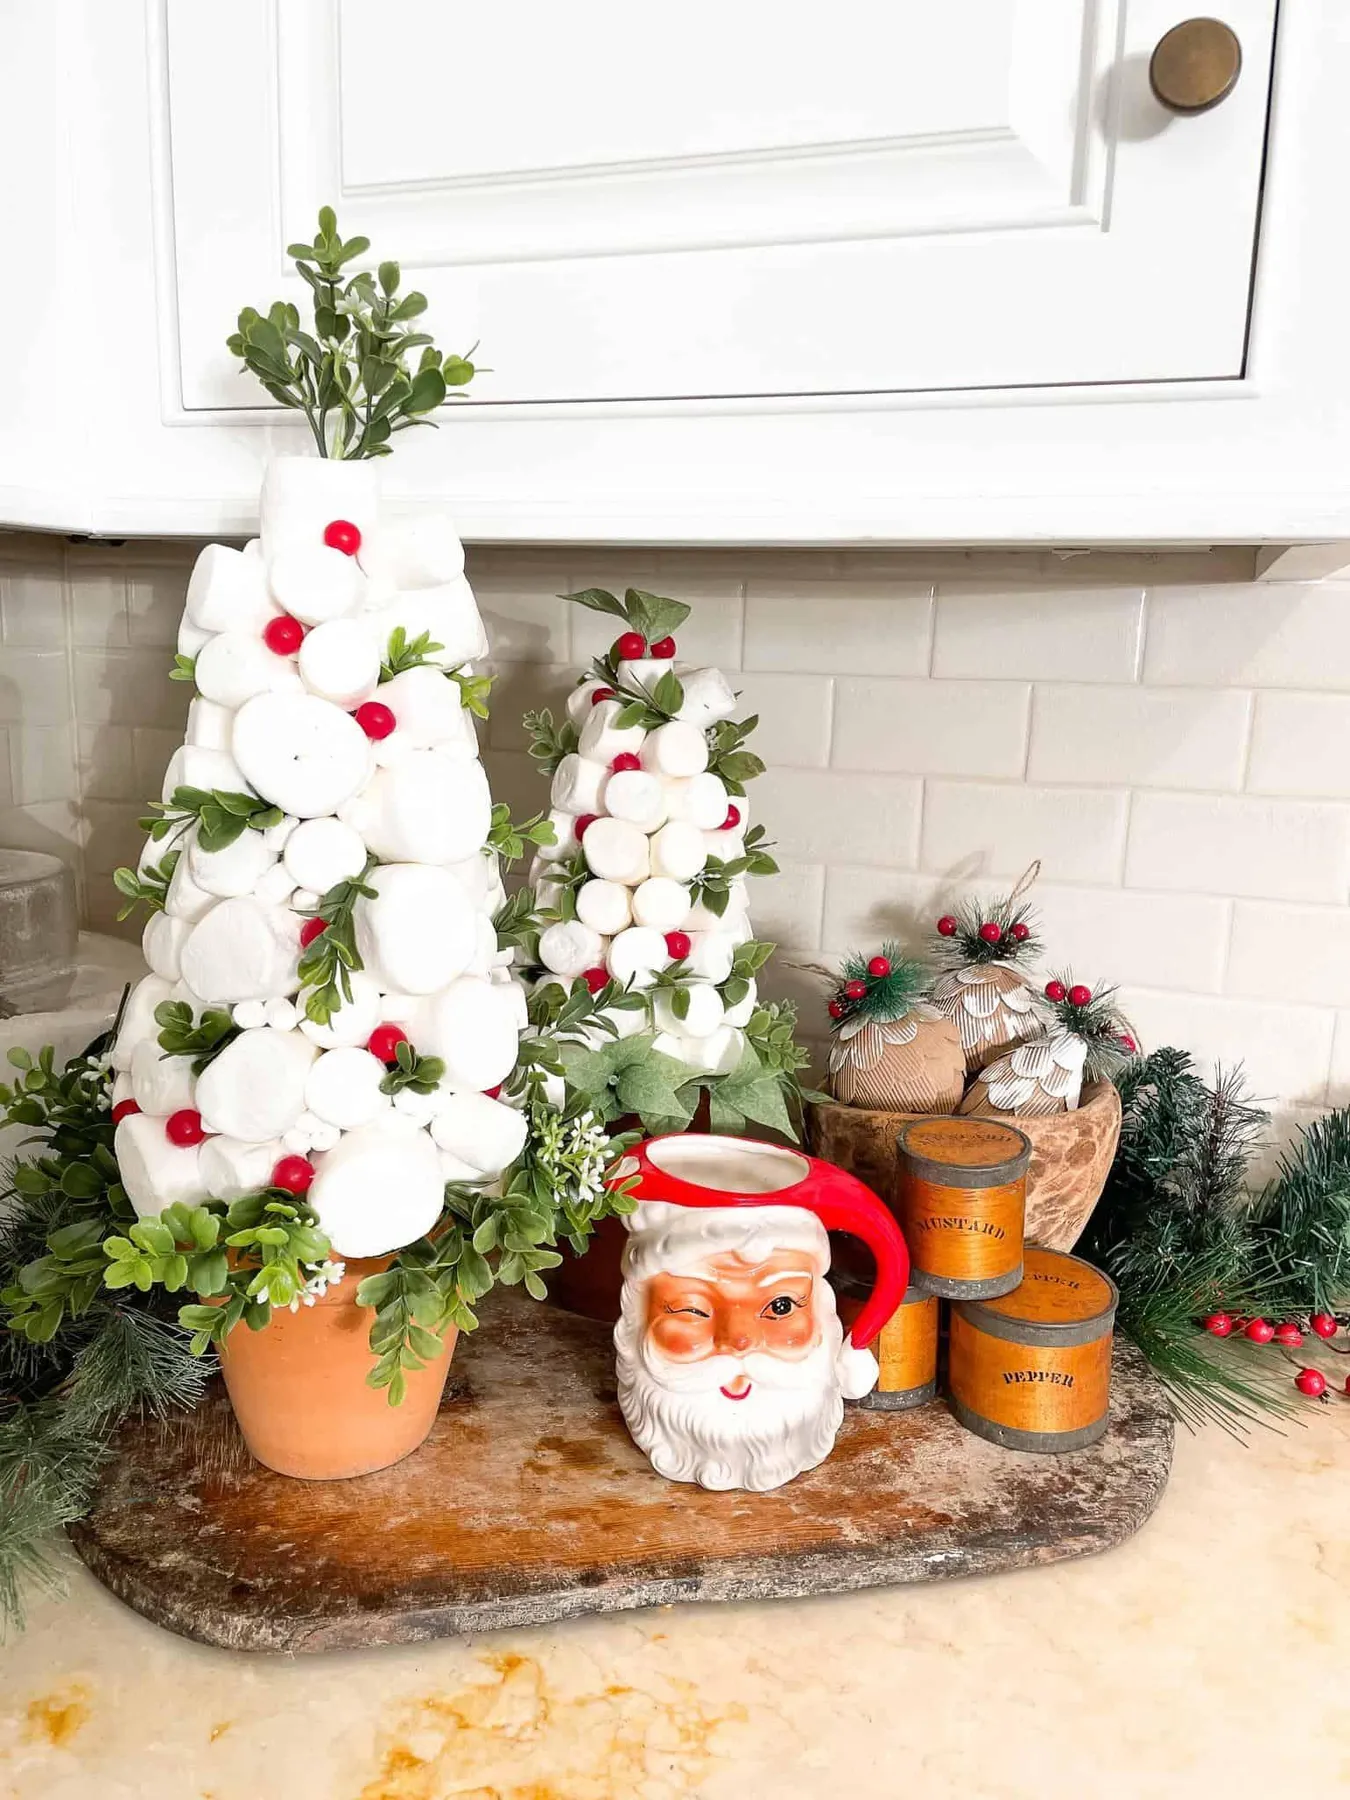
About 45 minutes and $12–$20 per tree, depending on how many marshmallows you eat along the way.
Here’s the honest part: marshmallows are food, so this is a one-season decoration, and it will attract ants if your kitchen runs warm. Leave the bottom row unglued if you plan to snack, or just accept it as a disposable craft. If you want something that survives storage in a bin, use white foam balls or painted wooden beads instead — same silhouette, zero pantry risk.
14. Feather-Topped Pencils With Hand-Painted Zigzags
Crafters are pushing back on the matching-boxed-gift look, and 2026’s biggest shift is toward small handmade objects that actually get used — pencils, bookmarks, keychains. Bright feathers plus gold foil tape land squarely in that world, and the result reads as an affordable luxury rather than a stocking filler. Nothing here requires a crafting background; it requires a steady hand and about four colors.
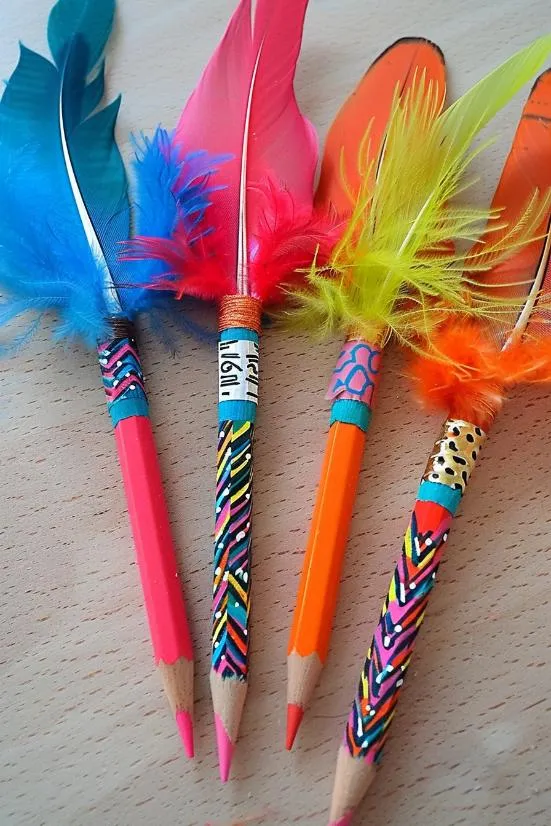
The cheapest version of this costs almost nothing. Grab a box of plain pencils from Dollar Tree, a $4 feather package from Michaels, and whatever acrylic craft paint is already in your drawer. Dollar-store gold nail foil does the job of the decorative tape for $1.25. That’s a set of four for under $10, and they look like a $40 gift shop find.
- Test your paint on one pencil first — waxy barrels resist acrylic and need a quick sanding.
- Work over a paper plate; feathers shed everywhere.
- Keep hot glue on the low setting or it melts the feather quills.
- Confirm feathers are clean and dye-free if these are going to kids.
15. A Greenery Wreath With Burlap and Gingham Ribbons
Three different ribbons, one cohesive look. Burlap is matte and bulky, red gingham is crisp and small-scale, and blue gingham adds the cool note that keeps the red from shouting. Because each ribbon has a different texture and width, your eye reads depth instead of clutter. Hanging it on a distressed white frame with a black iron handle pulls the natural burlap tone forward and gives those checks a place to settle.
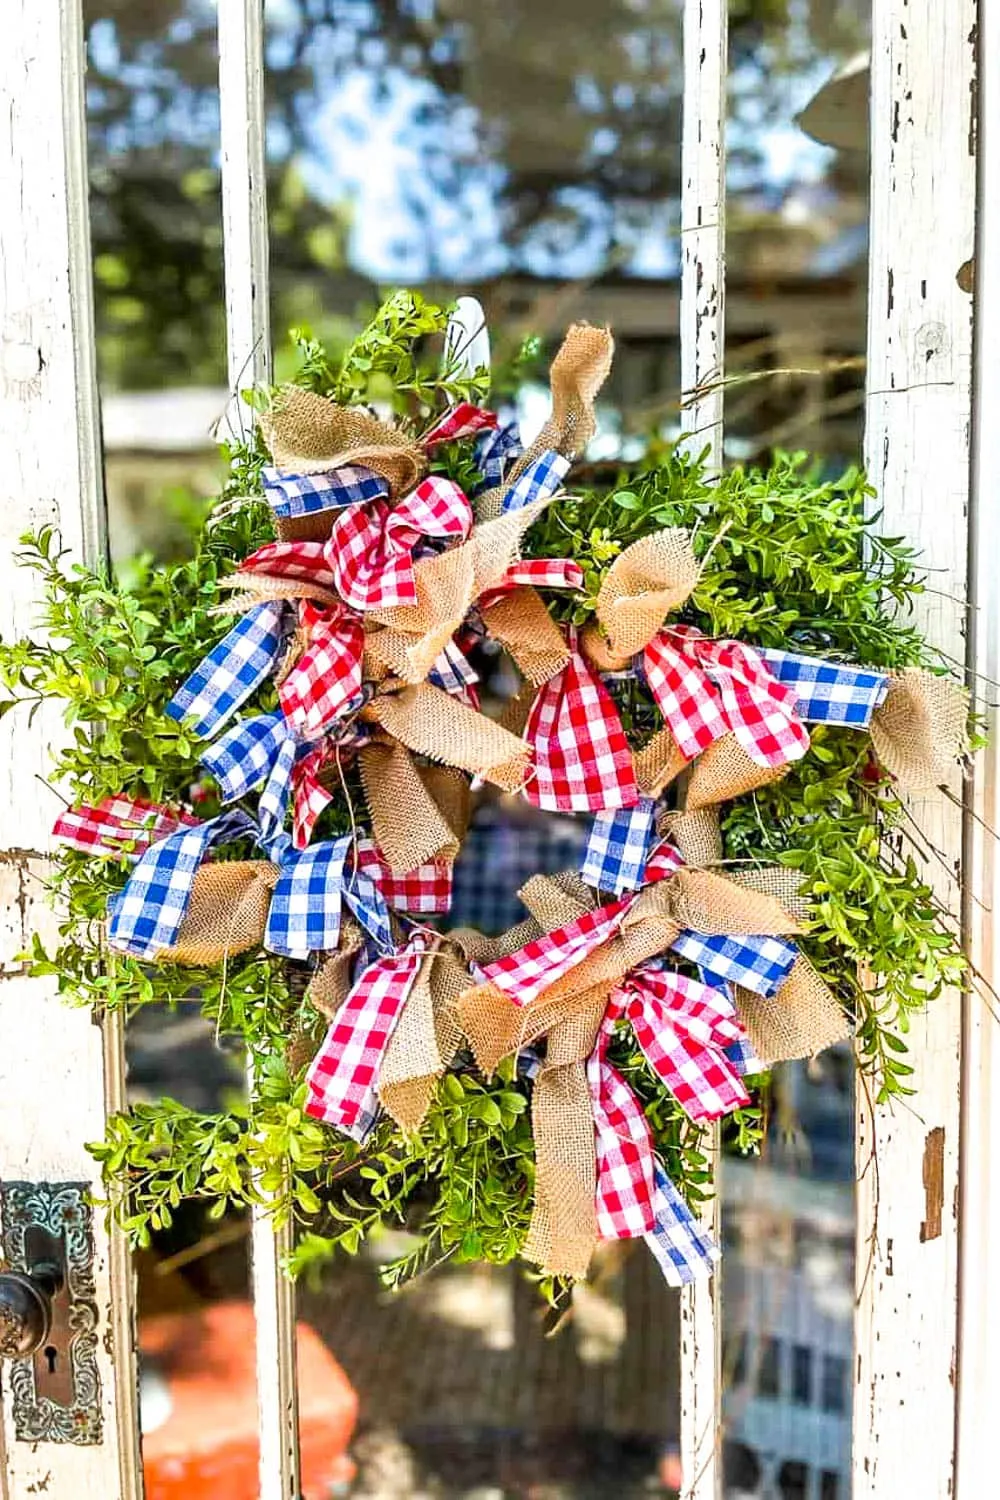
The ratio is 65% greenery, 25% ribbon, 10% hardware. Want it warmer? Ditch the blue gingham and double the red. Want it calmer? Replace the red with a wide cream linen ribbon and keep the burlap. Wider ribbons sit at the bottom of the cluster, thinner ones on top — that’s the only rule that actually matters.
16. A Silver Tinsel Wreath Above a Marble-Top Bar Cart
- Marble-top bar cart: $180–$450
- Silver tinsel wreath: $25–$60
- White LED candle and gold velvet ribbon: $15–$35
- Brass cocktail tools and candlesticks: $45–$140
- Marble tray, glassware, cookies and layered drinks: $40–$90
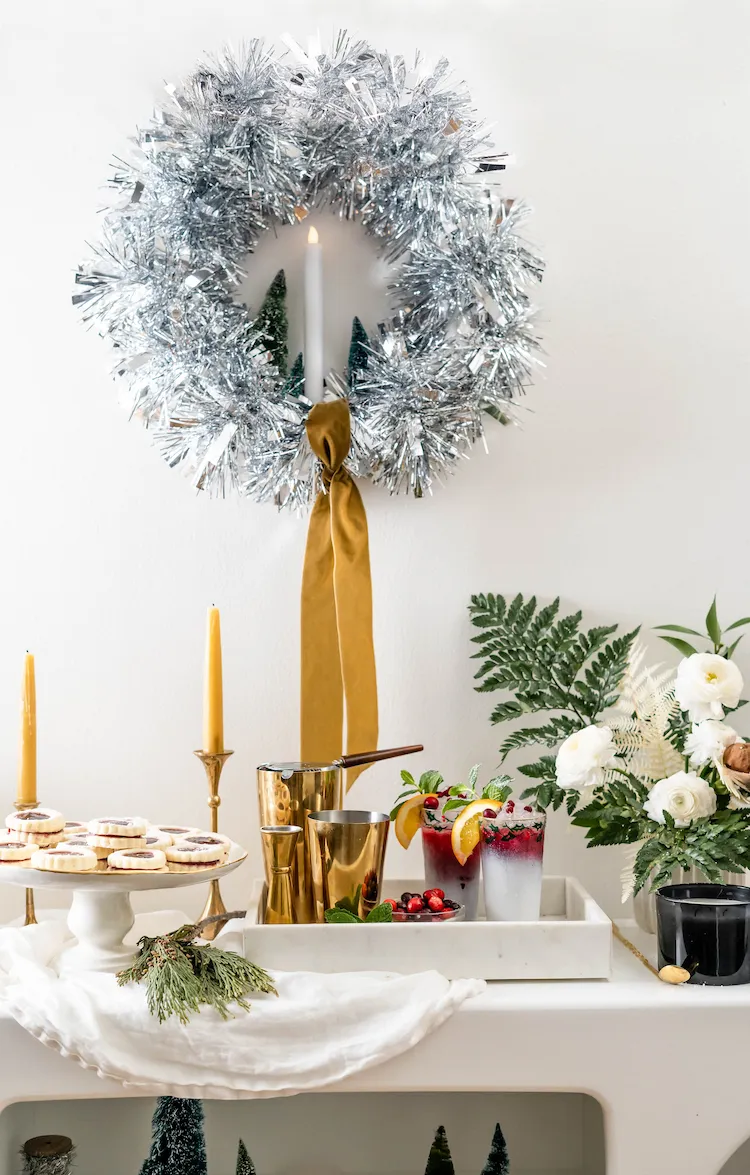
Total: $305–$775. The wreath-and-candle arrangement is the entire personality here; everything else is set dressing you may already own.
This setup wants a wall at least 4 feet wide and a cart no shallower than 15 inches, because the trays and glassware need breathing room. Ceiling height barely matters — a standard 8-foot room works fine, since the wreath hangs about 12 inches above the surface. In a tighter entry, look at Idea #19, where a white arched cart does the same job in half the footprint.
17. A Glowing White Ceramic Village House
The glow. A white ceramic house with nothing inside is a nice paperweight; the moment you put a bulb in it, the windows become the whole point, and the soft out-of-focus lights behind it do the rest of the storytelling. That’s exactly why one house sitting on a slightly reflective surface beats a crowded village of twelve every time.
Ceramic houses chip at the roof edges, which is precisely where they get handled, so lift them from the base. Keep the light source cool — a 4-watt LED bulb, not a real candle, because flame yellows the glaze and becomes a genuine fire risk. Store it in the original box with tissue, and dust with a dry microfiber rather than a damp cloth, since water pools in the textured roof and leaves streaks.
18. Maximalist Silver Trees and Gold Fringe Wall Streamers
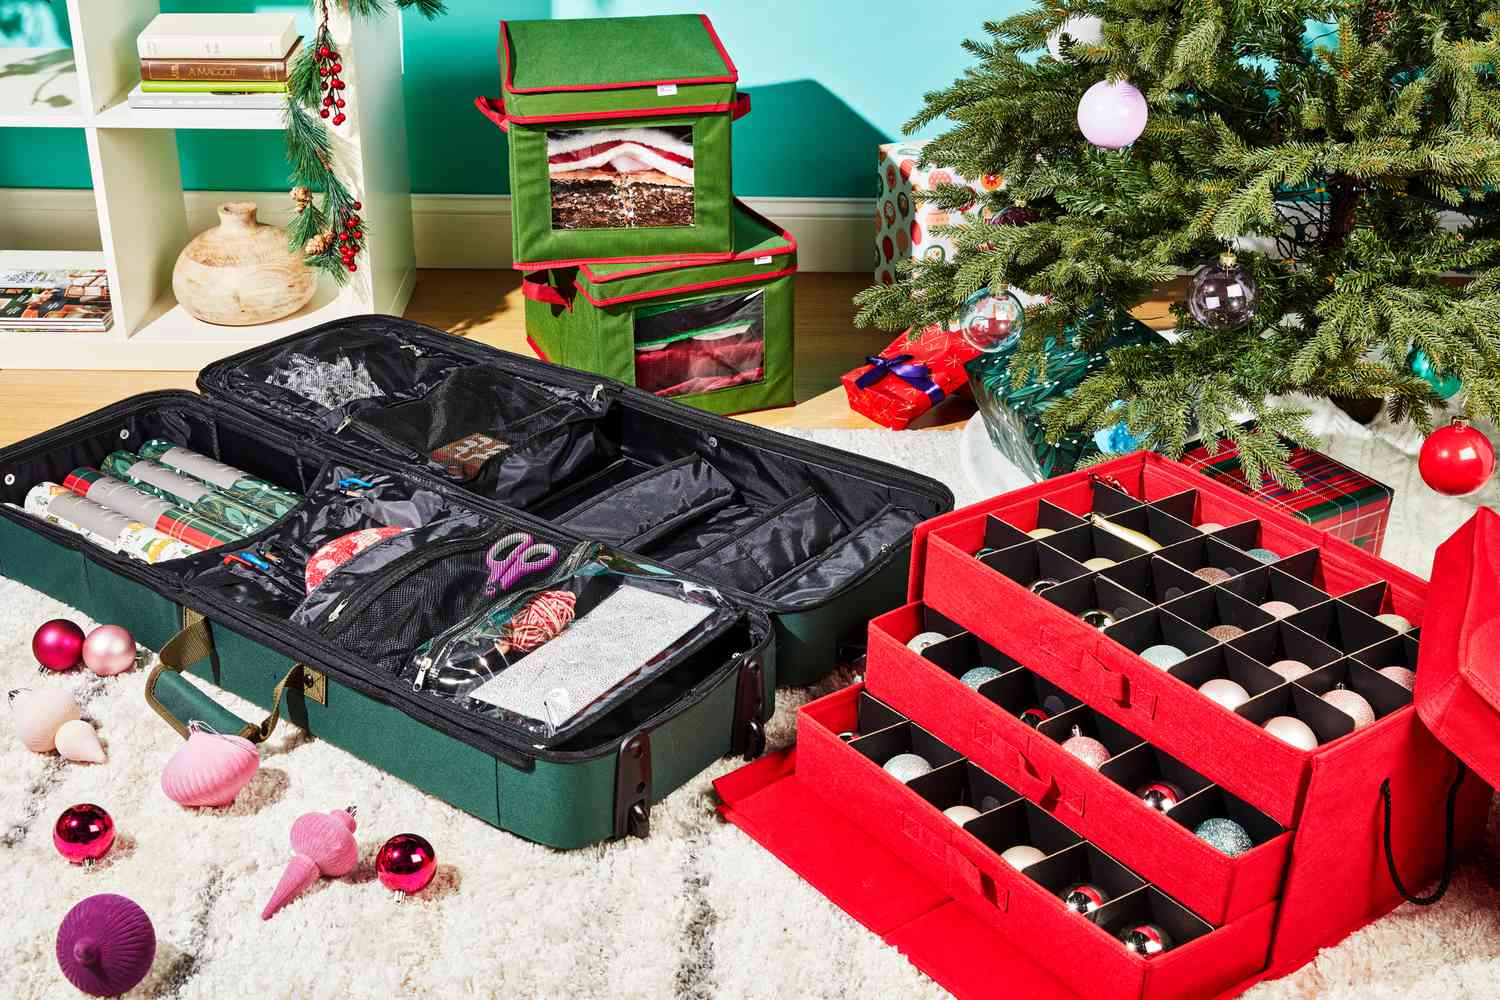
Fringe streamers are usually tissue or metallic foil, and both crease the second you fold them — store them rolled around a cardboard tube or you’ll be staring at permanent kinks next December. Also check what your walls can actually take. Lightweight foil hangs fine on painter’s tape, but tinsel garlands run along the ceiling need hooks, and that’s a patching job you’ll be doing in January.
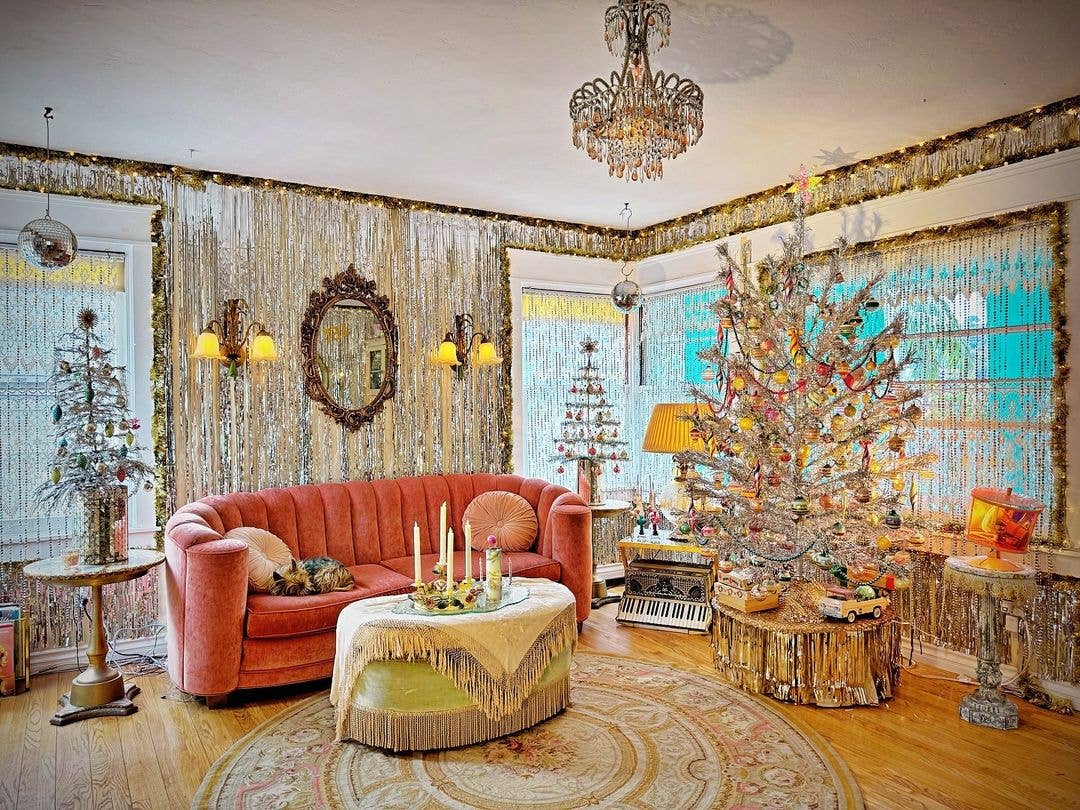
Roughly 40% silver, 30% gold, 20% salmon pink, 10% cream. The metals do the heavy lifting, the pink tufted sofa keeps the room from reading like a department store window, and the cream rug plus amber chandelier light give your eye somewhere to rest. Remove the pink and it turns cold; remove the cream and it becomes genuinely overwhelming.
19. A White Arched Bar Cart With an Accordion Paper Tree
Style carts in tiers, not rows. Put the tallest object — that dark green accordion paper tree — on the bottom shelf so the visual weight sits low, keep glassware and books on the middle, and reserve the top for cookies, truffles, and the two gold taper candles. Three heights on one cart beat fifteen small items at the same level every single time. Hang the tinsel wreath so its candle sits about 12 inches above the cart’s top surface.
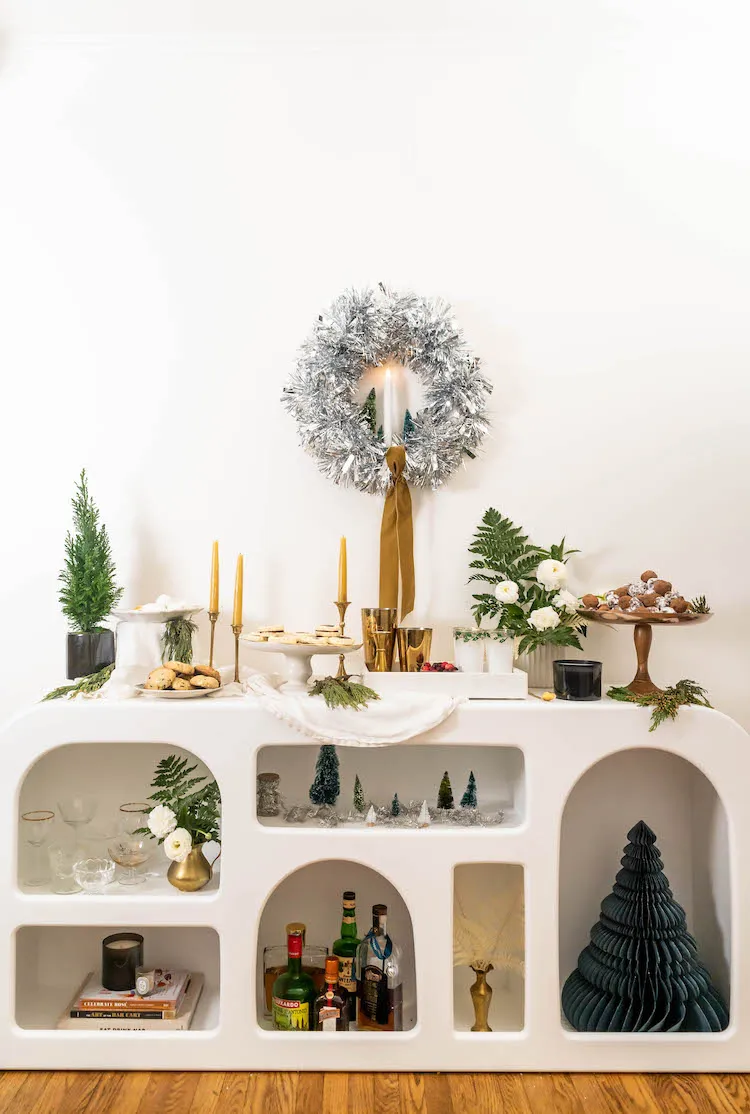
This is the budget version of Idea #1. Skip the marble top entirely and buy a basic white utility cart for $60–$90, then spend your money on the small stuff: a $6 accordion paper tree, $12 bottle brush trees, and one genuinely good candle. Thrift the glassware and the gold cups and you’re in around $140 for a look that photographs like four figures.
20. A Light Blue Christmas Quilt in a Striped Bedroom
Quilted Christmas bedding is having a real moment, mostly because it’s the one holiday decoration you actually touch. Light blue and white vertical stripes instead of red-and-green plaid signals the 2026 shift toward pastel holidays — snow tones, pale blue, and quiet red accents. It also survives January, which is more than most Christmas decor can claim.
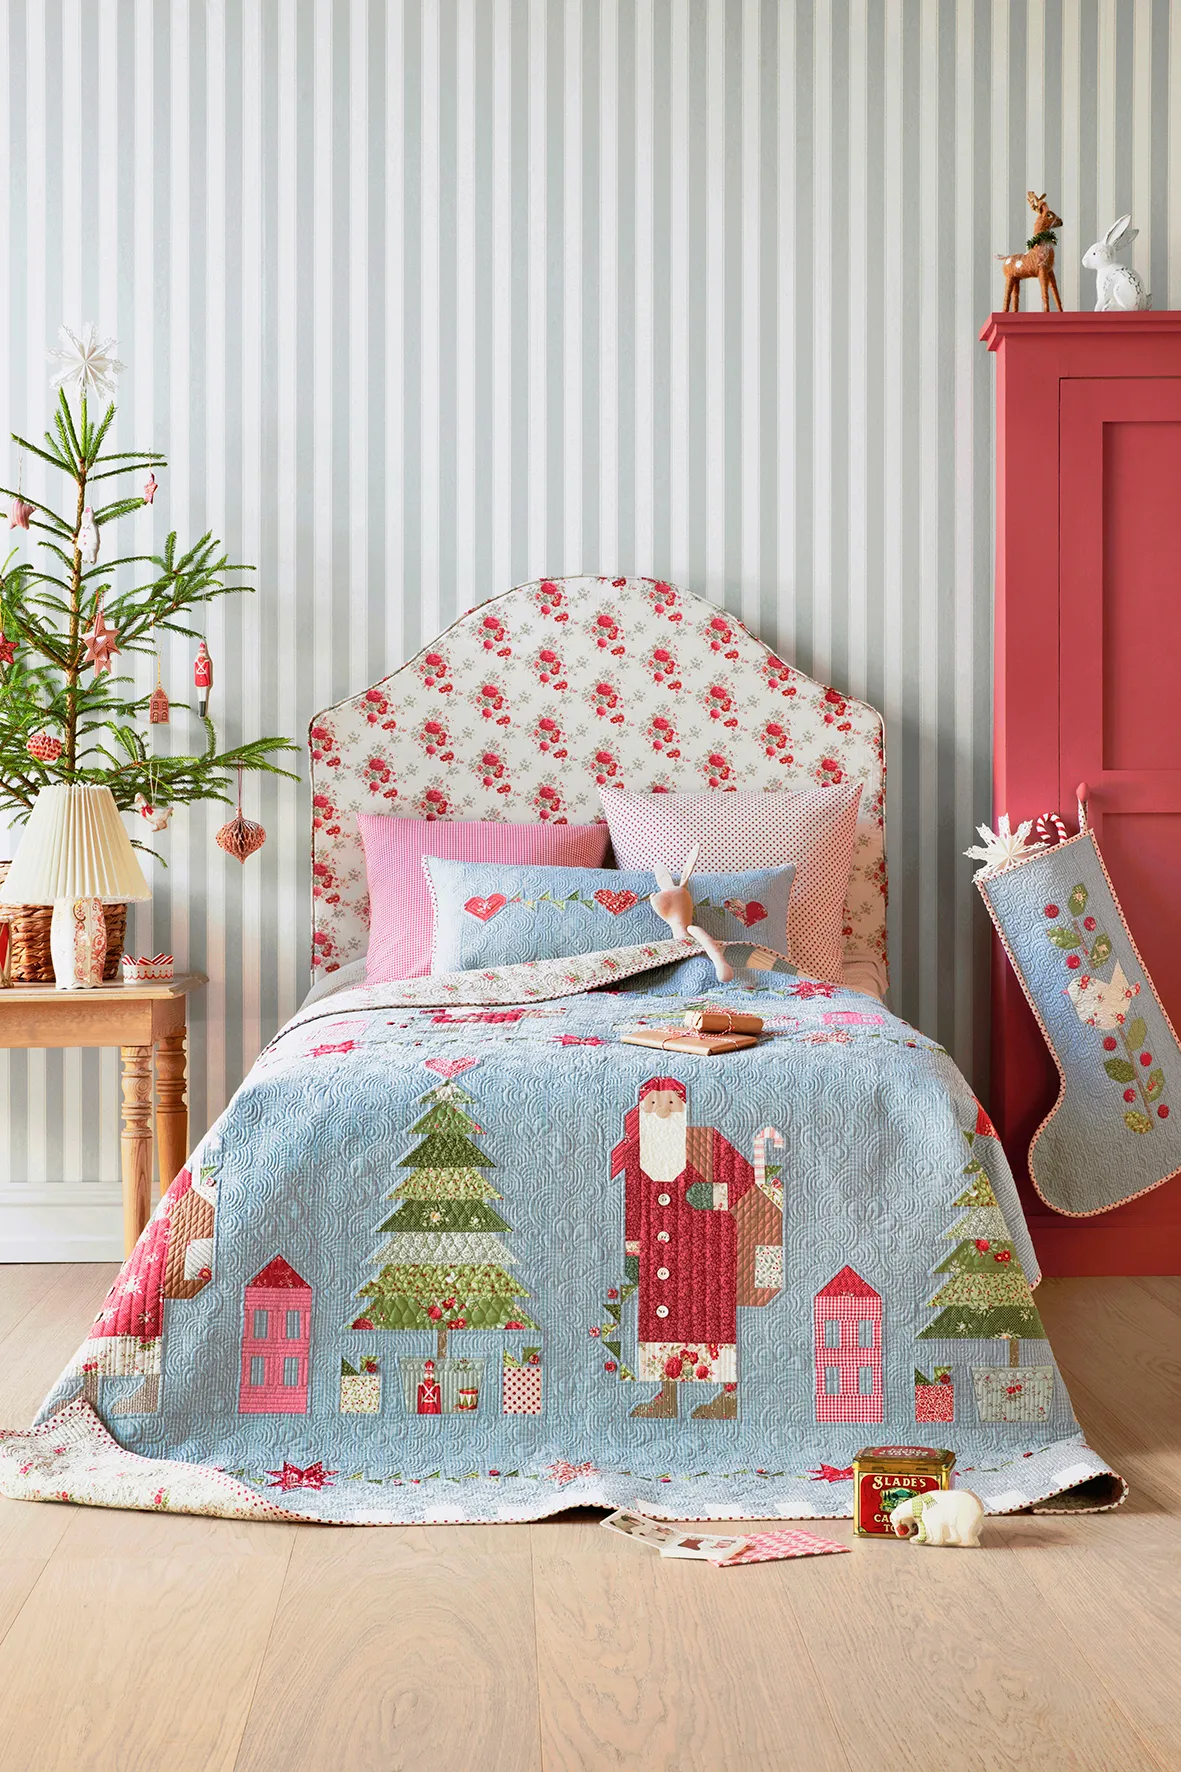
Striped wallpaper needs a room where your eye can follow a full line, so plan on a 9-foot ceiling or higher, ideally a bedroom at least 10 by 12 feet. In smaller rooms, keep the quilt and swap the stripes for a solid pale blue wall so the pattern doesn’t crowd you. The decorated tree on the nightstand works at any size — just keep it under 3 feet in a tight corner.
21. An Embroidered Cardinal Tree Skirt in Dark Green Felt
The cardinal. A dark green felt skirt is simply backdrop; an embroidered red cardinal perched on a pine bough turns it into something you leave out on purpose. It’s also the only red in the frame besides the gift wrap, which is exactly why those red-and-gold patterned boxes with green satin ribbons look intentional instead of busy. Remove the bird and the gifts are just sitting on fabric.
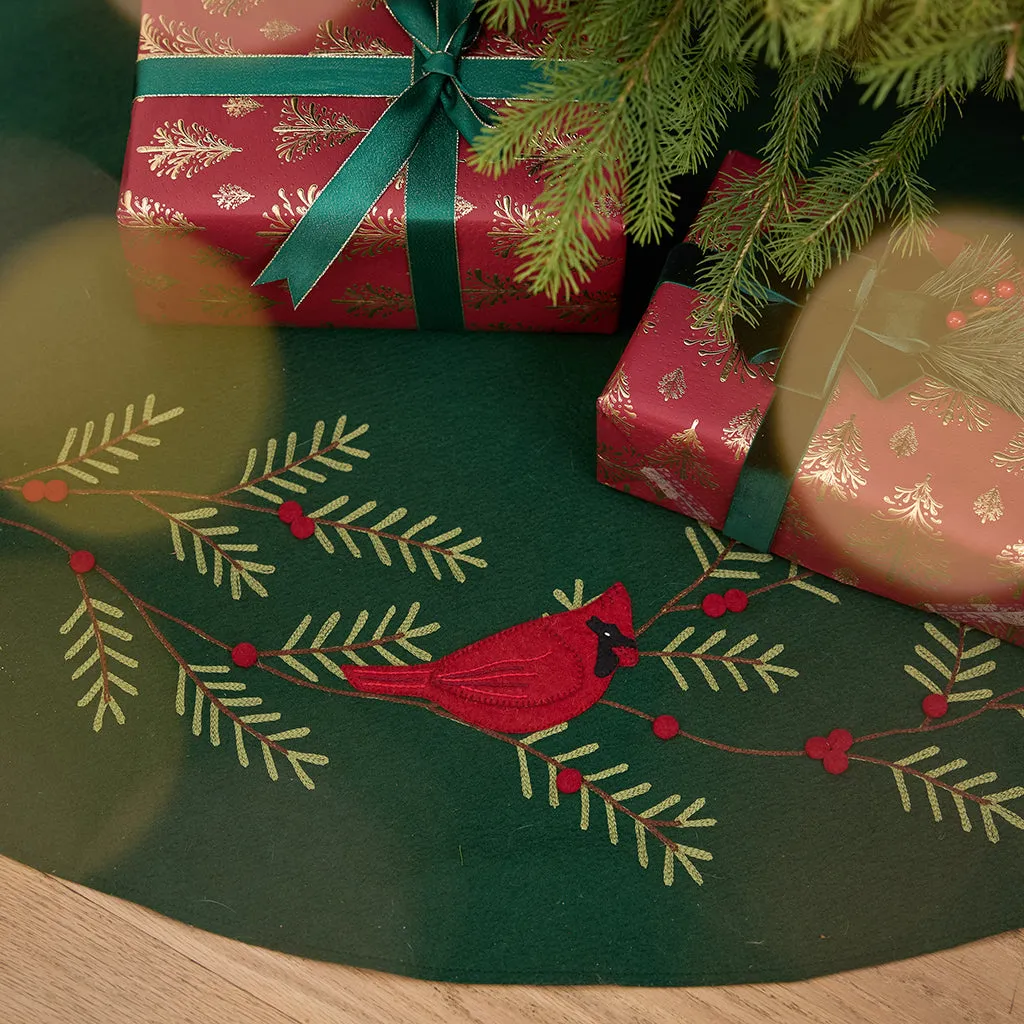
Felt pills and collects pet hair like a magnet, so vacuum with a brush attachment on the lowest setting and never a beater bar. Embroidered threads snag on ribbon, so tie bows loosely and lift presents rather than sliding them across the skirt. If you have a cat, assume the cardinal will be hunted; a wool blend holds up far better than acrylic and resists static.
22. Building an Evergreen Wreath With Golden Pinecones and Lace
- 18-inch wire wreath form: $5–$12
- Evergreen bundles, six to eight: $25–$60 (often free from a tree lot)
- Golden pinecones and acorns: $8–$20
- Dried orange slices and cinnamon sticks: $6–$15
- Lace ribbon and battery string lights: $12–$28
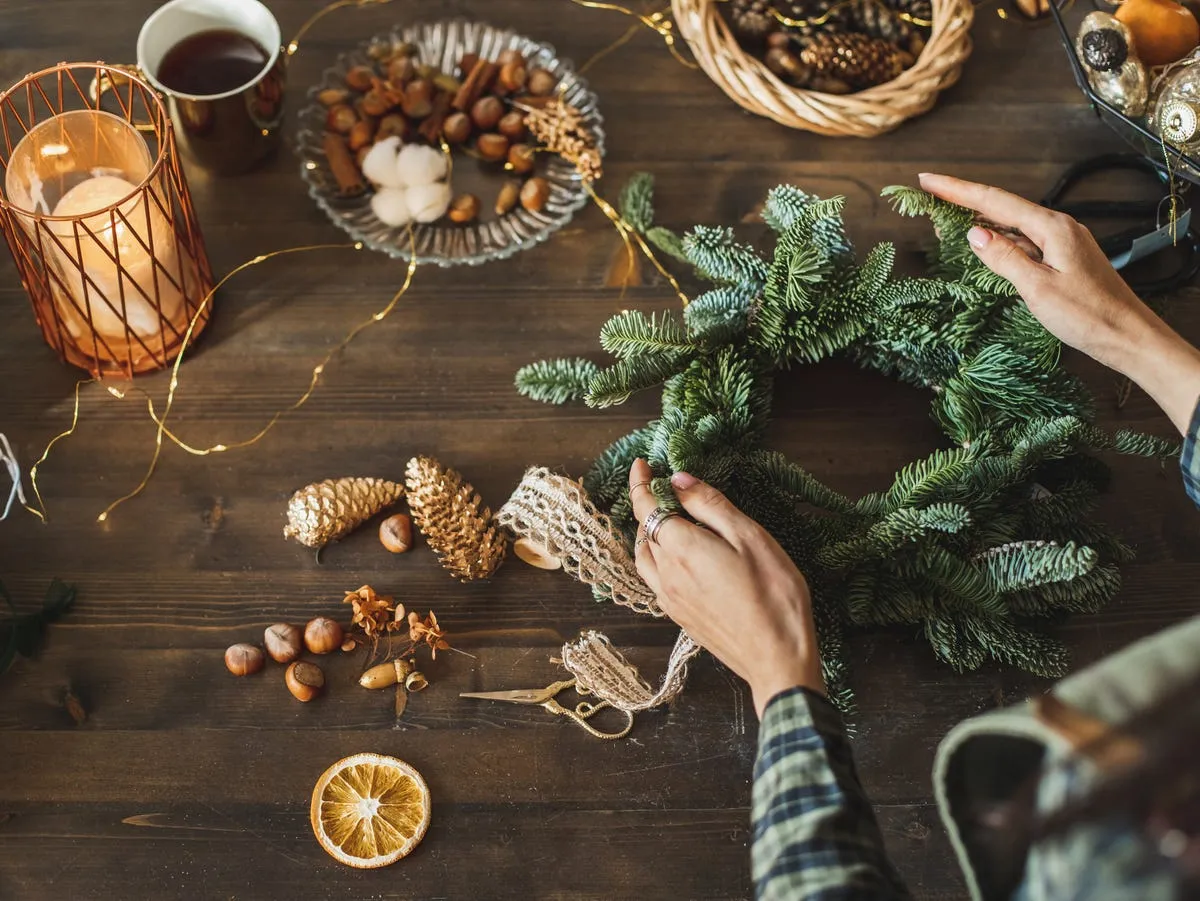
Total: $56–$135 for a wreath that runs $180 and up at a boutique. Fresh greenery is the swing factor — ask for trimmings and you’ve just cut your cost in half.
Wire greens in bundles of three, all facing the same direction, and lay each bundle so it covers the stem ends of the one before it. That overlapping rhythm is what separates a wreath that looks full from one that looks like a bundle of sticks. Work clockwise for right-handed crafters and keep each bundle to about 6 inches so the wire form never shows through.
23. A Knitted Stocking Advent Garland on a Dark Green Cabinet
- Knit or thrift 24 mini stockings and mittens in cream and brown — worsted weight, about 3 inches tall.
- Embroider numbers 1 through 24 in contrasting thread across the cuffs.
- Thread jute twine through the hanging loops, spacing pieces about 3 inches apart.
- Tuck a small evergreen sprig and a gingerbread cookie into each opening.
- Drape it across the cabinet and secure the ends with removable adhesive hooks.
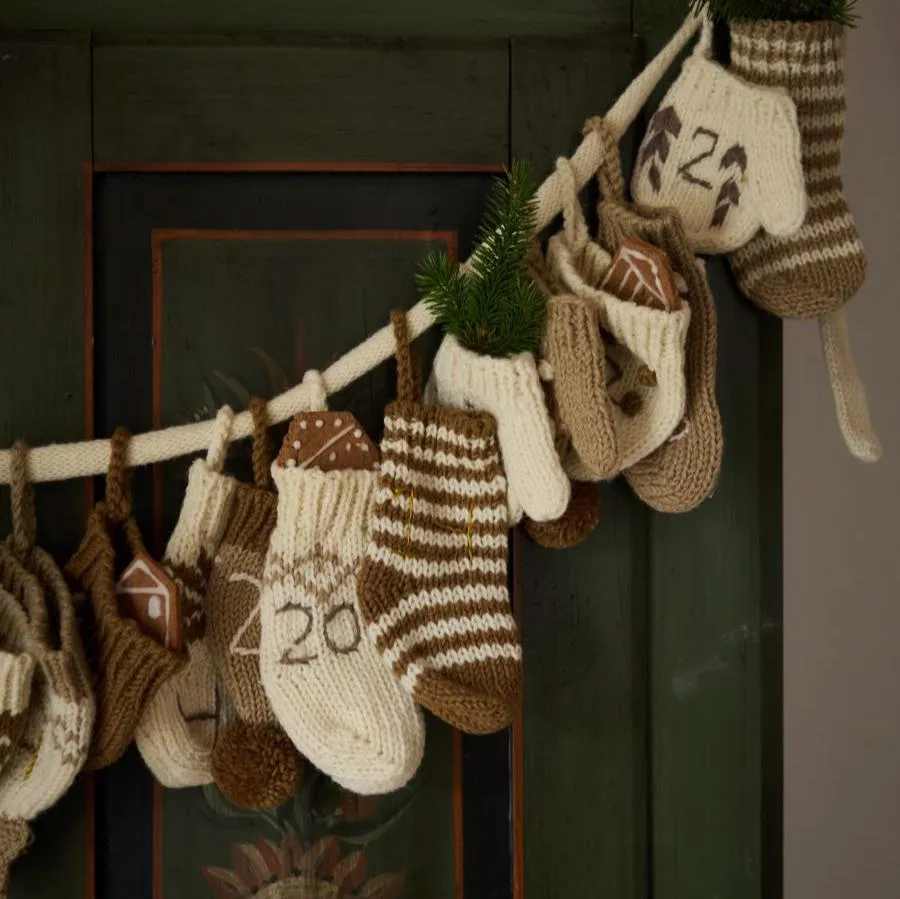
Hand-knitting all 24 takes a full weekend; thrifting them takes an afternoon and about $15.
Nobody needs to knit 24 stockings. Thrift stores sell single ornaments for a dollar, and a pack of mini stockings at Walmart runs about $8 for twelve. Pair those with a plain jute garland and you’ve got the same look for $20 total. If you want the handmade texture without the needles, see Idea #29, where one felt ornament carries the same cozy weight.
24. A Pinecone and Bauble Wreath Built With a Kid’s Hands
The mix of plain and frosted pinecones is what makes this read as a found object rather than a craft-kit project. Frosted pieces catch light and soften the silhouette; natural brown ones give your eye a matte place to land. Beaded chains thread through the gaps instead of lights, so the whole thing shimmers without a single cord to hide.
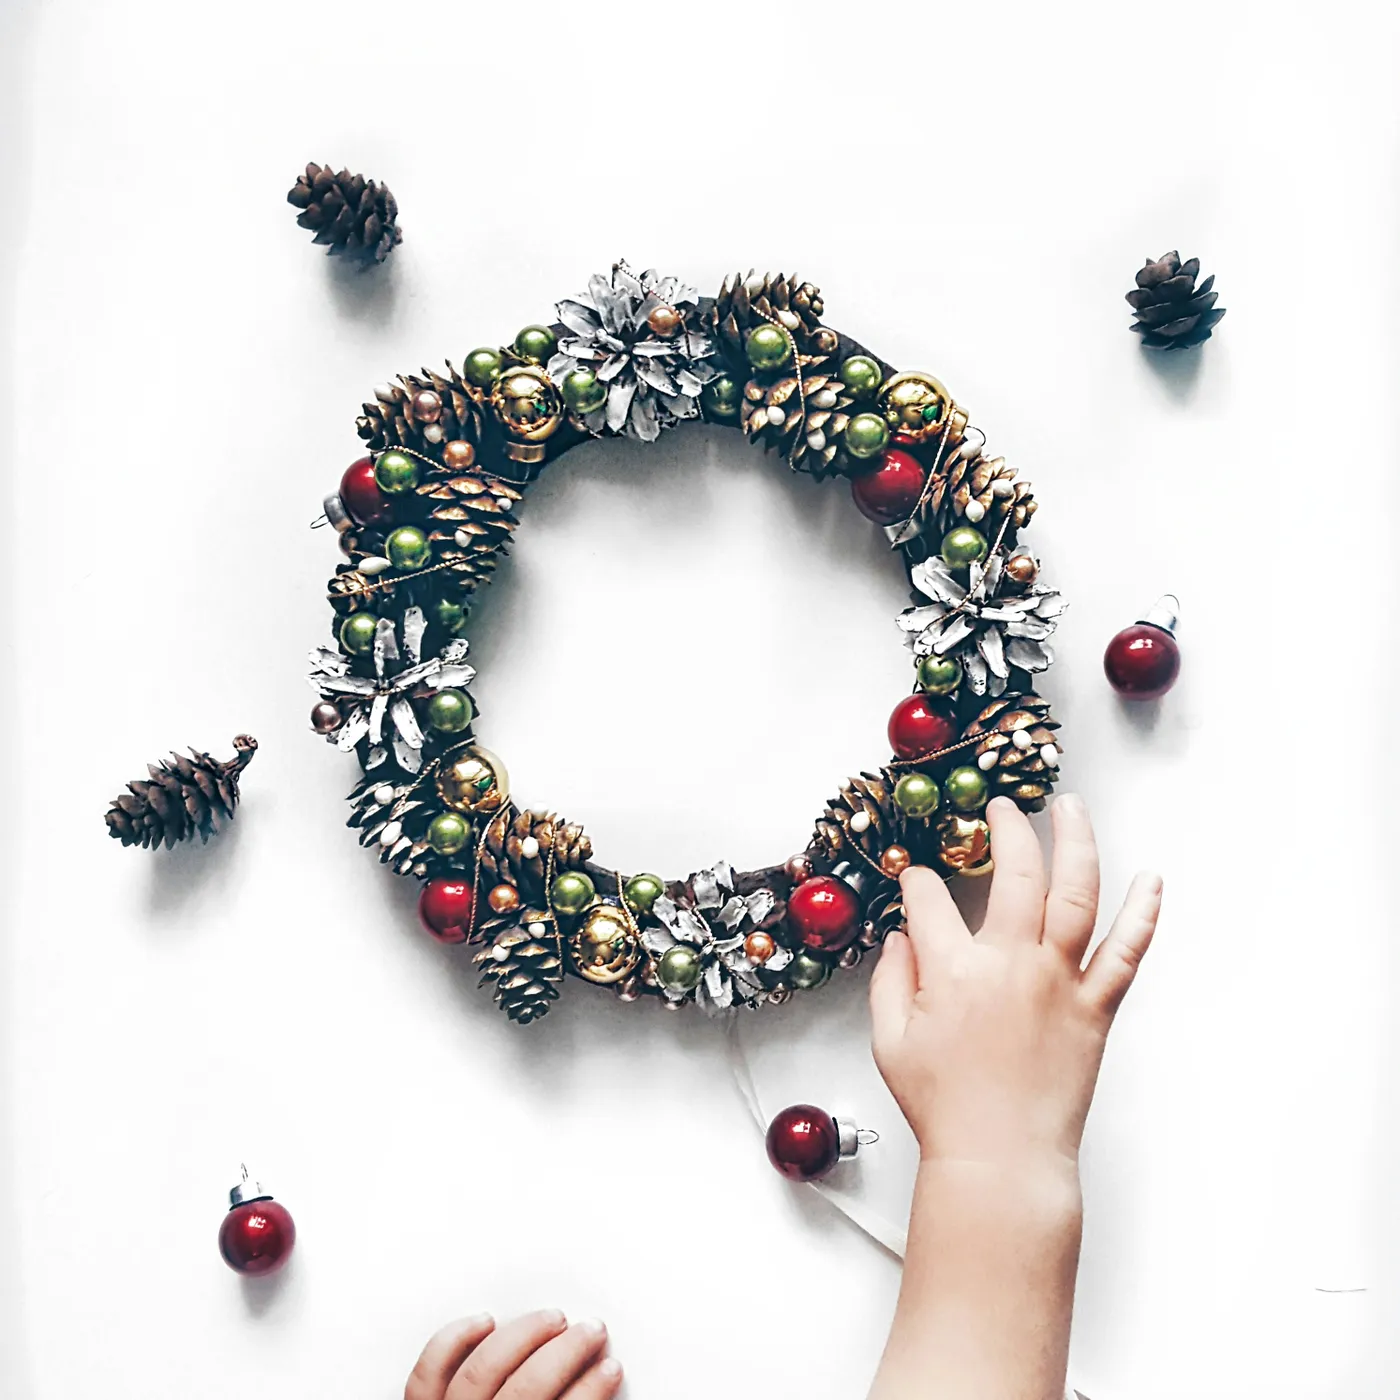
Pinecones from the yard carry sap, and sap ruins upholstery, so bake them at 200°F for 30 minutes before they come inside. Hot glue holds pinecones to a form far better than craft glue, which means an adult should handle that step. If kids are involved — and they should be — let them sort ornaments and place baubles while you work the glue gun.
25. Kraft Paper Gifts With Evergreen Sprigs and Twine
Layer in odd numbers: kraft paper, then a patterned band, then twine, then one sprig. Four elements and no more, because a fifth always tips it into messy. Use jute twine around 1.5mm thick — thinner snaps under tension, thicker looks like rope — and tie a double knot before the bow so the greenery stays put under the tree.

Kraft paper is the best-value wrap in the business: a 100-foot roll runs $8–$12 and covers an entire Christmas. Add $3 baker’s twine, a $5 bag of dried orange slices, and clip sprigs from the bottom of your own tree once it’s set up — free greenery that’s already in the house. Total for a wrapped-gift look that reads boutique: about $20.
26. Wreath Making With Cinnamon Sticks and Burlap
- Lay the wreath flat and wire three clusters of red berries at the 8, 12, and 4 o’clock positions.
- Bundle three cinnamon sticks with burlap and wire them beside each berry cluster.
- Tuck two pinecones and one small apple into the gaps, pointing outward.
- Wrap a wide burlap ribbon around the lower-left quarter as an anchor, then step back and check the balance.

Roughly 40 minutes and $30–$45 in materials if you already own the wreath form.
Fresh apples look fantastic for about five days and then start to spot — seal them with a light coat of clear acrylic, or swap in faux fruit if the wreath hangs near a radiator. Cinnamon sticks also crack in dry indoor air, so keep it away from heating vents. Want it to last through January? Go faux and no one will notice.
- Measure the door or wall first — anything under 20 inches disappears on a standard 36-inch door.
- Check the form: wire holds weight, grapevine compresses and sags.
- Gather wire cutters and floral wire; scissors won’t cut stems cleanly.
- Decide indoor or outdoor — fresh greenery dries fast in sun and wind.
27. A Flocked Tree and Grey Sofa on a White Faux Fur Rug
It breaks down to 45% white, 25% grey, 20% gold, 10% brown. The flocked tree and faux fur rug handle the white, the sofa anchors the grey, gold ornaments and a lantern bring the warmth, and brown paper-wrapped gifts tie the wood floor in. Swap the grey sofa for a beige one and this becomes a completely different, much softer room.
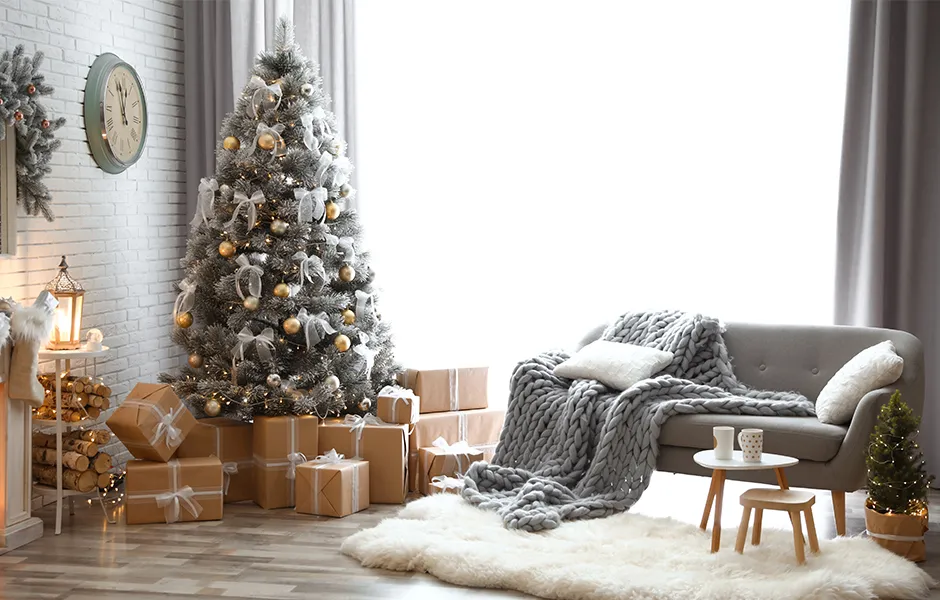
This scene needs air around it. Plan on at least 12 by 14 feet for a full-size flocked tree, a three-seat sofa, and a rug large enough that both front legs sit on it — usually an 8×10. Faux fur sheds for the first two weeks and wants a low-pile mat underneath in high traffic. In a smaller living room, go with a 6-foot tree and a 5×8 rug instead.
28. A Star of Bethlehem Patchwork Ornament Kit
- Kit with precut fabrics and instructions: $18–$35
- Gold-headed pins and beads, often included: $0–$8
- Gold wire ornament stand: $6–$14
- Extra fat quarters for variety: $12–$25
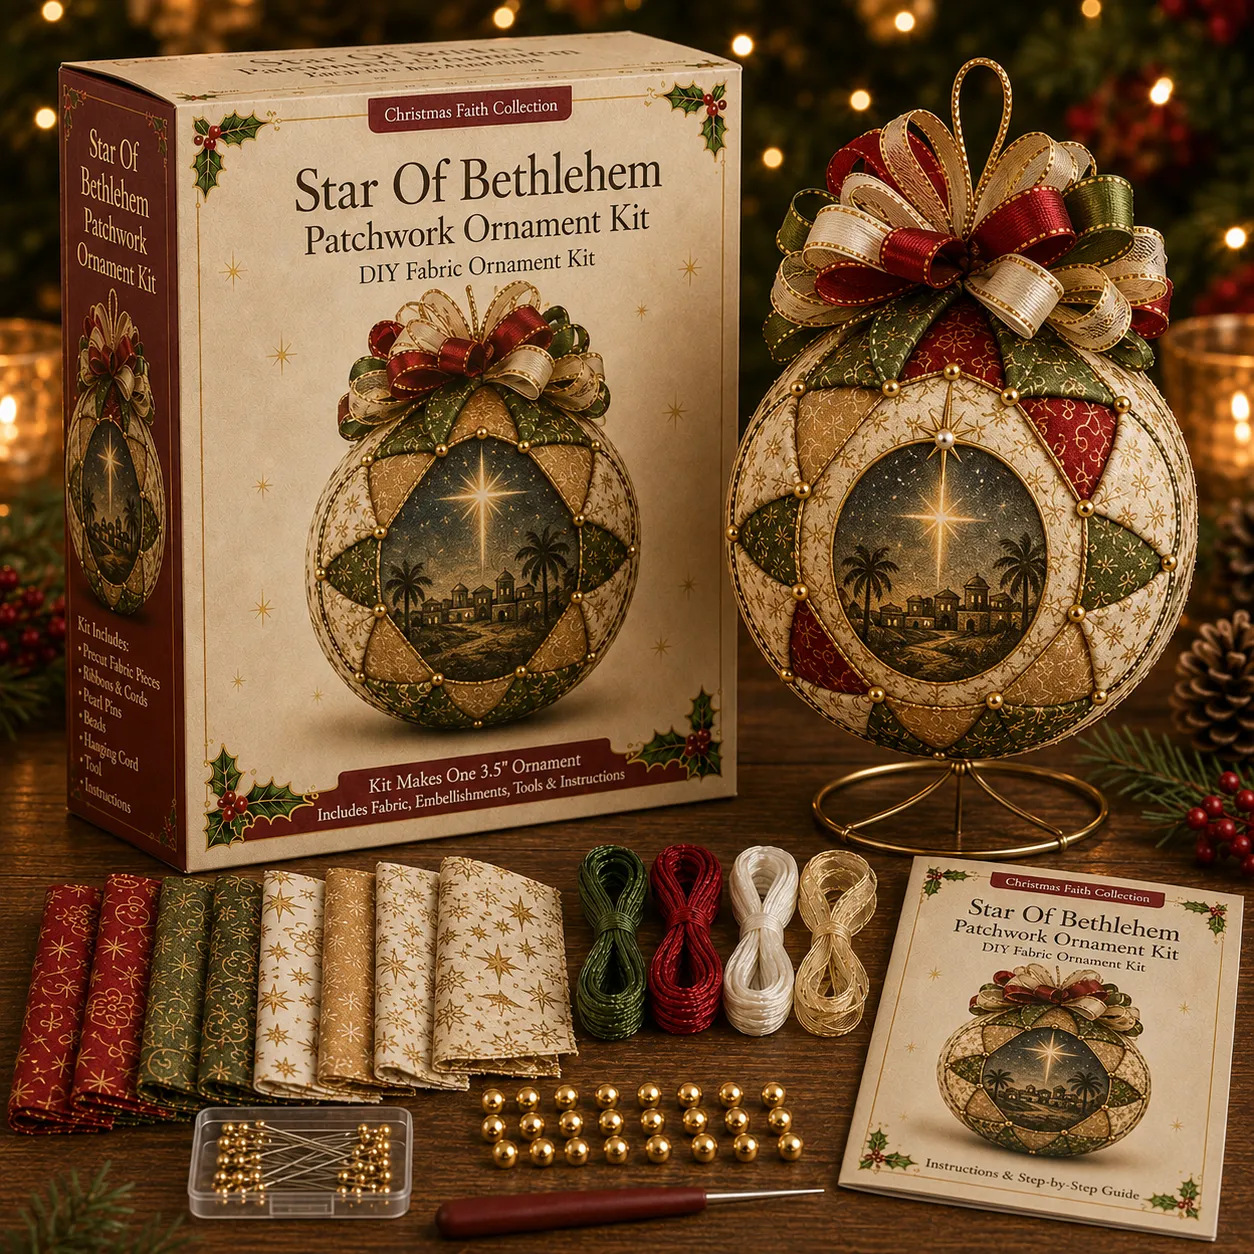
Total: $36–$82 for a finished ornament that takes one evening. Buy a single kit, learn the technique, then run it with your own scraps and it becomes the cheapest heirloom in the house.
Slow crafting is the quiet counter-trend to 2026’s buy-it-now culture. Patchwork ornaments made from fabric scraps, pinned rather than sewn, tap into both the heirloom-Christmas revival and a growing appetite for projects you can finish in one sitting. There’s a sustainability angle too, and here it isn’t just marketing — the whole point of this project is consuming leftovers.
29. A Hand-Stitched Felt Tree Ornament With Appliquéd Baubles
- Cut two tree shapes from cream felt, about 4 inches tall.
- Appliqué a red round bauble, a green elongated bauble, and a small brown bell onto the front piece with a running stitch.
- Embroider branch lines and a few red berries using two strands of floss.
- Sew a small yellow button near the top for a star.
- Blanket stitch the two layers together around the edge, stuffing lightly before you close the last inch.
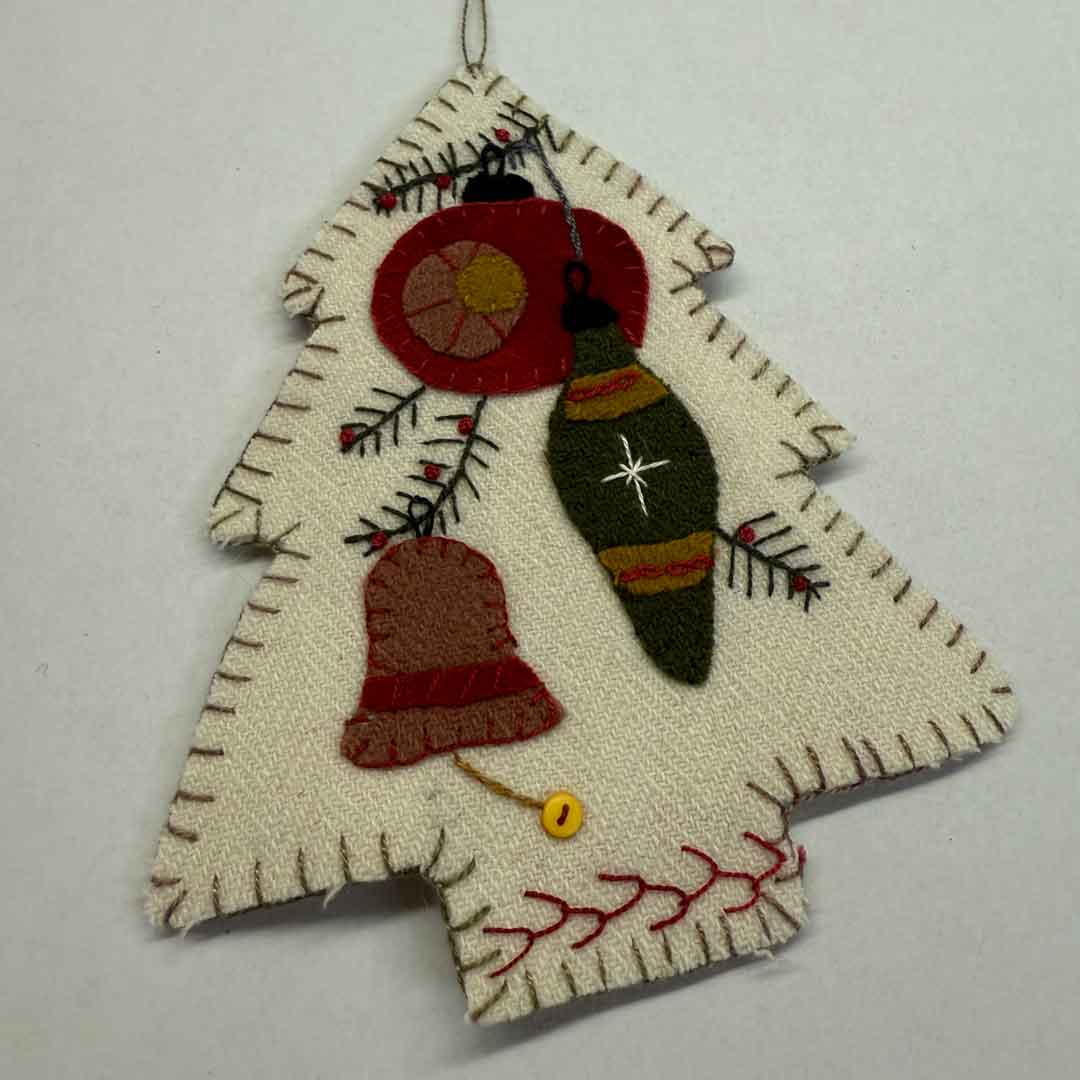
About two hours per ornament, and roughly $12 in felt, floss, and stuffing for a batch of six.
The blanket stitch is the whole thing. A running stitch would have been faster, but that thick, even edge is what makes the ornament look finished rather than homemade — it’s a visible signature of time spent. Keep the spacing consistent at about a quarter inch, because uneven blanket stitching is the one detail that separates a charming ornament from a wonky one.
30. A Wall-Mounted Wooden Lattice Tree
Anchor the lattice into studs, not drywall anchors. A 5-foot wall tree loaded with ornaments and lights can carry 20 pounds of load, and it will pull free the first warm week in January if you cut that corner. Space the diamond junctions about 10 inches apart so ornaments have natural resting spots, and run the string lights along the back face so the glow comes from behind the wood instead of in front of it.
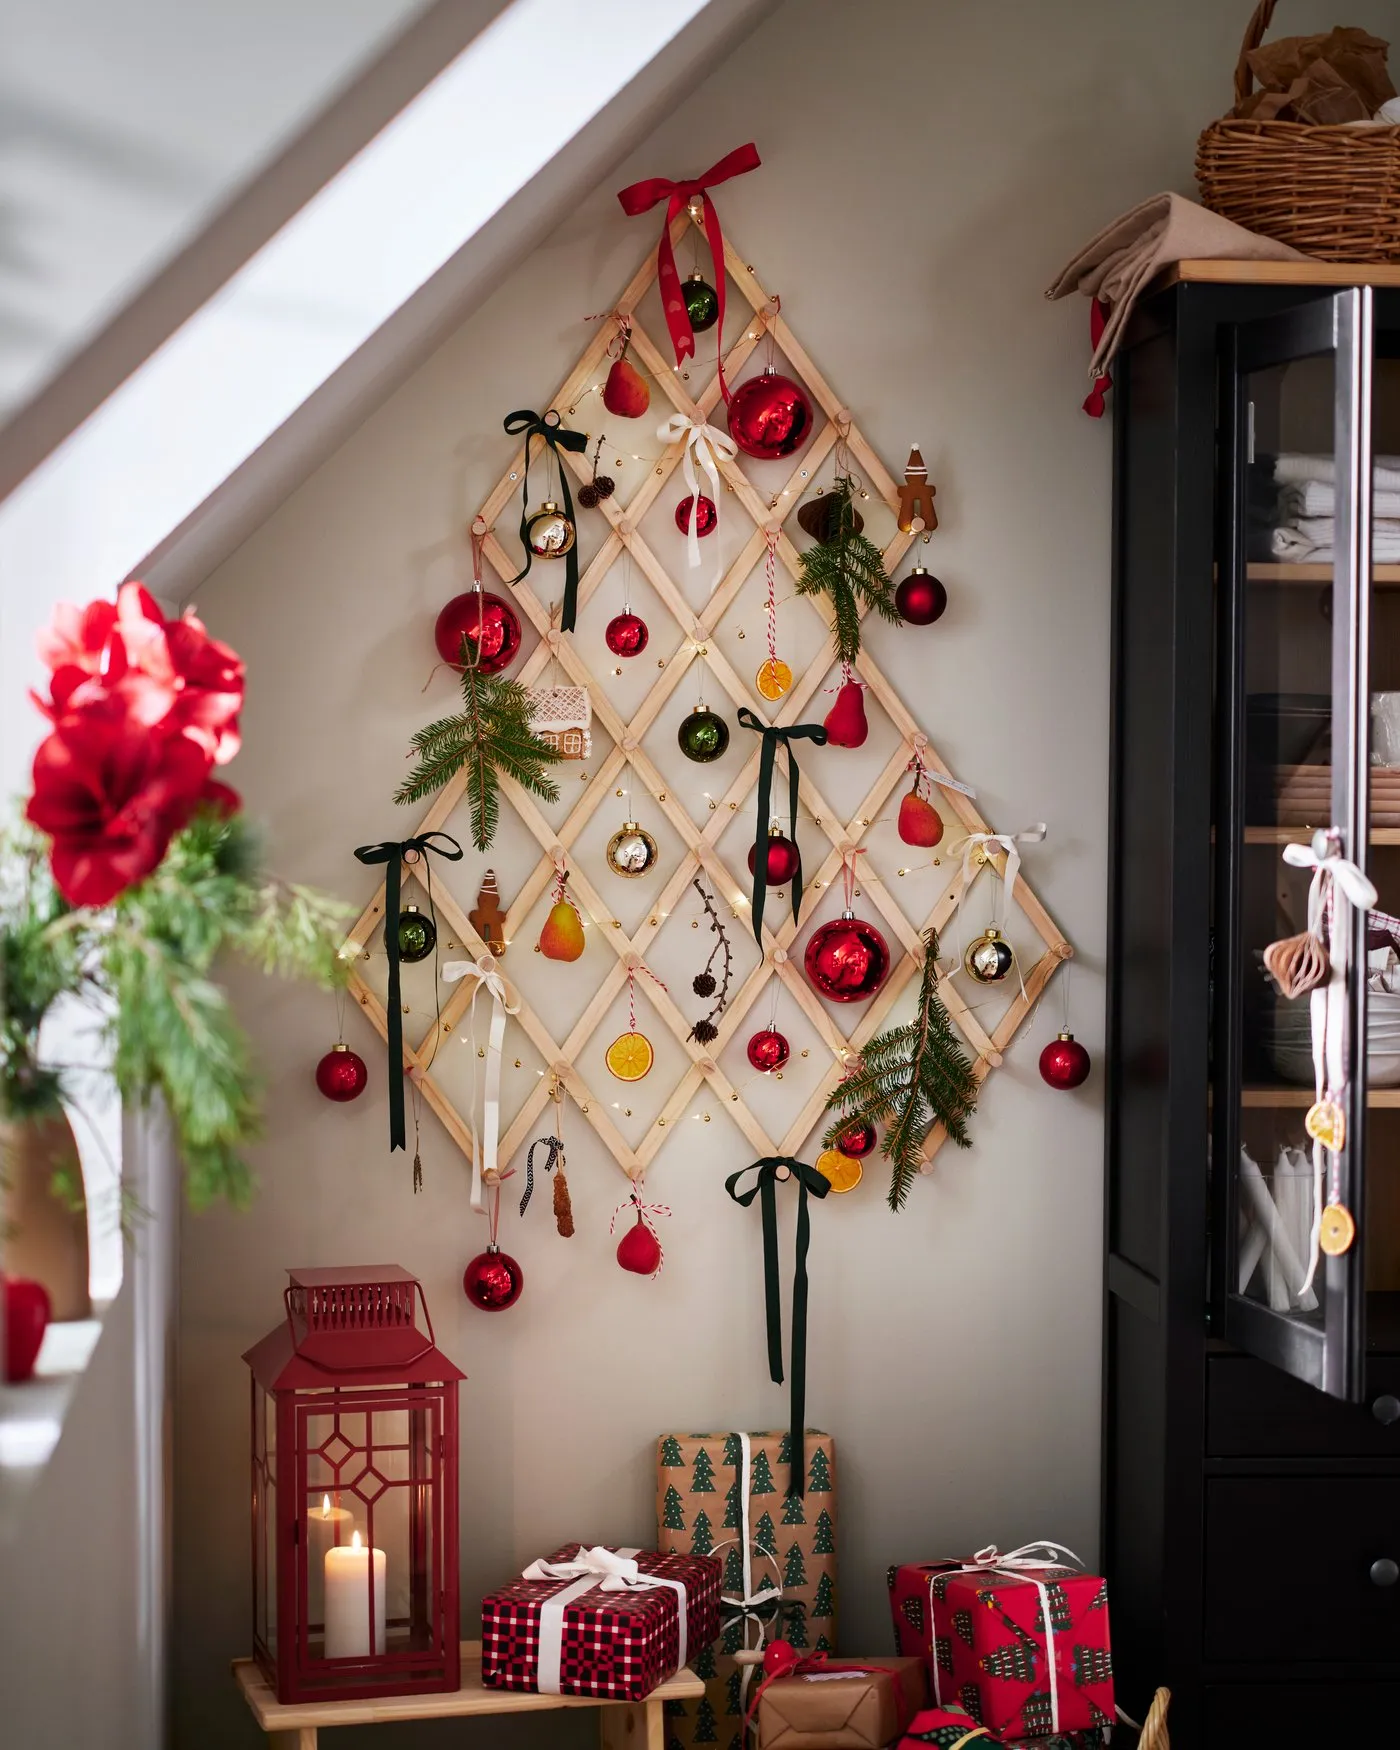
A wall tree like this is the answer for apartments and small rooms — you need about 3 feet of clear wall width and 6 feet of height, and no floor space at all. It’s the right call for anything under 10 by 10 feet, where a full tree blocks a doorway or a walking path. In a bigger room, treat it as a second tree; a lone lattice on an 18-foot wall looks lost.
31. A Ceramic Deer, Wooden Beads, and Bottle Brush Trees
This is one of the easiest looks to fake on a budget. Target and Walmart both carry white ceramic deer figurines for $10–$18 in season, wood bead garlands run about $8, and glittery bottle brush trees come in a six-pack for $12. Stack thrifted hardbacks with the jackets removed and paint the spines white if they aren’t already. Total: about $45 for a vignette that looks curated.
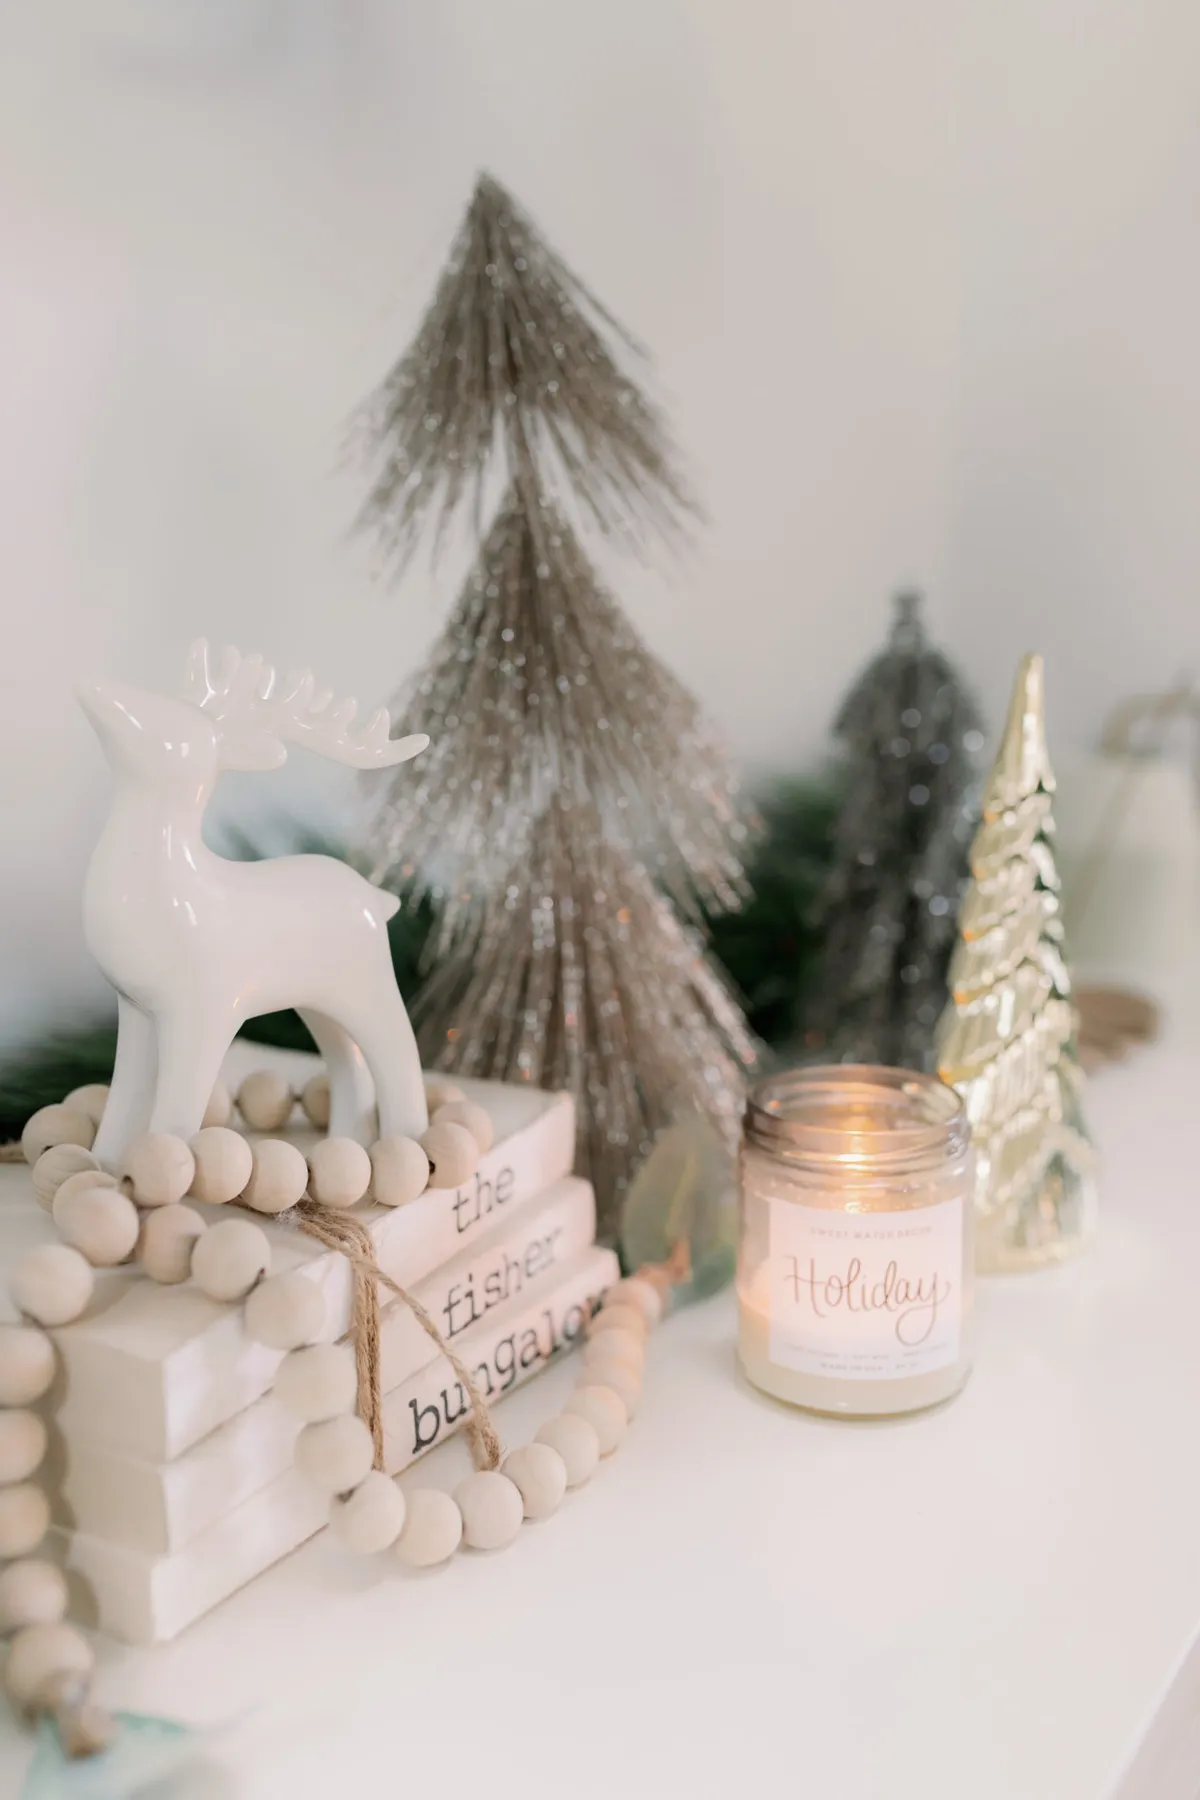
Glitter sheds, and it sheds most onto whatever surface you set it on — line the shelf with a piece of felt or use a tray with a lip. Glass trees and ceramic deer both need dusting with a dry cloth, since water dulls glitter and streaks ceramic glaze. Real jar candles also soot white ceramics over time, so trim the wick to a quarter inch or switch to LED.
From One Ornament to a Whole Handmade Christmas
You don’t have to build the whole house out of felt and twine — pick one project, finish it this week, and let that single bird or beaded branch be the thing people ask about in December. The rest of the decorating can stay exactly as easy as it’s always been.
📌 Pin the ideas you’re actually going to make so they’re waiting for you when the glue gun comes out.