
Glass Christmas trees are having a major moment on Pinterest right now — and once you watch a clear glass tree catch a warm string light at dusk, you understand why. Thousands of us are saving the same shots: crystal finials, mercury glass, ornaments that look lit from the inside out.
We spent serious time browsing Etsy, West Elm, Anthropologie, Amazon, and Target to bring you only what’s worth your attention this year — from a $12 glass bauble to a $480 sculptural centerpiece. Inside you’ll find 33 curated ideas covering heirloom ornament collecting, mercury glass, frosted Scandinavian minimalism, and full-on layered sparkle, with budget and luxury versions compared side by side.
And stay until the end — we break down the most common mistakes that can ruin these looks.
It tracks that 2026 is the year glass went from filler to focal point: as vintage ornaments flooded resale sites, designers started treating clear glass as sculpture. 📌 Save this to Pinterest for later — you’ll want to revisit these ideas. A few links here are affiliate links, which means we may earn a small commission at no cost to you.
1. Clear Glass Baubles Lit From Within, With Mercury Gold and Red Stripes
What makes a bowl of ornaments look styled instead of dumped is ratio: roughly half clear glass with light trapped inside, a third antique gold mercury glass, and the rest red-and-white stripes and solid baubles. The mercury finials pull the eye up, and the small striped pieces give it somewhere to rest.
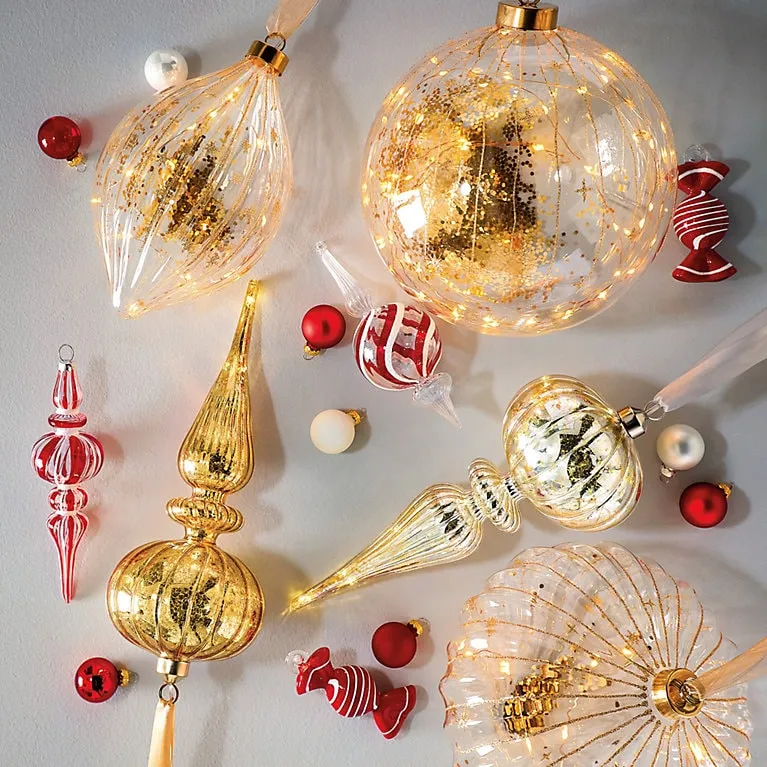
The lit clear balls act like tiny lamps, so the whole arrangement glows rather than just reflecting the room. Place the opaque pieces first and drop the lit ones in last, so their light has something to pass through.
- Large lit glass ornaments, set of 6–8: $60–$140
- Mercury glass finials, set of 4: $28–$65
- Striped and solid filler baubles, set of 12: $18–$40
- Fairy light inserts or a micro strand: $12–$30
- Gold caps, ribbon, and a shallow bowl: $14–$28
- Total: roughly $132–$303
Budget alternative: skip the inserts, weave one $12 micro strand through the bowl instead, then give the clear ornaments a light coat of spray adhesive and fine gold glitter. About 55% less, and it still sparkles from across the room.
2. Frosted Glass Cone Tree Glowing Over Evergreen Branches
Want the etched frost, swags, and snowflake to actually show? Light the cone from inside with a warm 2700K strand and keep everything else in that vignette dimmer. A cool-white LED flattens the etching until the glass reads as plastic — the exact opposite of what you paid for.
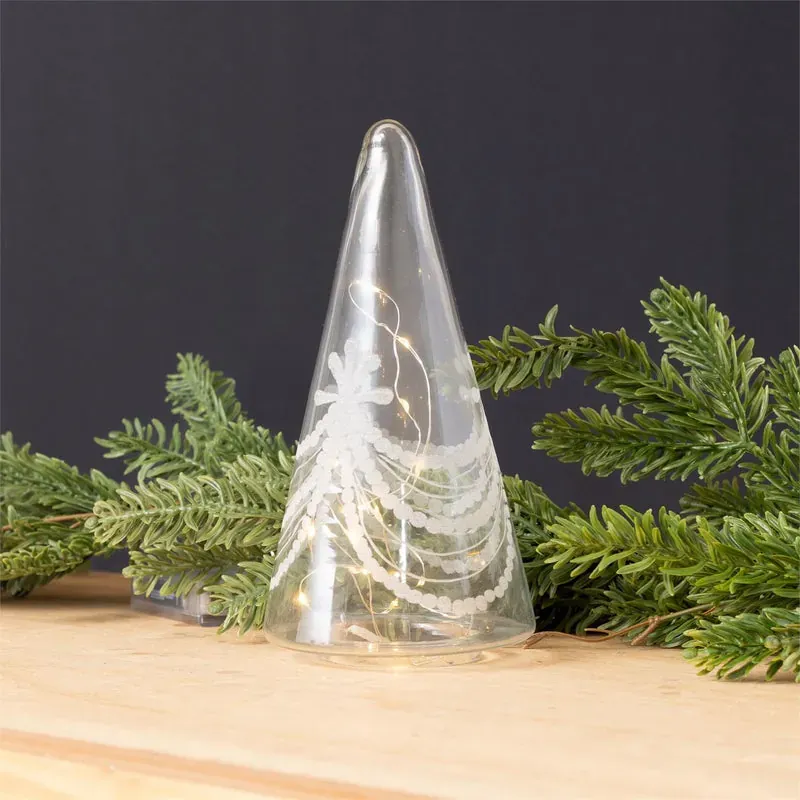
Reality check: this silhouette works between 10 and 16 inches tall. Shorter reads as a candle; taller starts competing with the room. The evergreens around the base collect dust and pet hair, so a quick swipe every couple of weeks keeps them looking fresh. If you have cats, set the whole thing on a dab of museum gel.
3. Clear Glass Tree on a Marble Console With a Gold Mirror Behind It
The formula is 40% clear glass, 30% white marble and pale textured wall, 20% warm gold, 10% black. Those stacked black books are doing more work than they look like they are — without them the console goes sweet and flat. Swap gold for brushed nickel and marble for pale oak and the exact same layout turns coastal without moving a single object.
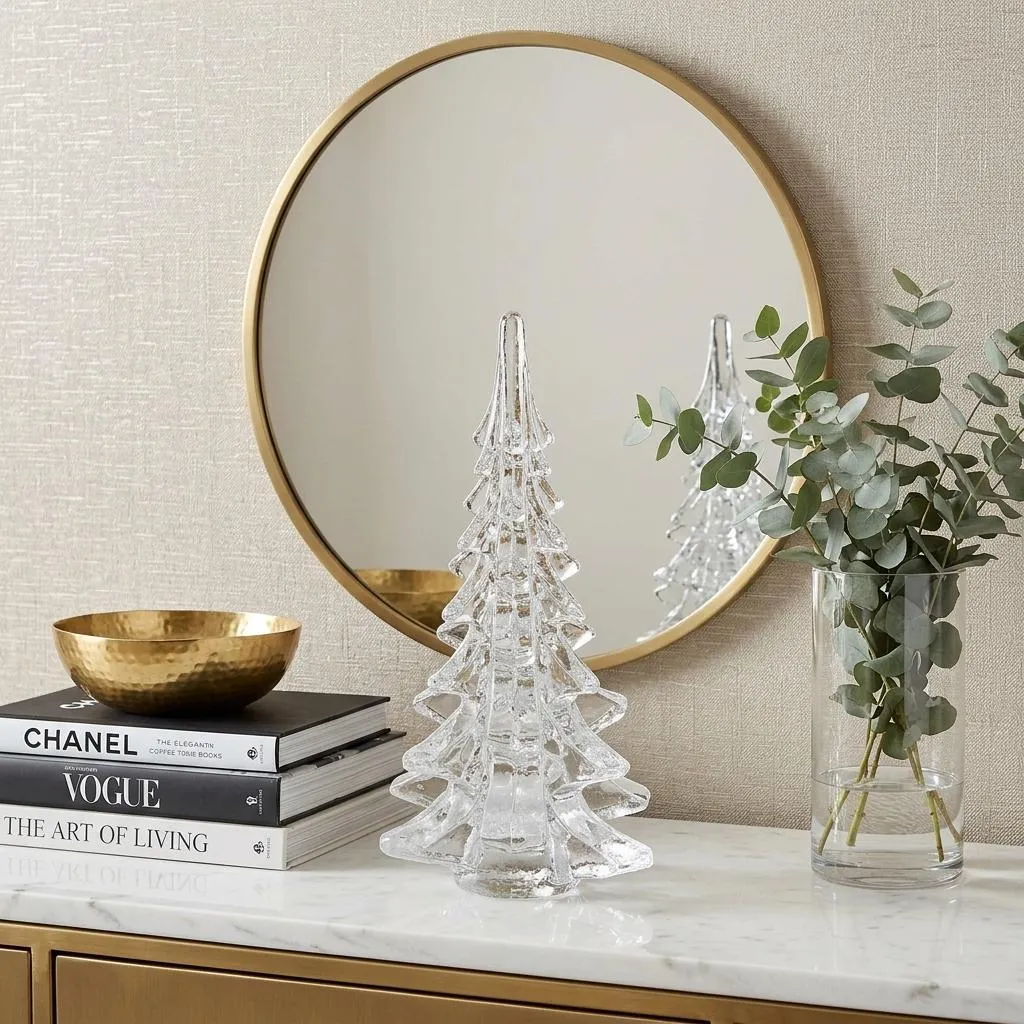
Size it right and it stays serene: a 48–60 inch console, a 24–30 inch round mirror, and a glass tree between 12 and 18 inches so the reflection reads as a second tree. Ceilings under 8 feet want the shorter end of that range.
- Center the mirror, bottom edge 8–10 inches above the console.
- Place the glass tree just left of center — off-axis beats dead center.
- Stack 3–4 dark books to the right, spines facing out.
- Add the hammered gold bowl on top of the stack, slightly turned.
- Finish with a clear vase of eucalyptus on the left for height and softness.
4. Miniature Green Glass Tree Dressed in Glitter, on a Mirror Base
You don’t need a boutique to get this. Hit a thrift store first for a green glass tree — they turn up constantly in January — then add a set of dollar-store mini ornaments and a $6 craft-store mirror round. Total realistic spend: $22–$40 versus $120+ at a design shop. Facebook Marketplace is also gold for last year’s glass trees that someone else got tired of.
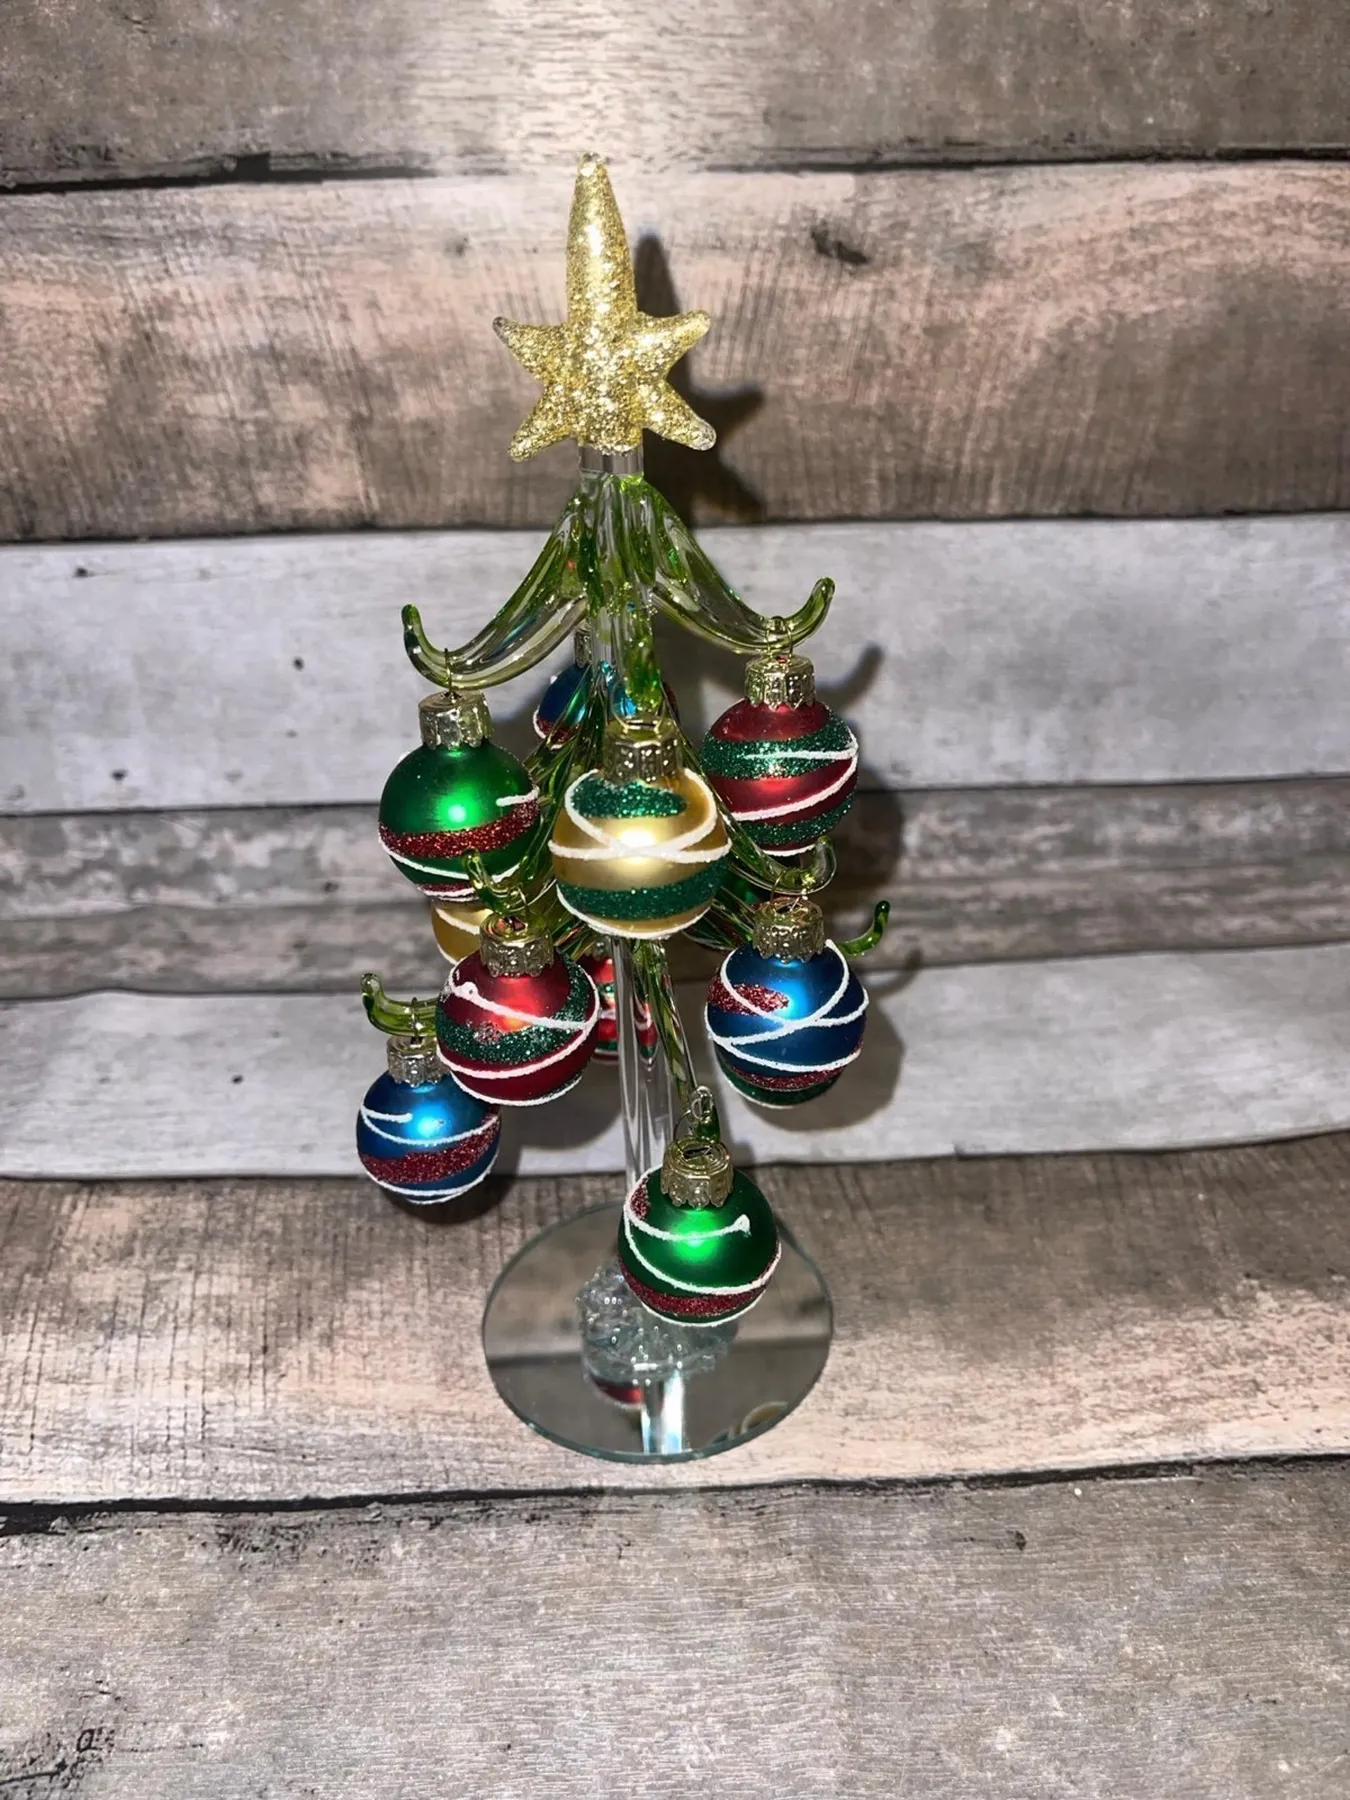
If you take one thing from this setup, take the mirror base. Without it, a 6-inch glass tree is just a trinket on a wood table. With it, the tree multiplies — you get a reflection under the branches that reads as depth, and the gold star above suddenly has somewhere to land. This is the tabletop version of Idea #3, minus the console and the budget.
5. A Glass Tree Filled With a Snowman and Tiny Wrapped Gifts
- Start with a clear tree-shaped container, 8–10 inches tall, with a removable base.
- Pour in half an inch of fine white glitter — more than that and your figures sink.
- Set a 3-inch frosted bottle-brush tree slightly off-center, then the snowman just in front.
- Add two or three wrapped mini gifts, alternating colors so the eye travels.
- Tuck a single warm micro light behind the tree and reseat the base.
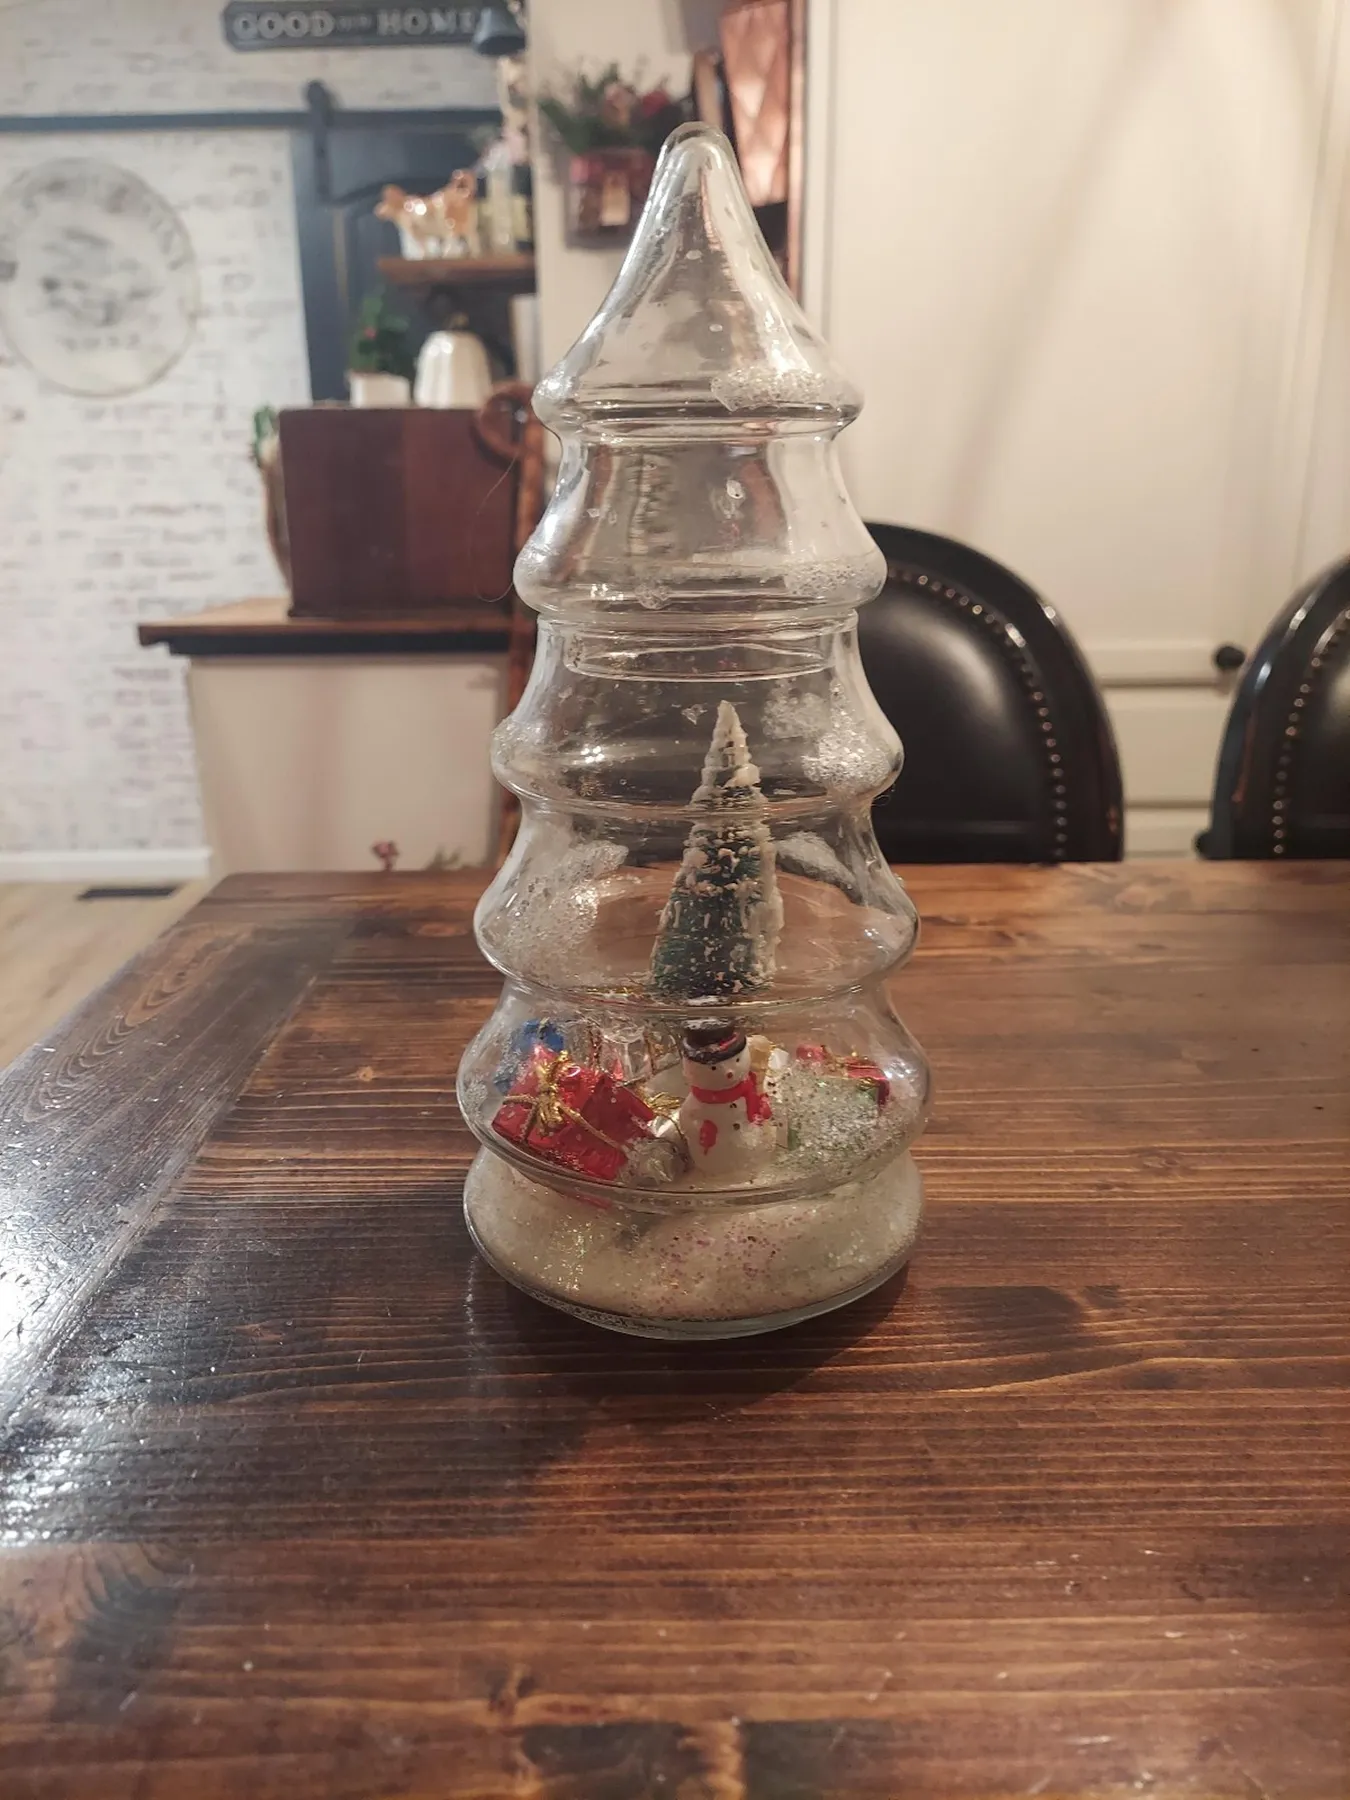
About 30 minutes, $15–$35 if you already own the glass. Compare with Idea #10, which stages a similar miniature scene inside a wooden box instead.
Upkeep is minimal but real: sealed glitter doesn’t escape, but static will pull it up the inside walls within a month. One gentle shake resets it. If your container isn’t sealed, expect glitter on your table every time you dust, and keep it out of direct sun so the white stays white instead of yellowing.
6. Twine-Hung Glass Baubles Holding Mercury Candles in Gold Glitter
Hang pairs like this at two different heights, never side by side. Rule of thumb: the lower ornament sits at about two-thirds of the branch drop, the upper one at one-third, with 5–7 inches between them. That gap is what makes the eye travel vertically instead of bouncing between two identical balls.
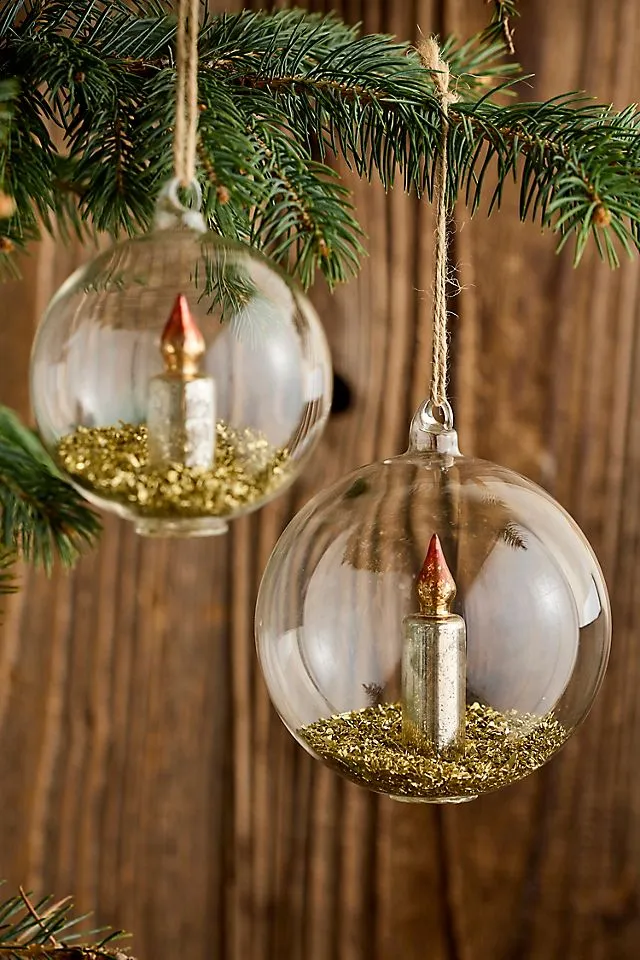
Broken down: 55% clear glass, 25% gold glitter, 15% silver mercury, 5% warm red-orange from the candle tips. The twine hangers read rustic against all that shine, which is exactly the tension that keeps it from looking like a store display. Swap the gold glitter for pearl white and the same formula turns frosty and quiet — same bones, entirely different mood.
7. Green Mercury Glass Tree Lit Warm From the Inside
Mercury glass is having a genuine revival — not the mirrored silver of 2015, but deep, slightly imperfect green and amber finishes that read vintage instead of shiny. 2026’s appetite for “collected, not purchased” decor is driving it: people want pieces that look like they came from a grandmother’s attic, even when they came from a store.
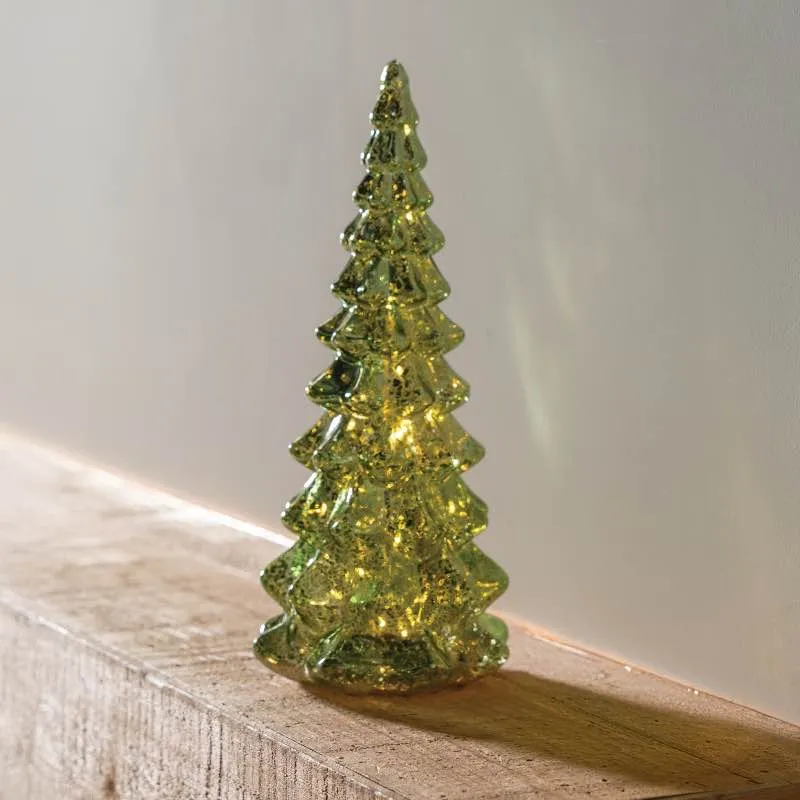
The good news is staying power. A lit mercury glass tree works with traditional red-and-green, with cream-and-brass, even with a modern neutral room, so it won’t feel dated in three years.
- Measure from your outlet — most glass trees come with a 5–6 foot cord.
- Check that the surface is level and won’t scratch from the glass base.
- Confirm the on-off switch is reachable without moving the piece.
- Stand three feet back and check the glow against your wall color.
- Decide now whether the cord will be visible or hidden behind decor.
8. Clear Glass Finial Against Plaid, Polka Dots, and Glitter Berries
Honest warning: plaid ribbon plus polka dots plus glitter trees plus berry sprigs is four patterns in a 10-inch radius. It works here because the clear glass finial and the matte beige ornament are quiet — they’re the pause between the loud pieces. Remove them and the whole cluster turns into a craft fair.
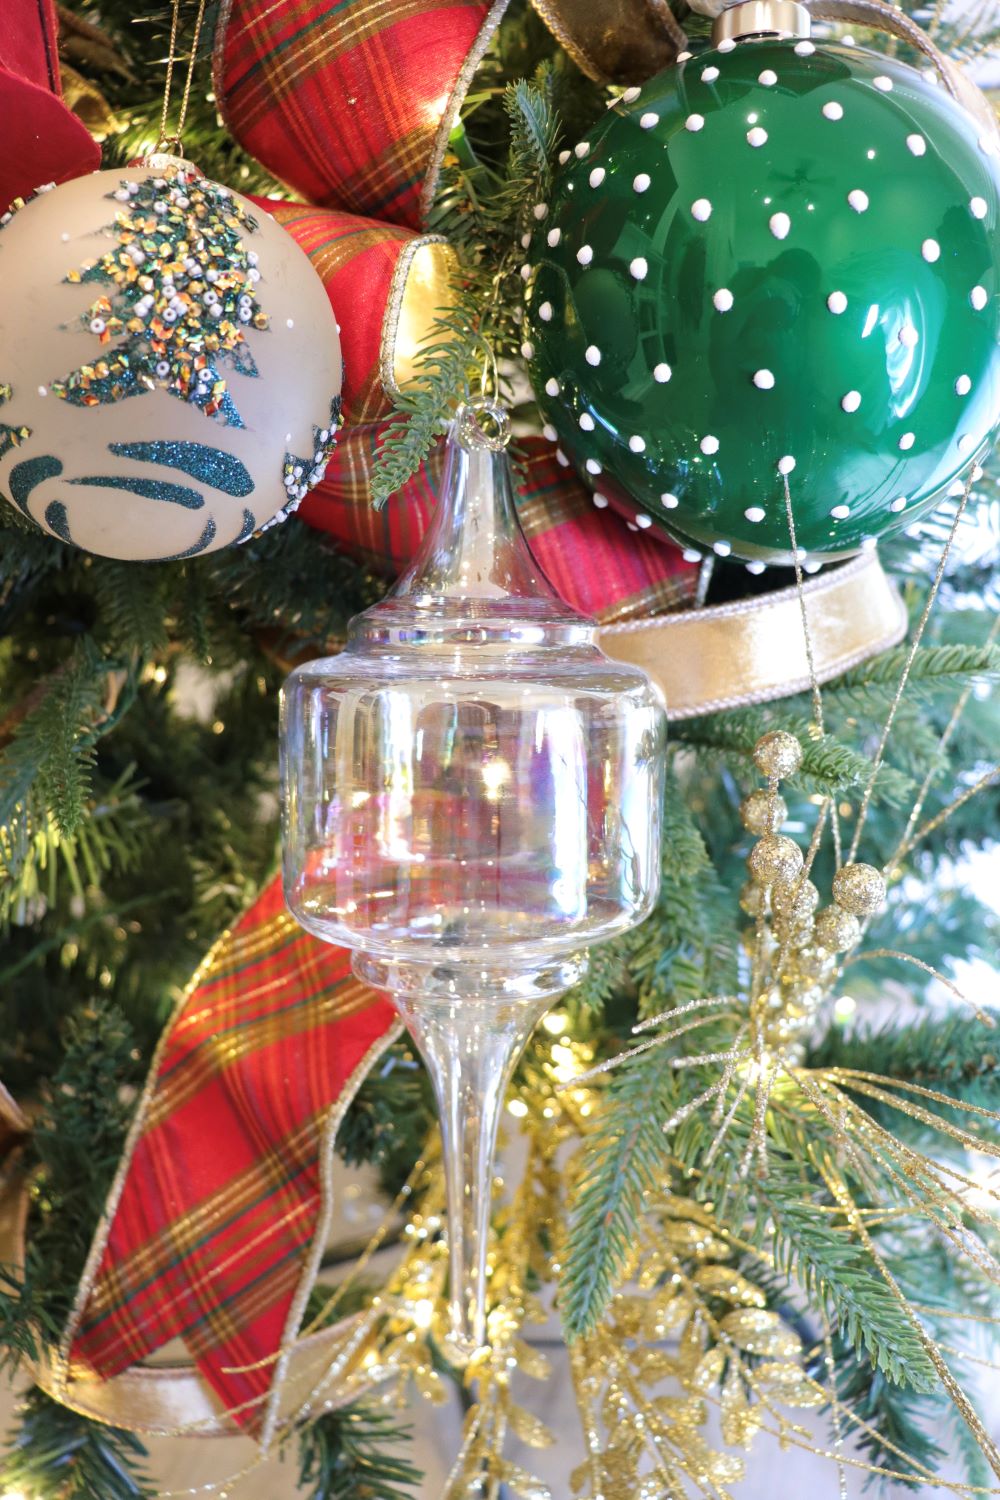
The design principle at play is gloss against matte, and it’s the most reliable trick on a Christmas tree. Every glossy ornament needs a matte neighbor, or the lights bounce back at you in a flat sheet of glare. Clear glass is your best matte-maker: it absorbs nothing and reflects selectively.
One number worth remembering: keep large ornaments in the bottom third of the tree, medium in the middle, small at the top, and space them about a hand-width apart. Mixing plaid ribbon in? Cut it to 1.5 inches wide for a 7.5-foot tree and don’t go wider than 2 inches unless the tree is 9 feet or taller.
9. Curled Glass Branches Holding Multicolored Globe Ornaments
This one is a genuine centerpiece, not a shelf filler. It wants 20 inches of clearance in every direction, a tabletop at least 36 inches wide, and ideally an 8-foot ceiling or higher so the glass finial doesn’t crowd the room. On a narrow console under 32 inches, a smaller 12-inch version reads better — see Idea #13 for the same sculptural energy with a moodier backdrop.
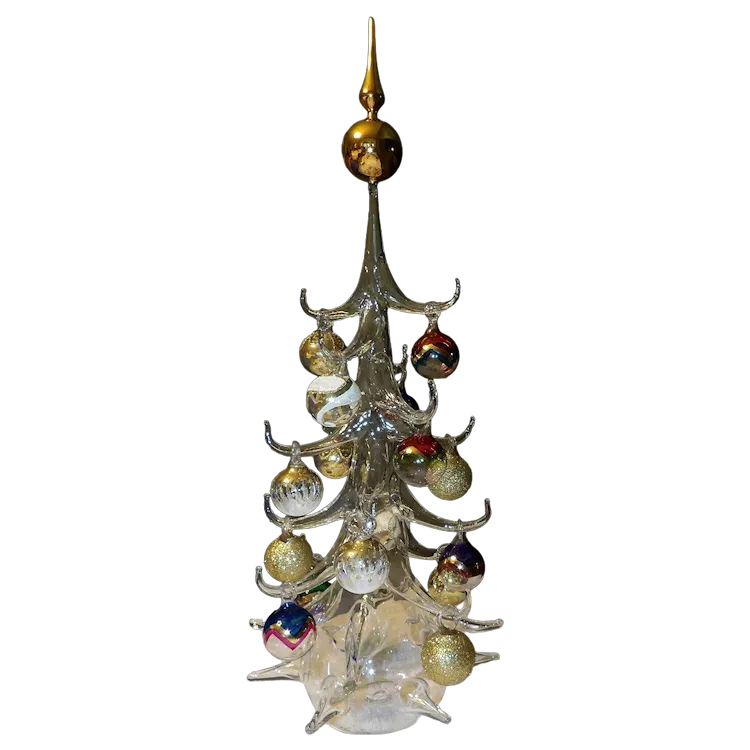
For less: a $25 glass tree from Target or a $30 one from Walmart gives you the silhouette, and you can hang your own ornaments on 12-pound fishing line from a drawn-back curtain rod bracket for a floating version. Total under $60. If you’d rather have the real thing, vintage glass trees from the 1970s surface on eBay most weeks for $40–$90 — check for chipped branch tips before you buy.
10. A Tiny Glass Tree Tucked Inside an Open Wooden Box
The single element doing all the work here is the open box. A small glass tree on a shelf is a figurine; the same tree inside a shallow wooden box with tissue paper is a gift, a stage, a story. Take the box away and you lose the framing, the shadow line across the back, and the sense that someone carefully packed this away.
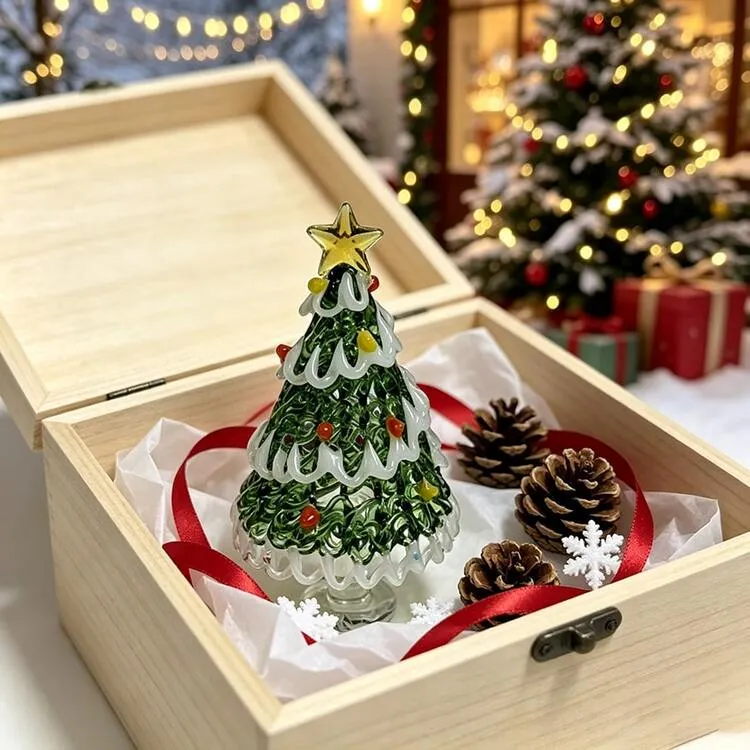
- Choose an unfinished light-wood box with sides at least 2 inches tall.
- Line the floor with crumpled white tissue, not flat — texture catches light.
- Set the glass tree slightly right of center, angled 15 degrees toward the room.
- Tuck two pinecones and a snowflake cutout at the back left corner.
- Drape a red satin ribbon over the front edge and let the tails fall.
Twenty minutes, about $18–$30.
11. Bubble-Top, Spiral-Bottom Glass Ornament on a Pine Branch
Textured glass needs to sit where light hits it directly. Hang bubble and spiral pieces within 8 inches of a string light strand, ideally in the front third of the branch depth — the raised bubbles only read when there’s a bright point nearby to catch. Tuck textured glass deep in the tree and you’ve spent money on a shadow.
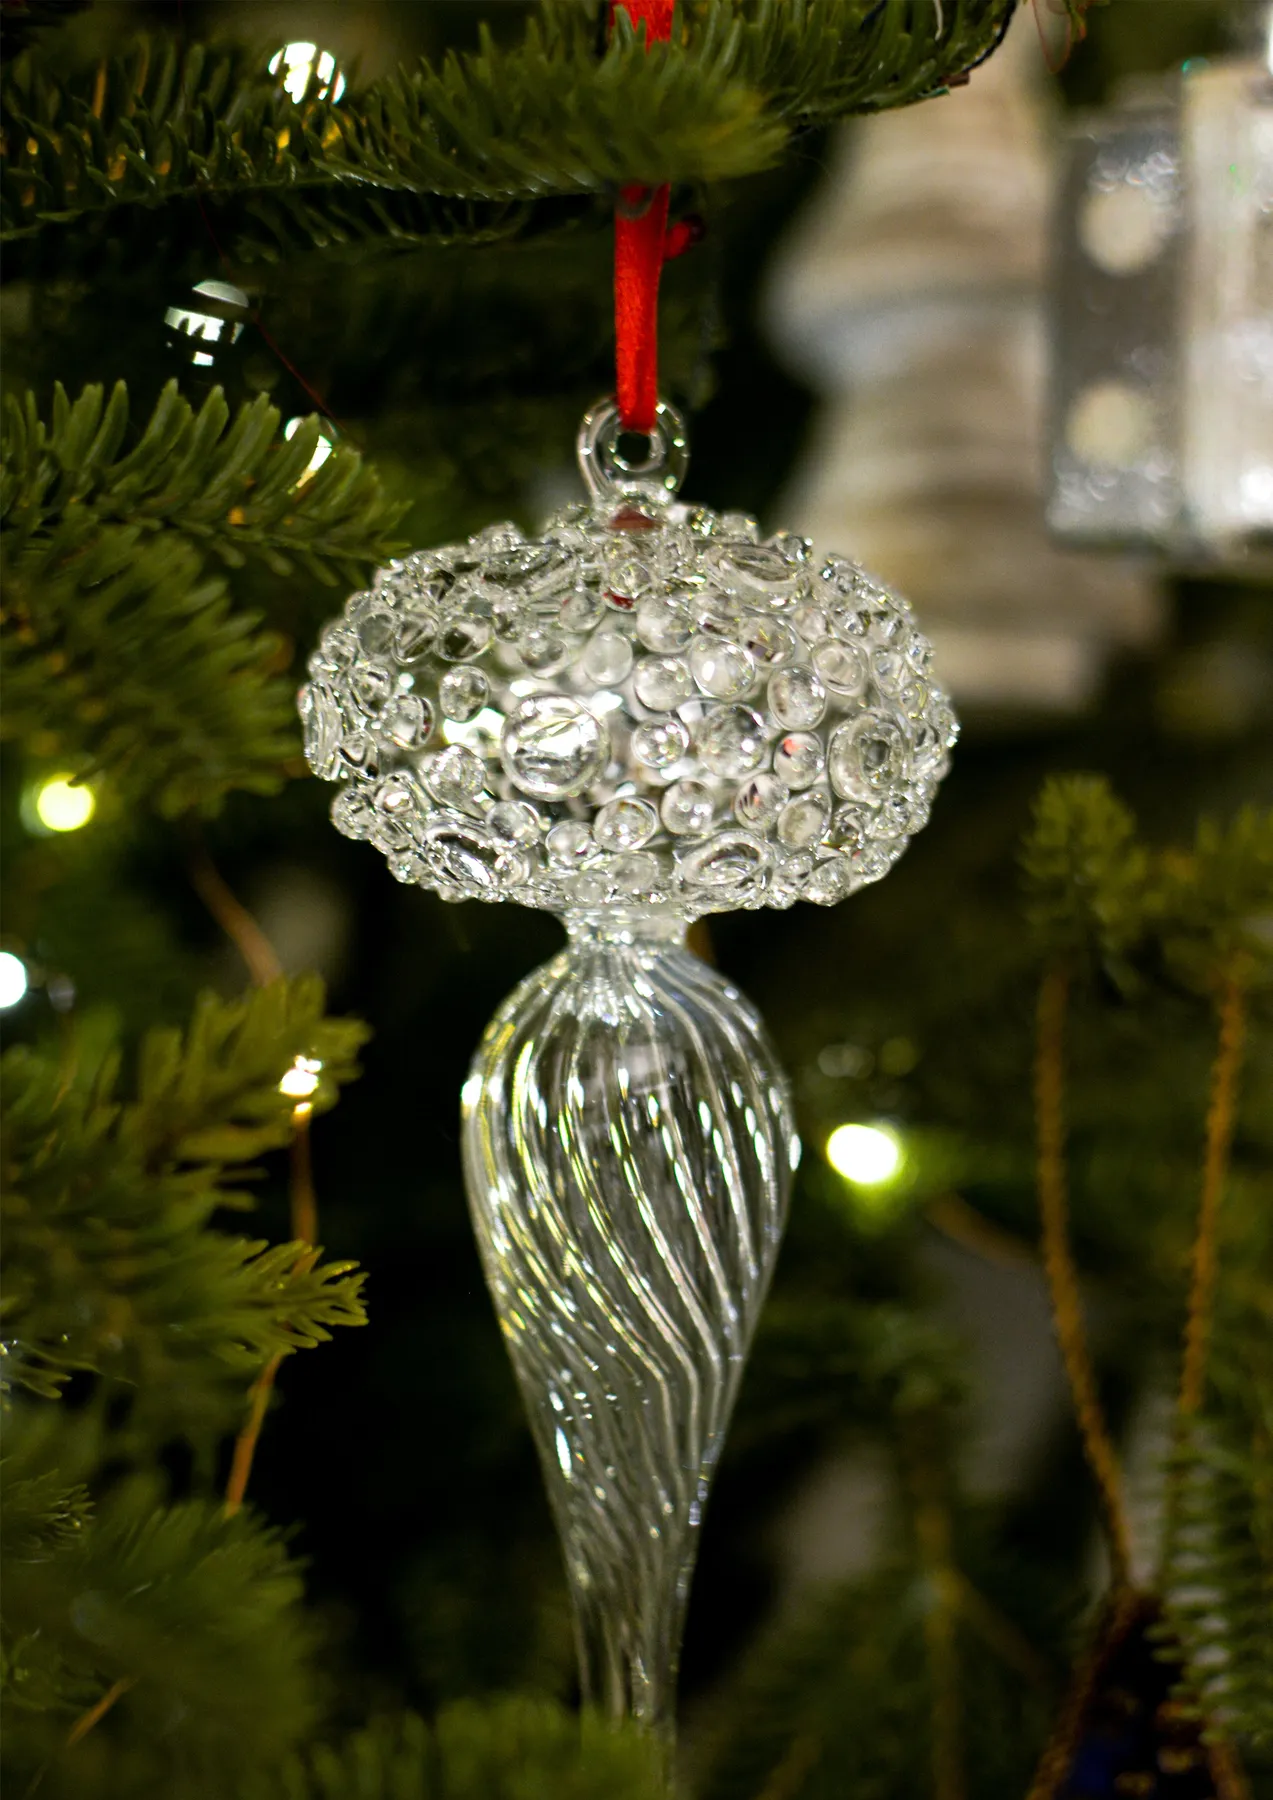
Cleaning matters more than people expect. Hard water spots etch into blown glass permanently within a few seasons. Wipe with distilled water and a microfiber cloth, never tap water, and never ammonia-based cleaner, which dulls the finish. Once a year, before packing, is plenty — and store these in acid-free tissue, not newspaper, which transfers ink to glass.
12. Sculptural Emerald Glass Tree on a Textured Circular Base
The formula is mostly backdrop: 60% dark wall or dark surface, 30% emerald glass, 10% clear highlights. Move this same tree onto a white table and it turns pale and weightless — you’d lose the whole point. Dark backdrop, glowing green glass, and a single clear base is a three-part composition, not a shopping list.
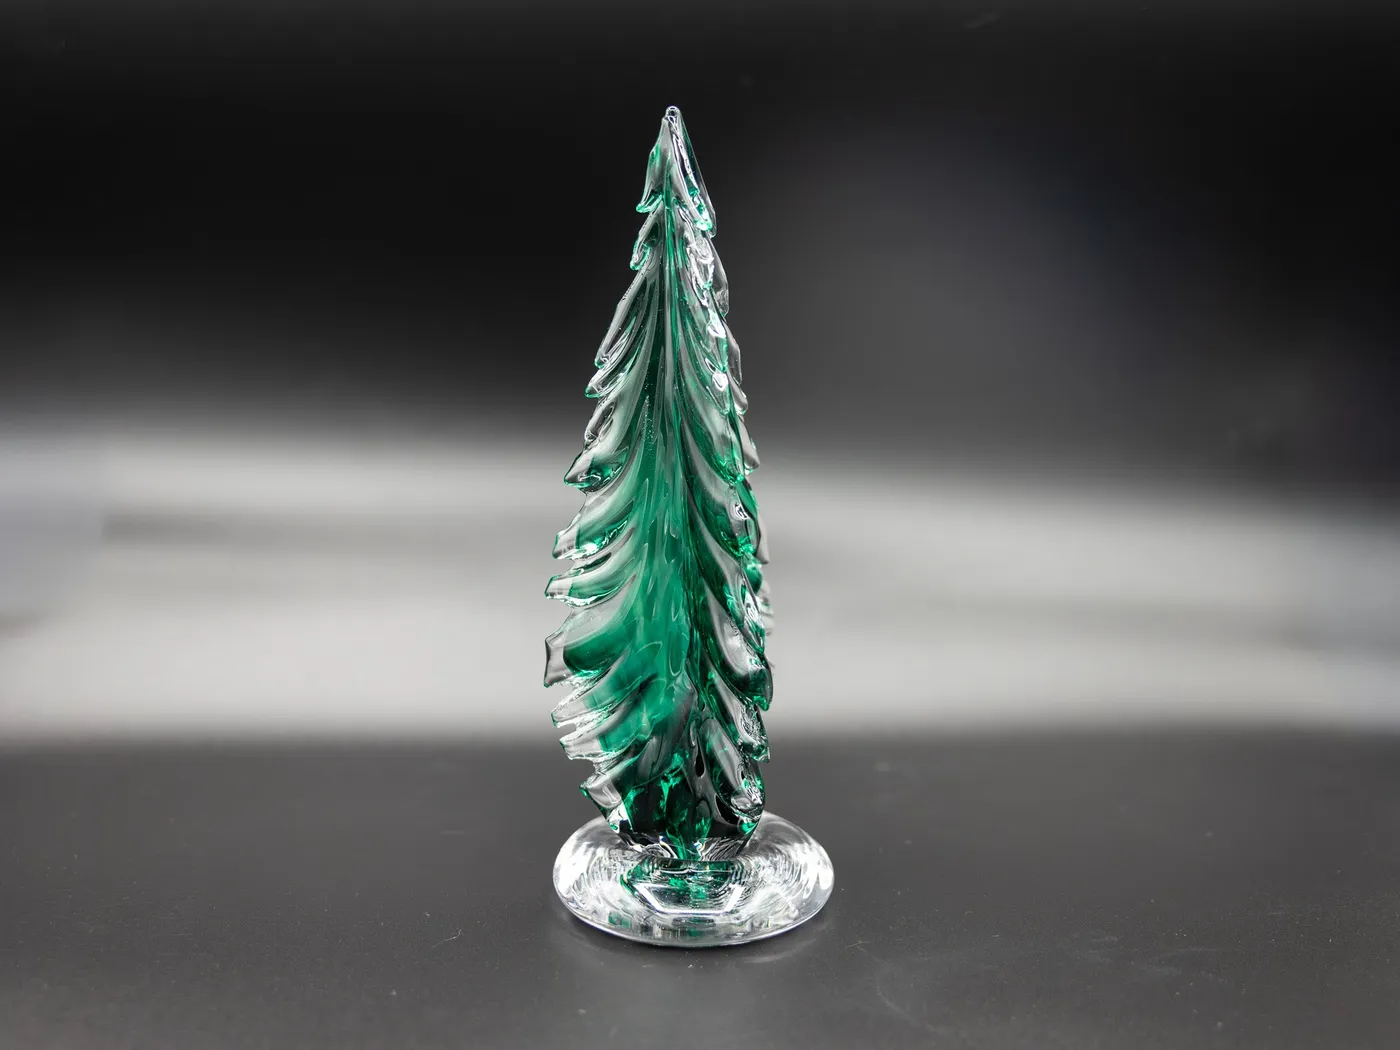
- Sculptural glass tree, 14–20 inches: $180–$420
- Dark painted or stone-effect backdrop panel: $0–$90
- Small spotlight or warm puck light: $25–$60
- Clear glass riser or base, if sold separately: $20–$45
- Total: roughly $225–$615
Budget alternative: keep your existing table and hang a $15 charcoal curtain panel behind it — you get 80% of the drama for a fraction of the cost. The one thing you can’t skip is the darkness behind the glass.
13. Gold-Leaf Glass Orb Beside Pinecones and Candlelight
Gold-leaf glass gets expensive fast, but you can fake the finish. Buy a plain clear glass ornament for $4–$8, pick up a $9 gold leaf kit from any craft store, and press small torn flakes onto the inside with a soft brush. Twenty minutes per ornament, and nobody will know it wasn’t hand-finished in a studio.
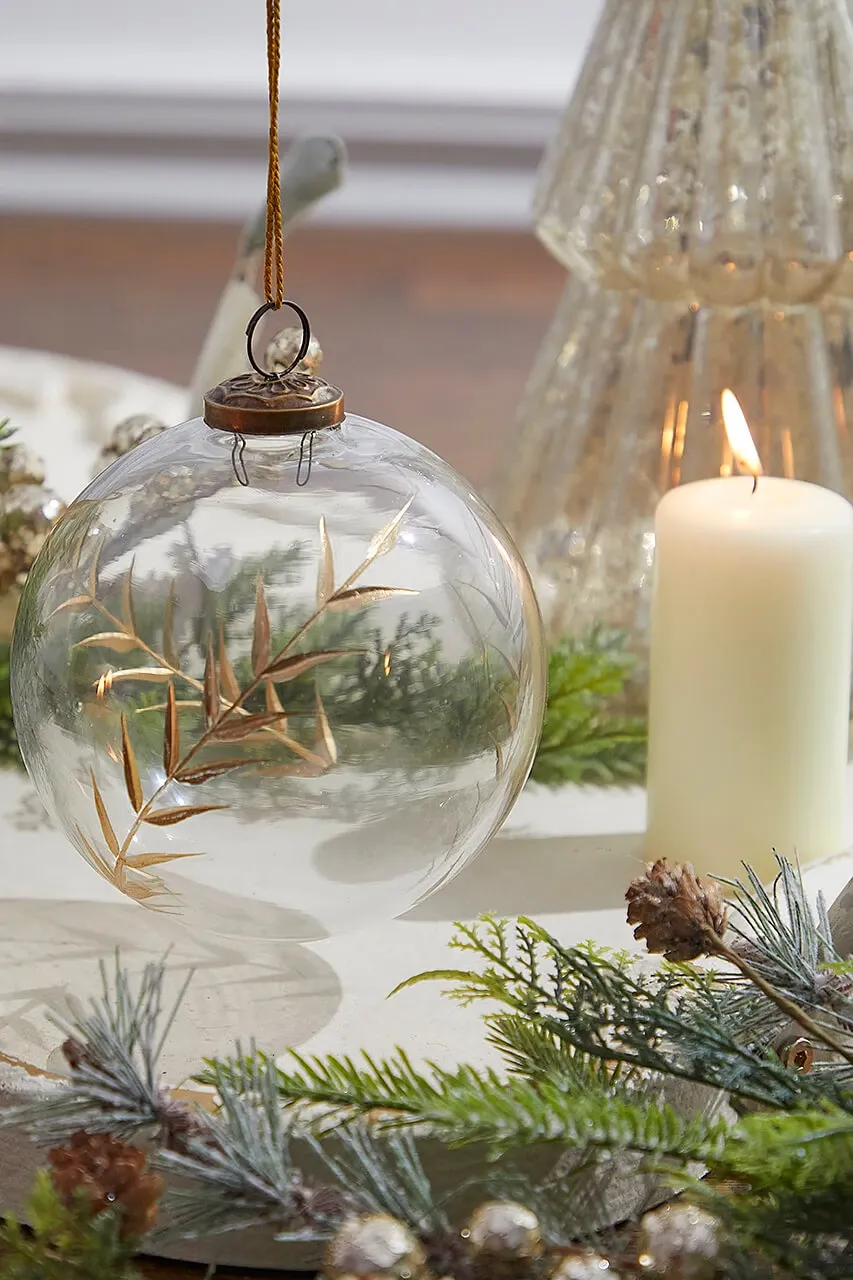
on the candle. That white pillar looks gorgeous next to glass and greenery, and it’s also the most common cause of holiday decor damage. Use a battery-operated pillar with a moving flame — modern ones fool everyone at three feet, and you can leave the room. If you insist on a real flame, keep 8 inches of clearance from any foliage, never leave it burning unattended, and set the whole vignette on a non-flammable tray.
14. Hand-Blown Glass Tree Ornament With Swirled Green and Tiny Baubles
Two things make this 3-inch ornament read as a tree rather than a blob: the swirled green glass suspended inside the clear body, and the tiny opaque baubles stuck to the outside. The swirl gives you trunk and branches at a glance. The little colored dots give it scale — without them, a viewer can’t tell if the ornament is two inches or two feet.
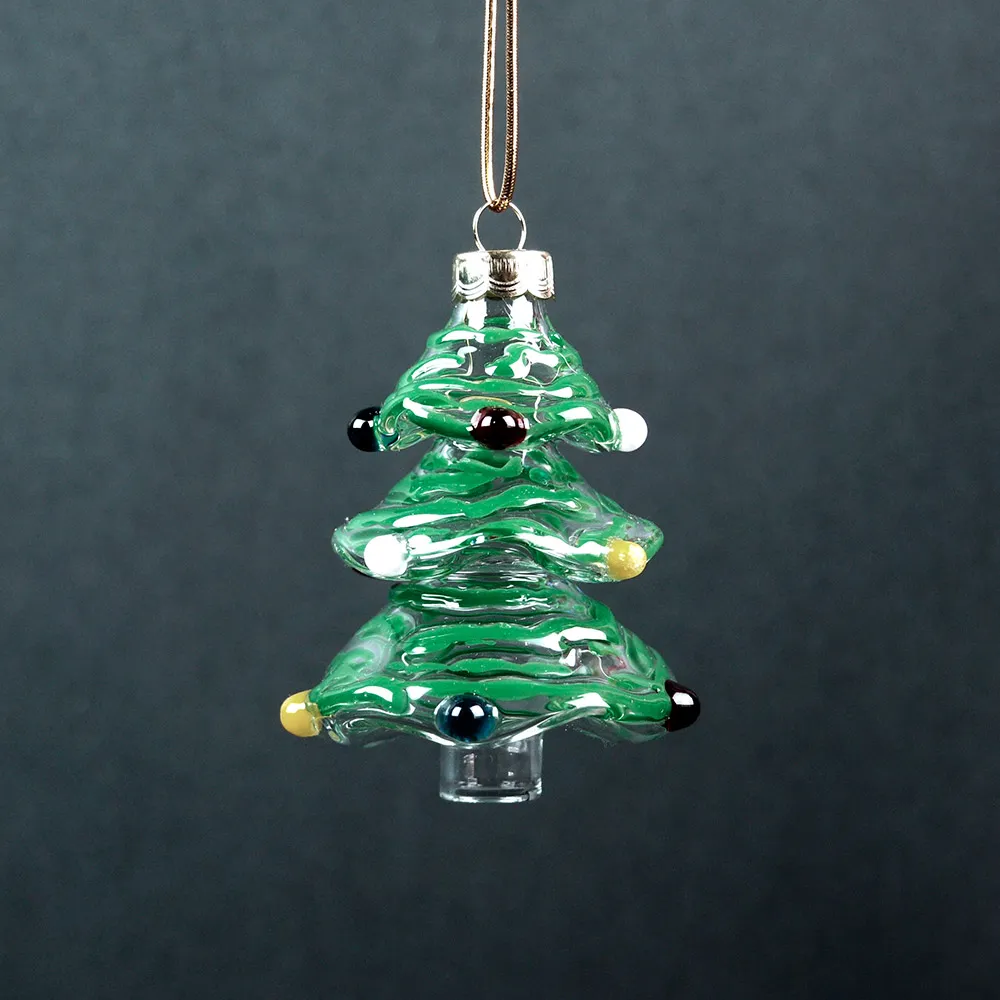
The element you’d miss most is the swirl. Remove it and you have a transparent teardrop with some dots on it. The green thread of glass is what makes your brain complete the shape, which is why hand-blown pieces command what they do — a machine can’t reliably suspend a spiral inside a sphere.
15. A Googly-Eyed Green Glass Tree That Grins Back
Whimsy pieces need discipline. One googly-eyed character per tree, hung at 5 to 6 feet — the natural sightline — and surrounded by at least eight plain ornaments on either side. Put three joke ornaments together and the tree stops being charming and starts being a novelty aisle.
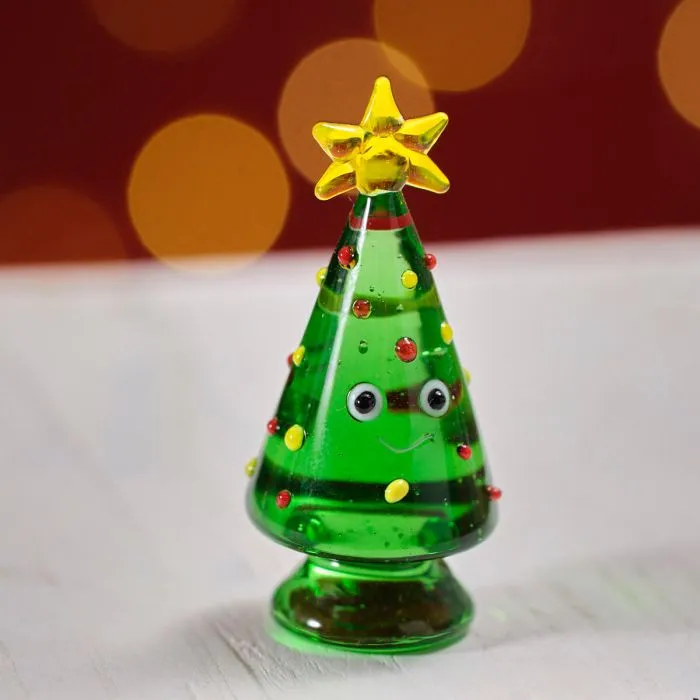
This is the “kidult” corner of holiday decor, and it’s growing fast. Playful glass trees with faces, tiny hats, and cartoon expressions are one of 2026’s most-shared ornament categories, partly because they photograph beautifully with bokeh lights behind them. My honest read: the plain glass and mercury glass in this guide will outlast it, but a single smiling tree costs $15 and makes a kid laugh every December. That’s a different kind of value.
16. Iridescent Glass Fairy Ornament on a Golden String
The wings are the whole point — pale pink, blue, and violet shifting as you move past. Iridescence is a surface treatment that splits light at different angles, so this piece will look completely different in the morning and at night. Hang it where people walk by, not where they sit and stare.
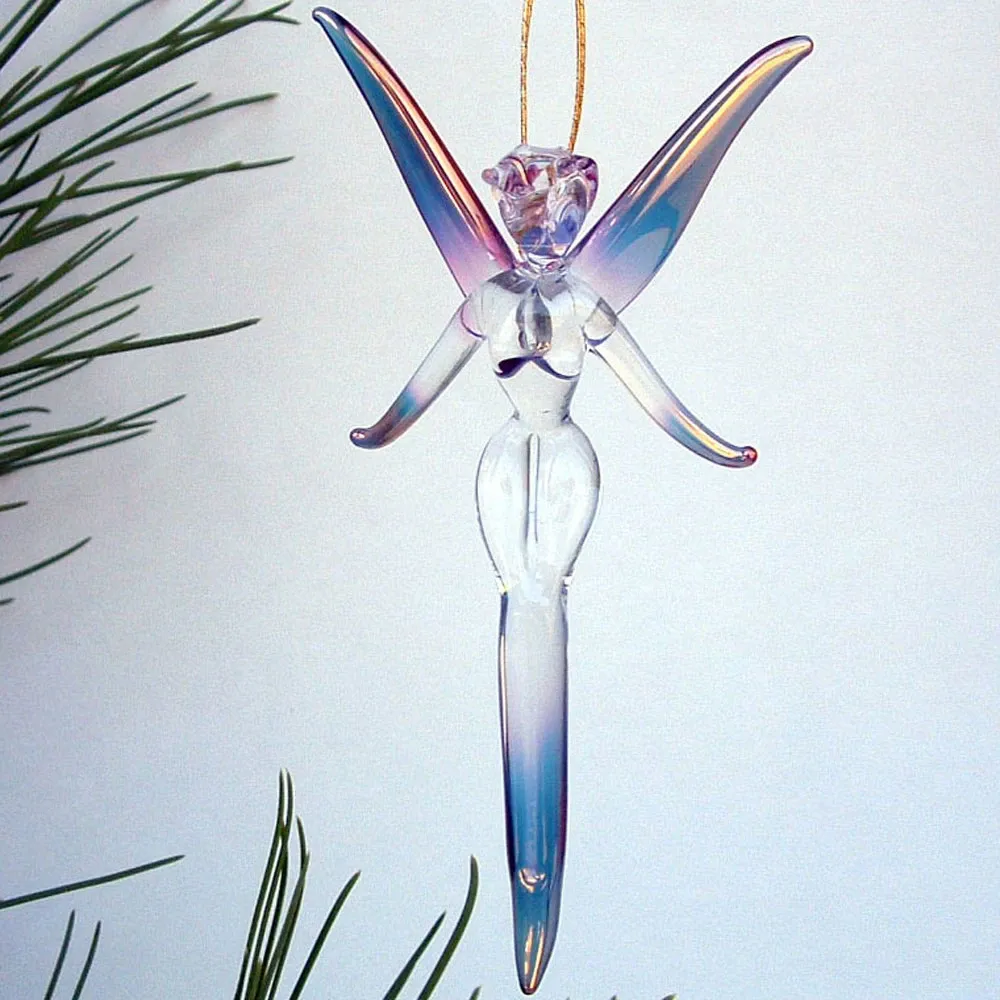
Delicate pieces like this need air. Give them 4–6 inches of clear space on every side, no crowding, no ribbon tails brushing the wings. Anything hanging within two inches will scratch the coating over a few seasons. These also want to be in the top half of the tree, where they won’t get knocked by gifts, pets, or elbows.
- Choose a branch tip that faces the room’s main sightline.
- Thread the gold string through and tie a slip knot for easy removal.
- Position the top of the loop about half an inch below the branch.
- Step back six feet and check the iridescence from that angle.
- Add one plain glass ornament nearby for contrast, no more.
17. Tiered Glass Tree Ornament on a Light Pink Velvet Ribbon
Pink velvet plus frosted white branches is a lovely combo that can slide into baby-shower territory fast. The fix is a third element with weight: a deep green pine sprig, a brass hook, or a gold satin tail tucked behind the bow. Without contrast, the palette goes soft and undifferentiated.
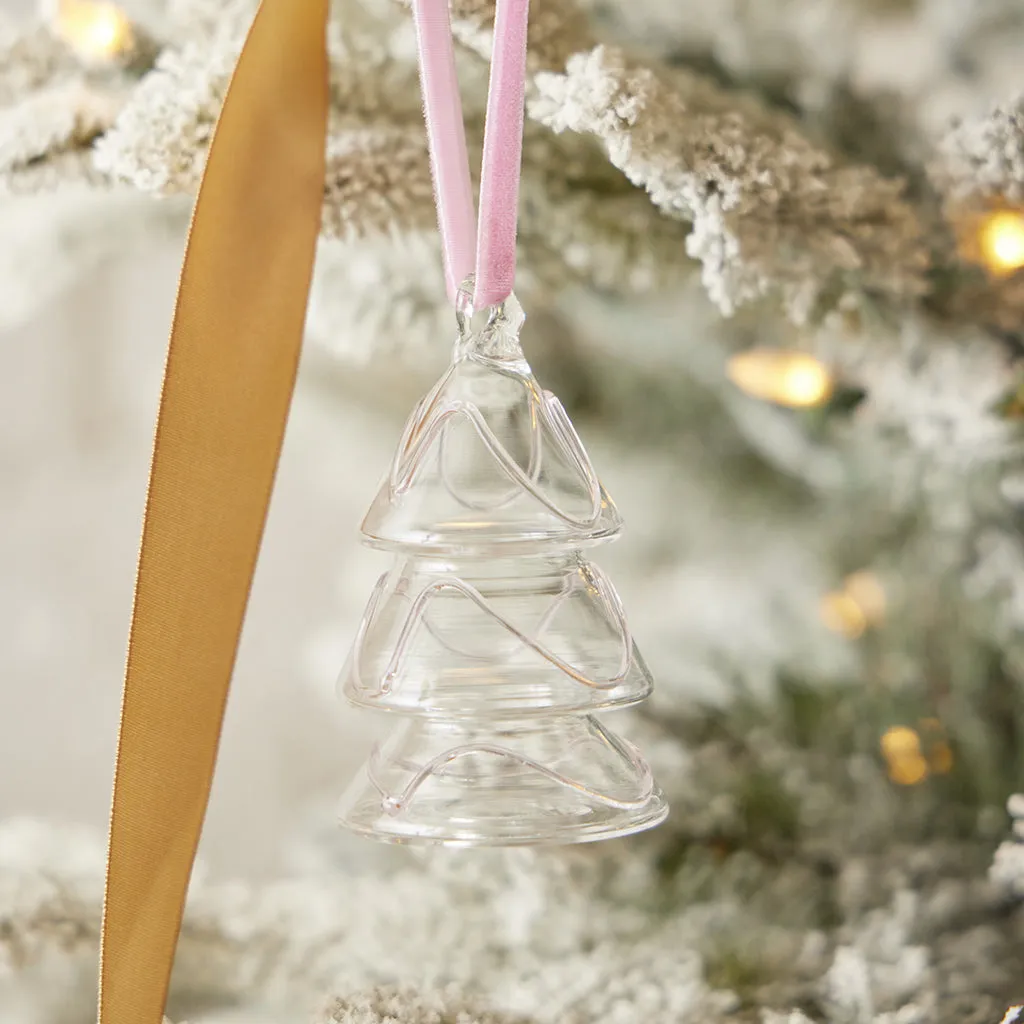
Velvet ribbon pricing is wild — designer rolls run $18–$28 for two yards, while craft store velvet is $6–$9 for the same length. Buy the cheap roll. Real velvet and polyester velvet look nearly identical at ornament scale, and the $20 you save buys three more ornaments. Even better: check thrift stores for vintage velvet ribbon spools, which turn up for a dollar or two and drape beautifully. The ornament itself pairs naturally with the frosty scheme in Idea #30.
18. Swirled Rainbow Glass Bauble Glowing on a Dark Green Tree
Here’s the ratio: 70% dark green branches, 25% clear glass, 5% concentrated color. That’s it. The tree is doing the heavy lifting as a neutral, which is why a single rainbow-swirled bauble pops harder here than twelve of them would on a white tree.
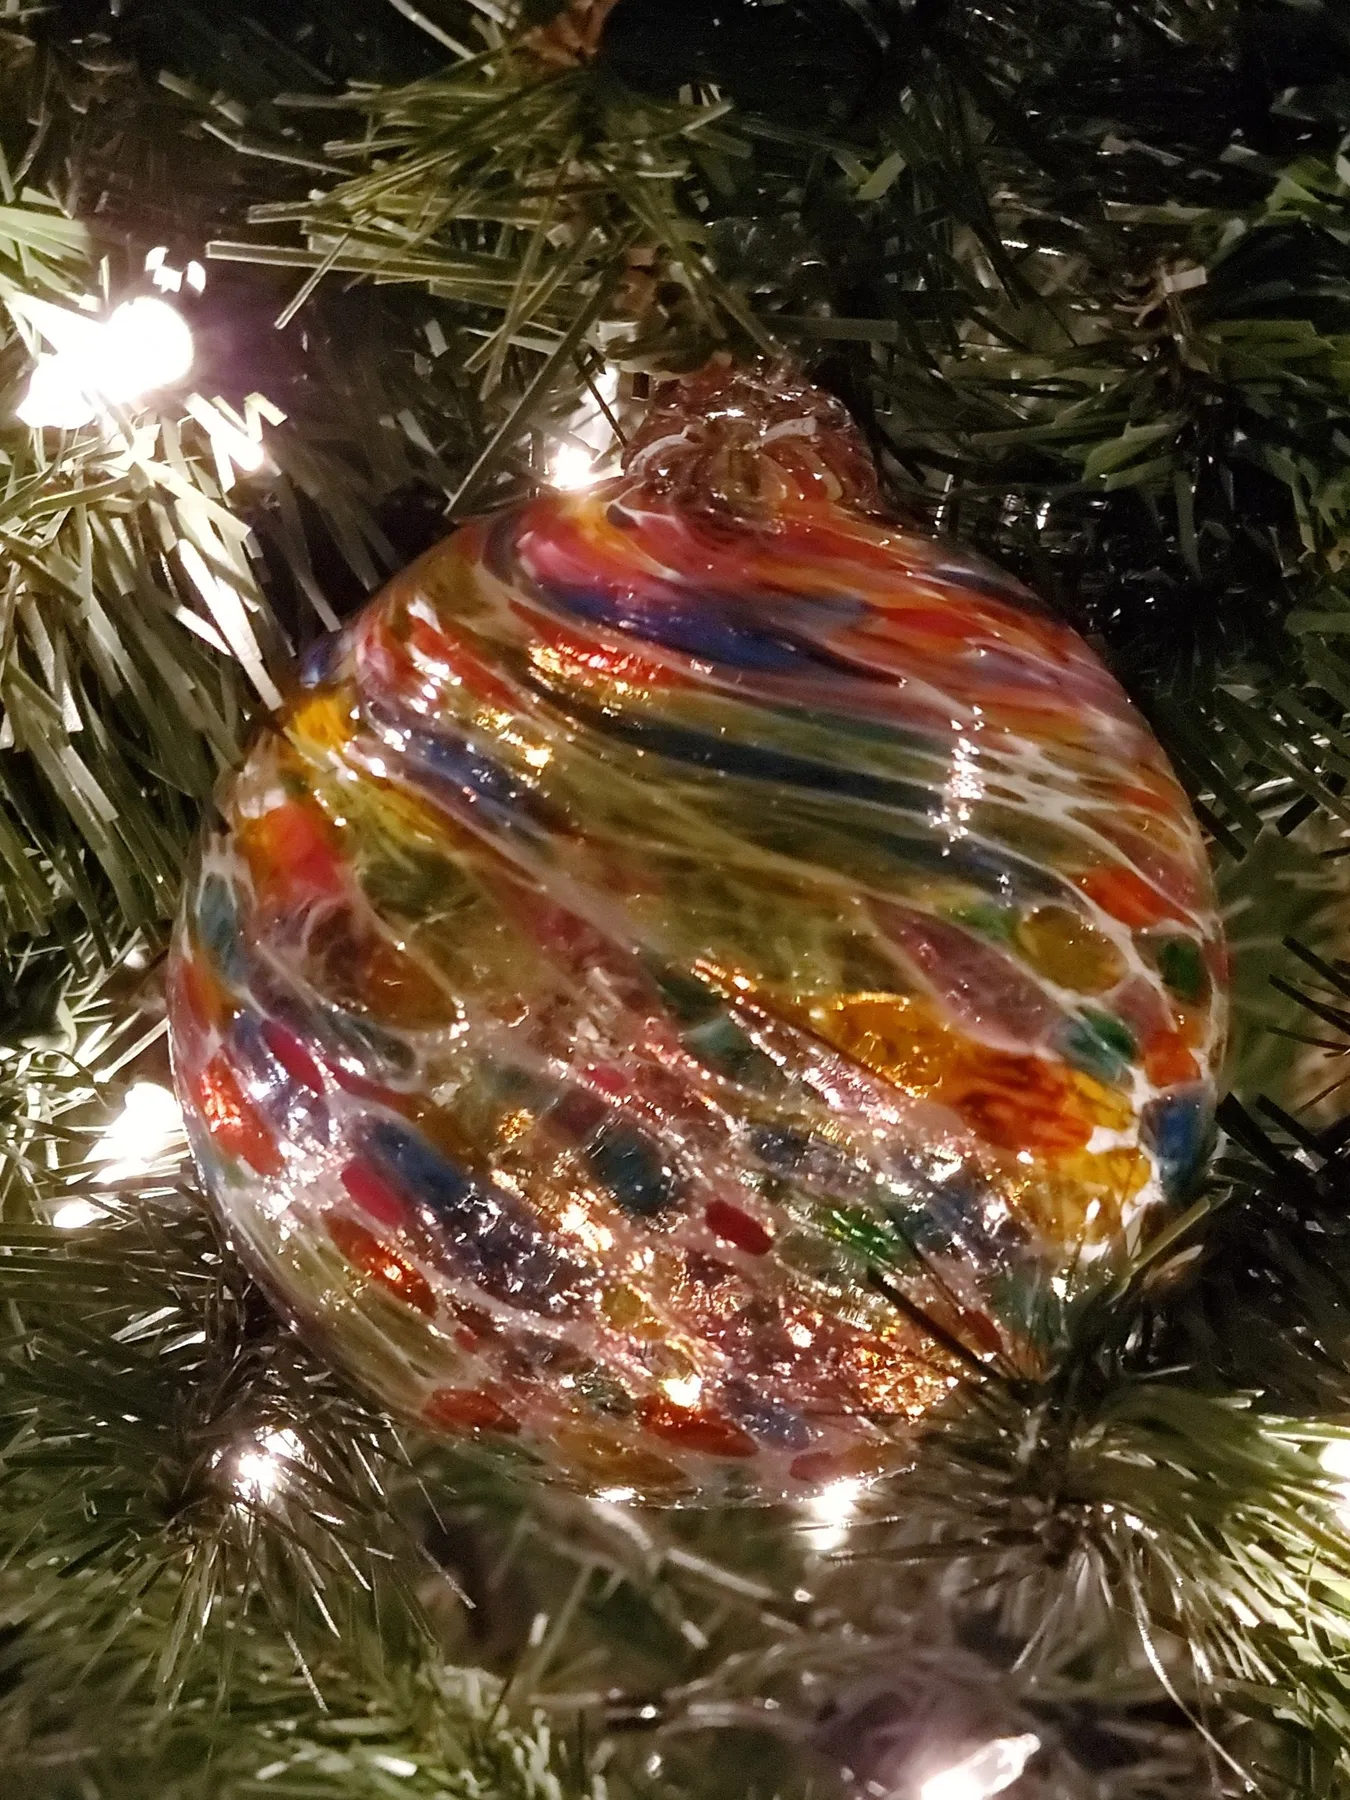
Dark green is basically a black backdrop with better manners — it absorbs the warm string lights and re-emits them as a glow behind the clear glass. The swirl pattern then reads like stained glass. If you want more color, add it in one or two pieces per foot of tree height, never more. Past that, the multicolor stops looking intentional and starts looking accidental, and you lose the effect you bought the ornament for.
19. Red and Clear Glitter Bauble With Sequined Stripes
that makes this bauble work is the horizontal sequin striping. Plain red glitter reads loud; granular clear glitter reads quiet. Banding them together in neat rows gives the ornament structure — it’s the same principle as a striped shirt, and it’s why this piece looks more expensive than it is.
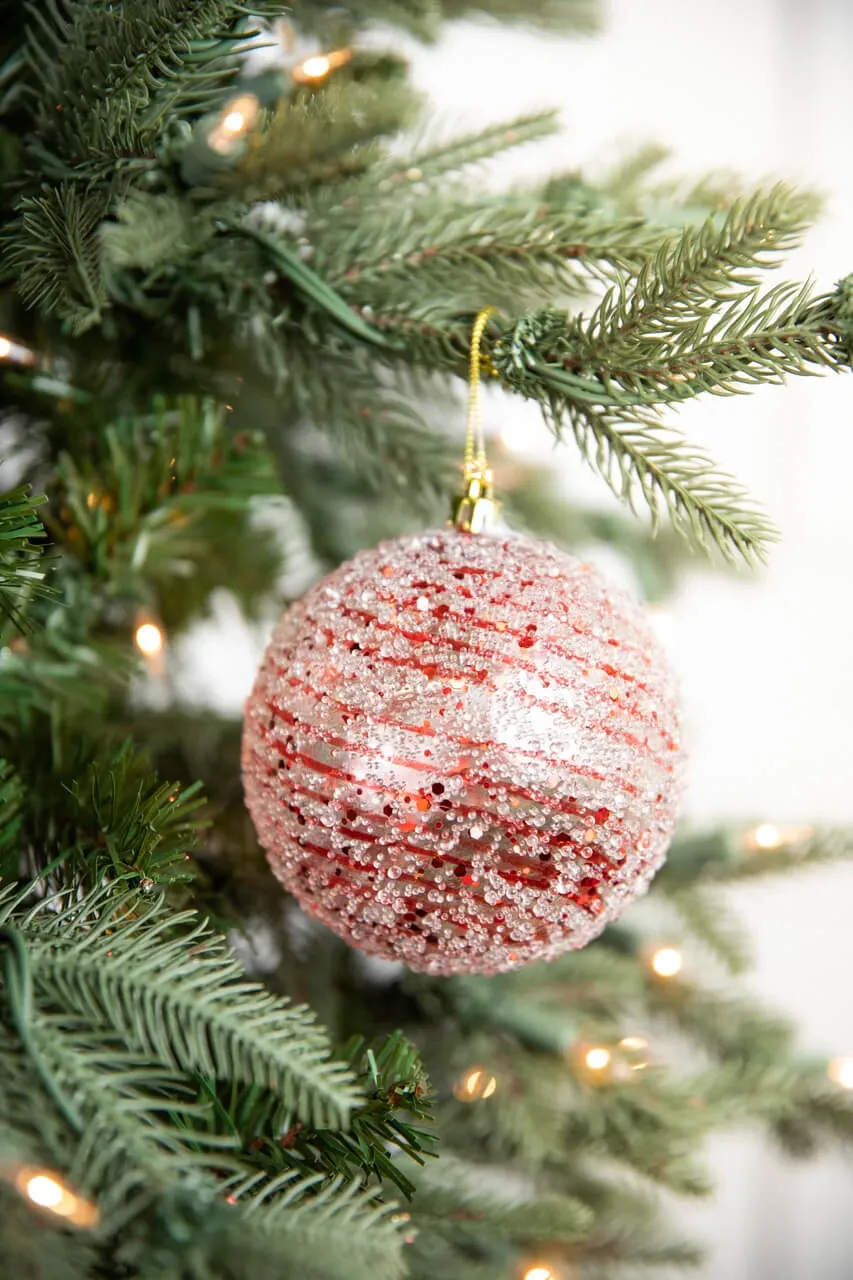
A spacing tip most people never hear: count your ornaments per square foot of tree face. A well-dressed 7.5-foot tree carries 60 to 80 pieces on the visible side, roughly 6 to 8 per square foot, with the largest in the lower third and small glitter pieces near the top. Glitter ornaments should also go where direct light hits them, because glitter only sparkles when there’s a nearby source — the same rule that applies to the bubble glass in Idea #11.
20. Teardrop Glass Ornament With a Painted Robin Inside
Hand-painted interiors are the divas of glass ornaments. UV light fades the paint from the inside out over three to five years, so keep these away from south-facing windows and off sunbaked sills. Store them in acid-free tissue in a divided box, never wrap them in newspaper or bubble wrap pressed tight against painted surfaces.
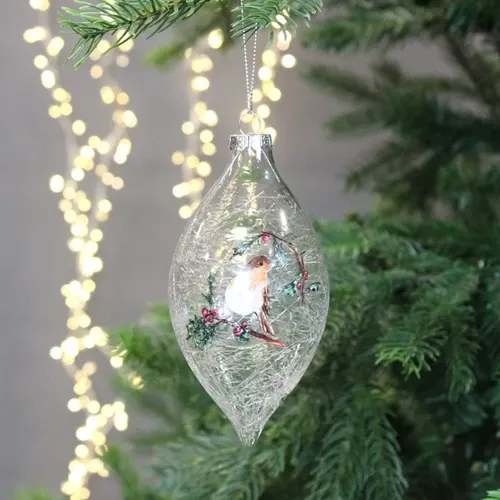
- Buy a plain clear 3-inch glass ornament with a wide opening and removable cap.
- Paint a small branch and two holly leaves on the inside using curved liner brushes.
- Add the robin body first, then the wing, then a single red berry dot.
- Let it dry 24 hours upright, then add a thin crackle medium coat.
- Write the year on the cap in permanent marker before you hang it.
About 45 minutes and $12 in supplies.
21. Bubbled Aqua Glass Ornament in a Halo of Warm Lights
This vignette only works on a full-size tree. You need at least 6 feet of height and roughly 40 square feet of floor space so the bokeh effect has room to develop — on a 4-foot tabletop tree, the lights sit too close and the ornament just looks busy.
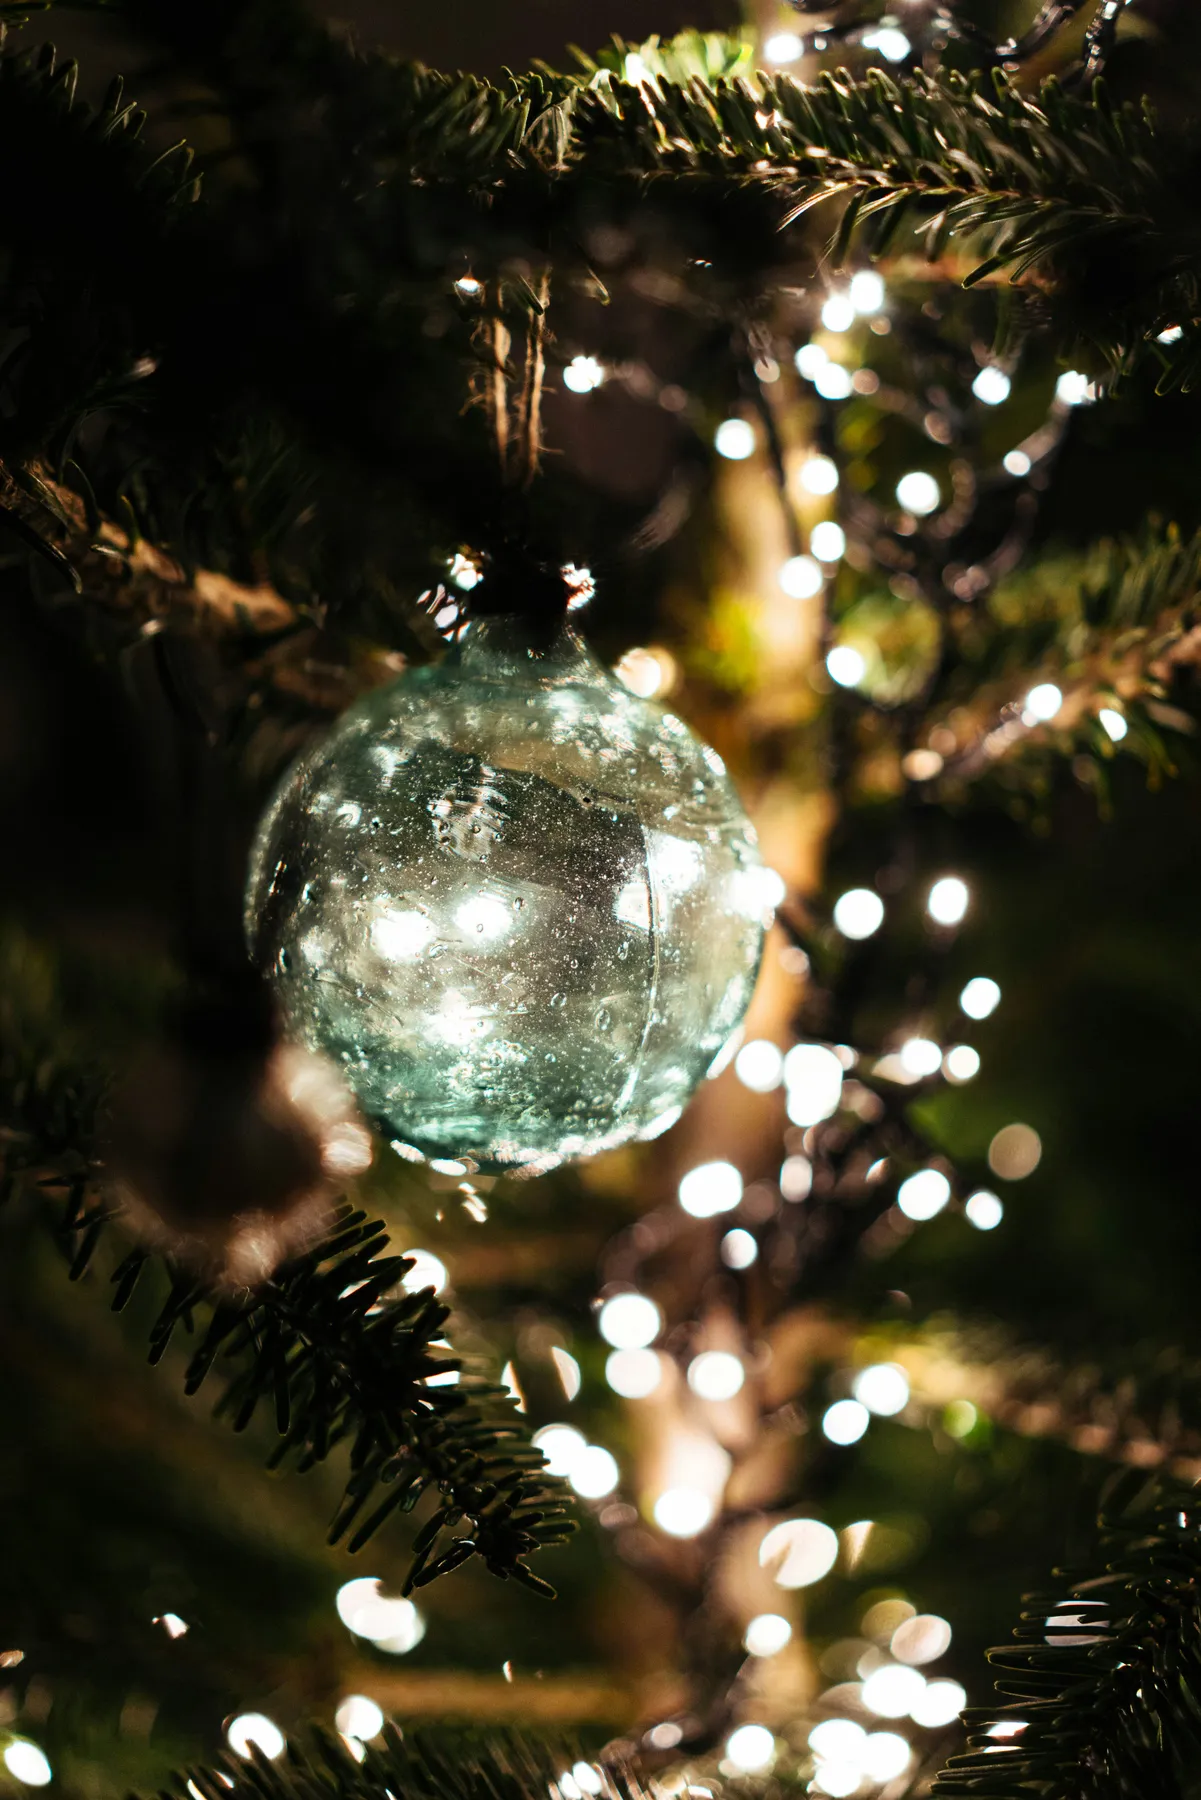
Scale math: 55% dark green needles, 30% warm white light, 15% aqua glass. The aqua is a deliberate cool note in a warm scene, and that temperature contrast is what makes your eye stop there.
- Check where your nearest outlet is before you commit to placement.
- Confirm the light strand is warm white, not daylight — cool white kills aqua glass.
- Make sure the branch can hold the ornament’s weight without drooping.
- Look at the tree from your sofa, not from directly in front, before hanging.
22. Three Ribbed Glass Trees in Green, Yellow, and Purple
Three trees, three colors, one grouping — that’s the rule that keeps this from looking like a clearance shelf. Odd numbers read as a collection; even numbers read as inventory.
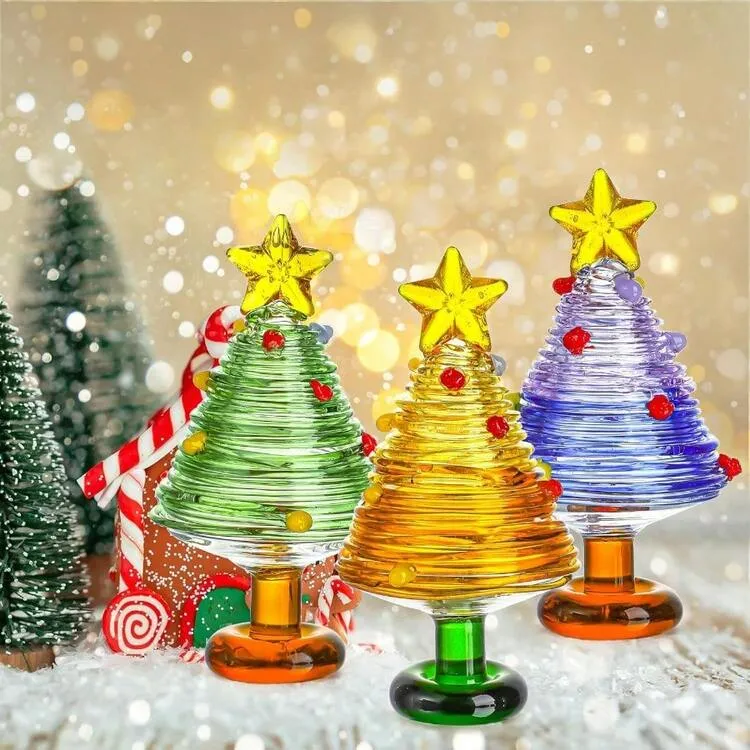
- Ribbed glass trees, 5–7 inches, set of 3: $36–$95
- Colored glass bases or risers: $12–$30
- Faux snow or a white linen runner: $8–$22
- Warm puck light underneath for the golden glow: $15–$30
- Total: roughly $71–$177
Budget alternative: single-color glass trees at dollar stores run $3–$5 each, and a $4 bag of faux snow gets you the setting. Paint the bases with two coats of craft enamel in amber, forest, or orange and you’ll have this exact look for about $28.
23. Light Blue Glass Ornament With Dark Red Swirls on Red Ribbon
Blue, red, green, and gold in one ornament is four colors doing push-ups. It works here because the green is the tree, the gold is a hair-width hanger, and the red ribbon is a repeat of the swirl — but it’s a genuine risk. If your tree is already loaded with multicolor ornaments, this piece will disappear into the noise.
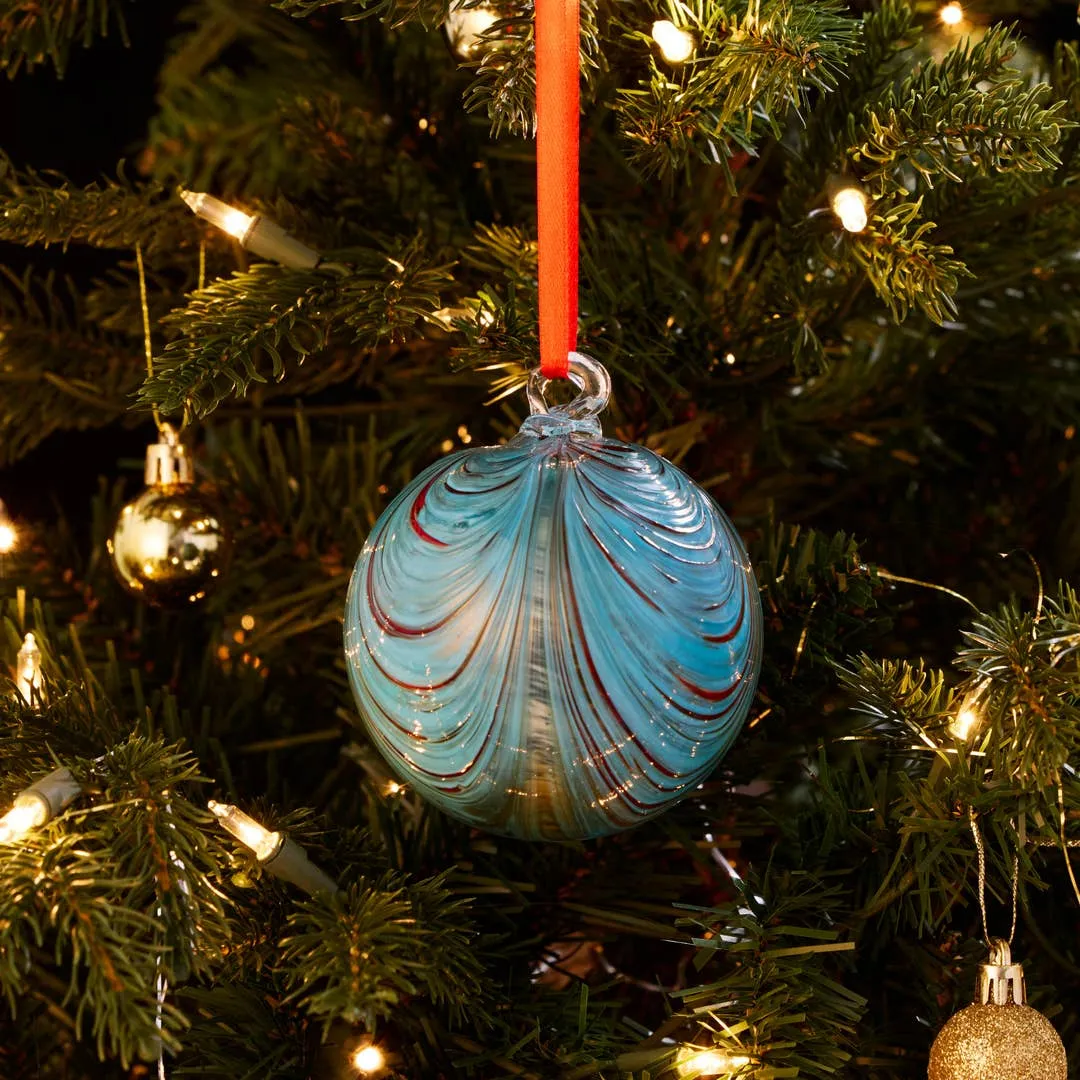
Apply the formula and it becomes easy: 60% dark green branches, 30% warm white light, 10% accent color, with the ornament itself counting as the accent. Swap the light blue for ivory and the same layout turns calm and Scandinavian. Swap the dark red swirl for emerald and you get a completely traditional tree. The blueprint survives any color change — see how a different temperature plays out in Idea #19.
24. Iridescent Fuchsia and Teal Swirl Glass Ornament
Iridescence shifts with the angle of light, which makes it the most “alive” ornament finish you can buy — and it pairs beautifully with matte surfaces, because matte never competes.
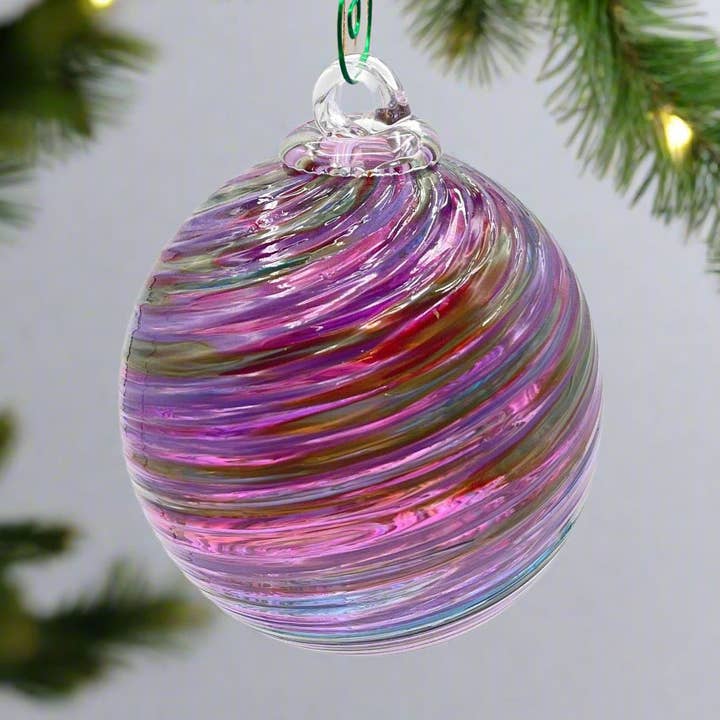
- Iridescent swirled glass ornaments, set of 6: $48–$110
- Clear glass top-loop ornaments for contrast: $18–$36
- Matte linen or velvet ribbon, 3 yards: $12–$24
- Warm white strand, 200 lights: $22–$45
- Total: roughly $100–$215
The reason it works: fuchsia and teal sit almost opposite each other on the color wheel, so the swirl reads as motion even when the ornament is perfectly still. Add matte cream or natural linen nearby and the iridescence has something to beat. A $25 set of iridescent baubles from Target gets you 70% of this effect — the swirl pattern is what the money actually buys.
25. Jute-Hung Clear Glass Bells With Gold Leaf Accents
Natural jute twine changes everything about how a glass ornament reads. Ribbon says formal; twine says collected. It’s a one-dollar swap that instantly relaxes a formal tree, and it’s why this trio works with pinecones instead of tinsel.
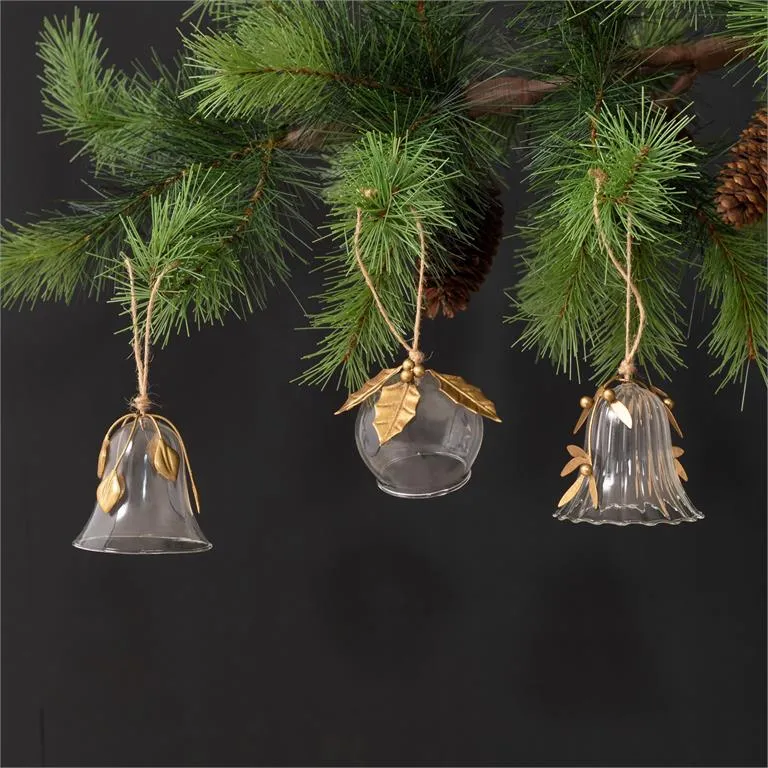
Spacing: hang jute pieces at least 18 inches apart on a full-size tree so the material reads as a deliberate note rather than a mistake. And give bell shapes real clearance — 3 inches below the bottom rim at minimum, since a bell that touches a branch tip looks broken. On a slim pencil tree under 5 feet, use a single jute-hung ornament near the top and skip the group entirely.
26. Dark Red Ornament With a Dog Silhouette and State Outline
Personalized glass ornaments are the fastest-growing ornament category heading into 2026, and pet portraits lead the pack. Custom pieces with a dog’s head or a home state silhouette outsell generic snowmen by a wide margin on Etsy every December. People aren’t decorating a tree anymore — they’re decorating a family archive.
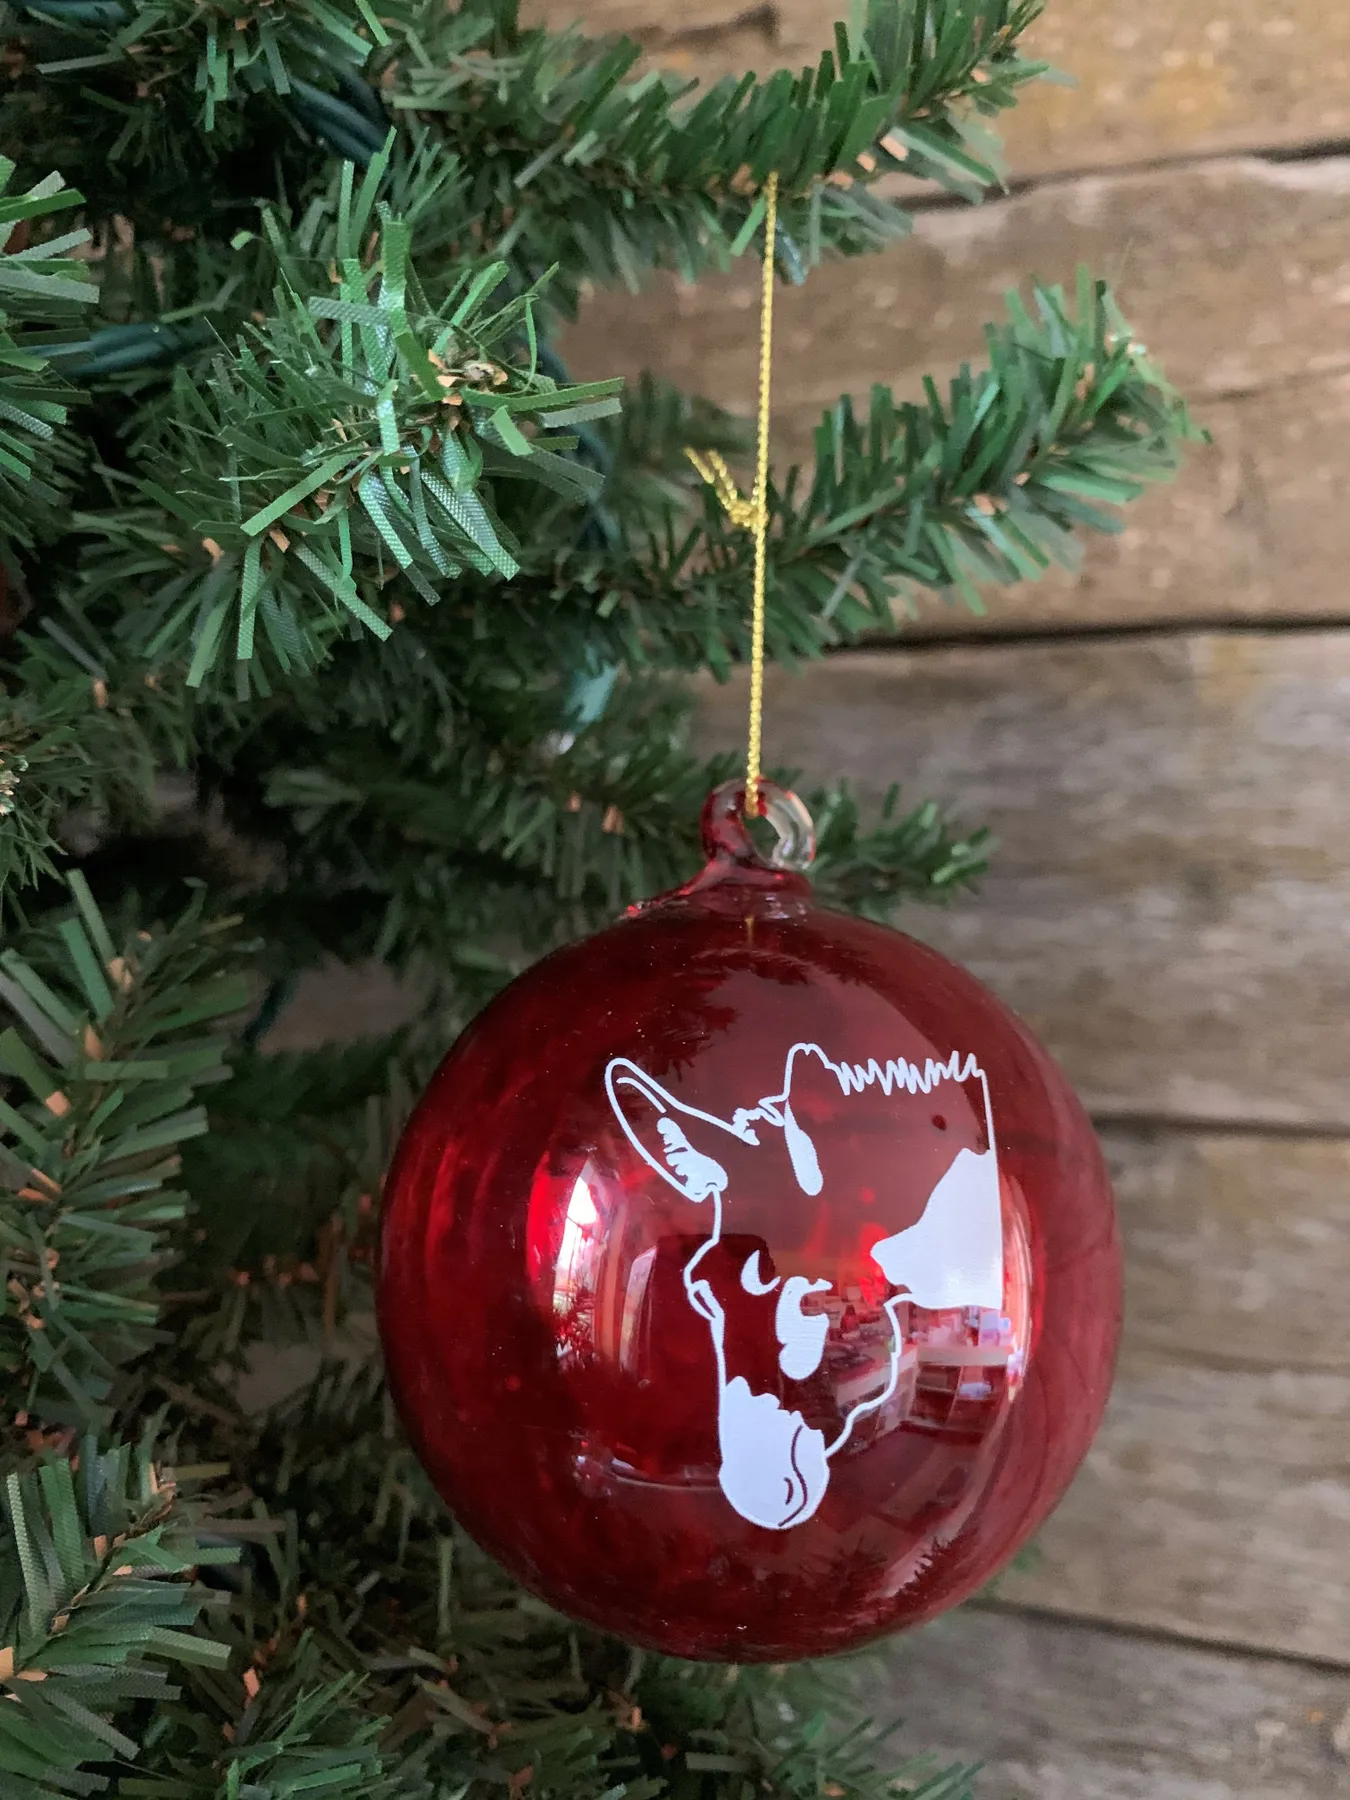
- Pick a glossy dark ornaments in a 3-inch size with a flat-ish front surface.
- Print your silhouette at 1.5 inches tall on adhesive vinyl.
- Center it on the front, smoothing from the middle outward.
- Weed the vinyl backing slowly so fine details like ears don’t tear.
- Seal with a thin coat of clear matte acrylic and hang by a gold string.
Roughly 30 minutes and $8 per ornament.
27. Faceted Crystal Garland Orb on Green Pine
The element that carries this piece is the graduated chain — one large faceted orb with smaller beads stepping up above it. Remove the small beads and you have a plain crystal ball. The graduation is what makes it look like it’s descending on purpose, echoing the glass-and-crystal layering in Idea #9.
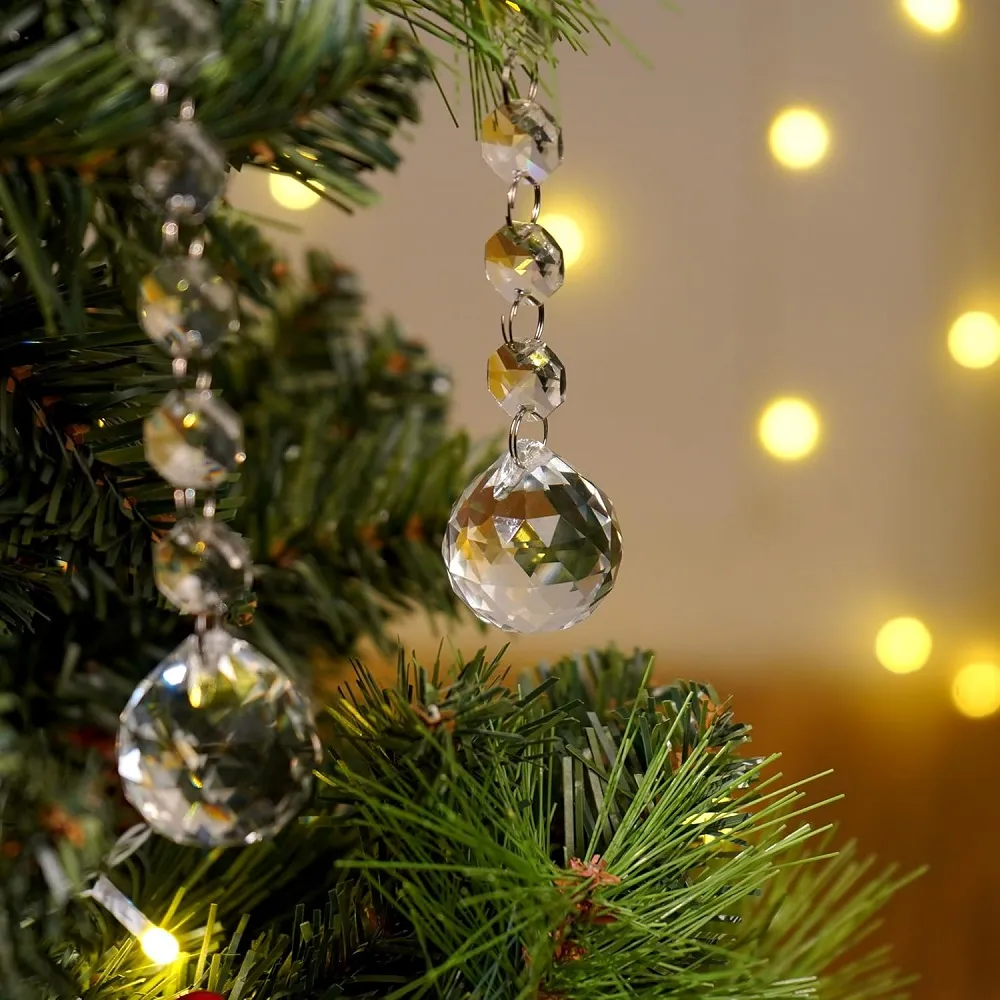
Honest caveats: faceted crystal chips easily, and a chip on an edge catches light as a white blob. It’s also heavier than it looks, so hang these on an inner branch near the trunk rather than a wispy tip, and check the wire loop for stress before you trust it. Store them individually, not piled in a bag — crystal-on-crystal in a storage bin is how you get scratches and dull facets.
28. Collegiate Train Ornament on a Heavily Flocked Branch
What makes this work is contrast plus restraint. A heavily flocked branch is essentially a white background, so a single dark red and black ornament lands like a period at the end of a sentence. Add five more school-color ornaments right there and the punch is gone.
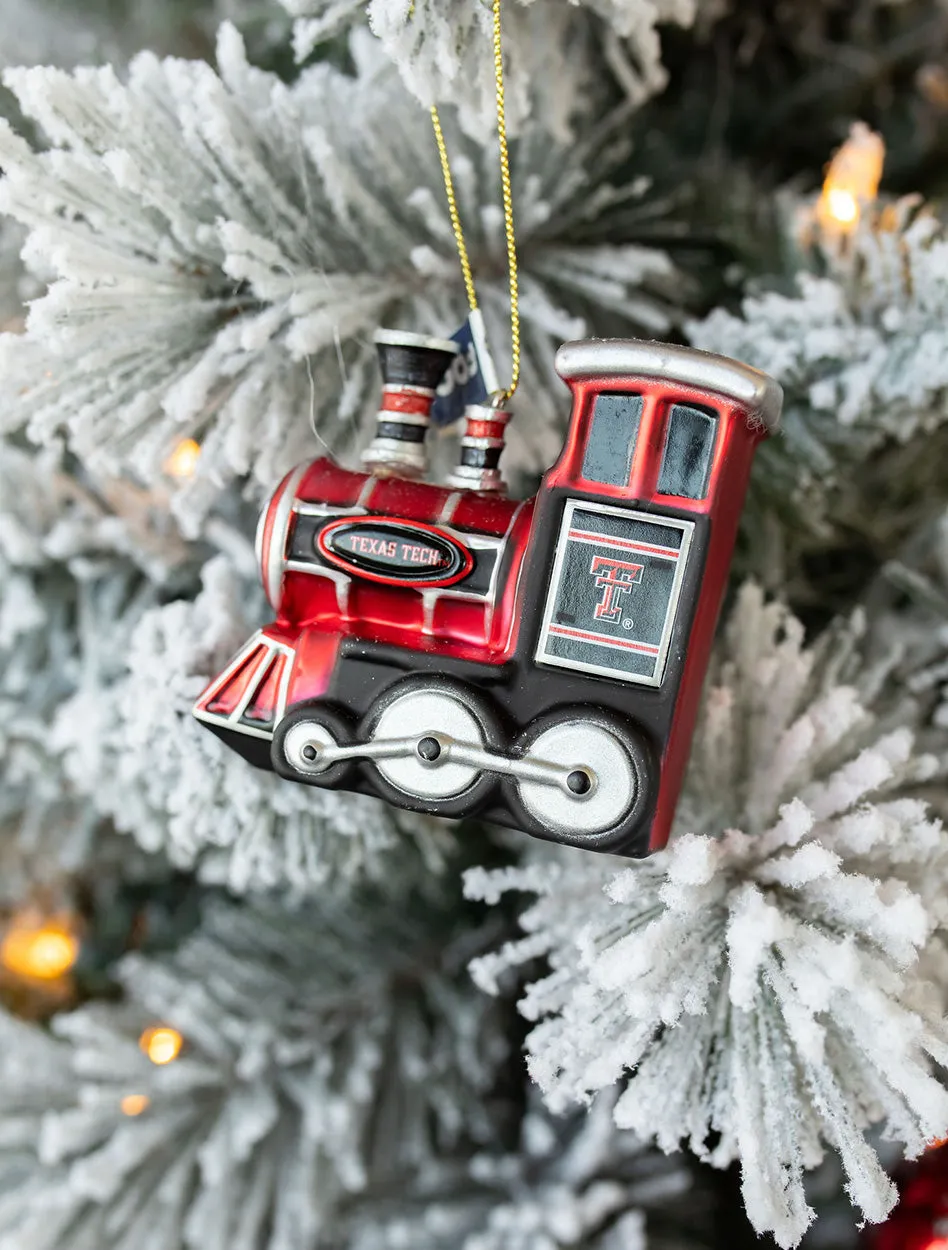
The flocking is also doing a job: white texture behind clear glass and silver reads as snow, which is why flocked trees handle crystal and glass ornaments better than plain green ones do.
- Check whether your flocking sheds — rub a hidden branch over a dark cloth.
- Plan how you’ll vacuum around the tree without pulling flocking loose.
- Test ornament weight; flocked branches are heavier and droop sooner.
- Confirm your light strand color temperature before adding warm accents.
29. Rectangular Glass Ornament With a Snowy Canal Scene Inside
Formula: 50% clear glass, 30% warm bokeh light, 15% winter white, 5% painted detail. The scene inside is the smallest part of the composition and it still dominates, because everything around it is soft and out of focus. That’s the trick with detailed miniatures — blur the environment, sharpen the object.
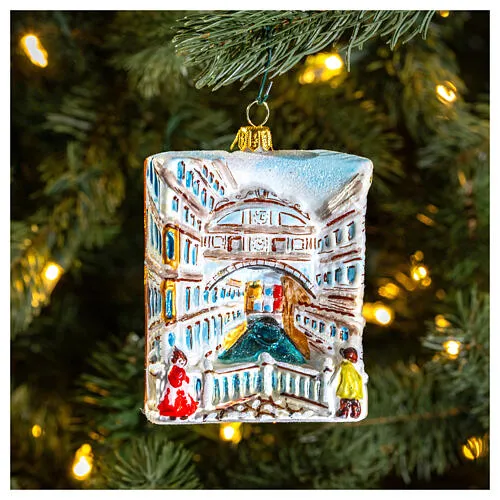
For a fraction of the price, buy a 2-inch clear fillable ornament for $4 and a pack of miniature railway figures for $12. Glue a tiny building and two figures to a scrap of balsa wood, slide it in through the opening, and seal the cap. Total under $20, and you get to choose your own street. If you’d rather buy, look for scene ornaments after December 26th — boutique shops discount them 50% to 70%.
30. Glass Icicles on White Ribbons With Matte Silver Baubles
Icicles hang straight down and they should never be bunched. Space them 5 to 7 inches apart along a branch line so each one reads as a separate drip, and alternate twisted and smooth shapes so the eye doesn’t lock into a pattern. White satin ribbon instead of a metal cap is what keeps them looking like frost rather than hardware.
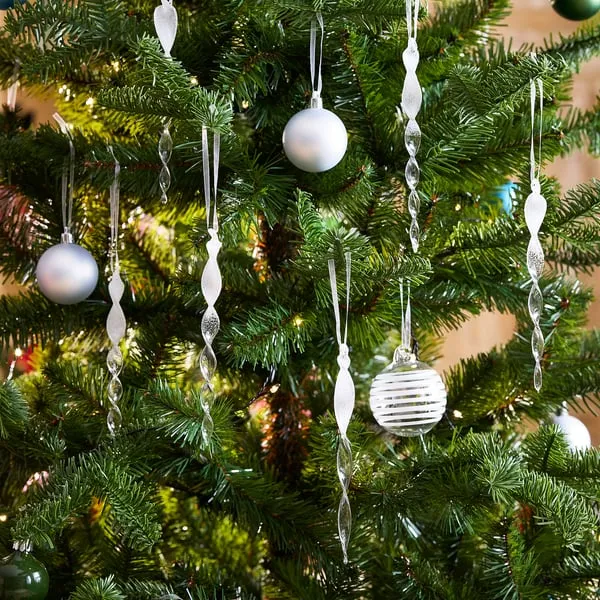
- Clear glass icicle ornaments, set of 12: $30–$75
- Matte silver spherical baubles, set of 12: $18–$42
- White satin ribbon, 3 spools: $9–$18
- Frosted white striped glass bauble, single: $10–$22
- Warm white strand, 200 lights: $22–$45
- Total: roughly $89–$202
Budget alternative: dollar store icicles at $1.25 each plus a $5 ribbon roll gets you the frosty effect for around $22. Nobody inspects glass from across the room — they see the silhouette and the light.
31. Blue-Grey Wavy Stripes Inside a Clear Glass Orb
Size matters here more than usual. This reads best on a tree 6 feet or taller, where the ridged interior pattern has enough neighboring branches to sit against. On a small tree the stripes compress and the ornament turns into a busy dot. If you’re working with a 4-foot tree, choose something more open — the piece in Idea #24 handles a small scale far better.
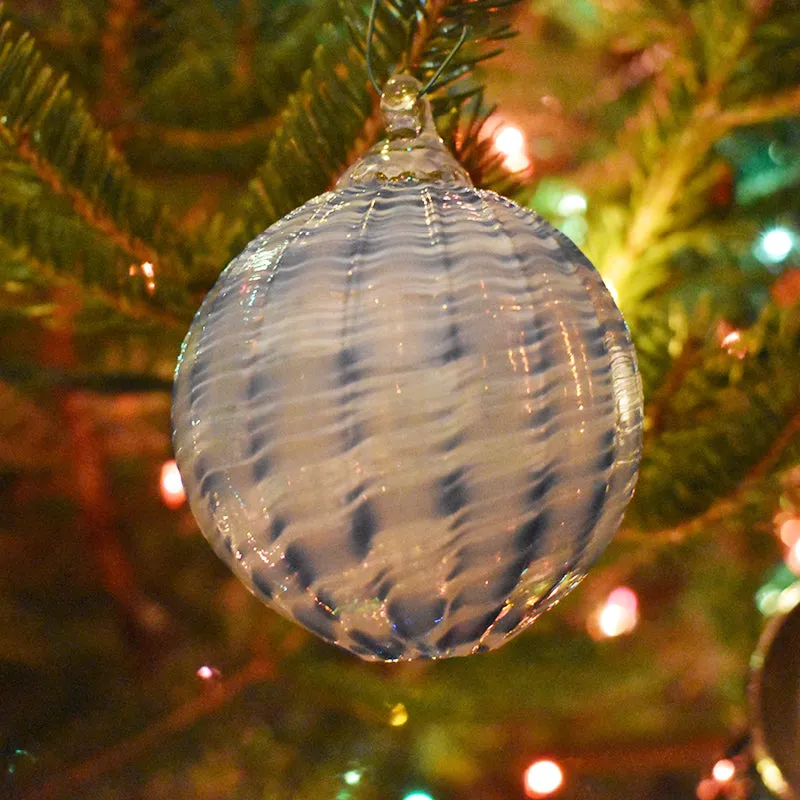
Upkeep is straightforward: dust with a dry microfiber cloth, and if you need more than that, use distilled water and blot — never rub, since interior ridges trap water and cause spotting. The colors around it also matter for longevity. Multicolored lights fade decorative finishes faster than warm white, so if you love these ornaments, keep them on the warm-white tree and let the reds and oranges live elsewhere.
32. Wordle-Style Letter Grid Ornament With a Santa Hat
Game-night decor is now a legitimate ornament genre. Wordle, Scrabble, and crossword pieces are consistently among the most-pinned DIY ornaments heading into 2026, largely because they’re the rare holiday decoration that starts a conversation instead of ending one.
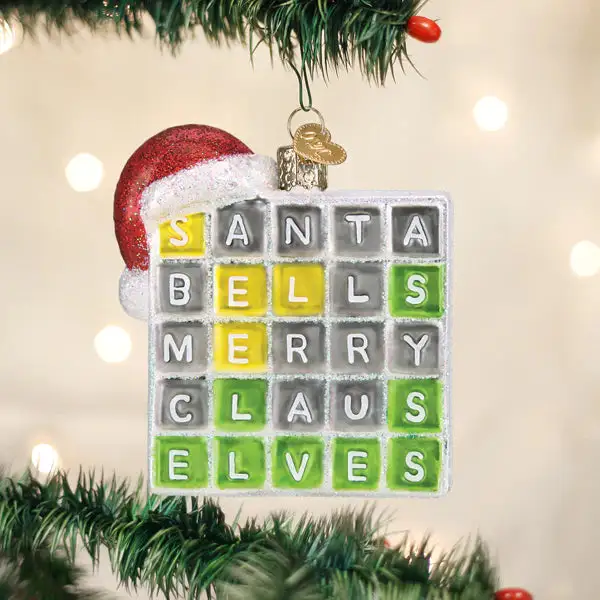
- Print six, five-letter holiday words in a clean sans-serif at 10pt.
- Cut the letters into individual squares with a craft knife and ruler.
- Arrange them in a grid on a square glass ornament, leaving gaps for the tile colors.
- Fill the background squares with craft paint — grey, yellow, and green — around the letters.
- Hot glue a small glittered Santa hat to the top left and hang on a metal hook.
About 35 minutes and $10 in supplies.
33. Gold Leaf Inside, Silver Glitter Outside, One Clear Sphere
External glitter sheds. That’s the honest trade-off with a piece like this — silver glitter bonded to the outside of a glass sphere will leave a trail on whatever surface it touches, and it’ll thin out over two or three seasons. Seal it with two light coats of clear matte acrylic and you’ll get years instead of months, but never hang it over a linen tablecloth or a piano lid.
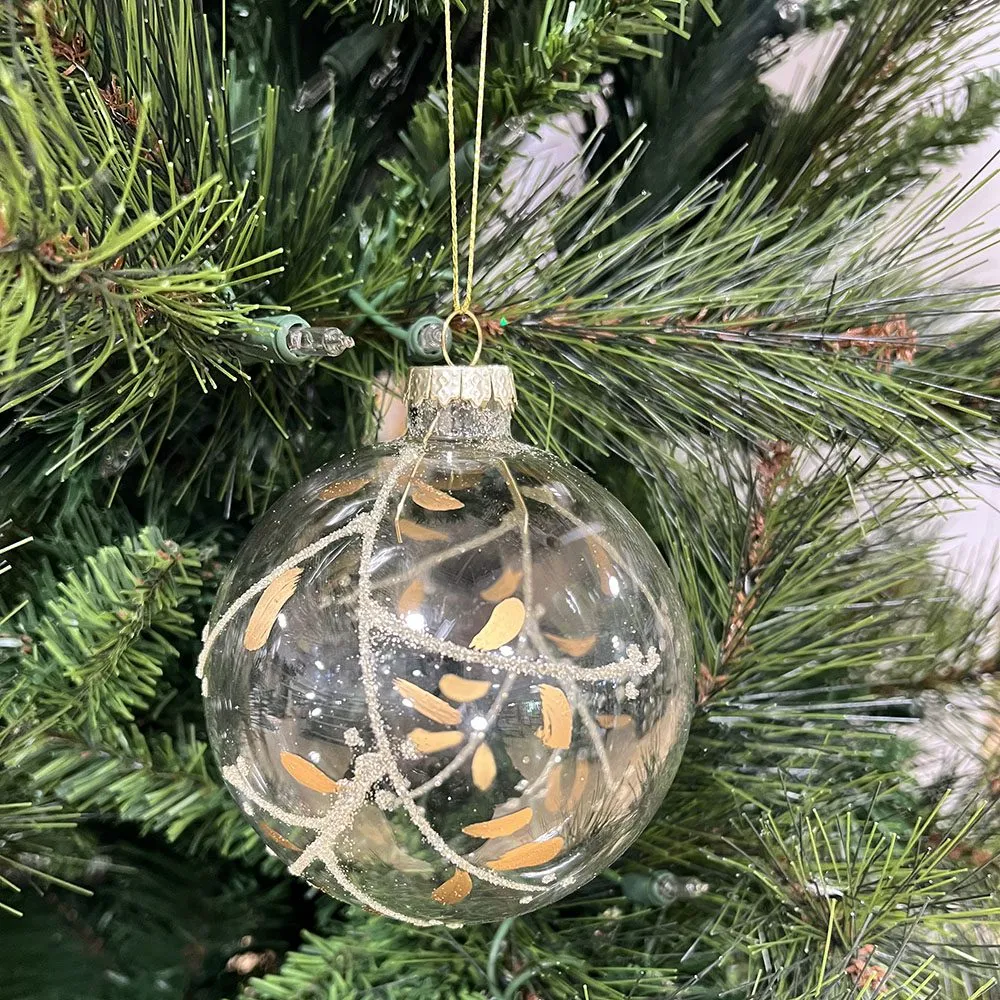
To build the layered look yourself, work from the inside out: drop torn gold leaf through the opening first and swirl it so it clings to the upper curve, then add glitter to the exterior with a fine brush and thin craft glue. A small funnel and a pair of long tweezers make the difference between elegant and chaotic. Gold string, not silver, ties the interior and exterior together.
Start With One Glass Ball and Let It Catch the Light
You don’t need to redo the whole tree this year. Buy one clear glass ornament, hang it where a warm light can find it, and watch how differently you see the rest of the branches. That’s how every collected tree in this guide started.
📌 Pin your favorite ideas from this list now — December-you will be grateful for the head start.