
You’ve pinned the photos. You’ve stood in the Dollar Tree aisle holding a black plastic cauldron and wondering whether it could possibly look like that. It can — with about four extra items and one technique nobody mentions.
We spent serious time browsing Walmart, Dollar Tree, Target, Amazon, and Facebook Marketplace to bring you only what’s worth your attention this year. Everything here runs from roughly $3 in jar-wrap supplies to $65 for a fully dressed harvest tablescape, and not a single idea requires a cutting machine.
Inside you’ll find 32 curated centerpiece ideas spanning rustic Halloween, gothic gold-and-black romance, warm autumn harvest, playful candy-shop themes, and fresh green topiary looks — with budget and luxury versions compared side by side on a few of them. And stay until the end — we break down the most common mistakes that can ruin these looks.
In 2026 the shift is toward reusable bases: glass jars, woven trays, and wood slices you re-dress every season instead of tossing. Save this post now — you’ll want it when you’re ready to shop. This post contains affiliate links, and we may earn a small commission at no cost to you.
1. A Cauldron Centerpiece That Earns Every Skeleton Charger
This table reads as designed rather than decorated because of contrast stacking: a dark textured cloth, then matte black chargers, then bright white plates, then a small black spider on top. Each layer flips value, so your eye travels down the place setting instead of stalling on the centerpiece. The cauldron follows the same rule — dark vessel, white webbing, dark branches, white eyeballs. Nothing blends into its neighbor, which is why it holds up under low candlelight.
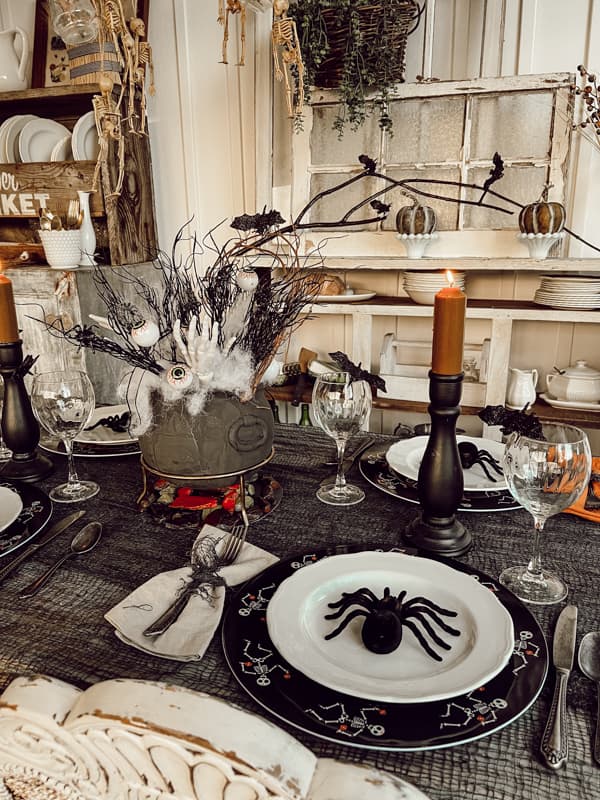
Branches are the part people get wrong. Cut them 18 to 24 inches above the cauldron rim, spray them matte black while still slightly damp so the paint grips, and let them cure overnight. Fill the cauldron two-thirds with wadded newspaper, top with Spanish moss, then push the branches in at three different angles. Straight-up branches look like a broom. Angled branches look like they grew there.
2. The Jar Candle Wrapped in Floral Paper and Twine
This one costs about $3 and takes twenty minutes, and it’s the rare dollar-store craft that doesn’t look handmade in the bad way.
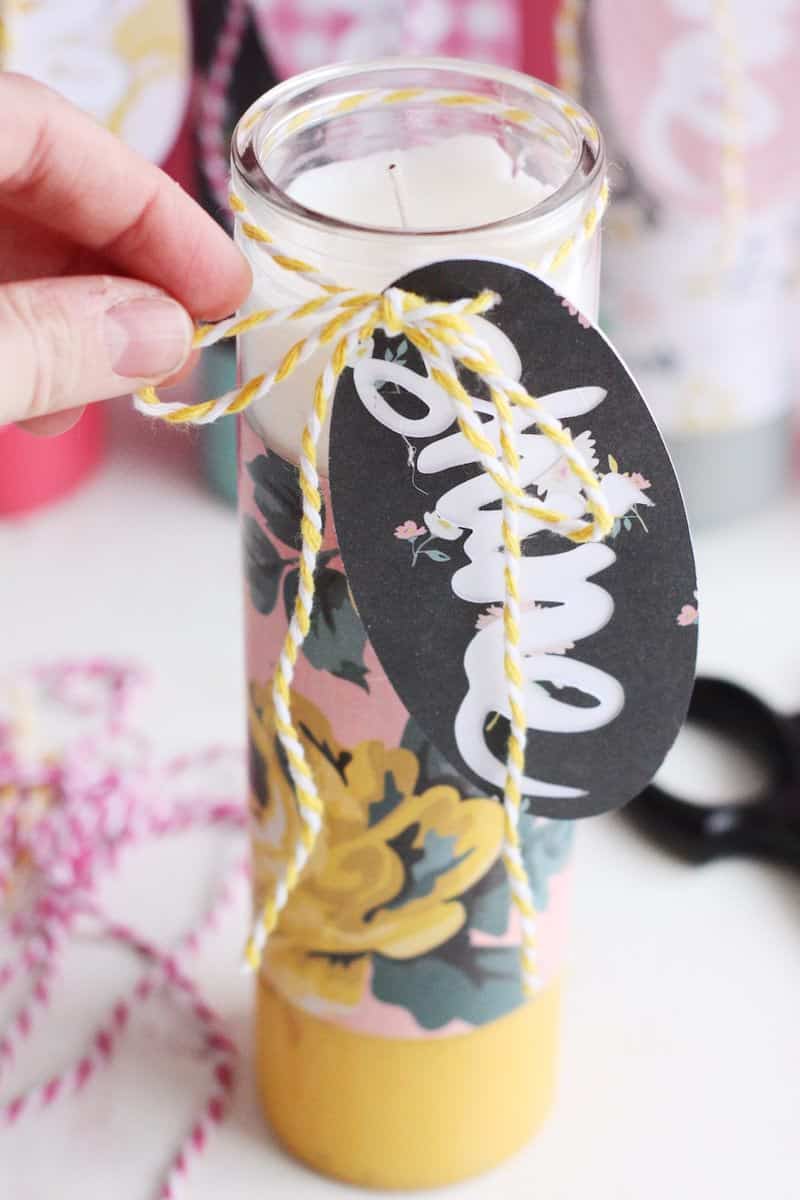
- Wrap paper around the jar and mark where it overlaps — that’s your cut line, no tape measure needed.
- Cut the patterned wrap so it stops three-quarters of an inch below the rim, then cut a solid band about two inches tall for the base.
- Glue with a glue stick, not hot glue. Hot glue ripples thin paper and leaves ridges.
- Twist the string around the neck three times, then thread the tag through before the final knot so it hangs flat.
Keep the candle short. Once the wax pool sits close to the paper edge, the wrap starts to curl and the whole thing looks tired. Trim the wick to a quarter inch every burn, and if kids are in the house, drop in a battery tealight instead and nobody will know from a distance.
3. A Skull-Embossed Black Vase Lit From Behind
It’s the raised skull relief that does the work. Take it away and you have a plain black vase — nice, forgettable. The shallow embossing catches warm light from the carved pumpkin and the metallic holders behind it, so the skulls appear and disappear as the candle flickers. That movement is the entire effect, and it only happens because the vase is matte black and the light is warm.
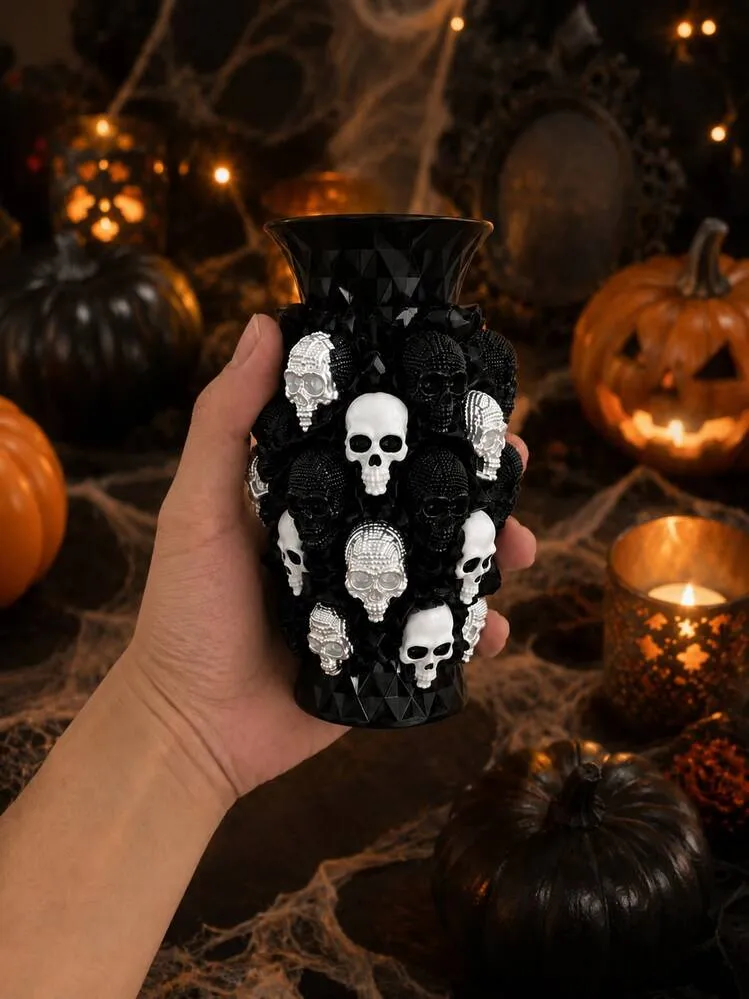
The formula here is roughly 70 percent matte black, 20 percent warm amber glow, 10 percent bone white. Swap the black vase for charcoal ceramic and the palette still works. Swap the warm light for cool white LEDs and it collapses — the whole thing turns gray and grim instead of eerie and rich. If you can only change one element, change the bulb temperature, not the vase.
4. Amber Glass, Orange Blooms, and Tiny Beige Skulls
- Amber glass vase: $1.25–8
- Two bunches of artificial orange blooms: $2.50–12
- Small beige plastic skulls, pack of 6 to 12: $1–4
- Distressed white wood riser or scrap board: $0–12
- Filler greenery and moss: $1–5
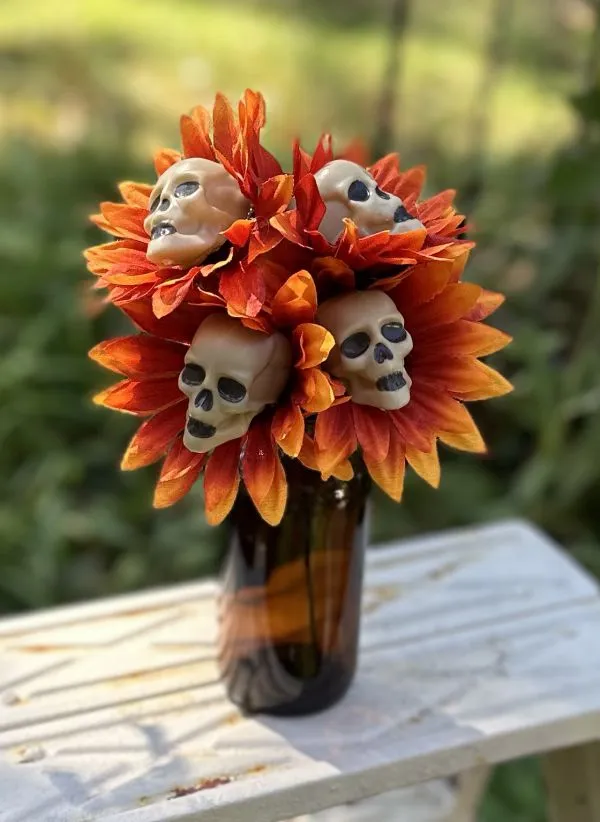
Total: about $6 to $40, depending on whether you already own a riser. Budget alternative: skip the riser and use a thrifted cutting board turned upside down, and buy one bunch of flowers and split it into three small arrangements instead of one big one — that’s roughly 50 percent off for the same visual weight.
Small skulls buried in orange blooms are the risky part. Tucked too deep, they read as dead leaves or clumps of dirt from across the room. Set them high, facing outward, and only three or four per arrangement. And if you have toddlers, hot glue them to floral wire first — they will get pulled out and they will end up in someone’s mouth.
5. Cauldron With a Skeletal Hand Reaching Out
Weight the base before anything else. A cauldron this light tips the moment someone bumps the table, and a hand flopping sideways kills the joke instantly. Drop in two pounds of river rocks or an unopened bag of rice, fit a wire cooling rack on top, then build the webbing and branches above that grid. You get a stable platform and the branches hold their angles without you fighting them.
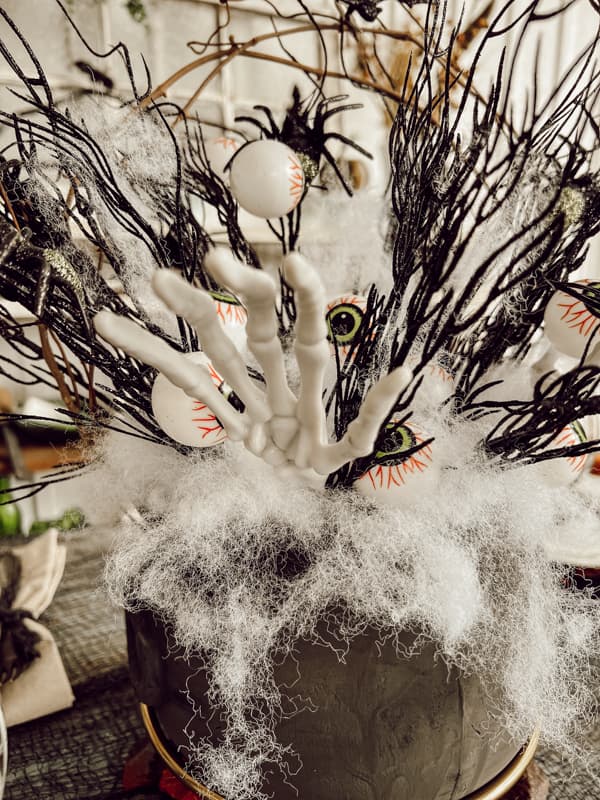
What makes this version work — and it’s a different animal from the full skeleton table setting — is the diagonal. The hand reaches up and to one side, the branches lean the opposite way, and the eye follows that line out of the cauldron instead of circling it. Pull the faux webbing into thin wisps rather than clumps, too. Thin wisps look like something escaped. Clumps look like a craft store bag exploded.
6. Gold Skulls on a Black Runner With Dark Roses
The ratio to steal: about 50 percent black wispy fabric, 30 percent gold, 15 percent deep purple, 5 percent actual flame. Keep the fabric gathered rather than flat so it reads as fog, and keep every hard object — skulls, holders, candles — on the same diagonal line. Change the flower color to oxblood and the formula still holds. Change the gold to silver and it goes cold and industrial, which is a different room entirely.
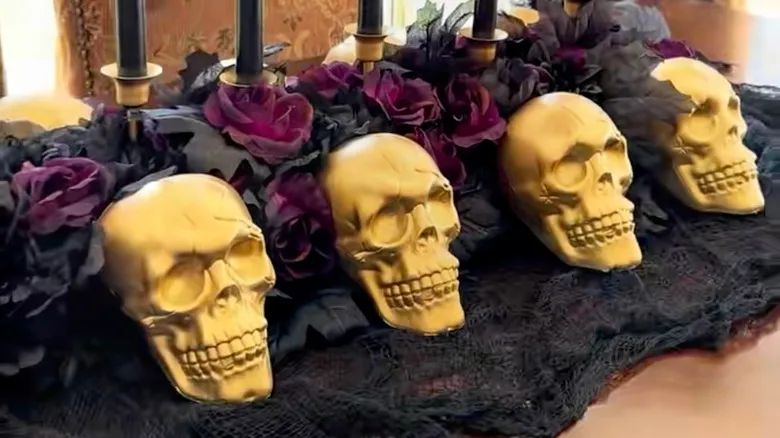
Gothic-glam Halloween isn’t going anywhere in 2026. The reason is practical: black and gold are already neutral, so people can leave half of this out year-round without their dining room looking like a haunted house in February. It photographs beautifully on Pinterest because there’s almost no pattern to fight the camera. Treat it as an investment palette rather than a one-weekend costume.
7. A Monochrome BOO Sign Built From Striped Blocks
Build the base first — a foam block wrapped in black-and-white striped paper, edges folded like a present. Stack three narrower blocks on top in descending widths, then hot glue the individual letter tiles that spell BOO across the front so they sit slightly proud of the stripes. Twenty-five minutes, roughly $5 in materials, and you can skip the letter tiles entirely if you have a label maker.
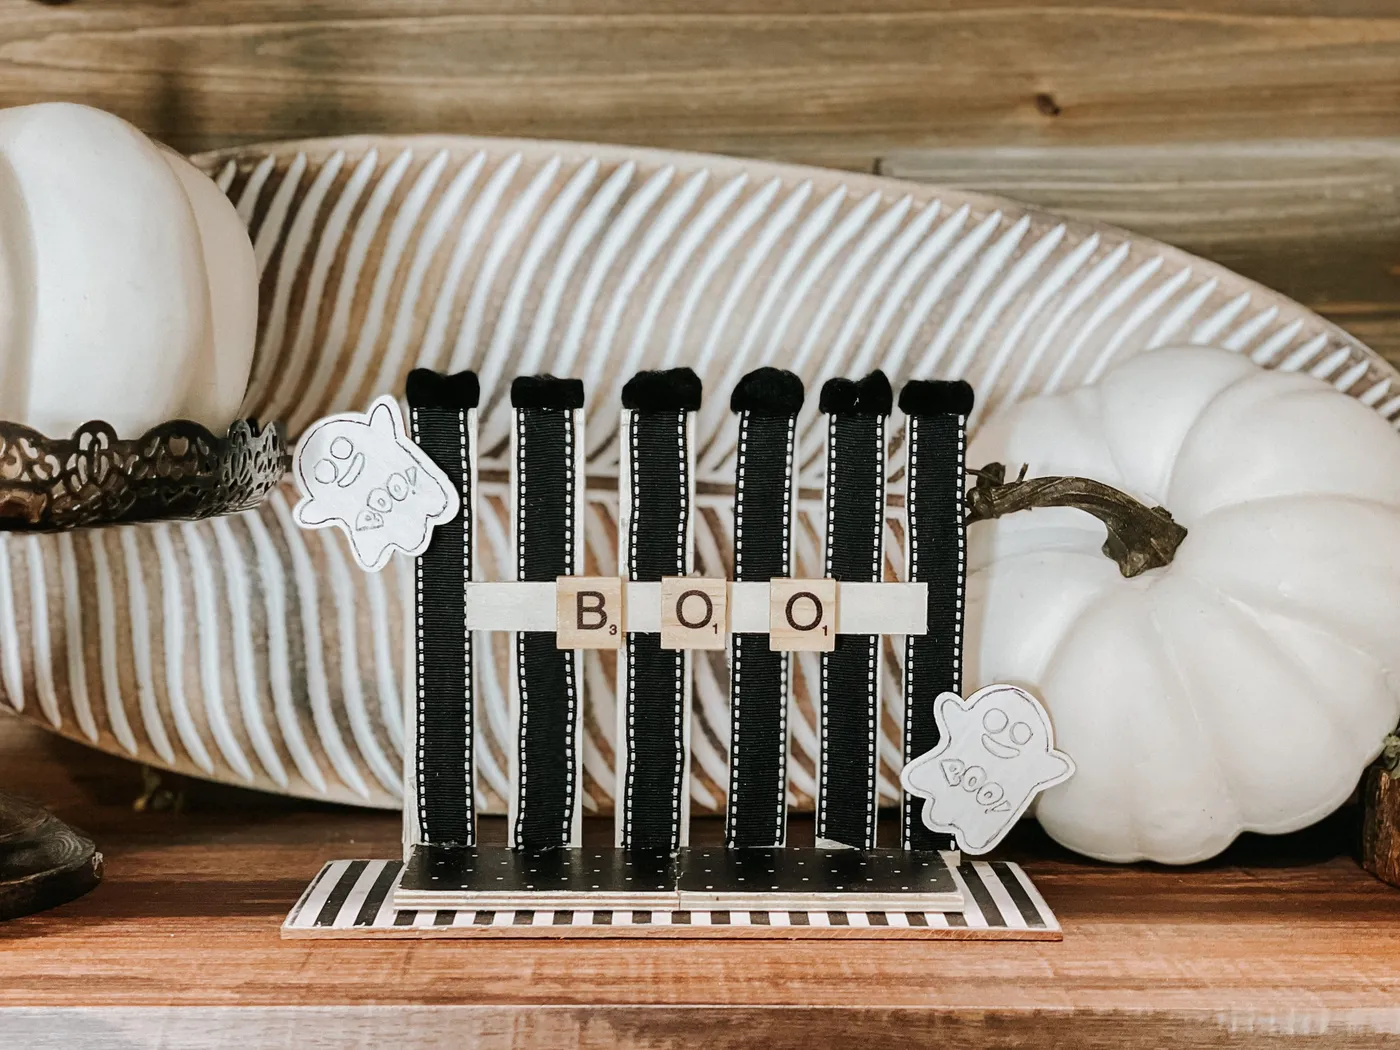
The thing that makes it look intentional instead of like a school project is the dark ornate metal stand holding one of the white pumpkins. It introduces a curve and a hit of aged metal into a display built entirely from stripes and flat planes. Without it, the whole vignette is a grid. With it, your eye has somewhere soft to land. Keep the pumpkins matte white — glossy ones fight the paper.
8. A Gingham Fabric Pumpkin With a Twig Stem
Cut your fabric into strips about one inch wide and four inches long, then work in vertical bands from the bottom up, overlapping each strip slightly. Random-size squares look like a scrap bin; uniform strips look like a print. For the stem, use a real twig instead of the foam nub, hot glue it deep into the top, and wrap a short length of twine around the body twice so it reads as tied rather than glued.
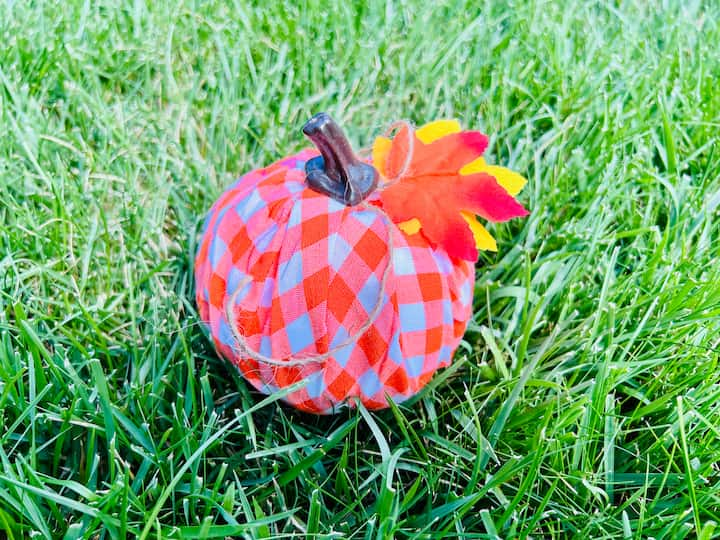
You can absolutely get this look for under $5. A dollar-store foam pumpkin plus a fat quarter from Walmart or a thrift-store shirt gets you there for about $3 total. The designer version of the same fabric pumpkin sells for $35 to $45. The difference is hand-feel and stem quality, not visible at three feet. Check Facebook Marketplace in late September — people unload whole bins of autumn decor for $10.
9. White Cylinders, Navy Pom-Poms, and Gold Stars
On an eight-foot rectangular table, run three of these cylinders down the center at 24-inch intervals and stop there — four gets crowded and guests lose sightlines. On a 60-inch round, use one tall center and two shorter flankers rather than three of the same height. Keep the whole arrangement under 14 inches tall if your ceiling is eight feet, and under 12 inches if you still want to see the person across from you without leaning.
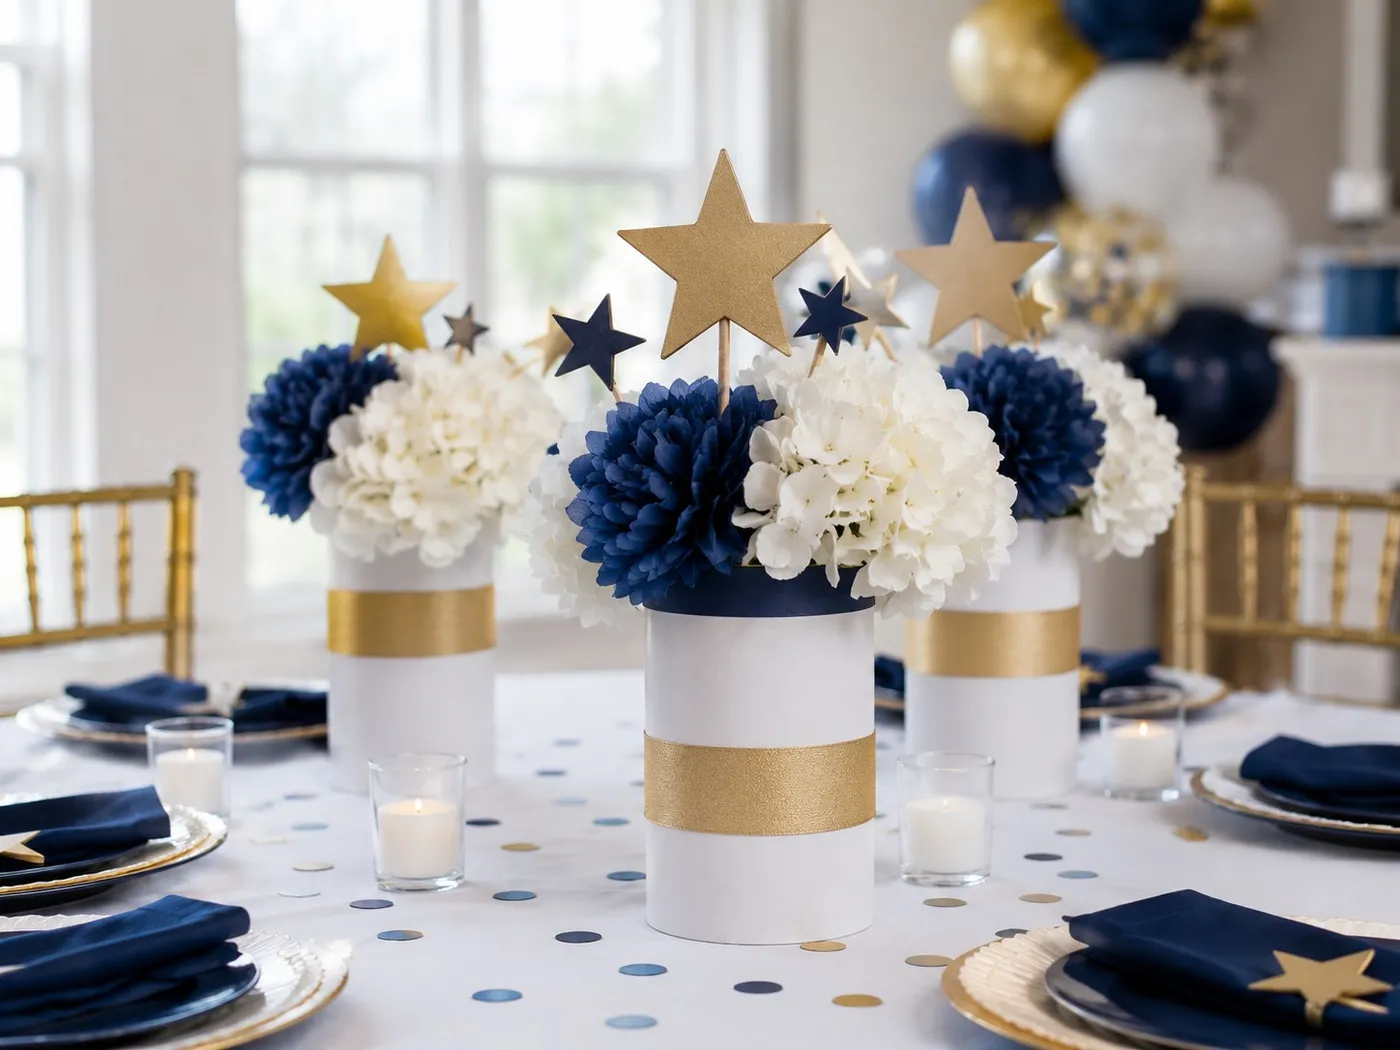
The color math is 60 percent white, 30 percent navy, 10 percent gold. The white tablecloth and vases carry the base, navy flowers and napkins carry the accent, and the gold ribbons and star picks are the sparkle that keeps it from going nautical. Swap navy for emerald and the formula still works for a holiday table. Just keep the metallic count low — one gold tone, not two.
10. Burgundy Tapers Rising Out of Sunflowers
Your tapers should clear the tallest bloom by six to eight inches — less and the flames look buried, more and they look like antennae. Set them in metal candle cups pushed into the arrangement, never directly into foam, and always light them after the flowers are placed. If the arrangement sits low and dense, drop a floral frog in the bottom of the vessel first; it costs six dollars and stops the whole thing from shifting when the candles get moved.
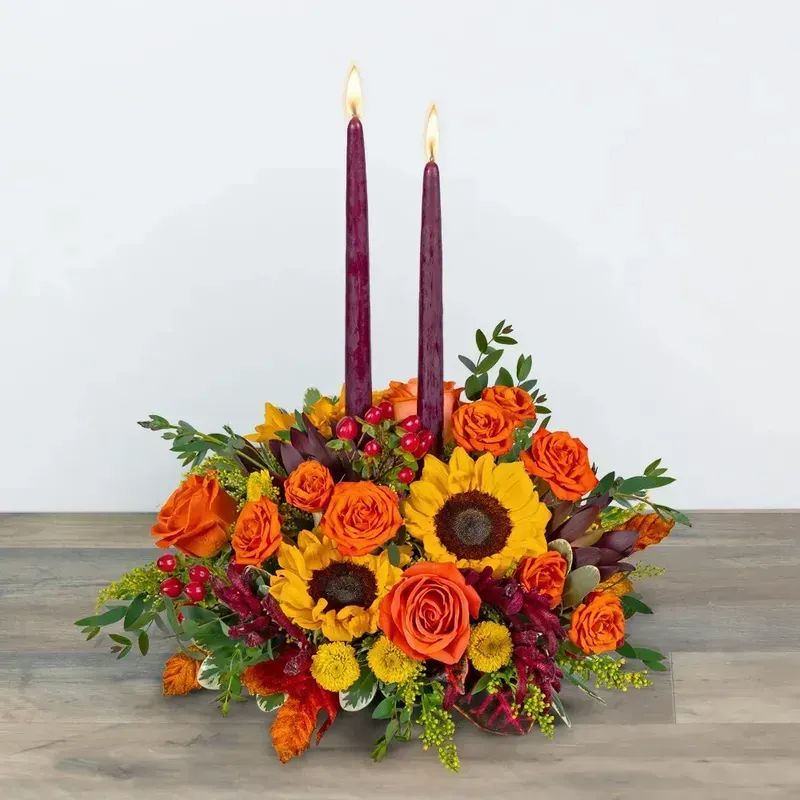
Two principles are doing the heavy lifting. First, color temperature mixing: warm orange roses and yellow sunflowers against cool burgundy tapers creates tension the eye reads as expensive. Second, the triangle — low mass at the base, two verticals rising from the center. Flanking clusters of red berries keep the base from looking like a puddle.
11. Mason Jars of Fairy Lights and Wildflower Bottles
Honest caveats, because this is the look people recreate and then quietly abandon. Battery strings last 8 to 12 hours on a fresh set and dim noticeably before they die, so buy rechargeable and rotate two sets. Multicolor strings photograph terribly next to warm white ones, so keep every string the same temperature. And if this table lives outside, glass plus wind equals broken glass in the grass — use plastic jars on the ends and save real glass for the middle.
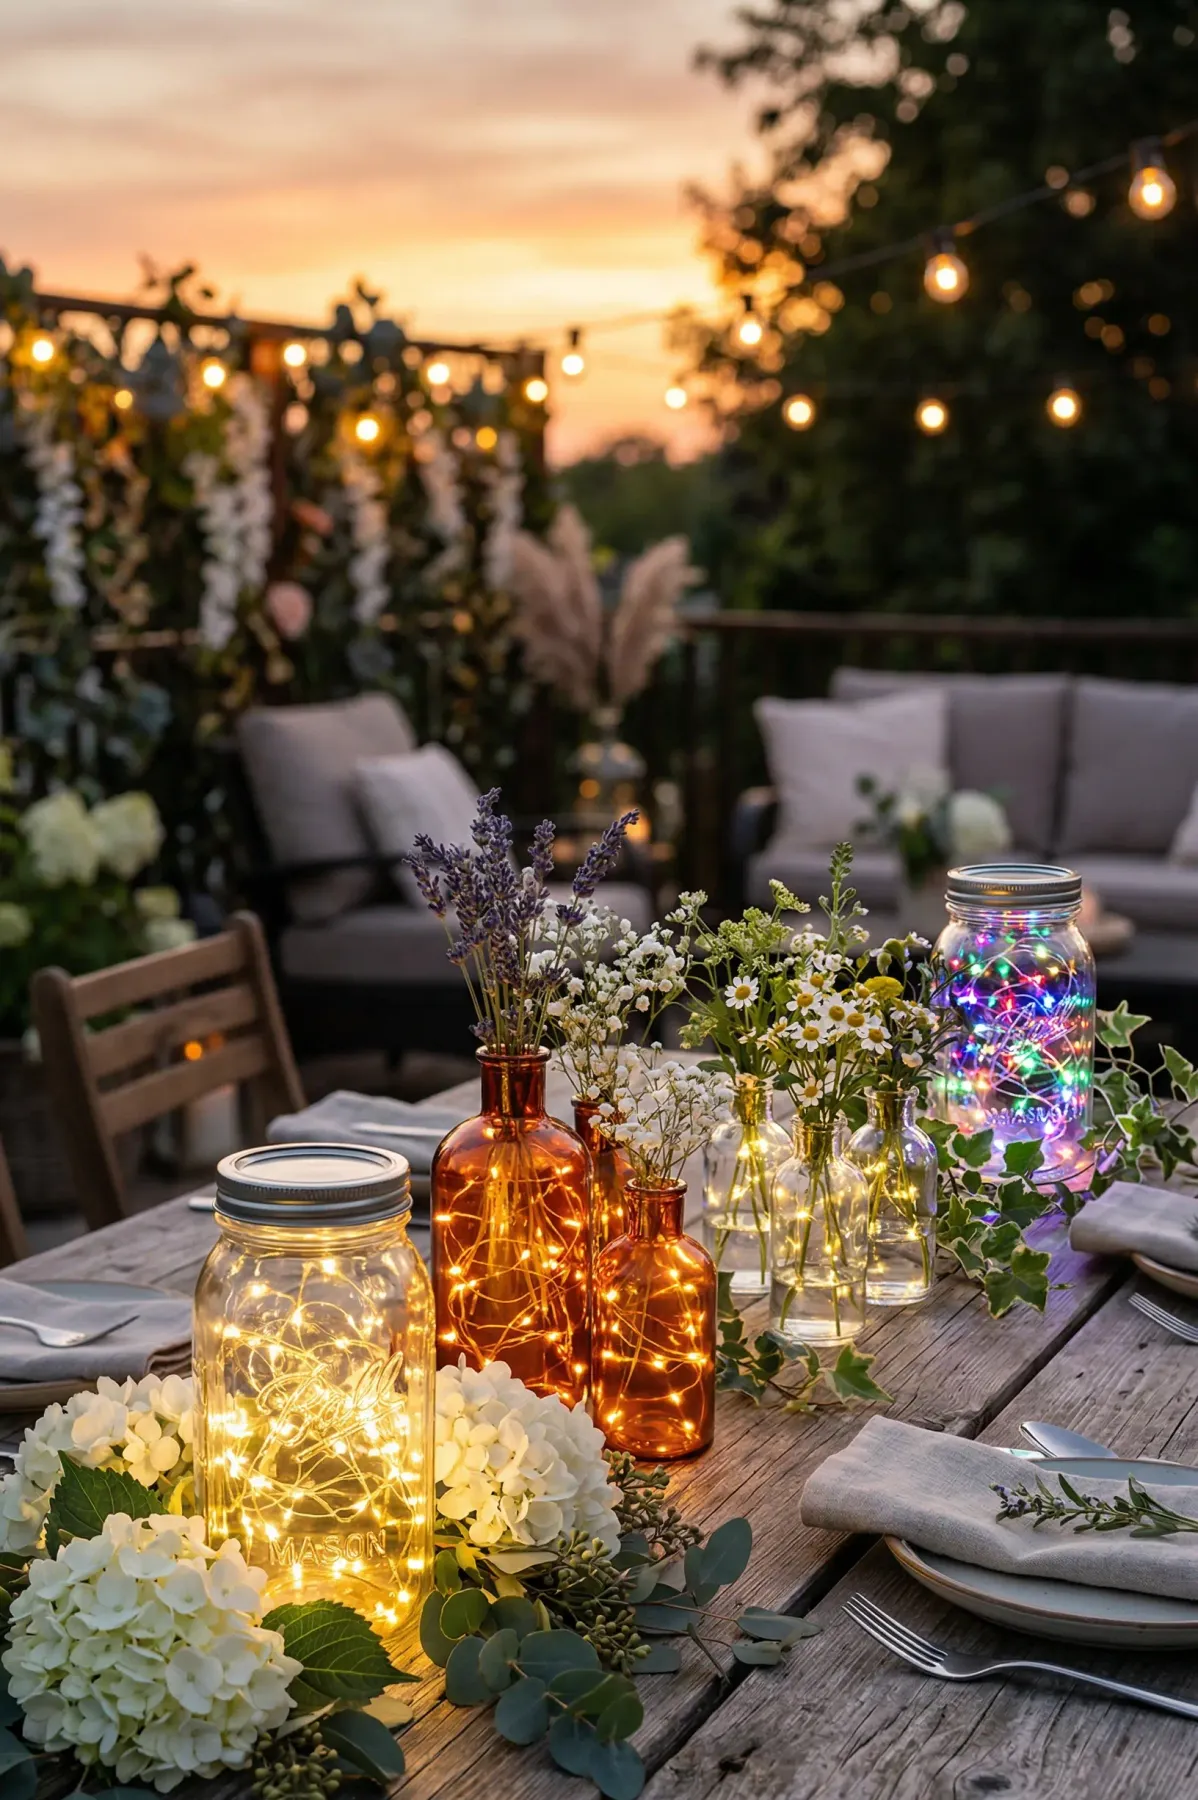
The cost case is genuinely good. Mason jars at about $1.25 each versus $12 apiece for amber glass bottles, and a six-foot fairy light string for $1.25 versus $15 to $20 at a craft store. Thrift stores and Facebook Marketplace are goldmines here — people sell bags of jars for $5. The one thing worth spending on is fresh greenery; eucalyptus and baby’s breath last a week and cost $8 total.
12. A Skeleton Lounging on a Woven Tray
Pose it before you glue it. Cross the ankles, tuck one arm behind the head, bend the other knee up, then hold the pose while you hit the joints with hot glue so it stays put. Set the skeleton on the tray first, then layer a velvet pumpkin on one side and a candle on the other, tallest object at the back. Fifteen minutes, about $8 in supplies, and you’ll use the tray again in November.
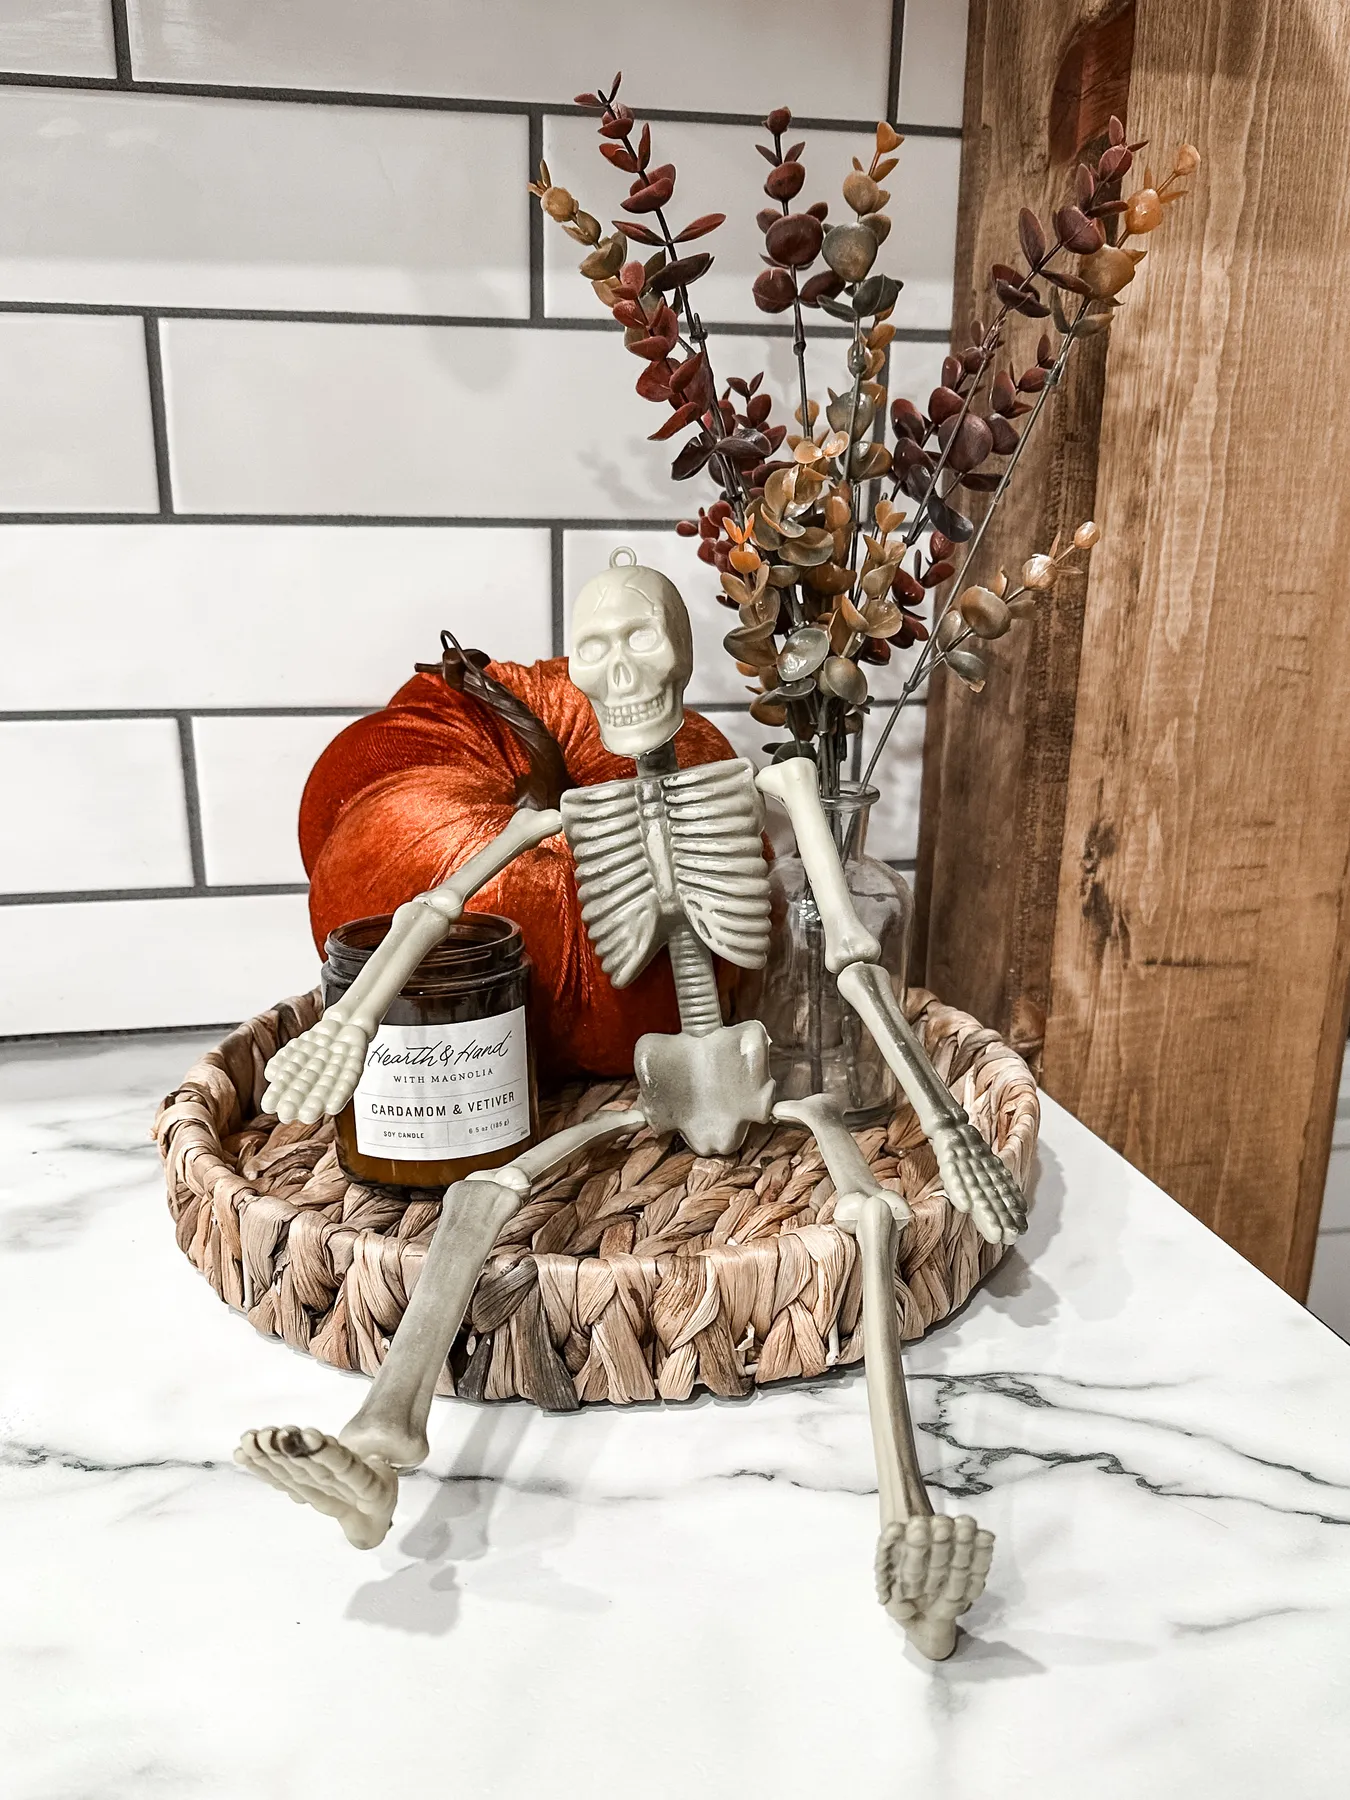
The pose is the entire joke. Standing skeletons are spooky; reclining skeletons are funny. It’s the difference between a haunted house and a skeleton on vacation, and that’s what makes people stop and smile at a countertop vignette they’ve walked past forty times. It also photographs as a story rather than a display, which is exactly why it gets saved.
13. Dried Roses in a Skull Vase, Framed in Distressed Gold
Dried roses shed. Expect petals on the surface within a week, and expect them to keep falling for months. A light mist of unscented hairspray when you first arrange them locks most of it in. Keep the whole thing out of direct sun or the pinks fade to beige by November, and dust with a hairdryer on cool from two feet away rather than a cloth, which snaps dried stems. Budget on replacing the stems once a year.
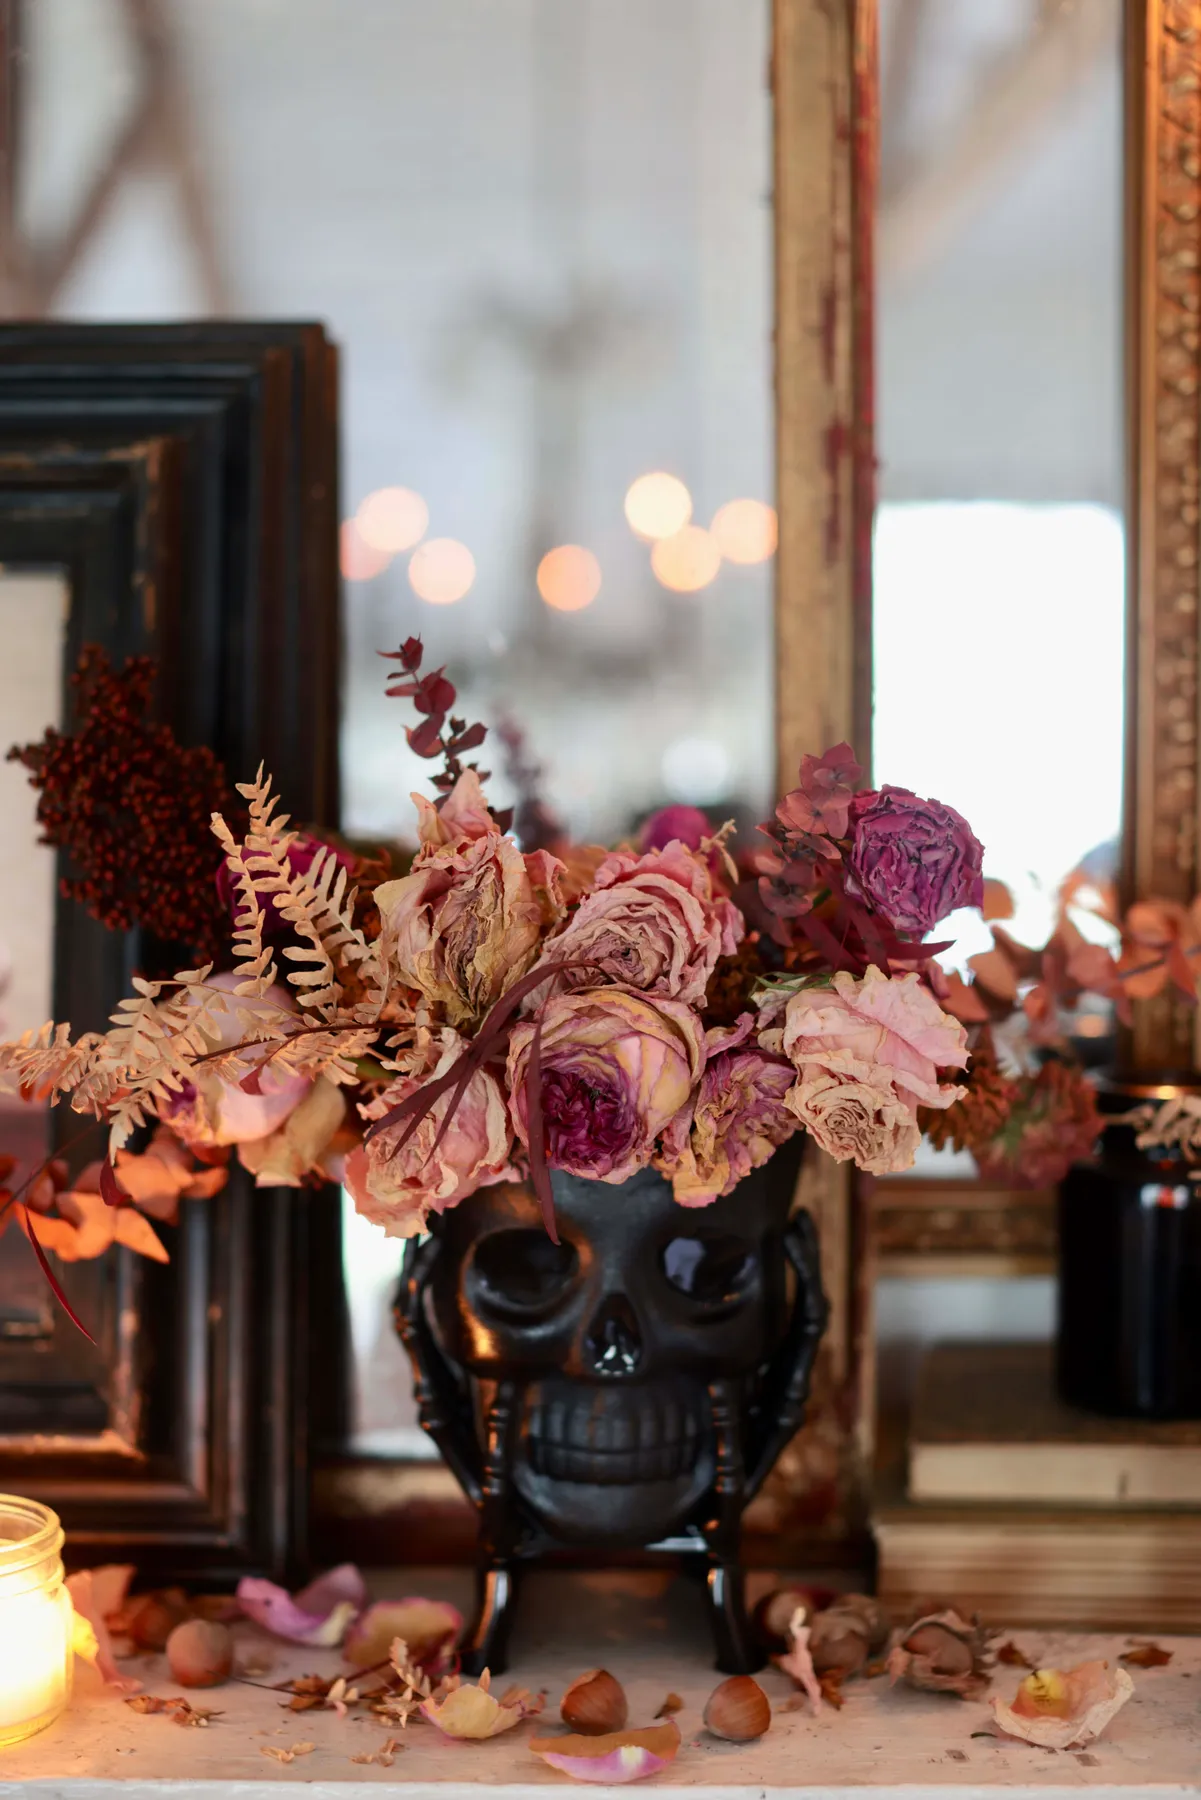
What makes this arrangement feel costly is the texture collision: matte black skull against papery, fragile petals against the chipped gold of that mirror frame. Three finishes, one palette. The scattered rose petals and hazelnuts on the surface are also doing real work — they push the arrangement out past the vase and onto the table, so it reads as a scene rather than an object with a boundary.
14. Wood Slices, Moss, and Three Taper Candles
- Measure your table’s usable width — leave at least 12 inches of clear space per diner.
- Check candle clearance: nothing flammable within 6 inches of a flame.
- Seal any fresh-cut wood slices so they don’t crack as they dry.
- Confirm your candle holders are metal or glass, never plastic.
- Set the runner down before the wood so you can shift the layout without lifting candles.
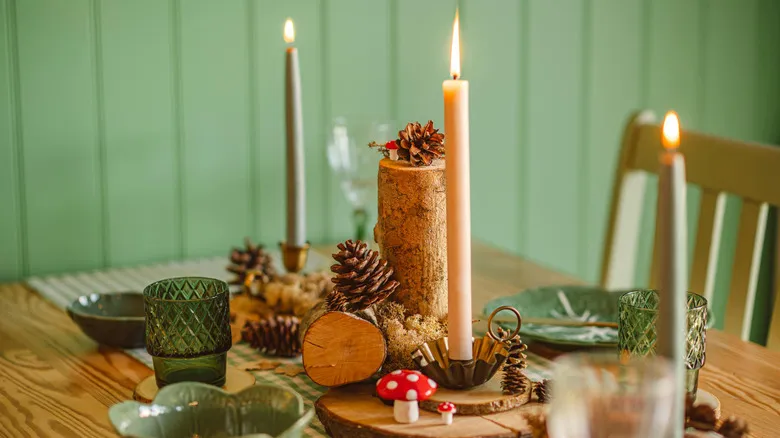
If you’re cutting your own slices, dry them at 200 degrees for about two hours, then let them cool completely before sealing. It kills anything living in the wood and dramatically reduces cracking. Glue felt pads to the bottom of each slice, too — wood on wood scratches, and nobody notices until the table’s already marked.
15. An Ornate White Vase Stuffed With Every Color
- Ornate white ceramic vase: $1.25–15 (thrift is your friend here)
- Four to six bundles of artificial blooms: $6–24
- Faux greenery and red berry sprays: $2–8
- Floral foam or a wire grid: $1–4
- Filler moss: $1–2
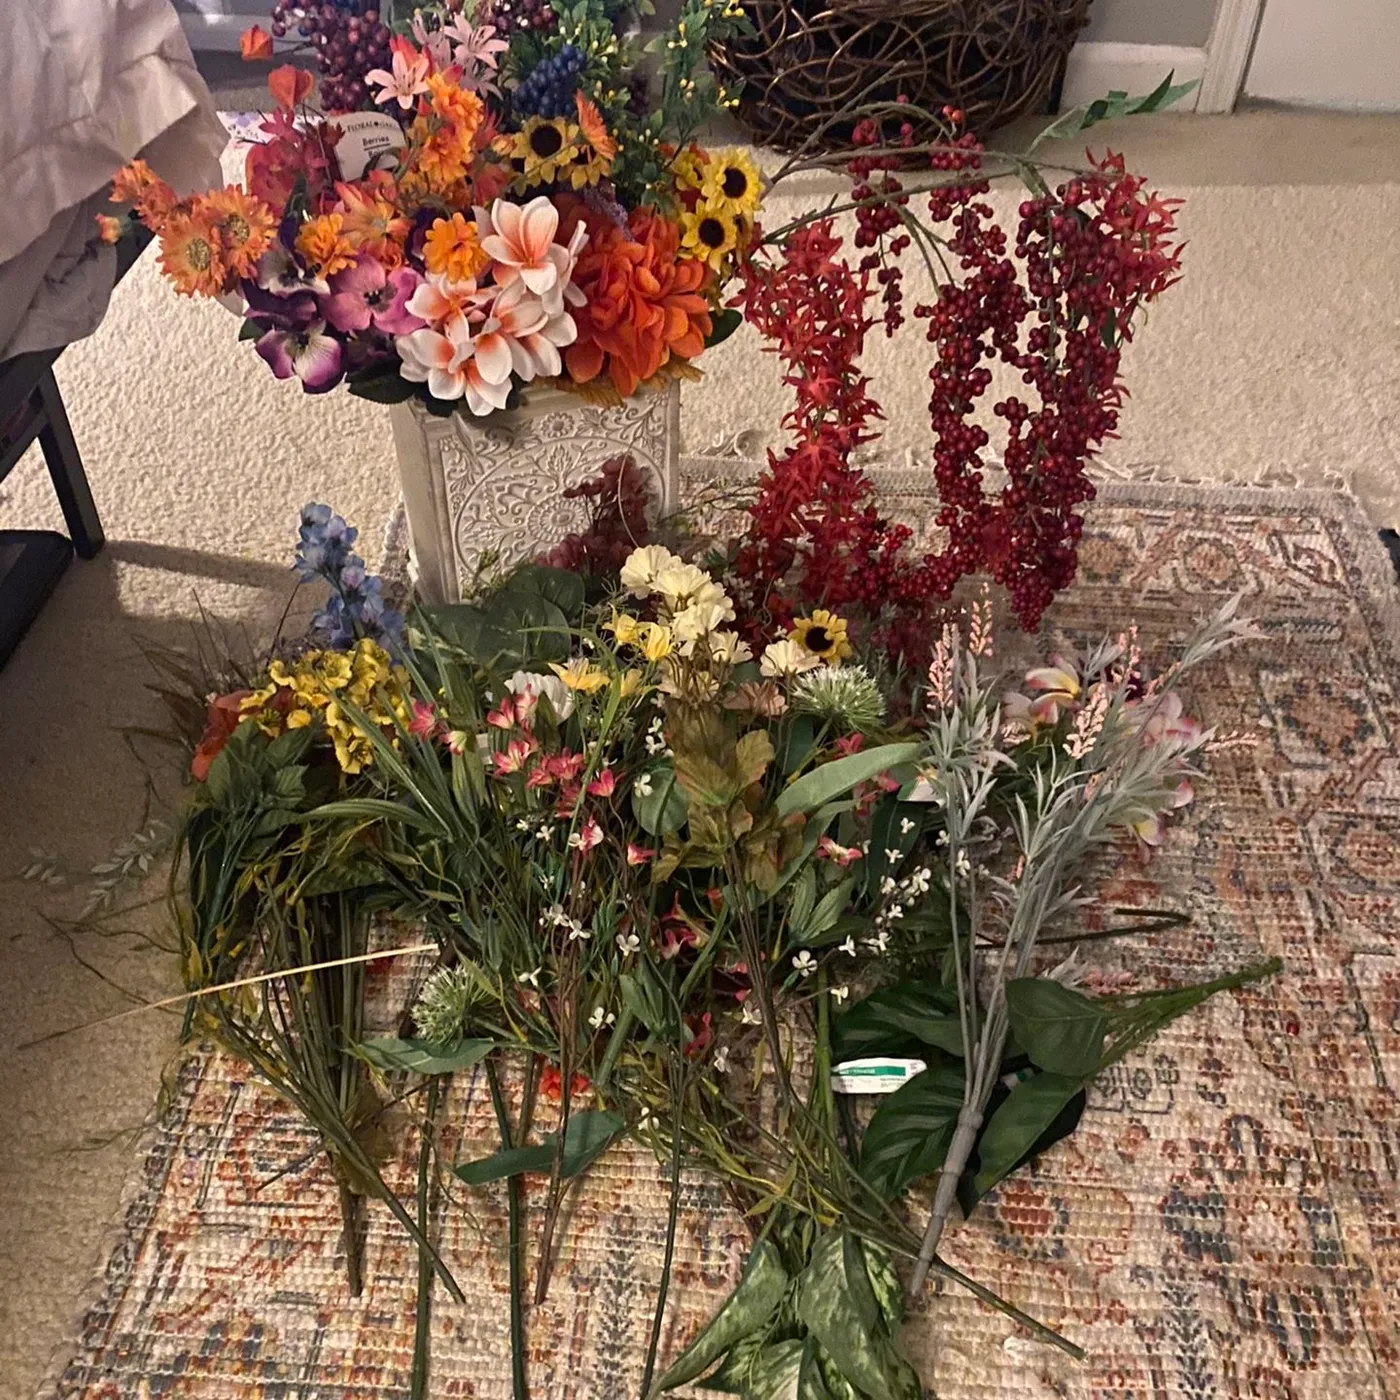
Total: roughly $11 to $53 for a full, dense arrangement. Budget alternative: buy three bundles instead of six and split each stem into two or three sections with wire cutters — density comes from stem count, not bundle count, and this cuts the flower cost by about half without any visible gap.
Color balance is the trick with a mixed bouquet. Aim for 60 percent of one dominant hue, 30 percent of a second, and 10 percent of a bright pop. Without a dominant color, this many blooms turns to confetti. Put the largest flowers in first at three points around the rim, then fill.
16. Three Moss-Filled Topiaries in Cream Pots
Three is the magic number for a six- to eight-foot table, but only if you space them evenly and keep the heights identical — this look is about rhythm, not variety. On a narrower console or buffet, two works better than three. Keep the tallest point under 18 inches so it doesn’t wall off the room, and give each pot at least four inches of breathing room from the table edge.
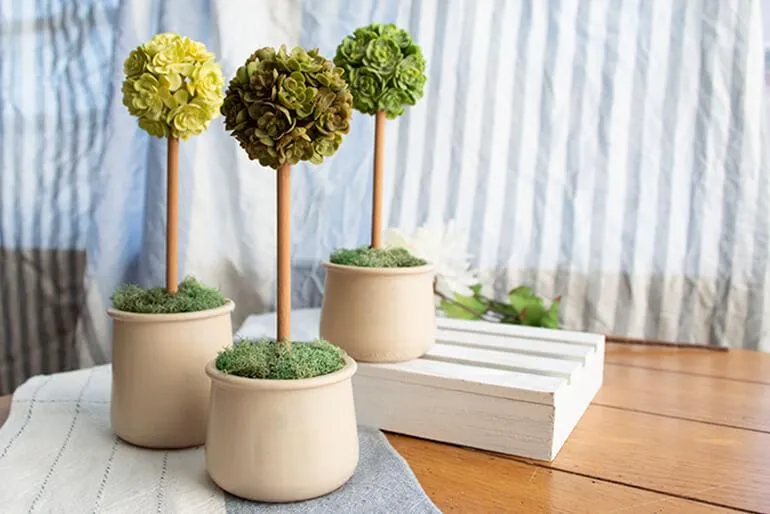
This is the budget sibling of the fairy light jar table, and the cost difference is dramatic. Dollar-store floral clusters and small pots come in around $3 per topiary. Pre-made topiaries at home decor stores run $25 to $40 each. The trick is to buy one green garland and cut it into segments instead of buying three separate bushes — same look, a third of the spend.
17. Painting a Pot Black at the Kitchen Table
Work on baking paper, not newspaper — paint sticks to newsprint and you’ll be picking fibers off the rim. Sand the pot lightly, wipe the dust, then two thin coats of chalk or matte black paint with 30 minutes between them. Let it cure a full 72 hours before it holds anything. Total time: about 15 minutes of actual work and three days of ignoring it on the counter.
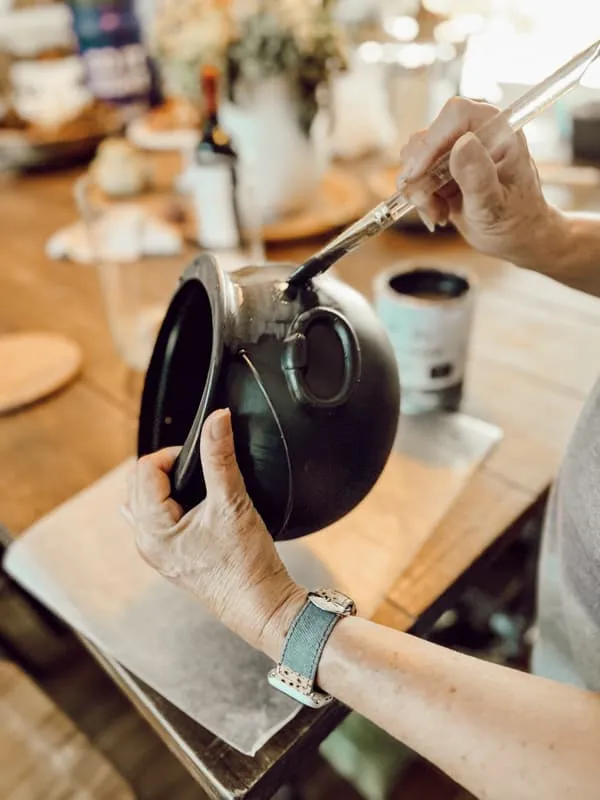
The reality check is chipping. A painted pot will scuff at the rim every time you slide a plant in or out, and soil moisture softens the finish from the inside. Drop a plastic nursery liner in first and never plant directly into the painted surface. If the pot lives somewhere humid, seal it with a matte poly topcoat — it looks slightly flatter, but it survives.
18. A Gold Cutout Votive Nestled in Eucalyptus
The cutout votive is the piece that makes this vignette feel collected rather than bought. Those circular perforations throw little coin-shaped shadows onto the burlap runner when the candle’s lit, which is a completely different effect from a solid holder of the same size. Remove it and you have greenery on fabric — pleasant, forgettable. The textured gold rim does the same thing at the top edge, catching light where the eye expects a hard line.
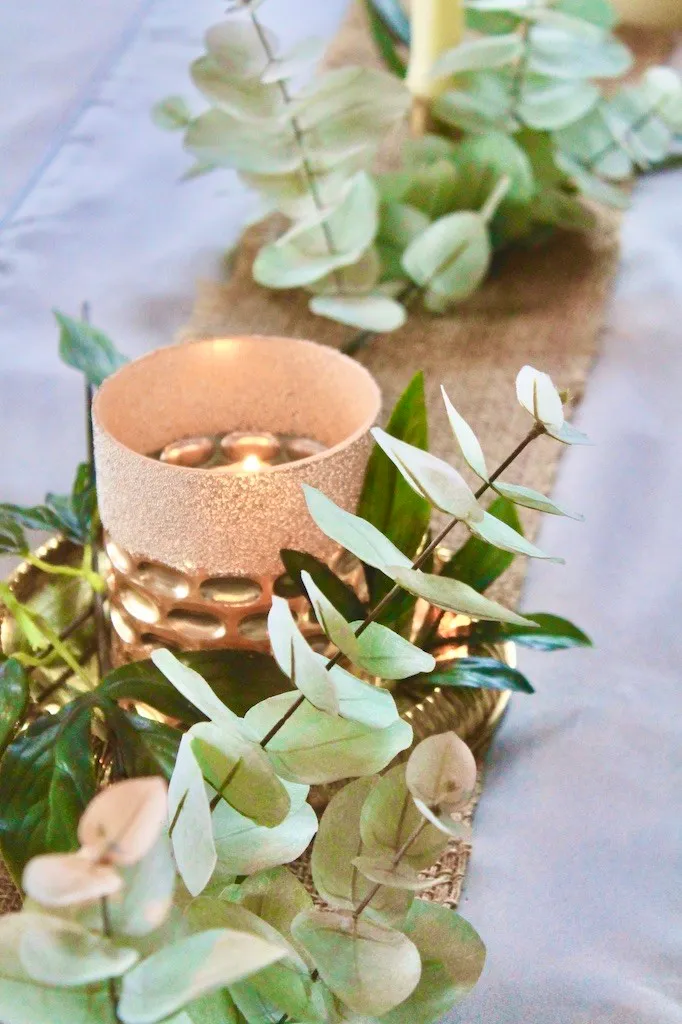
Upkeep is minimal but real. Faux eucalyptus collects dust fast and can’t be washed, so hit it with a hairdryer on cool once a month. Wipe the gold holder with a dry cloth only — metal polish strips the finish on inexpensive pieces. Reflective pebbles fog with wax and smoke, so rinse them in warm water every few weeks. Budget about $6 a year for replacement candles.
19. Blue-and-White Vase, Orange Blooms, and the Mess
- Blue-and-white ceramic vase: $1.25–14
- Artificial orange and cream blooms: $4–16
- Faux berry sprays and wheat stems: $2–6
- Wire cutters (one-time buy): $5–10
- Filler greenery: $1–4
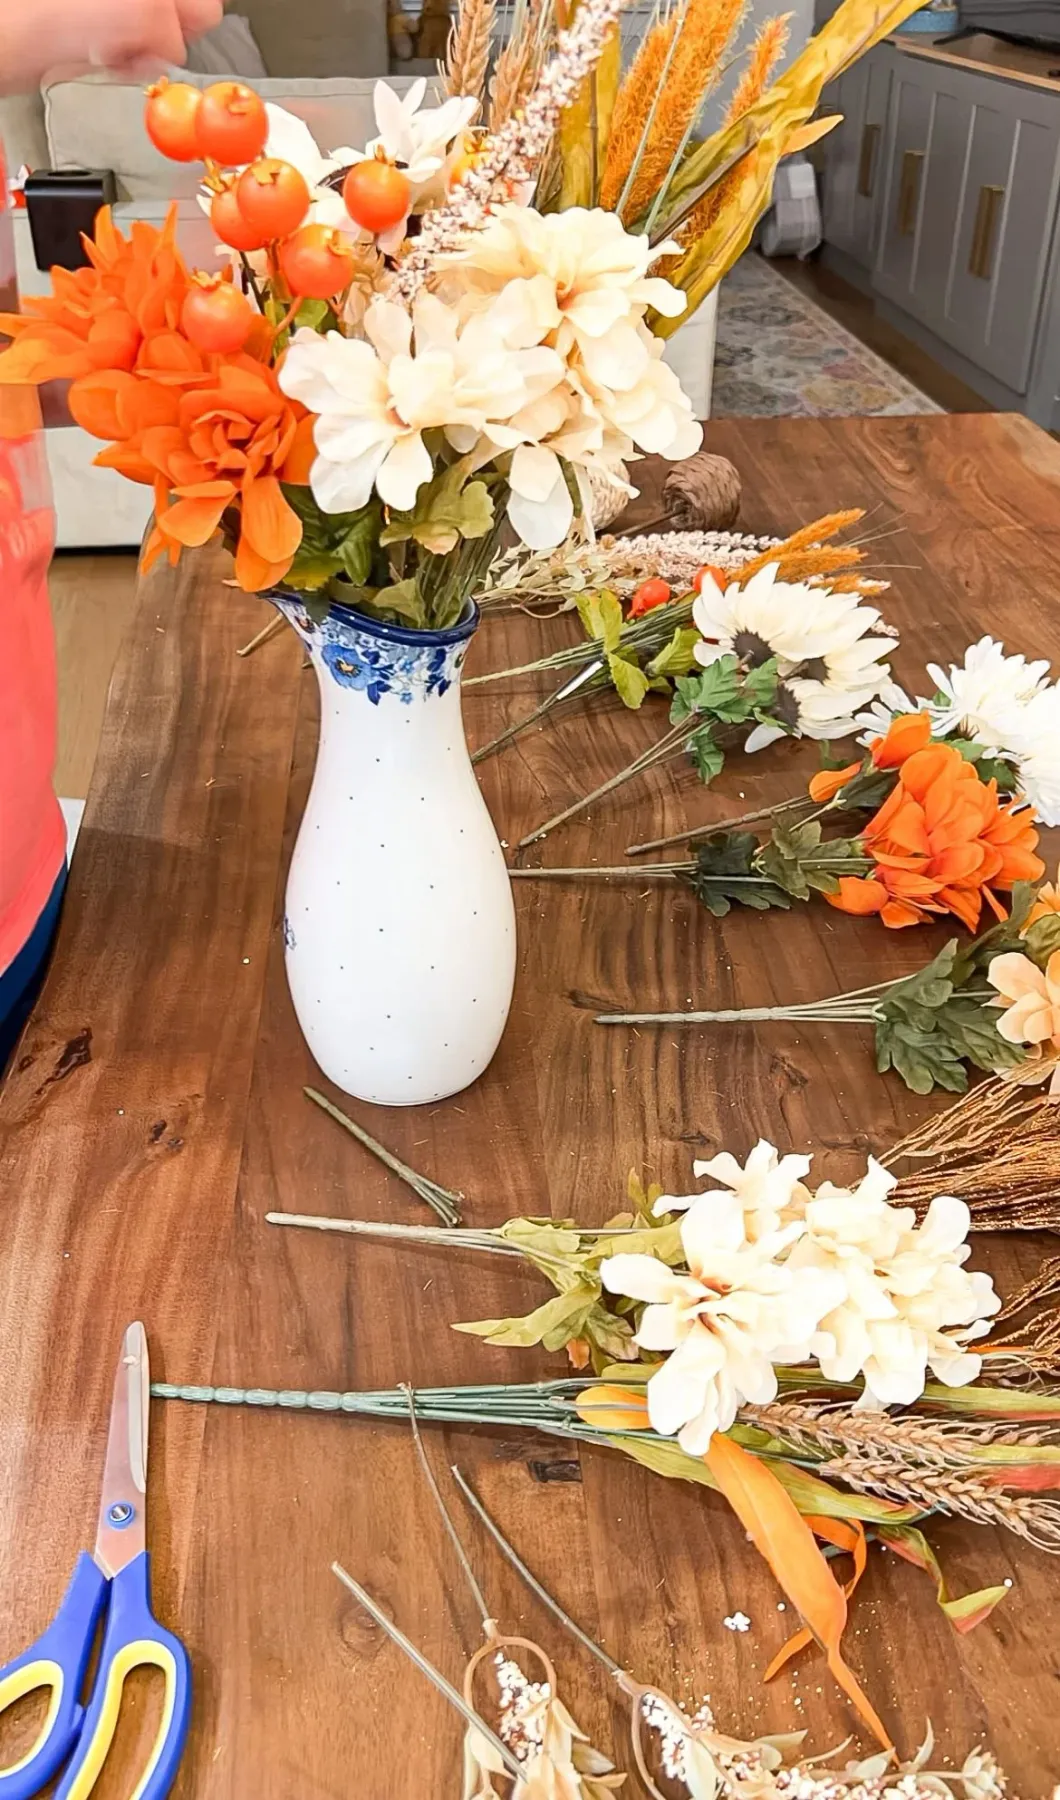
Total: $12 to $50, and the wire cutters pay for themselves the first time you rework an old bouquet.
Here’s the tip worth remembering: pull the flowers off the main stem and rebuild on a thinner wire, then group in odd numbers — three orange, three cream, five wheat. Bundles straight out of the package look like a bouquet; odd-number clusters look like a florist arranged them. Cut stems at different heights, tallest in the back left, shortest front right, and let the wheat break the dome shape.
20. A Woven Cornucopia Spilling Mini Pumpkins
The cornucopia came back hard, and the 2026 version is smaller and more edited than the giant wicker horns of the nineties — a single woven horn, a tight spill of mini gourds, and linen rather than burlap. It fits the broader pull toward harvest nostalgia and table settings that look assembled over years. Expect this one to hold; it’s seasonal rather than trendy, and the vessel stores flat.
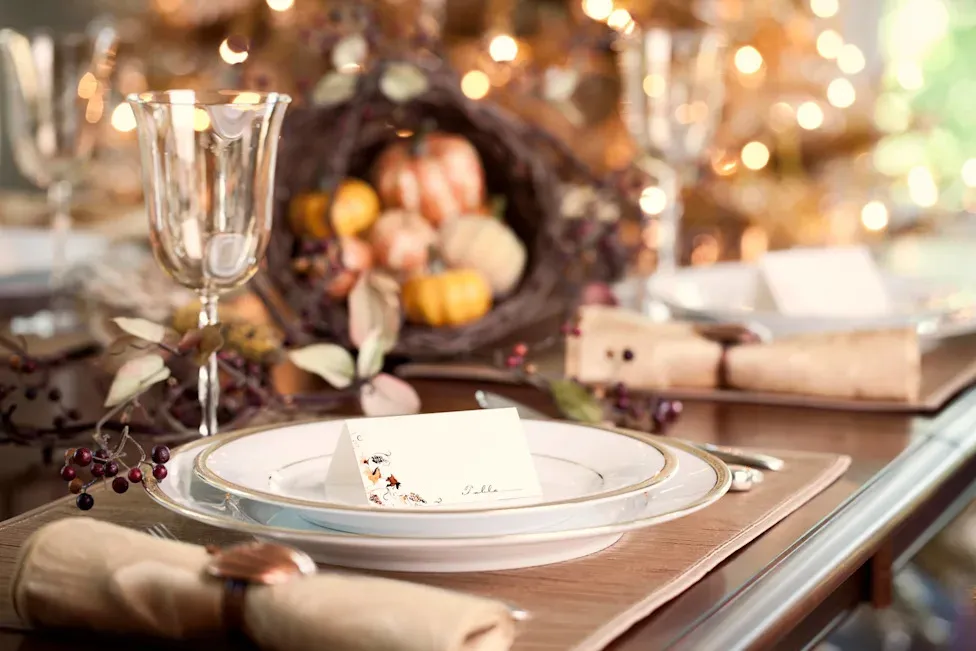
is directional flow. Everything spills one way, so the centerpiece has a beginning and an end instead of radiating in all directions like a wreath. The white plates with gold rims and the tan napkins also keep it from going muddy — without those two cool-ish neutrals, a cornucopia of orange gourds on a brown table reads as one continuous orange blur.
21. Skeleton Chargers, Fuzzy Spiders, and Dark Branches
Two things to plan for. Fuzzy spiders shed, and those fibers end up in food — so glue them to the plate or skip them entirely if you’re actually serving dinner. And black charger plates show every fingerprint and grease smudge, which means a wipe-down right before guests sit. Both problems are solved by moving the spiders to the napkins instead of the plates.
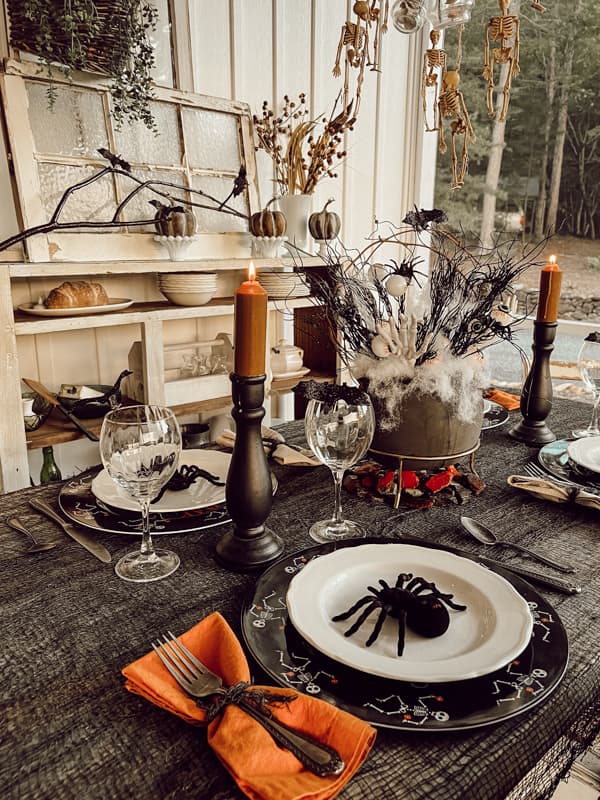
This layout needs a table at least 40 inches wide. The branched centerpiece plus tall orange pillars eat roughly 14 inches of depth, and you still need room for chargers and elbows. It works best at 8 feet long, where you can set three place settings per side and keep the tall elements clustered rather than spread. On a smaller table, look at the beige skull vignette instead — same mood, half the footprint.
22. Oversized Foam Lollipops and Wrapped Candy
Start with a foam disc and a wooden dowel. Paint concentric swirls freehand — don’t tape them, the wobble is the charm — then push the dowel into the foam and glue the seam. For the wrapped candies, roll a foam cylinder in cellophane, twist both ends, and tie with ribbon a shade darker than the candy. About 25 minutes per piece and roughly $2 each in materials.
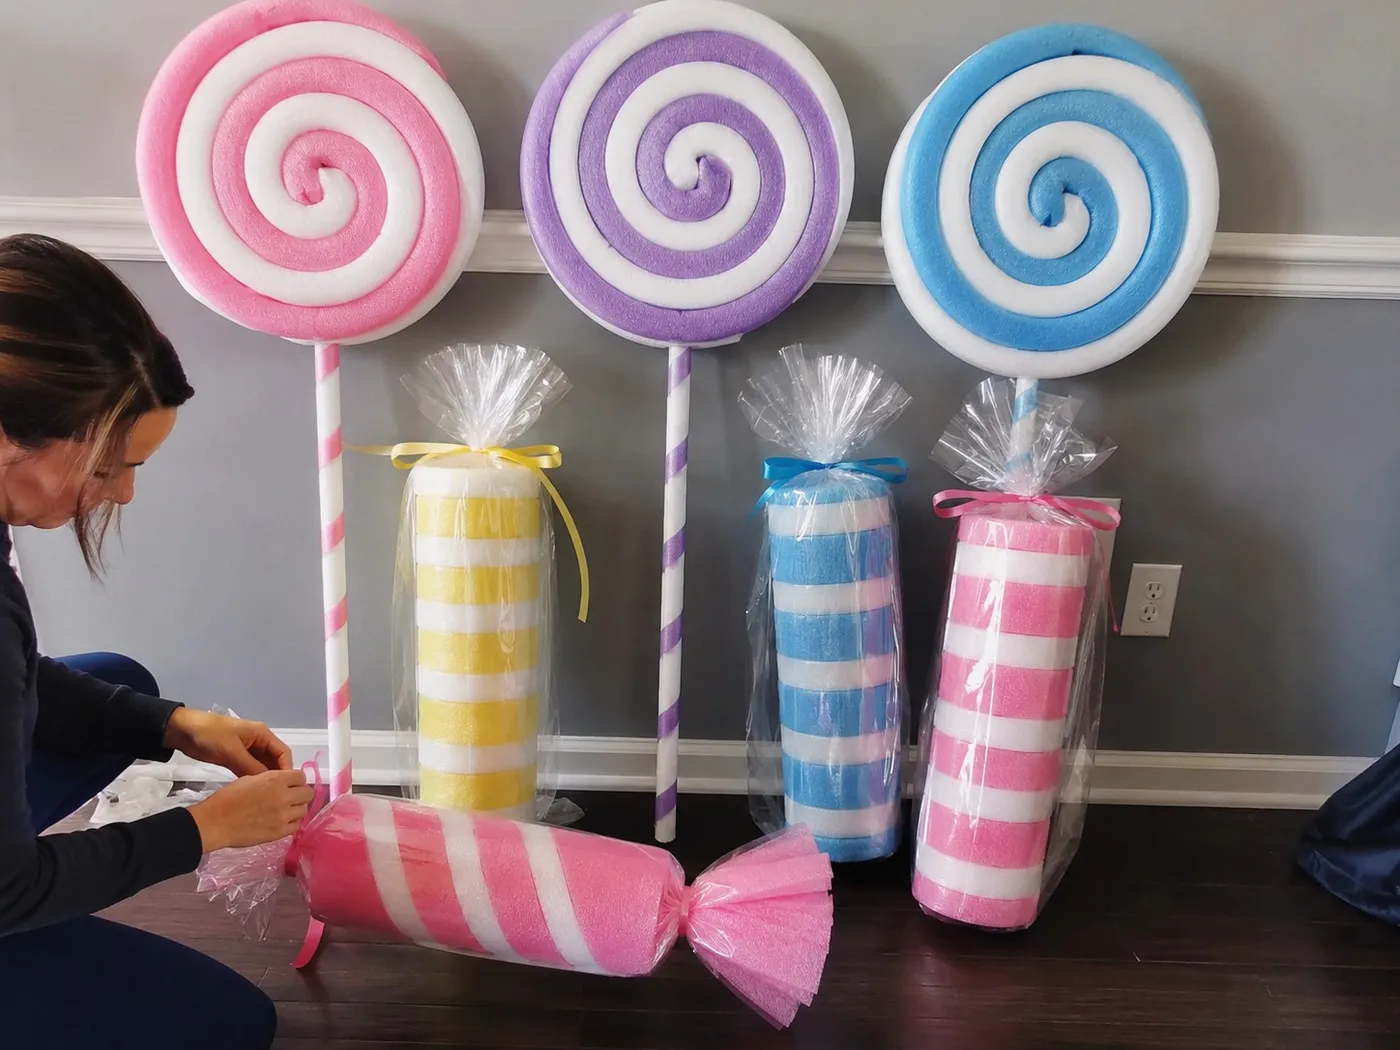
Party stores charge $18 to $30 for one giant prop lollipop. Dollar Tree foam discs, a dowel from the hardware aisle, and craft paint get you the same object for about $3. The cellophane is where people overspend — a roll from Walmart covers a dozen candies for $4. If you’re doing a whole candy land theme, make six and cluster them at three heights; scale is what sells the illusion, not quantity.
23. Dried Orange Slices Tied to Fringed Napkins
Dry your own citrus instead of buying it: slice oranges a quarter inch thick, blot them, and bake at 200 degrees for three to four hours, flipping once. Thicker slices mold; thinner ones curl into crisps. Tie with twine through the center hole and let the slice sit flat against the napkin rather than dangling, or it’ll spin every time someone reaches for a glass.
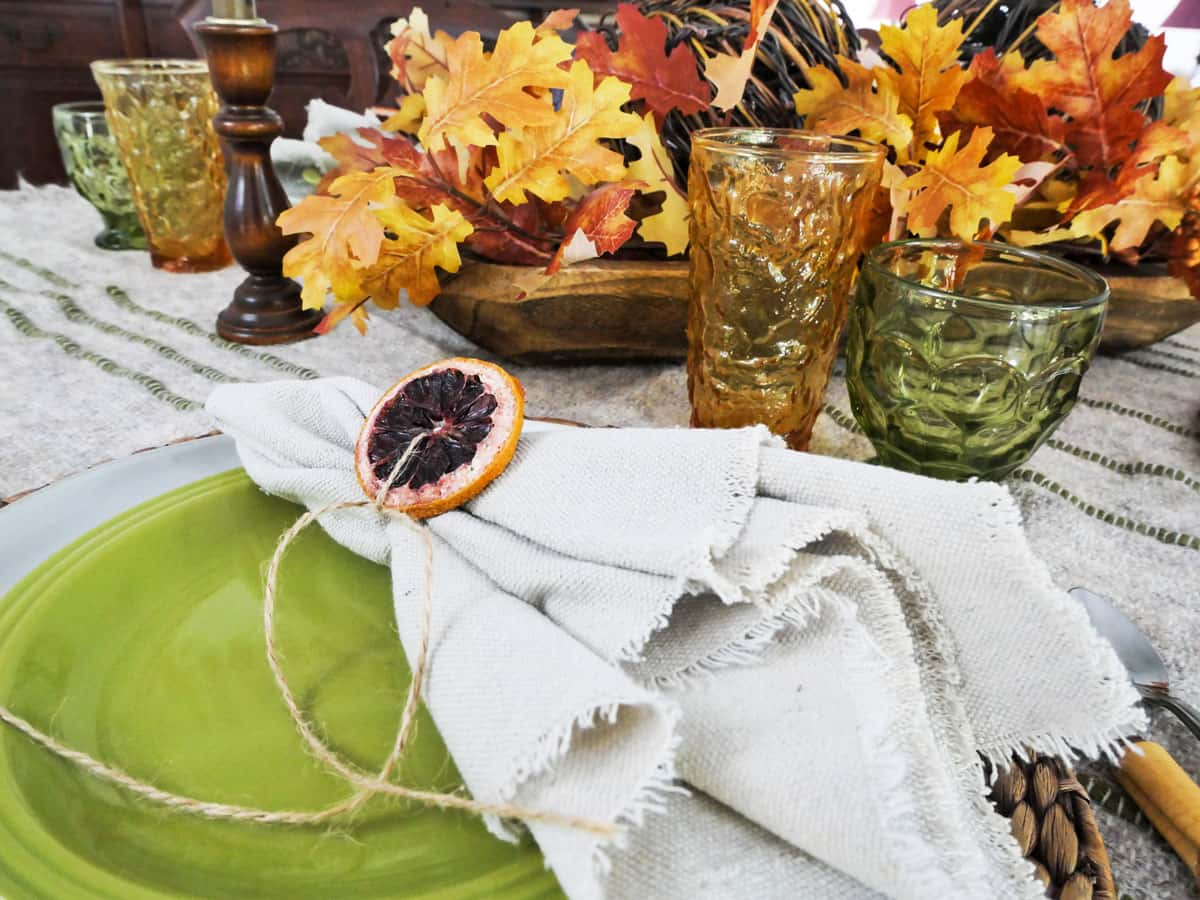
The palette math here is 50 percent rust orange and golden yellow, 30 percent oatmeal and cream, 15 percent olive green, 5 percent dark wood. It works because the neutrals are warm, not cool — swap the cream napkin for stark white and the whole setting goes flat and a little cheap. Layer the plate tones too: light green over gray reads richer than light green on its own.
24. A Dollar-Store Holiday Vignette You Can Rotate
The smartest dollar-store strategy isn’t buying a whole new centerpiece every season — it’s buying one good vessel and rotating what goes inside. A single neutral tray or jar handles Valentine’s, Easter, and Halloween with about $8 of swap-in pieces each time. Store the small stuff in labeled zip bags so you’re not digging through a bin every February.
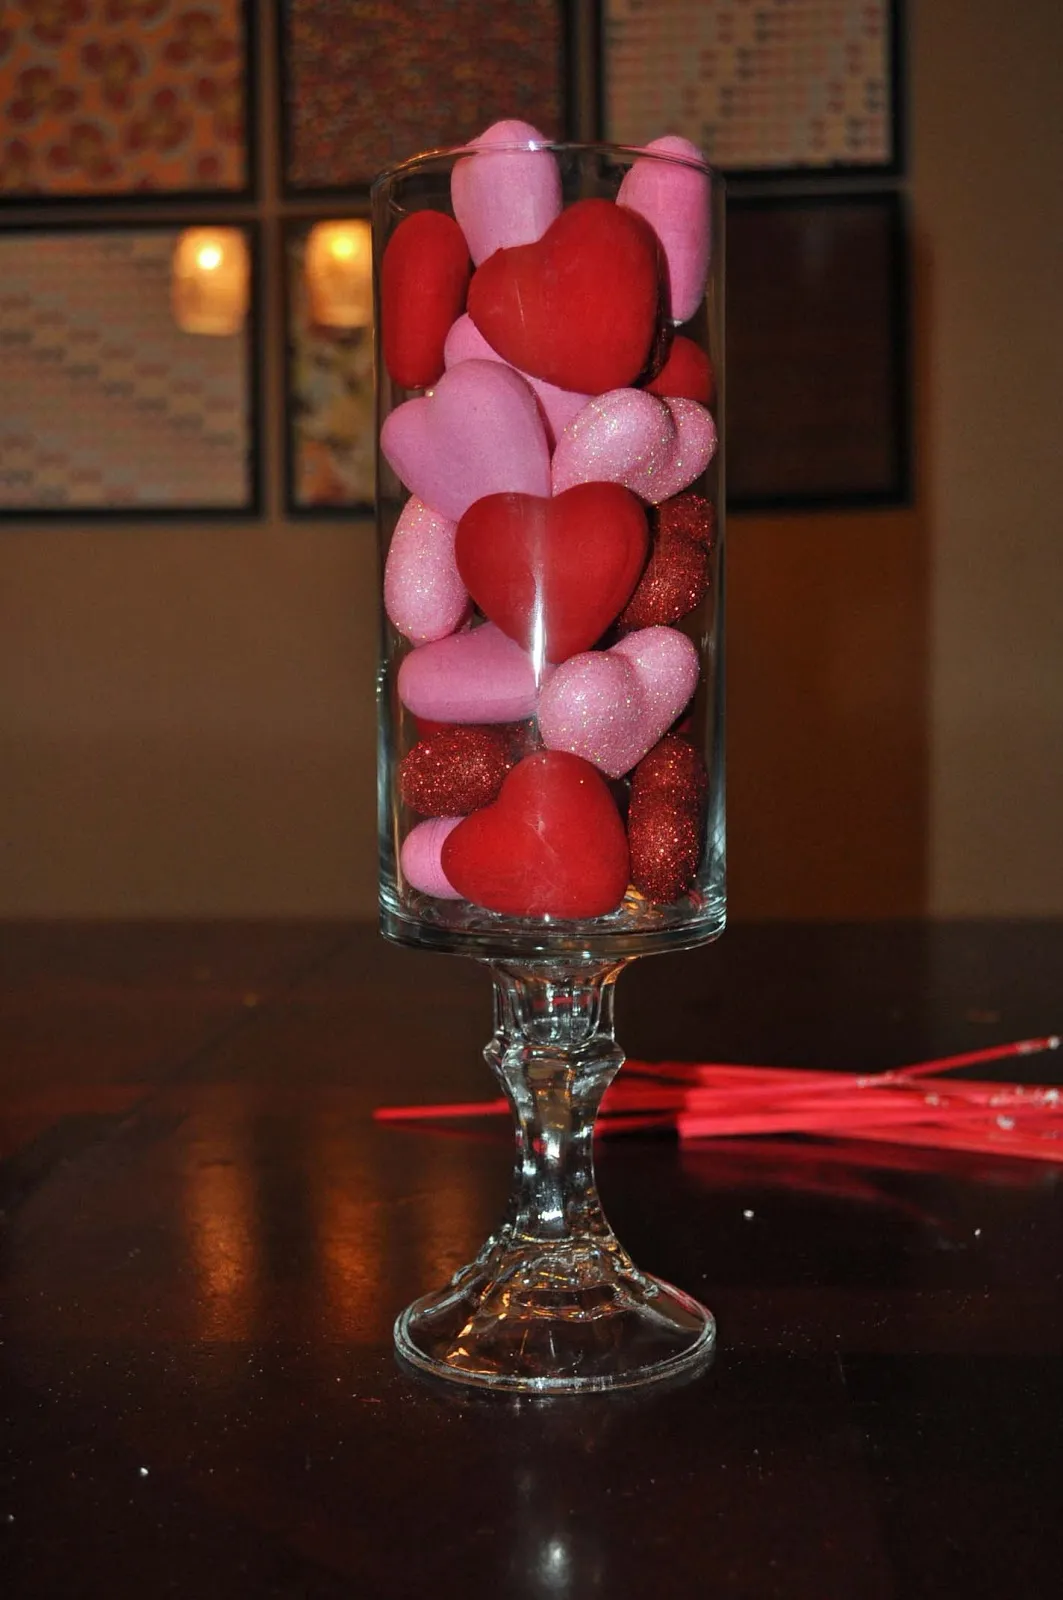
Honest warning: cheap holiday decor multiplies. It’s easy to end up with six half-finished vignettes and nowhere to put them. Cap yourself at one bin per holiday before you buy anything new, and if something hasn’t come out in two years, donate it. The pieces that survive rotation are the ones that are neutral in color and unexpected in texture — those read as decor rather than as party supplies.
25. Golden Glassware, Cream Napkins, Orange Alstroemeria
Three finishes are carrying this close-up: textured gold glass, matte cream linen, and cool silver flatware. Each one catches light differently, so the table sparkles from multiple angles instead of reflecting one flat glare. The silver vase is the quiet hero — it’s the only cool metal on the table, which makes the gold glass look intentional instead of accidental.
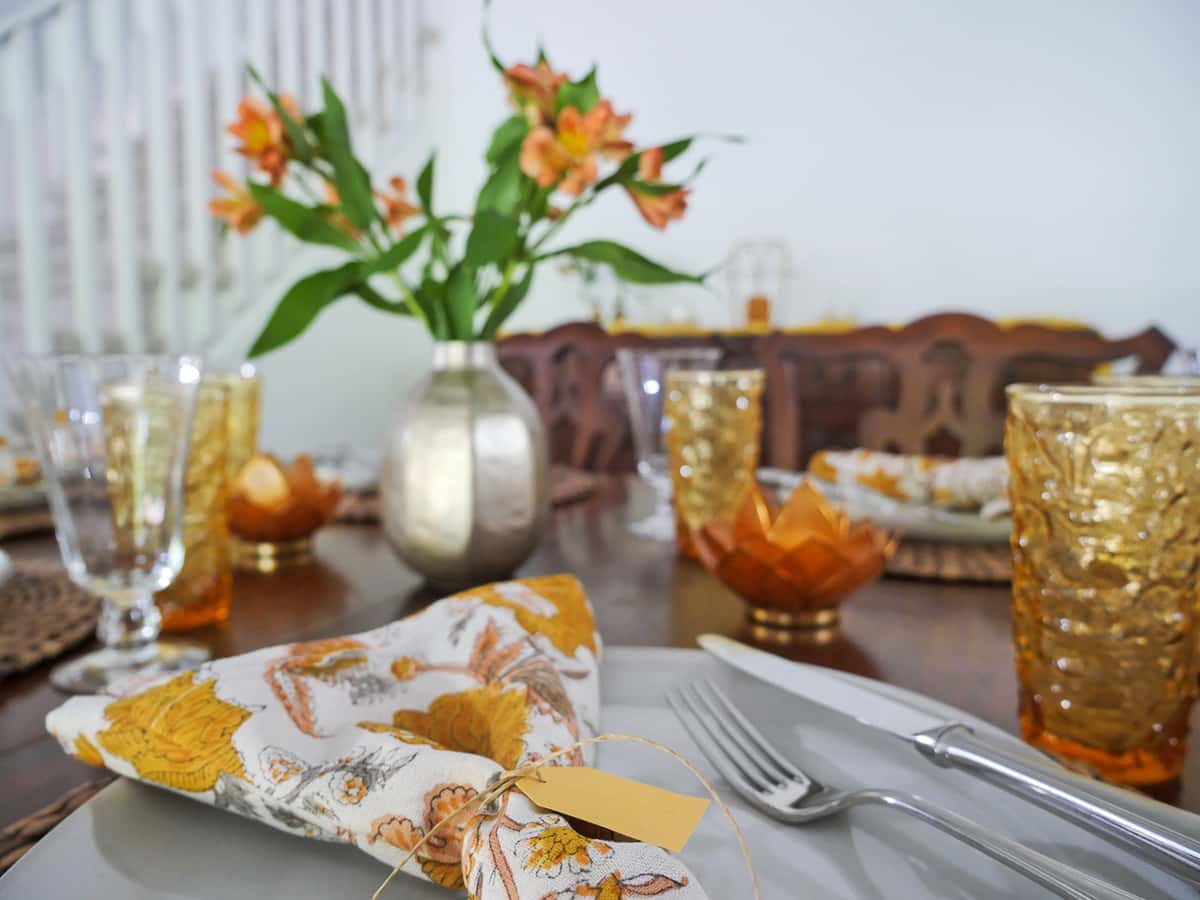
Small tip that changes everything: unfurl the napkin fully and let it drape off the edge of the plate rather than folding it into a tight square. Loose linen reads relaxed and expensive; crisp folds read banquet hall. Same napkin, ten seconds of difference. And buy alstroemeria over roses for this — you get four or five blooms per stem and they last nearly two weeks.
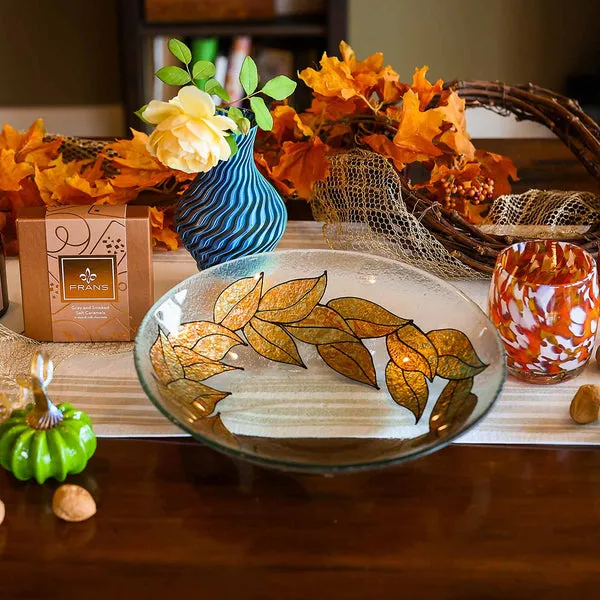
26. A Gold-Leaf Bowl Ringed With Twig and Leaves
The formula: 40 percent clear glass, 30 percent orange and gold leaf, 20 percent brown twig, 10 percent blue accent. That last 10 percent matters more than its size — the blue swirled vase is the only cool note in a very warm scene, and it stops the arrangement from reading as a single autumn blob. Swap blue for deep teal or plum and the math still works.
- Confirm the bowl actually sits flat on your runner, not on a seam.
- Check that leaves clear the candle flame by six inches.
- Make sure the runner width fits inside your table’s overhang.
- Decide the bowl’s purpose first — empty, or filled with fruit or gourds.
That last one matters. An empty patterned bowl looks like a mistake at a set table. Fill it with three small gourds and it becomes the anchor.
27. A Beige Skull on a Glass Stand Over Cobweb Fabric
The glass stand is the whole trick. It lifts the skull three or four inches off the table so it floats above the web-like runner instead of sitting in it, and the clear base disappears against the dark fabric. Without that elevation you have a skull on a cloth. With it, you have a skull hovering in fog, which is a completely different photograph.
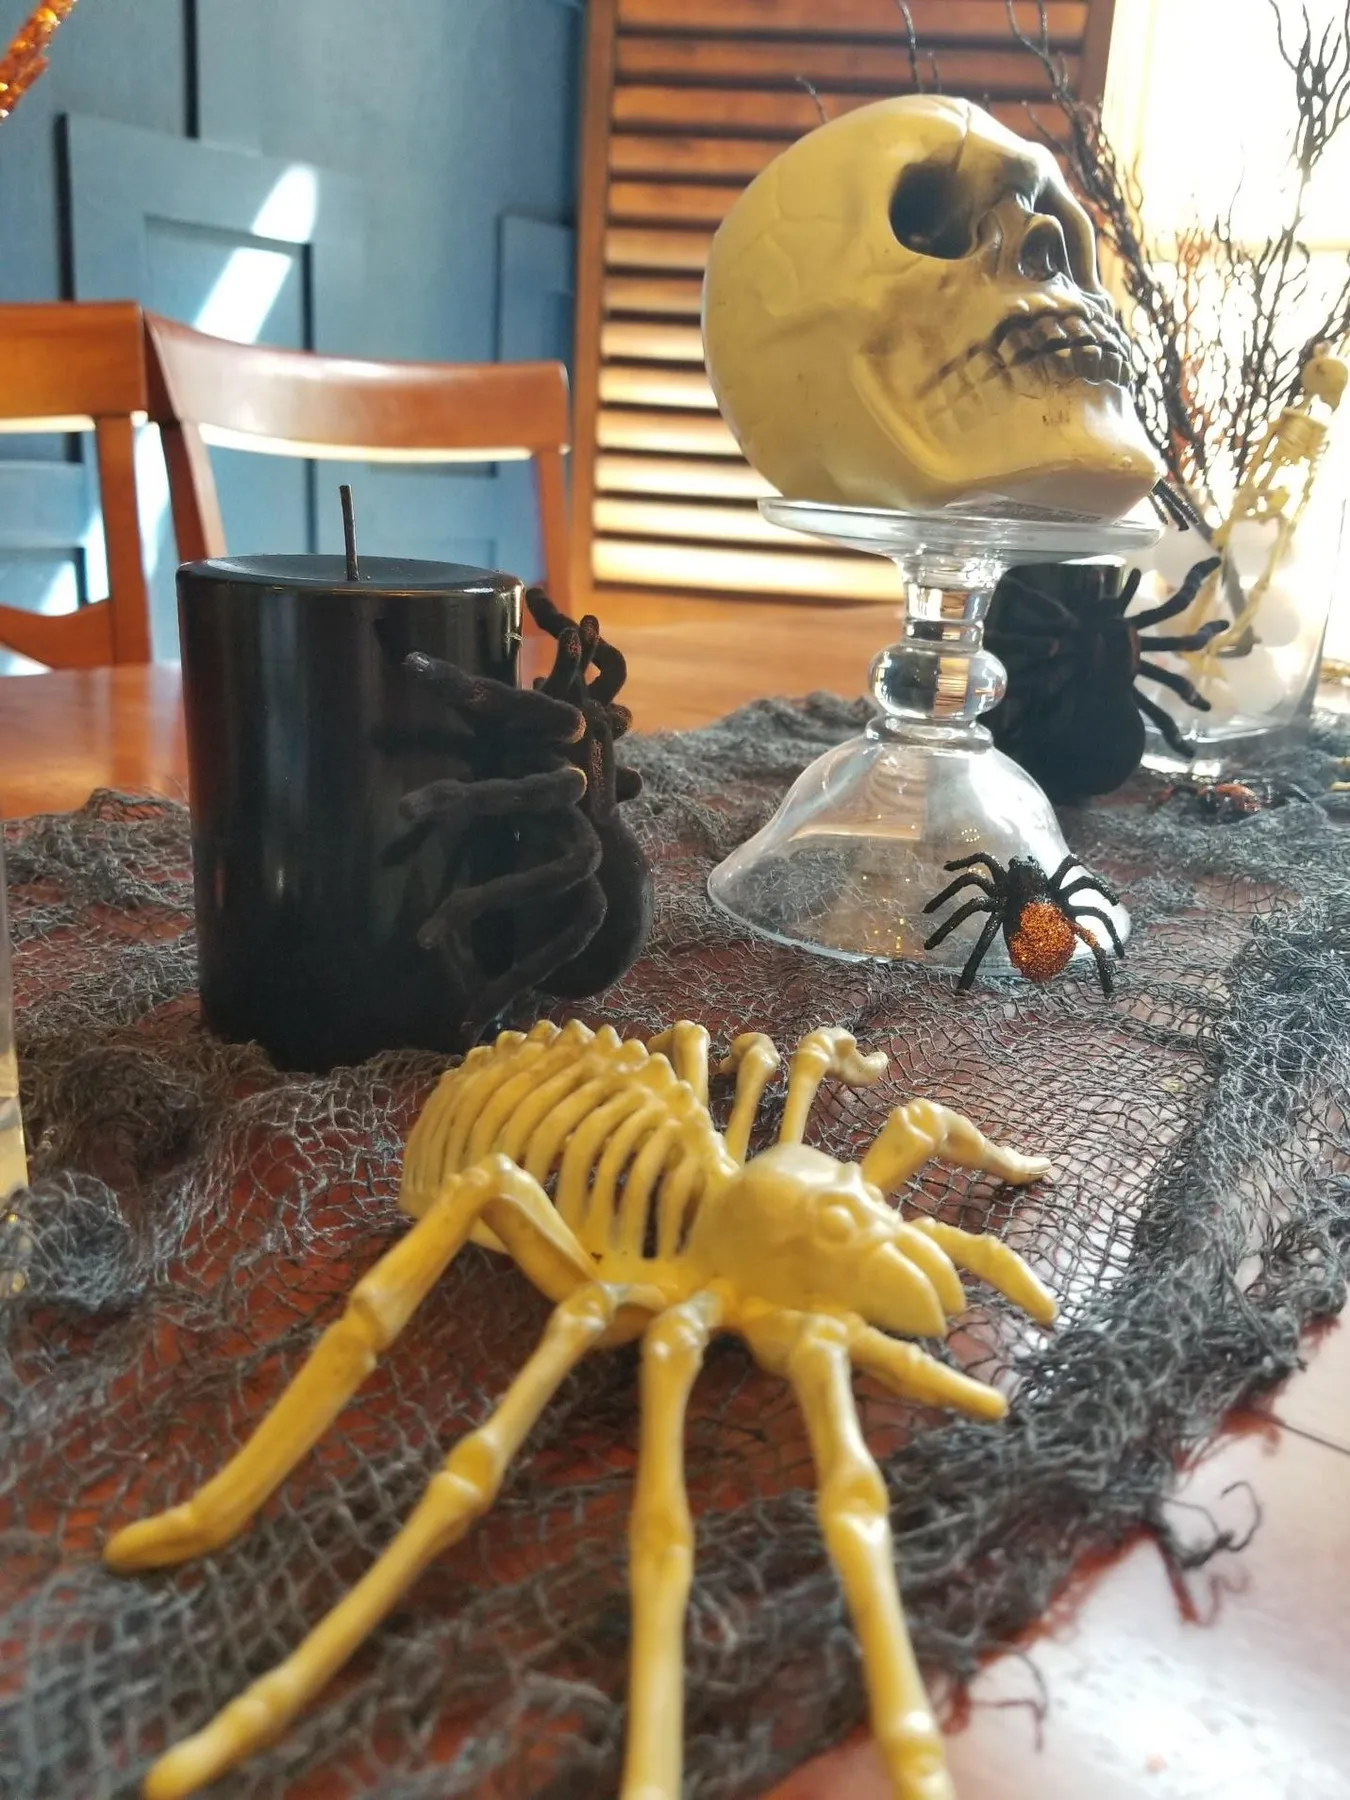
This is the small-table answer for Halloween. It needs about 10 inches of depth and 18 inches of width, so it fits a two-person bistro table, a console, or a narrow apartment dining table where a branched centerpiece simply won’t work. Keep the pillar candle shorter than the skull’s height so the composition steps upward, and drape the runner so it pools rather than ending in a straight cut.
28. Eyeball-Filled Vases and Copper Glitter Branches
Fill the vase in layers, not all at once. Eyeball filler at the bottom third, small skeletons pressed against the glass facing outward, then the glitter branches last so they don’t get buried. Pressing the skeletons against the glass is the detail that separates a good vignette from a jar of random plastic — you want to see them through the wall of the vase, not fish for them.
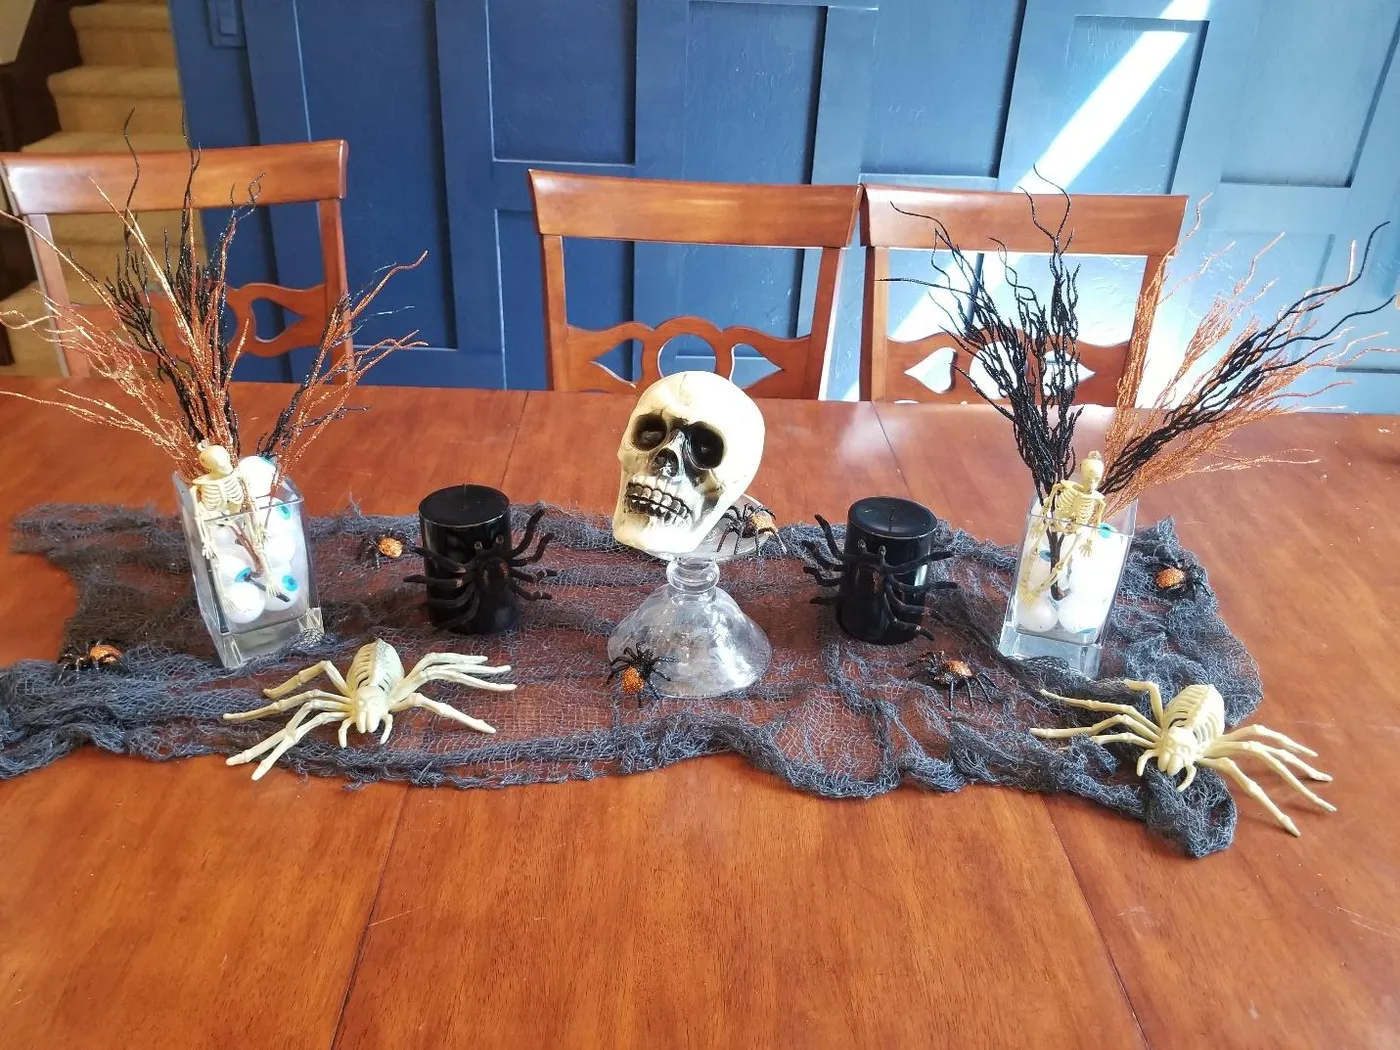
Copper glitter sheds everywhere, and it will migrate. Spray the branches with a light coat of matte sealant and let them dry fully before they go near food or fabric. Same rule as the skull-and-cobweb centerpiece: keep glittery, fuzzy, or shedding items off the actual dinner plates. Put them on the runner and let the chargers stay clean.
29. Dried Hydrangeas Lit From Inside the Vase
Dried hydrangeas go brittle in low humidity and limp in high humidity, which is a narrow window. Keep them away from heat vents and direct sun, and handle them by the stem only — the heads crumble if you grip them. Plan on replacing the arrangement every 12 to 18 months. The fairy lights inside run on a battery pack tucked into the pinecone filler, so budget for a fresh set of batteries each season.
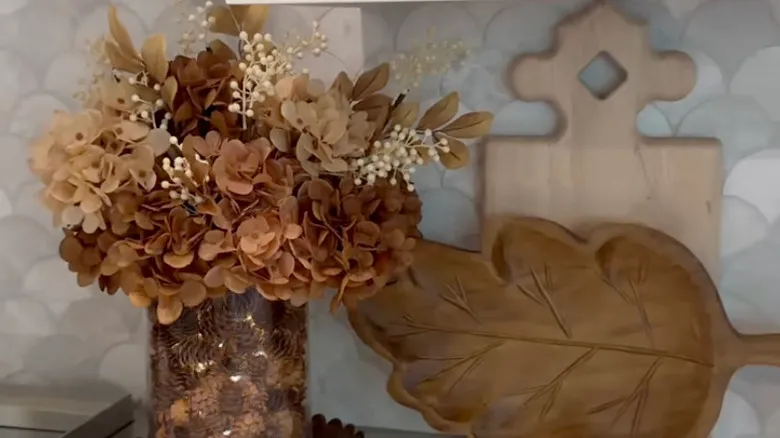
- Fill the vase a third of the way with pinecones.
- Coil the fairy light string around the filler, keeping the battery pack near the back.
- Cut hydrangea stems to varying heights, longest in the center.
- Add white berry stems last, poking out at three angles to break the dome.
- Set the carved wooden board behind the vase as a backdrop.
30. Pumpkin Placemats and a Grateful Maple Board
Engraved wood boards have become the centerpiece equivalent of a monogrammed towel — personal, giftable, and endlessly photographed. The 2026 version is smaller and word-based rather than a full scene, which is why it works as table decor and not just as a serving piece. It’s a low-commitment trend with real staying power, because the object still functions in January.
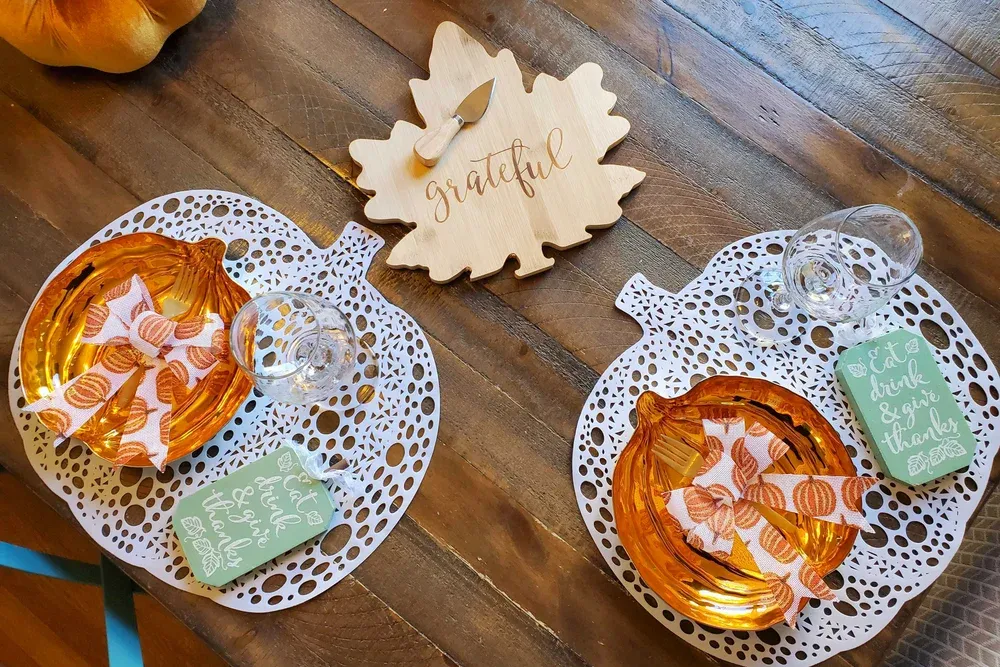
Sizing notes: this setting needs a table at least 36 inches wide so the white pumpkin placemats can sit opposite each other with a leaf board between them. On a longer table, repeat the board every two seats rather than stretching one. If your table is under 30 inches wide, the placemats will collide — use them as a charger on top of a plate instead and keep the tabletop bare wood.
31. A Stacked Pumpkin, Black Cat, and Witch-Hat Ghost
Stacked figurines are the cheapest way to buy personality. A jack-o’-lantern base, a black cat head, and a ghost in a witch hat run about $4 total at dollar-store prices, versus $30 to $50 for a single painted resin figurine of similar size. Check thrift stores in early October — people purge last year’s decor and you’ll find the weird, charming pieces that big-box stores stopped making.
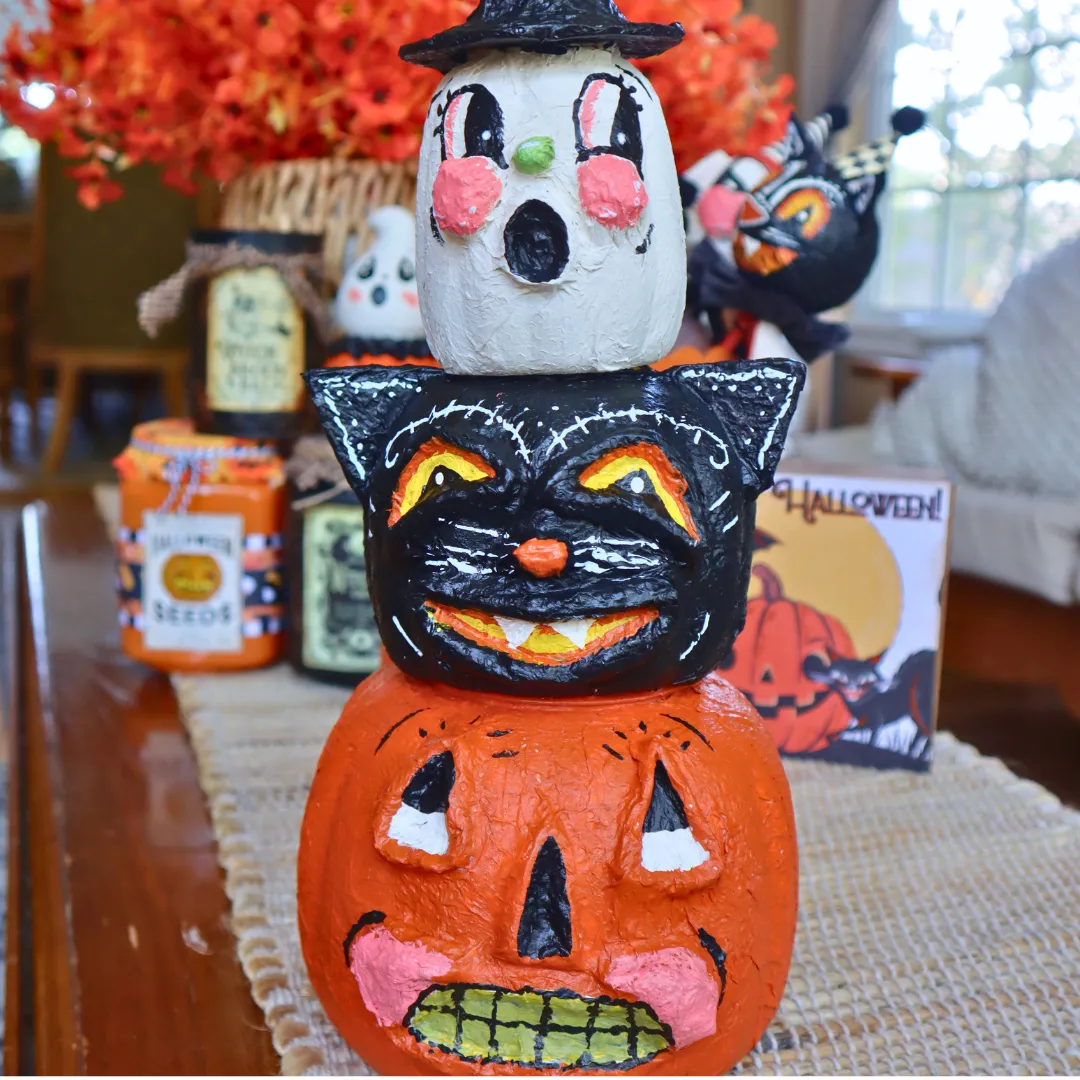
What makes this one land is the vertical stacking with three distinct expressions in about 10 inches of height. It’s a small joke in three acts, and jokes read better than displays. That’s the same reason the skeleton on the tray works — the pose tells you something. Set it on a woven runner so the base has texture, and keep the background flowers orange so the whole vignette agrees.
32. A Sunflower Ring Around a Melted Jar Candle
- Clear glass jar with candle: $1.25–6
- Artificial sunflowers, two stems: $2–8
- Faux fall leaves and berry clusters: $2–6
- Burlap ribbon, one roll: $1.25–4
- Miniature pumpkin: $1–3
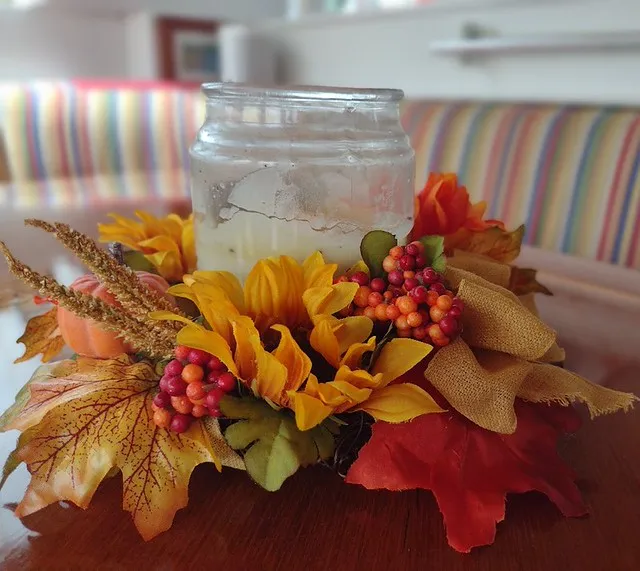
Total: about $8 to $27, and most of it is reusable next year.
It works because the candle isn’t sitting on top of the arrangement — it’s sunk into the middle, so the wreath surrounds the flame rather than decorating around it. That gives you a warm glow at the center of a ring of yellow and orange, which is exactly the composition your eye wants. It’s the same logic as the wrapped jar candle, just turned horizontal.
Your Table Has a Whole Year of Holidays Coming
Start with one vessel you actually like — a good glass jar, a woven tray, a black pot you painted on a Tuesday — and let it change clothes every season. That’s the difference between a house full of half-finished decor and a table that always looks put together for about $8 at a time.
📌 Pin this guide to your centerpiece board now — when the next holiday sneaks up on you, you’ll be glad you saved it.