
You know the moment: it’s 11 p.m., you’re forty pins deep into Disney Christmas trees, and everything you’ve saved either looks like a theme park gift shop exploded or costs more than your car. Neither is what you actually want in your living room.
We spent serious time digging through Etsy, the Disney Store, Target, Walmart, and HomeGoods to bring you only what’s actually worth your attention this year — from $6 ornaments to $480 light-up showpieces.
Inside you’ll find 26 curated ideas: character-covered trees, red-and-white polka dot classics, flocked trees with Mickey toppers, farmhouse ribbon work, and a handful of ornaments with no mouse in sight. Budget and luxury versions sit side by side throughout, so you can see exactly where the splurge pays off. And stay until the end — we break down the most common mistakes that can ruin these looks.
2026 is the year Disney decor stopped being kids-only. Grown collectors are styling character ornaments against neutral, grown-up palettes, which is exactly why these trees read festive instead of cartoonish.
📌 Save this to Pinterest for later — you’ll want to revisit these ideas.
1. The Mickey Lamppost That Greets Guests Before the Door
Oversized character light sculptures are the outdoor story of 2026. What began as a theme-park novelty now shows up on front porches, because shoppers treat outdoor decor as an extension of the living room — same nostalgia, bigger scale. The lamppost shape earns its keep for one reason: it’s vertical. The glowing Mickey head sits at eye level and pulls your gaze up from the snow, while the striped pole anchors the whole thing so it reads holiday rather than cartoon. Nostalgia-driven decor has held for four seasons running; this one has staying power.
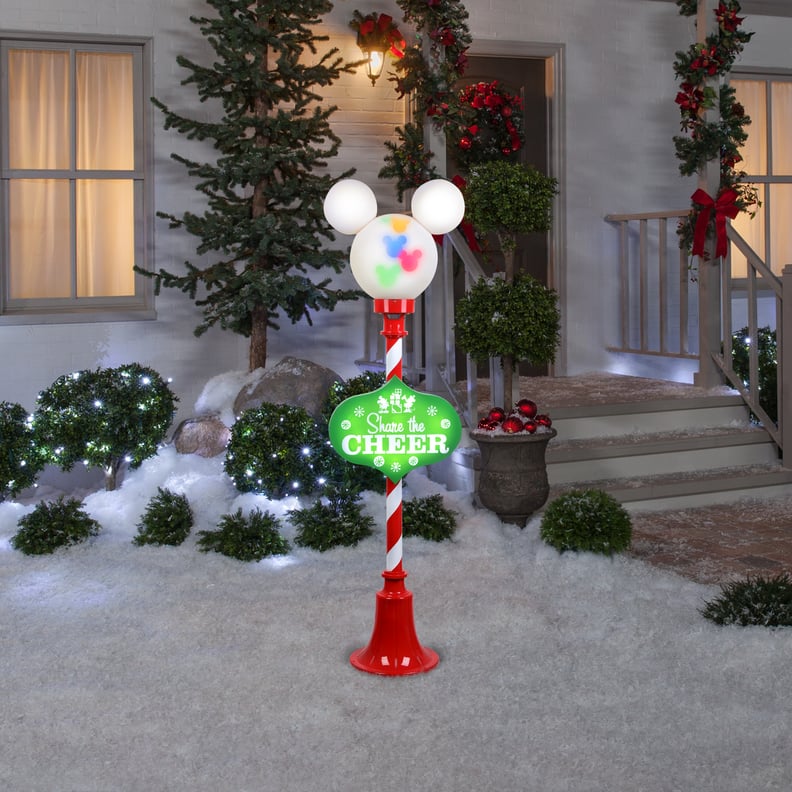
Building the light-post moment, start to finish:
- Set a 6-foot post in a 20-pound weighted planter — wind, not snow, is the real enemy.
- Wrap the bottom 18 inches in red-and-white striped ribbon, overlapping by half each pass.
- Zip-tie a pre-lit Mickey head to the top, then run one cord down the back so nothing dangles.
- Hang the illuminated sign at chest height, where photos actually get taken.
- Edge the bushes behind it with warm white strands, one per 18 inches of shrub.
Budget 90 minutes and roughly $120 if you already own the strands — closer to $250 starting fresh.
2. Red, Yellow, and Black Baubles: Mickey’s Original Color Code
Here’s the formula: 55% forest green base + 30% red, yellow, and black character color + 10% white glove accents + 5% warm light glow. The genius of the original Mickey palette is that it’s built from primaries, so it stays legible from across the room even when the branches get crowded. Swap the yellow for gold and it reads dressier; swap black for charcoal and it softens; trade white for cream and the whole tree warms up. Keep the 55% green base though — that’s the neutral holding everything together.
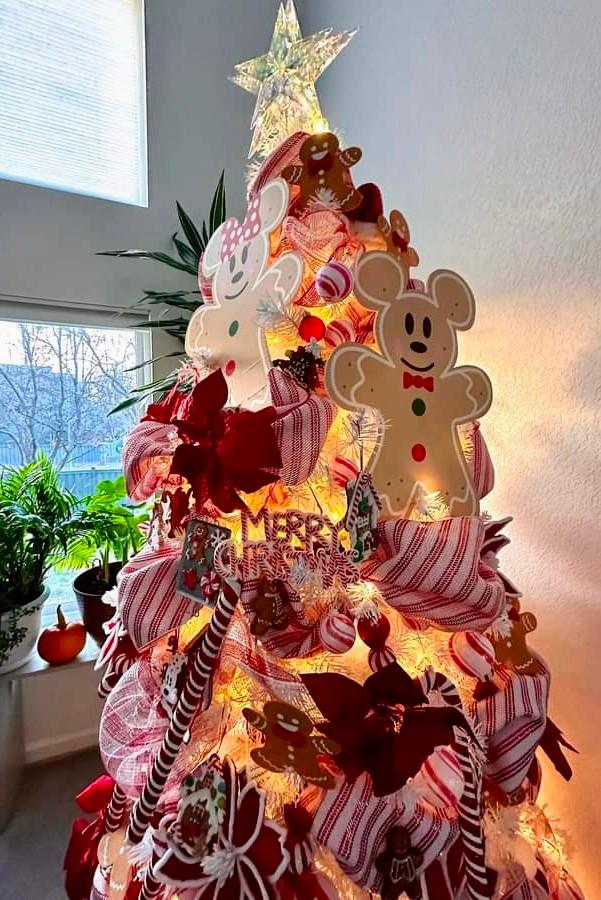
Ornaments read as pairs, not singles. Hang the white glove and yellow shoe shapes in matched sets within a 12-inch radius, so the eye completes the character instead of hunting for a missing half. Then work in three bauble sizes — 2, 3, and 4 inch — with the largest balls tucked into the lower third, where branches are strongest and the weight disappears. Roughly 100 lights per vertical foot keeps the glow even; anything less and the darker greens swallow the red.
3. Hanging Lighted Ear Spheres Above a Starred Wreath
The hanging ear spheres are the whole idea. Take them away and you’re left with a lovely but ordinary wreath — pretty, forgettable, the kind of thing your neighbor also has. Suspended at staggered heights, they turn dead ceiling space into part of the display and give the wreath something to answer to. Keep the spacing uneven on purpose: three spheres at 6 feet 6 inches, 7 feet, and 7 feet 6 inches reads designed, while an even row reads like a store display.
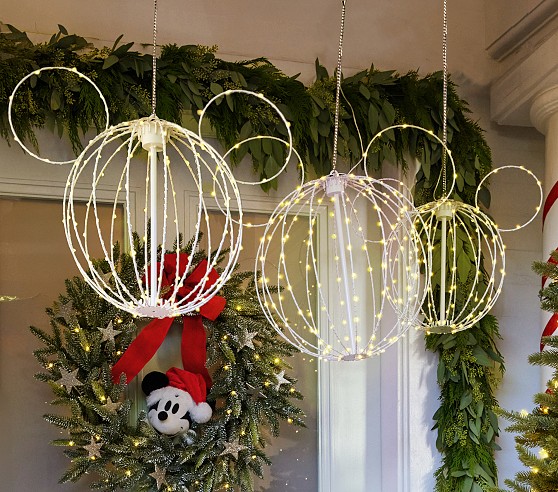
This setup needs ceiling height you can actually work with. Figure a minimum of 8 feet, with the lowest sphere hanging no lower than 6 feet 6 inches so nobody walks into it. The wreath itself wants a 36-inch span, which means a foyer or stair landing at least 5 by 8 feet. Shorter ceilings aren’t a dead end — the flocked tree topper in Idea #10 gives you the same whimsy at half the vertical commitment.
4. A Blue-Sided Porch With Plaid Pillows and Glowing Mice
What this porch actually costs:
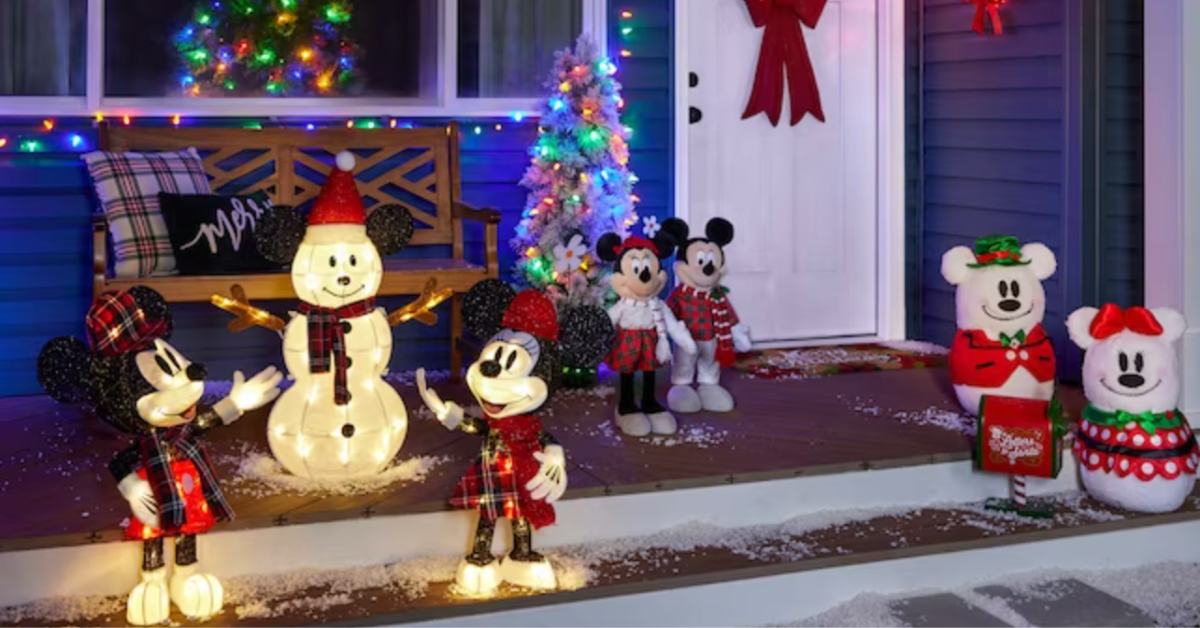
- Light-up Mickey and Minnie figures: $80–$220 for the pair
- Frosted 3-foot tree with multicolored lights: $40–$90
- String lights for railing and siding: $25–$60
- Plaid and holiday-lettered accent pillows: $30–$70
- Plush snowman versions of the mice: $35–$80
Total: roughly $210–$520, depending on how many characters you collect. Budget alternative: one light-up figure instead of two, dollar-store multicolor strands, and thrifted plaid pillows — same joyful porch for under $150.
Two things people forget on a porch setup. First, the blue siding is doing you a favor — it acts as a cool backdrop that makes red and green pop. But plush figures fade fast in direct sun, so keep the soft ones on the shaded bench and the light-up mice out front. Second, you need a GFCI outlet within reach. Running an extension cord across a walkway is the most common shortcut, and it’s the one that trips a breaker or a guest.
5. Sled-Riding Mice and a Golden Sack of Tiny Gifts
You don’t need the collectible version of this vignette. A thrifted sled ornament runs about $4, a mesh gold bag from a craft store is $3, and a pack of 24 miniature wrapped gift boxes is $6. Nest the tiny gifts inside the bag, tuck the sled beside it, and you’ve built the same moment of scale contrast for under $15 — versus $50 to $70 for the boxed set. This is the budget version of Idea #3‘s layered approach: small, medium, and one hero piece doing all the talking.
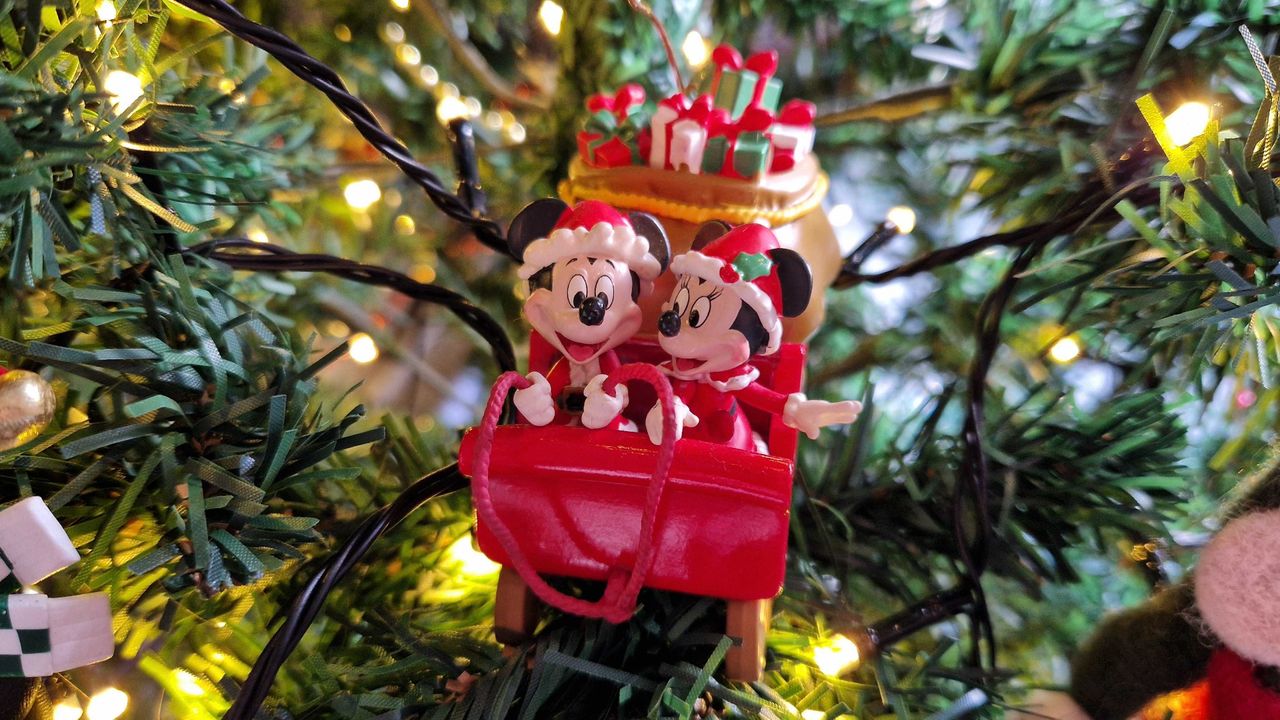
The golden sack of miniature gifts is the detail that sells the whole ornament. Without it, you have two mice in a sled — cute, but a single note. With it, you get scale play: tiny gifts beside small figures beside full-size branches, which makes the ornament feel like a scene instead of an object. If you’re building this yourself, keep the gift boxes under an inch tall and tie them with thread rather than ribbon, or they’ll overwhelm the sled.
6. Kissing Mice Under Mistletoe, Wreaths in Every Window
Three principles are doing the heavy lifting here. Repetition: the same lit wreath appears in every window, which turns a wide facade into one rhythm instead of five competing decorations. Consistency: every strand is warm white around 2700K, so nothing looks mismatched from the street. And color echo: the red front door repeats the red tucked into the yard art and the wreaths, pulling the eye straight to the entry — exactly where you want a guest aimed.
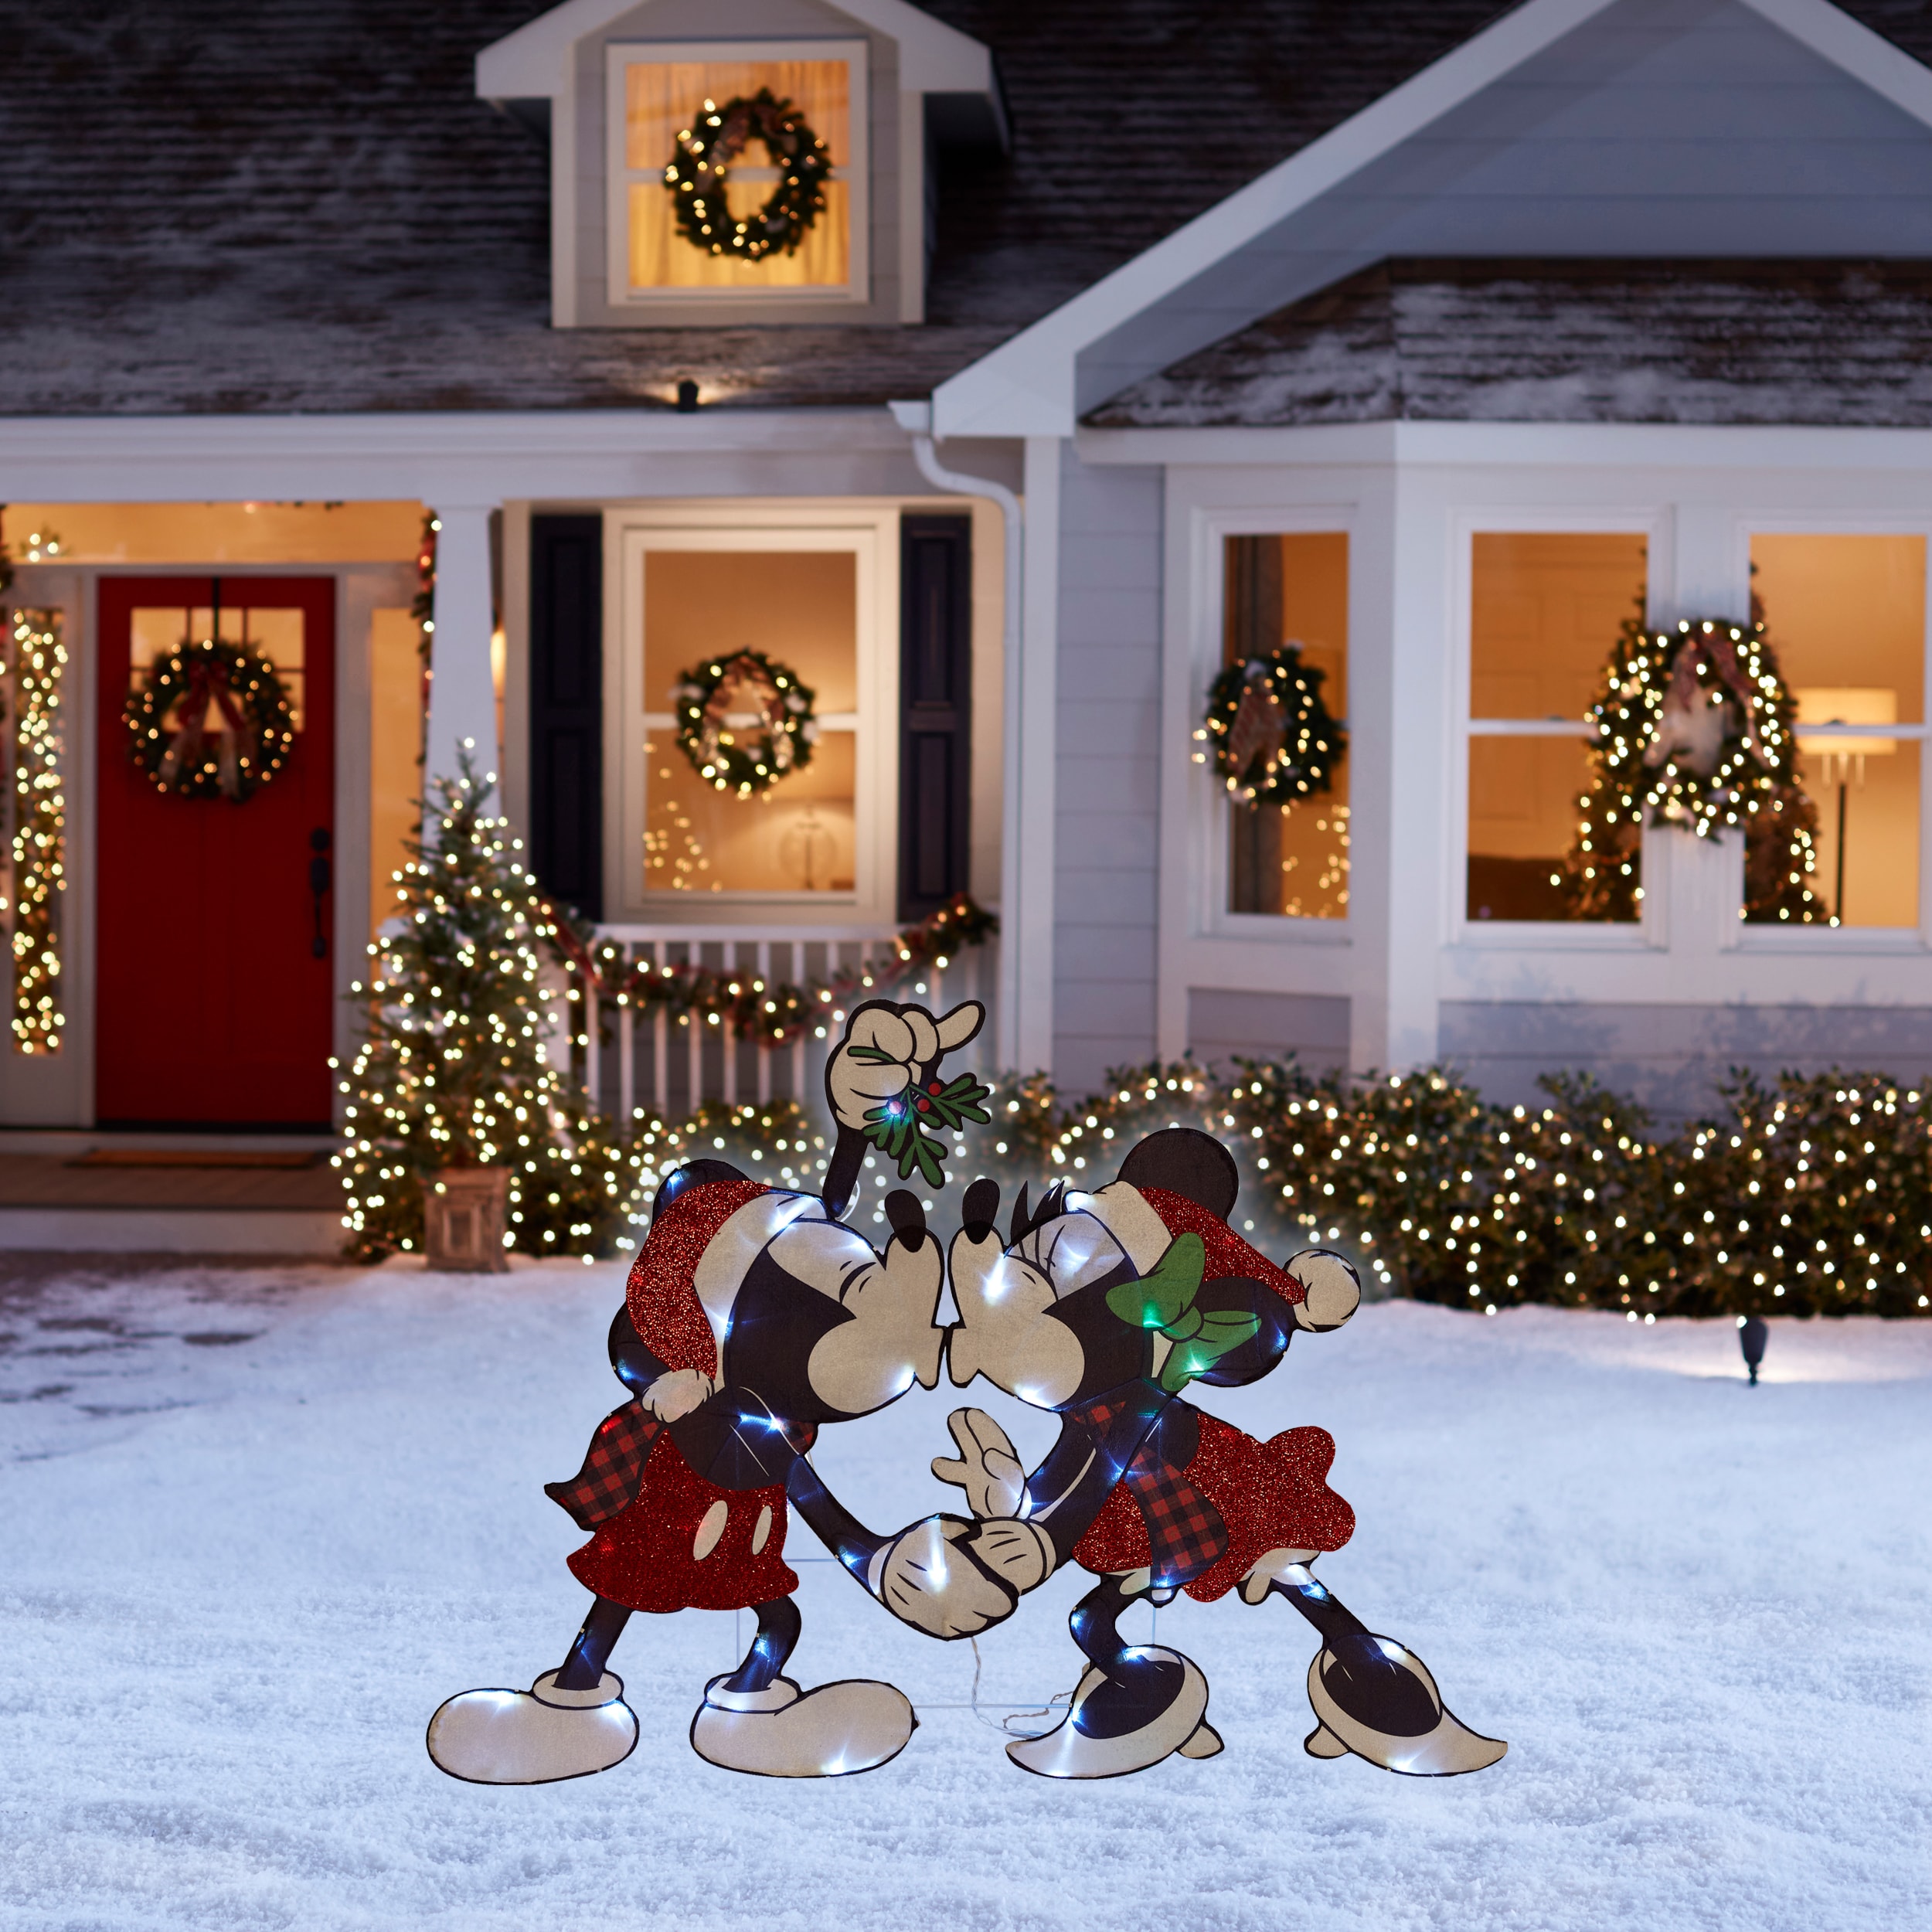
This is a wide-house design, not a small-yard one. It works best on a frontage of 20 feet or more with windows spaced 8 to 10 feet apart, so the wreaths get room to breathe. Leave at least 12 feet of yard depth for the kissing figures, or photos from the sidewalk will crop the house. On a smaller facade, pick one hero — either the mistletoe couple or the window wreaths — and let the rest of the house stay quiet.
7. That Little Red Warning Icon Deserves a Second Look
That red warning icon is worth more than the product photo. Listings for light-up character decor often reuse stock images and skip the details that matter: actual height, cord length, whether the bulbs are replaceable, and whether the coating is rated for outdoor use. Look for a UL or ETL listing on anything that plugs in, check the return window before you buy, and measure the space you’re filling — a “life-size” Mickey can arrive at 36 inches and look stranded on a full-size porch.
Run through this before you check out:
- Measured height and width of the spot you’re filling
- Distance from the nearest outdoor outlet
- Bulb type, so replacements still exist next December
- Return window and restocking fee
- Whether the finish is rated for covered outdoor use
Five minutes of checking saves a January full of returns.
8. Gingerbread Mice on a White Table With Rattan Chairs
Tabletop centerpieces have a height ceiling: keep everything under 12 inches tall, or you’ll be leaning around a gingerbread mouse to talk to your mother-in-law. Arrange the pieces in a loose triangle inside a 24-inch tray, with the tallest figure at the back and the smallest at the front corner, and leave six inches of empty tray at the edge. That negative space is what makes it look styled instead of crowded.
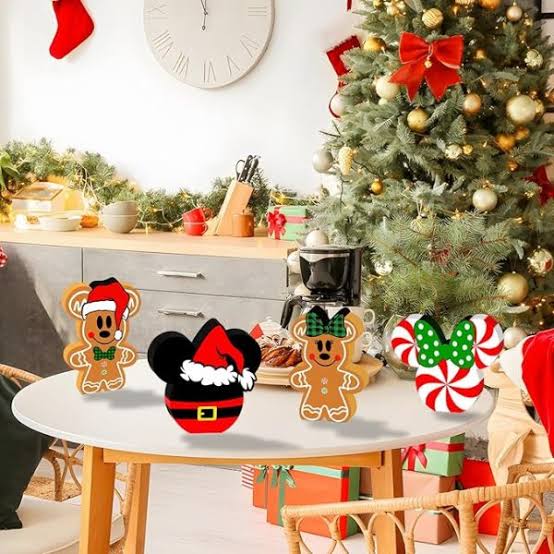
The formula here: 50% white base (round table, painted chairs, light walls) + 30% red and green character color + 15% gold + 5% black outline. Rattan and light wood keep the white from feeling cold, which is why the chairs matter as much as the decorations. Want a different mood? Hold the same ratios but shift the accent to silver and icy blue for a frostier table, or to copper and cranberry for something warmer.
9. Polka Dot Bows and a Matching Skirt in Red and Black
Polka dot bows and glittered ornaments shed. Expect a fine dusting of glitter on the tree skirt and floor through December — a lint roller handles fabric, and a damp microfiber cloth gets it off hard floors without smearing. Fabric bows need a quick fluff and a steam every season, or they flatten into sad little pancakes. Store everything flat in tissue rather than a jumbled bin, and plan on replacing one strand of lights per year; thin-wire sets always fail first.
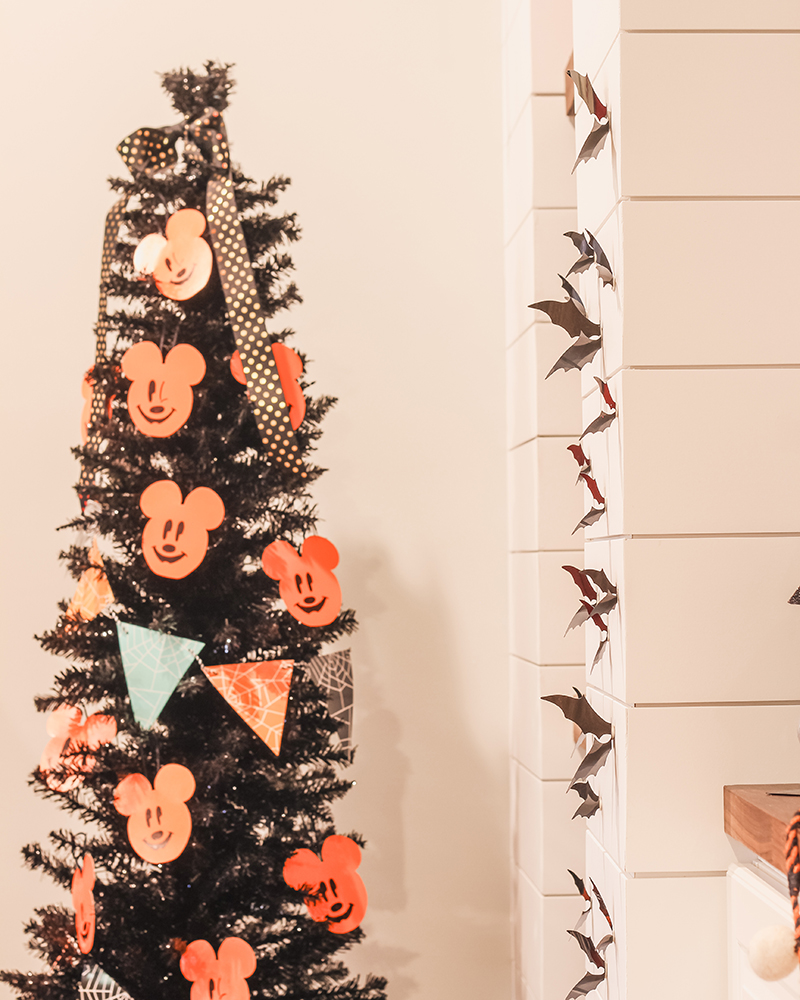
The red-and-white polka dot look is one of the cheapest themes to fake. A roll of polka dot ribbon from a dollar store is $1.25 and makes 10 to 12 bows. A plain red skirt can be upgraded with iron-on dots for about $8 total. And a can of red or black spray paint turns dollar-store baubles into a matched set — six ornaments for $5 instead of $30. Buy the tree itself secondhand from Facebook Marketplace in October, when people are clearing storage.
10. Flocked Branches, a Teal Glitter Sphere, and a Mickey Topper
Flocked trees eat light. The white coating absorbs and diffuses glow, so you need roughly 30% more strands than you’d use on a plain green tree — think 125 to 150 lights per vertical foot. Also secure the topper properly: run a zip tie through the top branch collar and around the topper base, or set it on a short dowel pushed into the top third. A multi-tier topper tips over the second someone bumps the tree.
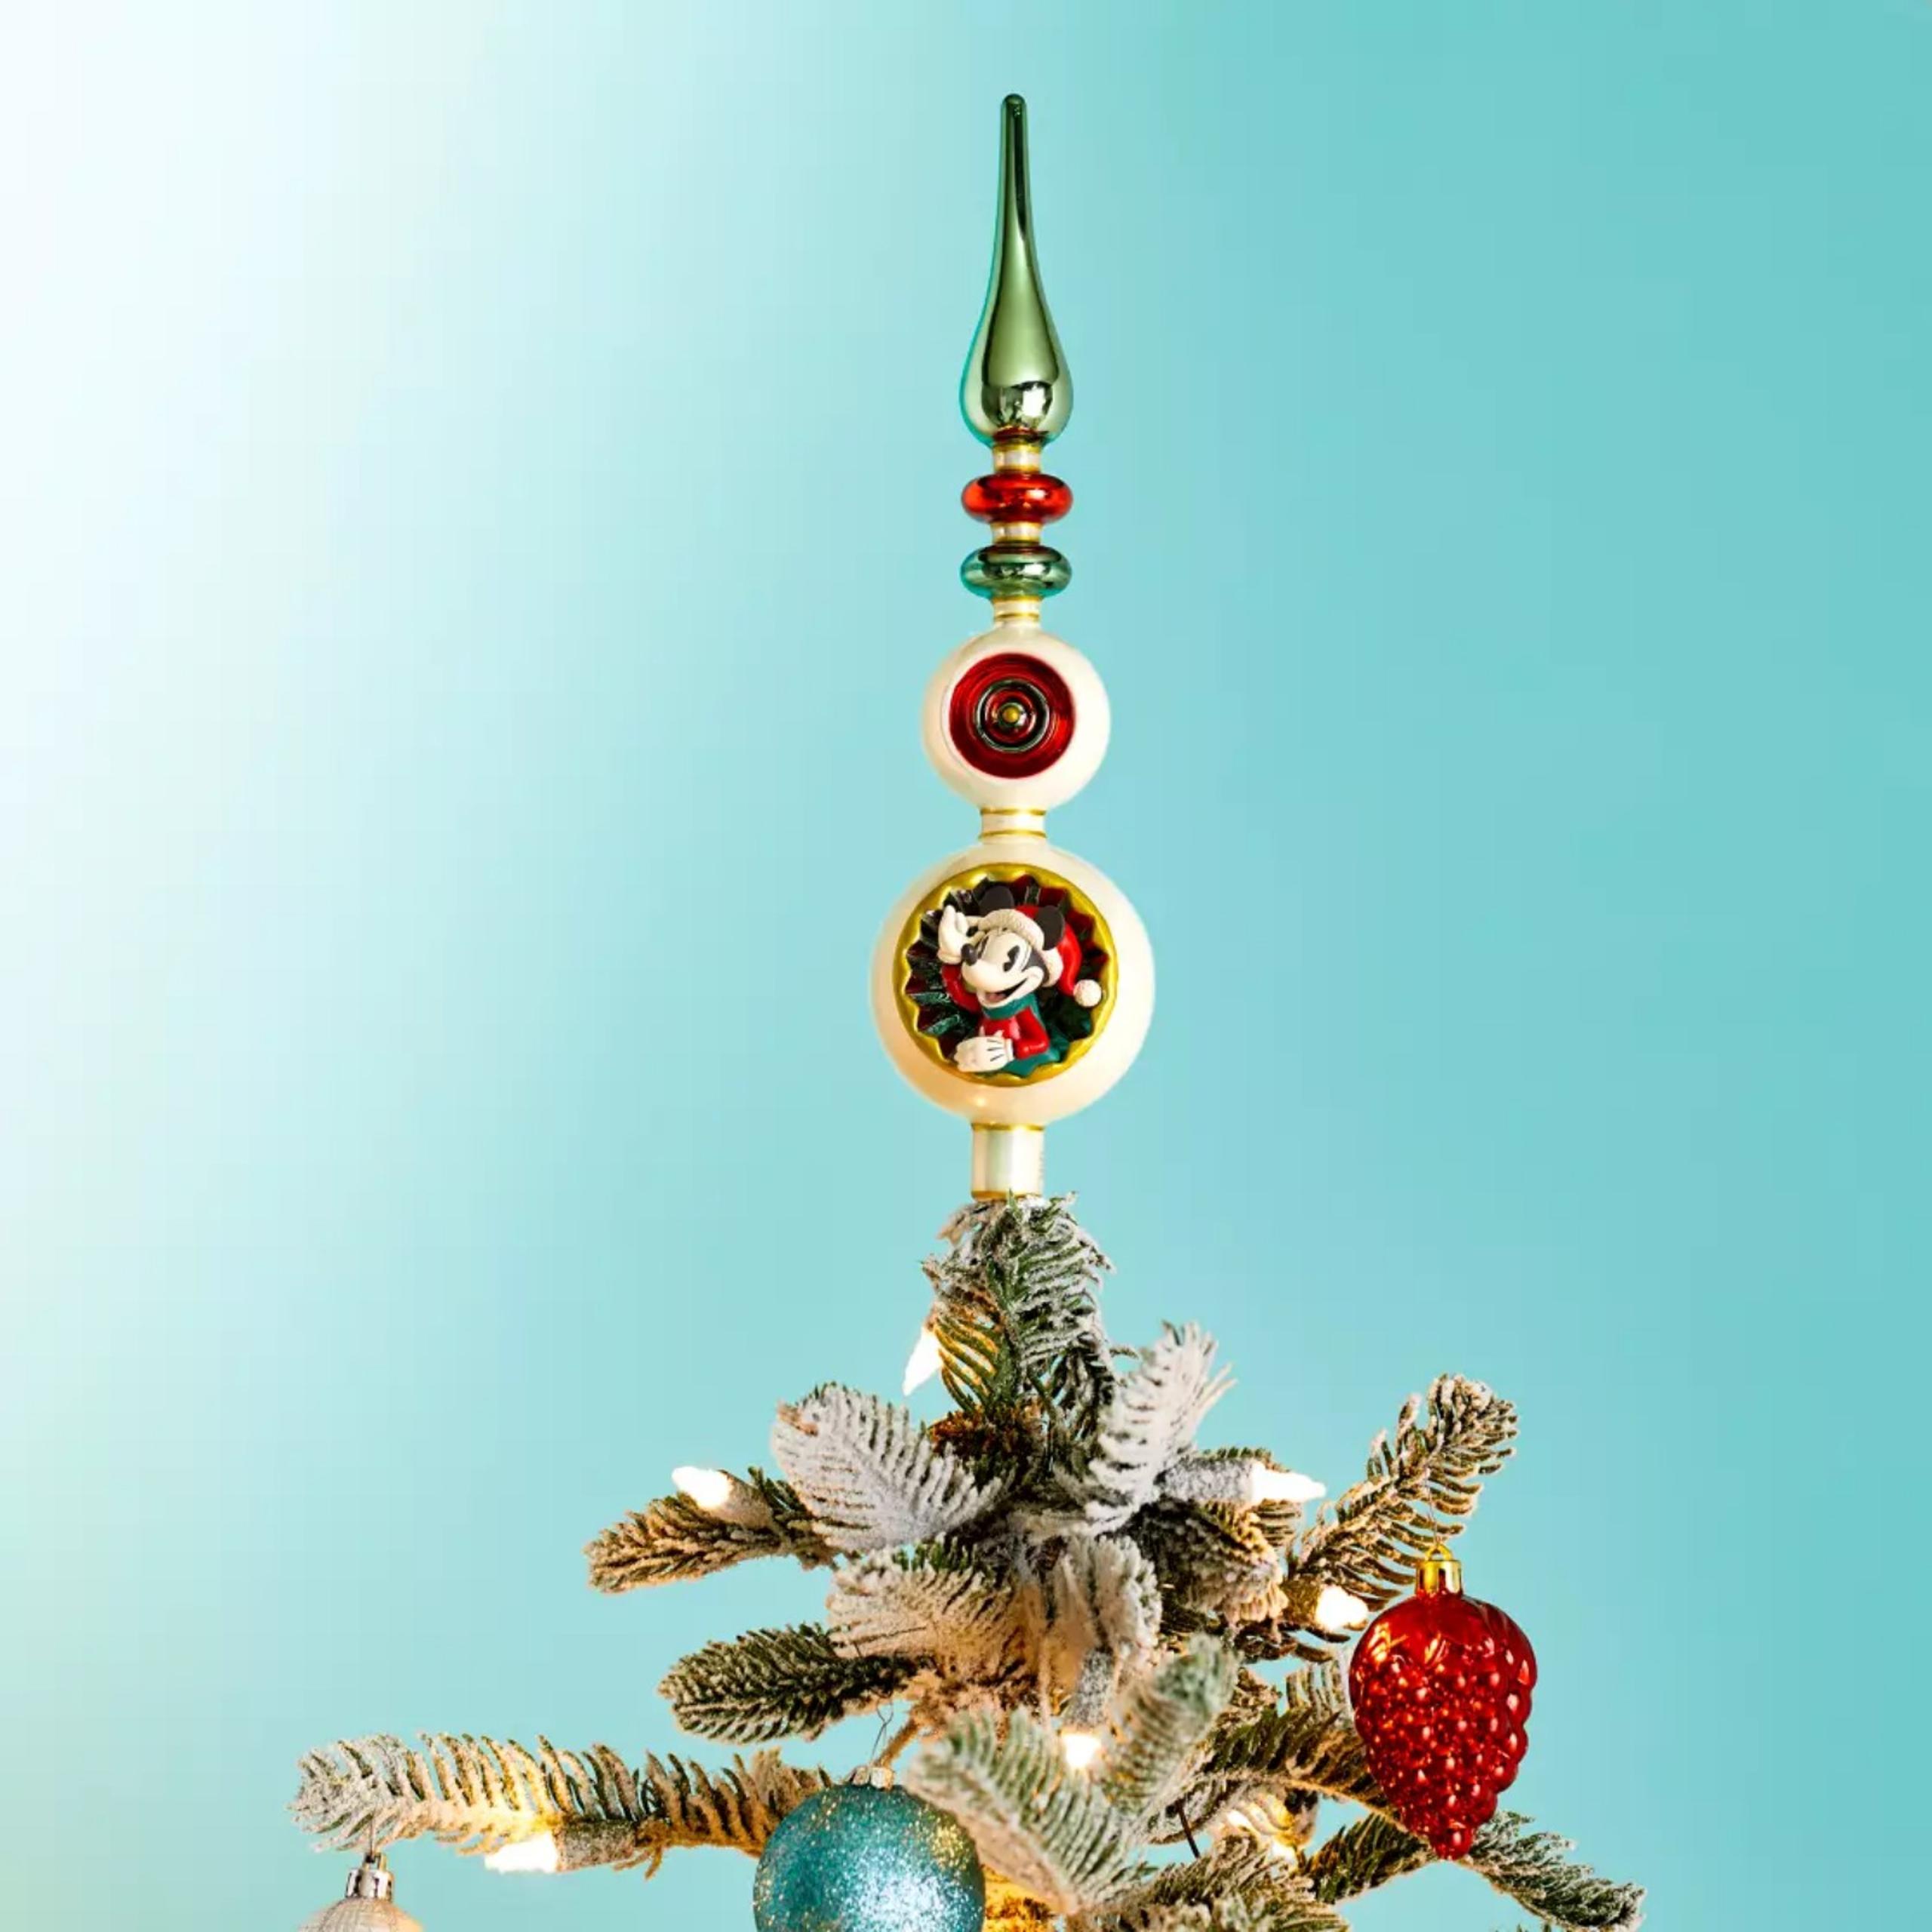
The topper isn’t really a topper — it’s a tiny vignette. The multi-tiered structure with the festive figure at the center reads like a miniature display case sitting on the tree, and that’s what makes the flocking feel intentional instead of dusty. Compare with Idea #3, which uses the same floating-sphere idea at ceiling height; this version keeps the whimsy but stays within arm’s reach.
11. A Green Resort Ornament Against a Blurred Mantel Garland
Building the layered mantel garland behind the tree:
- Start with a 6-foot faux cedar garland as the base and fluff every branch outward.
- Lay a second, thinner garland on top, offset a few inches so it reads layered, not doubled.
- Weave the lights up from underneath, so bulbs sit inside the needles rather than on the surface.
- Add three or four taper candles in staggered heights, never directly under the greenery.
About 45 minutes and $35 if you already own the lights.
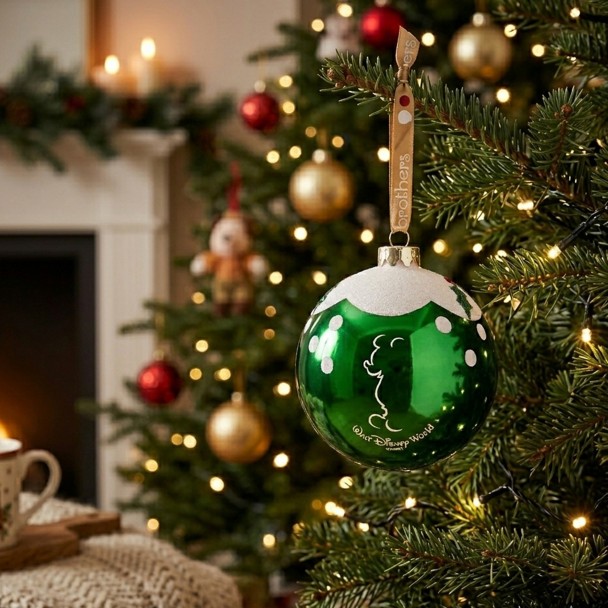
Souvenir ornaments are the quiet trend of 2026. Instead of buying a themed set, shoppers are picking up one dated piece per trip — a resort ornament here, a character globe there — and letting the tree accumulate a story. It’s the same instinct behind gallery walls, applied to branches. It holds up because it’s personal: a tree of bought-in-bulk baubles looks identical to everyone else’s, while a tree of specific memories can’t be replicated. Start now and by 2030 you’ll have a real archive.
12. A Merman Santa With a Red Glitter Tail
Multicolor lights are a deliberate choice here, not laziness. A novelty ornament with iridescent scales and a glitter tail needs busy light to look alive — warm white alone flattens it into a silhouette. The red, blue, green, and yellow bulbs also pick up different facets of the finish as the tree shifts, so the ornament changes depending on where you stand. Mixing a matte sculpted base with glitter toppings adds one more layer of texture without adding another color.
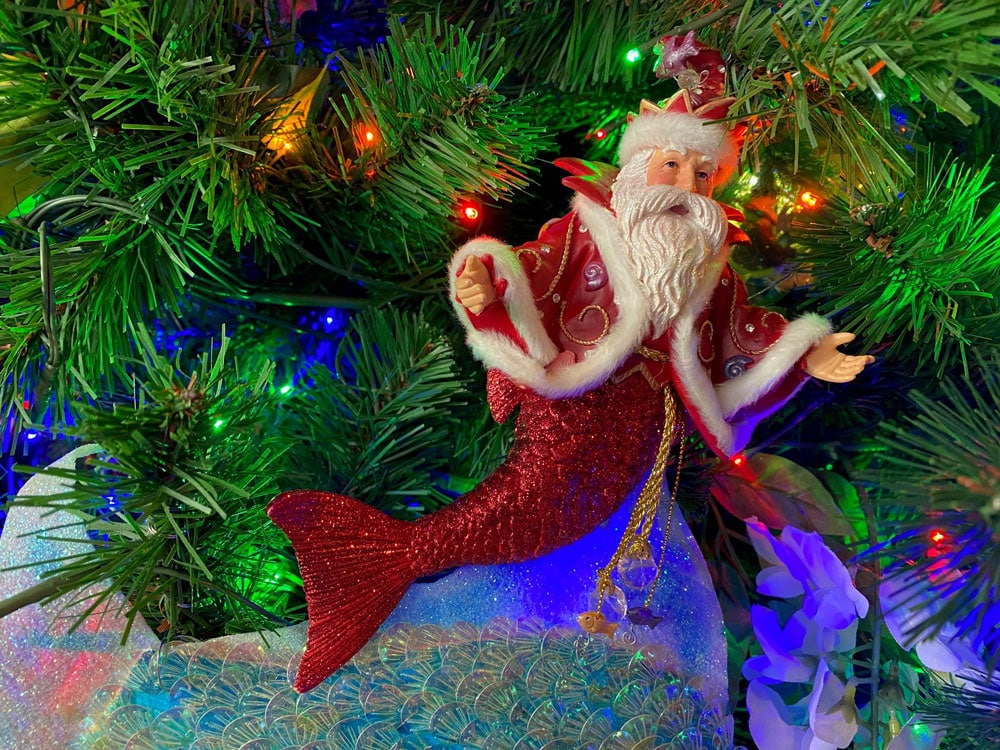
Novelty ornaments can be a one-season purchase. Specific character pieces are usually made in limited runs, so replacing a broken one next year may be impossible, and multicolor strands are notoriously hard to match — a new set will be a slightly different red. Buy a spare strand when you buy the first one. Also, glitter finishes shed; a quick coat of clear matte sealer on the tail before hanging saves you a February of vacuuming.
13. White Gloves, Striped Baubles, and a Polka Dot Skirt
What a full red-and-white Mickey tree runs:
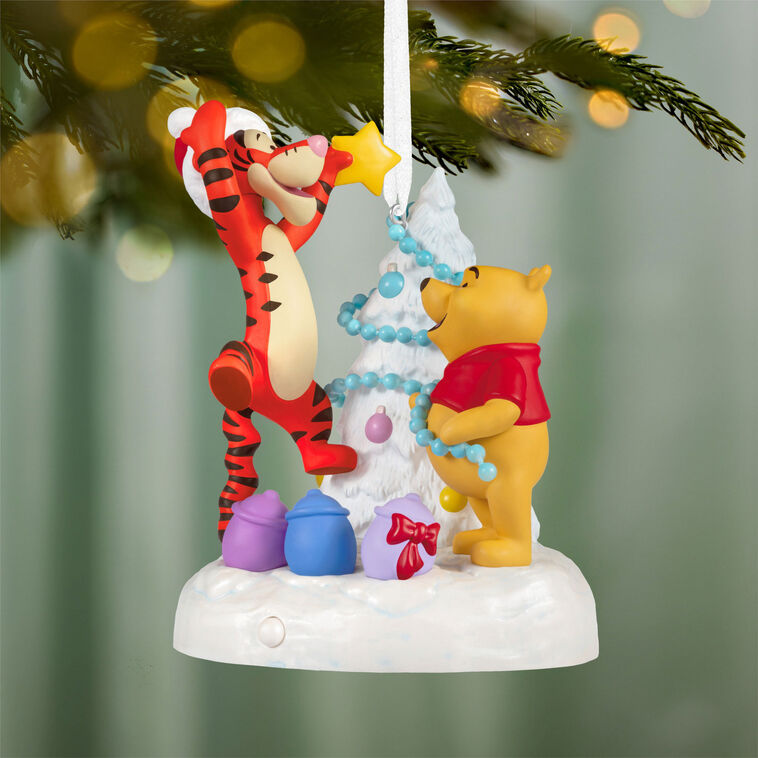
- 7.5-foot artificial tree: $180–$400
- Character ornaments and glove shapes: $120–$300
- Warm white light strands: $30–$70
- Polka dot tree skirt: $25–$60
- Large bow topper: $20–$45
- Character-patterned gift wrap: $15–$30
Total: $390–$905. Budget version: thrifted tree, dollar-store baubles plus a $12 pack of character ornaments, and a DIY skirt — roughly $180 for the same read.
This tree runs 60% red + 25% white + 10% black + 5% green foliage. The secret is repeating one motif rather than mixing patterns: polka dots appear on the skirt, the bows, and the gift wrap, which is why a tree this busy still reads cohesive. Held at those ratios, you could swap red for pink and white for cream for a softer version, or go red and green with white dots for something more traditional — the structure survives the color change.
14. A Gold Castle Ornament Held Up to the Light
If you’re photographing ornaments for your own boards, hold the piece at eye level about 18 inches from the tree, hanger facing the nearest light source, and shoot at a 45-degree angle. Backlit bokeh from the tree does the styling for you. And when you’re hanging small metallics like this castle, cluster them: a single 2.5-inch ornament vanishes on a full tree, but three grouped within a 10-inch radius read as one intentional moment.
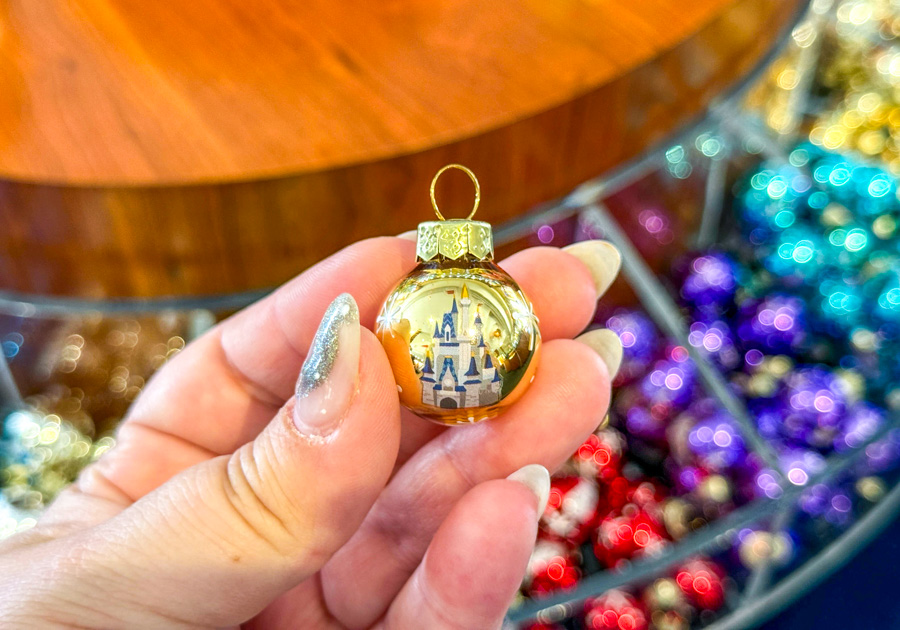
Small ornaments need small stages. Anything under 3 inches gets lost on a 9-foot tree — they float in the branches like confetti. Put them on a 4 to 5-foot tabletop tree, or cluster them low and front-facing on a full-size tree where they’ll be seen up close. On a 7-foot tree, plan on 120 to 150 ornaments total, and count the small ones as half an ornament each when you’re doing the math.
15. A Mirrored Maleficent Ornament That Reflects the Whole Tree
The mirrored finish is what makes a villain ornament worth hanging on a hero-heavy tree. That silver surface acts like a tiny mirror, catching the lights and colors around it, so instead of competing with red and green it quietly amplifies them. Remove it and the palette flattens. It’s also why one or two dark-character pieces can balance a whole tree of bright ones — they reflect rather than add.
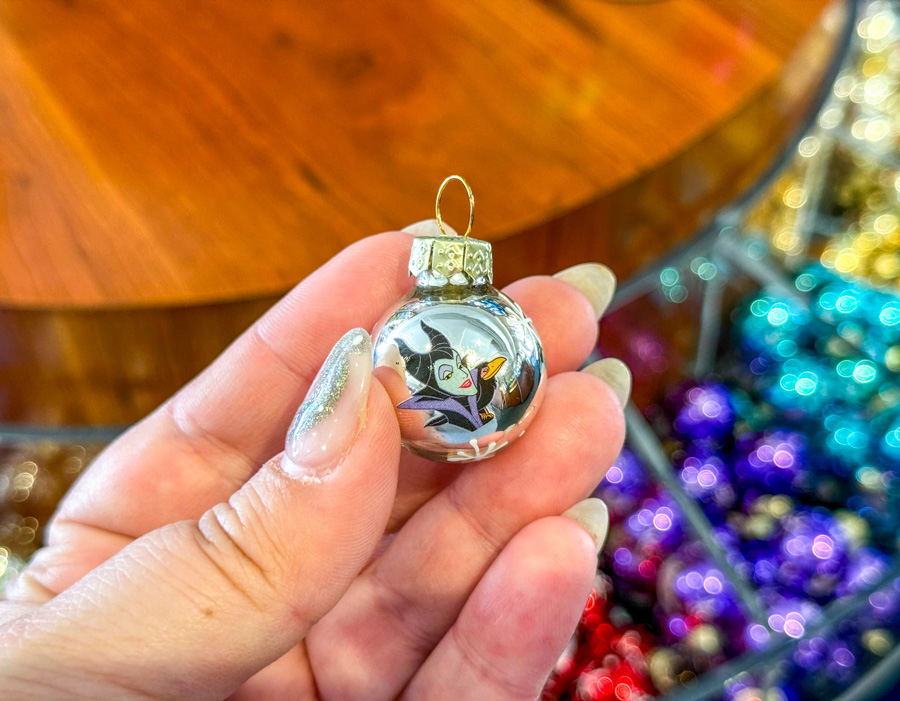
Mirrored ornaments are the highest-maintenance pieces you’ll own. Fingerprints show instantly, so handle them by the cap, not the sphere. Skip ammonia-based glass cleaner — it clouds the mirror coating over time; a dry microfiber cloth is all you need. Store them in individual tissue wraps, never in a bin with metal hooks rattling around. Expect the finish to dull slightly after three or four seasons, at which point they’re better off in a bowl on a shelf than on a tree.
16. Fuchsia, Snowflakes, and a Very Fancy White Cat
A saturated color needs boundaries: 70% one bold hue (fuchsia, here) + 25% white + 5% gold. The white cat and the painted snowflakes aren’t decoration, they’re breathing room — without them the fuchsia turns muddy under warm light. Keep any secondary colors in adjacent hues; pink and purple play nicely, pink and orange start a fight. This is the pink cousin of Idea #13, which runs the same dot-and-motif logic in red and white.
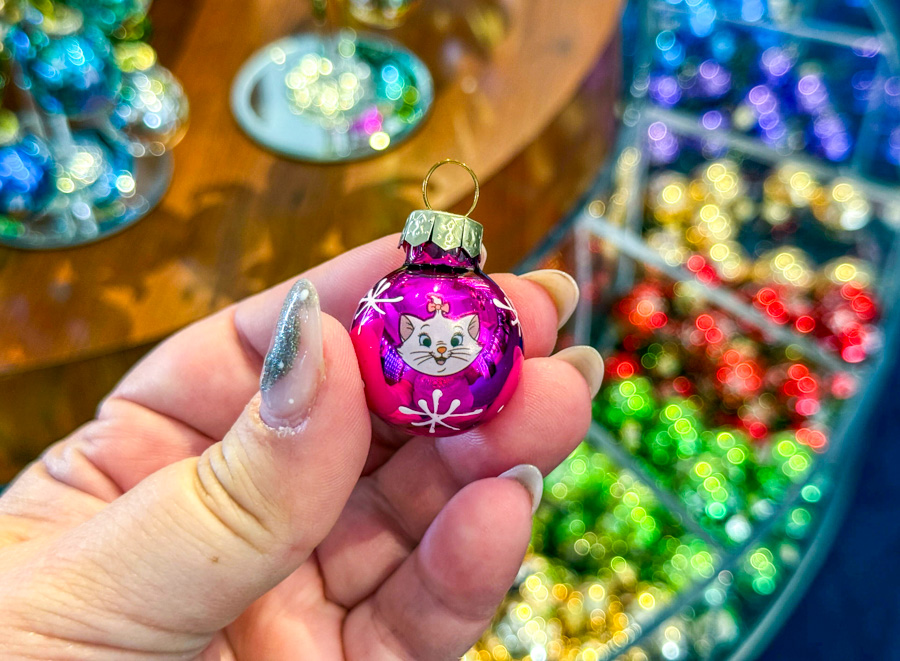
Character ornaments cost $20 to $30 each because of the licensing. A plain fuchsia or pink bauble from a craft store is $2, a white paint pen is $4, and a fine-tip brush gets you snowflakes in about 15 minutes each. Total: roughly $6 per ornament for a custom set that matches your tree exactly. For the licensed version without the price tag, look for open-box or loose ornaments at flea markets — the ones that lost their packaging usually go for half price.
17. A Glitter-Chested Owl Nestled in Warm White Lights
Contrast does the work: a matte, fibrous body against a glittered chest against soft warm light. If everything on the owl were sparkly, it would disappear into the tree; if everything were matte, it would go dull. Brown and orange also hold their own against green foliage in a way pastels don’t, so one woodland ornament can sit between character pieces without looking out of place — genuinely useful when you’re decorating with someone who isn’t a Disney person.
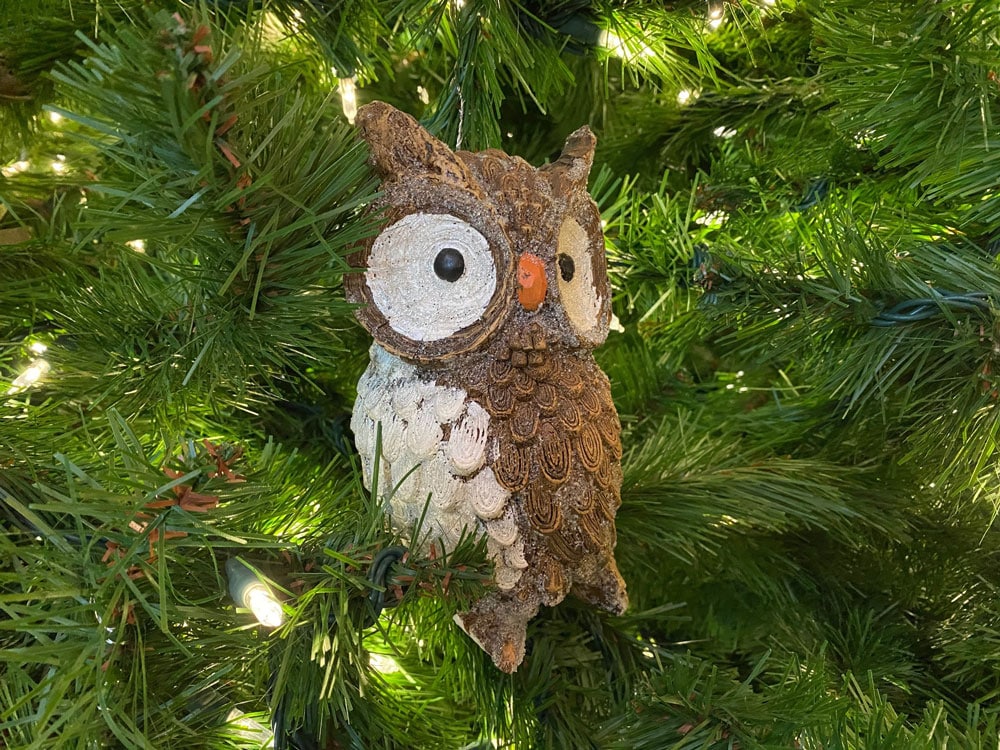
Aim for at least three distinct textures per square foot of tree: matte, glitter, and glass, in roughly equal measure. Texture is what keeps a crowded tree from looking like a shelf. And place your largest, most textural pieces on the outer branches where they catch light from two directions at once — ornaments pushed toward the trunk read half-size and always photograph dark.
18. A Red Mickey Topper and Gold Baubles for Days
Cost to build the red-and-gold version:
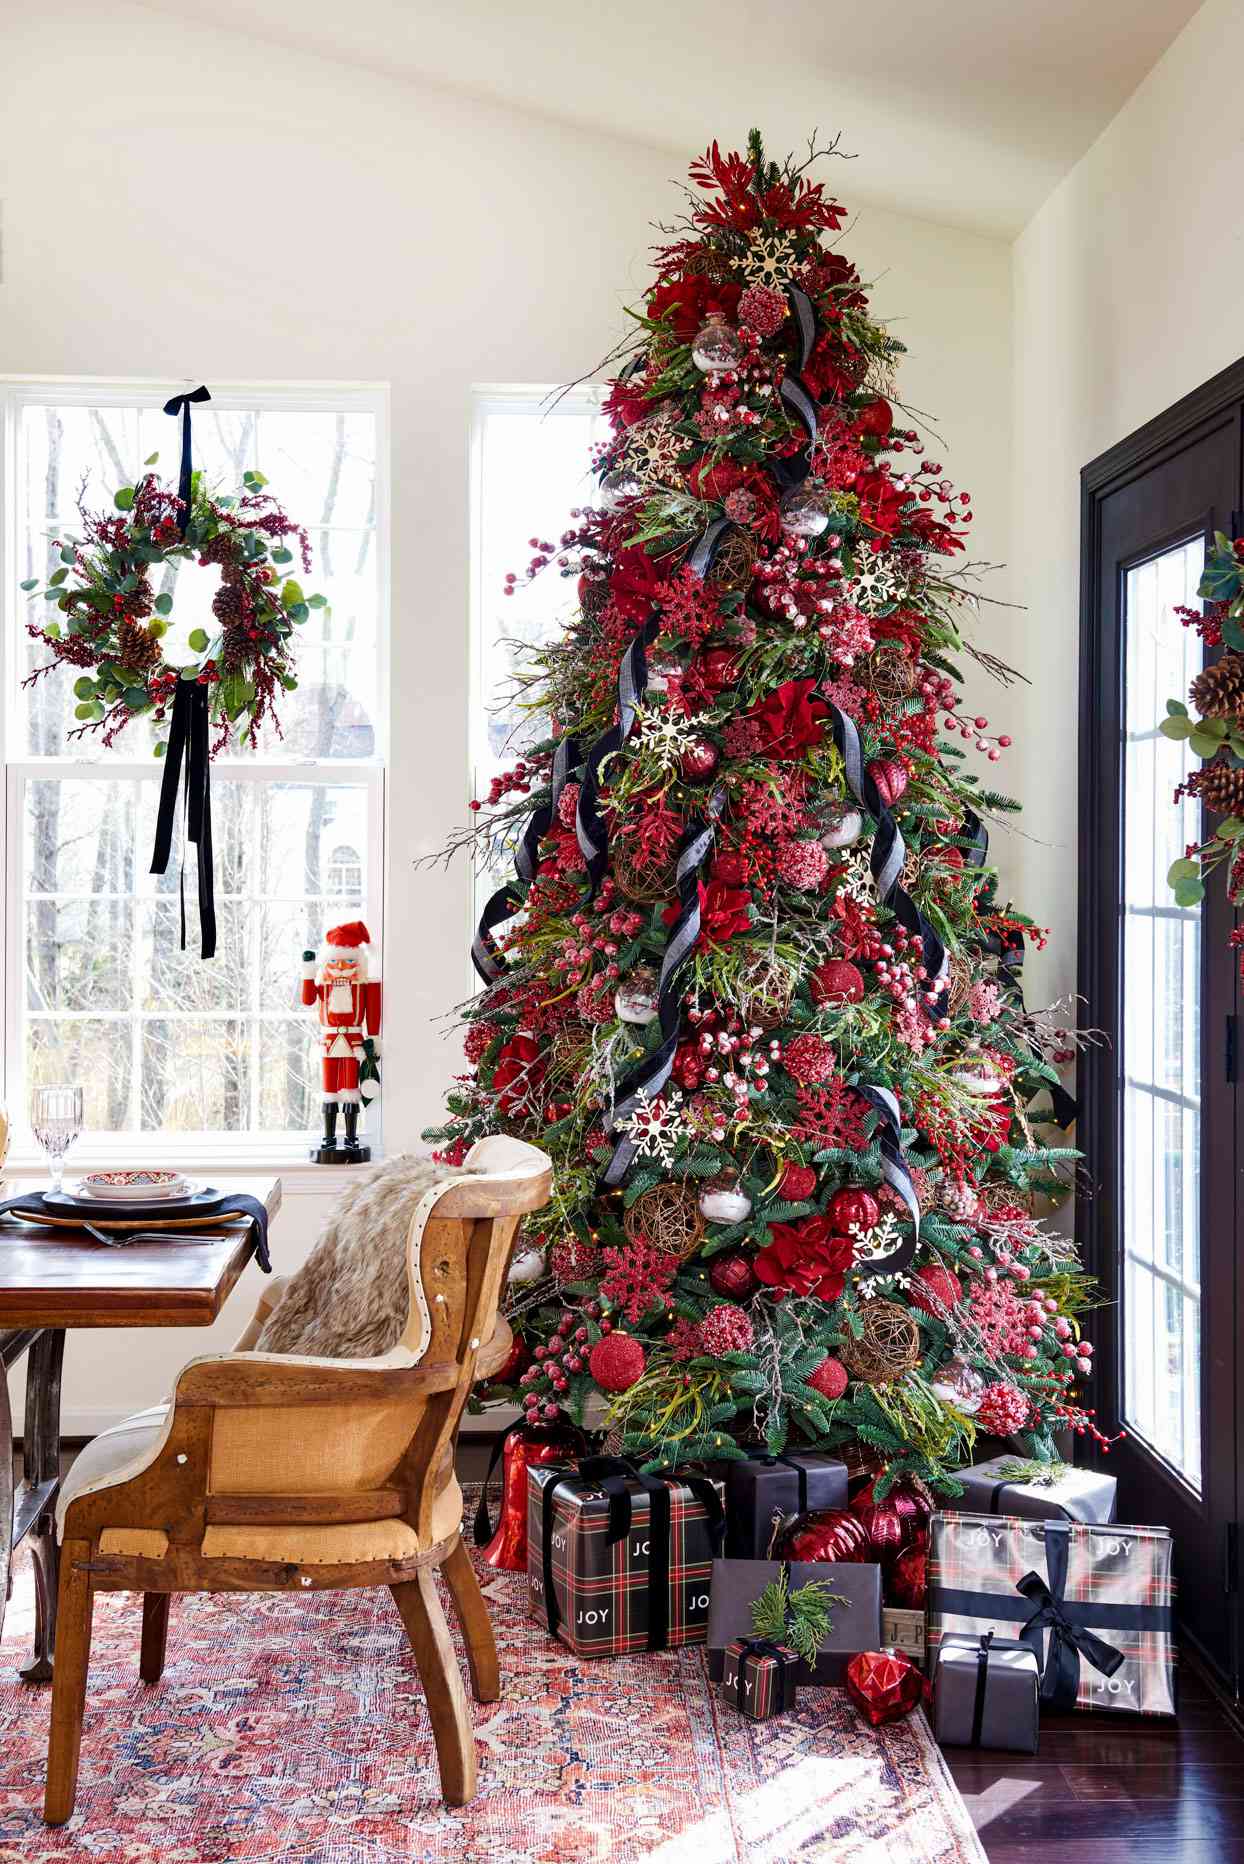
- 9-foot artificial tree: $250–$600
- Red and gold character head ornaments: $150–$350
- Gold and white ball assortment: $60–$140
- Large character tree topper: $35–$80
- Soft red tree skirt: $30–$70
Total: $525–$1,240. Budget route: a 7-foot tree, a mix of inherited and dollar-store gold balls, and a felt skirt sewn from two yards of fabric — about $220.
Gold is not one color, and that’s the trap. A brass-toned finish next to a pale champagne finish looks accidental under warm bulbs, so pick one and stay with it. Also check your tree’s top before committing to a large topper: nine-foot trees often have a flimsier top section, and a heavy character head will lean. Reinforce with a dowel or zip tie, or drop to a lighter topper and let the ornaments carry the theme.
19. Burlap, Buffalo Plaid, and a Galvanized Bucket Base
Getting ribbon to cascade instead of clump:
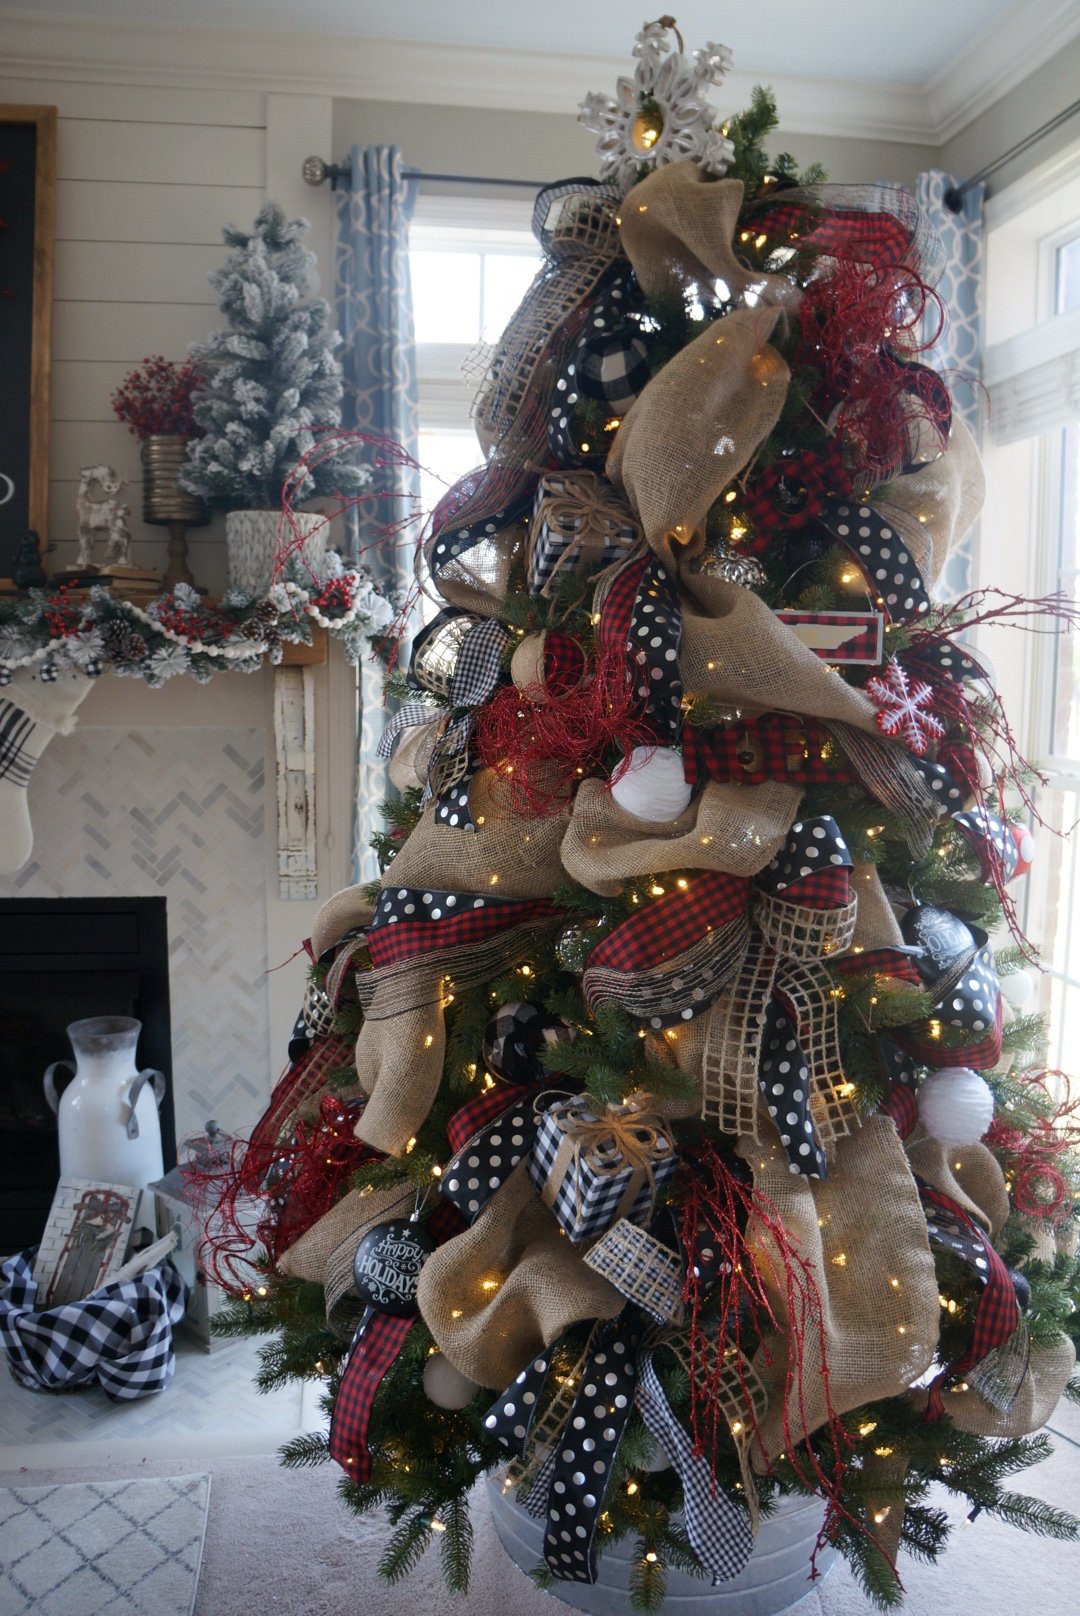
- Cut four lengths of 3-inch ribbon, each about 3 yards, in your chosen patterns.
- Start at the top, tuck the end into a branch, and let the rest fall in a loose spiral.
- Every 12 inches, pinch the ribbon and tuck it back through a branch for a soft pinch point.
- Alternate patterns so no two neighboring ribbons are the same.
- Stop at the halfway mark — cascading all the way down looks heavy.
About 40 minutes and $25 in ribbon.
This one wants a 7 to 7.5-foot tree under a 9-foot ceiling in a room at least 10 by 12 feet, because the ribbon width and the bucket base both add visual bulk. That galvanized bucket needs an 18 to 22-inch opening to hold a full tree securely — anything narrower tips. If your room runs smaller, a plaid tree collar gives you the same farmhouse finish in about half the floor footprint.
20. Crumpled Paper, Pine Sprigs, and Two Festive Mice
The palette formula: 55% red + 30% green + 10% gold and white + 5% black for the character outlines. Because both red and green are saturated, the gold glitter and the crumpled white paper act as reflectors, bouncing light back into the arrangement. Swap the red for burgundy and the green for sage and you get the same composition in a muted key. Hold the 5% black no matter what — it’s the detail that keeps cartoon characters from looking washed out.
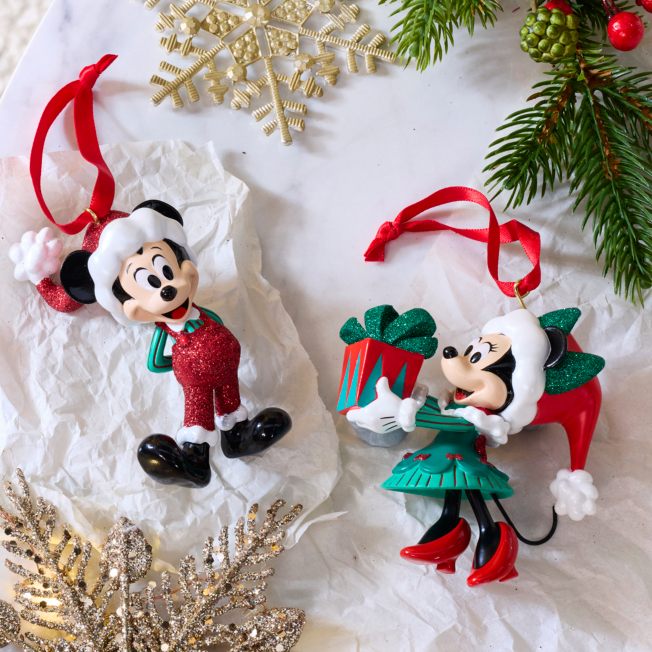
Check these before you commit to a character set:
- Ornament height sits between 2.5 and 4 inches for a standard tree
- Ribbon hangers, not metal hooks, on heavier sculpted figures
- The set includes both figures if you want the pair
- Red and green read the same warmth under your existing bulbs
- Original packaging, if you plan to store them long-term
Two of these five get skipped constantly, and they’re the two that matter.
21. Jungle Cruise Boats and Gingerbread Houses on One Branch
This tree is organized by story, not by color, and that’s why it works. A gingerbread house, a safari boat, a snowflake-covered head — hung near each other they read as a narrative rather than a jumble. Group ornaments into clusters of three within a 10-inch radius, mixing one large piece with two smaller ones, and leave 4 to 6 inches of open branch between clusters. The storytelling approach in Idea #11 does the same thing with travel souvenirs.
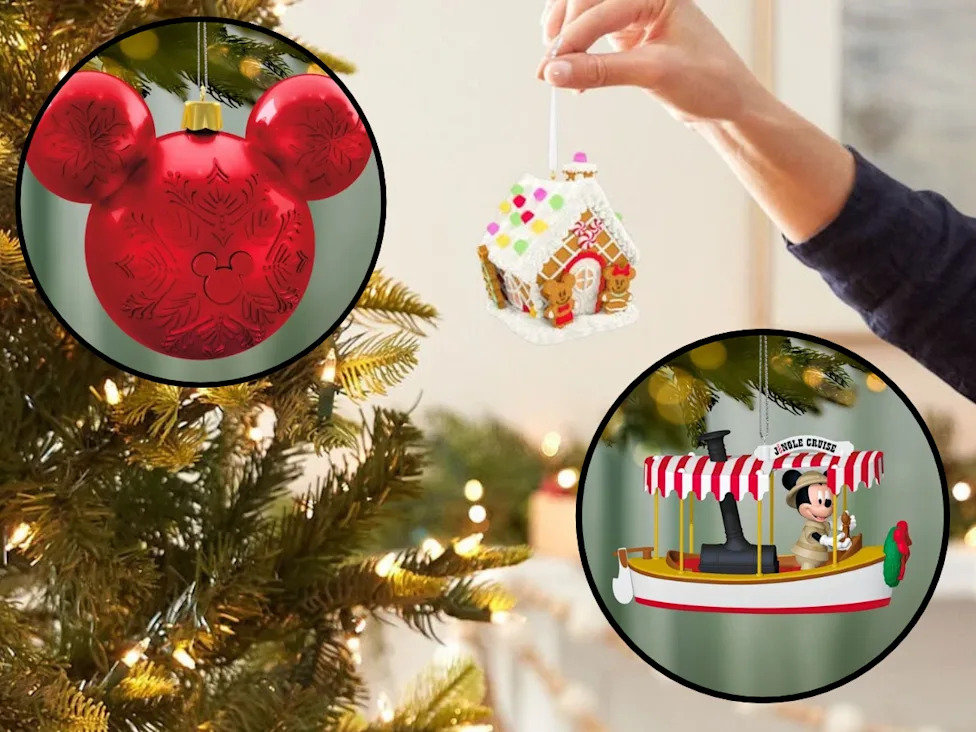
A 7.5-foot tree holds 120 to 150 ornaments comfortably — more than that and they start canceling each other out. Hang from the inside out, working back branches first so the surface layer stays loose, and step back every 20 ornaments. Distance is the only way to catch the bald spots your eye skips when you’re standing two feet from the branches.
22. Fairy Lights, Silver Balls, and a Plaid Tree Collar
Micro fairy lights are the first thing to die. The wire is thin and the solder joints are tiny, so expect to lose a strand or two each season — budget $20 to $40 a year for replacements. Glossy red ornaments show dust and smudges; silver ones scratch if they knock against each other in storage. A structured plaid collar is the easiest base to live with — spot clean with a damp cloth, and it holds its shape in a closet far better than a gathered fabric skirt.
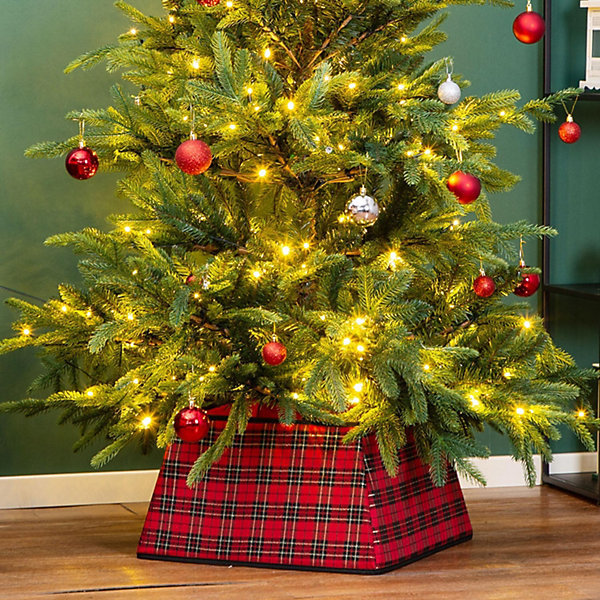
The whole look is buildable for under $100. Warm white fairy lights run $8 to $15 a set at Walmart or Target, and two sets cover a 7-foot tree if you spiral them evenly. Silver and red ball ornaments are the most common thrift-store find in January — buy them off-season for a quarter each. And a plaid tree collar is a cardboard box wrapped in two yards of buffalo check fabric, secured with hot glue: about $18 versus $60 retail.
23. A Plaid Poinsettia With Fuzzy White Trim
Making plaid fabric poinsettias:
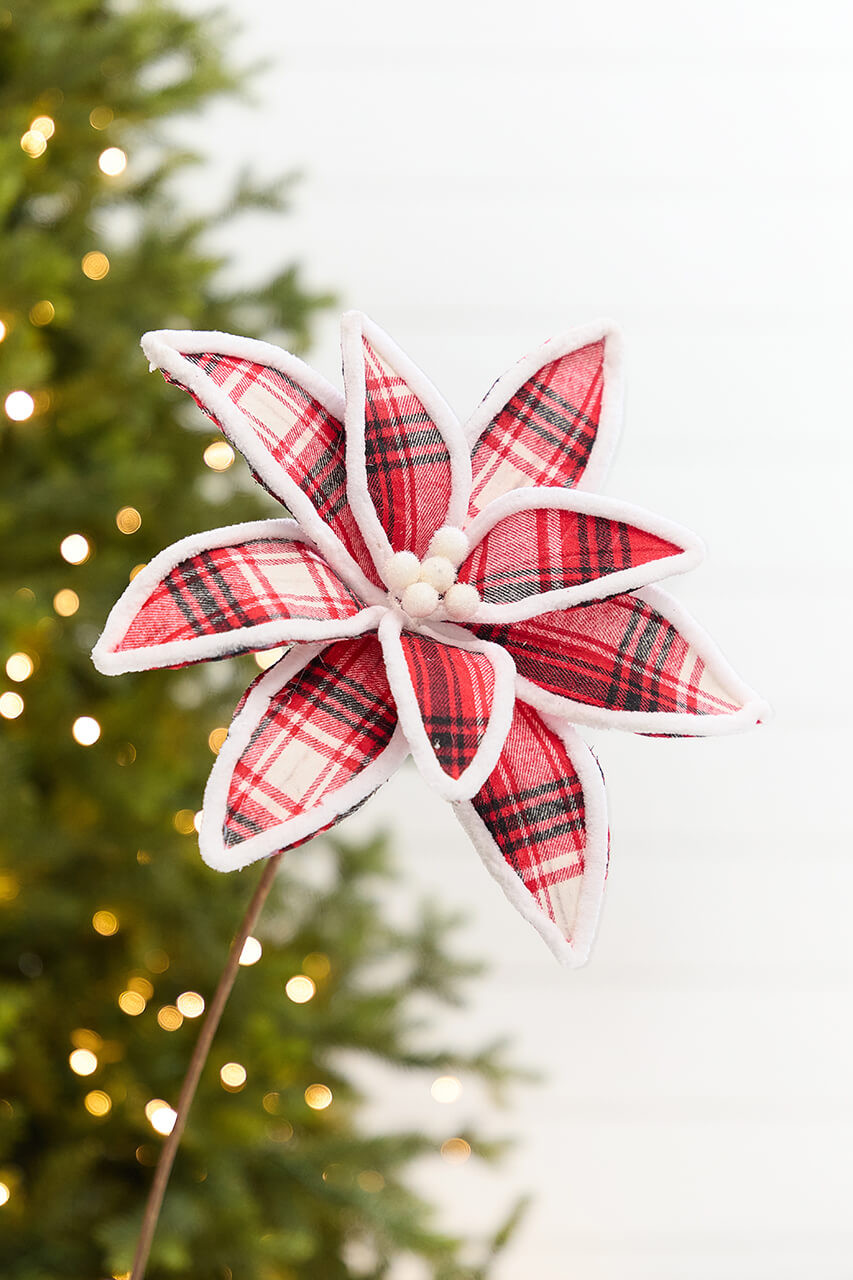
- Cut five 5-by-7-inch petals from plaid cotton or flannel.
- Run a thin line of fabric glue along each edge and press on fuzzy white trim.
- Pinch the base of each petal and secure with a dot of glue to create a cupped shape.
- Layer the five petals in a fan and glue them to a small felt circle.
- Glue five to seven white beads into the center.
- Attach a clip or wire loop to the back so it can move between the tree and a wreath.
About 20 minutes and $8 per flower, no sewing required.
The fuzzy white trim is the detail that makes the whole thing work. Without it, a plaid poinsettia reads as stiff craft-store felt. That soft border blurs the hard plaid edges just enough to look handmade and expensive, and it echoes the warmth of the string lights behind it. If you’re making these, don’t substitute a plain white ribbon — the texture is the point.
24. Olaf on the Beach: When a Disney Tree Goes Tropical
Theme subsets need a boundary or they take over. Cap vacation and novelty ornaments at about 20% of your total count — on a 7-foot tree that’s roughly 25 pieces, and they’ll read as a deliberate collection instead of clutter. Physically, that’s one 2-foot zone on the tree, ideally at eye level on the side you actually see from the sofa. Cute overload is the fastest way to make a themed tree look chaotic instead of curated.
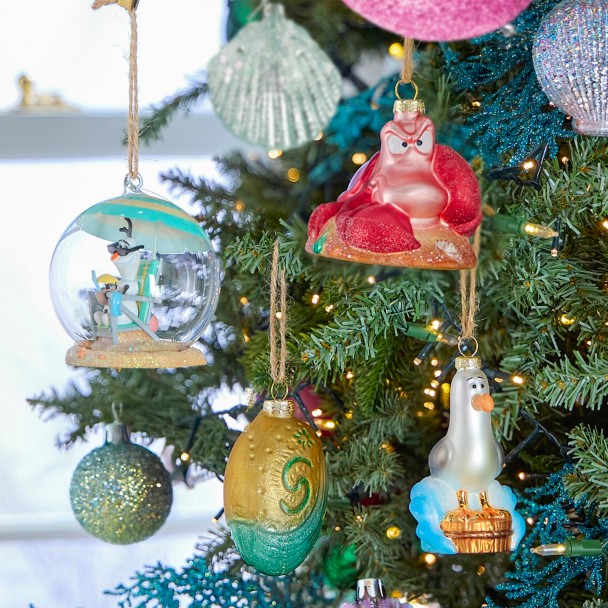
What a beach-and-Disney branch costs:
- Clear globe ornaments with character inserts: $12–$25 each
- Small sculpted character charms: $8–$18 each
- Gold and teal patterned ovals: $20–$45 for a set
- Twine for hangers: $4–$8
- Warm white fairy lights: $10–$20
Total: $70–$180 for one well-styled section. Budget alternative: reuse clear baubles you already own, tuck in small dollar-store figurines, and swap the twine for kitchen string — under $25.
25. A Glass Fairy With Pink Glitter Wings and a Star Wand
Glass ornaments slide. A 3-inch glass piece will drift off a branch within a day if the needle angle is wrong. Pinch the branch into a shallow V and hook over the crook rather than the tip, keep the ornament under 4 ounces, and place glass at 48 to 60 inches from the floor — eye level for a seated adult. Anything glass above 6 feet is a hazard waiting for someone reaching for the topper. Same principle applies to the mirrored piece in Idea #15.
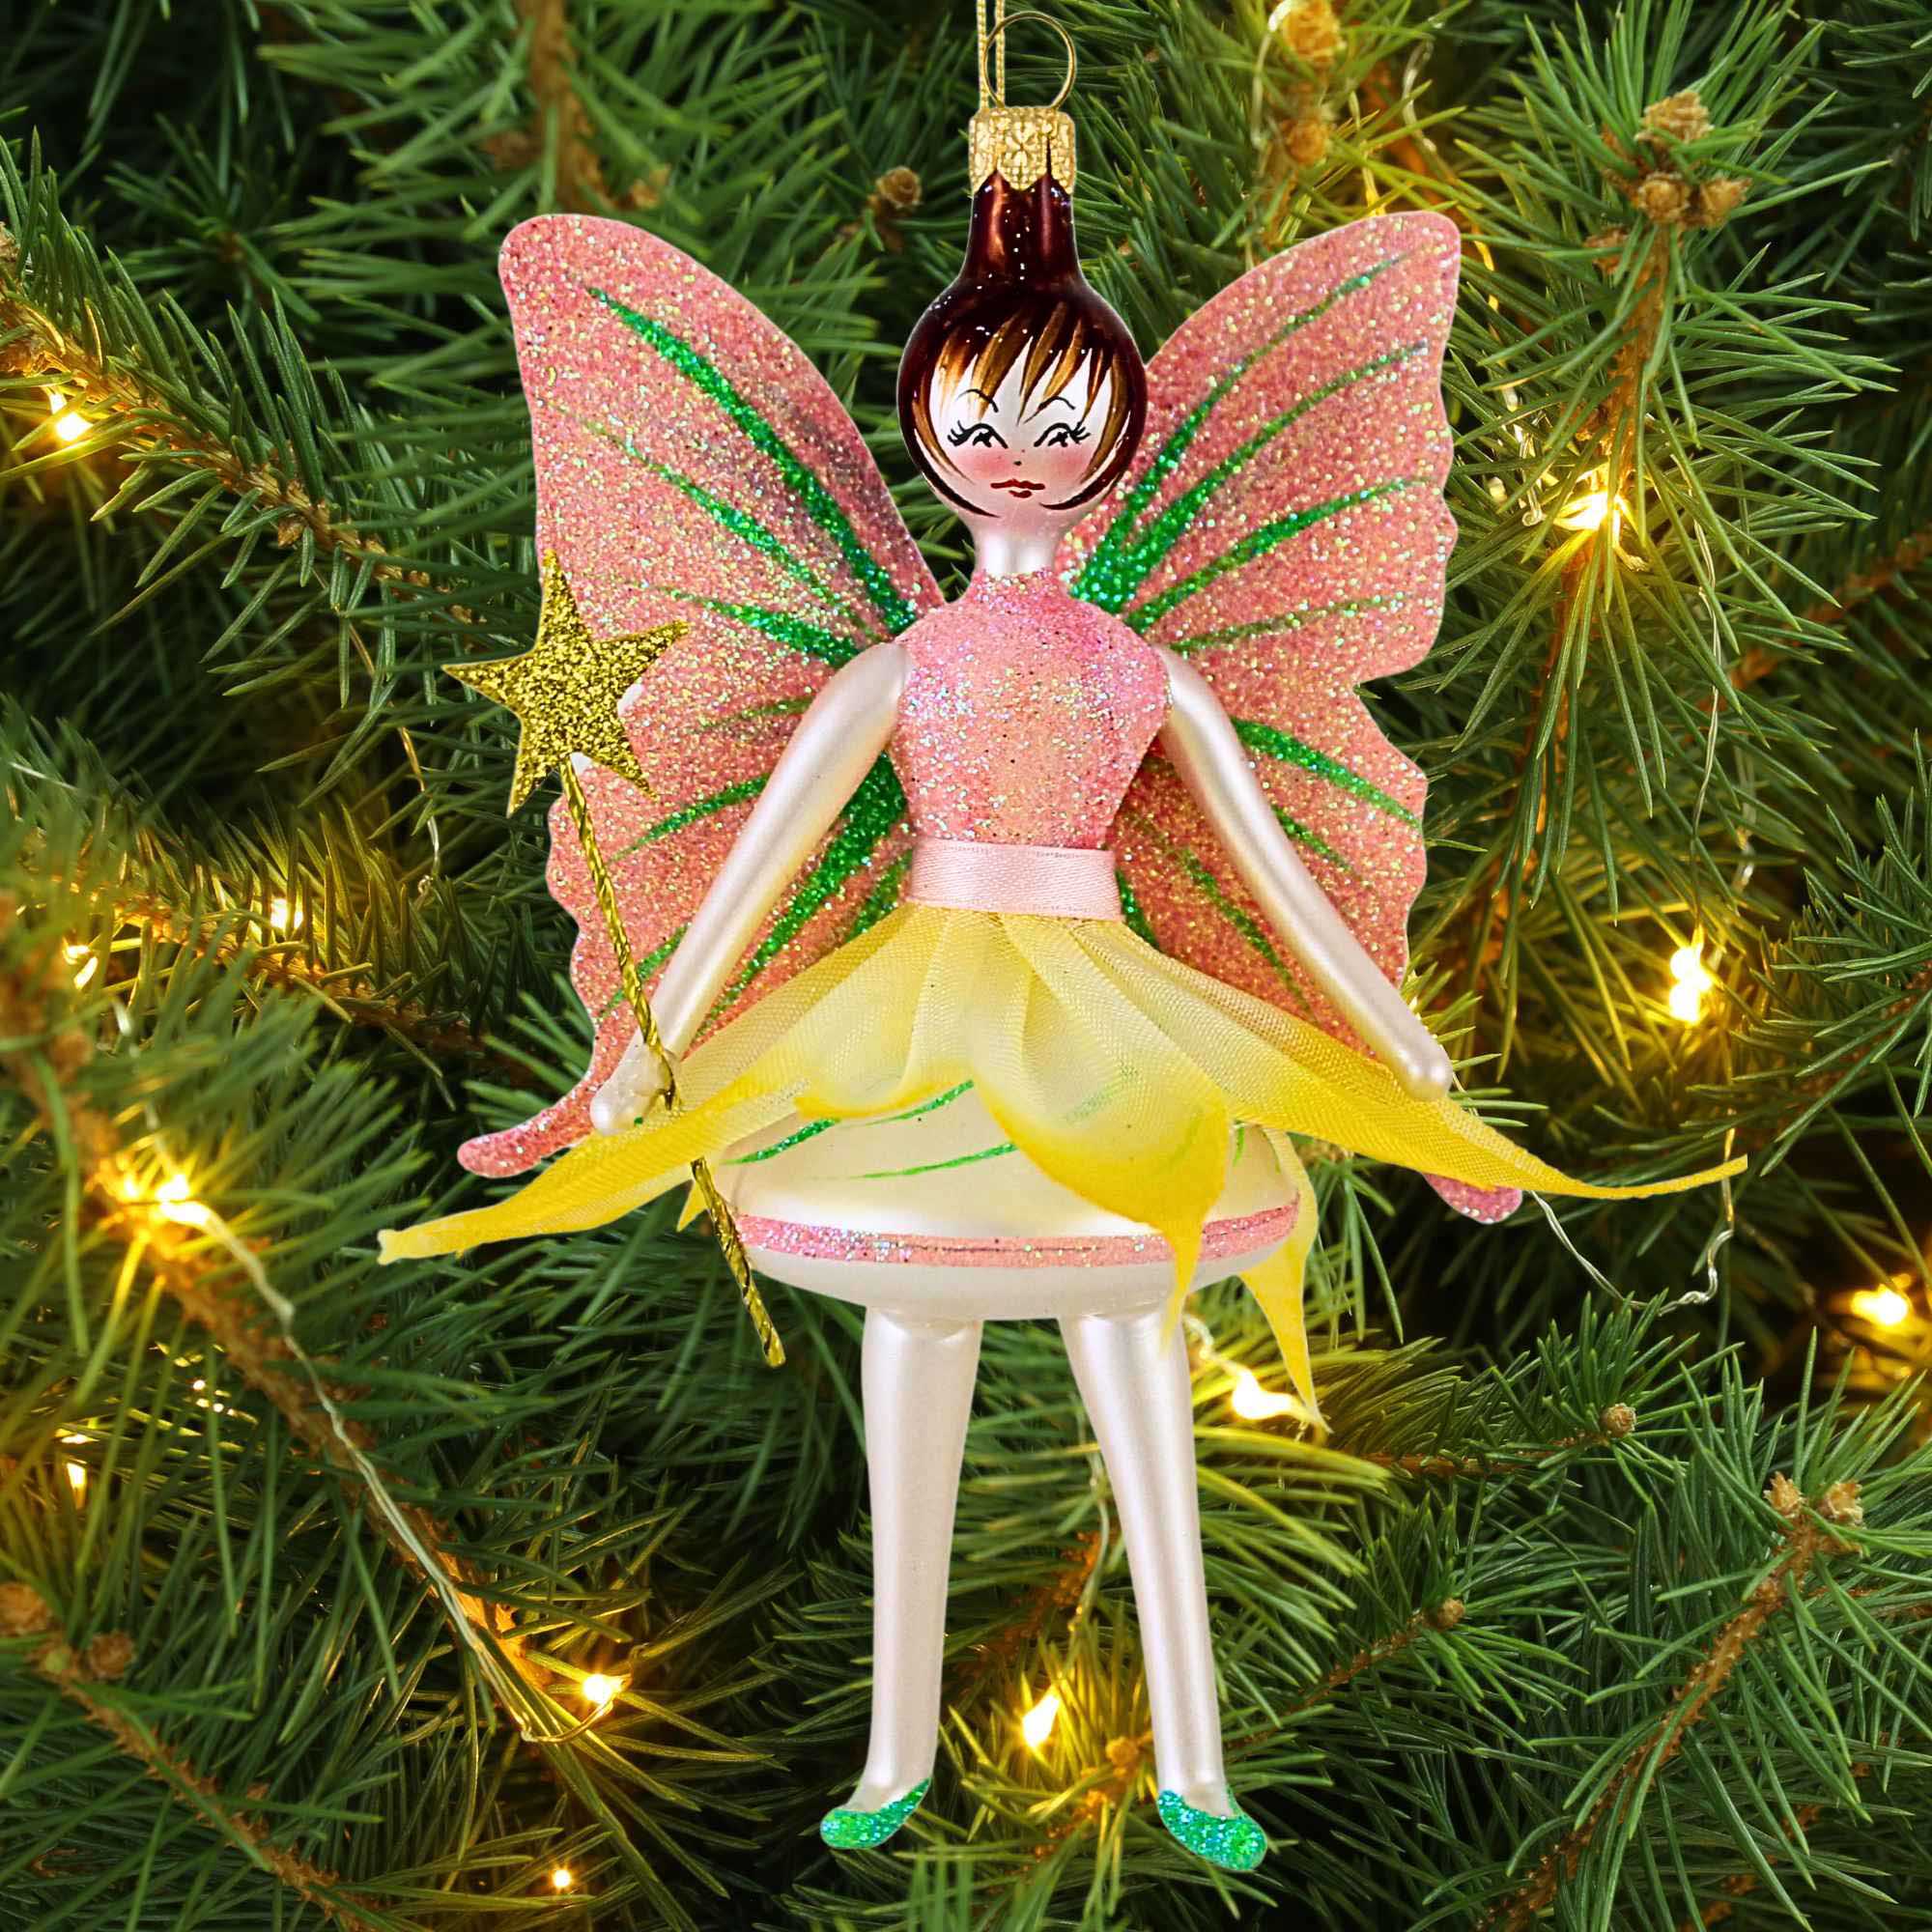
Color temperature decides whether pink glitter reads as candy or plastic. Under warm white bulbs around 2700K, the glittery wings glow softly; under cool white they turn icy and cheap. Translucent glass also layers differently than opaque ornaments — you see the needles through it, so the tree stays visible instead of being walled off. One or two glass pieces per branch cluster is plenty; more and you lose the solid pieces behind them.
26. Beaded Castles, Carriages, and a Very Ladylike Teapot
Hand-beaded and embroidered ornaments are having a moment, and it’s the holiday version of the small-luxury shift that’s been reshaping how people shop. Instead of a dozen mass-produced baubles, collectors are buying three intricate pieces and hanging them where they’ll actually be seen. It’s slow decorating: fewer objects, more craft, and a tree that rewards a closer look. Given how long this kind of piece lasts, it’s a trend with a very long tail.
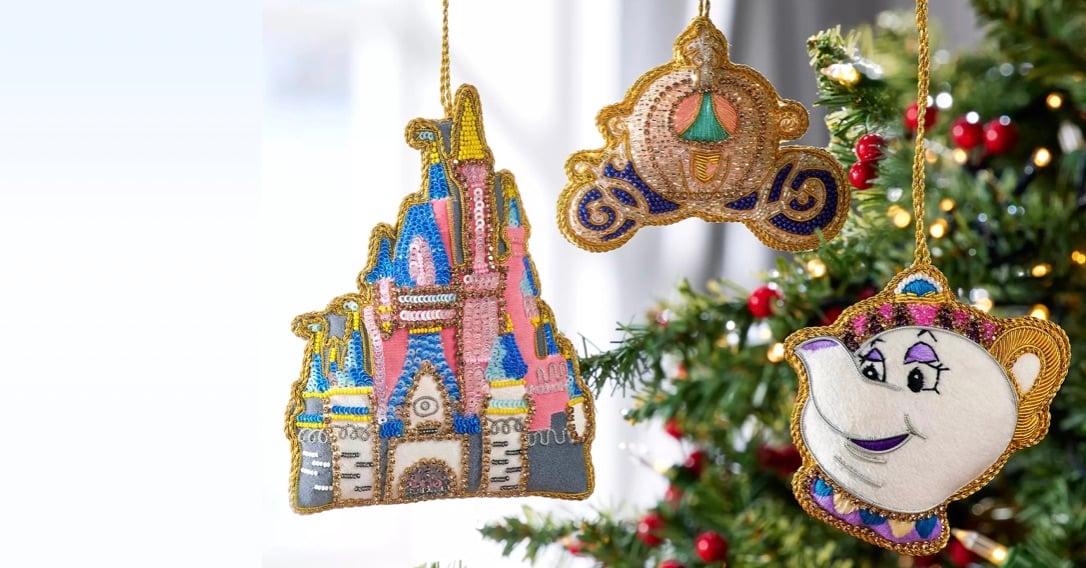
Check these before you hang anything beaded:
- Weight — beaded and embroidered pieces can top 6 ounces
- Branch support, especially on thinner upper branches
- Storage that keeps beads from knocking against each other
- A budget cap of three or four pieces per year, not per shopping trip
- Color temperature of your lights, so the beads actually flatter them
Heavy ornaments go low and toward the center, never on the top third.
Your Tree, Your Mouse, Your Rules
Nobody hands out awards for matching a catalog photo, and the trees people actually remember are the ones that look like someone’s real holiday. Start with one idea here, steal the parts that fit your room, and let the rest go — a half-finished tree you love beats a perfect one you copied.
📌 Pin your favorite version now so it’s waiting for you when the ornaments come down from the attic.