Christmas coffee stations are having a serious moment on Pinterest right now — and 2026 is the year the trend finally grew up. We spent real time combing through Target, IKEA, Walmart, Dollar Tree, and Etsy to pull only the setups actually worth copying, then narrowed it down to 29 ideas that span everything from an $8 cocoa upgrade to a $540 full party bar.
Inside you’ll find rustic farmhouse counters, brick-wall winter café nooks, whimsical Santa kitsch, and cocktail-bar glam — with budget and luxury versions compared side by side, and every idea shoppable through direct product links. And stay until the end, because we break down the most common mistakes that can ruin these looks before you buy a single jar.
📌 Save this to Pinterest for later — you’ll want to revisit these ideas.
1. Fireplace-Side Cocoa Bar With Snowflake Mugs
A bar table set directly in front of a firebox looks romantic and photographs like a dream, but heat and chocolate are not friends. Keep the table at least 36 inches from the hearth screen, and cap your tallest jar at 10 inches so it never competes with the garland on the mantel. Line the patterned mugs handle-out in rows of three — a free trick that makes a casual pile read like a curated set.
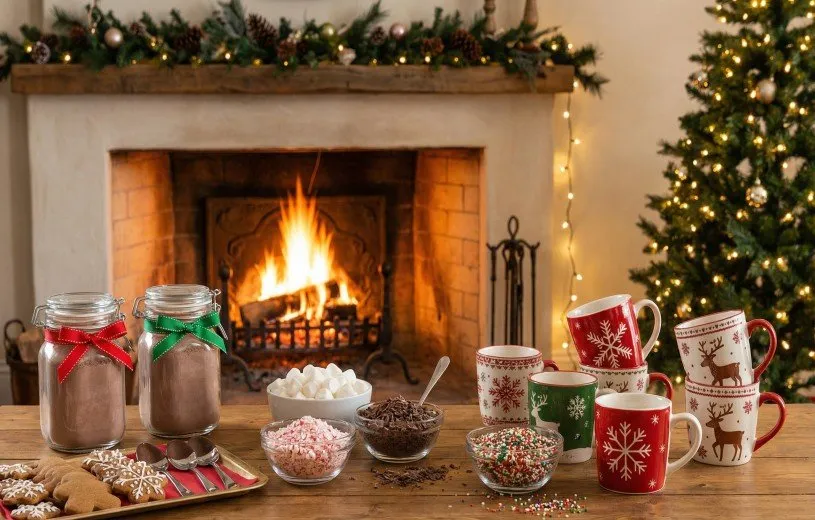
Three things are doing the heavy lifting here. First, repetition: the red, green, and cream in those mugs reappear in the jar ribbons and the tree ornaments, so your eye keeps landing on the same three notes. Second, light direction — the fire is the only warm source in the frame, which makes marshmallows and cocoa look genuinely appetizing instead of flat. Third, material contrast: slick glass against rough wood and brick gives the table texture without adding a single decoration.
2. A Crowd-Ready Party Drink Station Built for Refills
- Bar cart or folding table with a linen runner: $40–$180
- Dispensers, carafes, and lidded jars (4–6): $35–$120
- Mugs and glassware for 12–20 guests: $30–$110
- Toppings, mix-ins, labels, and signage: $25–$70
- String lights or a small accent lamp: $15–$60
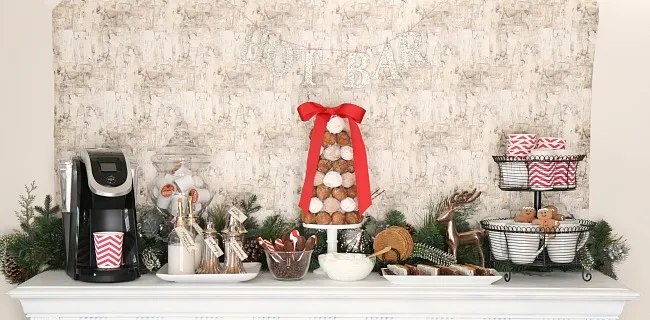
Total: $145–$540. Budget alternative: a $25–$40 cart from Facebook Marketplace, thrifted mugs at $1–$2 each, and washi tape instead of printed tags gets you the same station for closer to $90.
Here’s what nobody tells you about a self-serve drink station: twenty guests means twenty sets of hands, and by 9 p.m. the counter is sticky because someone knocked over the sprinkles. Put everything on one rimmed tray so spills stay contained, keep hot water in a push-button airpot rather than an open carafe if kids are anywhere nearby, and park a small trash bin within arm’s reach. You will refill the marshmallows twice. Plan for it.
3. Brick-Wall Winter Café Nook Under String Lights
The window is the whole idea. Everything else in this corner — the string lights, the floating shelves, the deep red and cream throws — is staging for a snowy view that acts like free wallpaper. Take the window out of the equation and you’re left with a brick wall and some chairs. So if you don’t have a view, build one: a soft-focus winter print, backlit, mounted in the same position you’d hang a window.
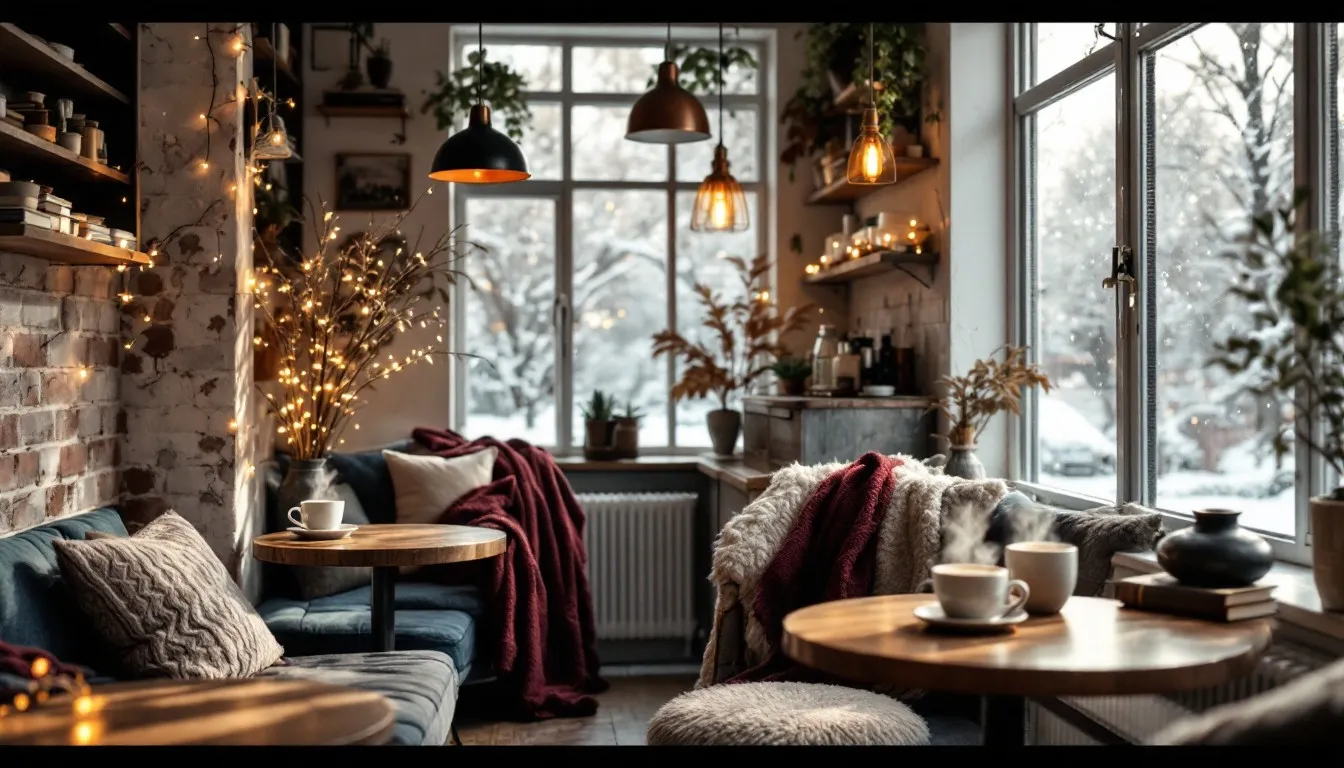
This setup wants a corner of roughly 5 x 5 feet with at least 8-foot ceilings, because the pendants and the garland on the shelves need vertical room to hang without bonking anyone’s head. Two small round café tables beat one big one, since they let you angle seating toward the light. Working tighter than that? Idea #13 shrinks the same vibe to a rolling cart that needs about two feet of wall.
4. Santa-Face Mugs Under a Boxwood Wreath
The look is a white fluted cabinet, a fat boxwood wreath, and a row of Santa mugs — and you do not need $250 to get it. Target and Walmart both carry Santa face mugs for $4–$8 starting in November. Clear apothecary jars run $6–$12 at Dollar Tree. A convincing faux boxwood wreath is $20–$35 from Michaels with a coupon, and the fluted cabinet becomes a white-painted thrift dresser. Under $80, all in.
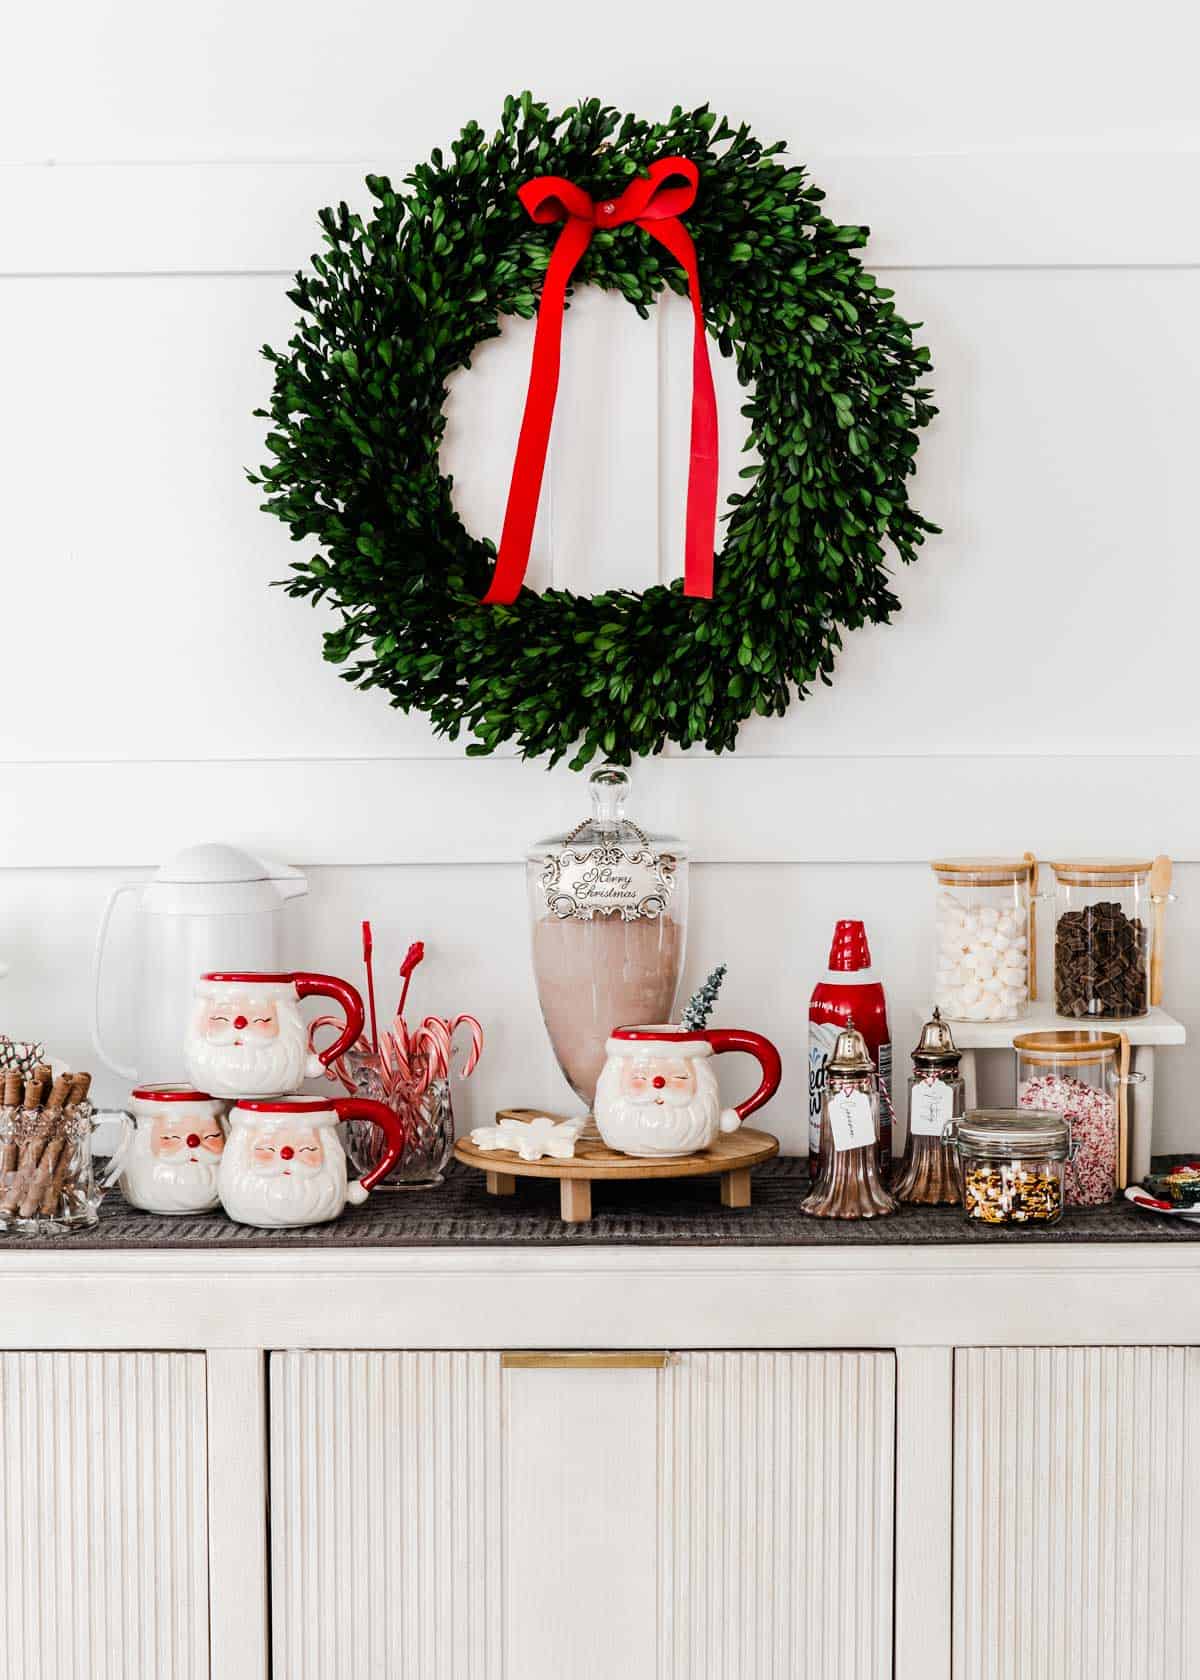
Wreath placement matters more than wreath size. Hang it so the bottom of the foliage sits 6 to 8 inches above your tallest jar — closer and the two fight for attention, higher and it floats, disconnected from the station. On fluted or beadboard surfaces, use a removable adhesive hook rated for at least 5 pounds. Finish with a 2.5-inch-wide red ribbon; wider swallows the mugs, narrower vanishes in photos.
5. Shiplap and Dark Wood Shelves for a Farmhouse Cocoa Bar
The formula here is about 60 percent white — shiplap, canisters, speckled counter — plus 25 percent dark brown wood, 10 percent red accents, and 5 percent faux evergreen. Hold those ratios and you can swap freely: trade the red sign for a black chalkboard, or the granite for honed soapstone, and the station still reads as the same room. Break the ratio by adding a second bold color and it turns into a craft store aisle.
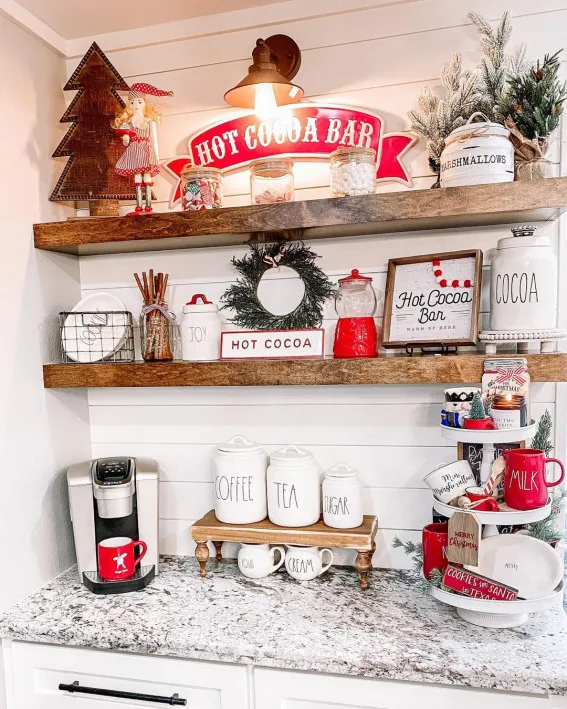
It’s the little red “Hot Cocoa Bar” sign. Without it, this is a very nice kitchen counter with some holiday jars on it. With it, your brain instantly reads “station” instead of “clutter” — and that shift is the entire difference between a styled setup and a pile of stuff. If you don’t want signage, replace it with something equally declarative: a single tray that visually fences the whole zone.
6. Tiered K-Cup Display on a Vintage Truck Runner
Sort your pods by color, then build the display in five steps. Total hands-on time is about 20 minutes and materials run $18–$25.
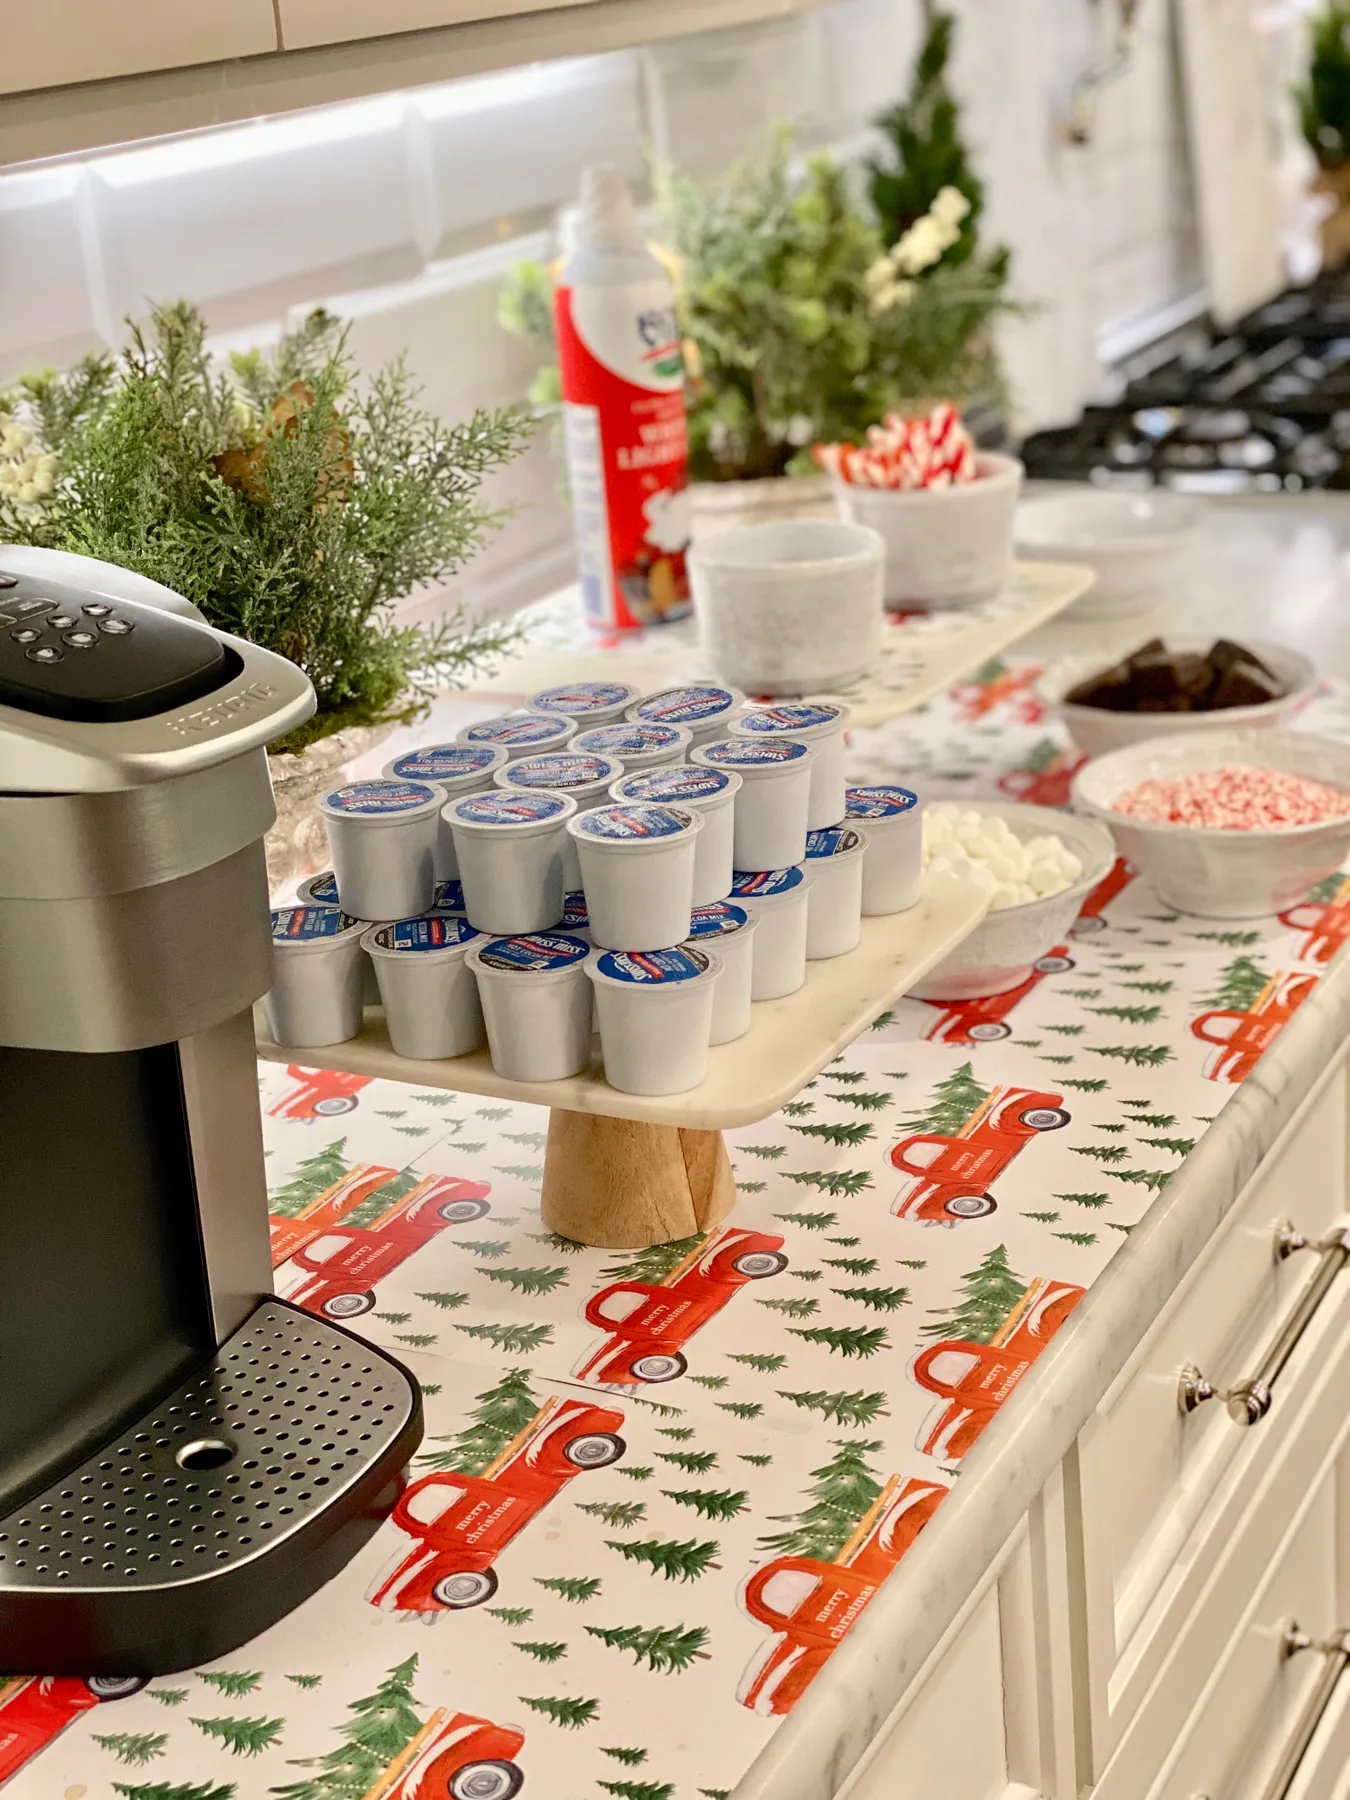
- Choose a three-tier stand with a base no wider than 10 inches — anything bigger eats your prep space.
- Load reds and greens on the bottom tier, whites and silvers up top.
- Cap each tier at 12 pods so it reads styled, not stocked.
- Clip a small faux evergreen sprig to the center post with a mini clothespin.
- Set the stand 6 inches back from the counter edge.
- Single-serve brewer: $60–$180
- Three-tier stand plus a 48-count pod box: $30–$60
- White bowls and jars for toppings: $20–$50
- Patterned table runner: $12–$35
- Faux frosted evergreen and small decor: $15–$40
Total: $137–$365. Budget alternative: skip the stand, stack pods in a white cereal bowl, and print the truck runner design yourself. About $45.
7. DIY Cocoa Bar Zoned From Wall to Counter
A good DIY bar isn’t a table full of stuff — it’s zoned vertically. Wall level holds the display: garland, a sign, hanging mugs. Counter level holds the working tools: brewer, kettle, jar of cocoa. Below counter holds the refills, so you’re not running to the pantry mid-party. Once those three zones exist, decorating becomes almost automatic, because every item has an obvious home and nothing ends up stacked on top of something else.
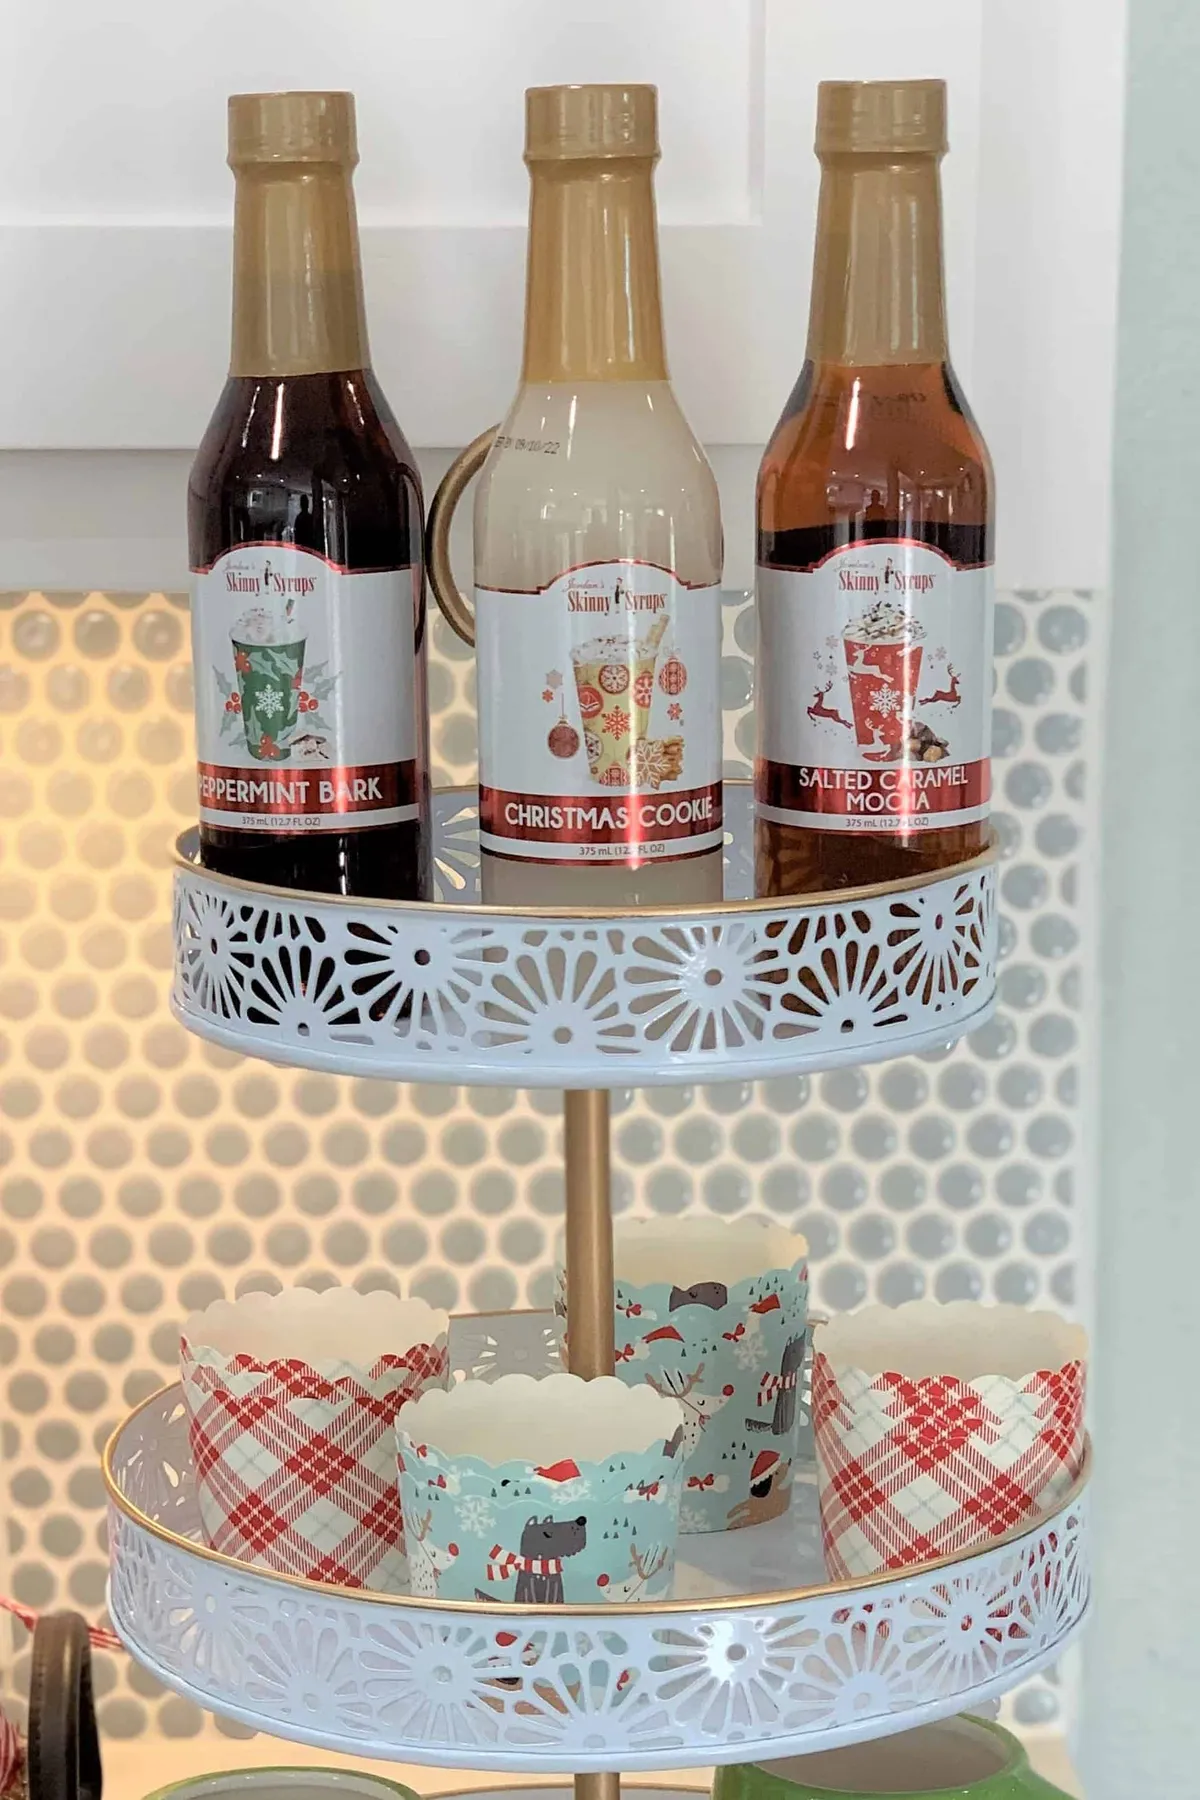
You can build the entire three-zone system for around $60. Use a $25 IKEA utility cart, hang mugs on a $6 adhesive hook rail, and put cocoa mix in a $4 Walmart flip-top jar. The garland is the only thing worth spending on — cheap garland looks cheap, and it’s the piece everyone photographs. Buy one good 6-foot strand for $15 and skip the rest of the seasonal aisle.
8. Grid-Pattern Mug and Wood-Lid Jars on Dark Wood
Heights are what separate a styled shelf from a supply closet. Keep your jars in roughly a 1:1.5 ratio — an 8-inch jar beside a 12-inch jar reads intentional, while three jars of the same height read like inventory. Wood-lid jars also need a silicone gasket if you’re storing anything that clumps: cocoa picks up humidity fast, and a loose lid turns powder into a brick within three weeks.
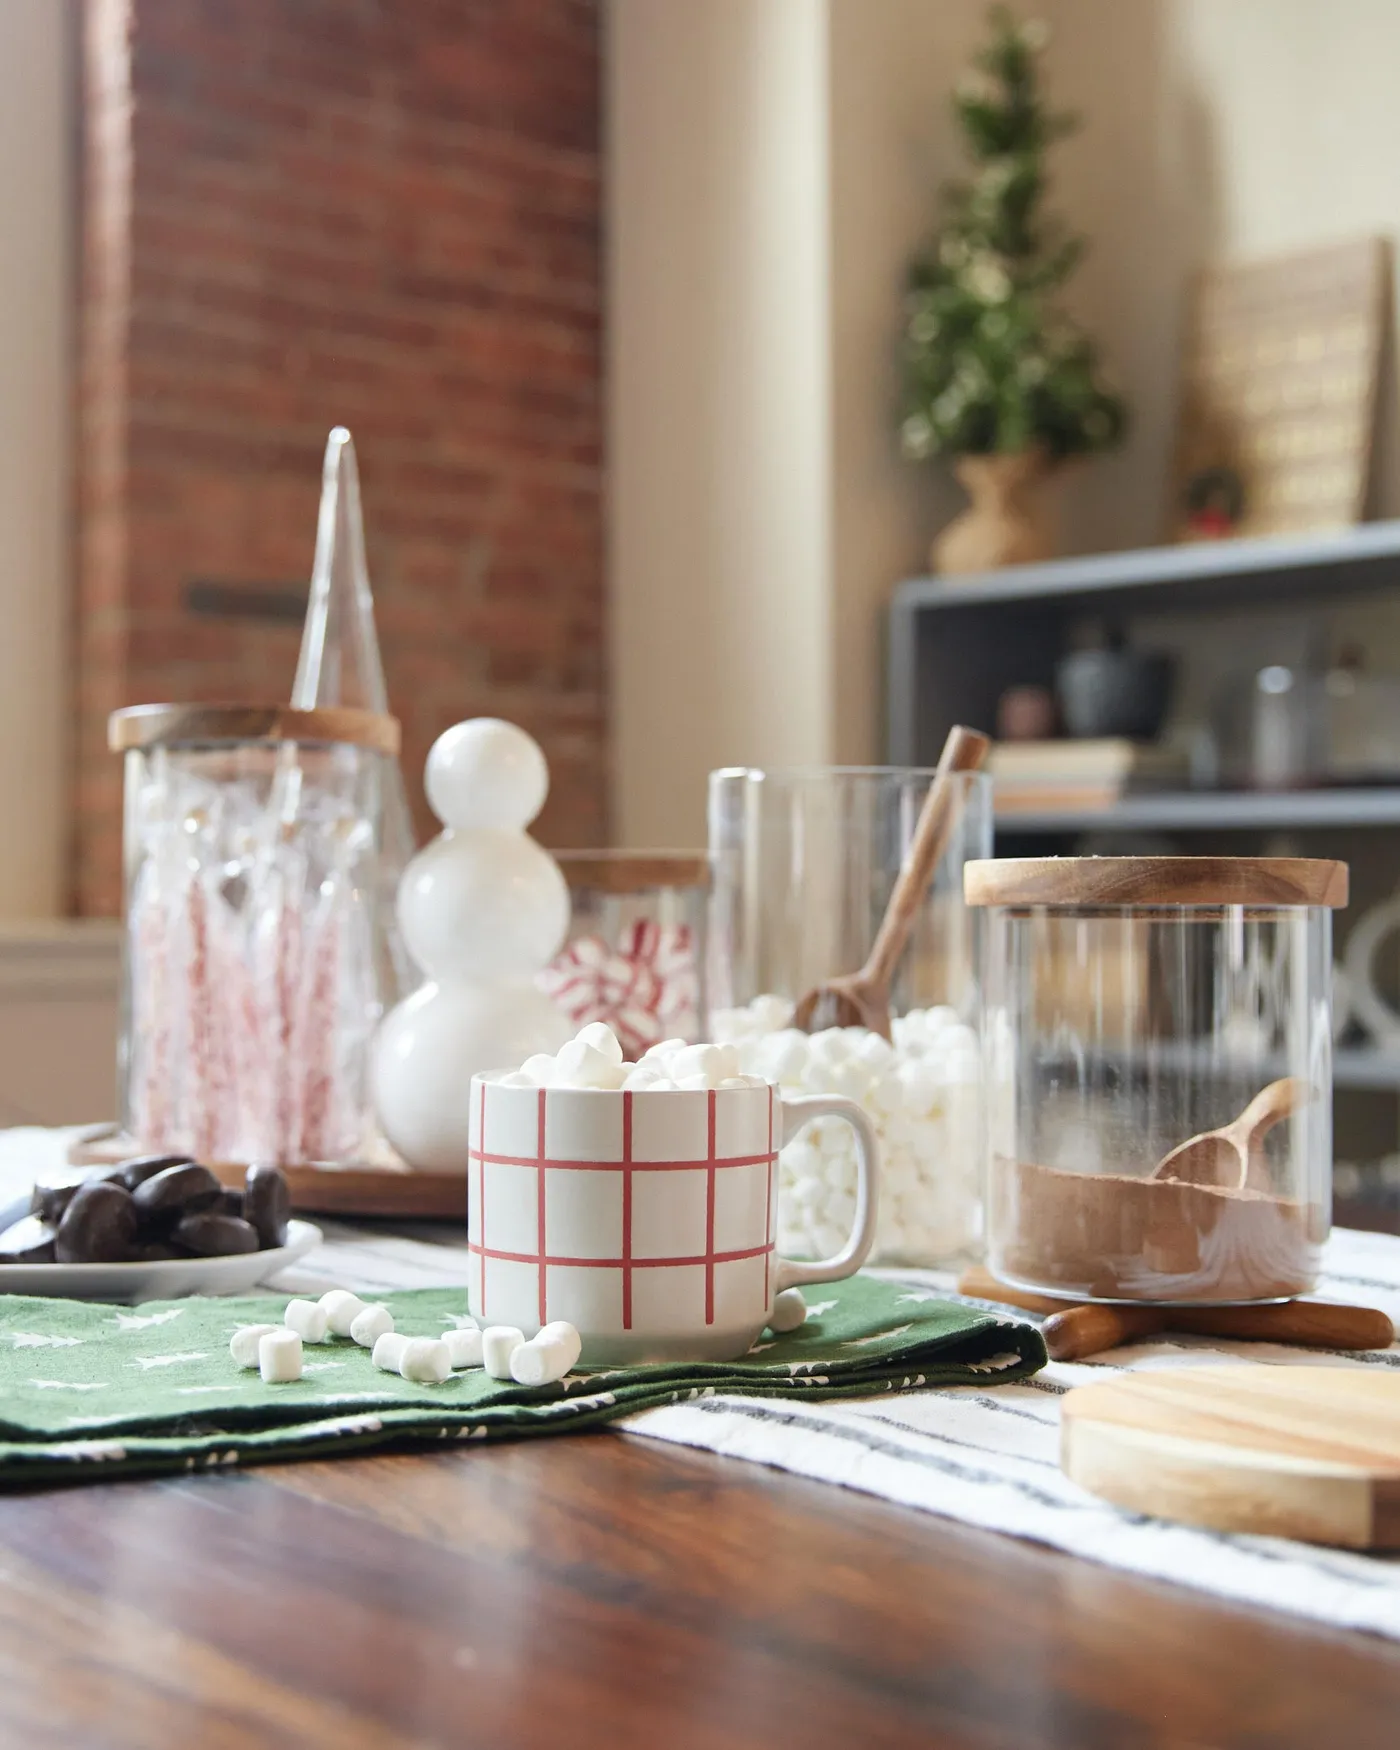
Count the palette: about 55 percent dark wood as the base, 25 percent white, 15 percent green, and 5 percent red. It’s a quieter formula than most holiday setups, and that’s exactly why it works — the red grid on the mug and the tree-patterned placemat are the only saturated notes, so your eye lands where you want it. Compare with Idea #15 — same cream and chocolate palette, completely different energy.
9. Hot Chocolate Shots on a Silver Tiered Stand
Two things make this spread feel like an event instead of a snack table. First, portion sizing: 3-ounce glasses mean guests can try three flavors without committing, and small servings look abundant even when you’ve made one batch. Second, height and reflection — the silver tiered stand bounces those blurred fairy lights back into the scene, so the table glows from the inside. Powdered pastries on the top tier finish the silhouette.
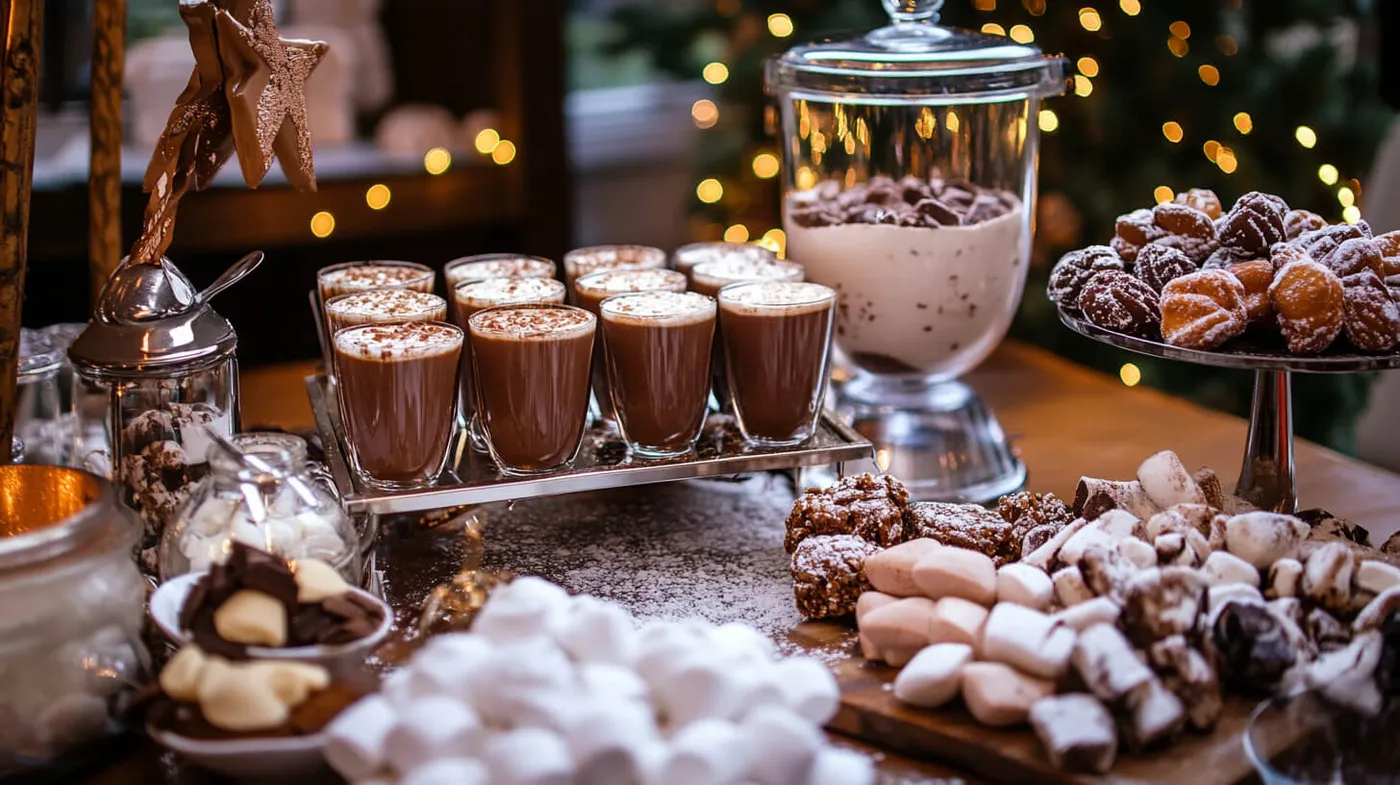
The serve-yourself shot tray takes about 25 minutes and roughly $15 plus glassware.
- Fill 3-ounce glasses two-thirds full, then let them cool 5 minutes.
- Top with foam, then dust lightly with cocoa through a small sieve.
- Set the glasses on a rimmed tray so drips never reach the wood.
- Stage dry toppings on the top tier and anything wet on the bottom.
- Replenish every 20 minutes — foam collapses fast.
10. Rattan Tray Topping Bar With Candy Canes and Cream
- Measure your tray footprint first — 16 x 24 inches holds about six toppings comfortably.
- Check that the surface is level; rattan plus glass dispensers on a wobbly cart equals broken glass.
- Confirm fridge space for cream and anything dairy-based.
- Decide who refills what, or the station will be picked clean by 4 p.m. on the 25th.
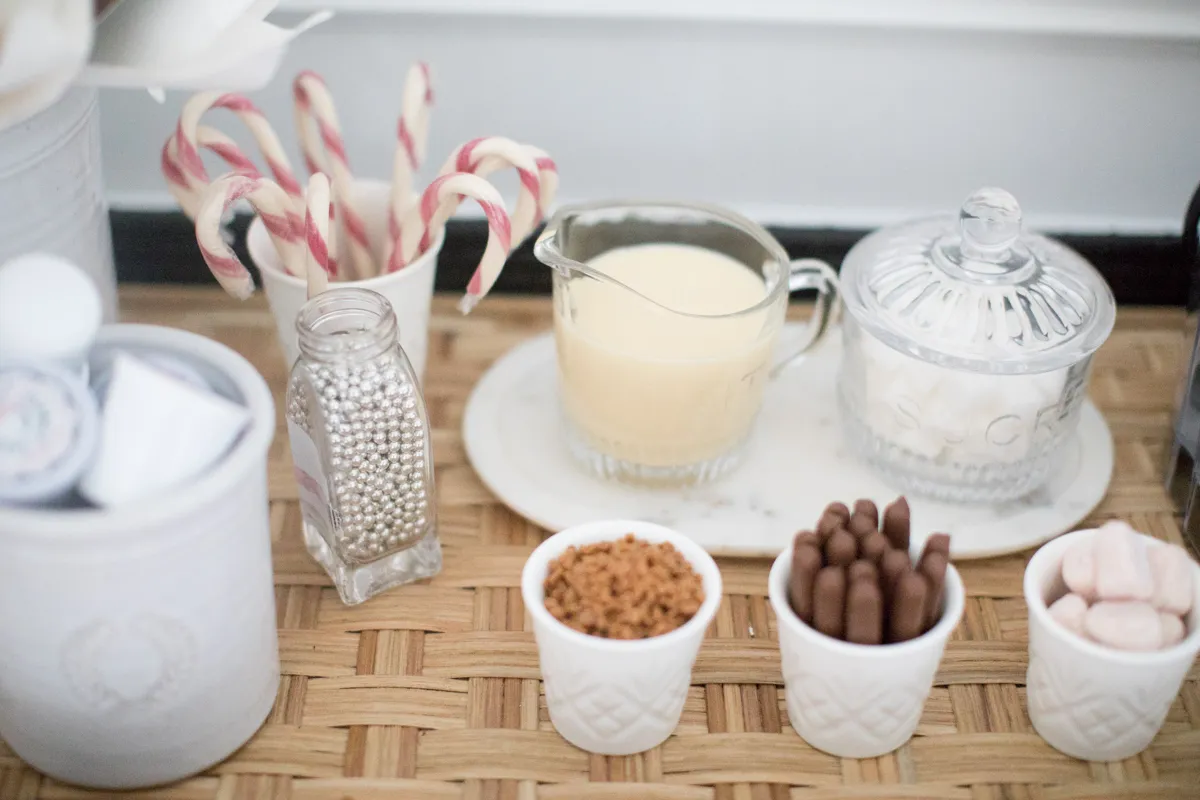
Cream sitting in an open pitcher has a two-hour window before you should swap in a fresh one, so set a timer if you’re hosting a long afternoon. Sprinkles and sanding sugar turn into sticky paste the second someone uses a wet spoon, so leave a small dry scoop in every container. Rattan hates moisture: wipe the tray with a dry cloth only and never set a sweating pitcher directly on the weave.
11. A Holiday Drink Station Built for Easy Cleanup
Paper cups look charming in photos and turn soggy in your hand. If you’re going the disposable route, double-cup or pair every cup with a kraft sleeve — condensation from hot cocoa ruins the coating faster than the drink itself. Also budget for the unglamorous part: a real trash bin within three feet of the station, and a stack of napkins weighted down so they don’t slide off the table every time the door opens.
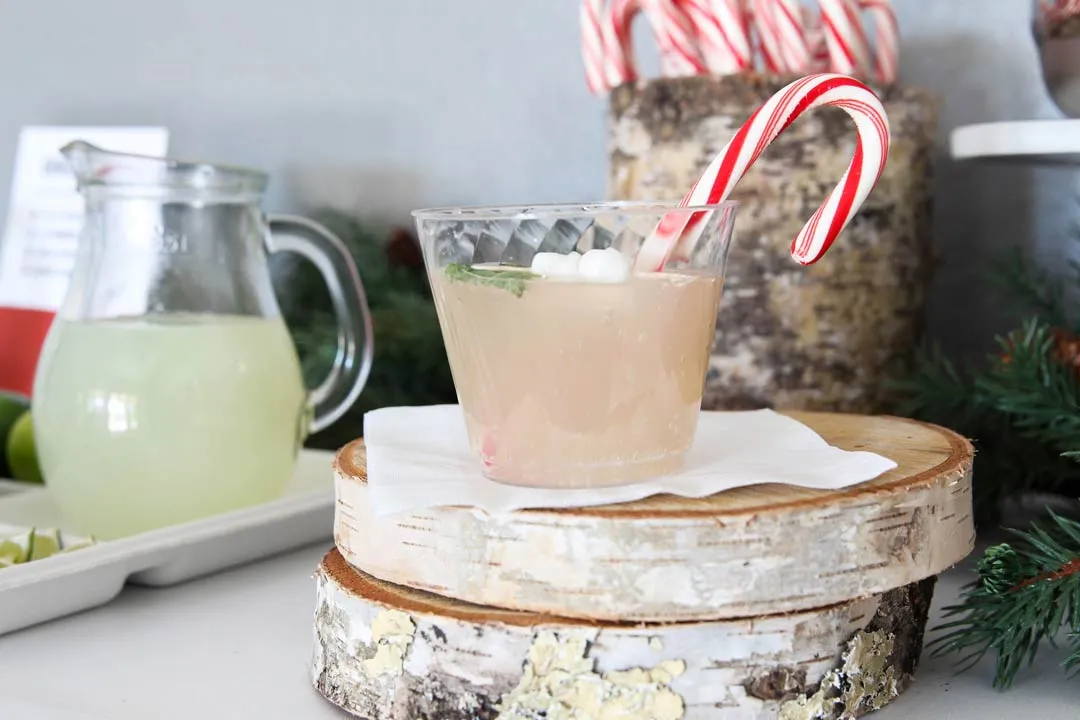
This is a small-space setup, and it’s sized like one. You need roughly 24 inches of counter run plus a 12-inch-deep landing zone, which fits an apartment galley kitchen without displacing the coffee maker you actually use every morning. If you have a big kitchen, resist stretching one station across the whole room — build a second compact one near the dining table instead. Two small stations always beat one sprawling one.
12. Pomegranate Cocktails on a Mirrored Gold Tray
The palette is roughly 70 percent dark — the wood surface and that deep background — 20 percent deep red from the drinks, and 10 percent gold. It’s a nighttime formula, and it only really works after dark: in flat daylight the gold reads brassy and the whole scene loses its drama. Keep the formula and swap the fruit: grapefruit and thyme instead of blood orange and rosemary gives you the same structure with a brighter, less holiday-specific flavor.
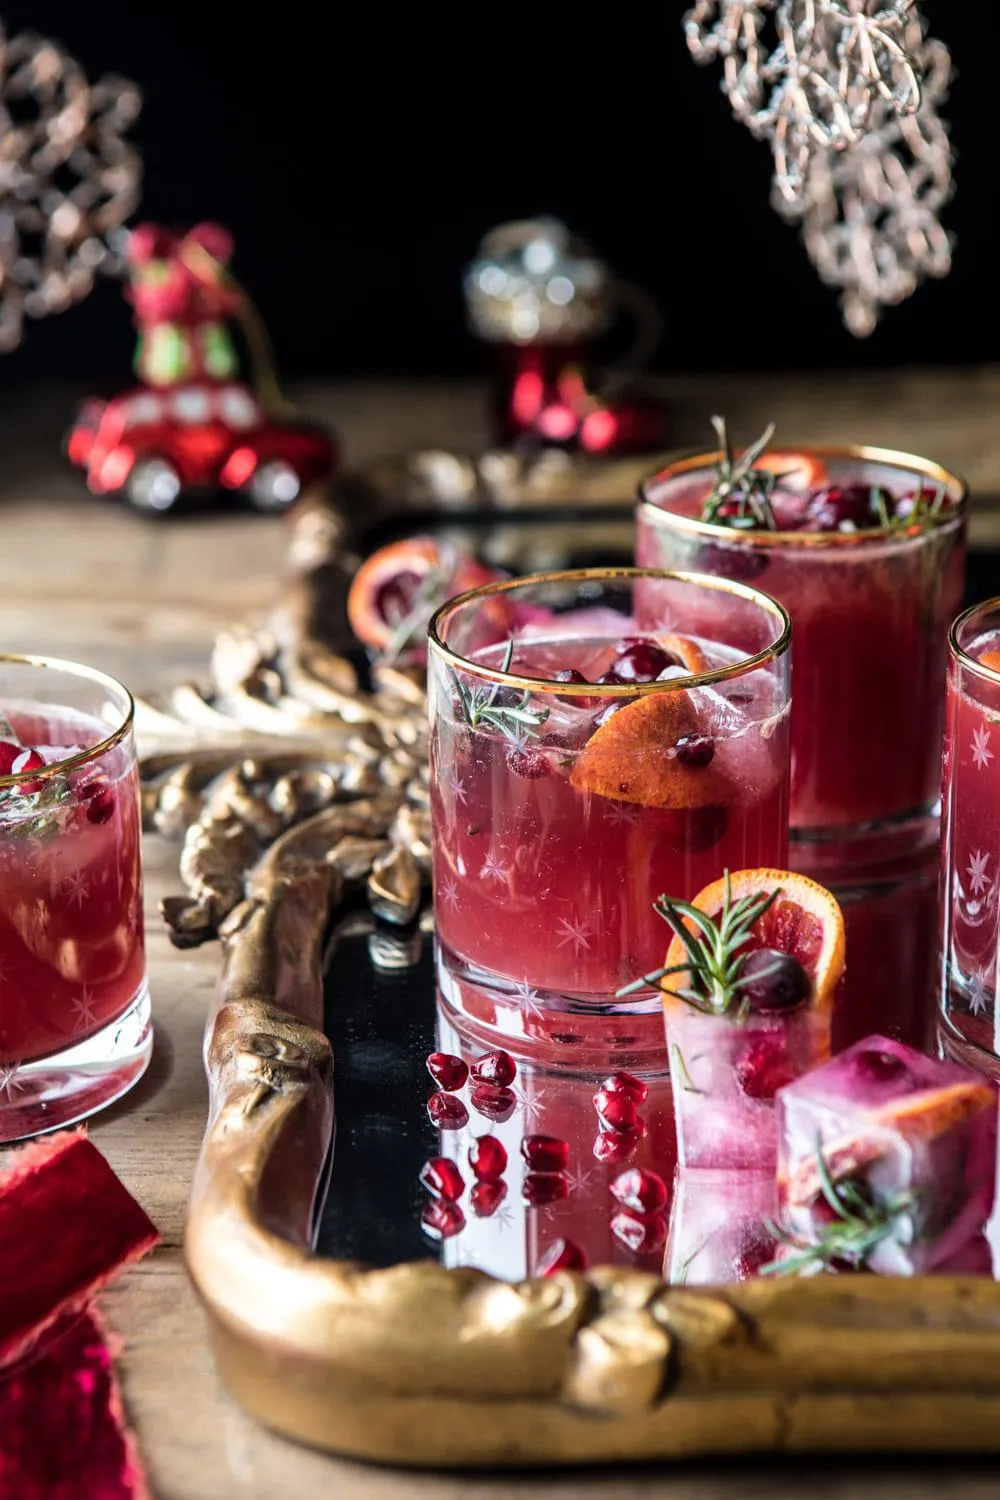
It’s the mirrored tray. Gold trays are everywhere, but a mirrored surface doubles every glass, catches candlelight, and turns three cocktails into something that looks like a full bar cart. Remove it and you have three nice drinks on a table. The etched snowflake glasses are a close second — but they’d read as plain glassware without something reflective underneath them.
13. White Rolling Cart Dressed in Red and White Checks
- Three-tier rolling cart (white metal): $30–$70
- Tiered serving tray and mug set: $25–$60
- Bottle brush trees, ceramic house, reindeer figure: $20–$55
- Checkered valance and garland: $18–$45
- Battery string lights and ribbon: $10–$25
Total: $103–$255. Budget alternative: a $30 IKEA cart plus thrifted mugs and Dollar Tree trees lands under $55. Skip the valance and clip a checkered tea towel over the top edge instead.
Two things kill rolling carts: wheel locks and weight limits. Most carts in this price range are rated for 30 to 50 pounds total, and glass jars plus a ceramic tiered tray can quietly get you there. Lock the casters — not just to stop rolling, but because an unlocked wheel on a slightly sloped floor will send the whole thing into a wall. Heaviest items on the bottom tier, always.
14. A Dessert-and-Drink Spread Backed by Holiday Fabric
The tablescape has quietly become the holiday content format of the moment — part dessert board, part bar cart, part photo studio. What’s changed for 2026 is the backdrop: hosts are hanging fabric or a curtain panel behind the table instead of relying on a bare wall, because it gives every phone photo a soft, intentional frame. It’s a Pinterest habit that started with food bloggers and has now fully crossed into home decor. Compare with Idea #22, where the same party energy gets built around individual desserts.
Backdrop placement is a simple measurement: hang your fabric 18 to 24 inches behind the edge of the table. Closer and it looks like a shower curtain; farther and it stops reading as a scene. Steam-iron it flat first, since every wrinkle shows up in flash photos, then clamp it to a backdrop stand or run it across two tension rods inside the window frame. Total cost: about $25.
15. Embossed Tree Mugs With a Ribbed Marshmallow Bowl
The five-minute drink topper, start to finish:
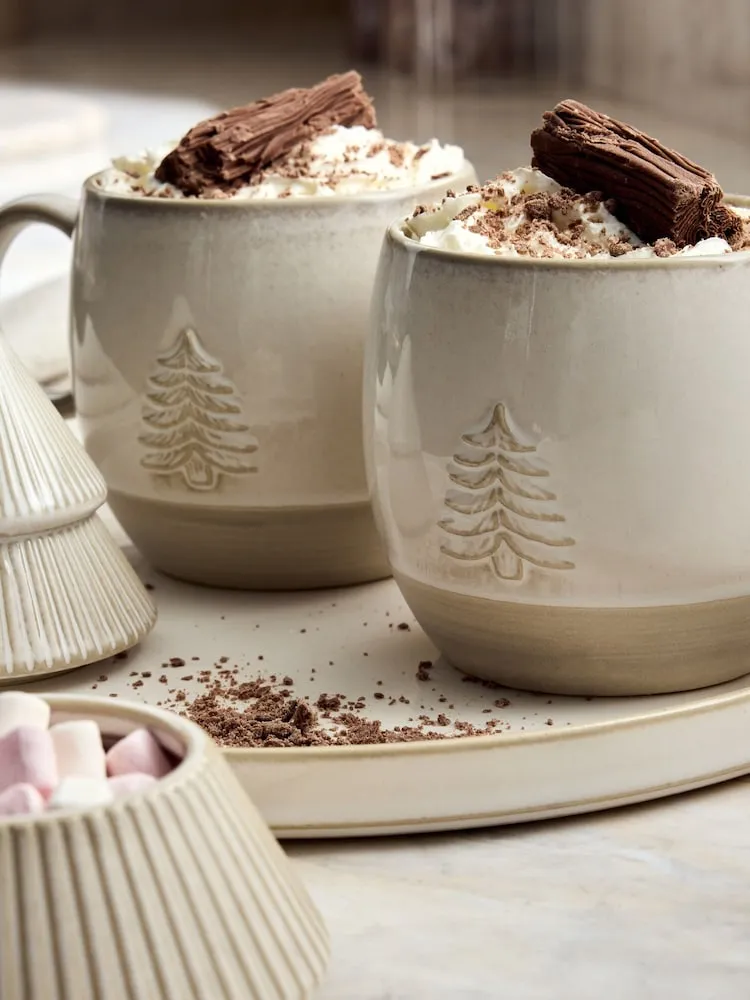
- Whip 1/2 cup cold heavy cream with 1 tablespoon powdered sugar until soft peaks form.
- Spoon it over hot cocoa, leaving a 1/2-inch rim of liquid visible.
- Shave dark chocolate with a vegetable peeler directly over the cream.
- Tuck a chocolate flake bar in at an angle — it’s structural, not just decorative.
- Add three marshmallows to the side bowl, never the mug.
Time: 5 minutes. Cost: about $6 for four servings.
The cream mugs with the embossed tree run $14–$22 each at boutique shops, but Target’s stoneware mugs are $5 and read almost identically on a tray. For the ribbed marshmallow bowl, a $4 Dollar Tree ramekin works fine if you only fill it two-thirds. The round serving tray is the one piece worth buying well — it’s what makes this look styled instead of improvised, and it’ll outlive every mug in the photo.
16. Candy Cane Martinis Next to a Glowing Tree
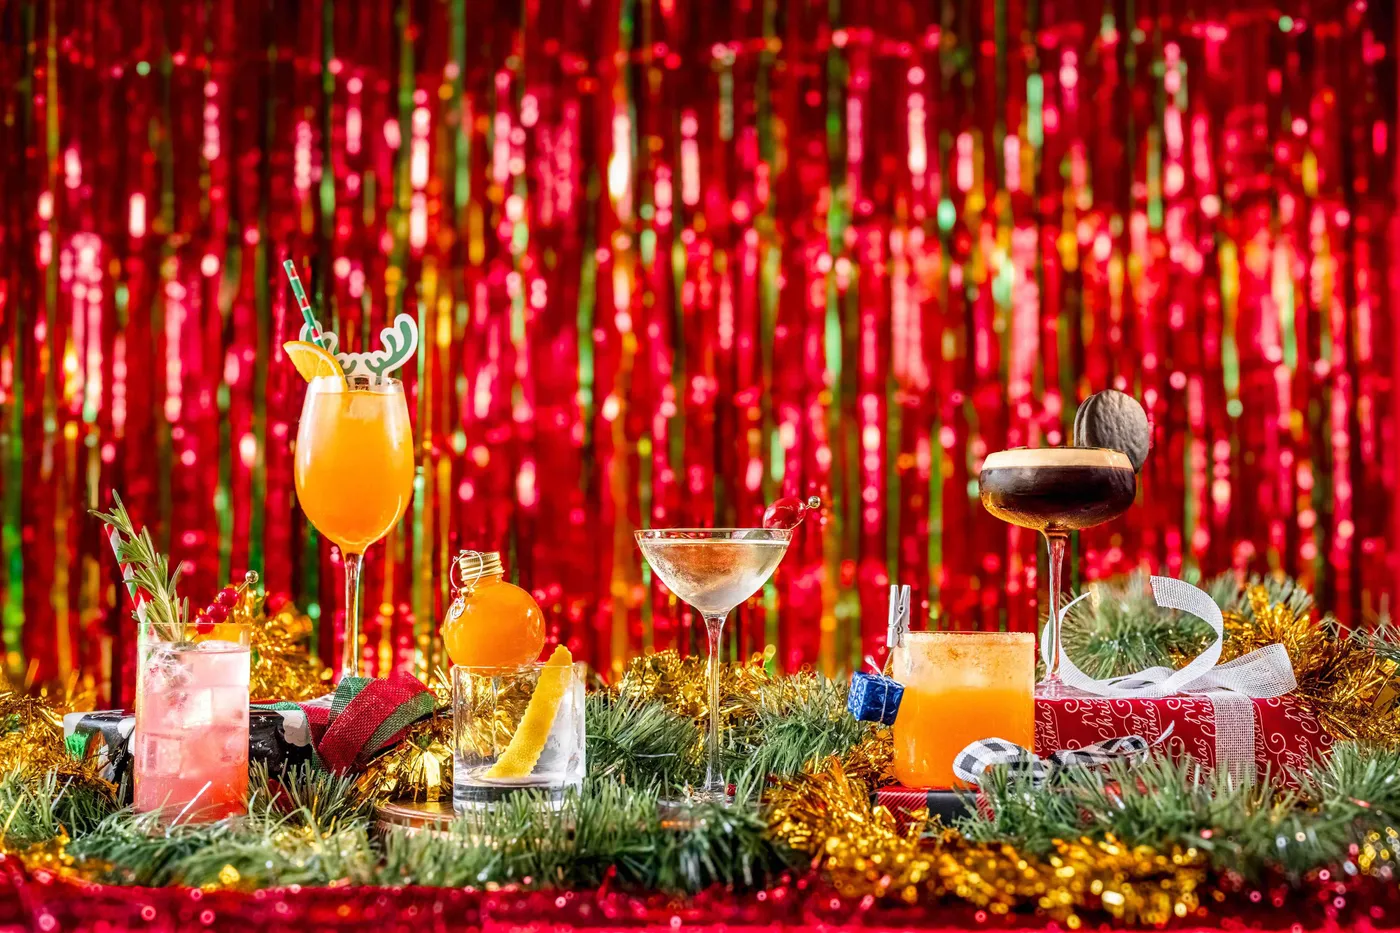
It’s the candy cane hooked over the rim. Adorable, yes, but it’s also doing real work: it gives guests something to do with their hands, it signals “holiday drink” from across the room, and it means you don’t need a garnish pick, a stirrer, or a coaster. Take the candy cane away and it’s just a white cocktail in a glass with a lot of tinsel behind it.
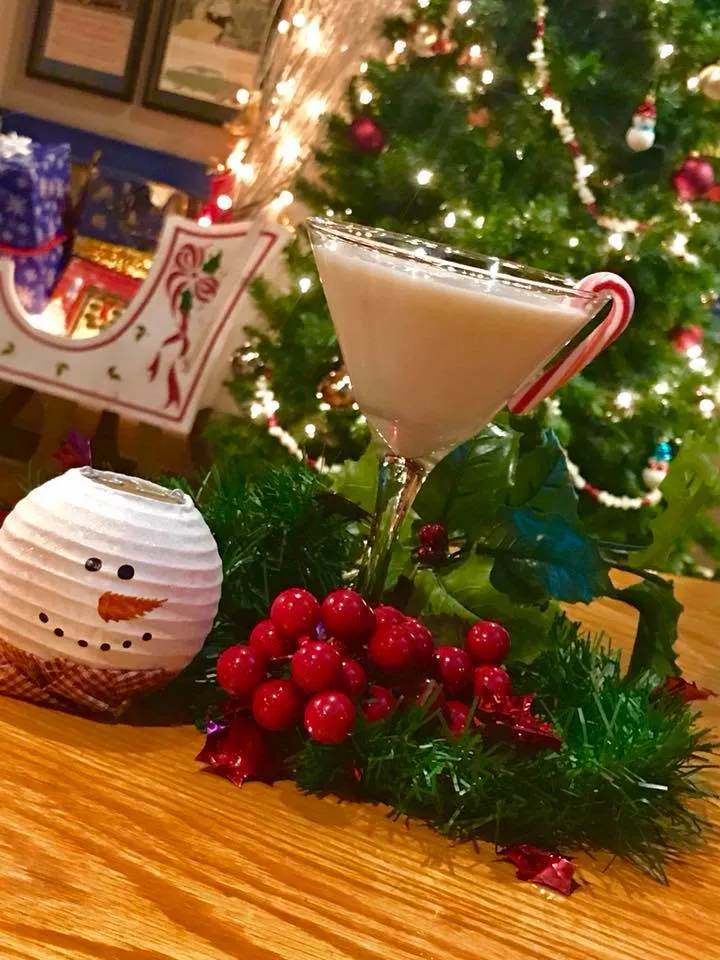
Creamy cocktails are the most perishable thing on your table. Use fresh cream, never anything that’s been sitting out, and serve within 30 minutes of mixing. Sugar rims start dissolving on contact, so rim the glasses right before guests arrive. Pre-chill the glassware for at least 20 minutes, because a warm glass flattens a creamy drink fast. Anything left in the shaker after an hour goes down the drain.
17. Marble and Wood Tiered Stand Stacked With White Pods
Standard kitchen counters are 24 to 25 inches deep, and you want 18 inches of clear working surface left once the station is down. A 10-to-12-inch-wide tiered stand hits the sweet spot — visible from the doorway, out of the way of the cutting board. Ceiling height doesn’t matter here, but upper cabinets do: leave 15 inches of clearance beneath them or the top tier becomes a head-bumper every morning.
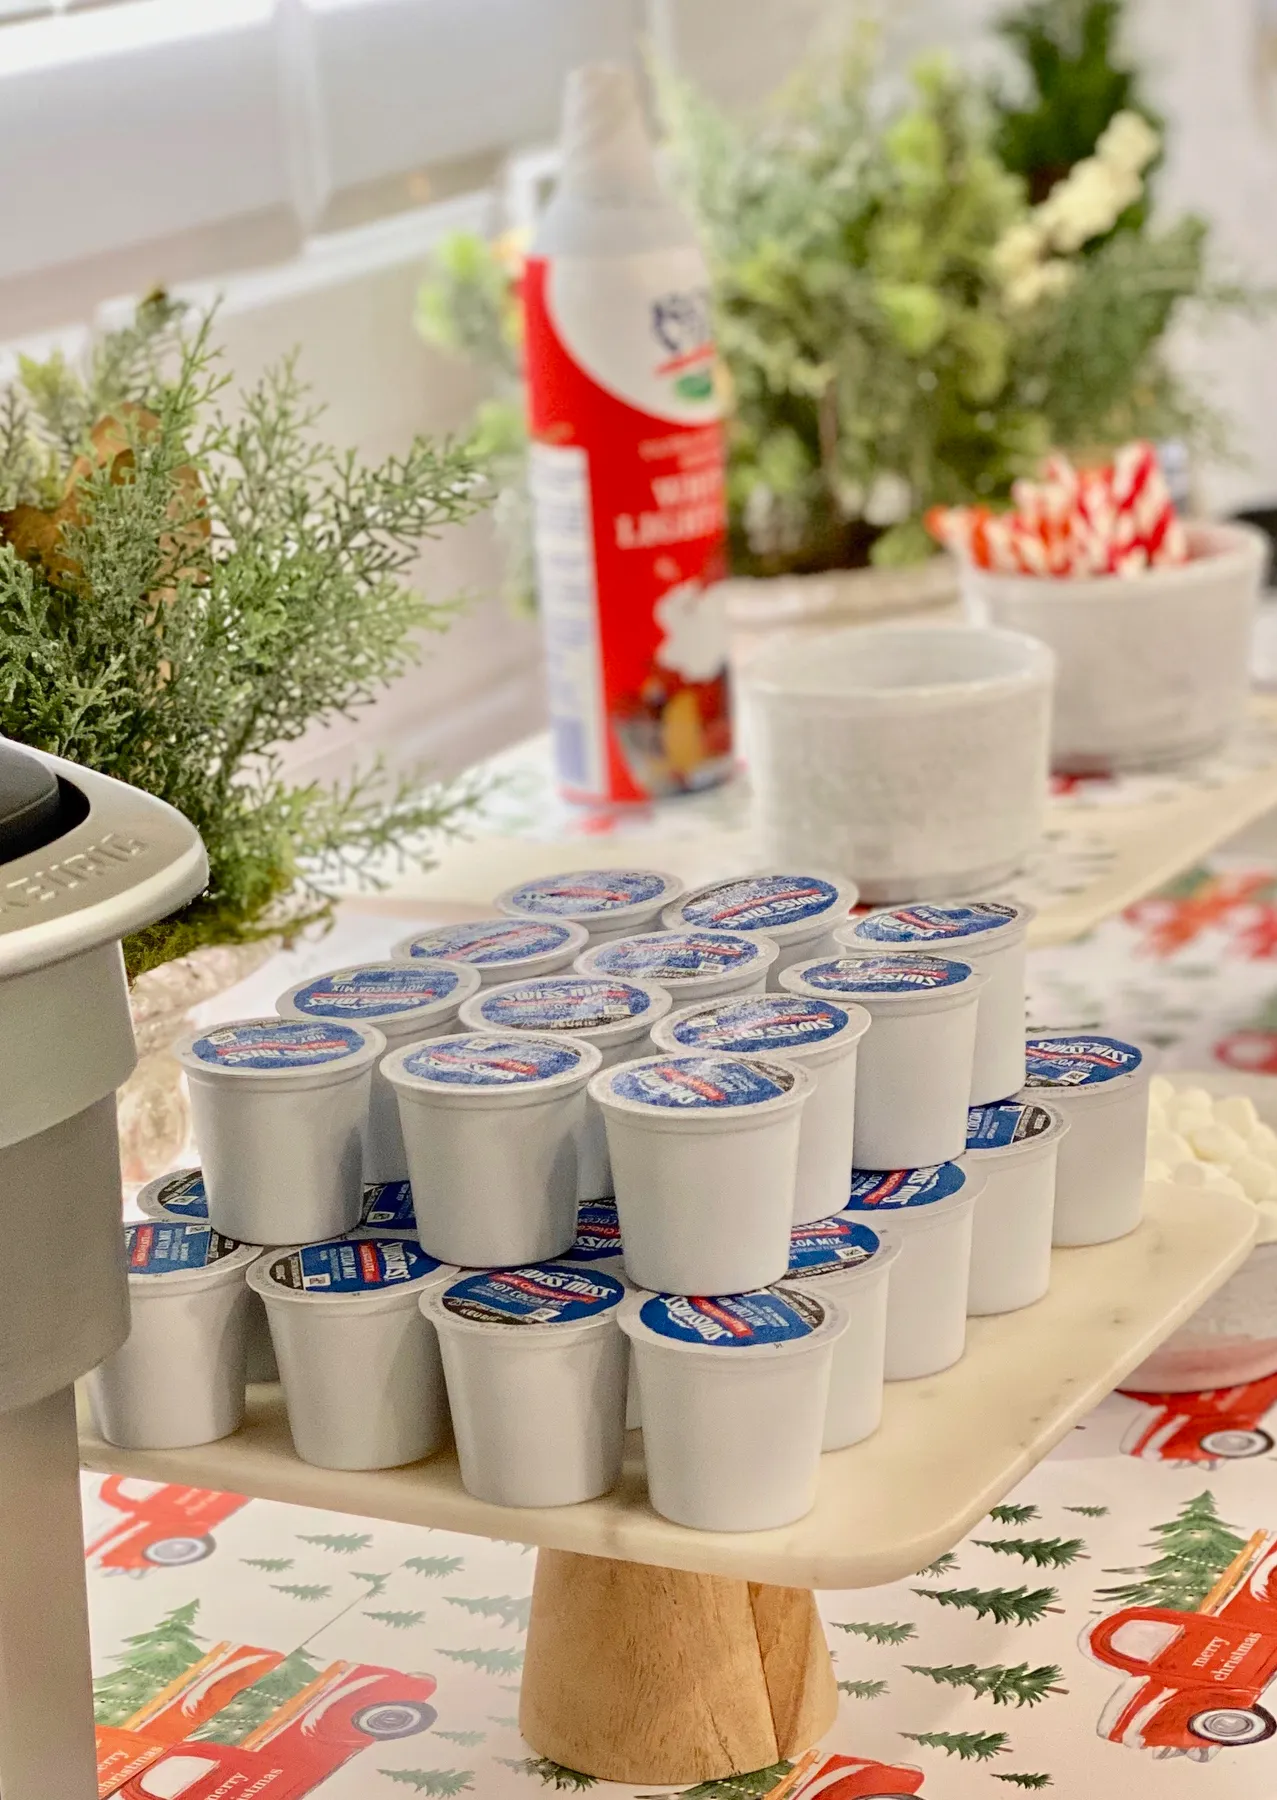
- Tiered marble and wood cake stand: $25–$55
- Pod box, 48 count: $18–$30
- Christmas table runner: $12–$30
- White marble jars and candy cane filler: $15–$40
- Faux evergreen branches: $10–$30
Total: $80–$185. Budget alternative: stack two white plates with a candleholder between them as a DIY stand, grab a plain Dollar Tree runner, and iron on a printed truck pattern. Under $35.
18. Light Grey Mugs and Striped Straws on a Truck-Print Cloth
Matte finishes photograph better than glossy ones — that’s why those textured light grey mugs look expensive sitting next to shiny white ceramic. Also, fill your topping bowls only two-thirds full. A bowl heaped to the rim looks messy within ten minutes and guests spill more than they take. Three-ounce ramekins for small toppings, six-ounce bowls for the big ones, and one spoon per bowl, full stop.
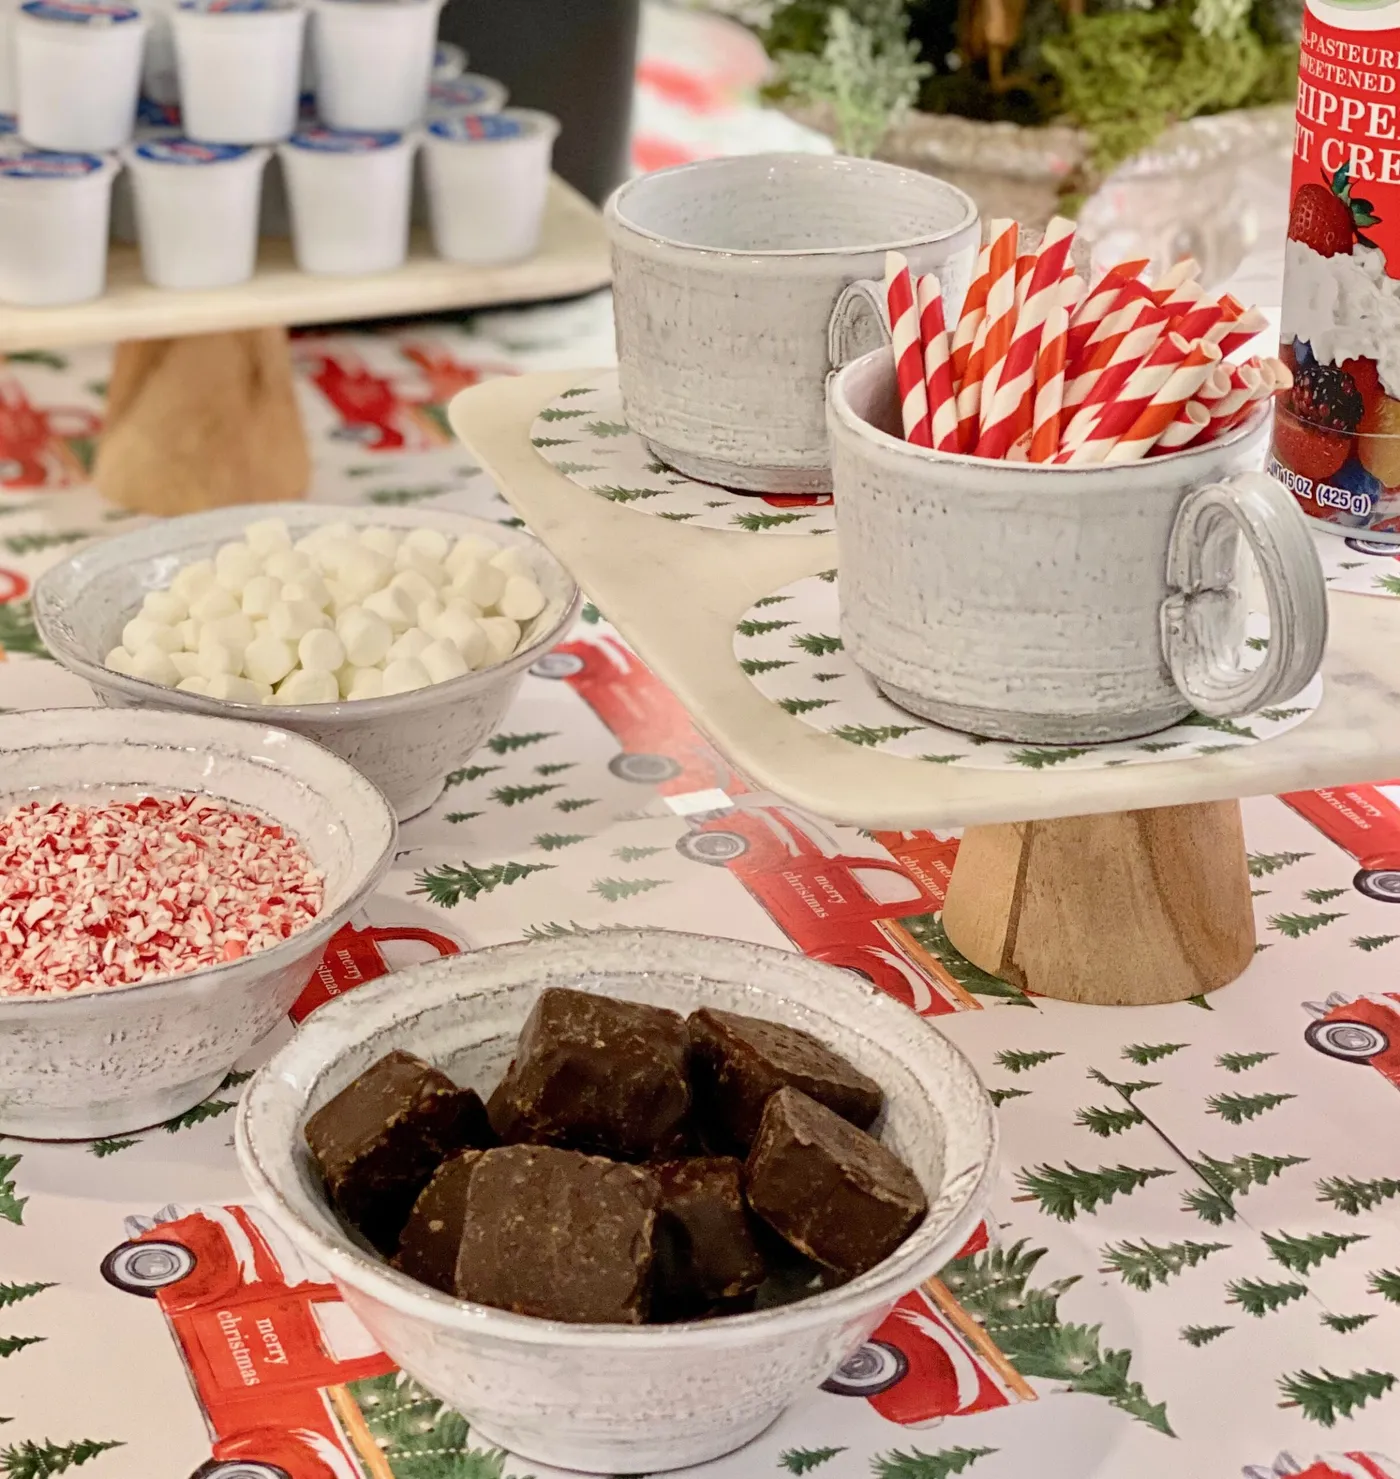
What’s working here is restraint. There’s exactly one pattern in the entire setup — the truck-and-tree cloth — and everything else is a solid: white bowls, light grey mugs, red and white striped straws. That’s why the color pops without turning chaotic. The two-tiered stand then adds height so your eye travels through three distinct levels: cloth, bowls, stand. Busy prints plus busy serveware would flatten all of it.
19. A Santa Suit Mug Filled With Icy Mint
Novelty mugs are fun and also frequently terrible. Check that the interior glaze is food-safe and lead-free before you pour anything hot into a Santa torso, and hand-wash it — the painted belt and boots do not survive a dishwasher. This one holds about 12 ounces, which is less than it looks, so don’t overfill it the way you would a normal mug. And skip hot liquid entirely if you’re serving it iced, like this one, with powdered mint over crushed ice.
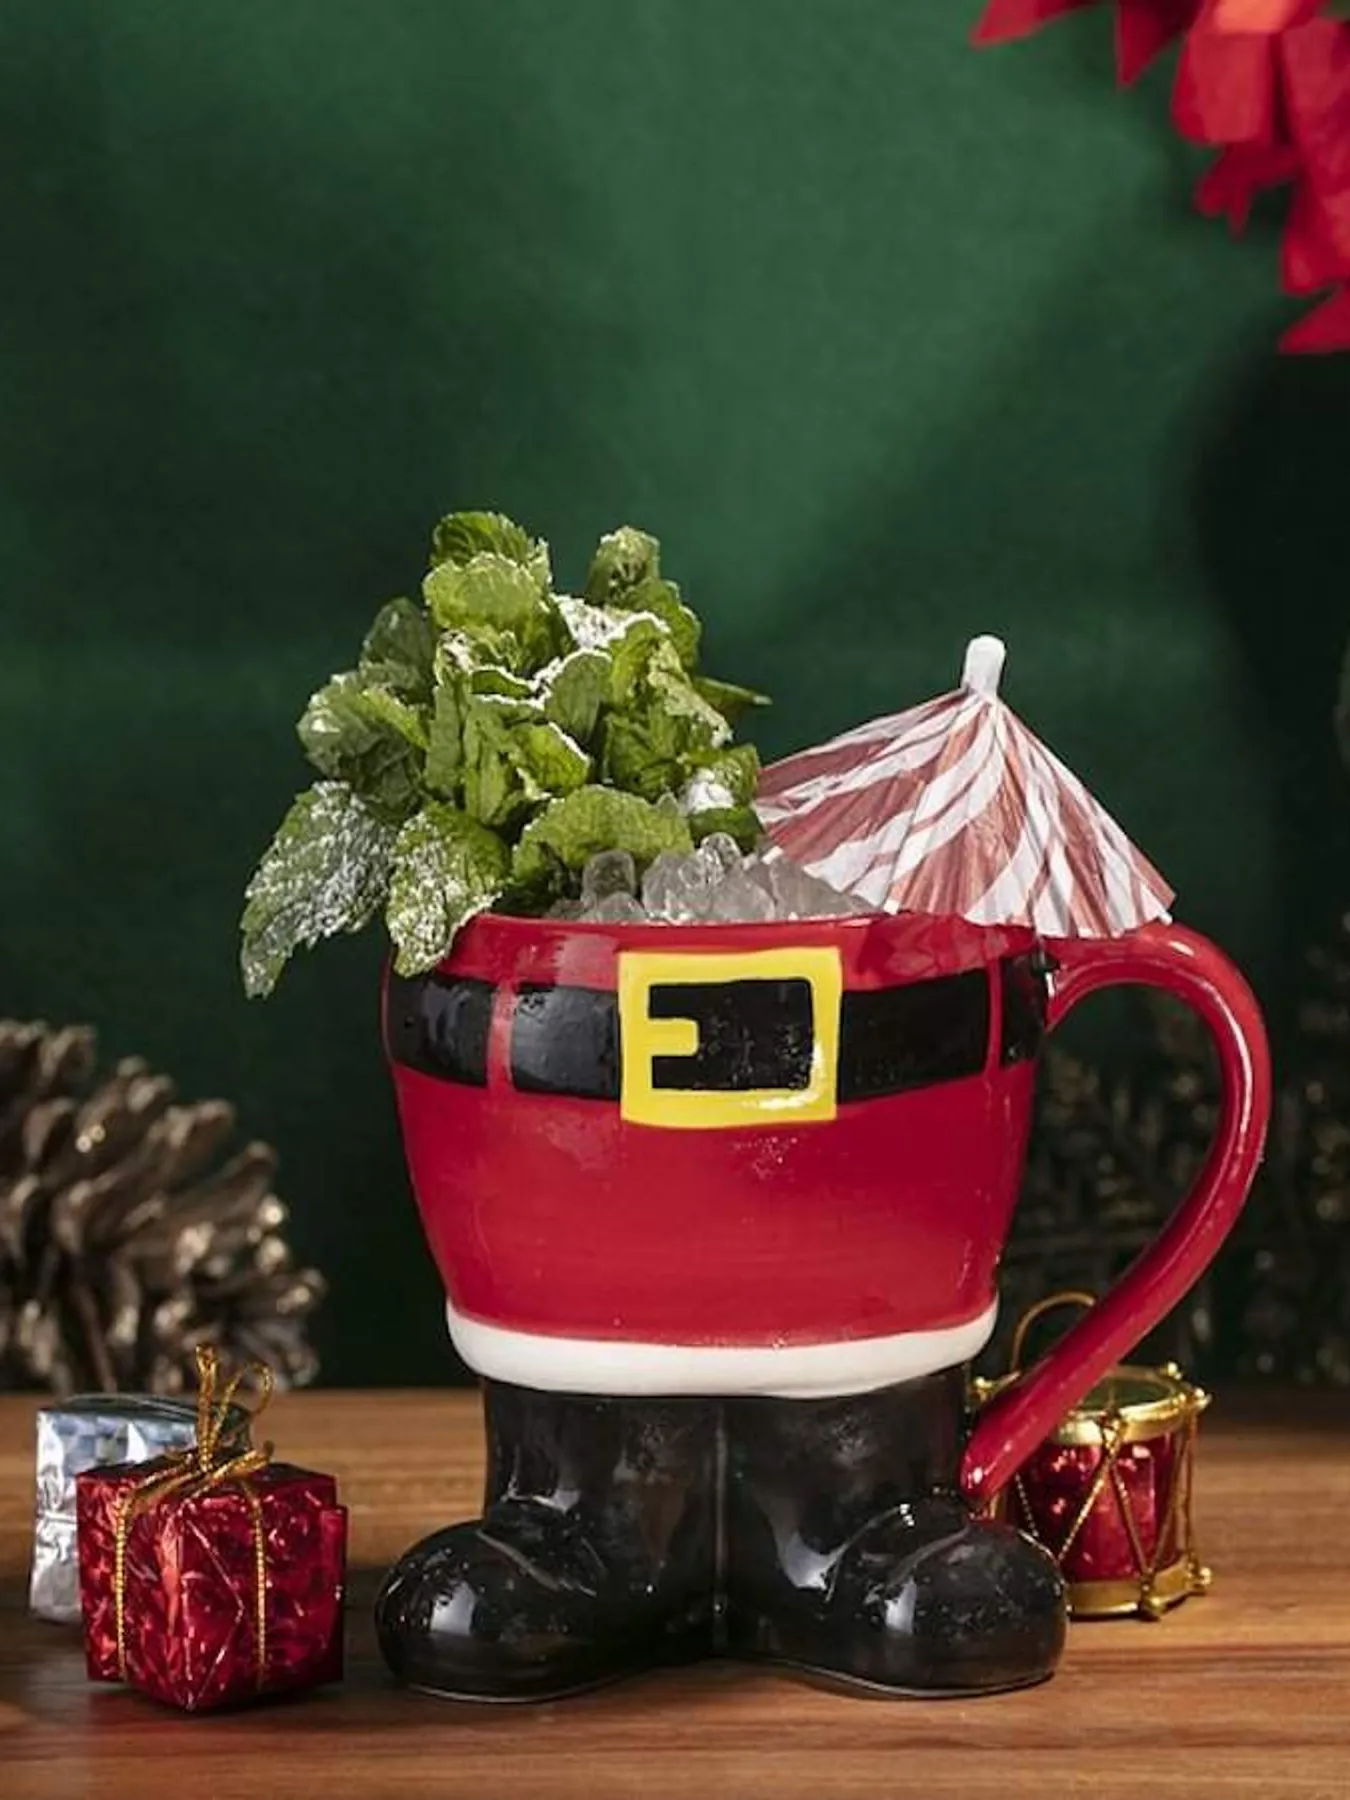
The formula is roughly 80 percent dark green, 15 percent red, and 5 percent metallic. It’s a high-contrast nighttime recipe built around that deep green background, which does the same job a painted accent wall does in a room. Compare with Idea #16 — both lean on a creamy white drink for contrast. Want it lighter? Swap the dark green for soft sage and drop the metallic entirely.
20. Three Stacked Santa Mugs on a Marble Counter
Three Santa mugs in a row can cost $60 at a boutique. Watch the November sales at Walmart and Target and you’ll find comparable ceramic versions for $4–$8 each. The marble-look surface is the more interesting budget win: peel-and-stick marble contact paper runs about $12 a roll and covers a small staged surface convincingly. Add a clear jar with a yellow ribbon ($6) and a sprig of real greenery, and you’re in for under $45.

This is a staging vignette, not a full working station — three mugs and a jar need about 18 inches of counter. That makes it ideal for a powder room, a console by the front door, or the narrow strip beside the fridge where nothing else fits. Keep the arrangement at eye level or slightly below; stack it above 60 inches off the floor and it starts to feel like shelf inventory instead of a welcome.
21. Sugared Berry Iced Drink With a Cinnamon Stick
The trick is temperature contrast. A deeply red, frosty drink sitting on a warm, textured peach surface gives your eye two opposing sensations at once, and that tension is what makes the photo stop a scroll. The cinnamon stick does double duty as garnish and aroma cue — you smell the drink before you taste it. Sugared berries scattered around the glass extend the color past the rim so the whole surface feels deliberate.
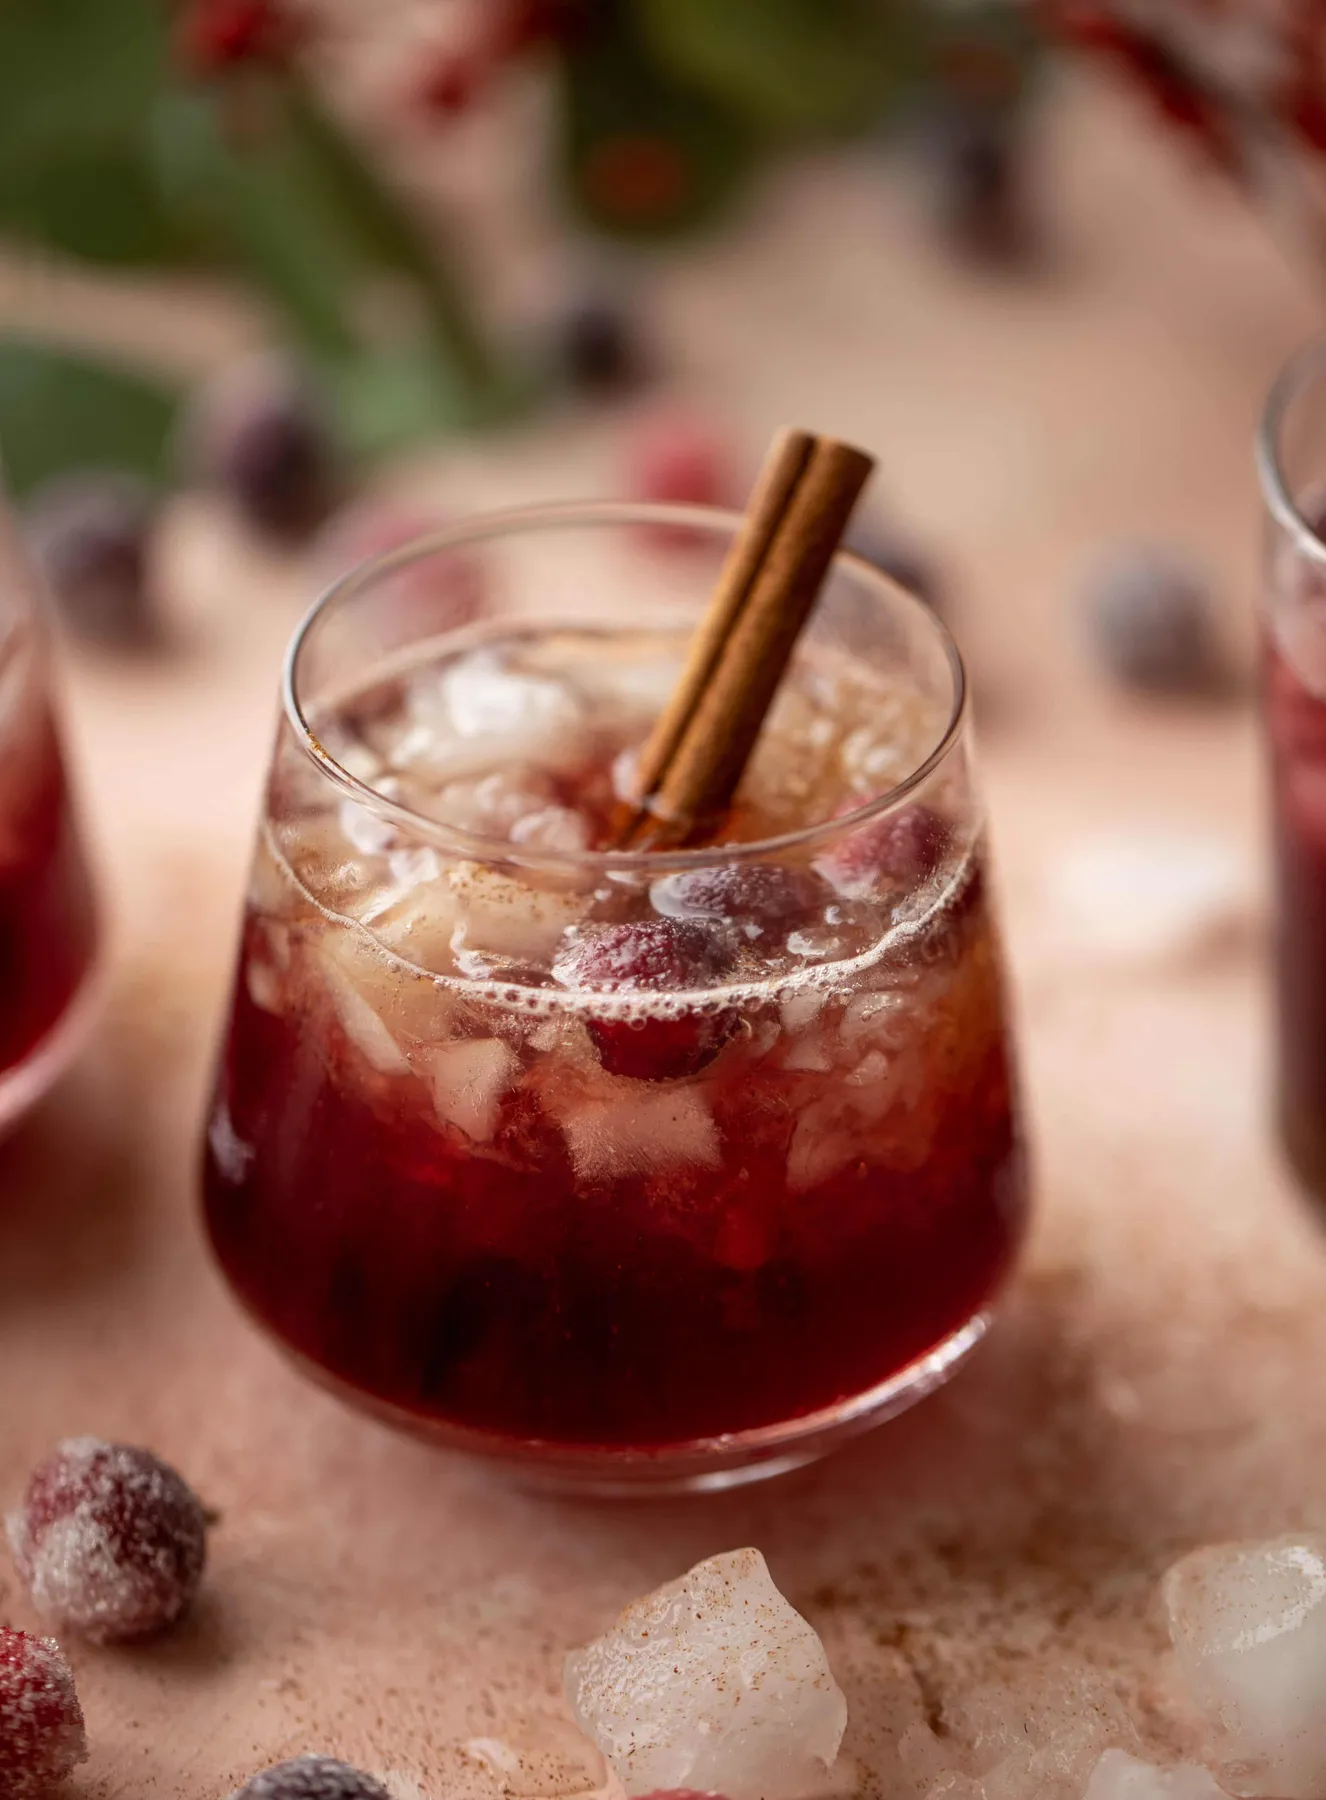
Iced holiday drinks were a niche a few years ago and now they’re a full category, largely because mocktails went mainstream. People want something that looks celebratory without a second glass of wine, and cranberry plus cinnamon delivers that in a stemless glass. This one has real staying power — the flavor profile is seasonal without being gimmicky, so it works just as well in February as it does on December 24th.
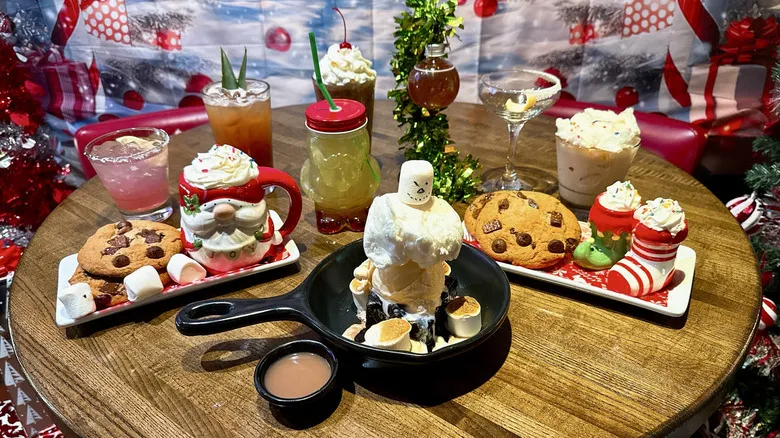
22. Marshmallow Snowmen in Mini Skillets
- Round wooden table or a large serving board: $40–$160
- Mini cast-iron skillets (set of 4): $25–$50
- Santa mugs and novelty cups: $20–$50
- Ice cream, cookies, and toppings: $25–$45
- Tinsel garland and backdrop fabric: $15–$35
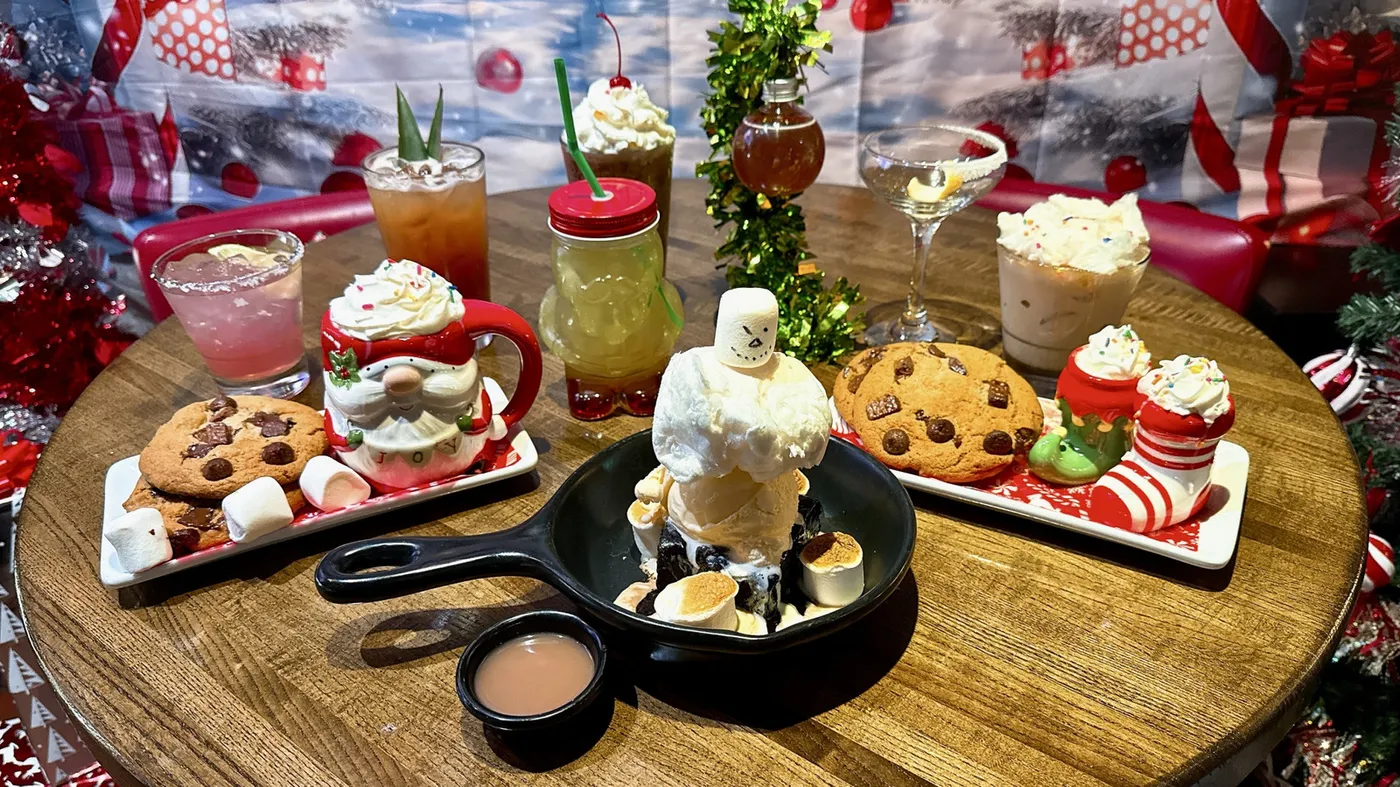
Total: $125–$340. Budget alternative: serve the dessert in ramekins instead of skillets and use thrifted Santa mugs. Under $60, easy.
Building a marshmallow snowman takes about four minutes per serving.
- Set a warm chocolate chip cookie in the bottom of the mini skillet.
- Add one scoop of vanilla ice cream and press it flat.
- Stack three marshmallows vertically, using a dab of chocolate syrup as glue.
- Add two mini chocolate chips for eyes and a sliver of red candy for a scarf.
- Serve immediately — the whole thing slides fast.
23. Polar Bear Mugs on a Galvanized Tray
If kids are involved, put the hot liquid somewhere they can’t reach and keep everything else at 36 inches or lower — roughly counter height for a six-year-old. Clear plastic mugs with a painted polar bear are exactly right here: lighter, cheaper, and they won’t shatter on tile. Use a push-button airpot for the cocoa so nobody pours from an open pitcher, and keep the marshmallow jar on the lowest shelf of the tray.
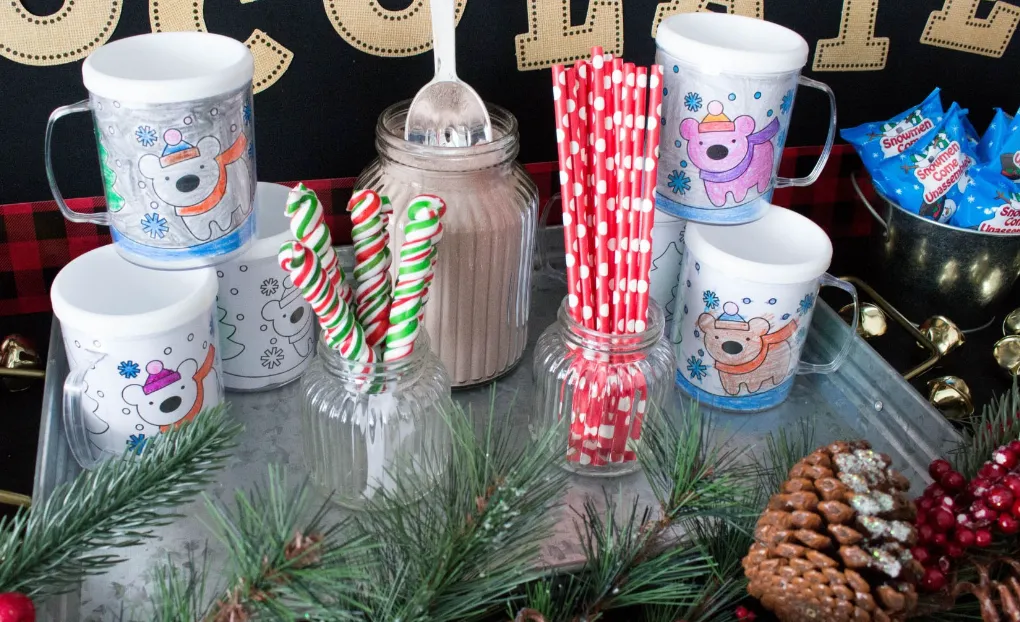
- Confirm the table or cart can’t tip — press down hard on one corner before you load it.
- Check that the buffalo plaid fabric stays well away from any heat source.
- Count your guests and cups, then add 30 percent.
- Decide where wet cups and sticky trays will land at the end of the night.
24. Antique Dresser Turned Cocoa Station With a Mug Rack
It’s the black metal mug rack with the flocked garland woven through it. That one piece turns a piece of furniture into a station — it puts twenty white mugs at eye level where guests can actually see their options, and it lets the garland read as a working part of the setup rather than decoration draped over the edges. Without it, the dresser is just a surface with a coffee maker on it.
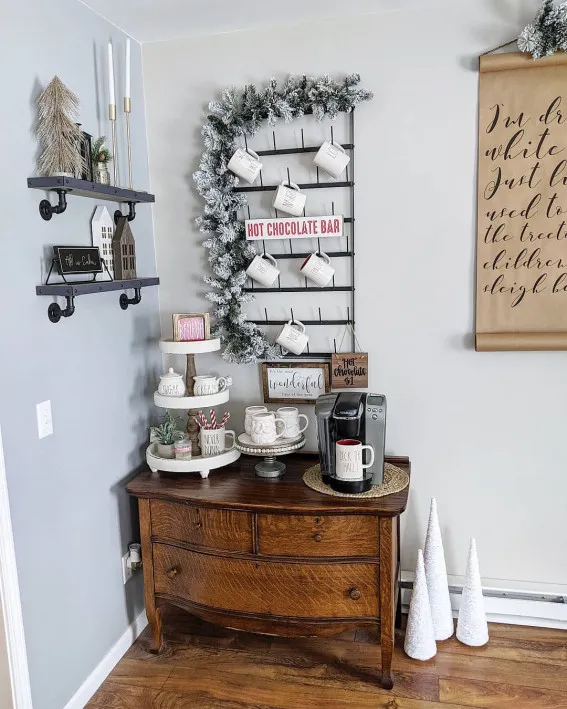
Antique dressers are gorgeous and not load-rated. A single-serve coffee maker plus a full urn can easily hit 25 pounds, and old veneer does not enjoy moisture. Set everything on a rimmed tray or a waterproof liner, never directly on the wood. Check the drawers before you load them with backup supplies, too — a sticking drawer under weight can crack the frame. Idea #4 solves the same storage problem with a painted thrift piece, which is far more forgiving.
25. Small-Space Cocoa Setup With a Bakery-Level Upgrade
You can build a genuinely lovely station on 18 inches of counter and 12 inches of depth — the trick is going vertical instead of wide. One narrow tray, one stack of cups, one jar of mix, and a mug tree on the wall. That fits a studio apartment kitchen without blocking a single drawer. Skip tiered stands entirely; they need a footprint bigger than most small counters can spare, and they’re the first thing to get knocked over.
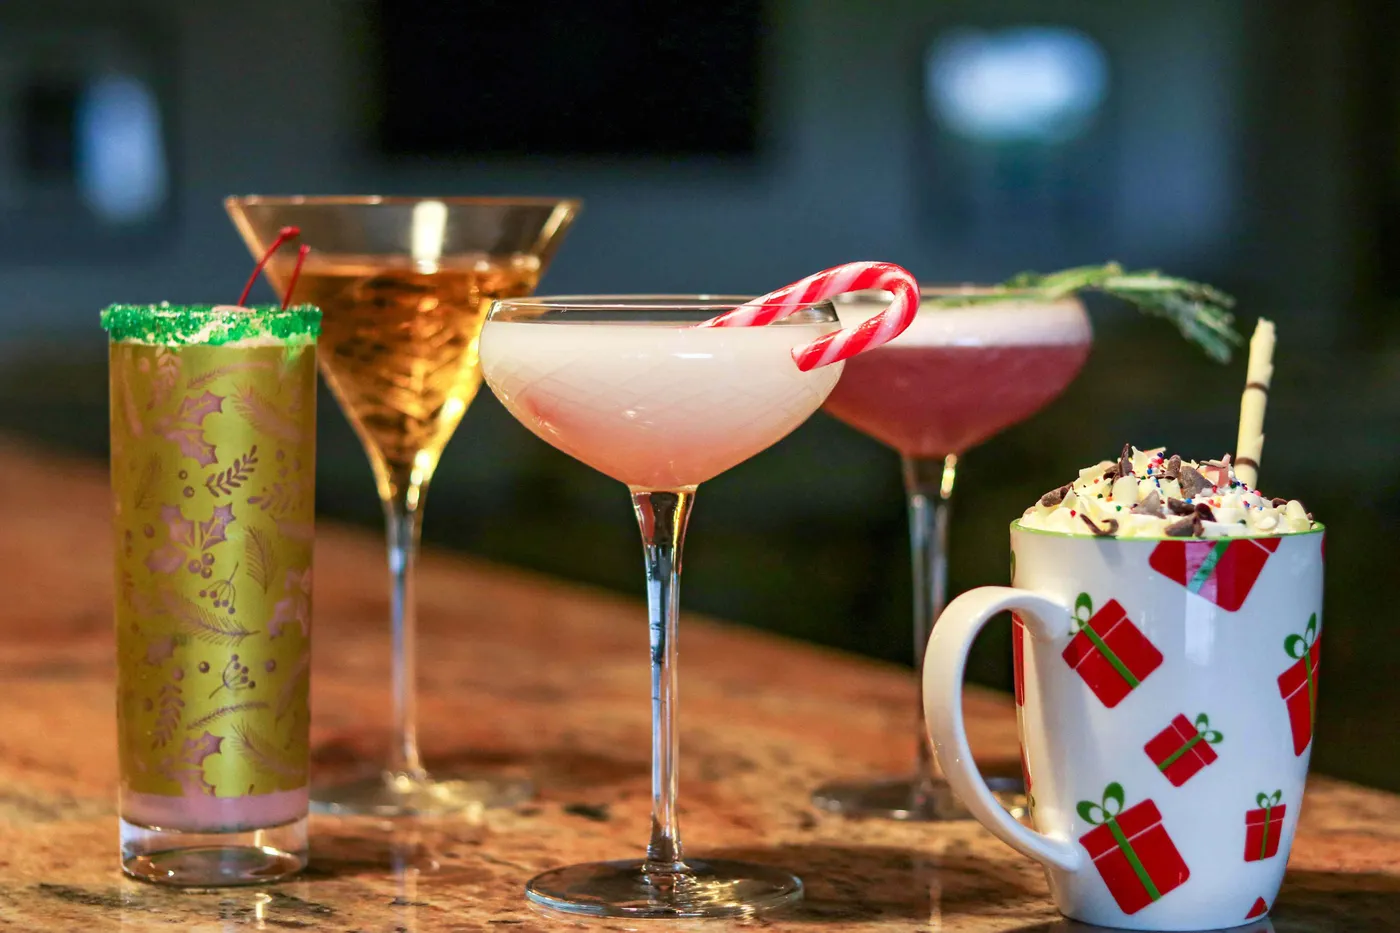
Here’s the shortcut nobody mentions: a $4 jar of good ganache or a $6 tin of drinking chocolate makes homemade cocoa taste like it came from a café, no recipe required. Stir one heaping tablespoon into a mug of hot whole milk and you’re done. Pair it with $1.50 grocery store bakery cookies and a $3 can of whipped cream, and you’ve matched a $40 hot chocolate bar experience for about $15.
26. Homemade Cocoa Mix That Fills a Station for Weeks
Good homemade cocoa is a ratio, not a recipe. Start at 1 cup unsweetened cocoa powder, 2 cups granulated sugar, and 1/2 teaspoon fine salt — that’s your base, and everything else is a variation. Swap in 1 cup of powdered milk for a creamier mix, or replace half the sugar with vanilla sugar. Use 2 tablespoons of mix per 8 ounces of whole milk. Once you know the ratio, you can scale a batch to fill any jar you own.
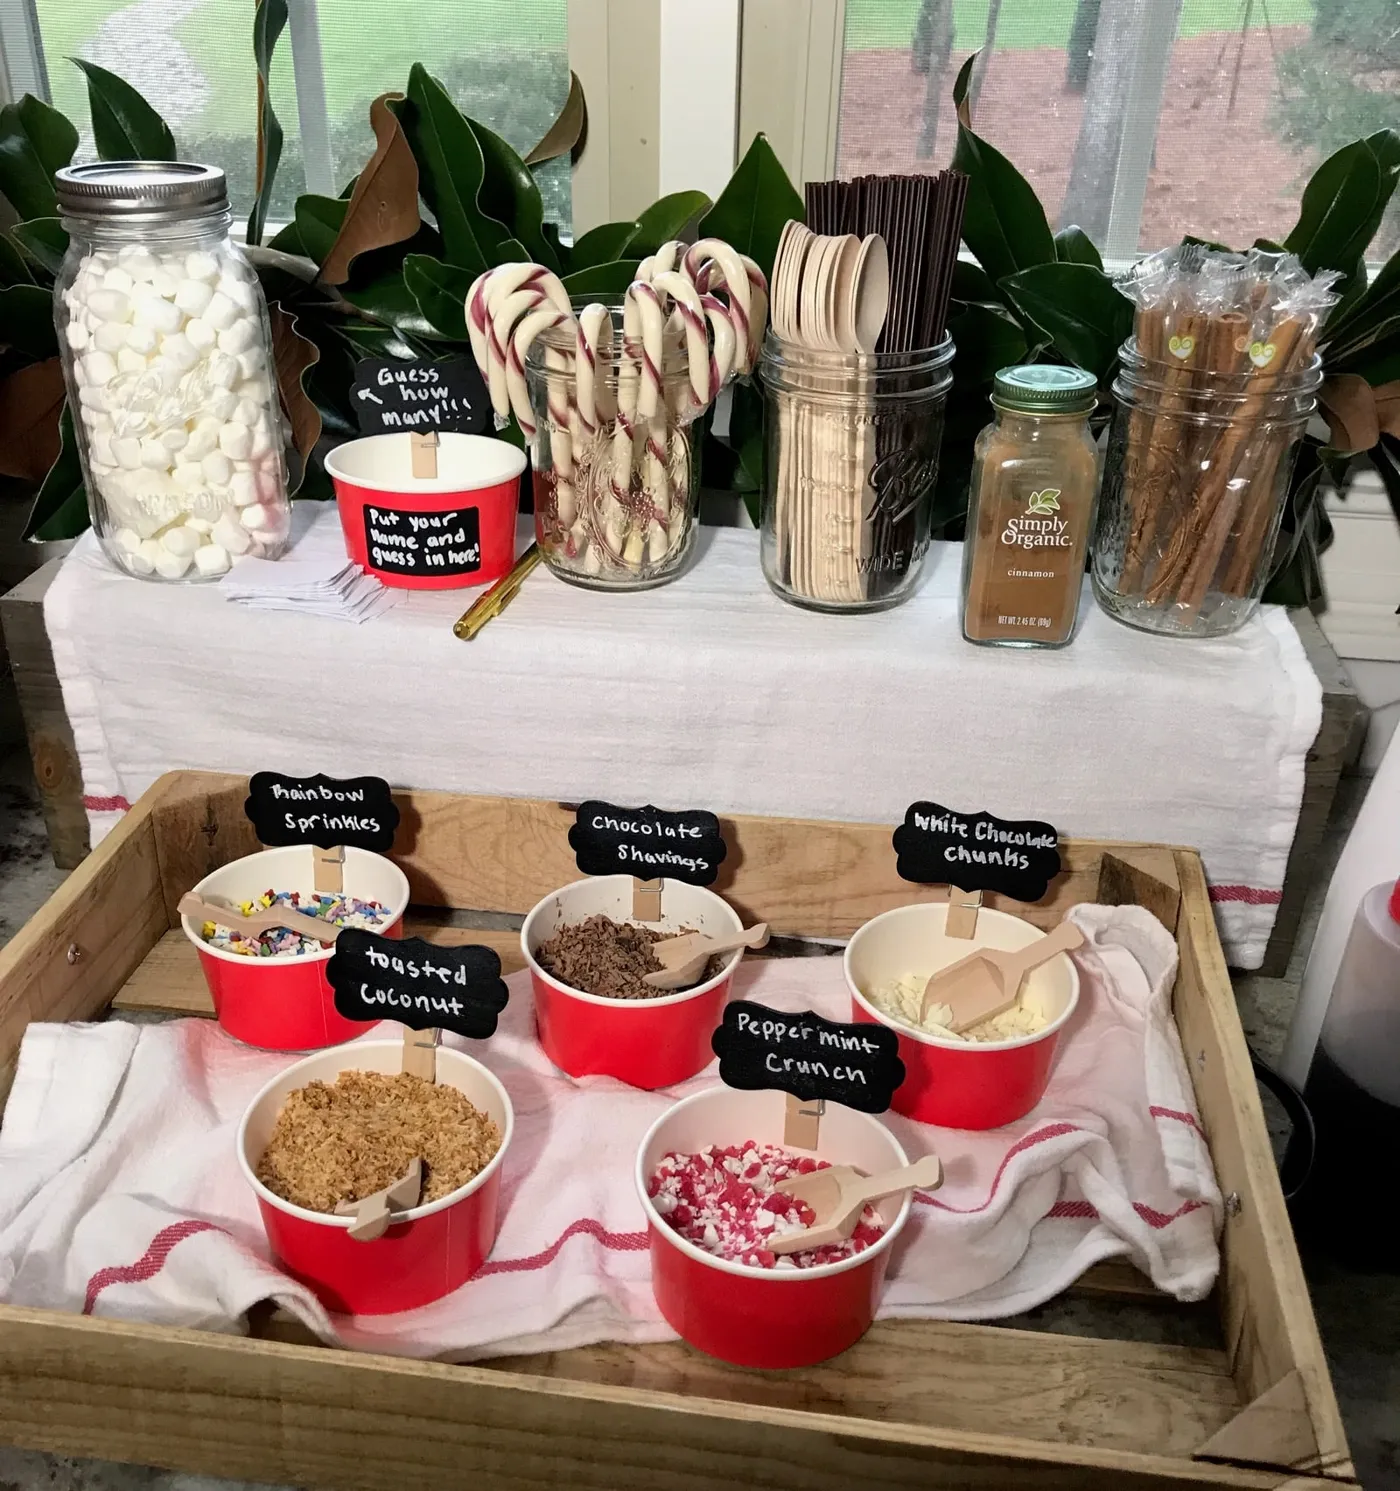
Store the mix in a jar with a rubber gasket, not a decorative cork. Cocoa powder absorbs humidity and clumps within weeks under a loose lid, and no amount of shaking brings it back. A 32-ounce flip-top jar with a silicone seal holds roughly 30 servings and fits a standard shelf. Label the underside of the lid with the mix date — cocoa stays good about six months, after which the fat starts tasting flat.
27. Cute Cocoa Station Details That Cost Almost Nothing
Cute isn’t expensive — it’s specific. A station feels charming when the small details echo each other: the ribbon on the jar matches the stripe on the straws, the spoon rest matches the tray, the sign matches the mug handles. Repetition across three unrelated objects is what your brain reads as “styled.” Random cute pieces from five different stores almost never work together, no matter how adorable each one is on its own.
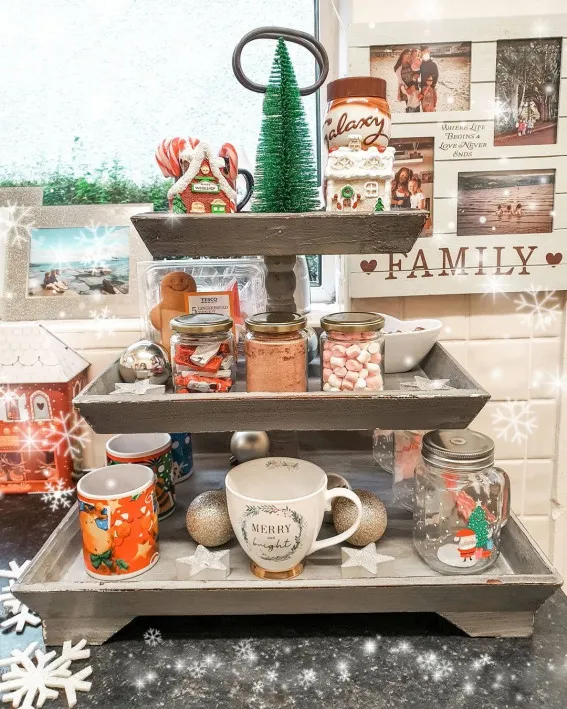
- Glass jars with wooden or ceramic lids (3): $15–$40
- Signage, labels, or a small chalkboard: $8–$25
- Ribbon, twine, and gift tags: $6–$18
- Mugs and a tray: $20–$55
- Small decor accents (trees, figurines): $12–$35
Total: $61–$173. Budget alternative: thrift the jars and mugs, reuse leftover wrapping ribbon, and hand-letter your own sign on cardstock. Under $25.
28. The One Upgrade That Makes Cocoa Taste Luxurious
If you’ve bought a nicer cocoa tin, treat it like one. Those mixes use real chocolate, which means a shorter shelf life than the powdered stuff — usually 6 to 9 months unopened and 2 to 3 months once the seal is broken. Keep it cool and dry, away from the stove and the dishwasher’s steam. If the powder smells like cardboard or looks dull rather than glossy, it’s past its best and no amount of marshmallows will hide it.
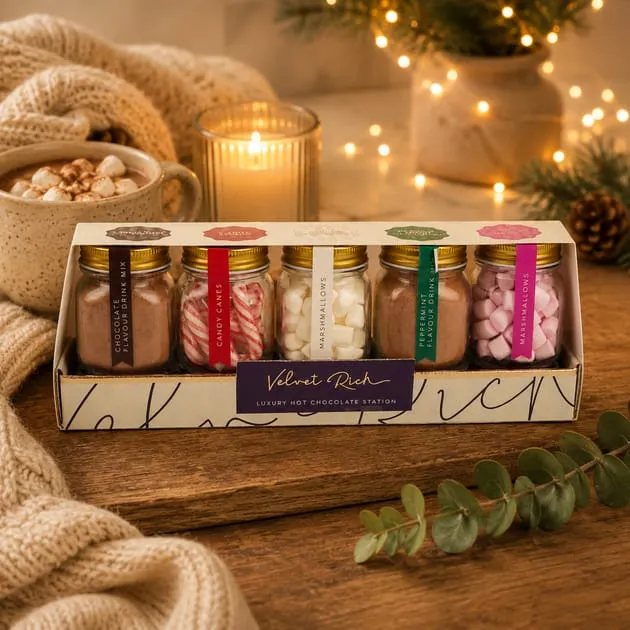
It’s the chocolate itself. A single good tin of drinking chocolate — or a bag of chopped couverture — is the one upgrade that changes how the entire station tastes, and taste is what people actually remember. Everything else here is presentation. Spend your money on the cocoa, then let the jars and ribbon do the rest on a budget. Compare with Idea #12, where one good ingredient carries the whole setup.
29. Cranberry Ice Cubes for a Holiday Drink Prep Area
Cranberry ice cubes are gorgeous and they will dye everything they touch — the glass, the tray, your tablecloth, and the fingertips of whoever fishes them out. Freeze them in a silicone tray, not plastic, or you’ll spend ten minutes prying them loose. And know that as they melt they sweeten and dilute the drink, so build your cocktail a touch stronger and less sweet than usual. Skip them entirely for anything clear or pale.
Making cranberry ice cubes takes about 10 minutes of hands-on work plus freezing, and costs roughly $4.
- Fill a silicone tray halfway with filtered water and freeze for 1 hour.
- Drop 2 to 3 fresh cranberries into each half-frozen cube.
- Top with water and freeze at least 4 hours, ideally overnight.
- Add a whole rosemary sprig to the tray for a second, greener version.
- Store in a zip bag up to 3 months.
Warm Mugs, Bright Mornings — Go Build Your Station
Whether you’re stacking three Santa mugs on a marble offcut or turning a thrifted dresser into a full cocoa command center, the best stations are the ones that actually fit your square footage and your real life. Start with one idea, one tray, and one thing worth spending on — then let the rest of it come together over a week instead of a weekend.
📌 Pin your favorite setup now, and tag us when yours is up — we’d love to see which one you built.