
Christmas mailbox ideas are having a major moment on Pinterest right now — and after scrolling past the four hundredth photo of the same red box, we know exactly why. Your mailbox is the one piece of your home that greets people before your front door does, and it’s cheap enough to redo every single December without guilt.
We spent serious time browsing Etsy, Target, and Michaels to bring you only what’s worth your attention this year — 35 ideas spanning $5 dollar-store finds to $320 collector figures. You’ll find rustic farmhouse greens, classic red-and-green tradition, candy-cane whimsy, and quiet natural evergreen arrangements, with budget and luxury versions compared side by side. And stay until the end — we break down the most common mistakes that can ruin these looks.
📌 Save this to Pinterest for later — you’ll want to revisit these ideas.
1. Red ‘Letters to Santa’ Mailbox Against a Wall of Glowing Bokeh
The mailbox itself is the easy part. A red tin box lettered “Letters to Santa” can be found for under thirty dollars almost anywhere in November. What you can’t buy pre-assembled is the backdrop — all those soft, out-of-focus points of light behind it. That haze is what turns a prop into a scene. If you’re styling this indoors, string lights eight to ten feet behind the box, not on it, and look at the setup from about six feet back.
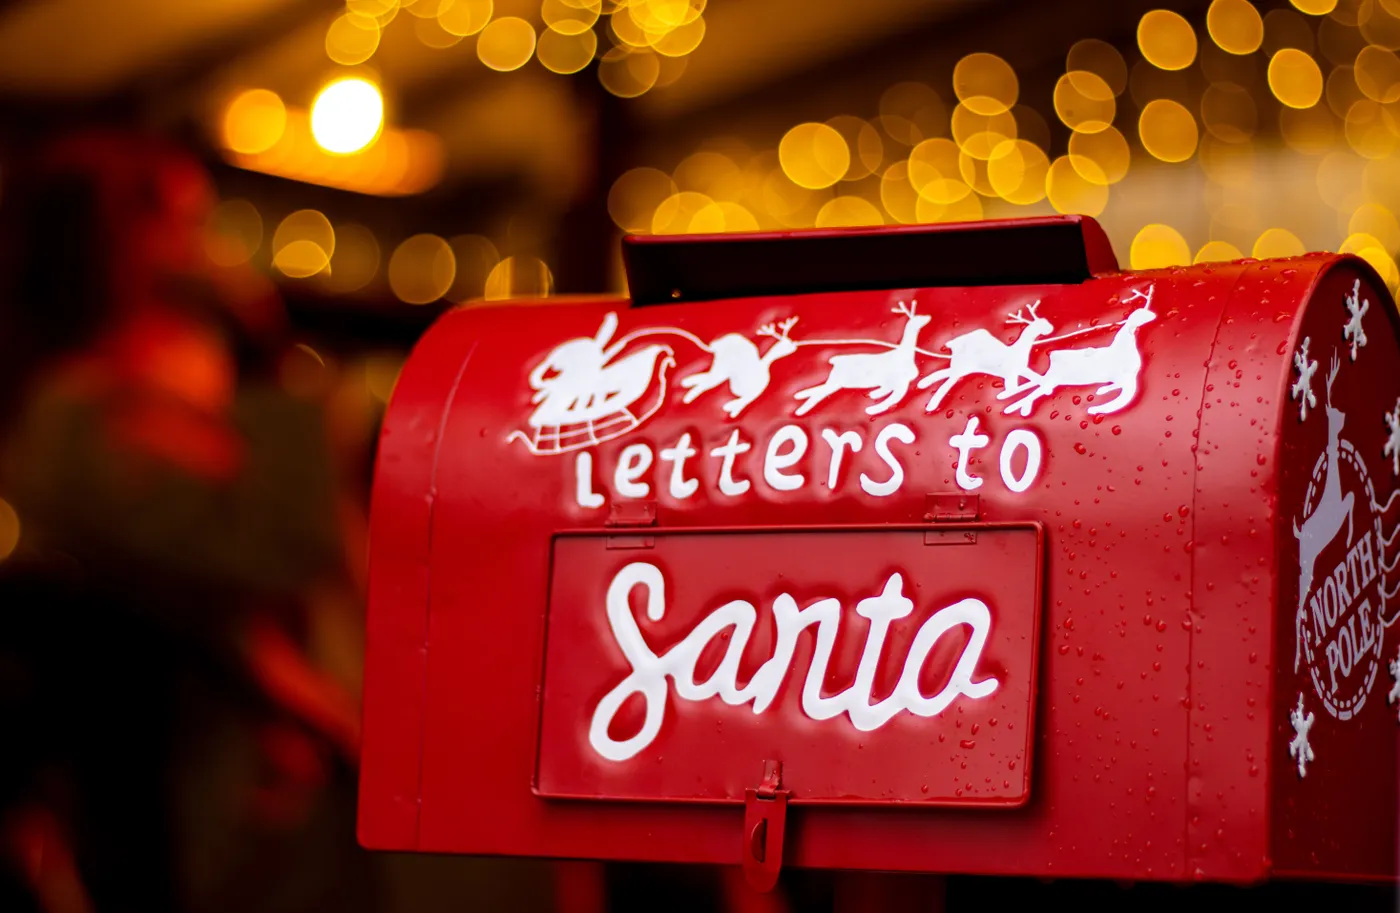
Three things are doing quiet work here. Depth, for one — the mailbox sits in the foreground while the lights retreat, so the eye has somewhere to travel. Then color temperature contrast: the red is warm and saturated, the bokeh reads cool and hazy, and that tension makes the red look redder. And restraint. There is exactly one object in focus. One.
2. Dark Green Mailbox Wrapped in Red and Green Tinsel Garland
Tinsel garland arrives flattened and slightly sad in the bag. Fluff it before it goes anywhere near the mailbox — pull each wire loop apart with your fingers and you’ll gain roughly a third more volume, which is the difference between festive and dollar-store afterthought. Buy two lengths for one mailbox: one to wrap the box, one to spiral down the weathered wooden post in six-inch loops.
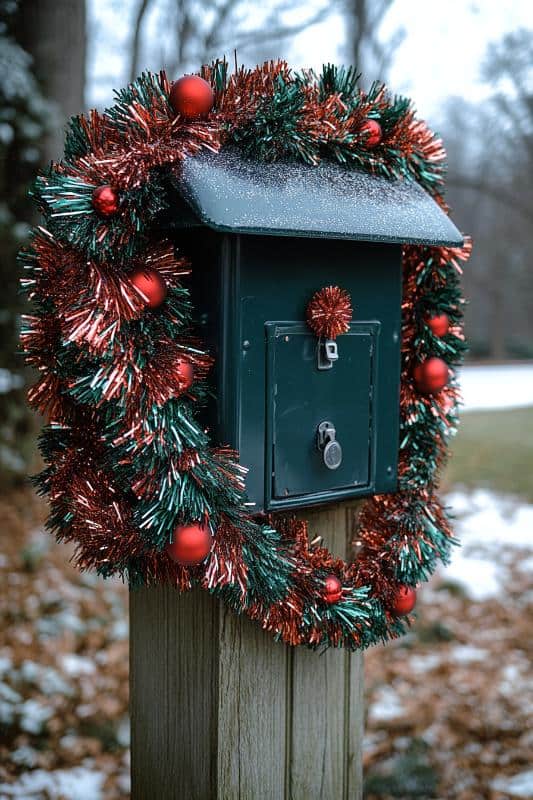
The formula here runs about 60 percent dark green, 30 percent red, 10 percent silver sparkle. Green lives in the mailbox and the tinsel base, red in the scattered ornaments and that little pompom on the front latch, silver is just light catching the foil. Swap the green box for black and the ratio still holds — the proportion is what matters, not the exact hue.
3. Copper Mailbox with a Tartan Plaid Bow and Evergreen Boughs
Copper mailboxes had their moment during the farmhouse wave, but pairing one with tartan plaid is the newer move. Searches for plaid holiday ribbon have climbed every fall since 2023, and the reason is simple: plaid reads traditional without reading grandma. It also photographs beautifully against warm metal, and the red berries tucked into the boughs give it a third texture so it never looks flat. Nothing about this dates.
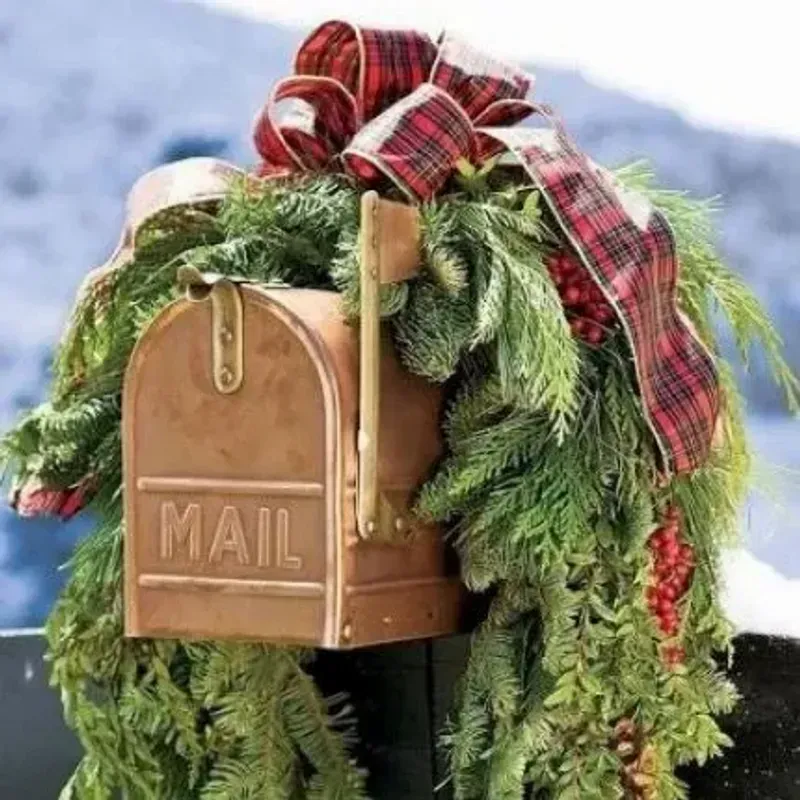
A real copper mailbox runs $150 and up, and nobody sane buys one just for December. Spray paint gets you 90 percent of the way: a $30 galvanized steel box plus two coats of copper metallic spray, about $12, reads convincingly from the sidewalk. For the bow, buy wire-edged plaid ribbon off a spool at Michaels for $8 and tie it yourself. Compare the plaid energy with Idea #16 — same ribbon family, completely different mood.
4. Distressed Wood ‘Happy Holidays’ Mailbox with Red Star Cutouts
Painted wood outdoors is a commitment. Freeze-thaw cycles lift paint off horizontal surfaces first, so the roof of a wooden mailbox starts peeling before the sides do. Plan on a light sand and one fresh coat every other spring, not every year. If you’d rather not repaint, choose a pre-weathered finish and let the chipping be part of the charm instead of a chore.
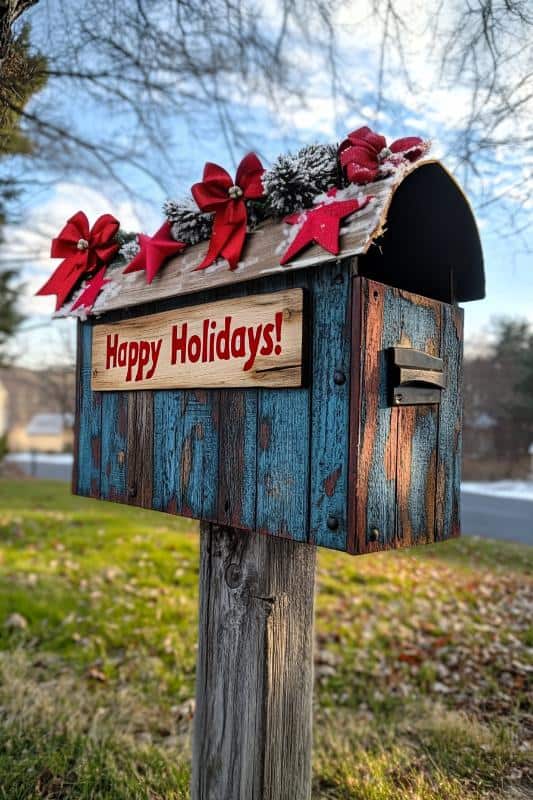
Make the “Happy Holidays!” plaque yourself:
- Cut a 9 by 4 inch piece of quarter-inch plywood.
- Sand the edges and wipe the dust.
- Paint two thin coats of cream craft paint, 20 minutes between coats.
- Print your text at 1.5 inch cap height, tape it down, and trace the letters with a ballpoint pen to transfer the outline.
- Fill in with red acrylic and a liner brush.
Roughly 45 minutes and $8 in materials.
5. Indoor ‘Letters to Santa’ Mailbox Staged on a Red Tree Skirt
This is a floor-level vignette, so it needs room to breathe. Under a six-foot tree you want at least 30 inches of clear space between the lowest branches and the floor, or the mailbox gets swallowed whole. Anything under 12 inches tall disappears at that distance, so aim for a box roughly 14 to 18 inches high. Tight on floor space? The wall-mounted version in Idea #22 works on a shelf instead.
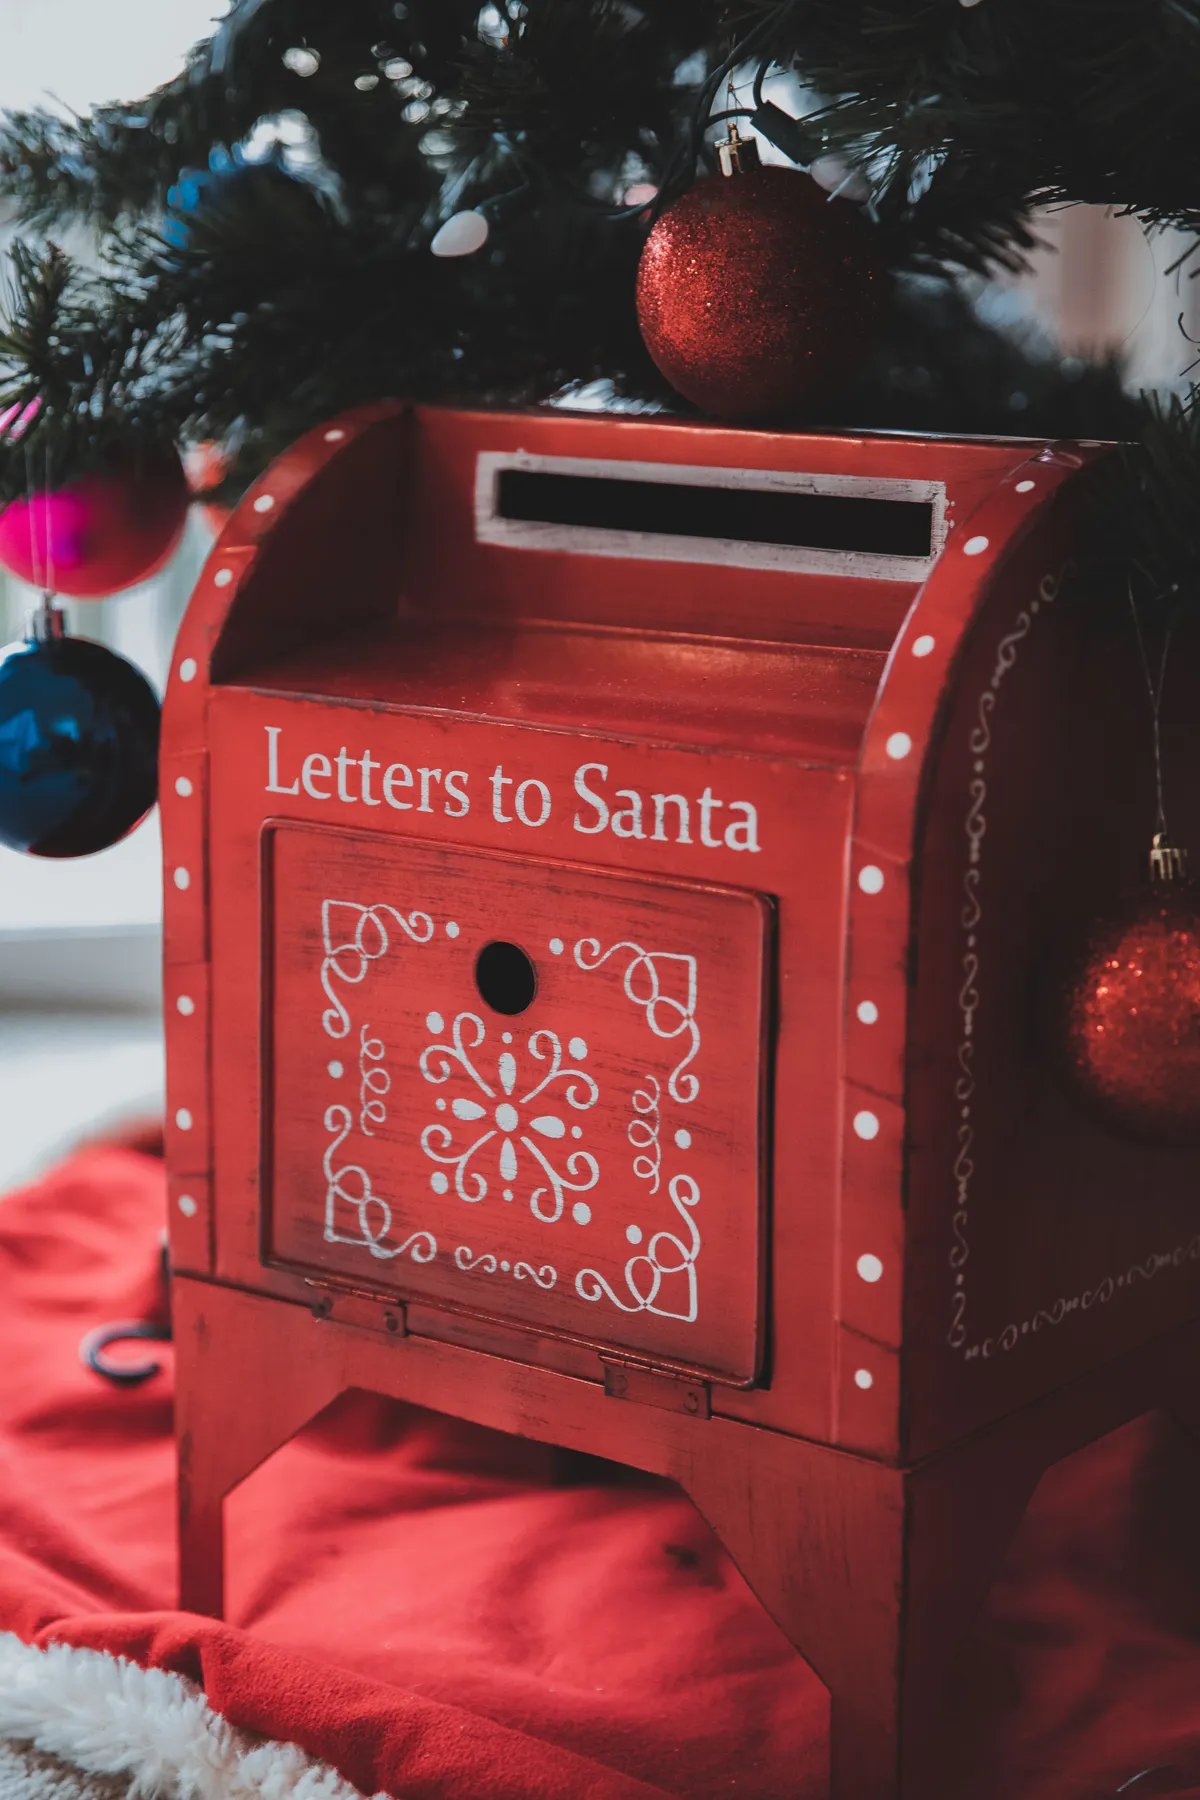
The tree skirt is the unsung hero here. Without that pool of red fabric with its fluffy white trim, the mailbox would just be sitting on carpet and the whole thing would read as a toy left out. The skirt gives it a stage, ties it visually to the tree, and echoes the white scrollwork painted on the box. Everything else in this scene is replaceable. The skirt is not.
6. Candy-Cane Post Mailbox Stenciled ‘Santa Mail’
- Mailbox and post: $55–$140
- Pine garland, six feet: $18–$45
- Stencil kit plus white outdoor enamel: $12–$22
- Berries, pinecones, floral wire: $10–$25
- Total: $95–$232
Budget alternative: a $12 thrifted mailbox, a $7 dollar-store garland, and painter’s tape in place of a stencil kit lands you under $30.
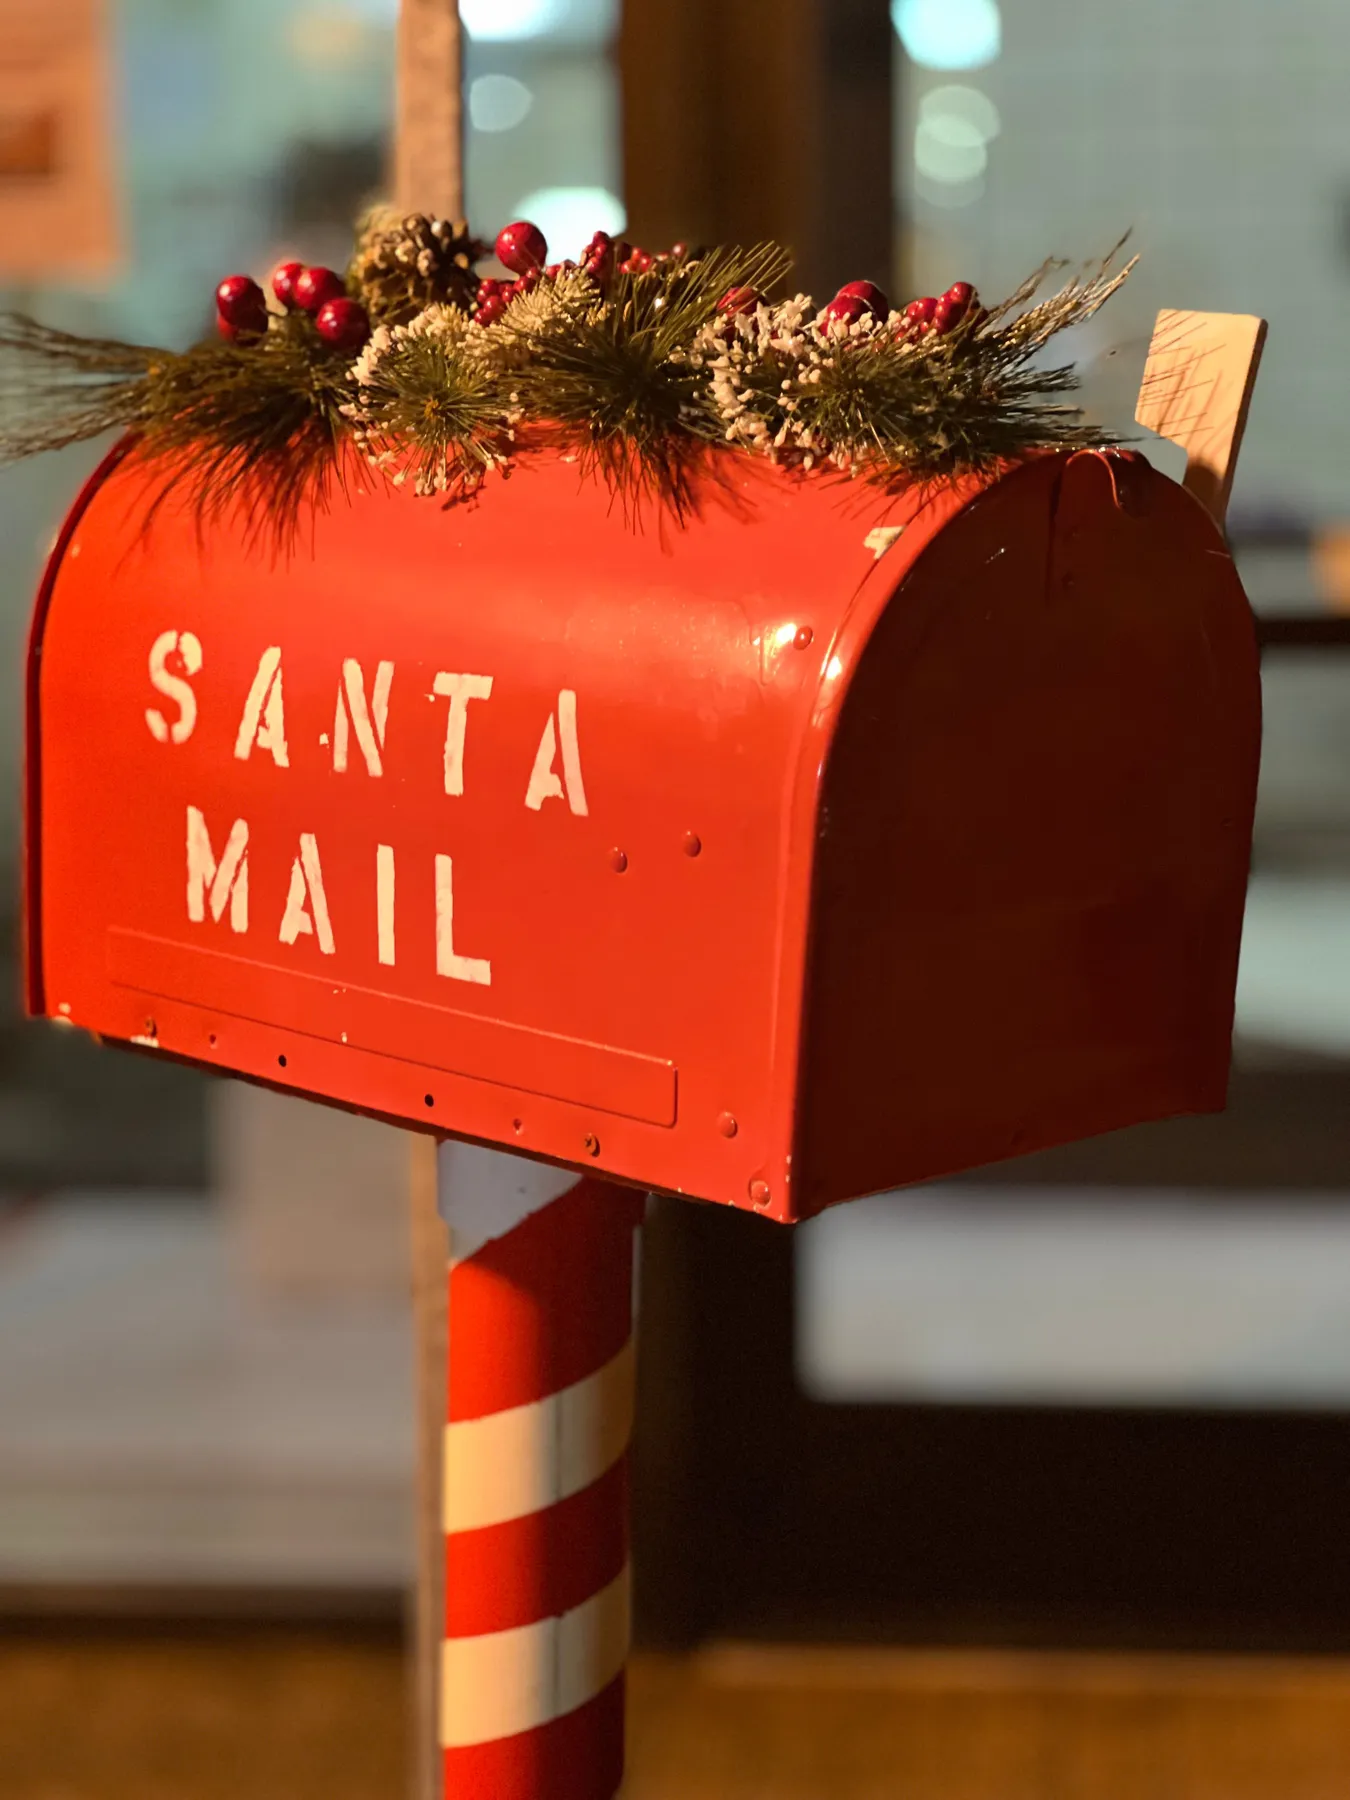
Stencil letter height should be about one-fifth the height of the mailbox face — on a standard 10-inch box, that’s 2 inches, no bigger. Lay the letters out on paper first and space them with a consistent gap equal to half a letter width. For crisp edges, mist the back of the stencil with spray adhesive, press it down, and paint with a nearly dry brush using a pouncing motion rather than strokes.
7. Black Mailbox with Mixed Pine, Pinecones, and Warm LED Glow
Mixed live greens look incredible for about ten days, then the needles start dropping every time the wind blows. If the mailbox sits somewhere you walk past daily, go faux or mix faux branches into a live base. Battery LED strands on a six-hour timer last roughly three to four weeks on one set of AAs. Keep a spare pack indoors so you’re not crawling out in the sleet in January to swap them.
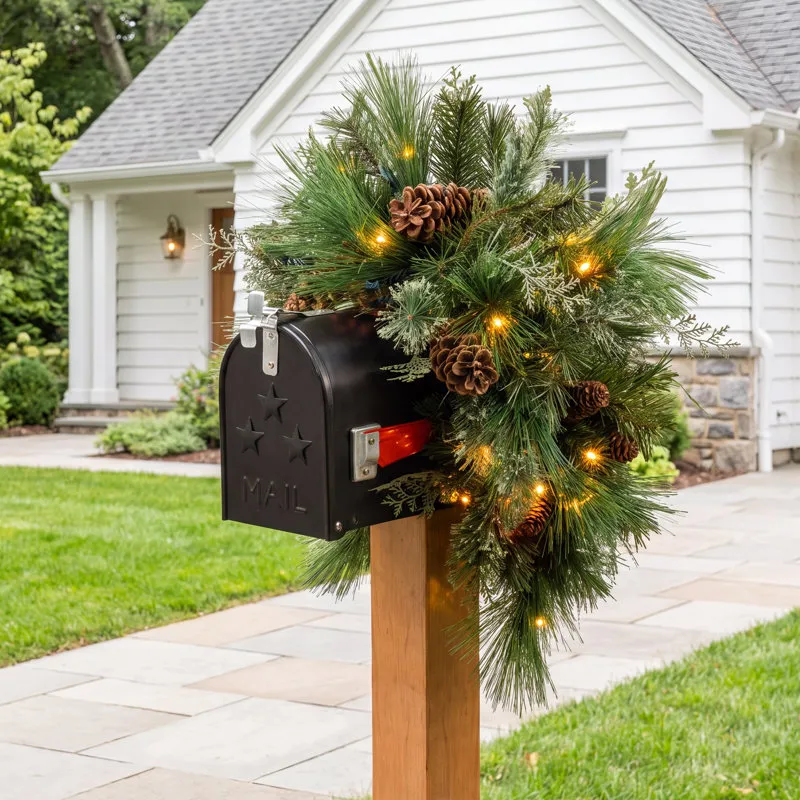
The mix is the magic. Long-needle pine, short-needle fir, and a few twiggy sprigs give you three textures inside the same green family, while the natural pinecones add a brown that keeps everything from reading as one flat mass. Meanwhile the red flag — factory issue, not added — quietly becomes an accent instead of an afterthought.
8. Speckled Teal Mailbox with an Elf on the Lid and a ‘Nice’ Tag
Count it out: roughly 55 percent teal, 25 percent red, 15 percent white frost, 5 percent glittery gold. Teal is a bold call, and it only works here because the red and white stay small and scattered — an elf in a red suit, a few berries, a tiny tag. Push red up to 40 percent and the whole thing turns into a carnival. Swap the teal for a deep navy or forest green and the formula still holds.
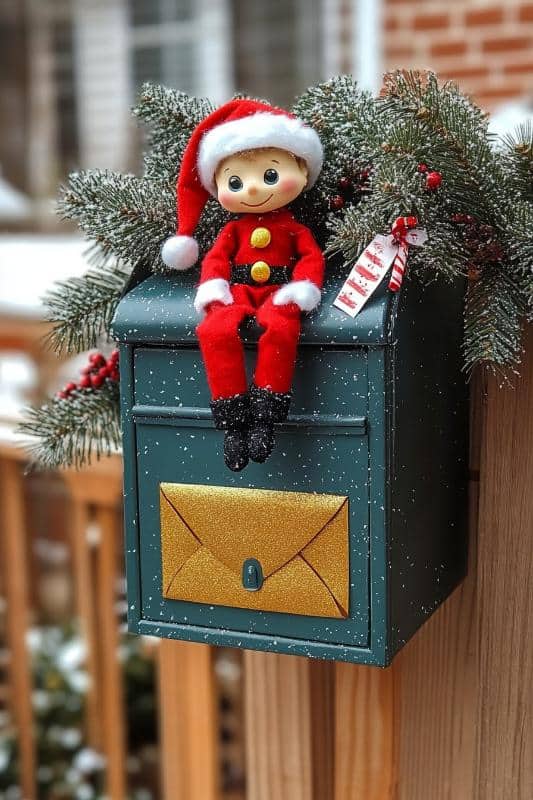
An elf doll lives outdoors about as well as a cat does. Fabric fades and absorbs moisture, so this is really a covered-porch or indoor display, not something for an exposed post. And if kids are involved, expect the elf to relocate within a week. Accept that early and treat the whole installation as a movable vignette rather than a fixed decoration.
9. Brick Mailbox with Garland, String Lights, and a Visiting Cardinal
Never drive nails into brick. Use outdoor-rated adhesive hooks or masonry-safe clips rated for below-freezing temperatures, and wrap the garland in a 45-degree spiral rather than circling it flat — that diagonal is what makes an installation look professionally done. For a brick column this size, plan on nine to twelve feet of garland, and hide the wire inside the greenery as you go rather than tucking it in afterward.
Brick mailboxes are the biggest canvas in this roundup, sometimes three feet wide at the base, so a standard six-foot garland won’t cut it — you’ll need two joined. If yours is a slim post instead, skip ahead to Idea #26, where one eight-foot garland handles the whole job. Measure the perimeter before you buy, because running short mid-wrap is the single most common reason garlands look half-finished.
10. Evergreen Swag and Gold-Trimmed Red Bow on a White Post
A custom evergreen swag from a florist runs $70 to $120. The version here — swag, lights, bow, and berries — can be assembled for about $28: $14 for a faux swag at Walmart, $8 for a battery light strand, $6 for a pre-tied bow at Target. The trick is fluffing a cheap swag properly and reinforcing its center with floral wire so the bow doesn’t droop by week two.
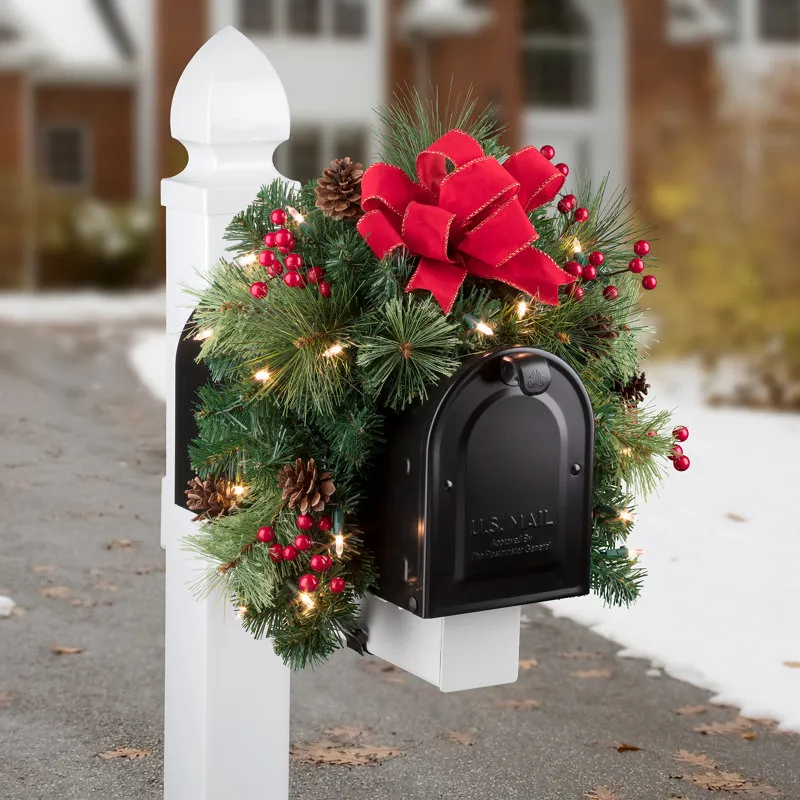
Anything wrapped in light strands needs a plan for the battery pack. Tuck it inside the swag behind the bow, never on the ground, or snowmelt will kill it. Zip ties beat twist ties outdoors — UV eats twist ties in a single season. And if both your post and mailbox are metal, make sure nothing is rattling against the hollow box; a loose swag banging at 2 a.m. is genuinely maddening.
11. Illuminated Snoopy and Woodstock Mailbox Display with a Lighted Flag
Nostalgia decorating is the biggest thing in holiday exteriors right now. Blow molds, vintage characters, and licensed figures have moved from tacky to charming in about four years. Part of it is the broader 1970s revival; part is that scrolling Pinterest in November now serves you a steady diet of warm, slightly imperfect family displays. Will it last? Character props have survived every taste cycle since the 1960s, so yes.
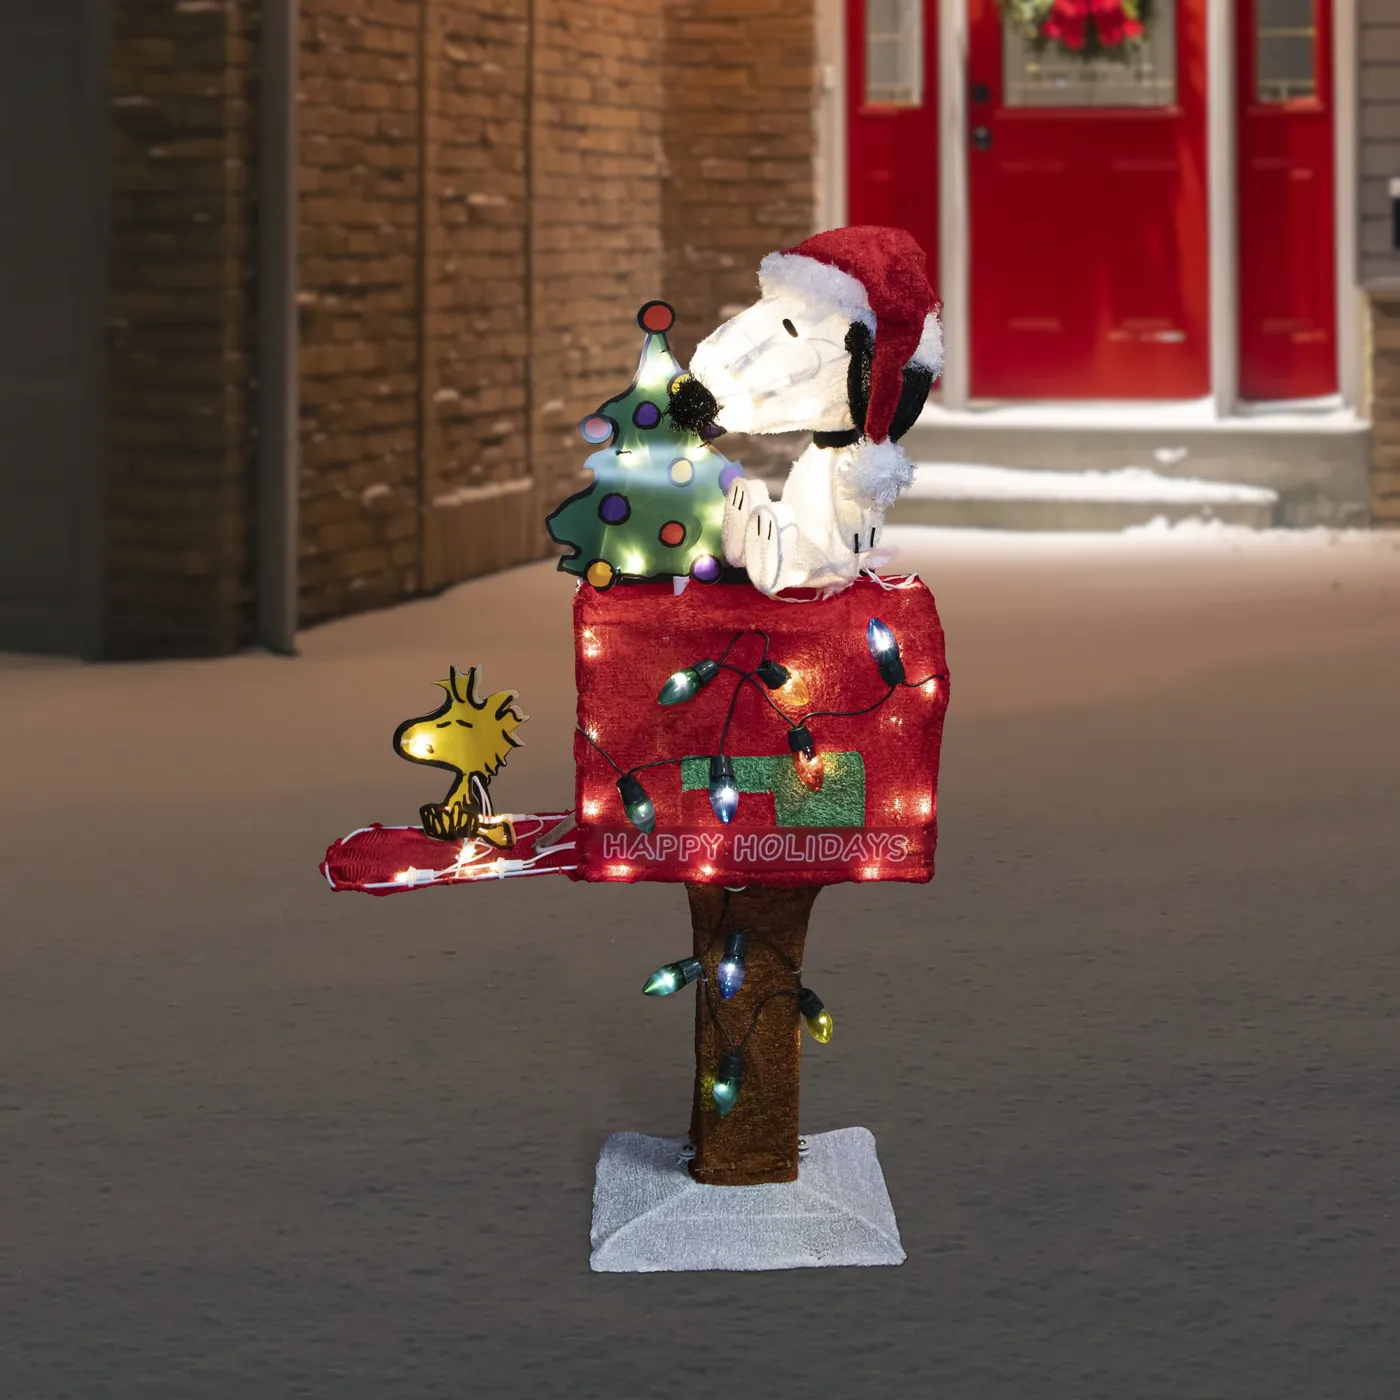
It’s Woodstock, perched on the mailbox flag. Nothing else in this display is small. Snoopy is huge, the tree is huge, the mailbox is huge — and then there’s this tiny yellow bird balanced on a moving part. That one small element gives the whole thing a punchline. Without it you have a nice light-up scene. With it, you have a story people stop the car for.
12. Crocheted Christmas Mailbox with a Scalloped Snow Roof
Make the little crochet envelope that peeks out of the open door:
- Chain 13 in white cotton.
- Single crochet in each chain across and turn — 12 stitches.
- Work six rows even.
- Fold the top third down and slip stitch the sides to close the flap.
- Embroider a red heart in the center.
About 30 minutes and roughly $3 of yarn — a perfect scrap-buster for tucking inside a mailbox door.
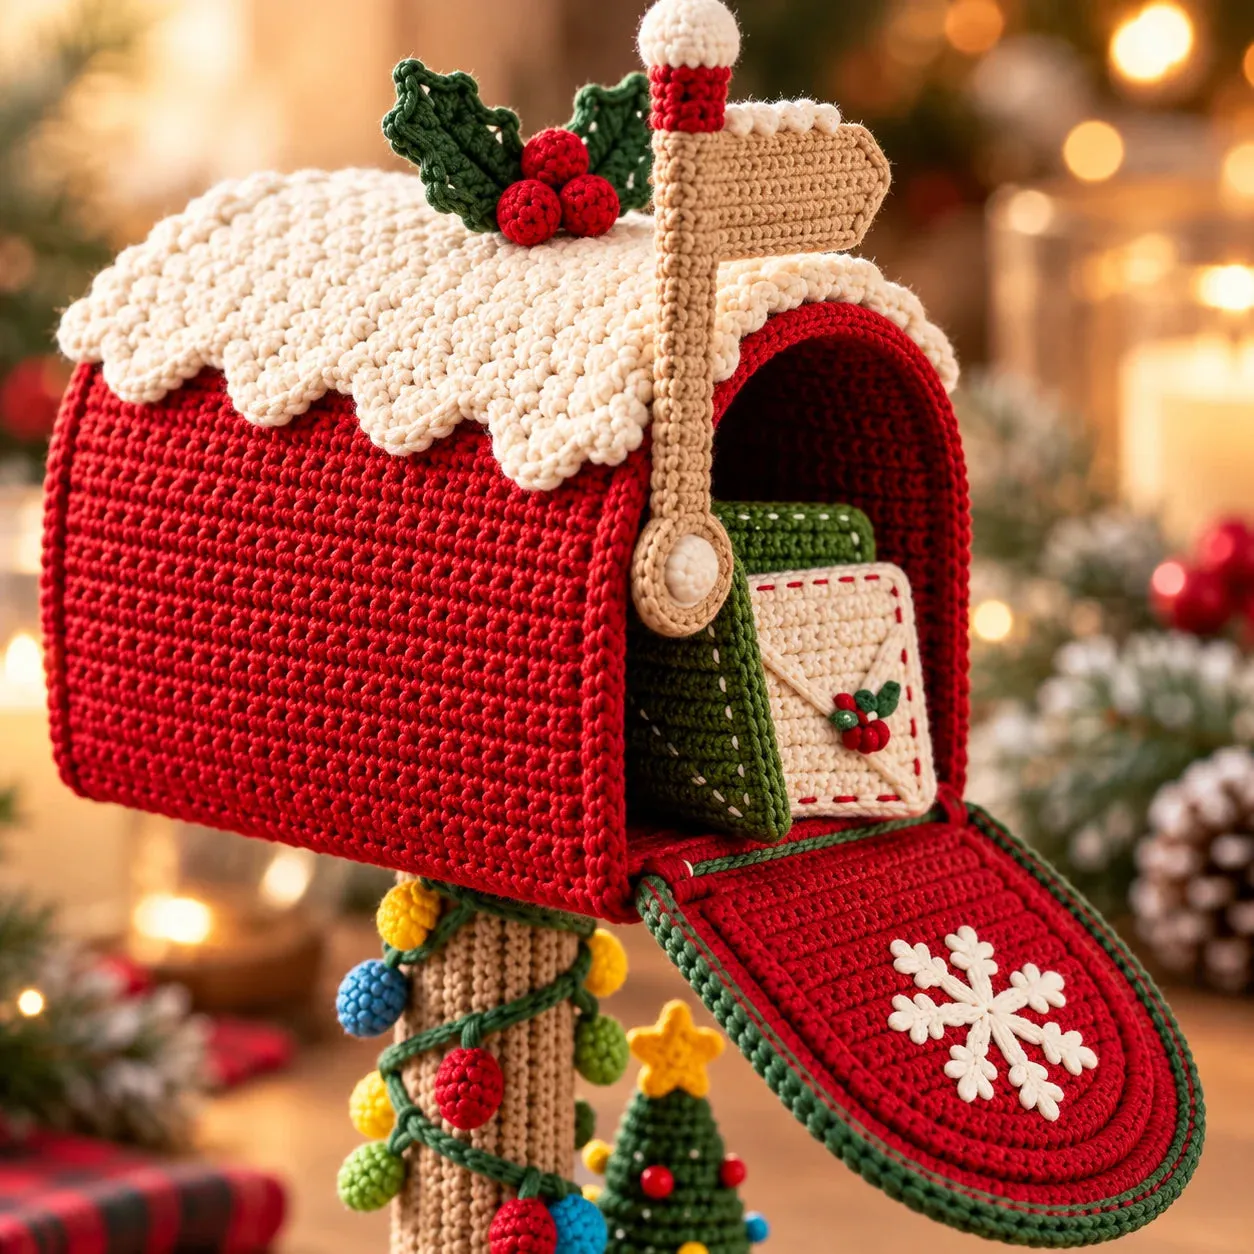
Handmade crochet mailboxes sell on Etsy for $35 to $70, which is fair for the hours involved, but you don’t have to buy one. A $5 wooden box from a craft store, a thrifted doily, and a skein of red cotton yarn get you the same spirit for under $15. Or let a single crochet snowflake be the star — the speckled teal box in Idea #8 is another good home for one small handmade detail.
13. Golden Finial ‘Letters to Santa’ Mailbox on a Lit Candy-Cane Post
Two principles are carrying this. First, vertical stacking: mailbox, striped post, snow-covered ground, and behind it all a lit evergreen. The eye climbs exactly the way you want it to. Second, repetition with variation — candy stripes on the post, scrollwork on the box that echoes the same idea, red-and-white again in the snow. Repeating a motif three times at three different scales is what makes a display feel designed rather than assembled.
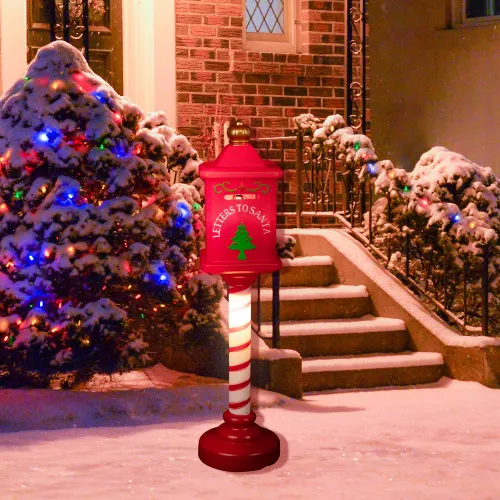
For a lit post, skip plug-in cords unless an outlet is within ten feet. An extension cord crossing a walkway is a trip hazard and looks terrible in daylight. Solar path-light stakes with a red or warm lens read beautifully and cost $10 to $15 each. If you do go plug-in, run the cord down the back of the post and pin it with cable clips painted to match.
14. Red and White Striped Bow with Berry Sprigs on a Classic Red Box
This is a 70/20/10 build. Seventy percent red — the mailbox itself, undecorated and confident. Twenty percent white, all of it concentrated in that single striped bow. Ten percent green, tucked in as pine needles and berry leaves. The white is doing an enormous amount of work for how little of it there is. Trade the striped bow for a solid red one and the entire composition flattens out.
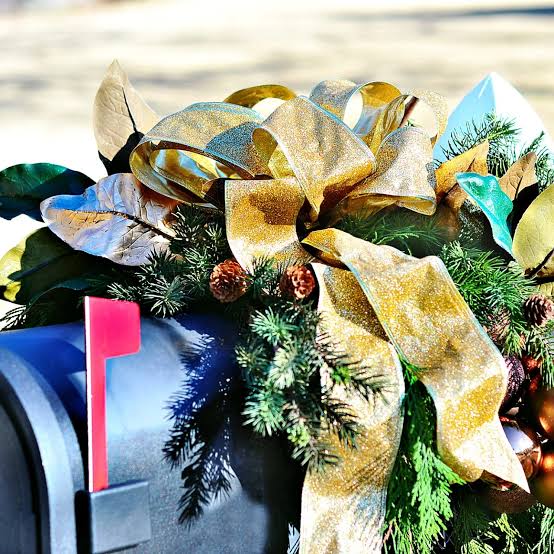
Whatever you attach to the flag, the flag still needs to flip. Mail carriers will not be charmed if they can’t raise it. Keep that sprig under three ounces and wire it to the flag arm, not the flag face. Also worth knowing: metal mailboxes sweat in cold climates, and real berries left pressed against the paint will stain it a permanent purple-brown by spring.
15. Upright Red Mailbox with Gold Reindeer and Snowflake Decals
Freestanding boxes like this one usually run 18 to 24 inches tall, which means they need a porch floor, a wide step, or a garden bed. On a narrow post they look lost. Give it at least 18 inches of open space on every side, and keep the text side facing the approach so “Letters for Santa” is readable before anyone reaches the door. Snow-dusted steps below it make the whole thing feel anchored.
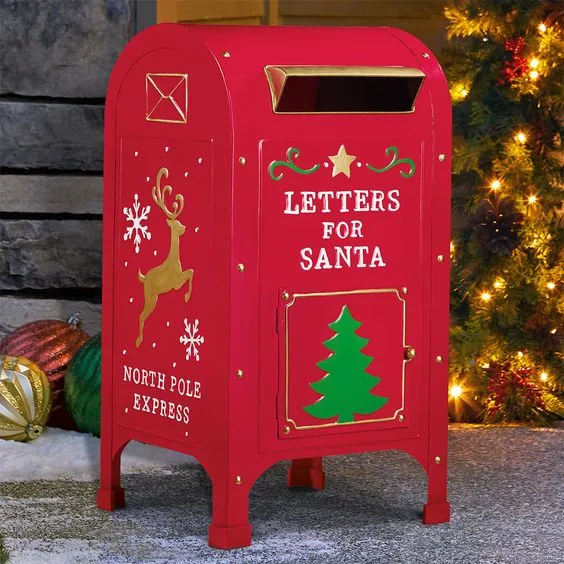
Personalized and decal-decorated mailboxes are booming because home vinyl cutters finally got cheap. A $150 cutting machine and a roll of outdoor vinyl let you produce something that looks bespoke for about $4 in materials. That’s why you’re seeing so many one-of-a-kind boxes this year — the gap between “I saw it on Pinterest” and “I made it myself” has basically collapsed.
16. Black Pedestal Mailbox with a Single Oversized Plaid Bow
Bow scale is where most people go wrong. The finished bow width should be roughly one-third the width of the mailbox face — on a standard 9-inch box, that’s a 3-inch bow, which takes about 4-inch wire-edged ribbon and four good loops. Bigger isn’t merrier; it’s top-heavy. Anchor the bow with florist wire through the back, and let the tails fall to about eight inches below the box lid so they frame the brass keyhole instead of covering it.
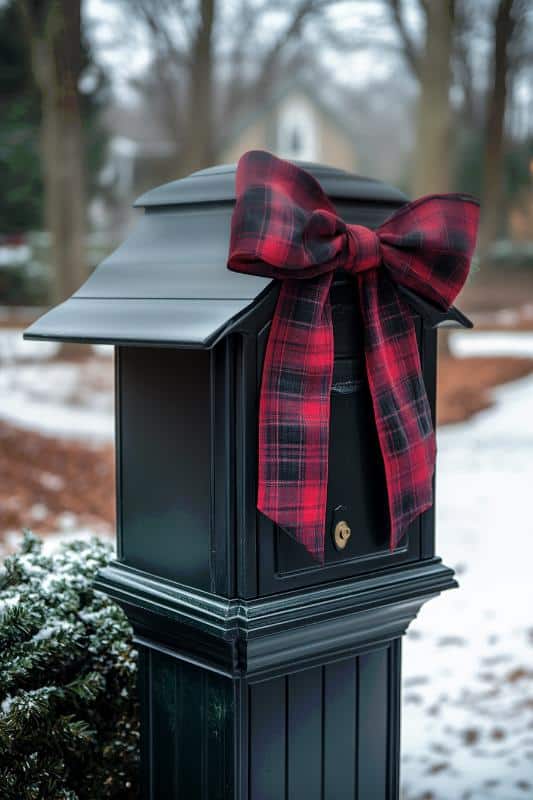
There is one decoration here. Not three, not a garland plus lights plus ornaments — one bow, and it’s enough. That’s the entire idea. The peaked roof, the brass keyhole, the snow-dusted evergreen at the base: all set dressing. Remove the bow and you have a mailbox. Remove everything else and you still have a design.
17. Santa Mailbox Nestled Beneath the Branches with Glitter Baubles
You can put this together for about $20. Tin mailboxes printed with “Letters to Santa” show up at dollar stores and discount chains every November for $5 to $10. A plain red tablecloth or a square of red fleece becomes the skirt for $6, and the fluffy white trim is a half-yard of craft trim. Add one glitter bauble from an ornament pack. Nothing here is precious, which is exactly why it works all season.
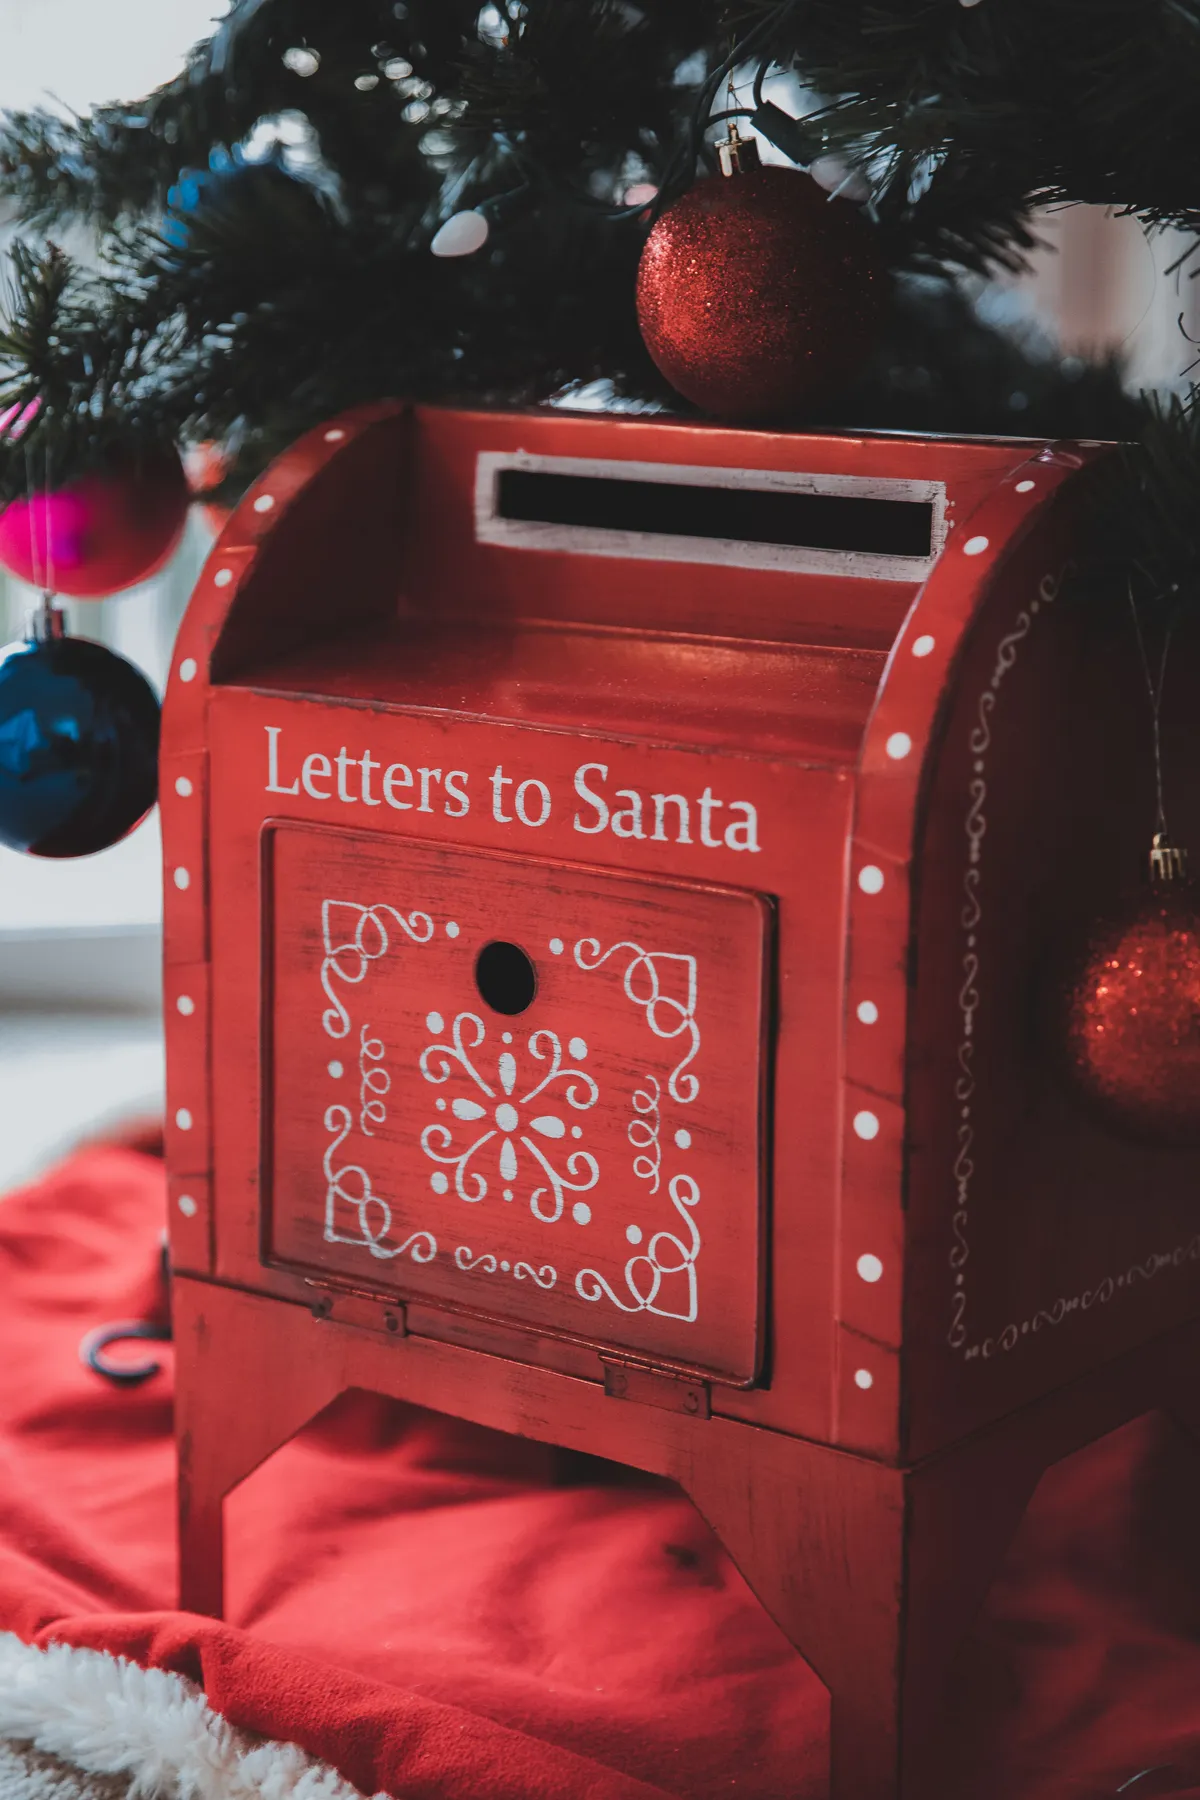
Style the vignette in five minutes:
- Lay the skirt so its fluffy edge faces the room.
- Set the mailbox at a slight angle, not square to the room.
- Tuck the glitter bauble just behind the box so it peeks out.
- Pull two low tree branches forward to frame the top.
- Step back six feet and confirm the white trim still reads.
Compare with Idea #4, where a similar box sits on a scalloped snow-frosted base instead.
18. Weathered Entry with a Snow-Dusted Red Cylindrical Mailbox
Steel mailboxes rust from the bottom up, and road salt accelerates it. If yours sits near a sidewalk, wipe the lower third with a damp cloth once a month through winter and touch up any chips before spring. Terracotta planters crack when trapped water freezes and expands, so empty them before the first hard freeze. The black plastic planter beside it will survive either way.
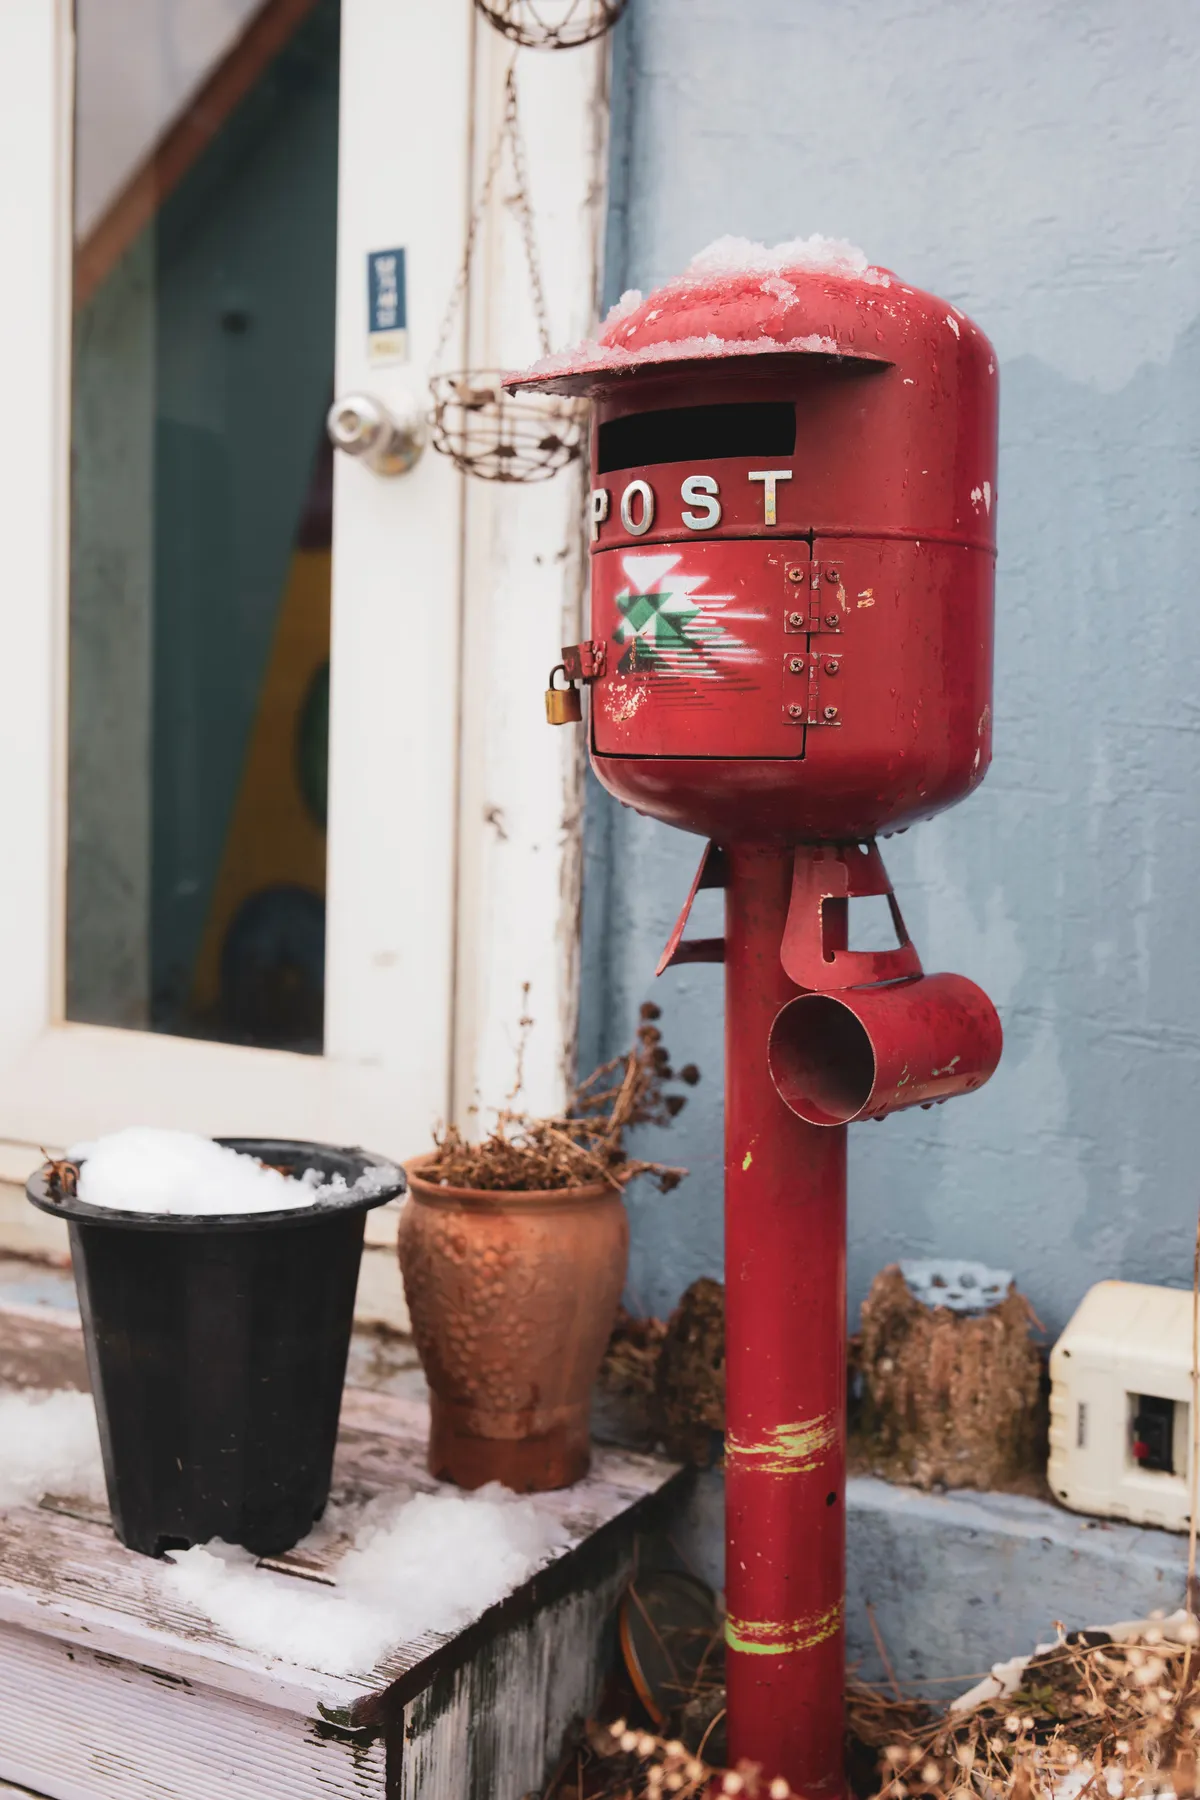
This weathered, slightly imperfect look is gorgeous in a photograph and annoying in real life if you’re the one maintaining it. Peeling white paint on wooden steps means annual scraping. Dried foliage left in planters all winter looks fine in snow and scruffy in a January thaw. Buy into the wear deliberately, or choose pressure-treated wood and skip the romance of decay entirely.
19. Three-Ingredient Cluster: Pine Boughs, One Pinecone, Red Berries
- Measure the gap between the box and the post collar — the cluster should span it, not float above it.
- Check your post material: wood takes floral wire, metal needs adhesive clips.
- Confirm you have 22-gauge wire and clippers; thicker wire kinks the stems.
- Decide fresh or faux — fresh holds 8 to 10 days outdoors in cold, less in a thaw.
- Budget $12–$20 for a faux version that survives the whole season.
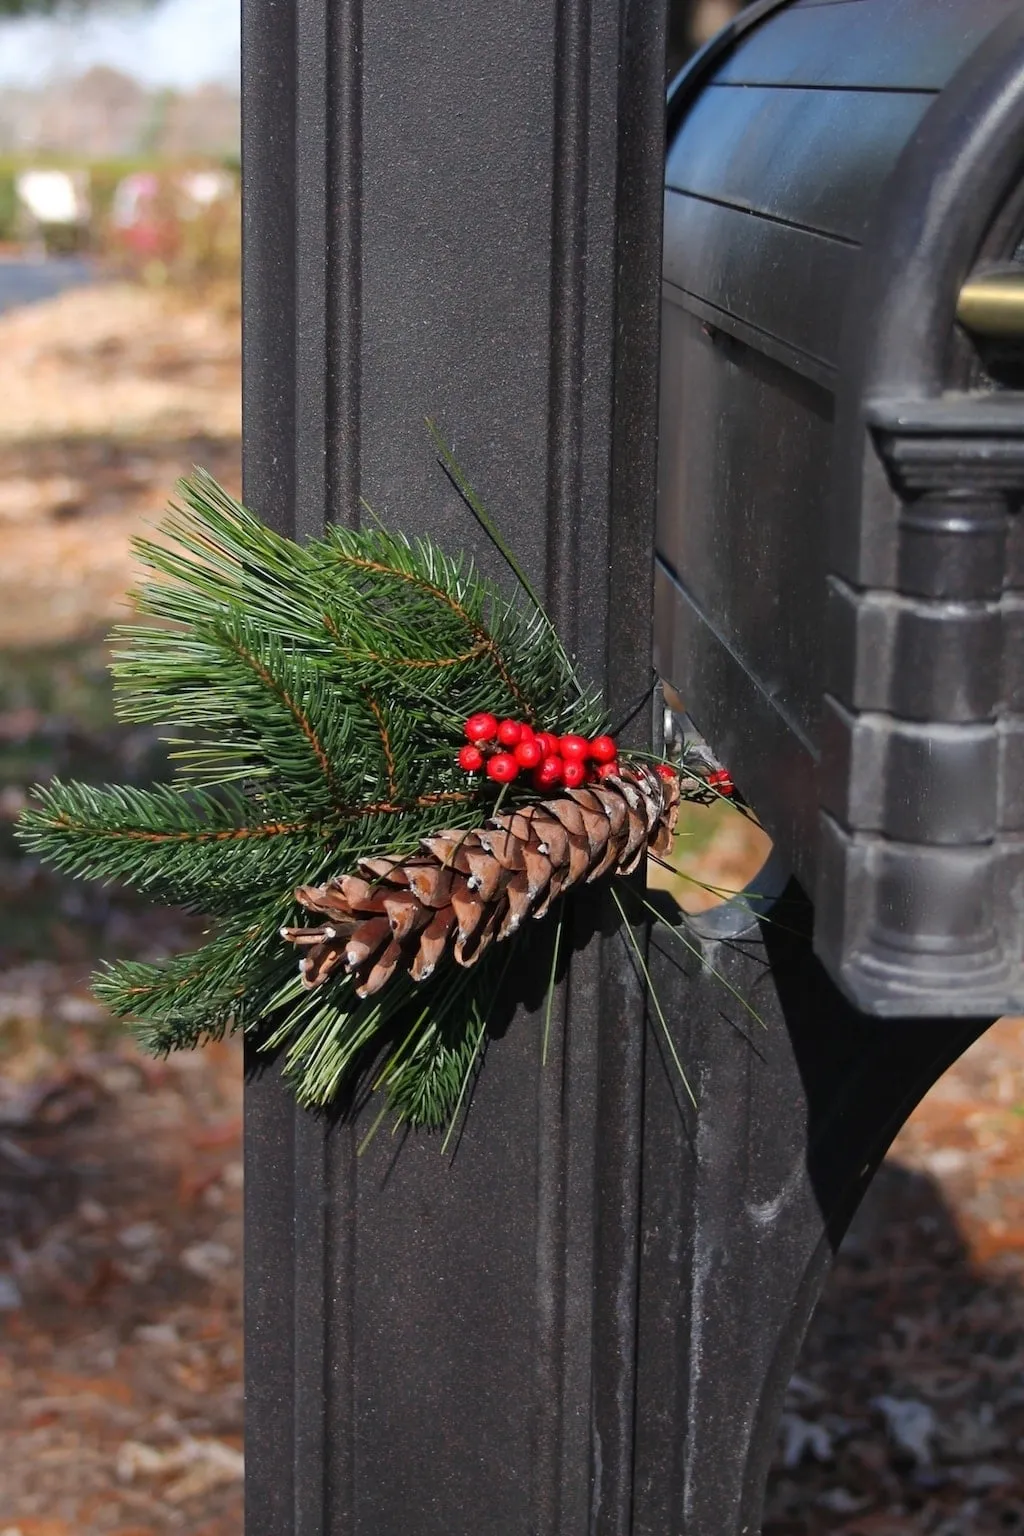
Place the arrangement at the junction where the box meets the post, not centered on the box itself. That spot is the natural visual hinge of the whole structure, and decorating there makes the mailbox look intentional rather than accessorized. Keep it tight — three elements, no more. A single pinecone, a handful of boughs, one berry cluster, all wired at 22 gauge.
20. Snowy Front Porch Garland That Continues the Mailbox Story
Three things are working: repetition, temperature, and restraint. Red appears in the bows and the lanterns and nowhere else, so it reads as a deliberate accent rather than a color scheme. The warm white lights sit against blue-toned snow and produce that cozy-cold tension everyone loves. And crucially, the garlands follow the architecture — railings, door frames — instead of being draped randomly across it.
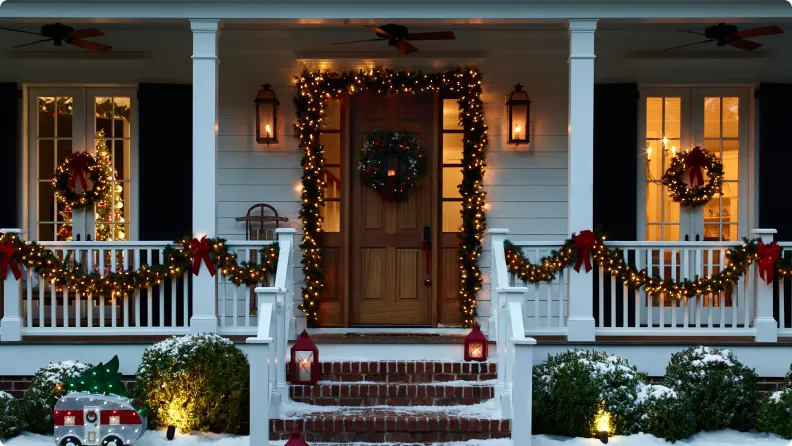
For a porch this size, plan on 12 to 20 feet of garland per railing run, more if you want the full swooping look rather than a tight wrap. Railing height matters more than ceiling height: garlands read best sitting slightly below the handrail so they don’t obscure it. If your entry is a single brick column instead of a full porch, Idea #9 is the scaled-down version.
21. Red and Gold Plaid Ribbon Woven Through a Black Post Garland
Roughly 50 percent black, 30 percent green, 15 percent red, 5 percent gold. The mailbox and post form the base — most people forget that dark hardware counts as a color, and it’s why this arrangement feels grounded instead of busy. Gold stays under 5 percent: a few berry clusters, one ribbon stripe. Push it higher and the whole thing starts reading like a hotel lobby rather than a front walk.
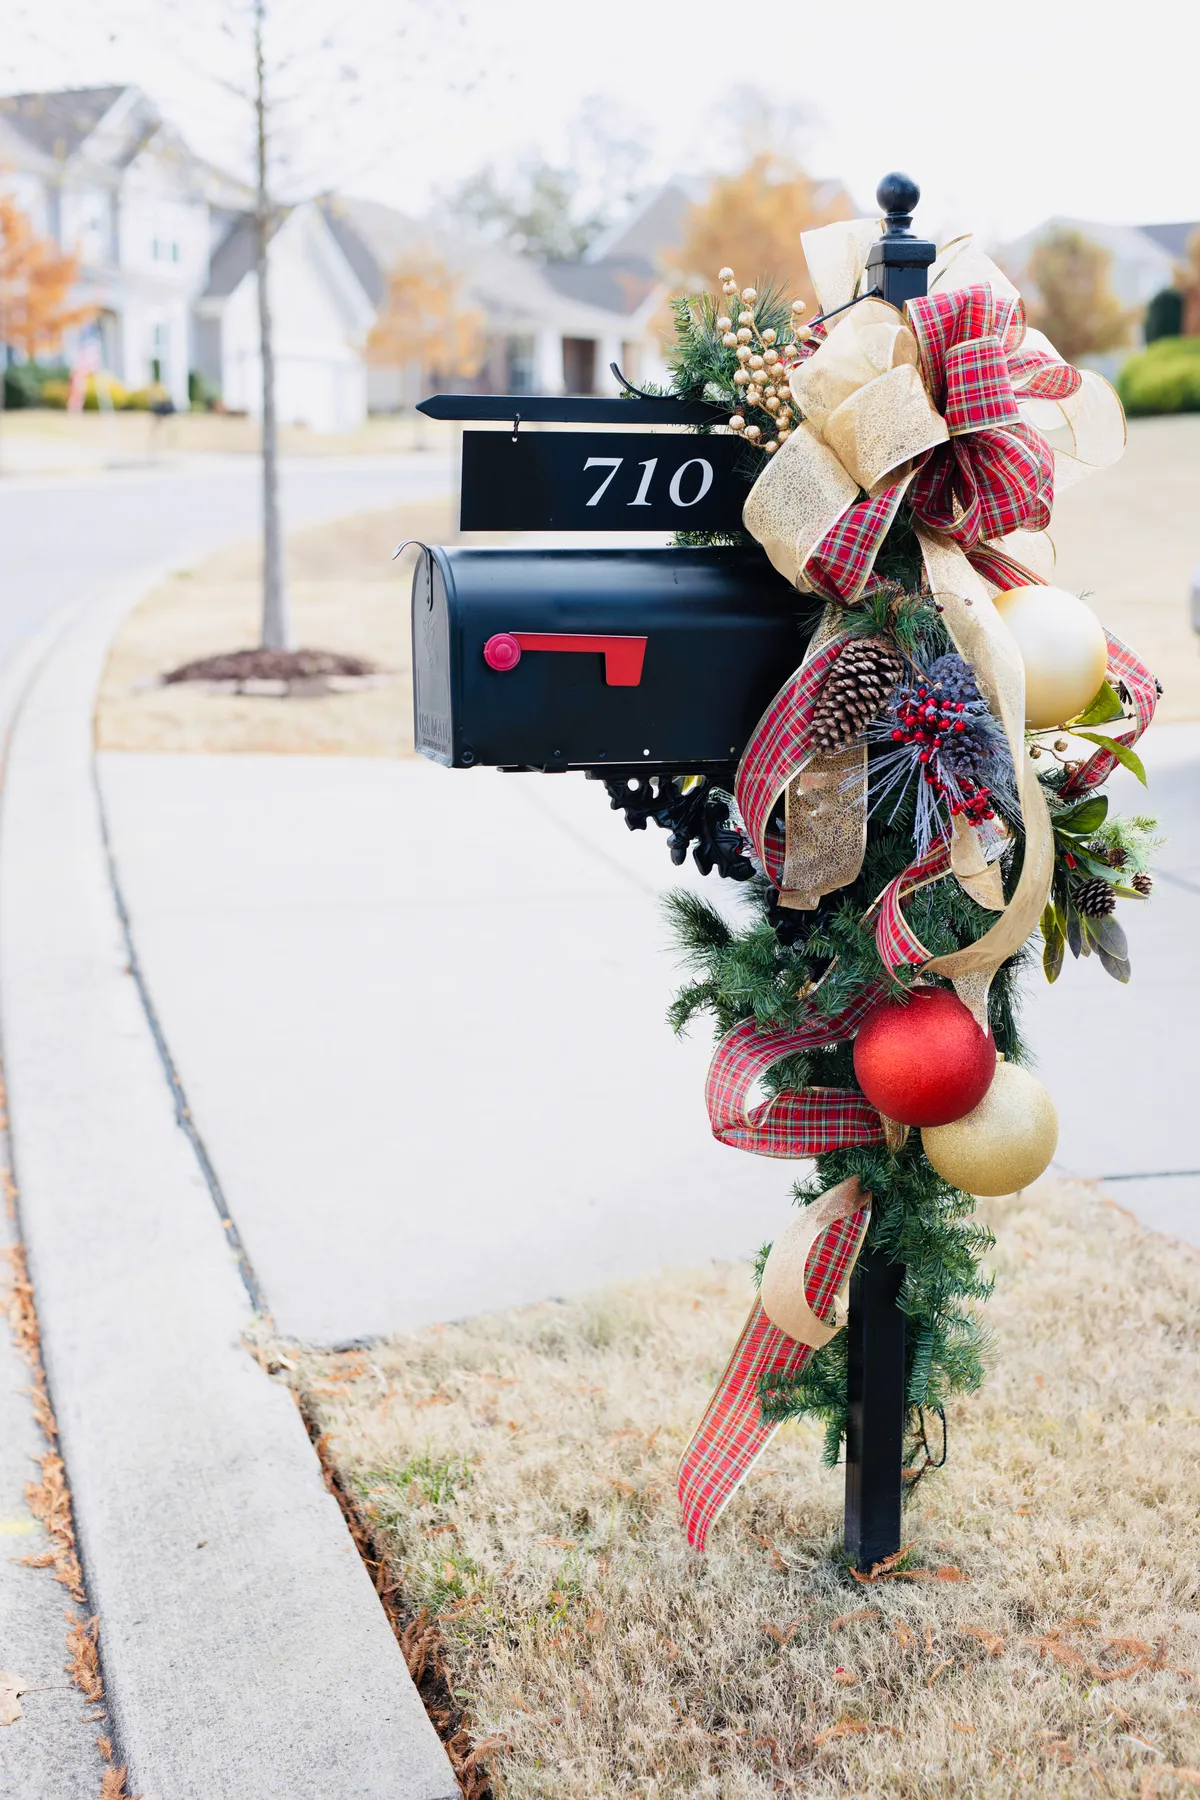
- Faux pine garland, nine feet: $25–$55
- Mixed red and gold ornaments: $15–$40
- Plaid and gold ribbon, two spools: $14–$30
- Pinecones and berry clusters: $10–$22
- Total: $64–$147
Budget alternative: dollar-store ornaments at $1.25 each for eight pieces, plus one spool of plaid ribbon cut into two widths, brings this in near $35.
22. Oversized ‘Santa’s Mail’ Box with Gold Leaf Trim and Pinecones
An oversized prop box should be two to three times the size of your actual mailbox, and it should never replace it — place the prop beside or below the working box so both read as intentional. Keep the prop within 12 inches of a wall or planter so it doesn’t float, and echo one material from the real mailbox, here the matte black wall-mounted box, to tie the two together visually.
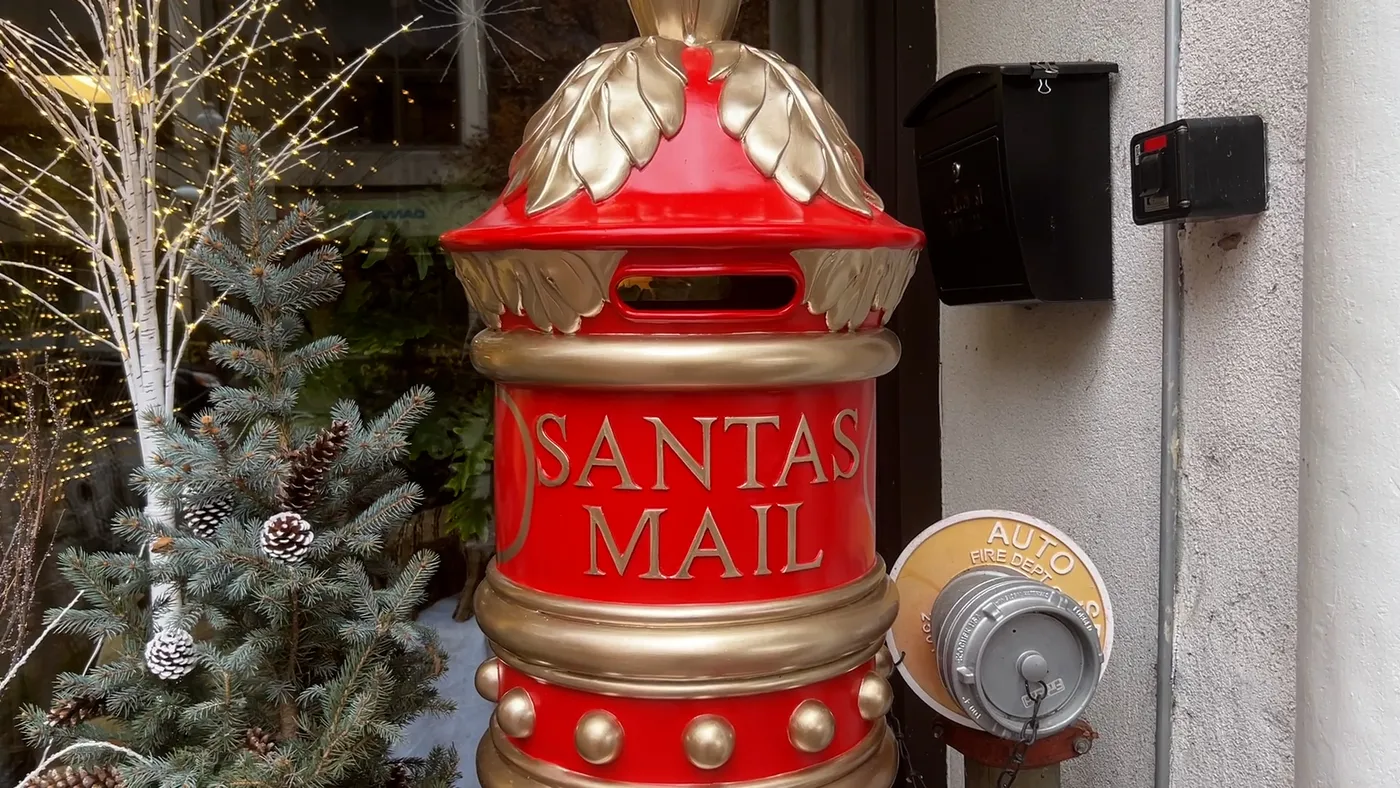
Two practical realities before you commit. Storage: a 30-inch prop box eats closet space eleven months a year, and if it isn’t collapsible, that’s a genuine cost. Also, homeowners associations. Many limit the size and number of holiday props visible from the street. Check the rules in October, not December. If you need something smaller, the freestanding red box in Idea #15 is the compromise.
23. Star-Embossed Mailbox Glowing Under a Lit Evergreen Garland
The embossed stars are the reason this works. Every small cutout and raised detail catches the string lights from a slightly different angle, so the box itself is doing decorative work before you’ve added a single ornament. That’s a principle worth remembering: choose hardware with texture and you need less on top of it. Flat black boxes need almost twice the greenery to feel finished.
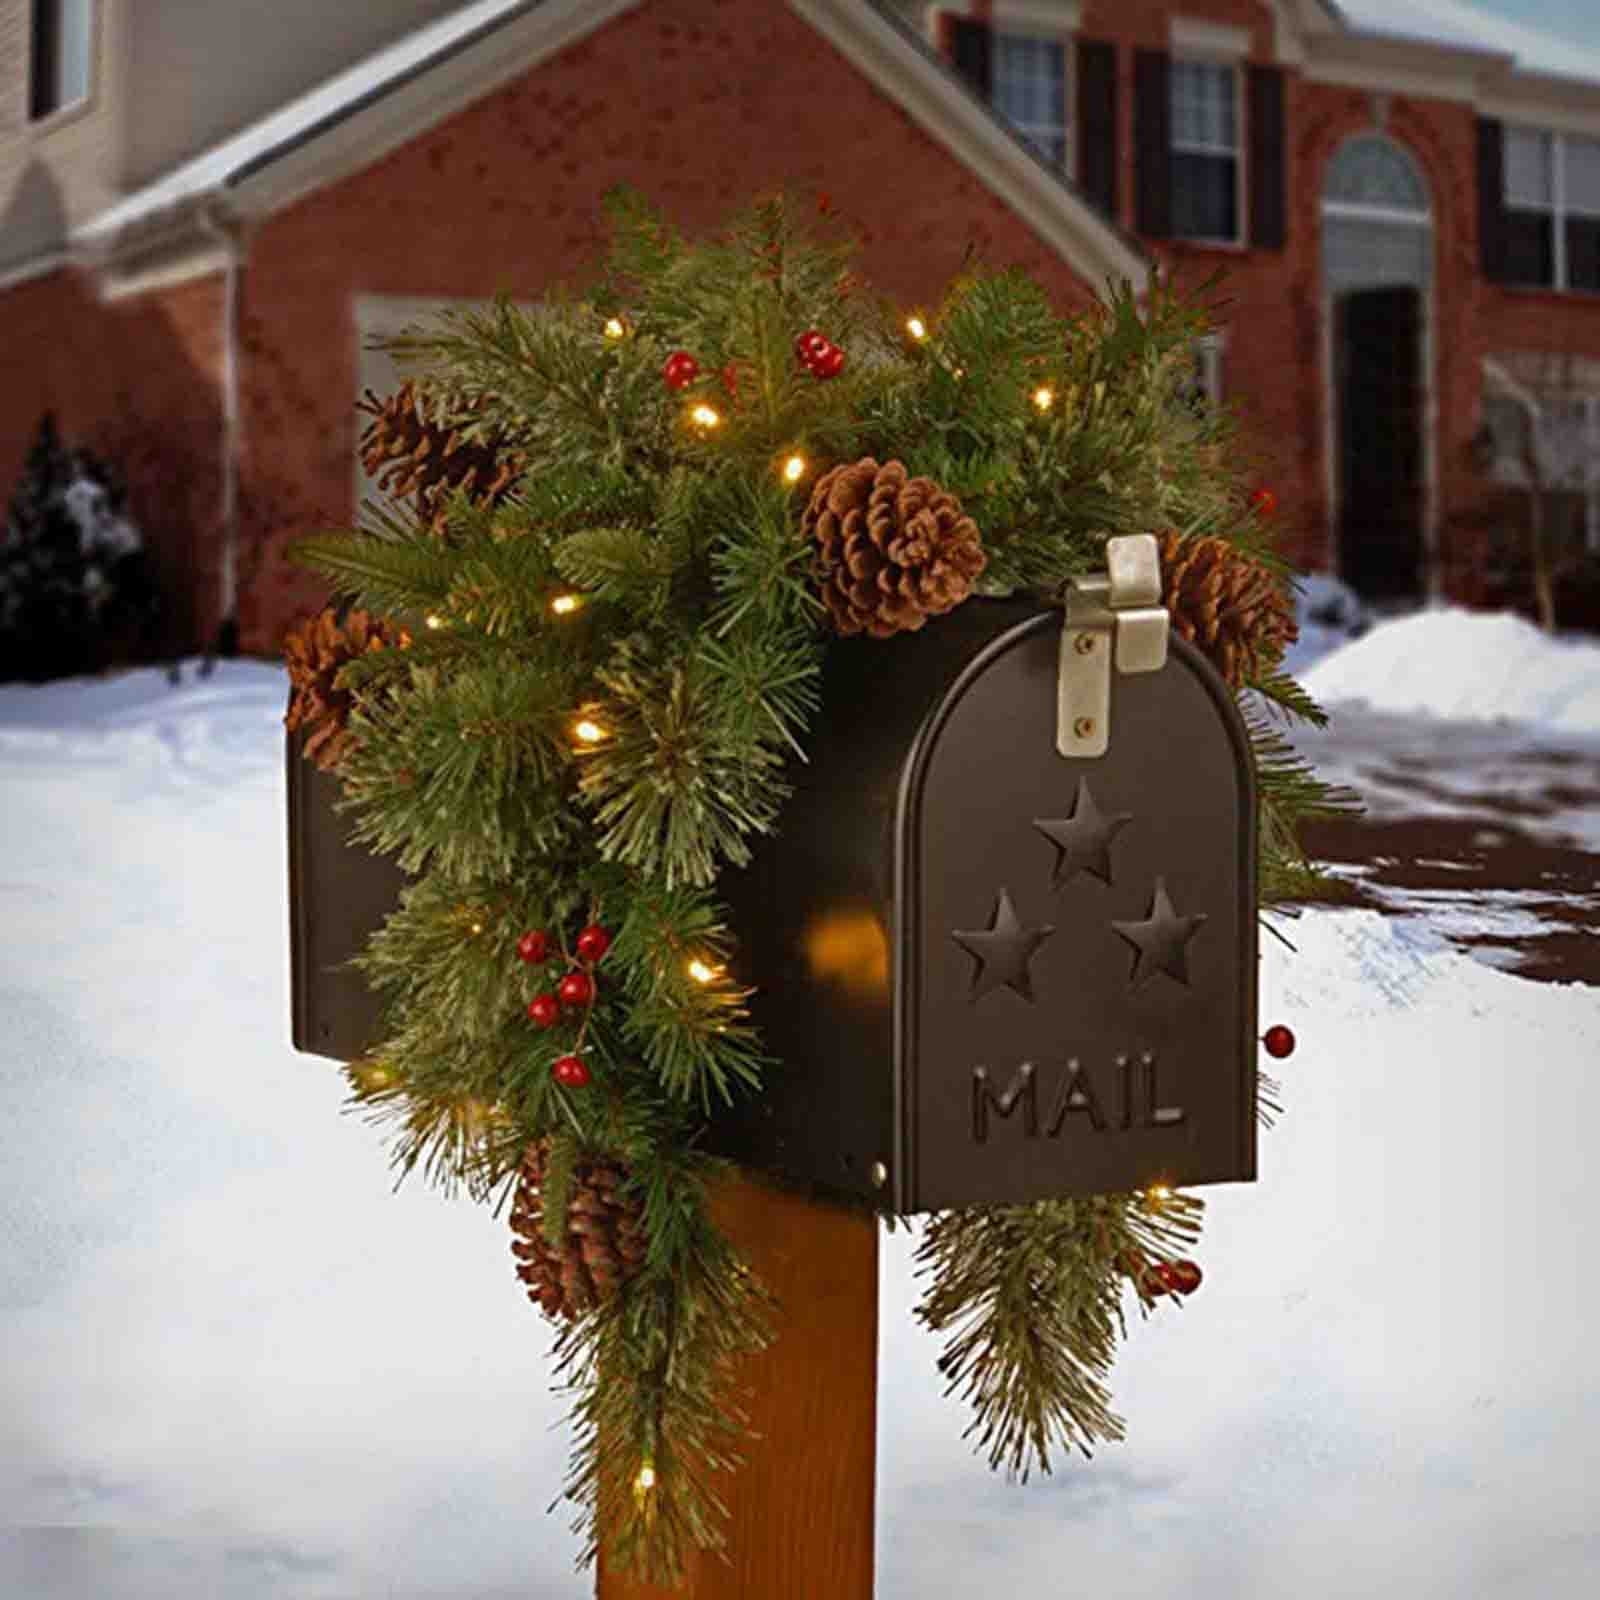
Battery packs hate cold. Standard alkalines lose up to half their capacity at freezing, so a strand that runs thirty days in October might last ten in January. Lithium AAs cost more but hold up far better in winter and are worth the upgrade for anything outdoors. Also check your strand’s IP rating — you want IP44 or better for exterior use.
24. Frosted Berry Garland Draped Over a Curved ‘Santa Mail’ Box
The white frosted accents are the whole trick. Look closely and the arrangement isn’t just green and red — there’s an irregular scattering of white tips and tiny white florals mimicking snow sitting on branches. That one detail is what makes the garland read wintry rather than merely festive. Strip it out and the same pine sprigs and glossy berries look like leftover Thanksgiving decor.
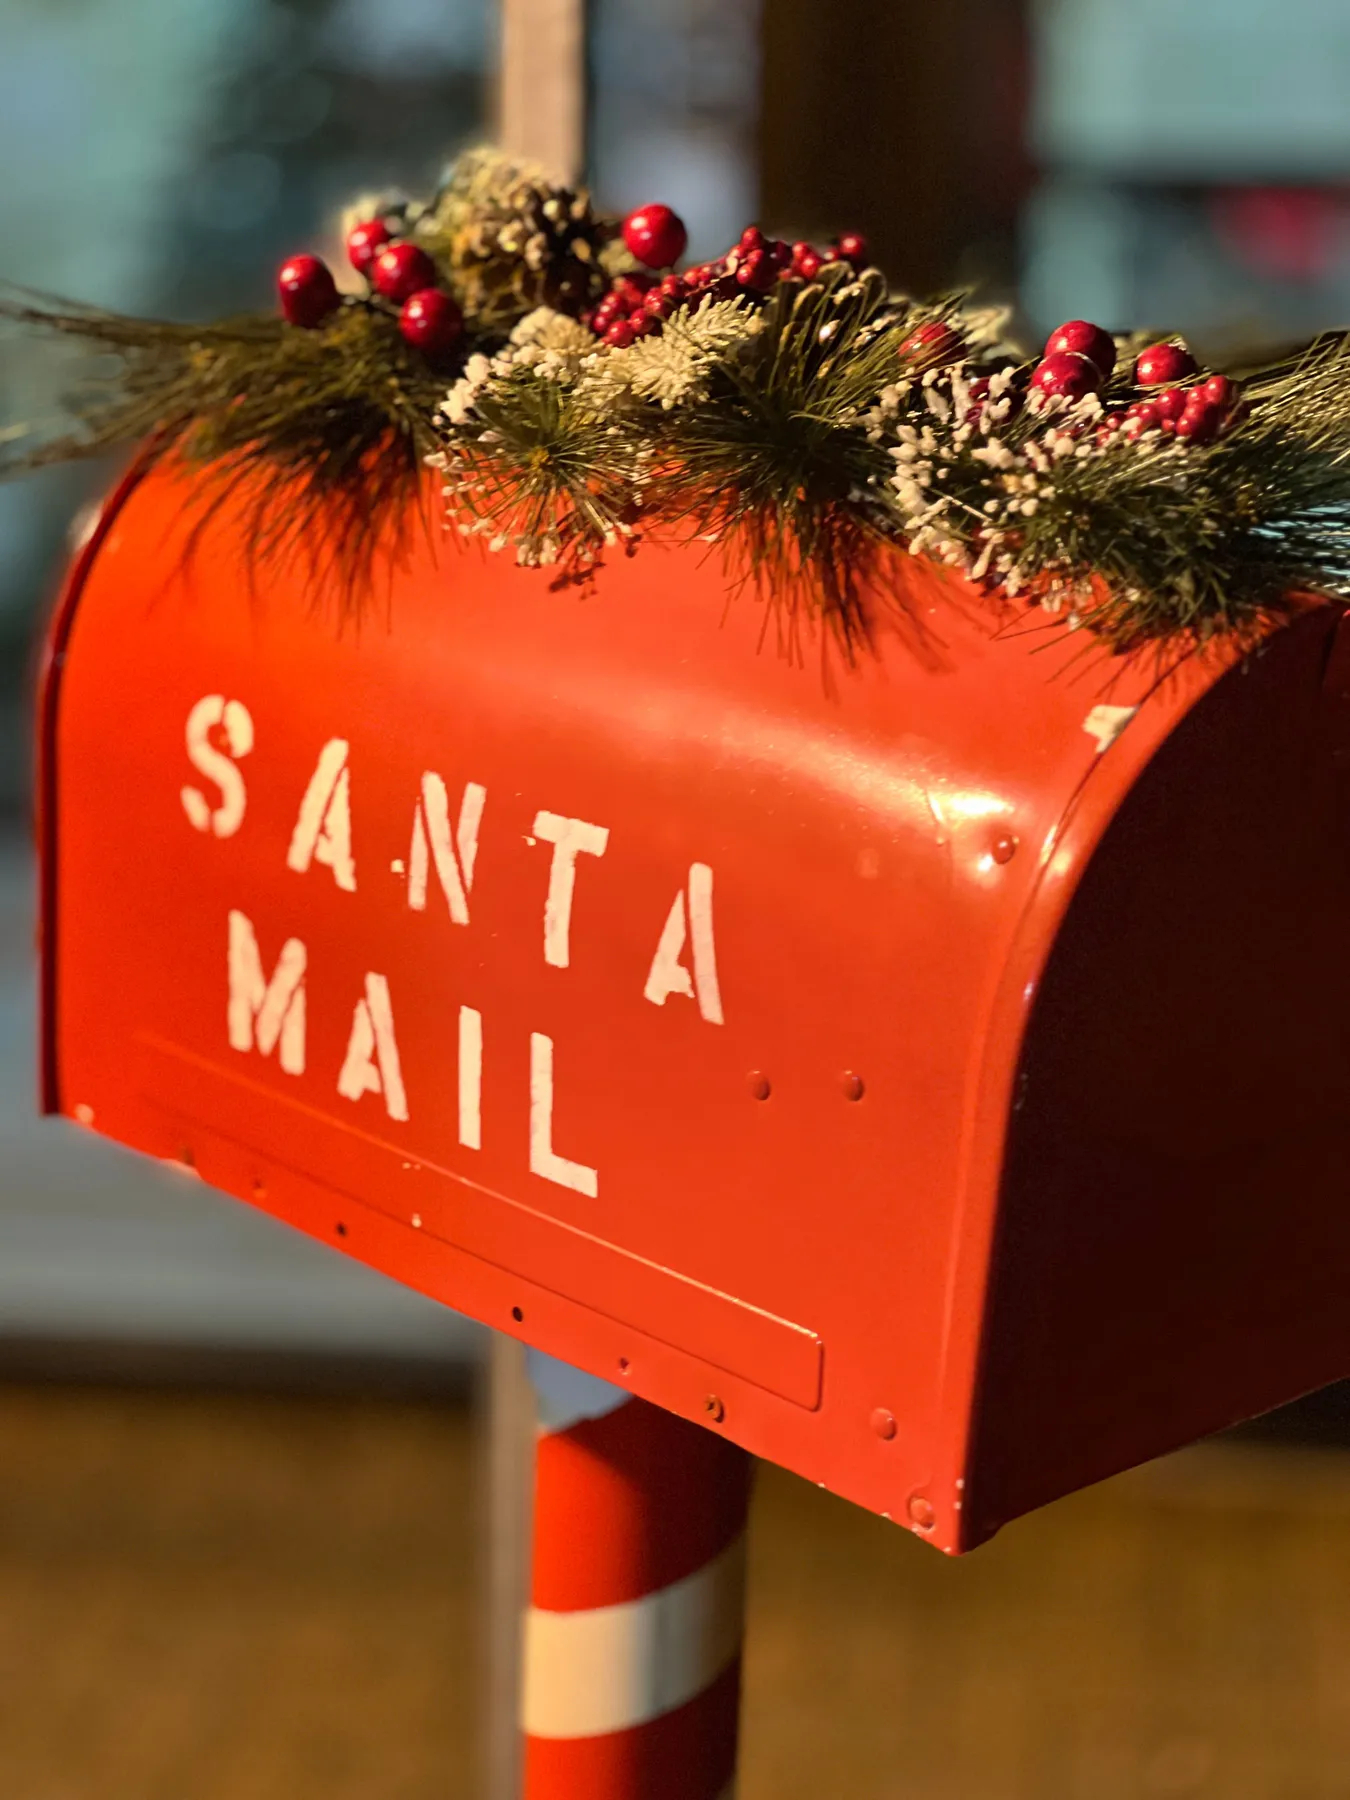
The ratio here runs 45 percent red, 35 percent green, 20 percent white — unusually white-heavy for a Christmas display, and deliberately so. Red box, red berries, candy-striped pole on one side; pine sprigs and frosted tips on the other. To adapt it, keep the white share identical and swap red for a deep burgundy, which reads richer in low evening light.
25. Snow-Covered Green Mailbox with Hand-Flocked Garland
You can flock garland yourself for about $12 instead of buying pre-flocked at $45. Hang it outside on a dry day, mist lightly with spray adhesive, then dust with artificial snow from a shaker can held about 18 inches away, working in short bursts. Let it cure two hours before handling, then set it with a matte clear coat or the flocking will shed all over the walkway.
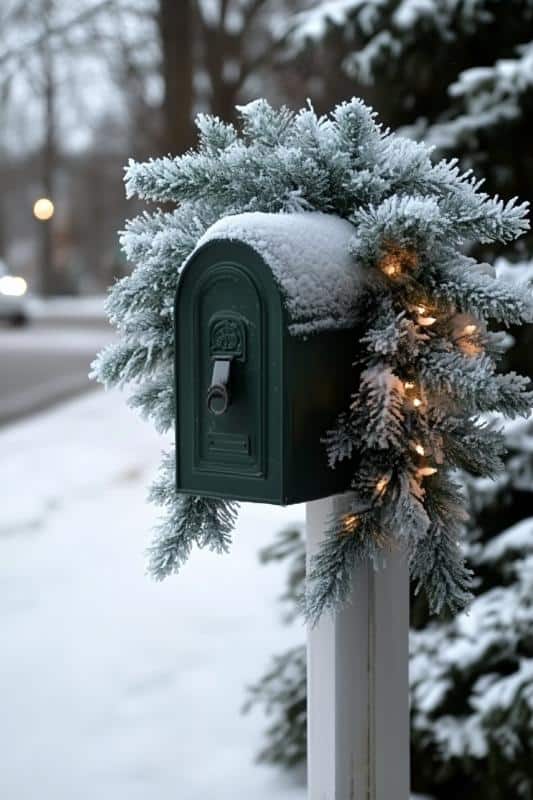
Pre-flocked garland is the single most overpriced item in holiday decor. A plain faux garland at Walmart runs about $12, a can of spray snow is $6, and a bottle of matte sealer is $8 — enough to treat three or four separate garlands. Or skip flocking entirely and let real snow do it. A plain green garland left out overnight in a cold climate looks nearly identical by morning.
26. Classic Black Mailbox with a Full Pine Garland Drape
The classic red-and-green mailbox look is having a comeback precisely because maximalist holiday decorating peaked and people started craving order. Searches for traditional Christmas garland have been climbing while festive maximalism flattens. This is the look you inherit from your grandmother and your neighbor copies in October — which is a good sign. Trends that survive a backlash become classics.
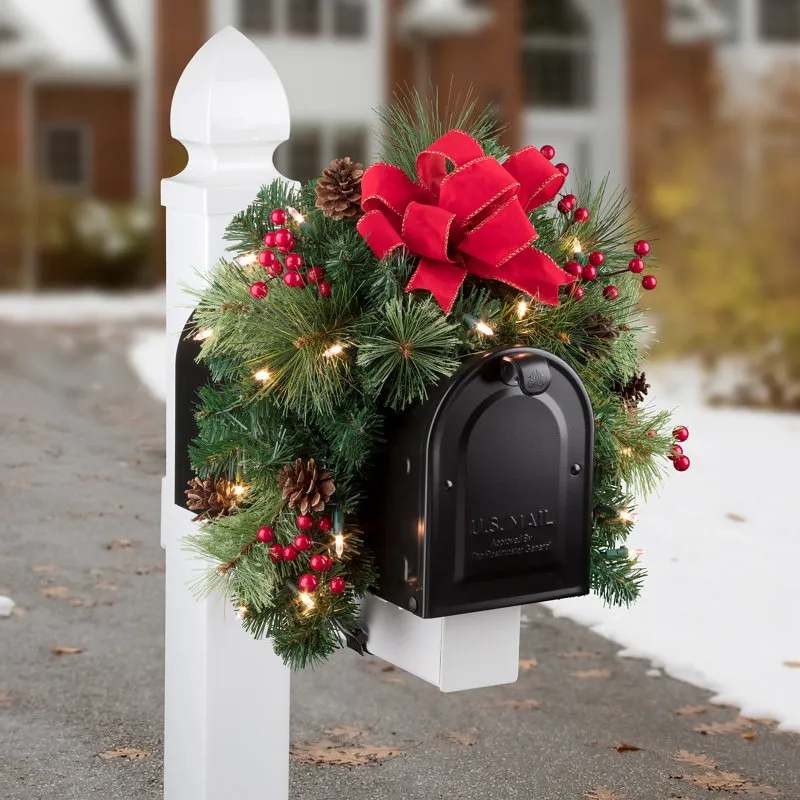
Draping the garland in five steps:
- Start at the back of the box and bring the garland over the top.
- Fork it into two tails at the front, one down each side, twisting the stems together.
- Secure with 22-gauge wire at three points — never tape.
- Weave the light strand up from the bottom so the battery pack ends up behind the bow.
- Add berries and pinecones last, clustering them in odd numbers.
About 30 minutes and $30 to $60 in materials.
27. Wreath-Shaped Tinsel Garland Ringing a Dark Green Mailbox
Tinsel sheds. Every time the wind picks up you’ll find red and green foil strands tracked into the house for three months. It’s also not pet-safe — cats and dogs eat the shiny bits, and that’s a vet visit. If you love the look but not the cleanup, a matte garland with a few glossy ornaments gives you 90 percent of the effect and zero glitter in your hallway.
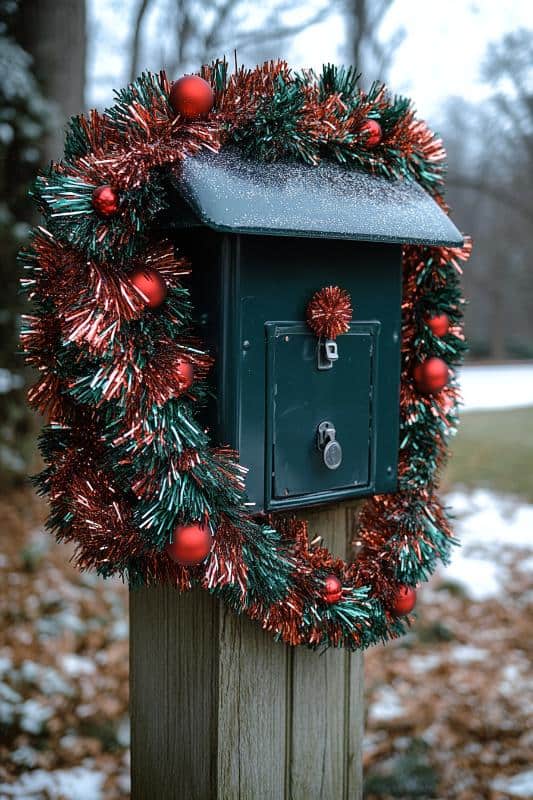
It’s the wreath shape. Most mailbox decorations drape down or hug the box; this one forms a complete ring around it, which is why the box appears to be sitting inside a wreath rather than wearing one. That single structural choice changes the silhouette entirely. Take it away and you have a dark green mailbox with some ornaments on it — pleasant, forgettable.
28. Snow-Dusted Garlands on a Charcoal Grey Mailbox
Charcoal grey reads almost black in low winter light, which makes it a strong base for greenery — but it also means the decoration needs volume to register. On a standard box, eight to nine feet of garland is the sweet spot. If yours sits on a slim post under a covered porch, halve that and lean harder on the lights. For a porch that can take a bigger, looser wrap, see Idea #20.
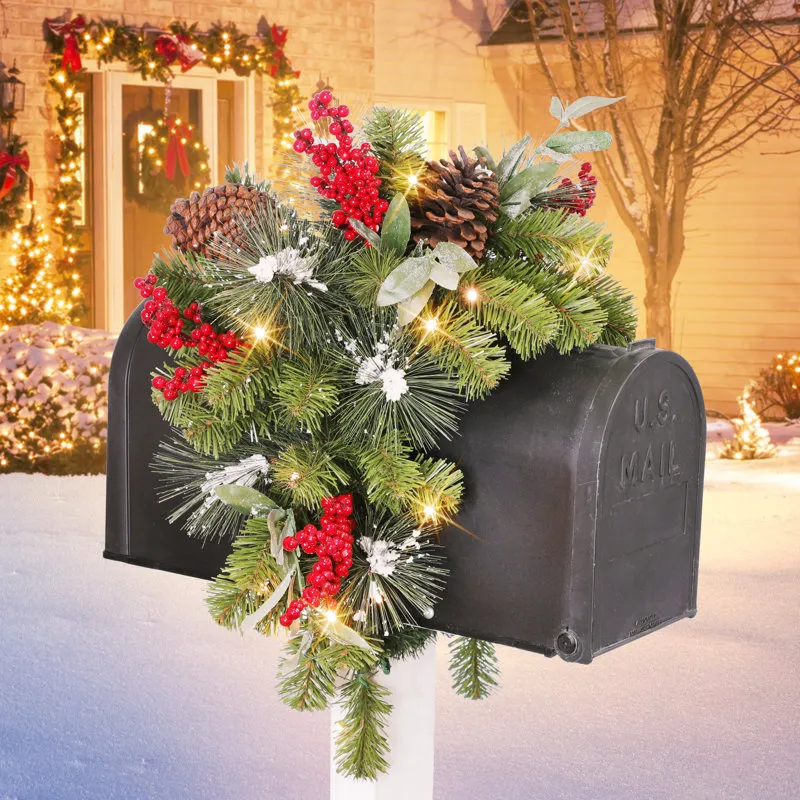
The snow dusting is doing more than you think. It softens the contrast between the dark grey box and the deep green branches, which is why the arrangement reads as one object instead of two. And the warm lights sit just inside the garland rather than on top of it, so they glow through the needles instead of perching on them. That’s the difference between lit and luminous.
29. Standard U.S. Mailbox Dressed with Homemade Frosted Pinecones
Frosted pinecones are the cheapest upgrade in holiday decorating. Buy plain pinecones at a craft store for about 40 cents each, dip the tips in white craft paint thinned with a little water, and dry them on wax paper. Ten of them costs under $5 and takes twenty minutes, versus $3 to $5 each for pre-frosted. Glue a small wire loop to the base so you can hook them into the garland instead of balancing them on branches.
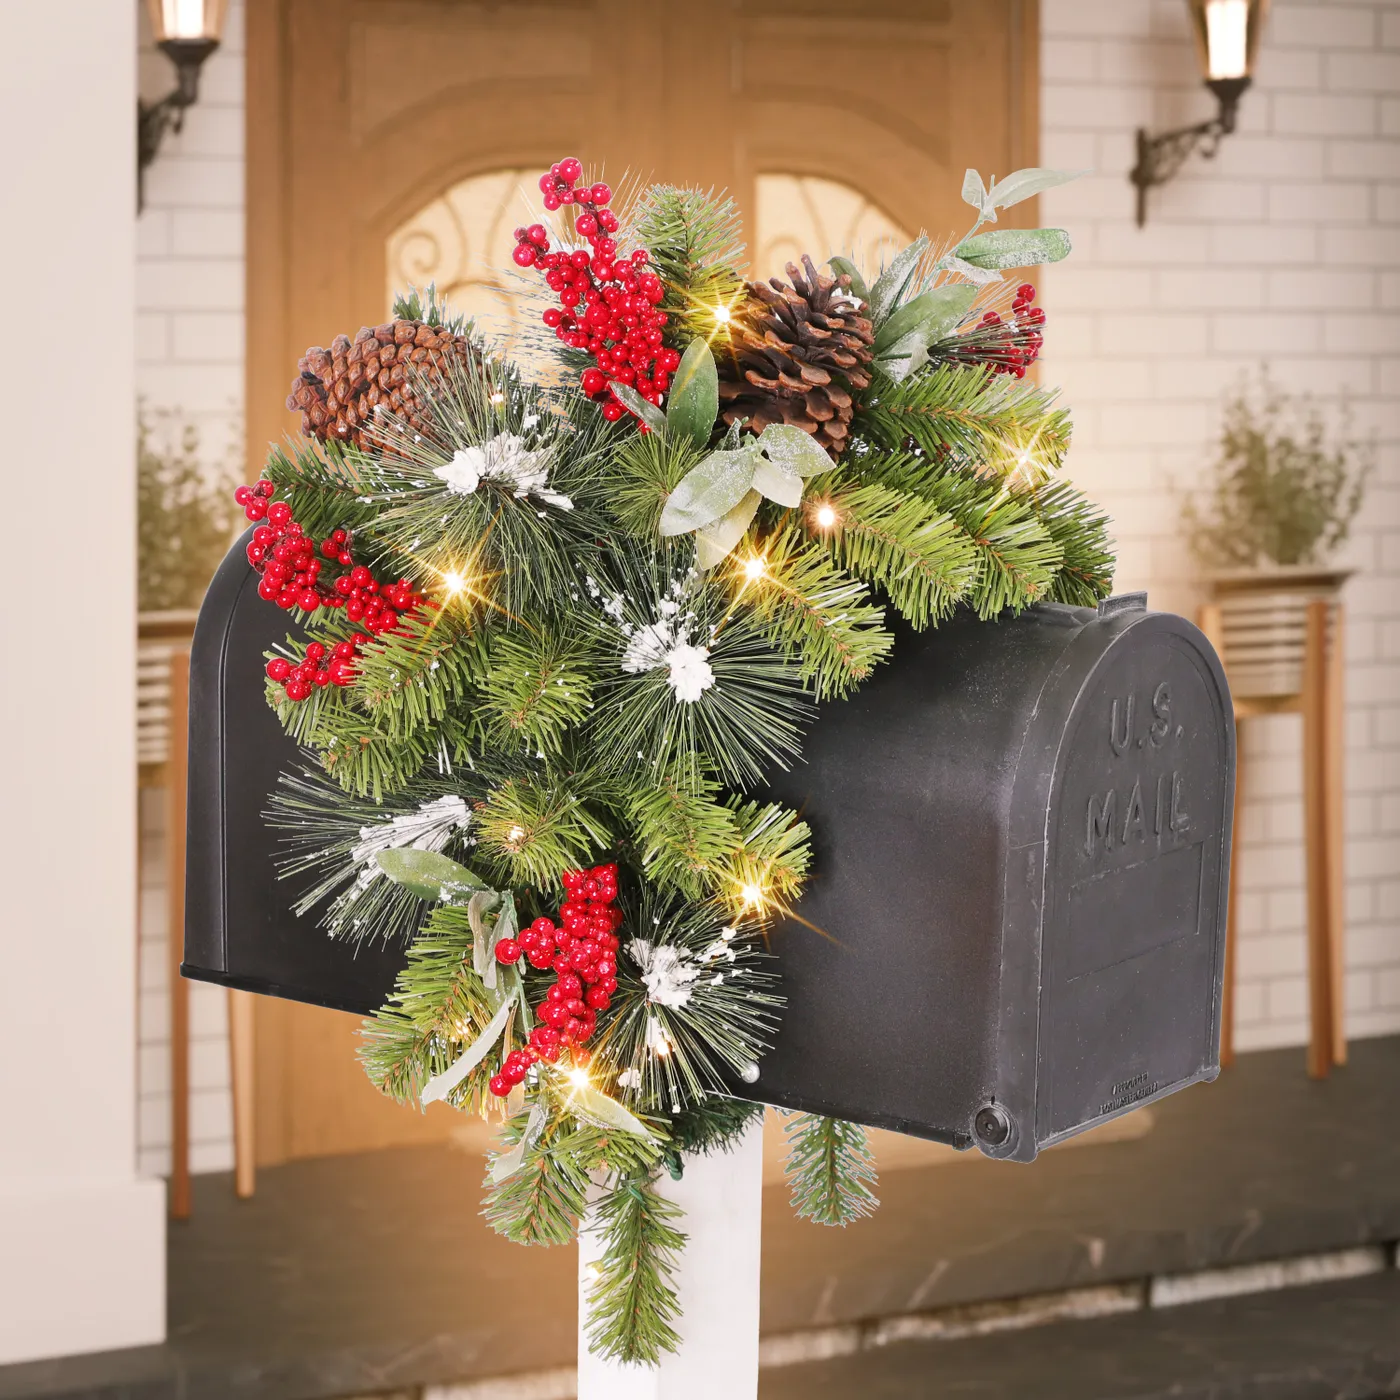
This whole arrangement can come in around $40. An eight-foot faux evergreen garland from Walmart, $12. A battery warm white strand, $8. Berries and pinecones from a dollar store, $6. Floral wire and clips, $5. And the white post you don’t have to buy — a coat of exterior white paint on the existing post does the same job for $15.
30. Plaid Ribbon Tied at the Post with a Pine and Berry Cluster
Tie a post bow that survives weather:
- Cut a 4-foot ribbon length plus a 2-foot tail piece.
- Wrap the short piece around the post twice and knot it at the back.
- Make four loops with the long piece, twisting each at the base.
- Thread 22-gauge wire through the center and cinch tight.
- Fluff the loops and let the tails drape down one side only.
Fifteen minutes and about $10 in ribbon.
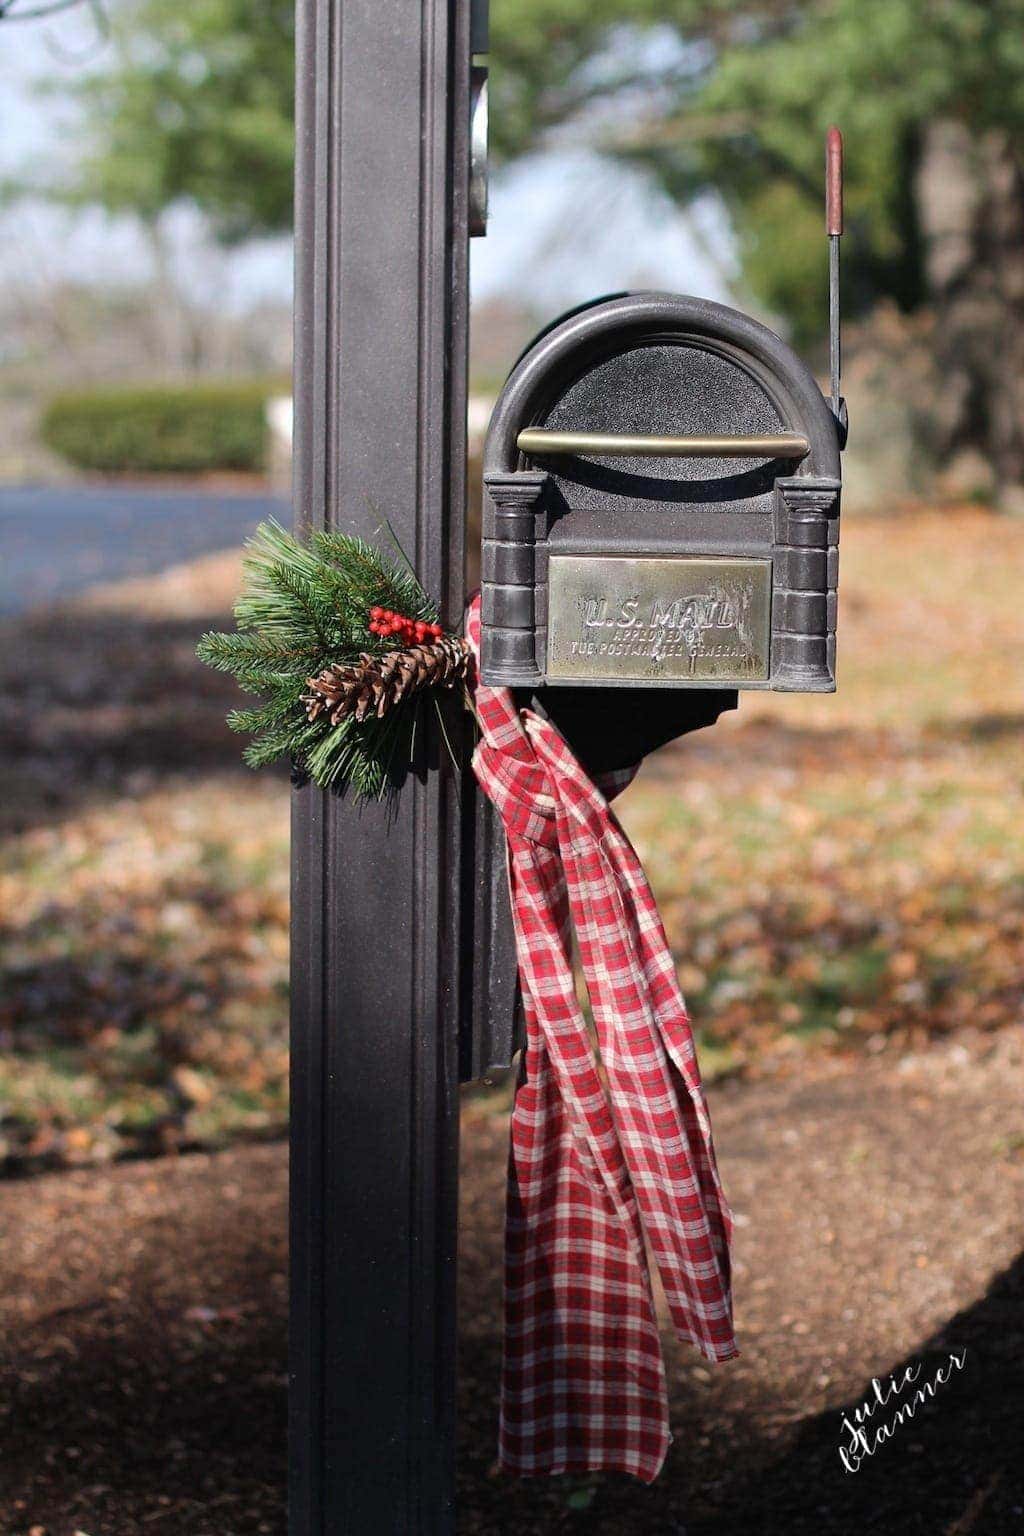
Ribbon width should scale with post height, not mailbox size. A four-foot post takes 1.5-inch ribbon; a six-foot post takes 2 to 2.5 inches. Below that the bow looks like a napkin ring; above it, it swallows the hardware. Keep the pine, pinecones, and berries within a 12-inch vertical band on the post, or the eye loses its focal point entirely.
31. Balloon Cluster Bursting from a Numbered Black Mailbox
Balloon clusters migrating from birthday parties to holiday mailboxes is a genuinely 2020s development, fueled by cheap balloon-garland kits and the rise of drive-by celebrations. It reads playful rather than traditional, which is why it works just as well for a milestone December birthday as for Christmas itself. Staying power? Limited as a holiday staple — but perfect as a one-off moment.
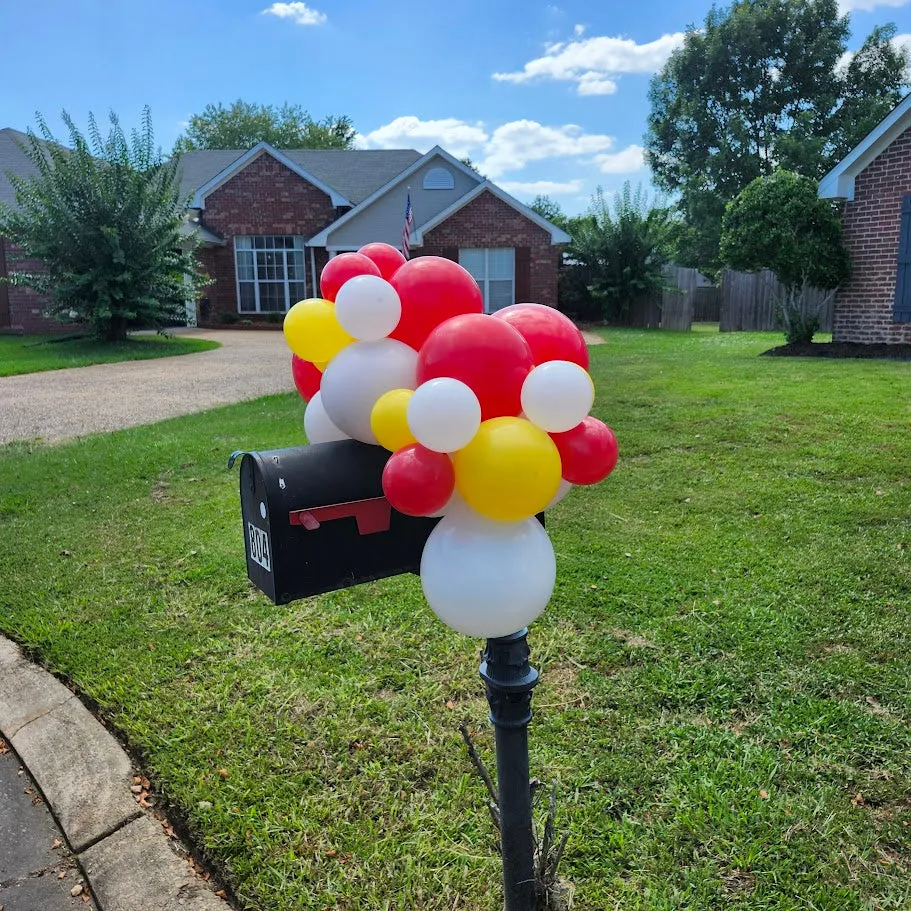
Latex balloons deflate fast in cold air. Expect a 40 to 50 percent loss of volume within 24 hours outdoors in freezing temperatures, so plan to install them the morning of. Helium isn’t the answer here; these are air-filled and taped to a frame. Use outdoor-rated balloon tape, anchor the cluster to the post rather than the box, and never block the mailbox opening itself.
32. Rustic Wooden Mailbox with Icicles and a Mini Berry Wreath
The icicles are the detail that sells it. They hang from the eaves above the mailbox, so the snow on the pitched roof looks like part of a continuous winter rather than a prop sitting on top of one. Second, the light is wrapped, not draped — it spirals the post and hugs the roofline, which keeps the glow even. Third, the wreath is small and centered. A bigger one would have broken the silhouette.
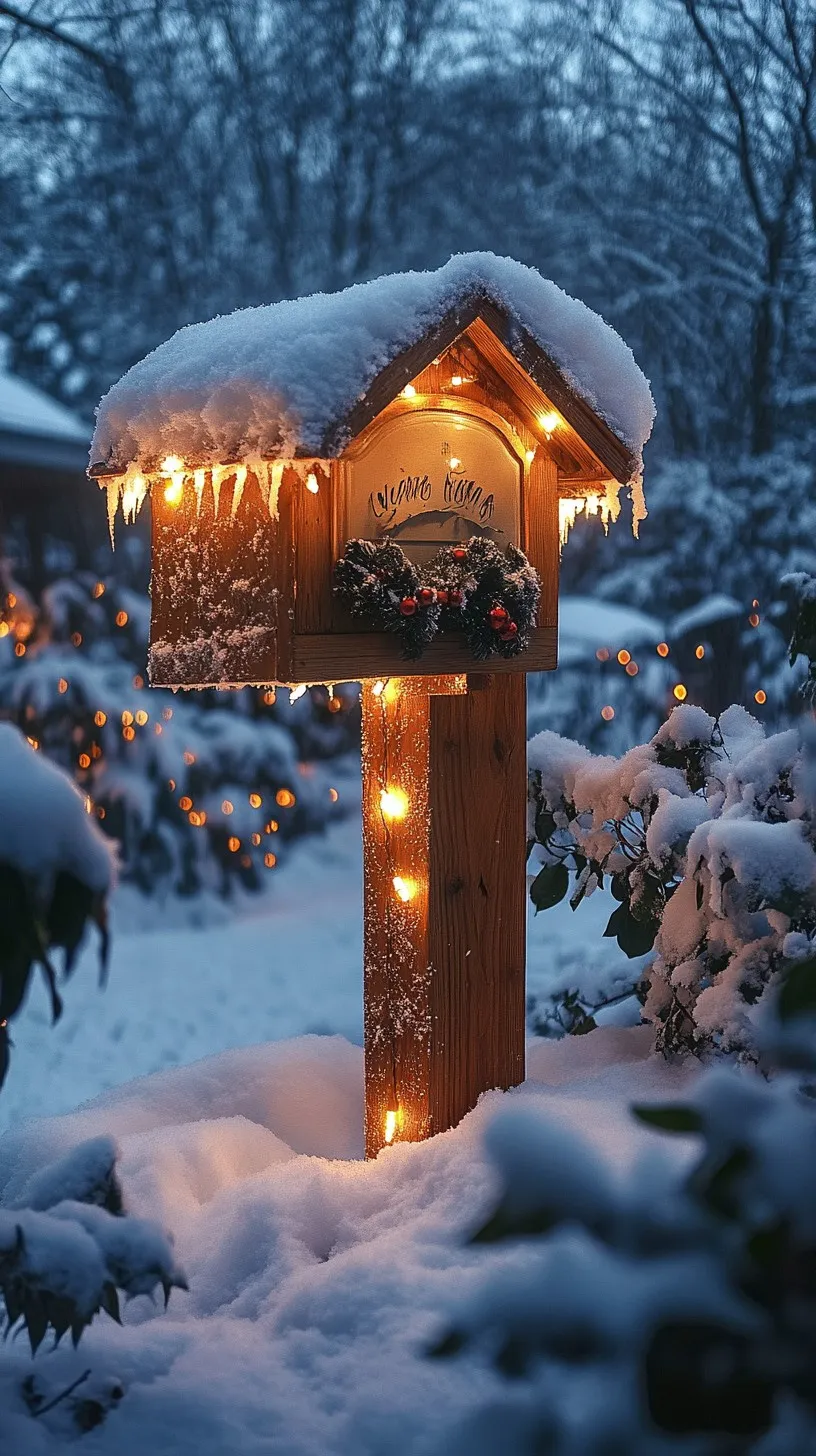
Wood plus repeated freeze-thaw equals checking. Inspect the roofline every February for splits, and reseal the pitched top with an exterior-grade clear sealer every two years — that’s the surface water sits on longest. Icicle lights are also the strand type most likely to lose a section, so buy one spare set and wrap every connector in electrical tape.
33. Magnetic Santa and Snowman Mailbox Cover with Cursive Script
Red cover, white script, and a cartoon palette of green, black, and icy blue in the shutters behind it. That light blue is the unlikely hero — it’s the only cool tone in the composition and it keeps the red from getting syrupy. If your house is beige or brown, add a cool accent somewhere nearby, even just a wreath ribbon, before committing to a cover this saturated.
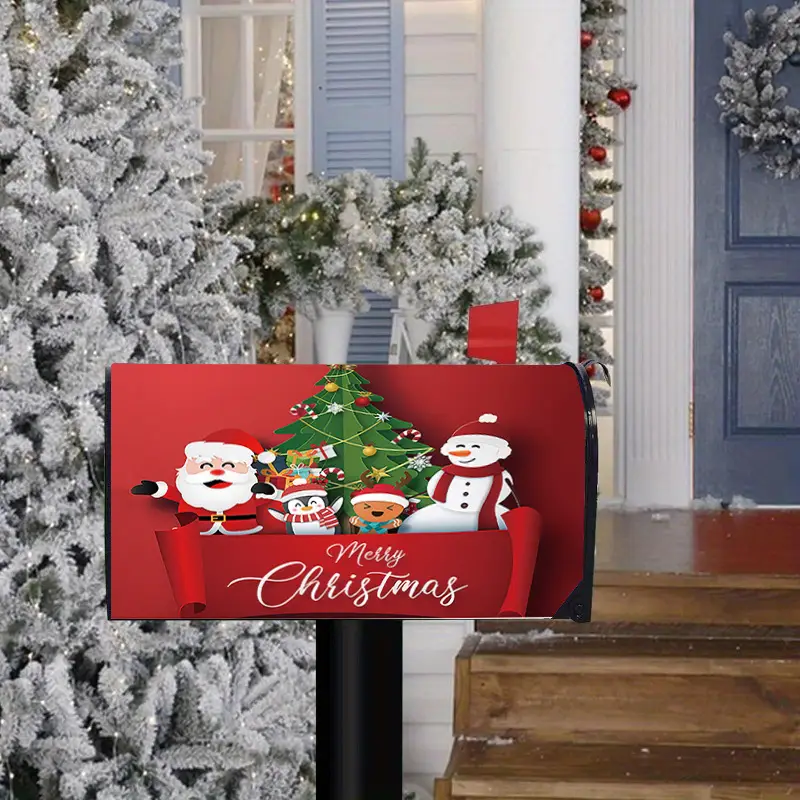
Magnetic mailbox covers are sized for standard boxes, roughly 6.5 by 19 inches, and they do not stretch. Measure the length and height of your box face before ordering, and remember covers with a flap add about two inches. Magnets also lose grip on cold metal in extreme temperatures — tuck a small piece of tape or a zip tie under the windward edge if you live somewhere with real winters.
34. White Mailbox with Pink Watercolor Trees and Gold Stars
The pink. Everything else in this composition — white box, dark grey door, green wreath — is neutral or expected. The watercolor trees in three shades of pink are the only thing that’s actually a choice, and they’re what makes the entry feel hand-painted rather than store-bought. Swap the pink for standard forest green and this becomes a mailbox you’ve walked past a hundred times.
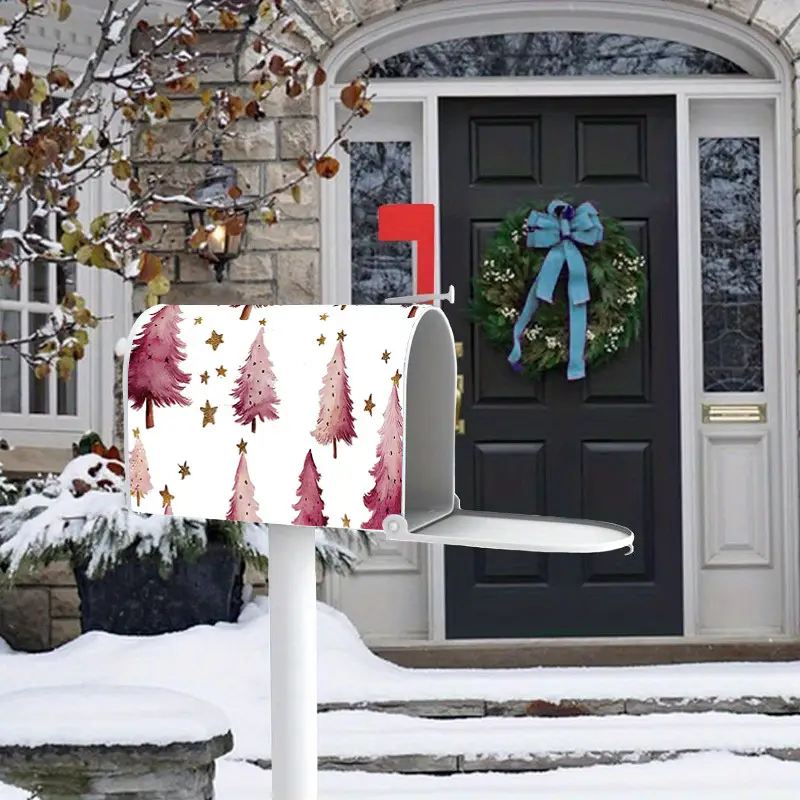
Paint watercolor trees on metal:
- Clean the box with rubbing alcohol and let it dry fully.
- Mix acrylic craft paint with a little water and apply with a flat brush.
- Paint the tree silhouette first — no outlining.
- While wet, dab a lighter pink along one edge and let the colors bleed.
- Add gold stars with a small round brush after 30 minutes, then seal with matte exterior varnish.
About two hours and $12.
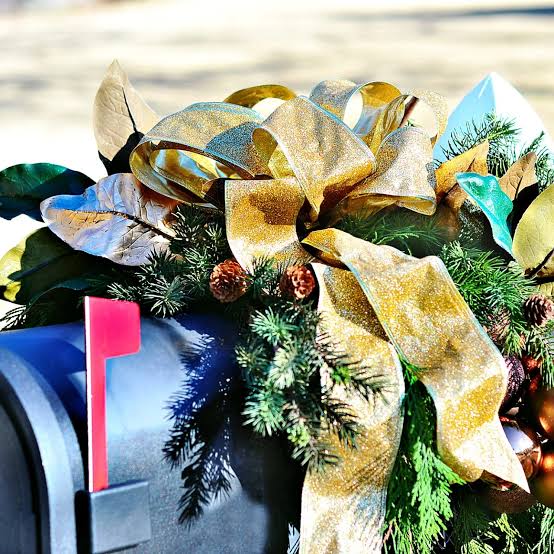
35. Magnolia and Cedar Topper with a Hand-Tied Red Bow
Toppers work best on boxes at least 9 inches wide — anything narrower tips over in wind. Keep the entire arrangement under 14 inches tall, since most mailboxes sit near eye level and anything taller blocks the numbers from the street. If your box is small, the restrained three-element approach in Idea #19 scales down better than a full mixed arrangement.
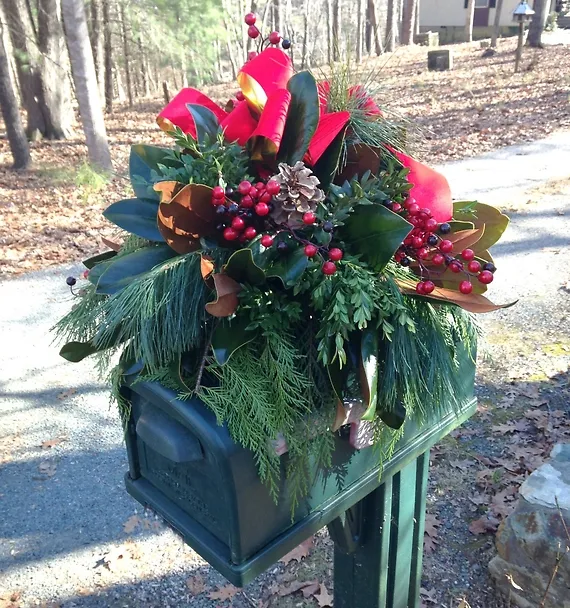
Magnolia leaves are the expensive part — a florist bunch runs $20 to $35. Shortcut it two ways: buy a faux magnolia stem at a craft store for $8, or clip real ones from a neighbor’s tree. Ask first. Cedar sprigs are usually free from a tree-trimming pile in late November, and glossy berries come cheap by the bunch. With thrifted ribbon, the whole topper can land under $20.
Your Mailbox Is the First Hello of the Season
Thirty-five ideas, one mailbox, and a whole lot of December. Pick the version that matches your house and your patience level — a single plaid bow takes ten minutes, a crocheted snow scene takes a weekend and will outlast your furniture. Either way, that little box by the road is the first thing people see when they pull up, and it deserves the twenty minutes. 📌 Pin your favorite version now so you can find it again next November, when all the good garland is sold out.