
Somewhere between the fourth Pinterest board and the third trip to the craft store, it hits you: a DIY advent calendar for kids shouldn’t be this hard. It isn’t — not once you see how real families actually pull it off.
We combed through Etsy, Target, Walmart, and IKEA (plus a lot of late-night maker-shop scrolling) and narrowed it down to 31 ideas that actually deliver. Prices run from about $5 in kraft paper and twine to $180 for a wooden house calendar you’ll keep for a decade. You’ll find rustic wood villages, felt pocket trees, kraft-bag branches, painted nutcracker drawers, fabric panel calendars, and one cardboard box full of cross-stitch kits — with a budget swap or an honest warning attached to nearly every one.
The 2026 shift is toward calendars that count as decor: pieces you leave out for six weeks instead of tucking back into a bin on December 26. And stay until the end — we break down the most common mistakes that can ruin these looks.
📌 Save this to Pinterest for later — you’ll want to revisit these ideas. (A few links here are affiliate links; we only point you to things we’d buy ourselves.)
1. The Oversized Illustrated Calendar Kids Can Actually Touch
The drawings — little houses, lopsided trees, five-pointed stars — are lovely. But what makes this calendar work is scale. It stands nearly as tall as the child opening door twelve, which turns a countdown into a daily destination: the kneeling, the pointing, the negotiation over whose turn it is. Shrink the same artwork down to tabletop size and the ritual evaporates.

As for placement: put the bottom row between 20 and 28 inches off the floor so a three-year-old can reach it without a stool, and keep the top row under 48 inches so you’re not lifting anyone by December 10. If it leans against the wall instead of mounting, park a low basket of spare stickers beside it — small hands want something to do while they wait their turn.
2. Cream Canvas Pockets With Muted Red Numbers
Three colors, used ruthlessly: warm cream canvas, one muted brick red, and a whisper of deep green from the twig wreath beside it. The red-and-white striped rope is the clever bit — it repeats the red a second time and gives all those soft fabric pockets one crisp line to hang from. Nothing competes, so your eye lands on the lettering and then travels down the pockets in order.
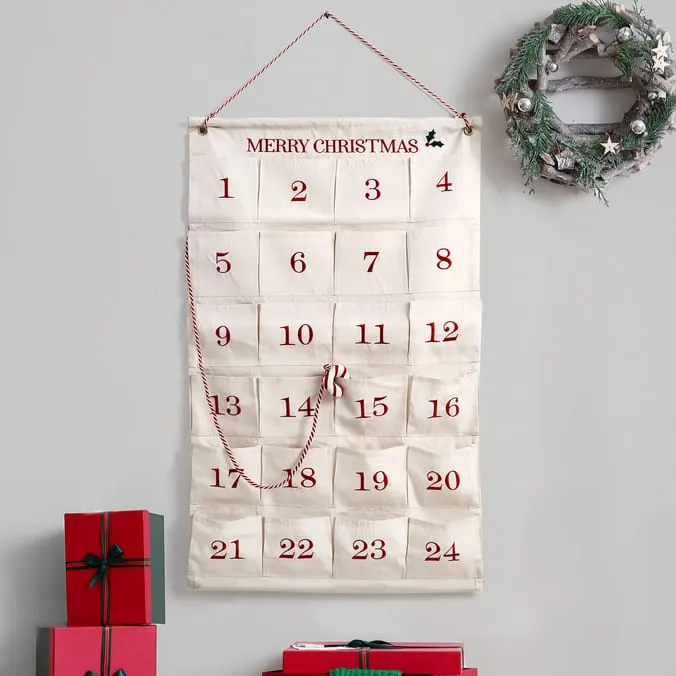
You can sew this for roughly $25–$35: a yard of canvas or drop cloth, a dowel, cotton twine, and 24 pockets cut from the leftovers. The numbers are the only fiddly part — freezer-paper stencils and fabric paint beat hand-lettering if your handwriting is anything like mine. It’s also the low-effort cousin of Idea #30, which uses the same pocket logic with far more illustration.
3. Kraft Bags And Red Baubles Hung From A Real Branch
- Find a branch 4–5 feet long, no thicker than 2 inches, and strip any loose bark.
- Seal it with a coat of matte polycrylic so it doesn’t shed on the wall.
- Drive two small eye hooks into studs or ceiling joists, or use adhesive hooks rated 25 lb and up.
- Loop jute twine through both ends and level it with a spirit level before anything hangs.
- Tie the bags on at staggered heights so each number still reads clearly.
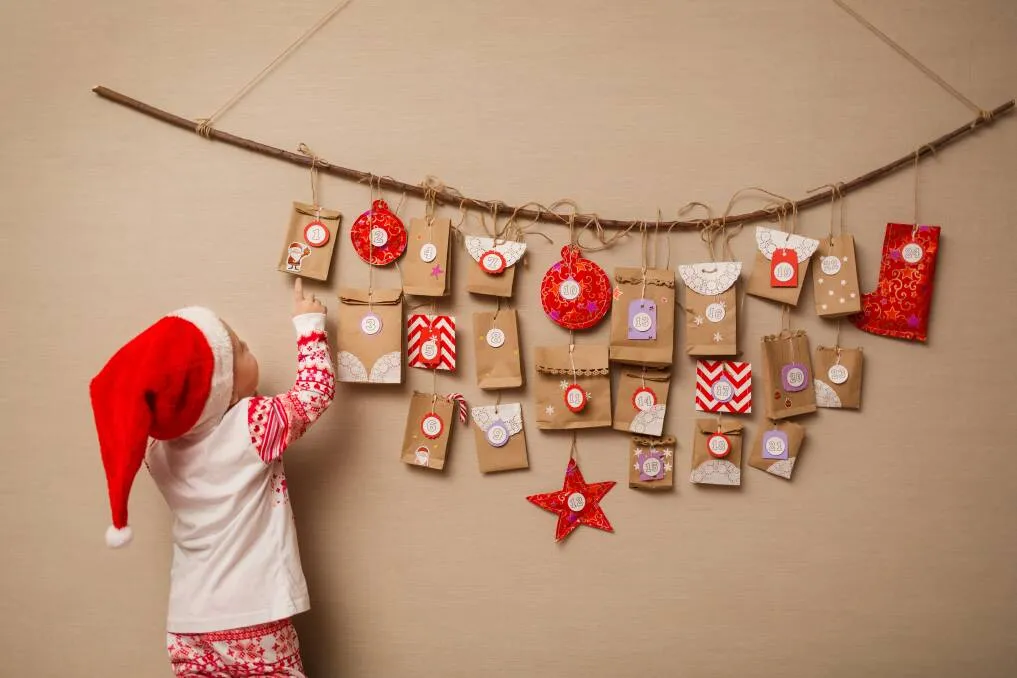
About 90 minutes and $20 in materials, assuming you already own a drill.
Here’s what nobody mentions: 24 bags with small toys get heavy, and kids pull. Keep each bag under 3 ounces — stickers, trading cards, one chocolate, a folded note — and hang the red ornaments near the branch’s center where the wood is strongest. If the branch bows more than an inch, you’ve overloaded it.
4. Twenty-Four Felt Trees In A Cheerful Row
The formula is simple: 60% cream felt ground, 30% repeating brights — mustard, forest, teal — and 10% wool ball accents scattered above and between the trees. Keep the brights repeating in the same order so the grid feels intentional rather than random. Want a calmer version? Swap the brights for sage, ecru, and a single brass ball, and the identical pattern reads completely differently.
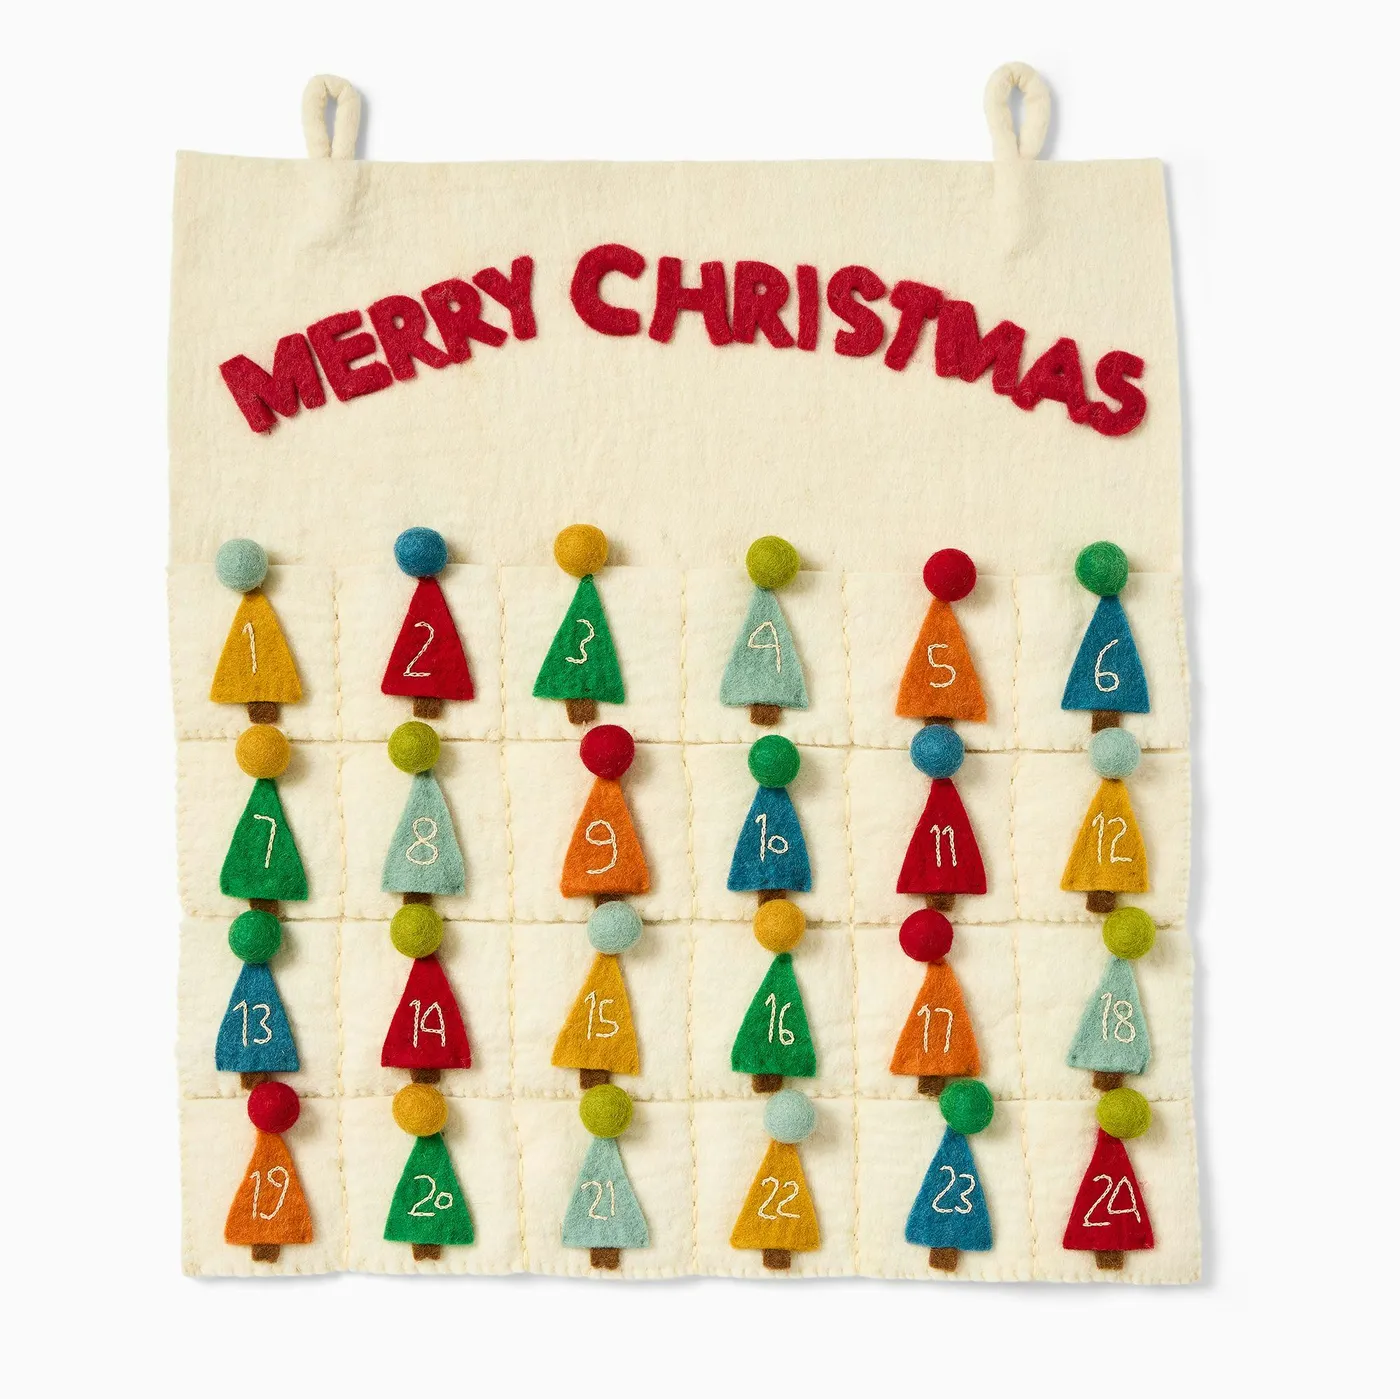
Felt is forgiving but not immortal. Wool felt pills where small hands rub it, the felted balls collect every pet hair within ten feet, and none of it goes in the washing machine. Spot clean with a damp cloth, store it flat with a cedar block, and budget about ten minutes of lint-rolling a week.
5. A Paper Pop-Up Calendar That Lives In The Kids’ Room
Paper pop-up calendars are having a moment in 2026, and the reason is boringly practical: they fold flat. No storage bin, no twelve months of a wooden house hogging shelf space. The other draw is ritual — the daily unfold gives kids a small physical event, which is exactly what a screen-free countdown needs to compete with.
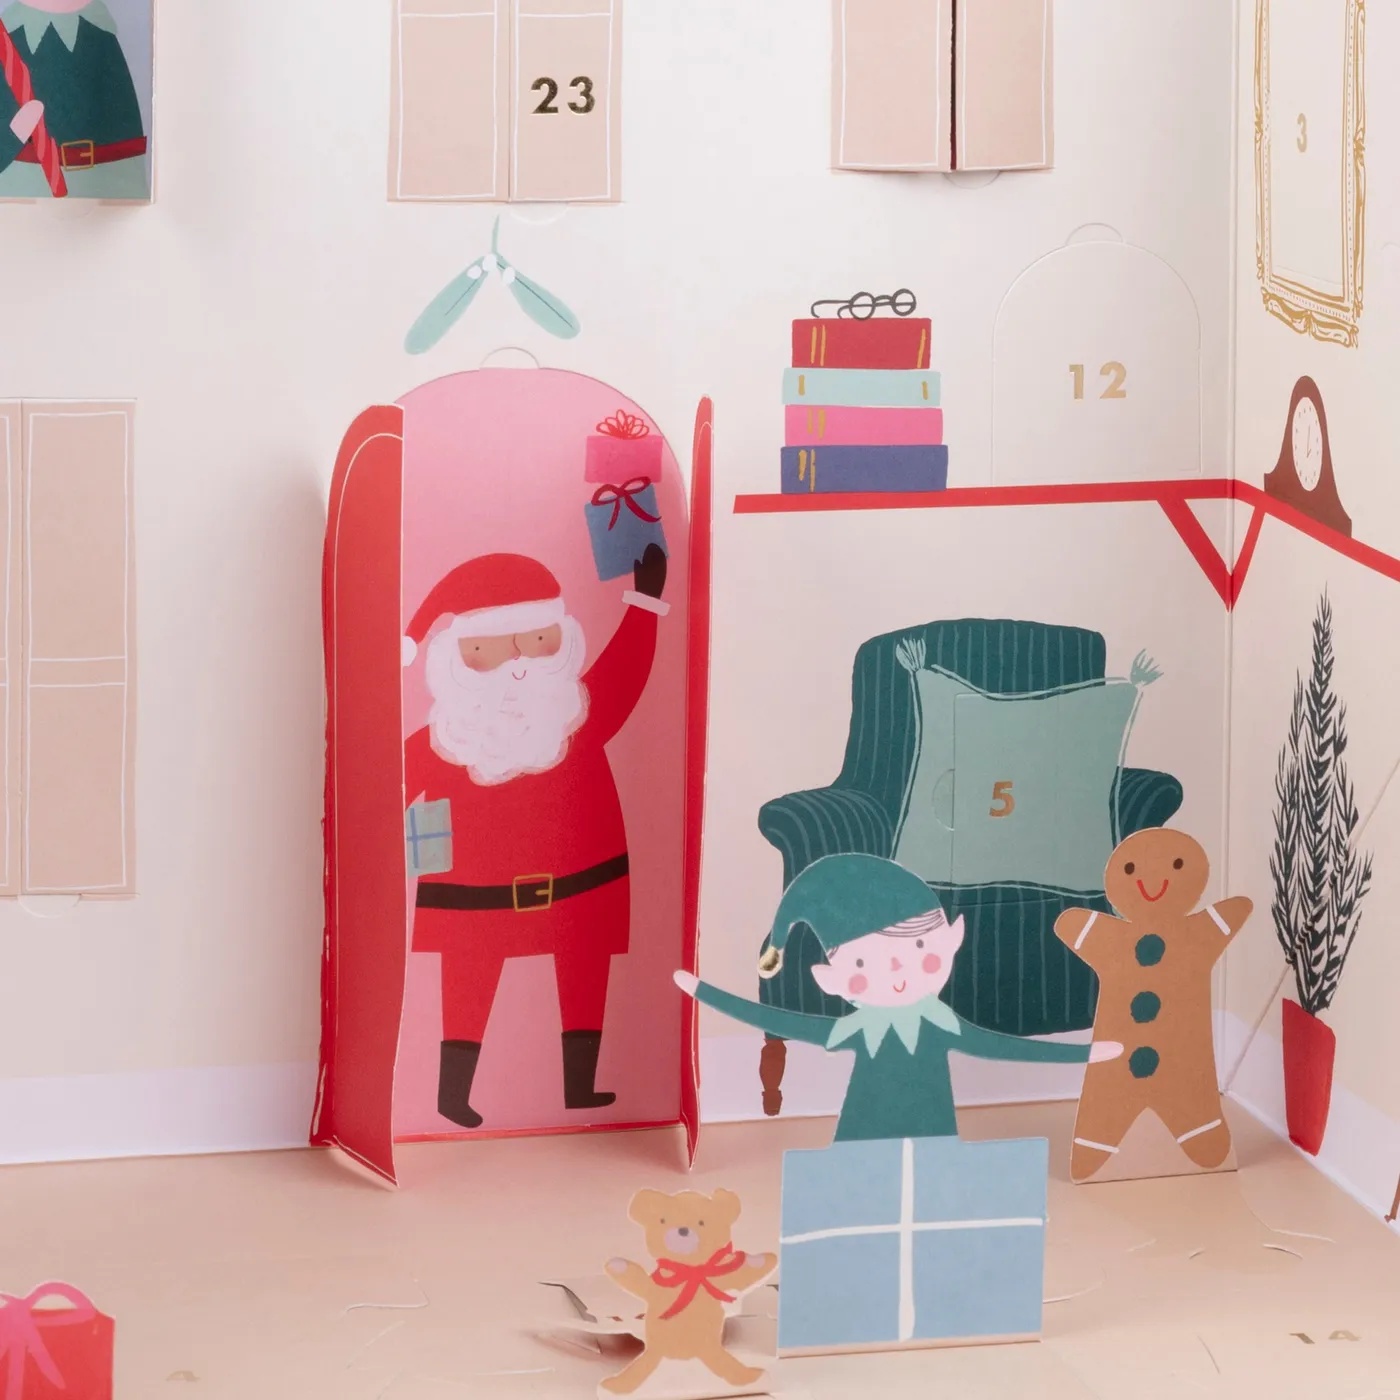
- Measure the shelf or wall space first; pop-ups need 10–12 inches of clearance to open.
- Check the finished height — the bottom row should sit at or below 36 inches for kids under six.
- Decide your treat size before you buy; most pop-up pockets top out around 2 inches.
- Confirm it folds flat for storage, or you’ve just purchased next year’s clutter.
- Set a $40 ceiling before you fall in love with a $90 import.
6. A Nutcracker With Twenty-Four Pull-Out Drawers
Roughly 70% raw wood, 20% uniform — red above, green below — and 10% gold glitter on the hat and trim. That’s the whole recipe, and it’s why the piece reads as a nutcracker instead of a painted box. Swap the glitter for matte gold paint and it becomes a much more grown-up object without losing the silhouette.
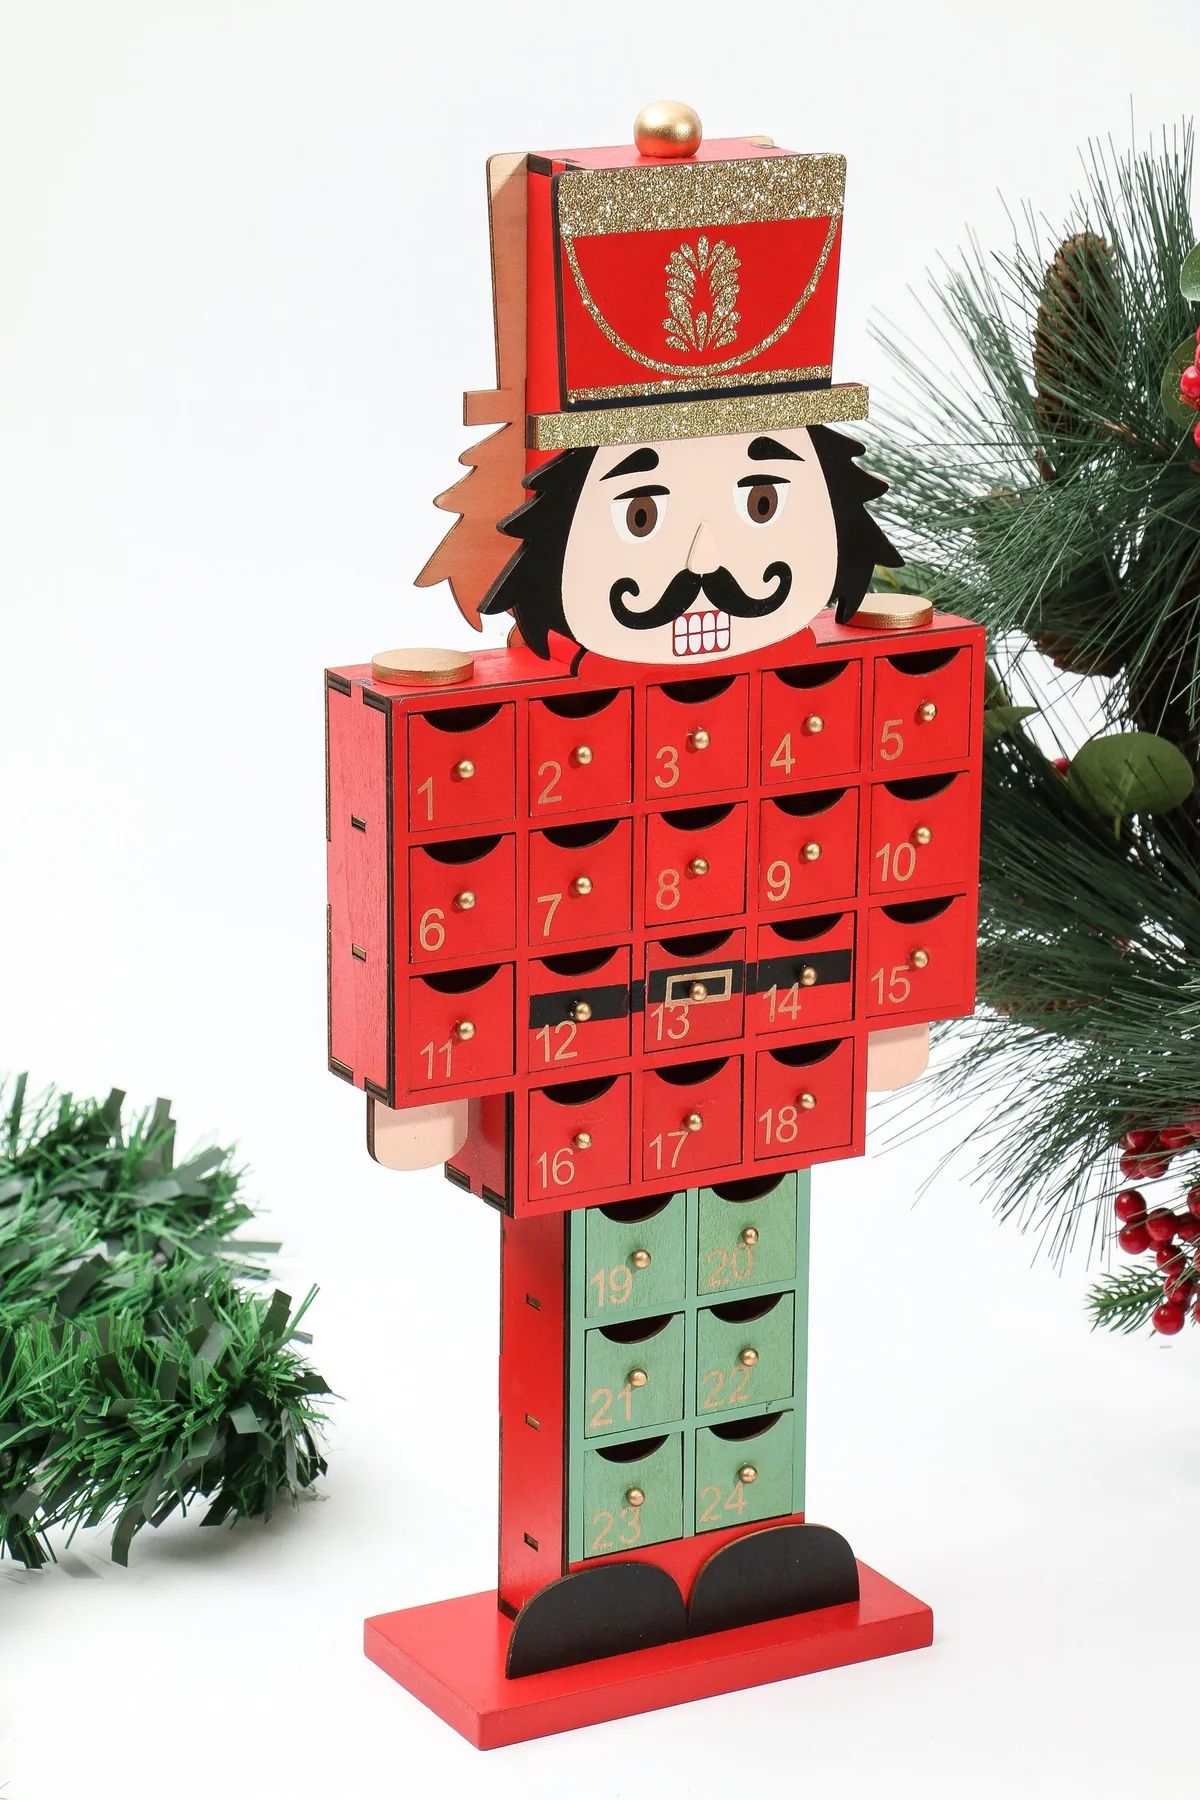
The face is doing all the heavy lifting. Cover it and you have a handsome, slightly boring set of drawers; put it back and the calendar has a personality your kids will name. If you’re painting one yourself, spend your time on the eyes and the jaw line — those two details sell the illusion from across the room.
7. A Lighted House With Two Peek-In Dioramas
Two things to plan for before you buy: light source and cord. Battery LEDs mean no outlet hunting but roughly 30–40 hours of runtime, so expect to swap batteries mid-December. Plug-in versions are brighter and free to run, but you need an outlet within reach or a cord running down the wall — which is why most people put these on a console where furniture hides the drop.
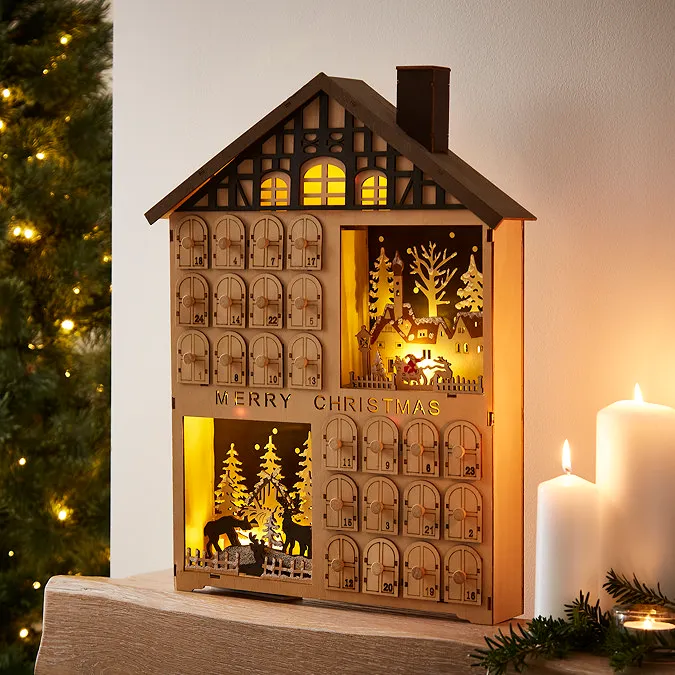
What makes it convincing is depth. The dark brown roof and timber trim act as a frame, and the two glowing cut-outs sit a couple of inches behind the front panel, so you’re looking into rooms rather than at a sticker. It’s an old theatre trick: dark border, warm center, one light source.
8. Bare Wood, Twenty-Four Knobs, One Faux Fur Base
- Wood house calendar with 24 drawers: $45–$90
- Laser-cut winter village topper: $0–$20, often included
- Miniature trees or figures: $8–$15
- Faux fur throw, cut to size: $12–$25
- Paint pen, stain, or wax: $8–$12
- Treats and tiny gifts for 24 days: $30–$50
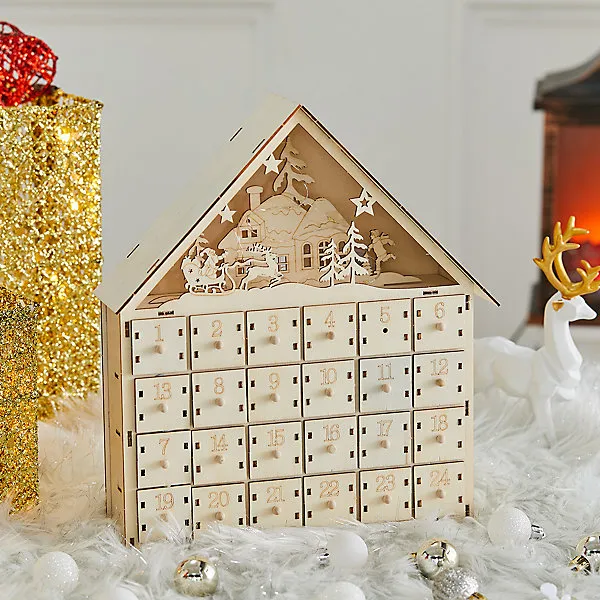
Total: roughly $105–$210, depending on the blank you start with. Budget alternative: a $25–$35 unfinished calendar from a craft store plus a $10 throw blanket gets you 80% of the look — the fur base is doing more visual work than the wood species.
Whatever blank you buy, re-number it. Factory numbers are usually tiny and printed in a washed-out gray. A fine-tip paint pen in warm white or soft black, applied in two thin coats, makes the drawers readable from six feet, which is the distance everyone will actually view this from.
9. Red Roof, Warm Window, Serious Presence
This one wants a console 40–48 inches wide with at least 12 inches of depth, against a wall rather than in front of a window. Much wider and the piece gets lost; narrower and it looks like it’s hovering. Apartment dwellers can compare with Idea #17 — same idea, smaller footprint.
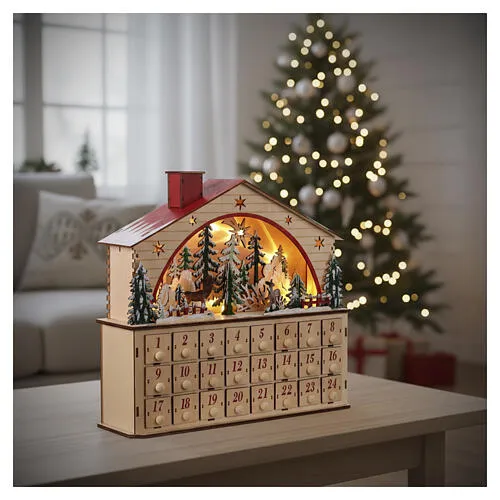
The red roof is the focal point, and the arched, backlit landscape gives it something to frame. Warm light against cool window daylight is the contrast that makes the whole thing glow instead of glare.
Upkeep is mostly dust: a soft brush between the drawers once a week, microfiber on the roof. If yours has faux snow, expect light shedding for the first season — put a felt pad underneath. The LEDs are rated for years; the batteries are the real cost, around $10–$15 a season.
10. Red Drawers, White Frame, Two Little Gnomes
- Cut a piece of 1/8-inch foam board to fit the diorama opening.
- Cover it with a printed winter backdrop or a sheet of pale blue card.
- Hot-glue birch-style twigs and two small pine trees in a loose triangle.
- Place the gnomes slightly off-center — dead center reads as a product display.
- Run a battery micro-string behind the trees and tape the pack to the back.
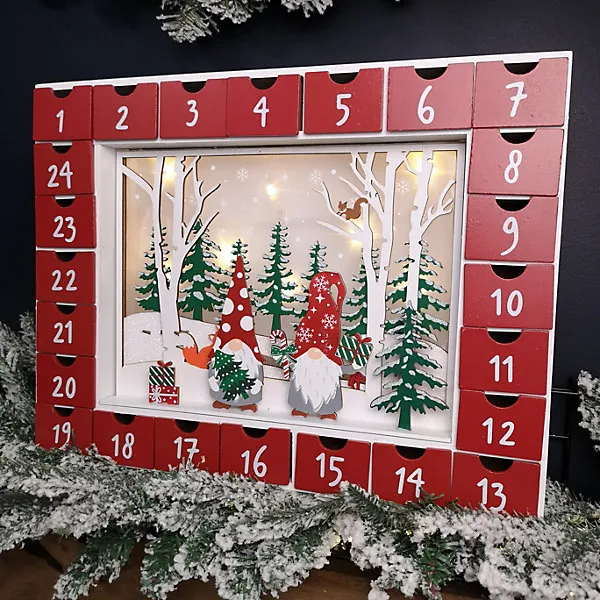
About 45 minutes and $12–$18, most of it the figures.
Retail versions of this run $130–$180. You can get there for under $70: a plain drawer calendar from Target or Walmart at $30–$45, two gnome ornaments at $8–$14, and a $6 frosted garland from IKEA draped underneath. The layered-diorama trick is the part worth copying; the price tag isn’t.
11. A Whole Wooden Village, Lit From The Inside
Take away the light and you have a nice display shelf. Keep it and twenty-four numbered houses read as a real place after dark — windows glowing, base lit, tiny pines throwing shadows. That’s the element worth protecting: it’s the difference between seasonal decor and the thing your kids describe to their own kids someday.
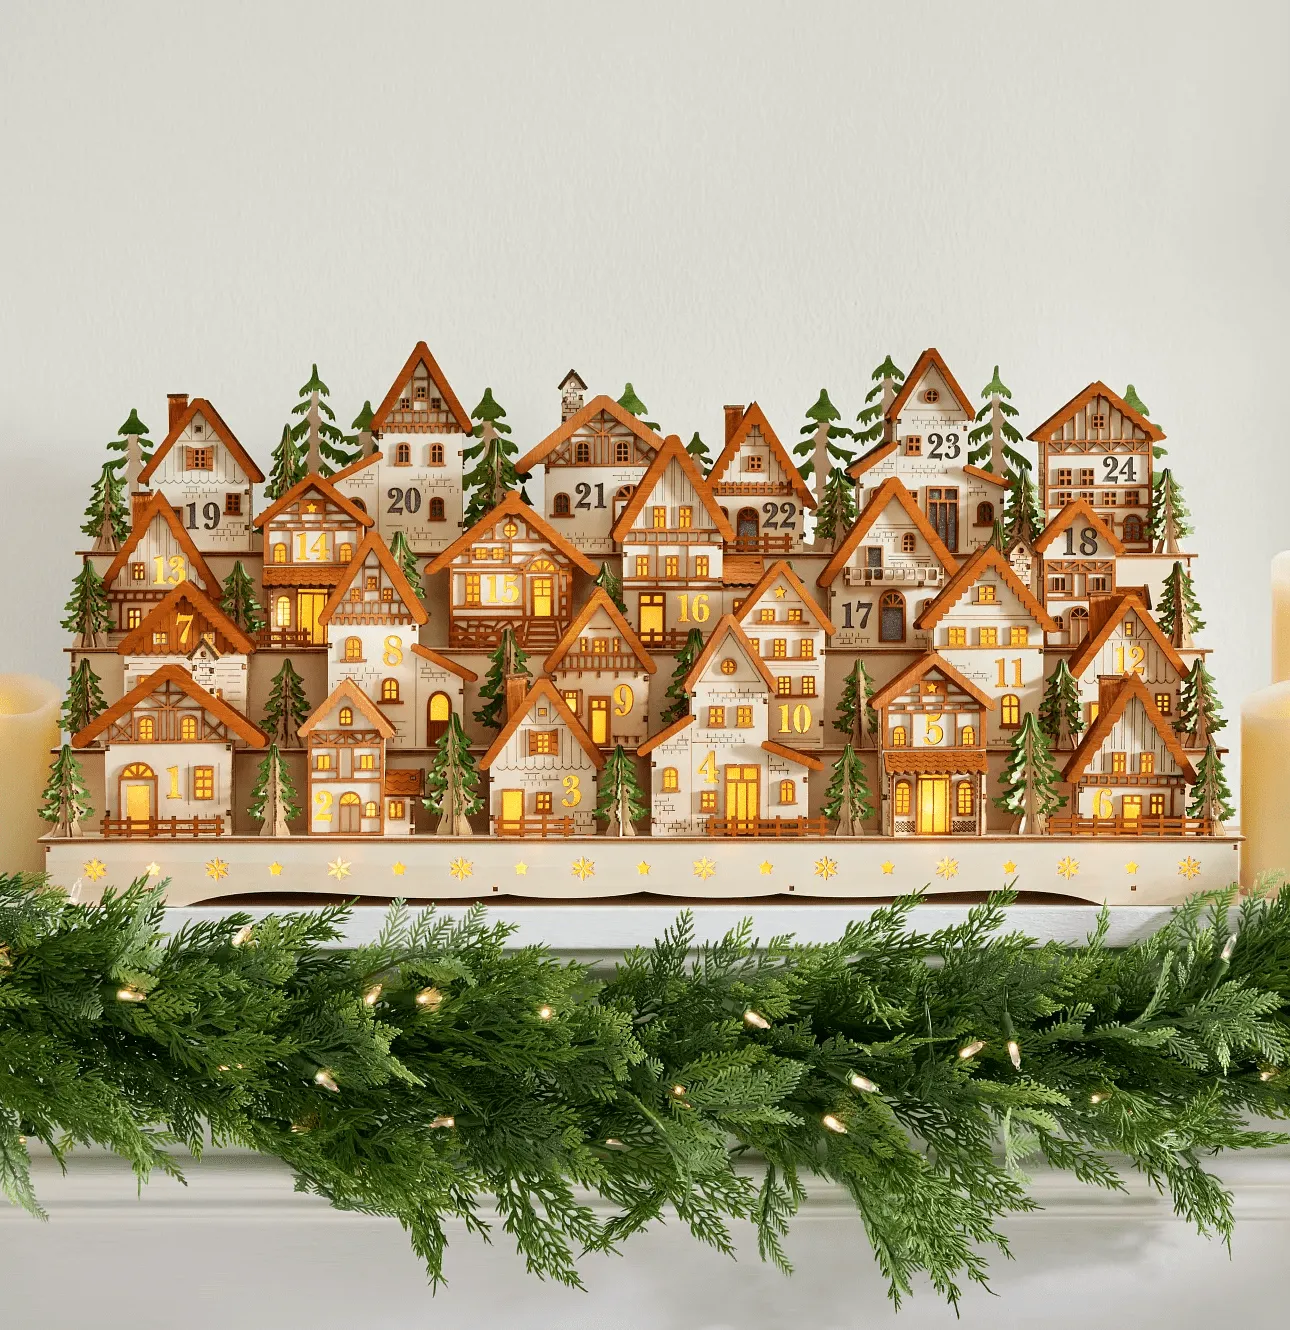
Which means you have to maintain it like a small appliance. Test every window light before December 1, because one dead bulb reads as a broken tooth. Keep spare batteries in a drawer you’ll actually remember. Dust with a soft brush rather than a cloth, since fabric snags on tiny rooflines, and expect the garland to shed needles for a week.
12. A Square Village With A Central Archway
- Unfinished square drawer calendar: $55–$95
- Bottle-brush trees, assorted sizes: $10–$18
- Miniature houses and a Santa figure: $12–$25
- Felt snow or batting for the base: $6–$10
- Small treats that fit shallow drawers: $30–$50
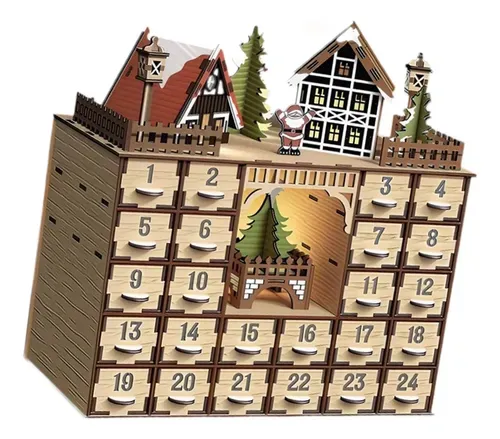
Total: about $115–$200, or closer to $60 if you repurpose a bamboo drawer organizer and craft wood. That archway in the middle is what keeps it from looking like a wall of squares, so don’t bury it in props.
The rule that separates a charming village from a toy pile: keep every miniature figure within about 15% of the others’ height. If Santa is twice as tall as the houses, the illusion dies. Buy one set from one maker instead of assembling a mismatched collection over three years.
13. Distressed White Tree, Woodland Doors, Deep Red Velvet
About 55% distressed white, 30% deep red velvet underneath, 10% forest green from the frosted garland, and 5% copper on the star topper. That last 5% is what stops the whole thing from feeling like a craft fair — one warm metallic keeps distressed white from reading as chippy paint.
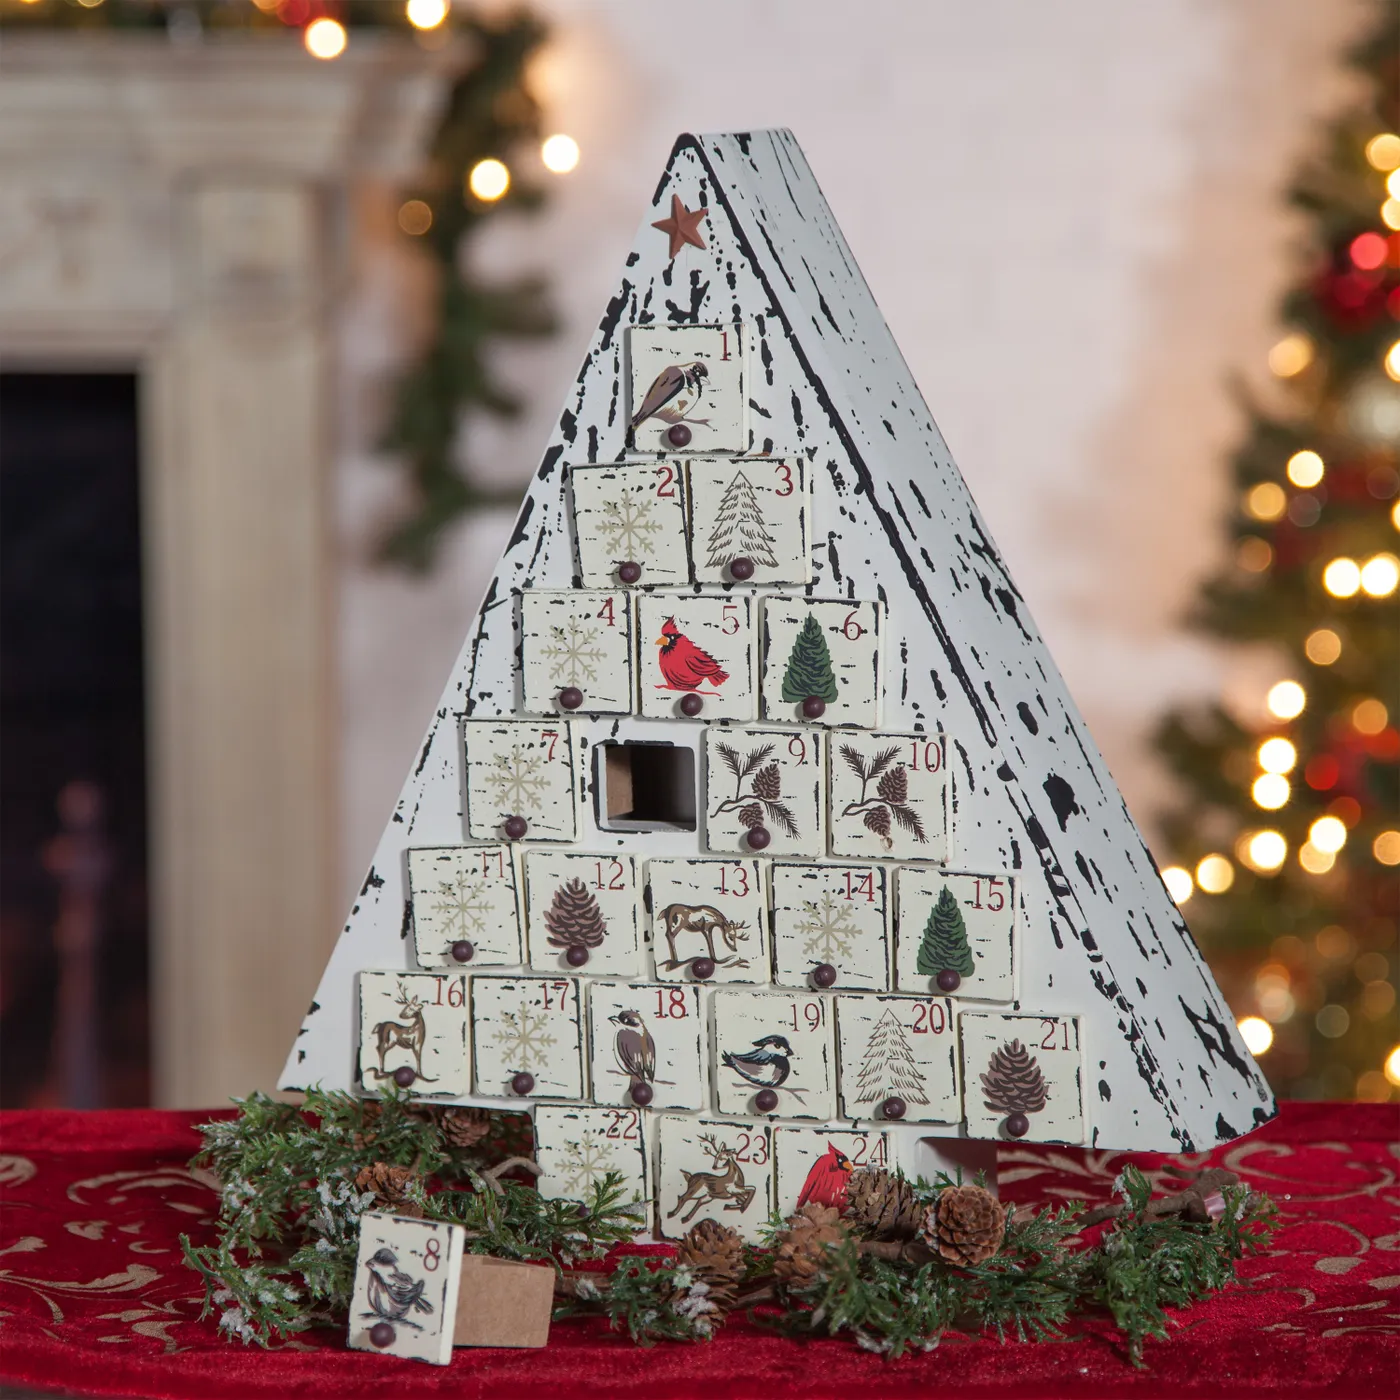
Distressed finishes photograph beautifully and live less well. Every sticky fingerprint shows, and the paint on a mass-market piece will chip along the drawer edges within a season, so keep matching craft paint on hand. Also check the knobs: small round pulls on a kids’ calendar are a real choking hazard for under-threes, so hang this one above toddler height.
14. A Tree Calendar Where The Drawers Actually Slide
- Pull every drawer and rub the runners with paraffin wax or a dry bar of soap.
- Sand rough drawer sides with 220-grit.
- Test each drawer — it should slide with one finger, not a tug.
- Mark the sticking ones and re-wax once.
- Number the drawers on the inside with pencil so they go back in order.
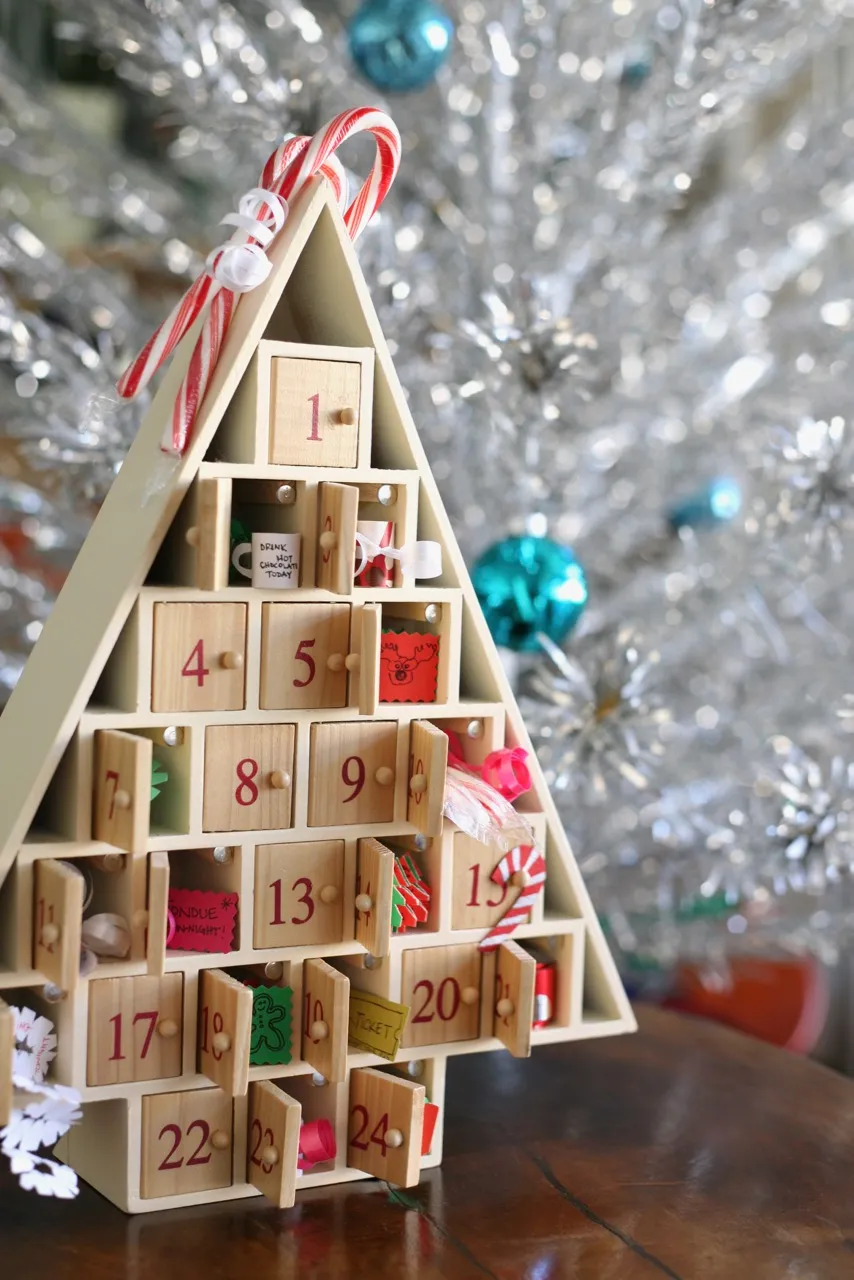
Twenty minutes and about $5 for the wax.
Worth the effort, because in 2026 the drawer itself is the point. Experience calendars are replacing candy: folded notes, a pick-the-movie slip, a tiny Lego, a coin for the hot chocolate jar. Here, several drawers sit open with exactly that — miniature gifts and handwritten notes instead of chocolate.
15. Twelve Illustrated Drawers And A Pile Of Tiny Ornaments
This is the version to build if you want the whole thing done for under $60. Watch the dollar bins at Target and Michaels in October, raid your own ornament box, and check thrift stores for small felt shapes and pom-poms. Twenty-four tiny ornaments bought one at a time will run you $120; bought as a mixed bundle, $25–$40.
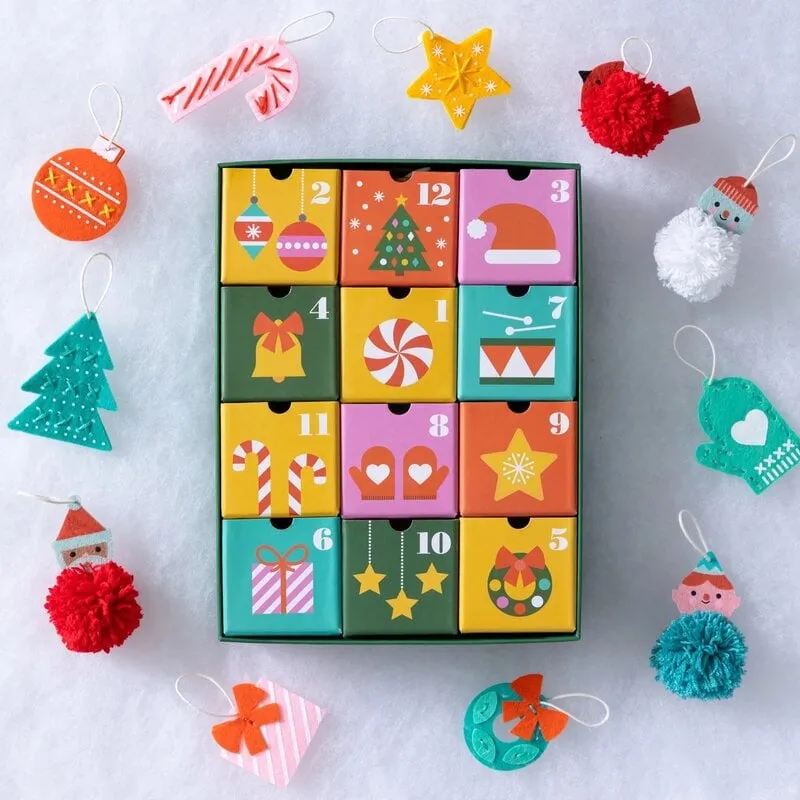
- Twelve-drawer illustrated box: $20–$35
- Assorted mini ornaments, felt and pom-pom and painted wood: $30–$60
- Craft paint for touch-ups: $8–$12
- Small treats to tuck alongside: $25–$40
Total: about $85–$145, or under $60 with thrifted ornaments. For a pastel-drawer version of the same idea, hop over to Idea #23.
16. A Gnome Village Under A Full Moon
Density is the strategy. Every door is part of a scene — ladders, treehouses, animals, gnomes looking up at the moon — so opening the calendar feels like exploring rather than checking a box. Kids will spend ten minutes hunting for number 19, and that’s the point. The two cut-out trees flanking it, each holding red candles, frame the illustration like stage wings.
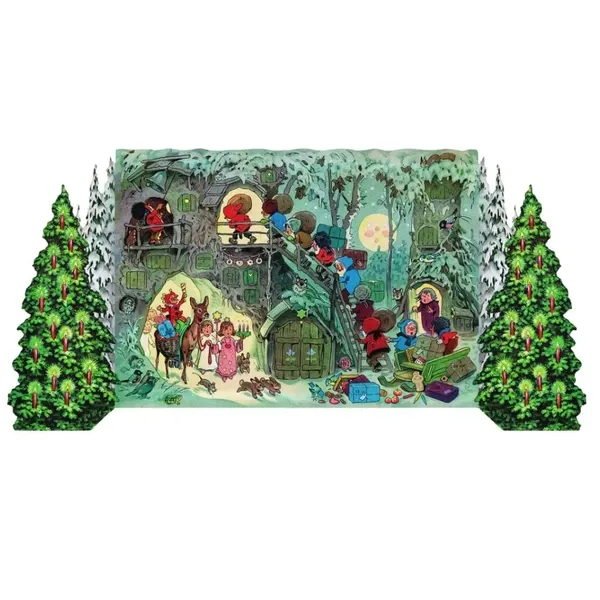
If you’re designing something similar, number along the illustration’s natural path instead of in a grid. Keep each number within about a foot of the last so the eye travels in a line, and put the highest numbers near the bottom — it gives December a sense of arrival rather than a scramble.
17. The Miniature Village Behind Cut-Out Windows
Footprint is roughly 14–18 inches wide and 8 deep, which makes it one of the easier pieces in this whole collection to place. It wants a shelf at 36–44 inches — eye level for a seated kid, comfortable for you — and it needs a solid wall behind it, since the lit windows read best against something dark. Small apartments, this is your one.
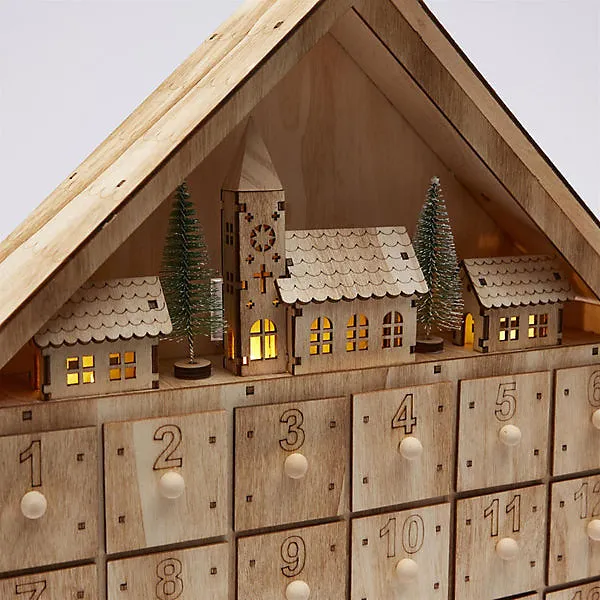
The church steeple is the detail that saves it. Twenty-four drawers make a horizontal grid, and grids get boring fast; one vertical element punching through the roofline gives the eye somewhere to rest. When you style the village scene above, keep something tall in it — a steeple, a tower, a lone pine.
18. A Wooden Stable With White Nativity Cut-Outs
Two honest notes. First, white cut-outs on pale wood can disappear from across the room — you’re effectively relying on shadow to draw the figures. Second, if your family’s version of this is a religious calendar, talk to your kids about what’s in the drawers before December 1, or you’ll get polite disappointment by day four.
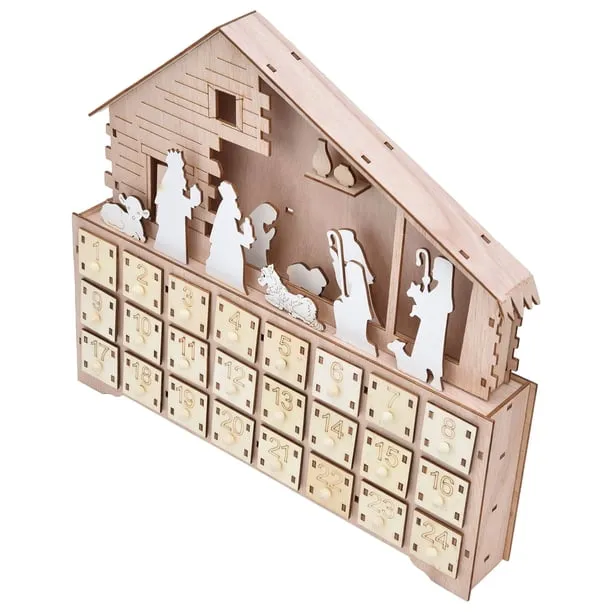
The palette is 80% light wood, 15% white, 5% shadow. To keep it from going flat, add one controlled accent: a brass star above the stable, a sprig of deep green, or dark knobs on the drawers. One accent, not three. This design works because it’s quiet.
19. The Brick-Backed Box Calendar You Assemble Yourself
- Cut the outer frame and stain it; let it cure a full 24 hours.
- Paint the inner tray a saturated red in two thin coats.
- Stencil the white brick pattern with a small sponge, not a brush.
- Drill the side holes a size larger than your boxes so they slide freely.
- Dry-fit all 24 boxes before you glue anything.
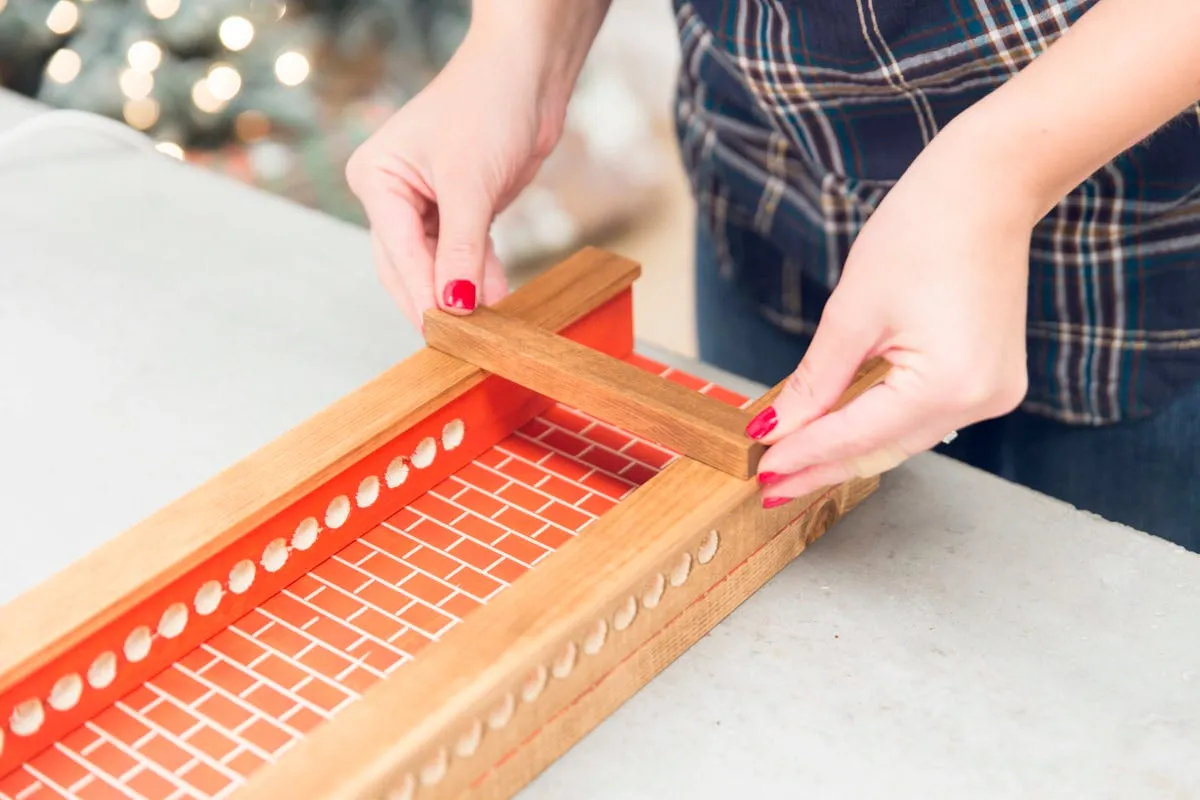
Allow 2–3 hours across two evenings and about $25–$30 in materials.
The measurement that matters: drill each hole roughly 1/8 inch wider than the box going into it. Paint builds up inside holes and wood swells in December humidity, so a snug fit in November becomes a stuck box by the fifteenth. Oversize it and add a felt strip if you need grip.
20. Fabric Pouches Pegged To A Macramé Dowel
- Fat quarters or scrap fabric for 24 pouches: $20–$30
- Macramé cord and a 36-inch dowel: $12–$20
- Wooden clothes pegs: $4–$6
- Gold number stamps or a metallic fabric pen: $8–$12
- Small treats: $30–$50
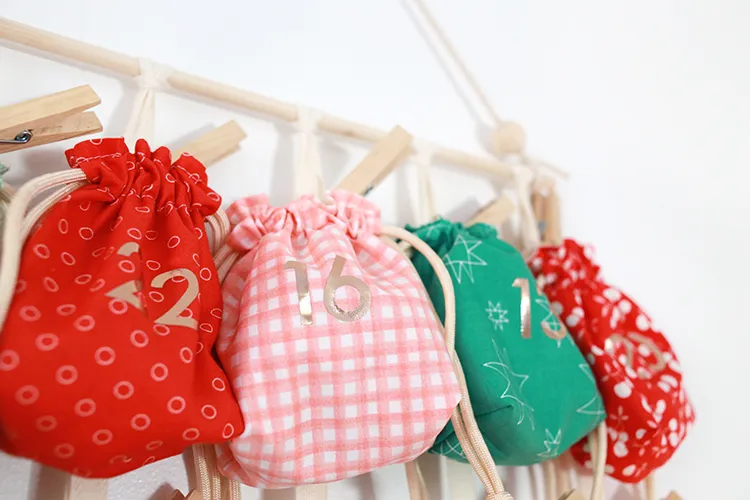
Total: roughly $75–$120, and the fabric stash already in your closet might cut that in half.
If sewing two dozen drawstring pouches sounds like a November you don’t want, buy them. Pre-made cotton favor bags run about $12 for 24 online, and gold peel-and-stick numbers are $6. Under $30 total, and nobody at eye level can tell. It’s the relaxed cousin of Idea #2 — same wall, same idea, cheaper execution.
21. A Fabric Tree Hung Beside A Loaded Hutch
This needs roughly 24 inches of clear wall, hung so the lowest pocket sits near 36 inches. Leave at least 18 inches between the calendar and the hutch — that shelf styling is busy, and the calendar needs breathing room to read as a calendar instead of more shelf clutter. Anchor the bottom with a stack of wrapped gifts.
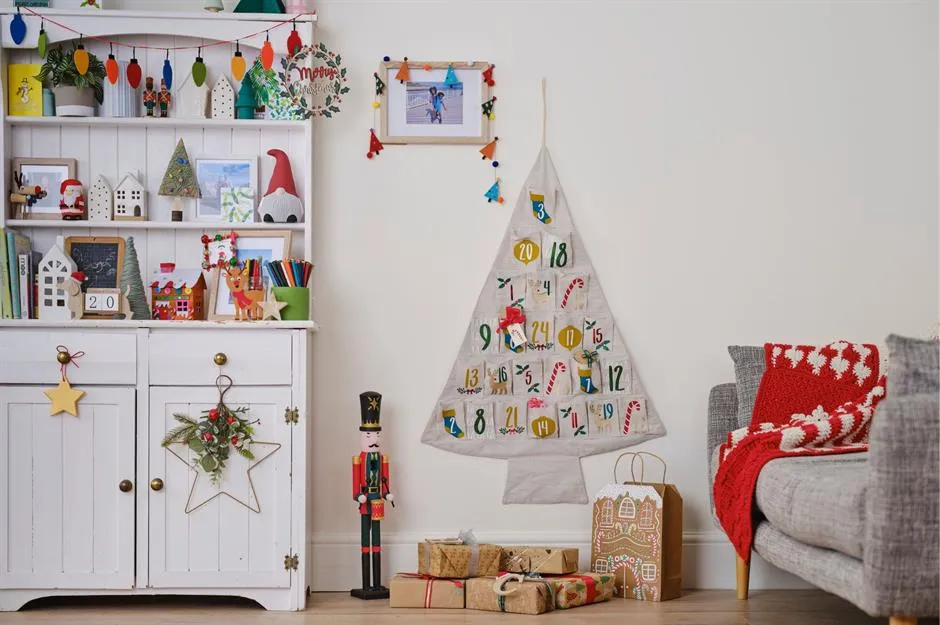
The practical issue is proximity to all that decor. Fabric pockets pick up dust from garlands and heat from nearby lamps, and printed numbers fade fast in direct sun. Wash by hand in cold, air dry flat, and restock weekly rather than nightly so crumbs don’t migrate into the seams.
- Measure the wall gap; you need 24 inches minimum.
- Check pocket depth against the treats you plan to use.
- Confirm the hanging loop is stitched, not just glued.
- Pick a spot out of direct afternoon sun.
- Decide where the backup treats live so the calendar isn’t the pantry.
22. A White Chest Of Drawers On A Snowy Sill
It works because it’s a silhouette. White drawer fronts, white paper houses, white snow outside — the only things separating them are the dark window frame and the warm glow inside the little houses. That’s a paper-cut effect you simply can’t fake on a colored wall. The green fluted candles and pine branches handle the rest.
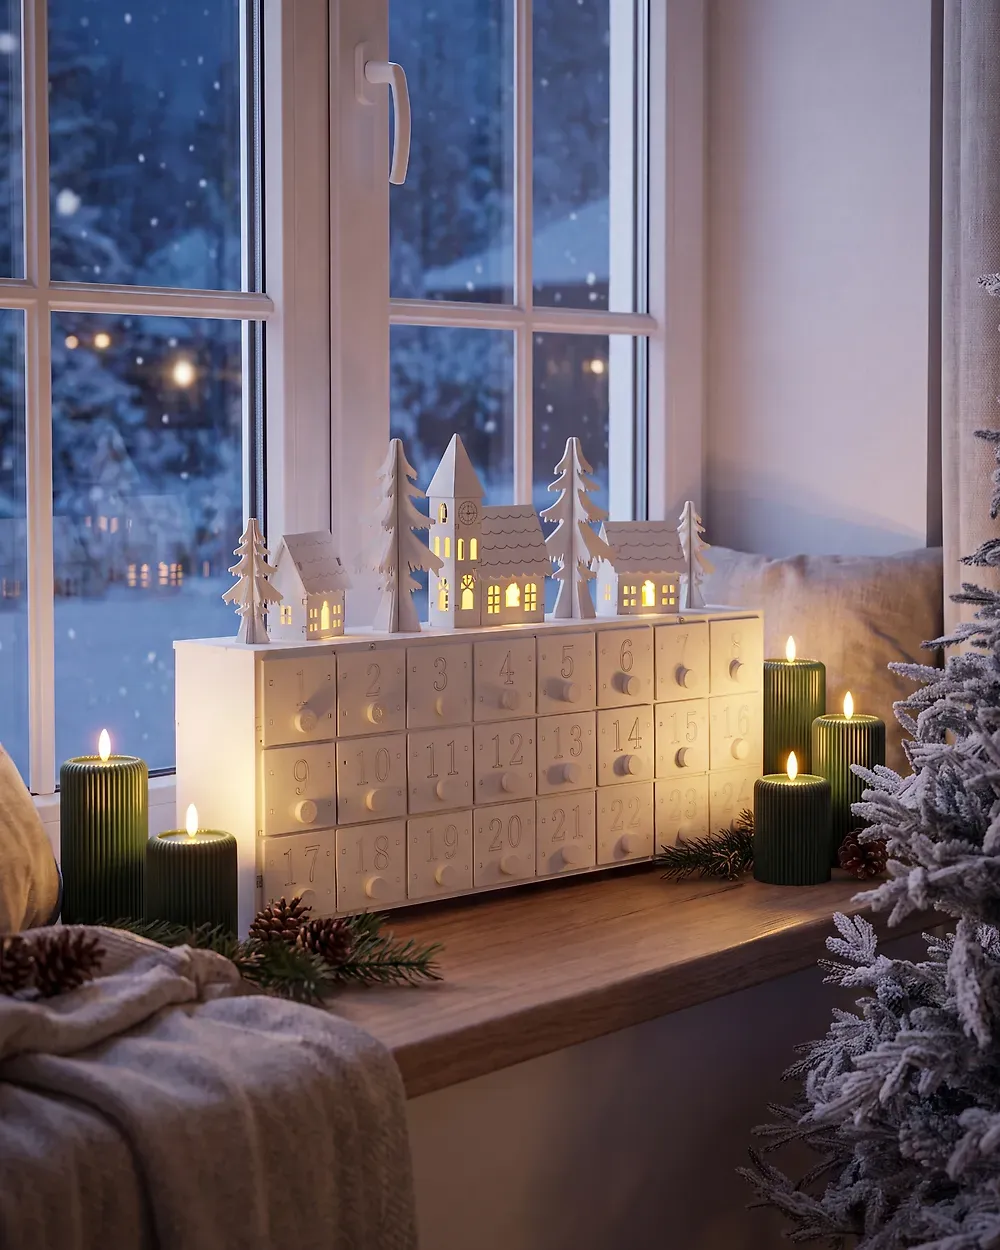
Now the warnings. Window sills get condensation, harsh UV, and radiant heat off the glass — paper houses warp and fade by New Year’s, and printed drawer labels go brittle. And if those candles are real, move them. Paper houses plus open flame plus a December draft is a bad equation. Battery votives look nearly identical at dusk.
23. Dark Green Tree, Pastel Drawers, White Fluff
Roughly 50% deep green body, 35% pastel drawer fronts in peach, mint, and butter yellow, 10% white fluff underneath, and 5% red ornaments in the background tree. The green is what keeps the pastels from turning saccharine — without it, this reads as a nursery piece instead of a Christmas one.
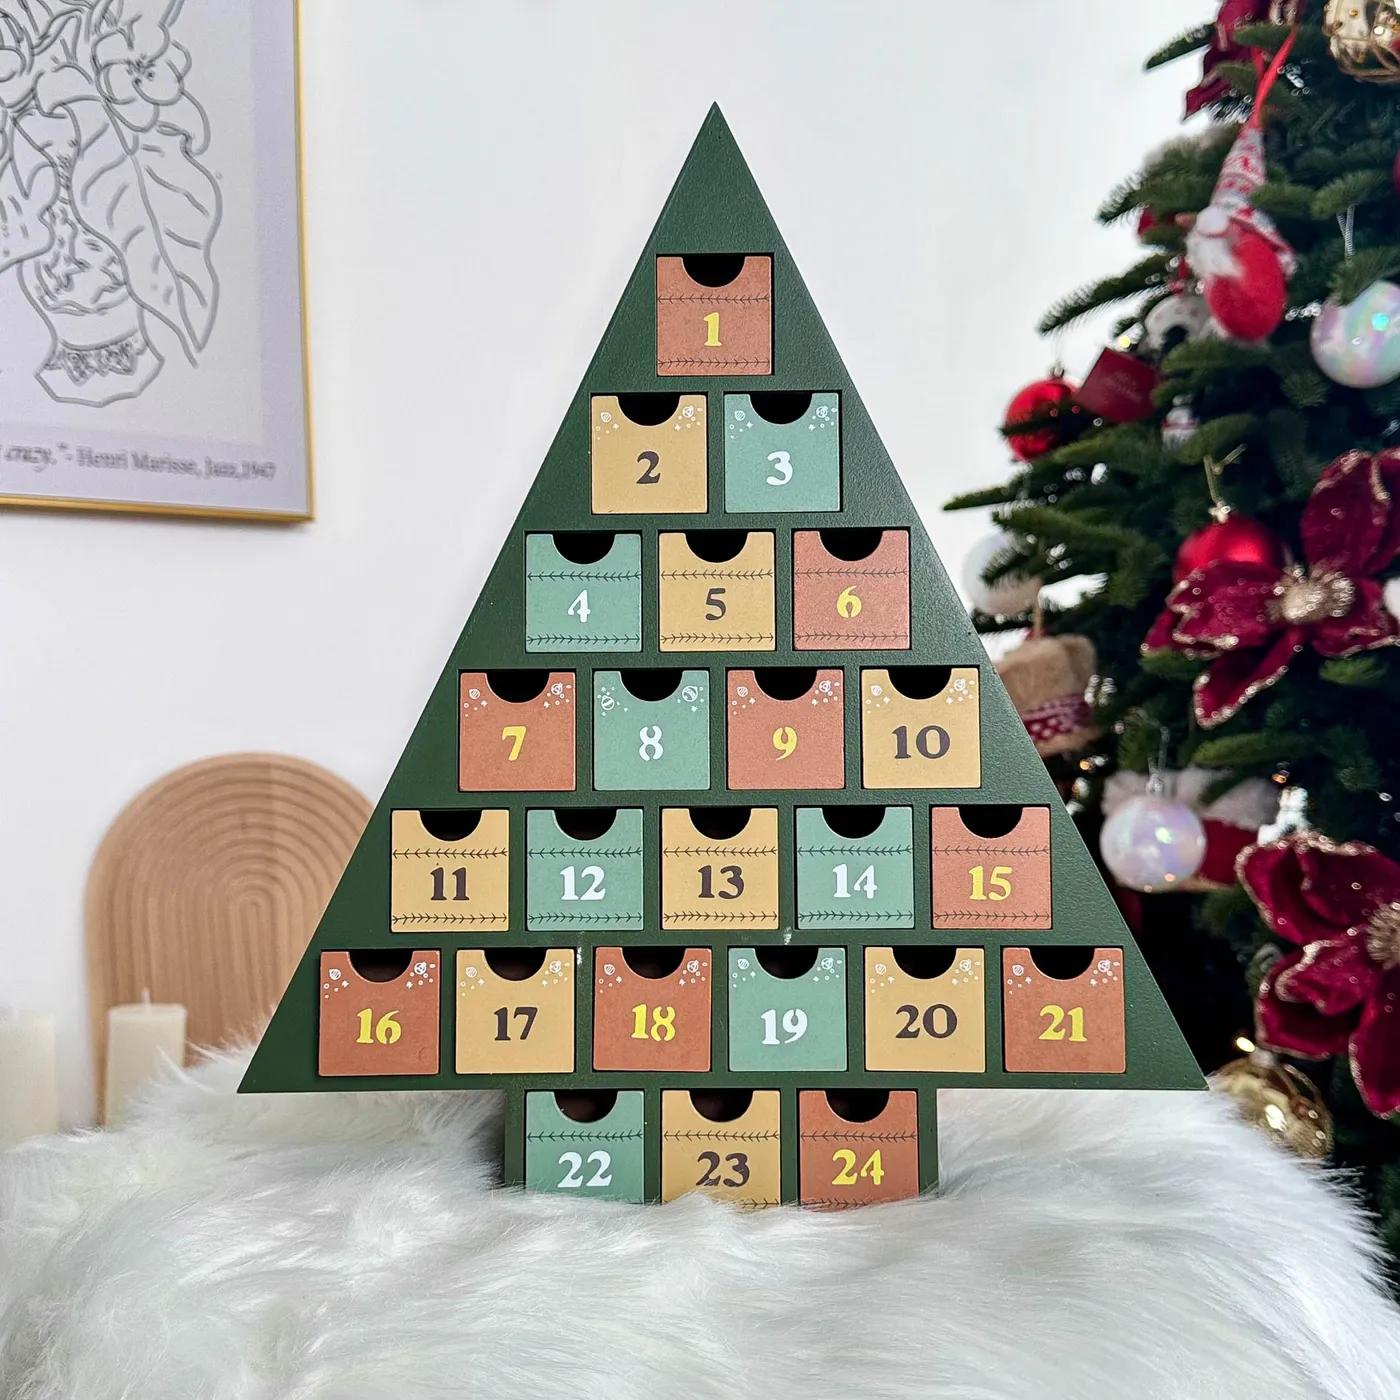
- Unfinished tree calendar: $40–$70
- Sample pots in four pastels: $12–$20
- White faux fur or a fluffy throw: $15–$25
- Treats: $30–$50
Total: about $100–$165. Paint the drawers before you assemble anything, and tape a label to the back of each one so you’re not matching mint to mint on December 2.
24. A Lit Nativity Roof Over Numbered Drawers
The roof is the whole personality of this piece. Lit from inside, the nativity cut-out — shepherd, wise men, animals, snowflakes — glows like a lantern, and the grid of drawers below becomes the base instead of the star. Unlit, it’s a nice wooden house. Lit, it’s the thing everyone photographs.
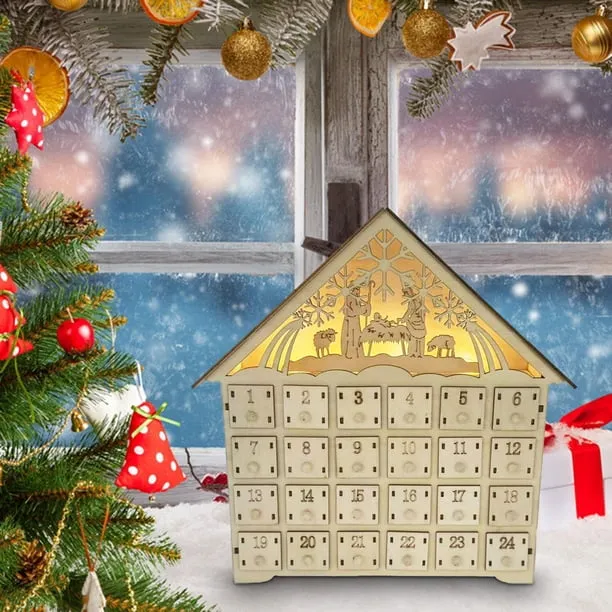
Size-wise, expect a footprint around 16 inches wide and 12 deep, which lands it on a console, an entry table, or a deep windowsill. That’s also why it wants to sit low: if kids can’t reach the bottom drawers, they’ll drag a chair over. Compare with Idea #29 for the quieter, gold-trimmed version of the same silhouette.
25. Deer In The Window, Chocolate In The Drawers
- Wood calendar with laser-cut scene: $45–$80
- Battery micro LED string: $8–$12
- Chocolate coins and wrapped caramels: $15–$25
- Glass candle holder and pillar candle: $8–$14
- Restocking through December: $25–$40
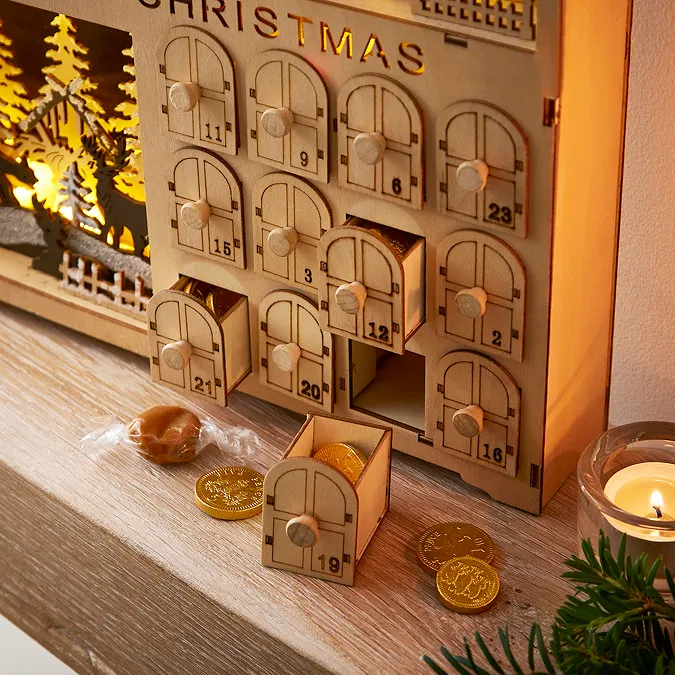
Total: about $100–$170. Skip the internal lighting and you drop $20 while losing almost nothing — a candle nearby does most of the warm-light work.
Chocolate and warm light don’t mix. Stored in a lit drawer near a candle, coins bloom into a chalky gray and caramels slump. Keep filled drawers out of direct heat, restock in small batches, and check the bottom row weekly. If there’s a toddler in the house, gold coins are a choking hazard — swap stickers into that row.
26. Red Roof, Snowman, Sled — The Nostalgic One
Hide the battery pack. Tape it inside the chimney or behind the roof with double-sided foam tape, then run the wire along the back edge where nobody looks. A plug-in timer set for 4 pm to 10 pm means the calendar is already glowing when the kids get home and dark by bedtime — and you never touch a switch.
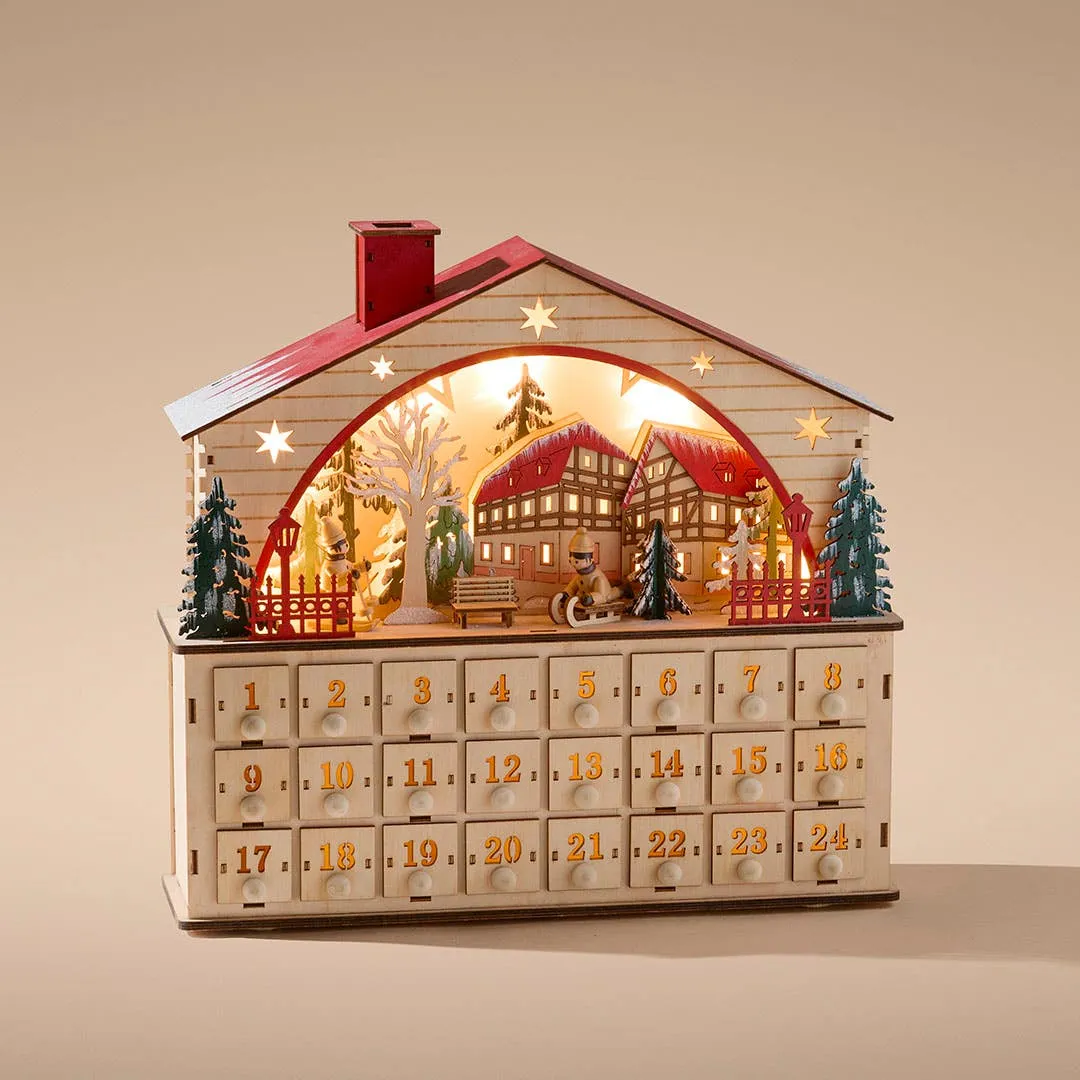
The architecture is pure color theory: a saturated red roof, crisp white trim, and one warm light source. Red shows up again in the drawer numbers and in Santa’s sleigh, which is why the piece feels unified instead of busy. Take away that repetition and it still works — it just stops being memorable.
27. Twenty-Three Red Drawers And One Gray One
Roughly 65% red, 20% white trim, 10% green, and 5% gray — that lone gray drawer with the tiny wreath. That’s not a mistake, it’s the detail that keeps a wall of red from becoming visual noise. Every calendar in this collection with real charm has one element that breaks its own pattern.
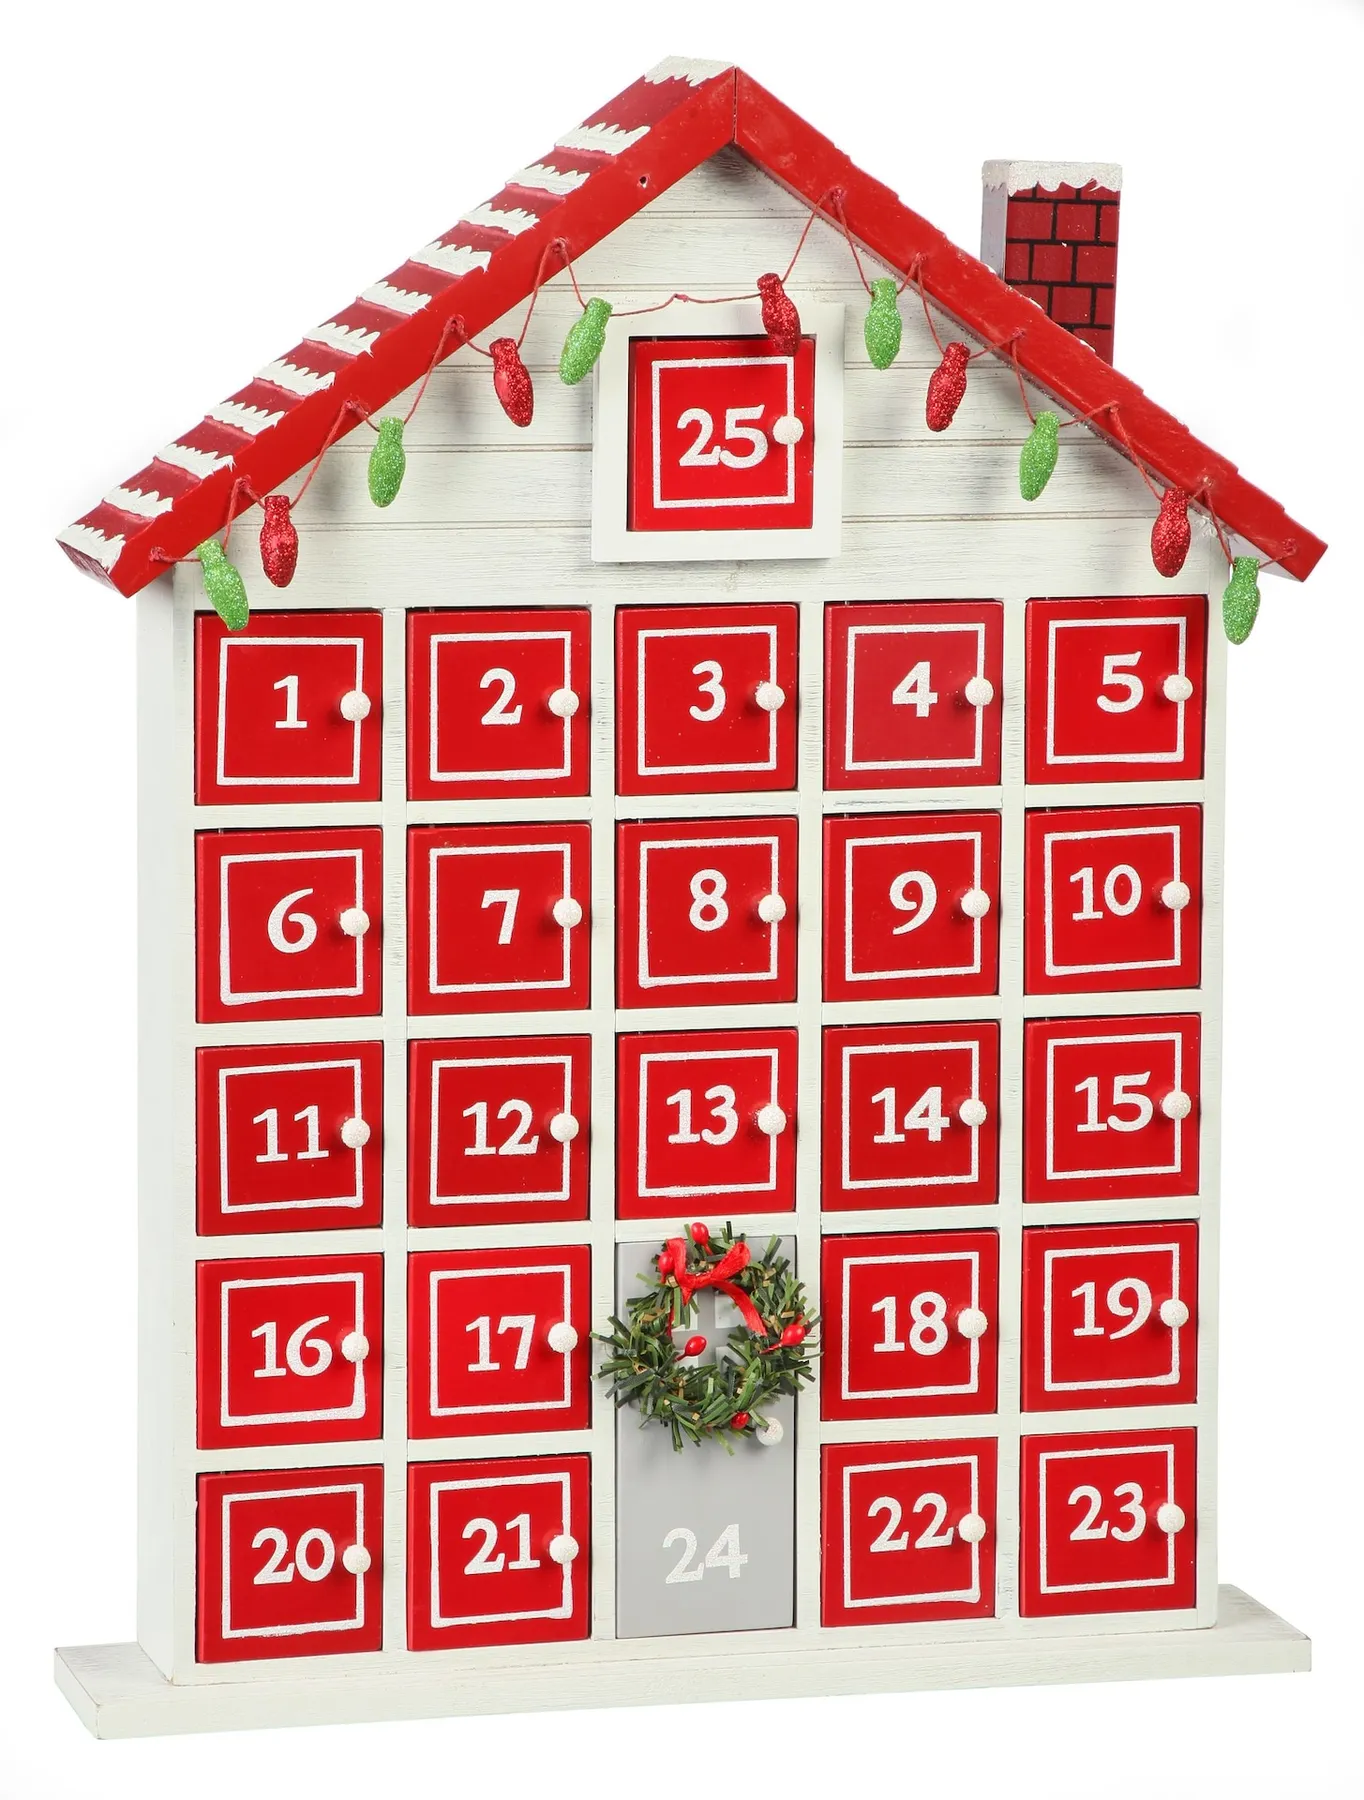
If you already own a plain house calendar, this is a $35 project: two tubes of craft paint, a fine paint pen for the numbers, and a mini wreath from the floral aisle. Painted wood blanks turn up at thrift stores for $10–$15 all year long. Retail versions run $110–$140, so the savings are real.
28. A Layered Village Built Into An Arch
- Draw the arch on kraft paper and cut it as your template.
- Cut three tiers from 1/4-inch plywood, each 2 inches shorter than the one below.
- Glue the tiers to the back panel with wood glue and clamp overnight.
- Place bottle-brush trees and figures front-to-back so the layering reads.
- Number along the arch itself, following the curve instead of a grid.
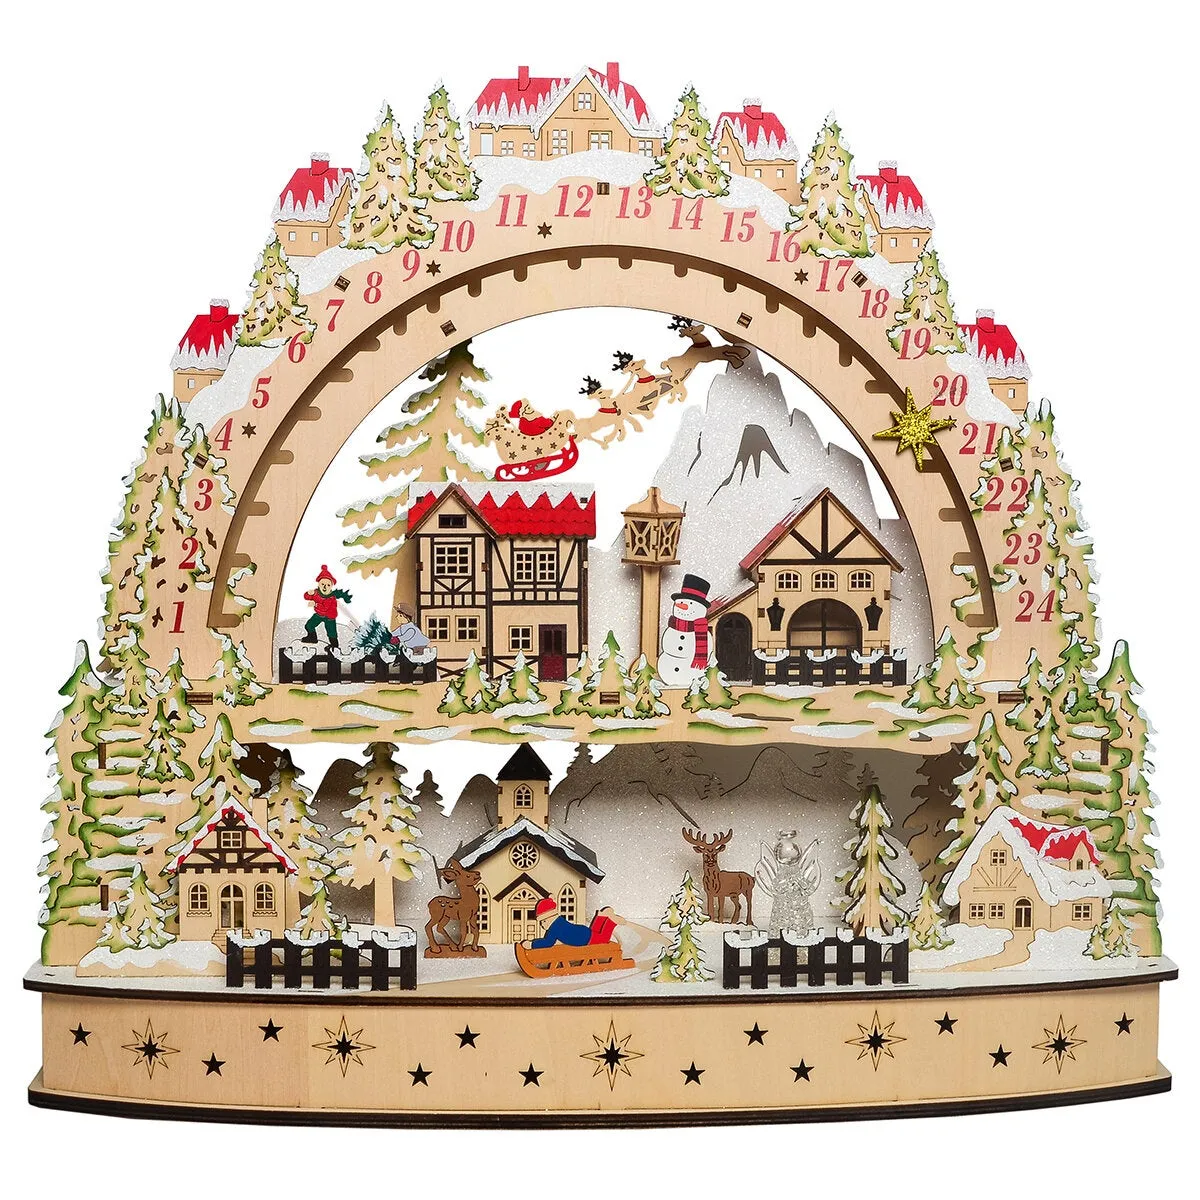
Budget three hours and around $35 in materials.
Those curving numbers are the entire trick. A grid of 1 through 24 tells you where you are; numbers running up an arch tell a story, with day 24 landing at the peak. If you’d rather build something flatter, Idea #12 uses the same village parts in a square format.
29. Gold Trim, Laser-Cut Snowflakes, Quiet Glow
Wooden, unpainted, no plastic, no glitter explosions — this is the quiet Christmas corner of 2026, where the calendar is meant to be an heirloom rather than a seasonal novelty. Unpainted wood blanks keep climbing in popularity as people buy one good piece and finish it themselves instead of replacing a cardboard version every December.
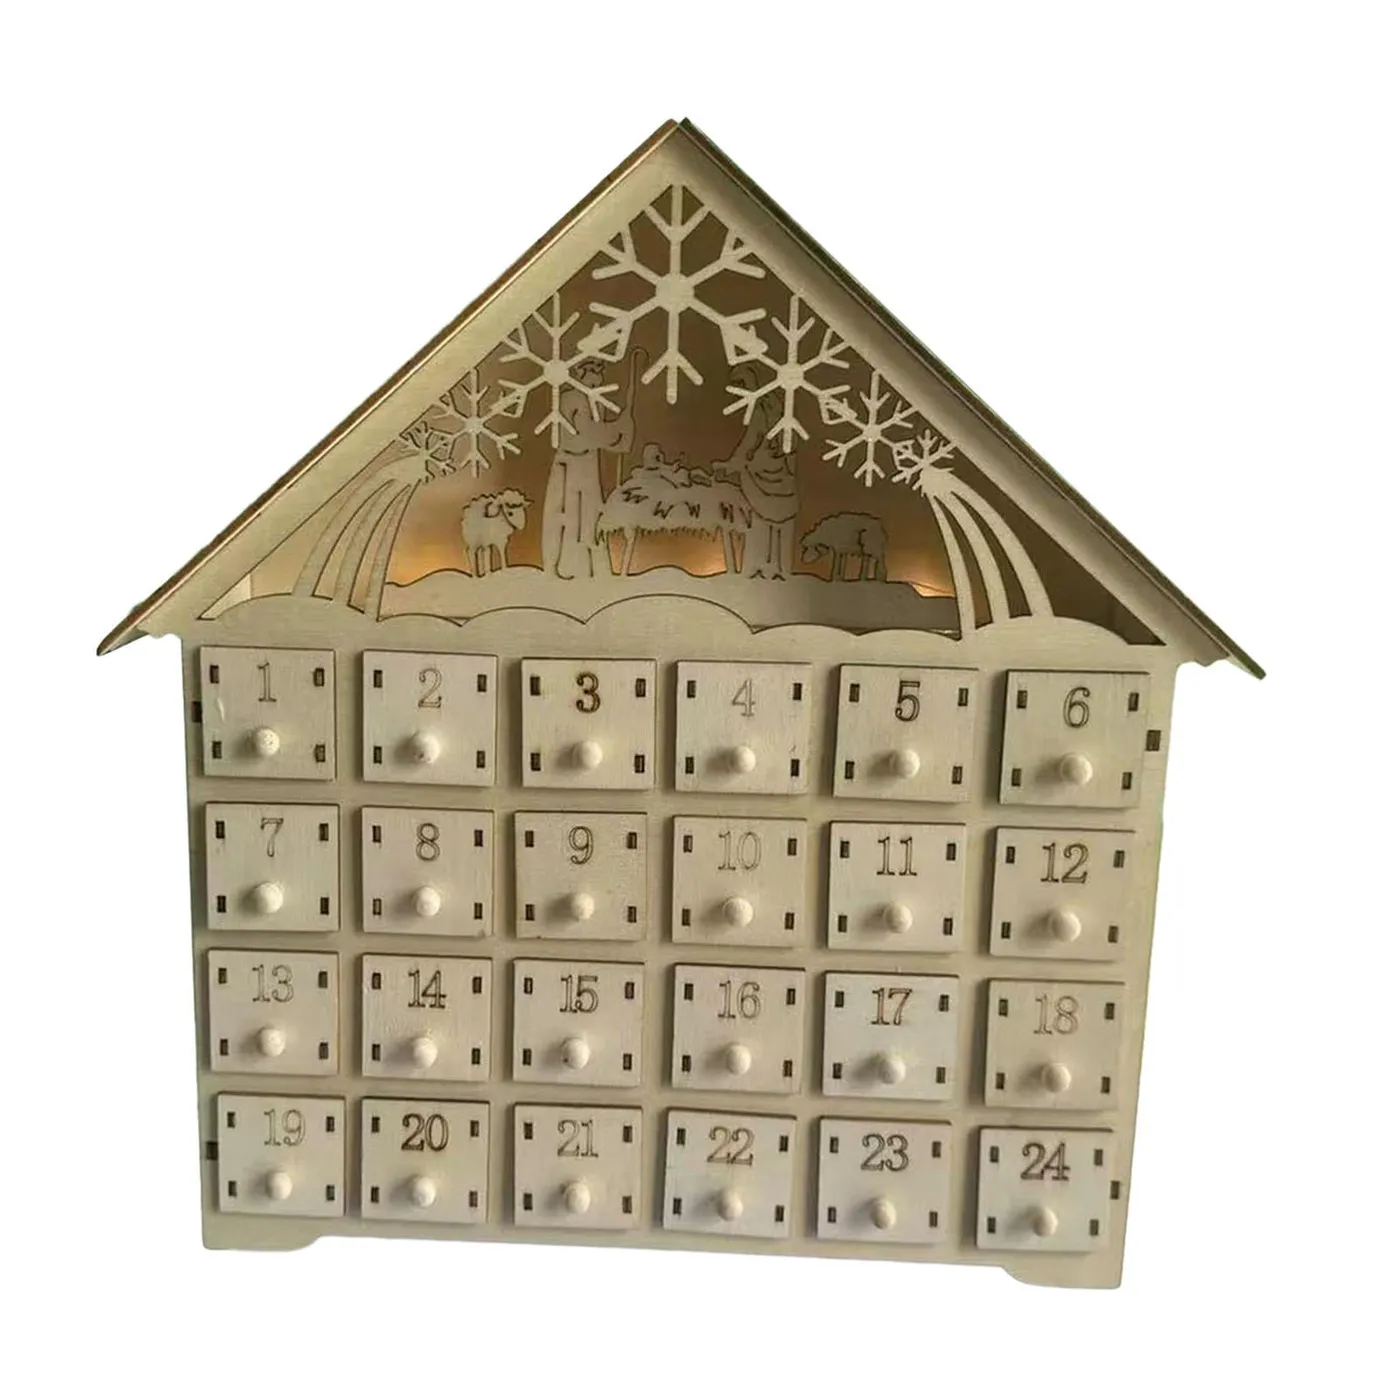
One technical note that changes everything: use 2700K warm white LEDs, not cool white. Cool white turns metallic gold trim a dull brassy yellow and makes pale wood look gray. Check the Kelvin rating on the box before you buy — anything above 3000K will fight the finish you paid for.
30. A Printed Nutcracker Panel Full Of Pockets
Printed cotton panels fade faster than you’d expect, especially hung near a window, and the pockets stretch once small hands start pulling. Prewash the panel in cold water before sewing so it doesn’t shrink after assembly, clip the curves rather than notching them, and press on low heat with a cloth between the iron and the print. After that, hand wash only.
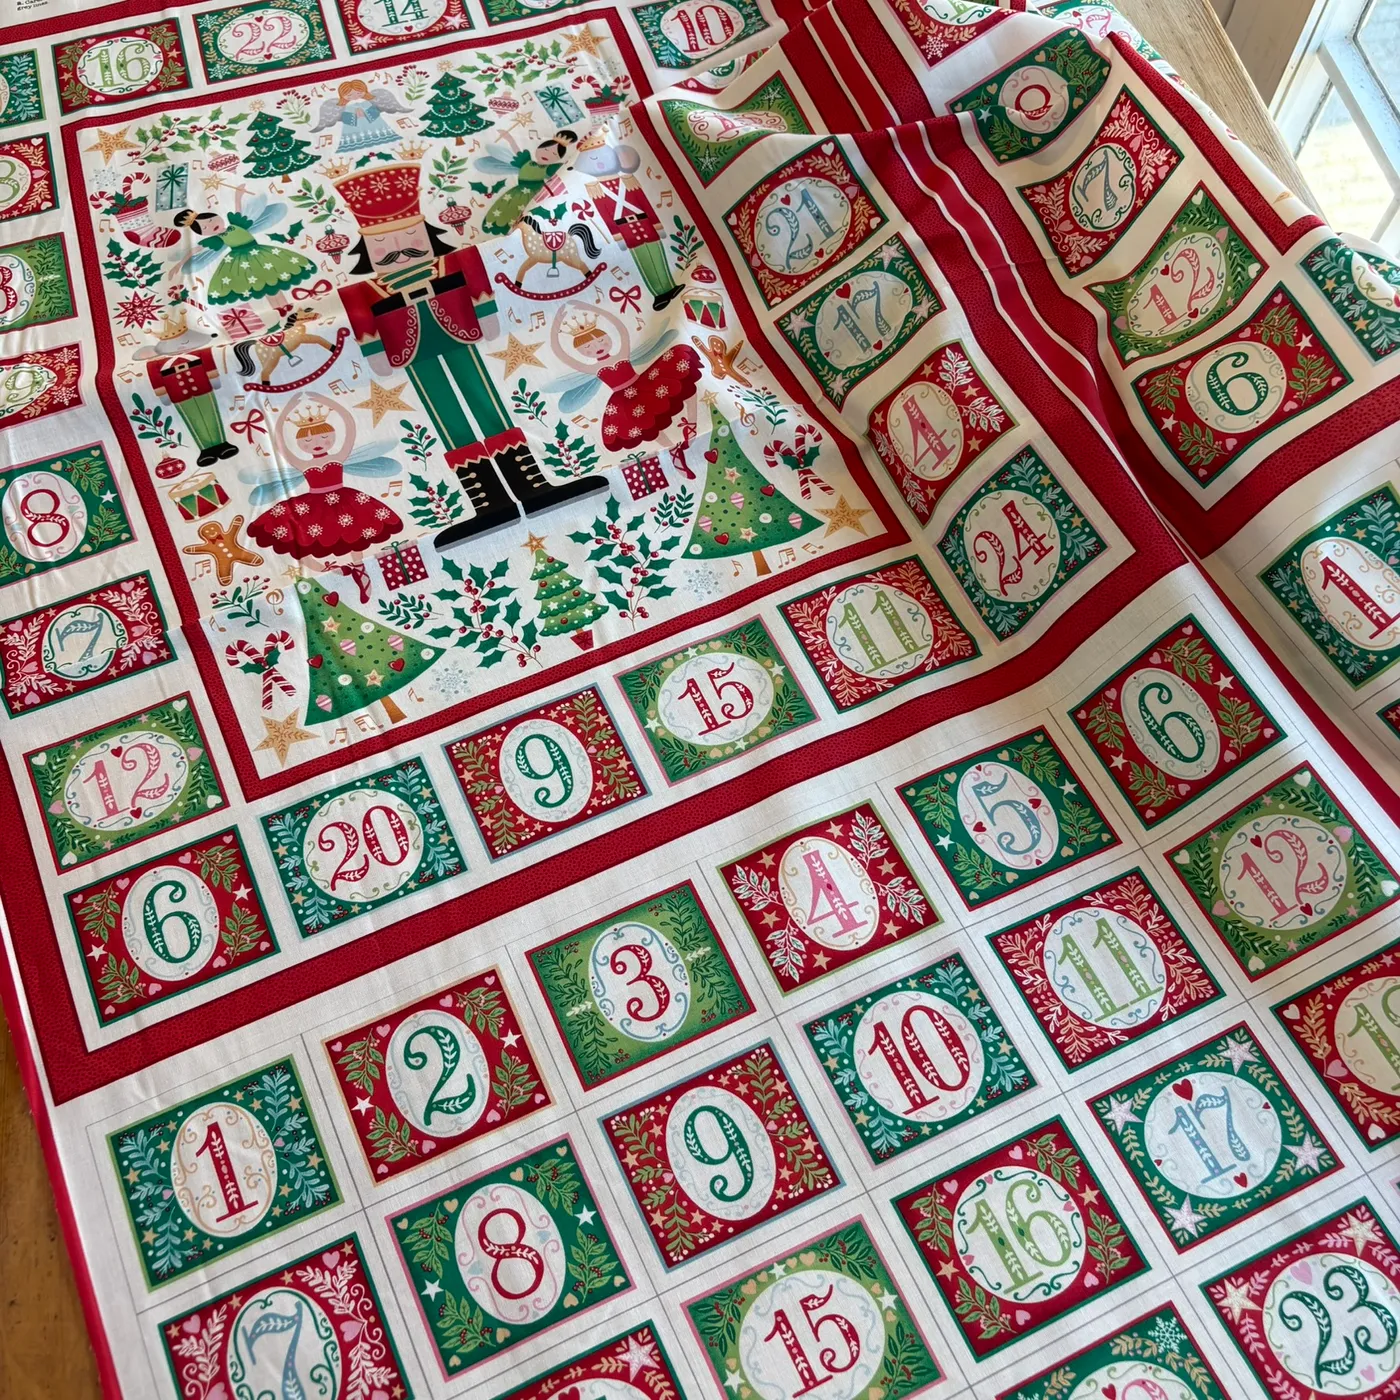
Price check: a finished fabric calendar runs $90–$130. The panel itself is $15–$25 on Etsy or at a quilt shop, backing is about $8, a dowel is $4. Under $40 total for an afternoon of sewing, and you get to pick the ribbon yourself.
31. Cardboard Compartments Full Of Cross-Stitch Kits
- Count your compartments and buy one mini kit per day, not per week.
- Sort kits by difficulty and put the simplest ones in days 1–6.
- Bundle floss and fabric into each box so day one is ready to stitch.
- Add a folded card with the pattern guide taped to the lid.
- Label with blue painter’s tape — repositionable and easy to replace.
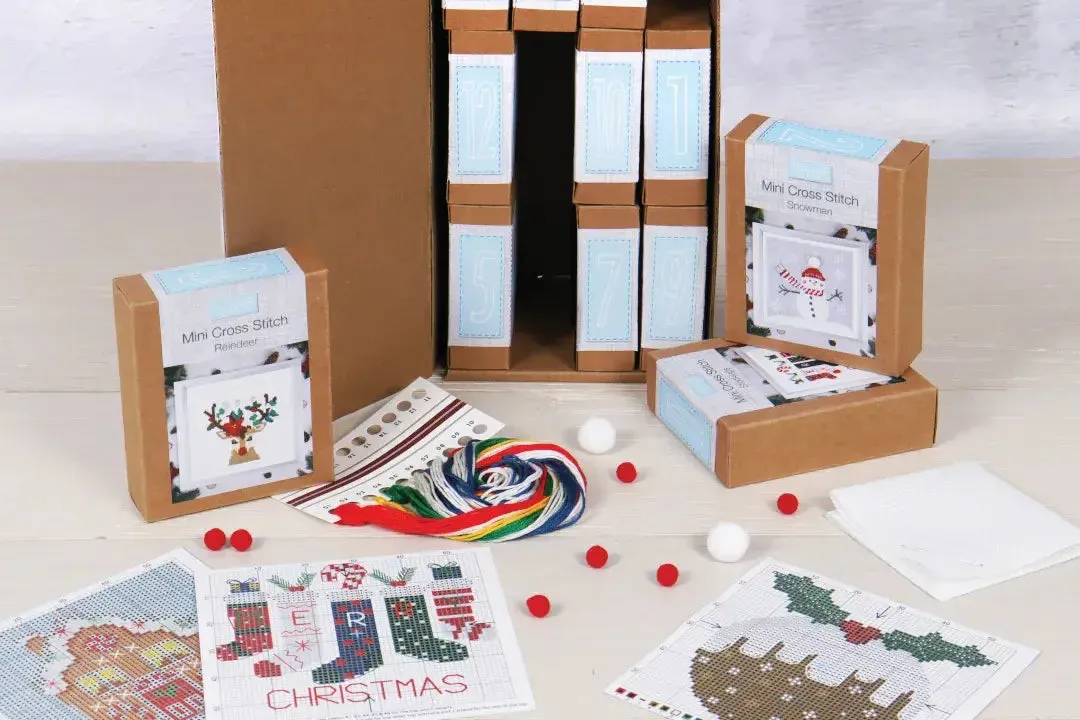
About 45 minutes of sorting and $25–$40 for twelve mini kits.
- Check the age range on the kits; most involve sharp needles.
- Confirm you have a flat surface where a half-finished project can live.
- Buy spare floss and a second hoop before December.
- Decide whether finished pieces become ornaments or get stored.
Twenty-Four Small Doors, One Very Good December
Pick the version that matches the energy in your house right now — a $20 branch strung with kraft bags counts just as much as a lit wooden village you’ll hand down. Start with one idea, gather the supplies early, and let the calendar be slightly imperfect, because it will be anyway by December 12.
📌 Save this to Pinterest now so it’s waiting for you in November — and send it to the friend who always says she’s going to make one this year.