
DIY ornament ideas are having a major moment on Pinterest right now — and honestly, the handmade stuff is out-styling the boxed sets. We spent serious time browsing Michaels, JOANN, Etsy, and Amazon to bring you only what’s actually worth your hot glue this year, from $4 wooden cutouts to $85 artisan ceramics.
Inside you’ll find 25 curated ornament projects spanning rustic felt, chunky crochet, natural wood, and vintage velvet — with budget and luxury versions compared side by side, and every idea shoppable through direct product links. What’s driving it in 2026? Crafters are drifting away from glitter-bomb chaos toward natural materials, tonal palettes, and ornaments that look collected rather than purchased.
And stay until the end — we break down the most common mistakes that can ruin these looks. 📌 Save this to Pinterest for later — you’ll want to revisit these ideas.
1. A Knitted Gray Elephant With a Tiny Red Scarf
Hand-knit ornaments live or die by gauge. Work a worsted-weight cotton or wool at 7 to 8 stitches per inch on US size 2 or 3 needles and the stitches stay crisp instead of going fuzzy — which is exactly what makes a gray elephant read from across the room. Stuff it with wool roving, not polyester fill; poly puffs out between stitches and leaves limbs looking deflated within one season.
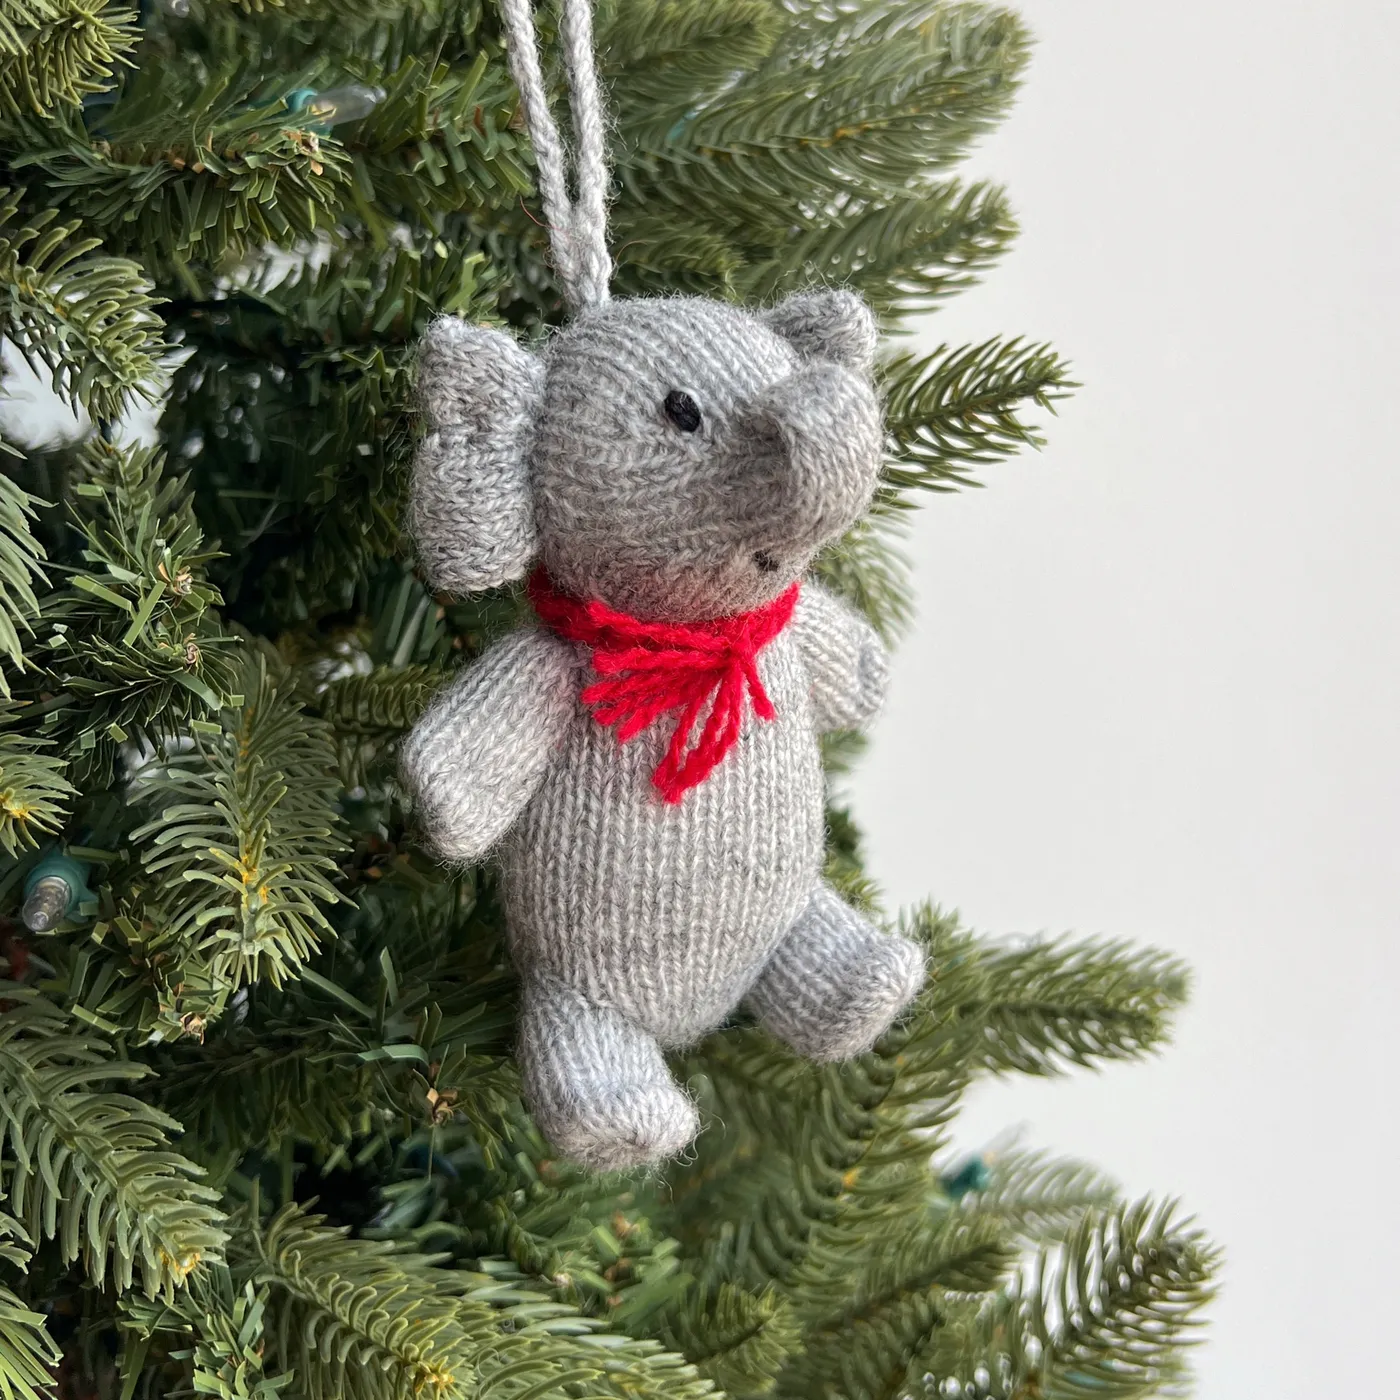
Proportion rule: keep any accessory scarf or hat to about one-third of the ornament’s body height. Bigger and the animal disappears under its own outfit.
Three things are quietly doing the heavy lifting here. First, matte texture: the flat gray yarn swallows light while the glossy pine needles and clear string lights bounce it back, and that contrast is why the ornament feels soft rather than washed out.
Second, the red. It covers maybe five percent of the surface, and that’s the whole point — a tiny saturated accent against a neutral body is the cheapest way to make a handmade piece look intentional. Third, the black embroidered eyes, which give the elephant a face at the distance where stitched details would otherwise vanish.
2. The Felt Alligator in a Miniature Santa Hat
That little red hat is the entire personality of this alligator, and it takes about twenty minutes to make.
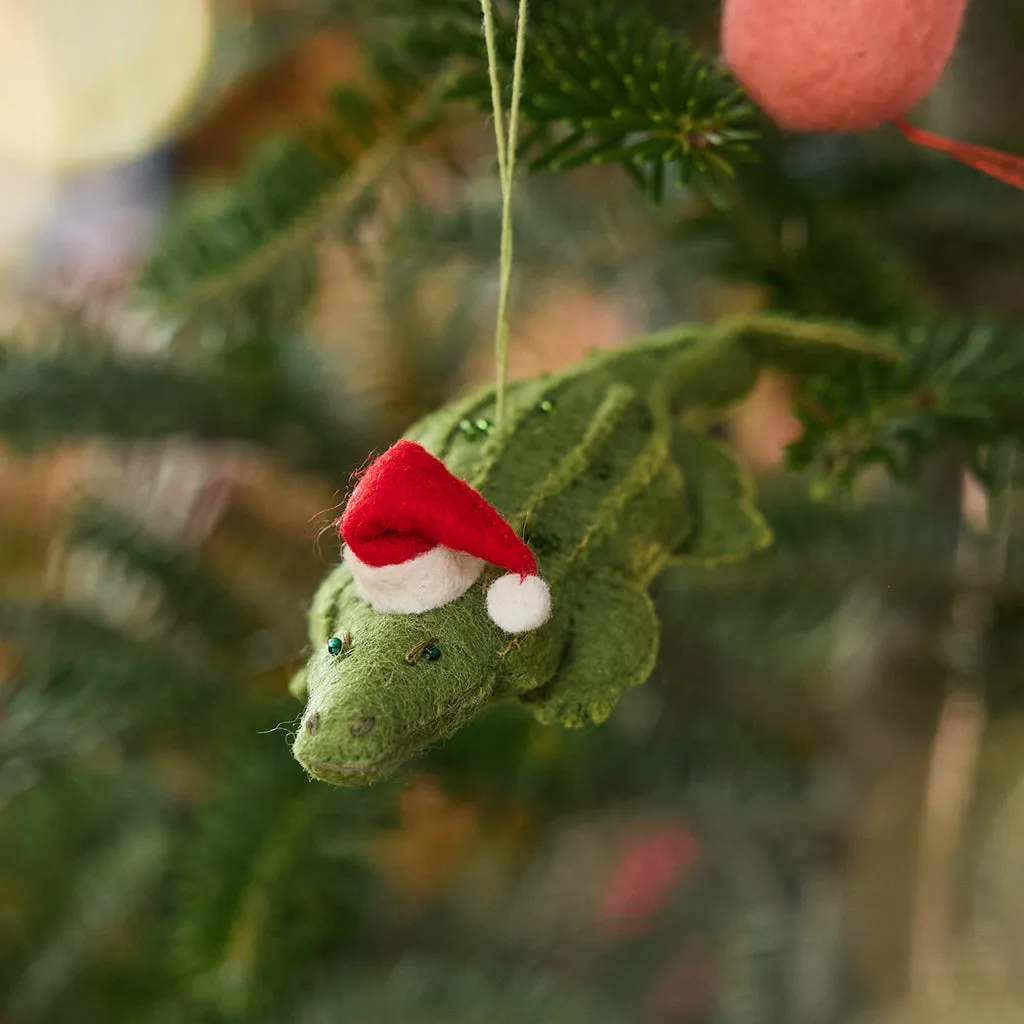
- Cut a triangle from red felt, roughly 2 inches tall and 2.5 inches wide at the base.
- Roll it into a cone and whip-stitch the seam closed with red thread.
- Cut a white felt strip 1/4 inch wide and stitch it around the base as trim.
- Roll a 1/2-inch white felt circle into a pompom and attach it to the tip.
- Slip the hat over the head and tack it down with two hidden stitches so it survives storage.
About $3 in felt and thread, twenty minutes once you’ve cut your first pattern.
Take away the hat and you have a green felt alligator — cute, but it’s a summer camp craft. The hat is what turns it into a Christmas ornament, using roughly a square inch of red felt. That’s worth noticing, because it means you don’t have to redesign anything to make a handmade piece season-appropriate. One accessory, in a color your tree already speaks, does the entire job. Working from a pattern you love — a fox, a bear, a fish? Ask what single holiday detail could carry it across the line.
3. Layered Green Felt Trees on Wooden Log Bases
- Wool-blend felt sheets (three greens plus star scraps): $8–$12
- White pom-poms or felt circles for the “snow”: $3–$5
- Wooden log slice bases, 1.5–2 inch: $2–$4 each
- Gold metallic thread and thin cord for hanging: $5–$8
- Fabric glue or matching thread: $4–$6
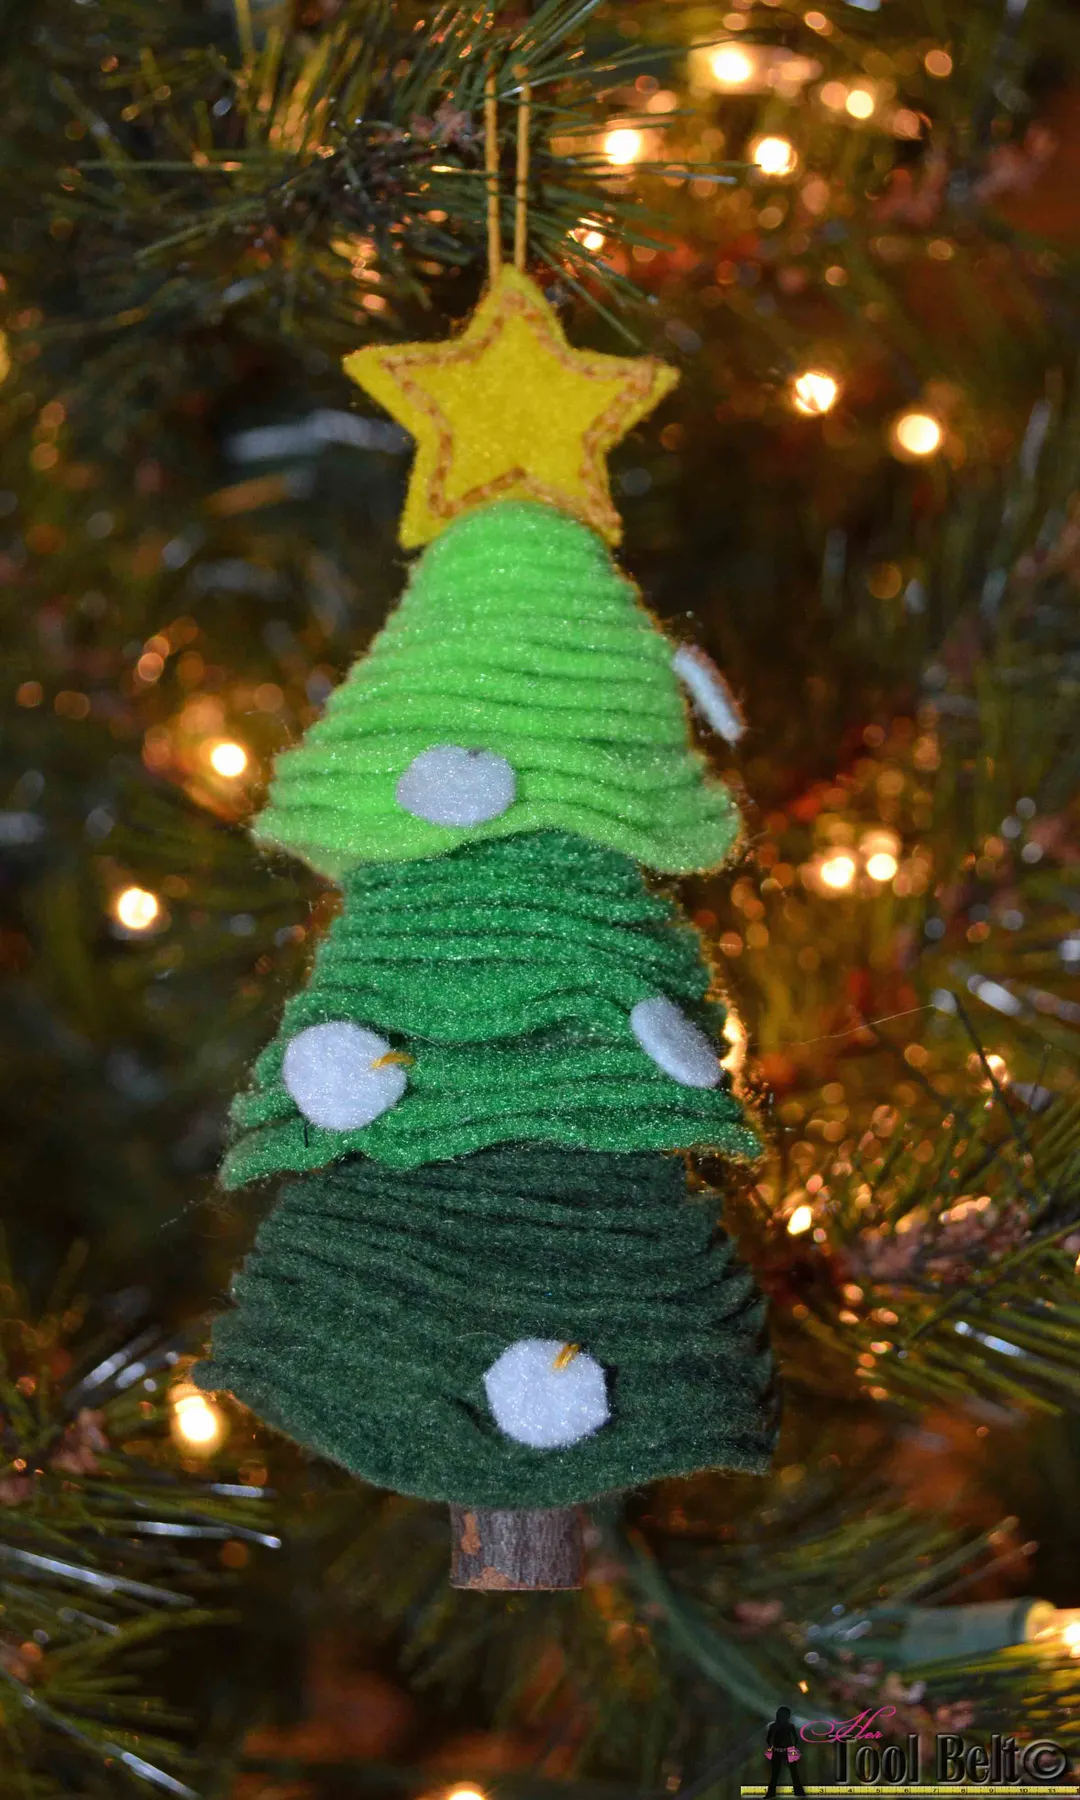
Total: $22–$35 for a batch of six — about $4 to $6 apiece, well under what a boutique charges for one layered felt tree.
Budget alternative: swap wool-blend felt for acrylic craft felt at roughly $0.50 a sheet. It’s stiffer and pills faster, but at ornament scale you won’t notice for two or three seasons.
The layering works because it follows a simple value ladder: 60 percent mid-tone green as the anchor, 30 percent deep forest green behind it for depth, and 10 percent lime plus white for the highlights that catch your eye first.
To shift the palette without rebuilding the pattern, keep the percentages and change the family. Cream, oatmeal, and blush give you a neutral tree; black, charcoal, and silver get you something moodier. The three-tier silhouette does the work — colors just set the temperature.
4. A Felt Gift Box With a Beaded Red Heart Inside
Beaded edging is what separates a felt ornament that looks store-bought from one that looks like a Sunday afternoon. Use size 11/0 seed beads with a beading needle and doubled thread, and stitch through every third bead rather than every one — that keeps the line from puckering around curves.
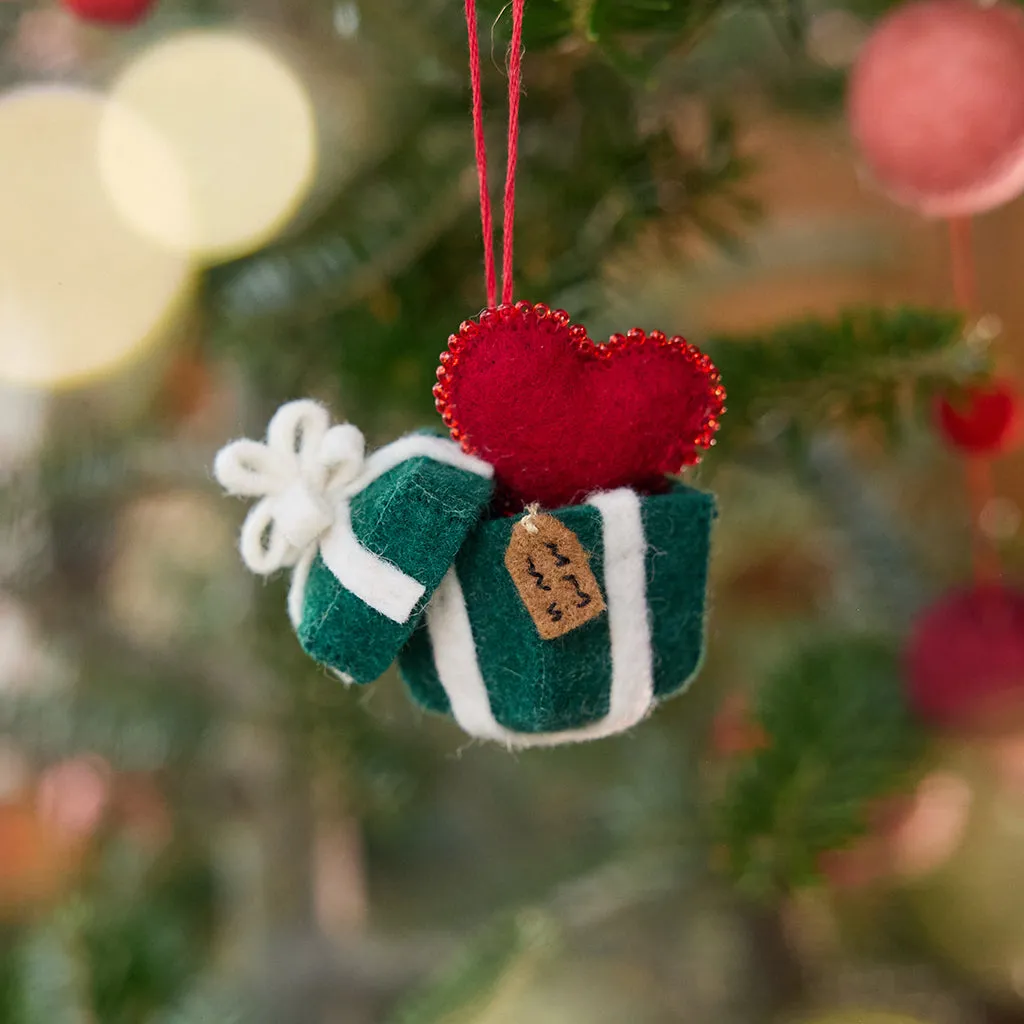
The other trick: cut a piece of cereal-box cardboard to fit inside the box shape and glue it behind the front panel. It gives the opening a crisp architectural edge instead of a soft, stuffed look.
Here’s what nobody mentions about bead-edged felt: it is not toddler-friendly. Loose seed beads are a choking hazard, and hand-stitched edges unravel fast if a curious three-year-old gives them a tug.
If you’ve got small kids, pets, or a cat who treats the tree as a climbing frame, keep these in the top third or skip the beadwork and use a simple embroidered blanket-stitch border instead. Same charm, nothing tiny on the floor. Compare with Idea #22, which gets a similar handmade feel using glued berries instead of threaded beads.
5. A Glitter Red Sleigh Loaded With Wrapped Mini Gifts
It would be easy to call the sleigh the star. It isn’t. The thing that makes this ornament look styled rather than assembled is the small green bottle brush sprig resting on top of the gift pile.

Without it, you have a sleigh and three boxes — just a stack of objects. With it, you have a tiny scene: something growing out of the presents, a hint of scale, a suggestion that a person arranged this on purpose. Miniature vignettes almost always need one organic element to breathe, and bottle brush is the cheapest way to get it.
Miniature world-building is having a real moment. Pinterest searches around dollhouse-scale holiday decor and “tiny Christmas scenes” keep climbing, and it tracks with a broader 2026 shift: people are crafting fewer, more detailed objects instead of buying bulk packs.
It also explains why so many ornaments this year borrow from model-making — layered depth, mixed materials, props with their own story. Staying power? Strong. Miniatures have been a holiday staple since the first putz houses, and they photograph beautifully, which keeps them circulating.
6. Tropical Santa in a Hawaiian Shirt and Ukulele
Felt pieces stay sharp-edged when you interface them. Iron lightweight fusible interfacing to the back of your felt before cutting the shirt, shorts, and hat, and the shapes hold their line instead of stretching when you stuff or stitch them. One yard costs about $4 and will handle a dozen ornaments.
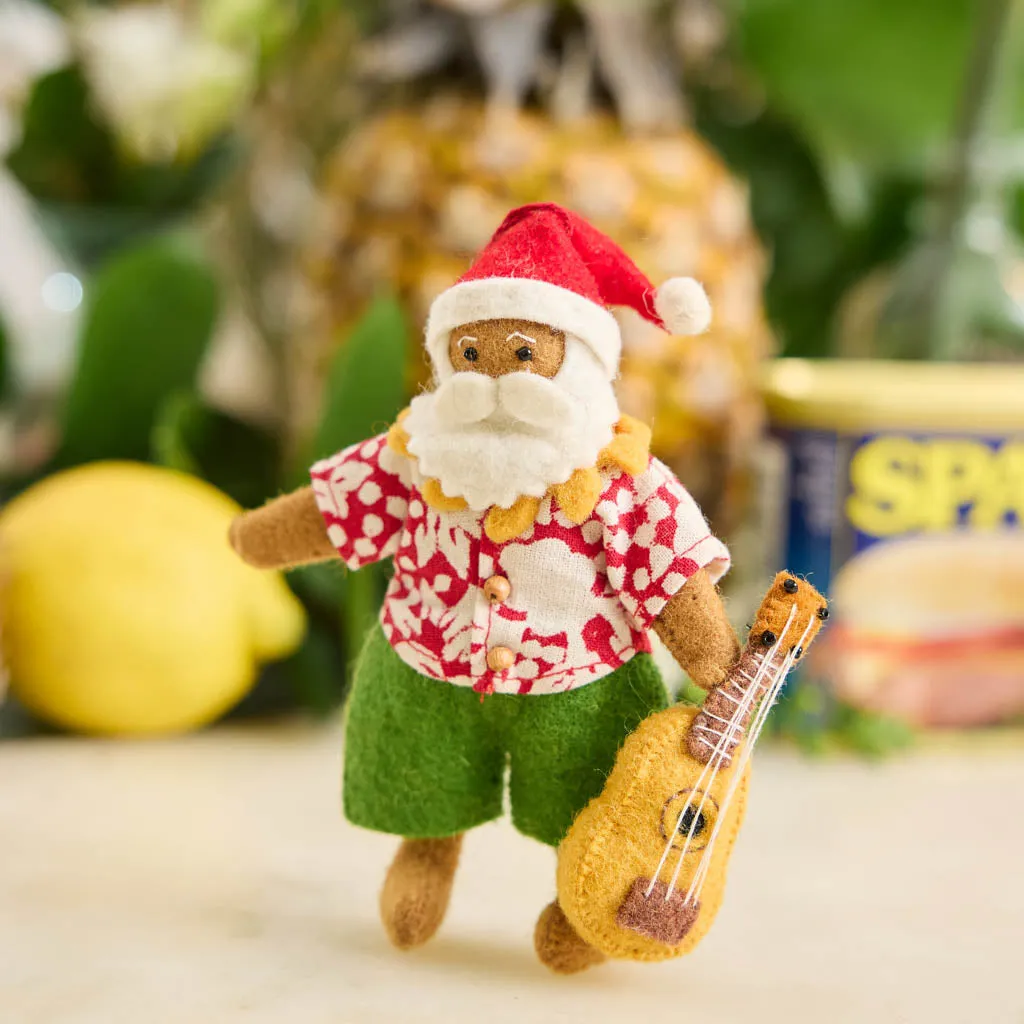
Also: cut small pieces with sharp embroidery scissors, not fabric shears. At this scale — a quarter-inch shirt collar — a clean cut is the difference between charming and lumpy.
Blanket stitch is the workhorse of felt ornaments, and it’s easier than it looks.
- Thread a tapestry needle with embroidery floss, knot the end, and start from the back layer.
- Bring the needle up about 1/8 inch from the edge.
- Hold the thread under your thumb, insert the needle a quarter inch to the right, and come up where you started.
- Pull gently so the thread catches the edge — snug, never tight.
- Repeat the whole way around, keeping stitches about a quarter inch apart.
Twenty minutes to learn, and it finishes the edge of almost anything felt.
7. Tiered Crochet Trees in Green and in Pink
The tiered triangle is the same pattern in both versions — only the color families change, and they follow a clean formula: 60 percent of the ruffles in one dominant hue, 30 percent in a lighter sibling tone, 10 percent in a bright accent at the star and pom-poms.

The pink tree runs rose, blush, and cream with a yellow star. The green runs forest, sage, and white. Neither works if you distribute colors evenly; the gentle gradient from dark to light is what makes the tiers read as a tree instead of a stack of ruffles.
These read best on a tree between 6 and 7.5 feet, where a 4- to 5-inch tiered ornament sits comfortably mid-range. On a 4-foot tabletop tree, scale the pattern down to 2.5 or 3 inches — otherwise the ruffles crowd each other and the star disappears.
Room-wise you need very little: about 12 inches of table depth and 18 inches of width to display them on a tray. Tight spaces work better with just the pink pair on one tray, the way a single sculptural stand does in Idea #11.
8. Wooden Ghost Cutouts Tucked Into Ferns
Wooden cutouts in a garden look wonderful in photos and slightly tired by February. Untreated pine and birch gray and check within a single wet season, and carved faces collect water when they sit face-up.
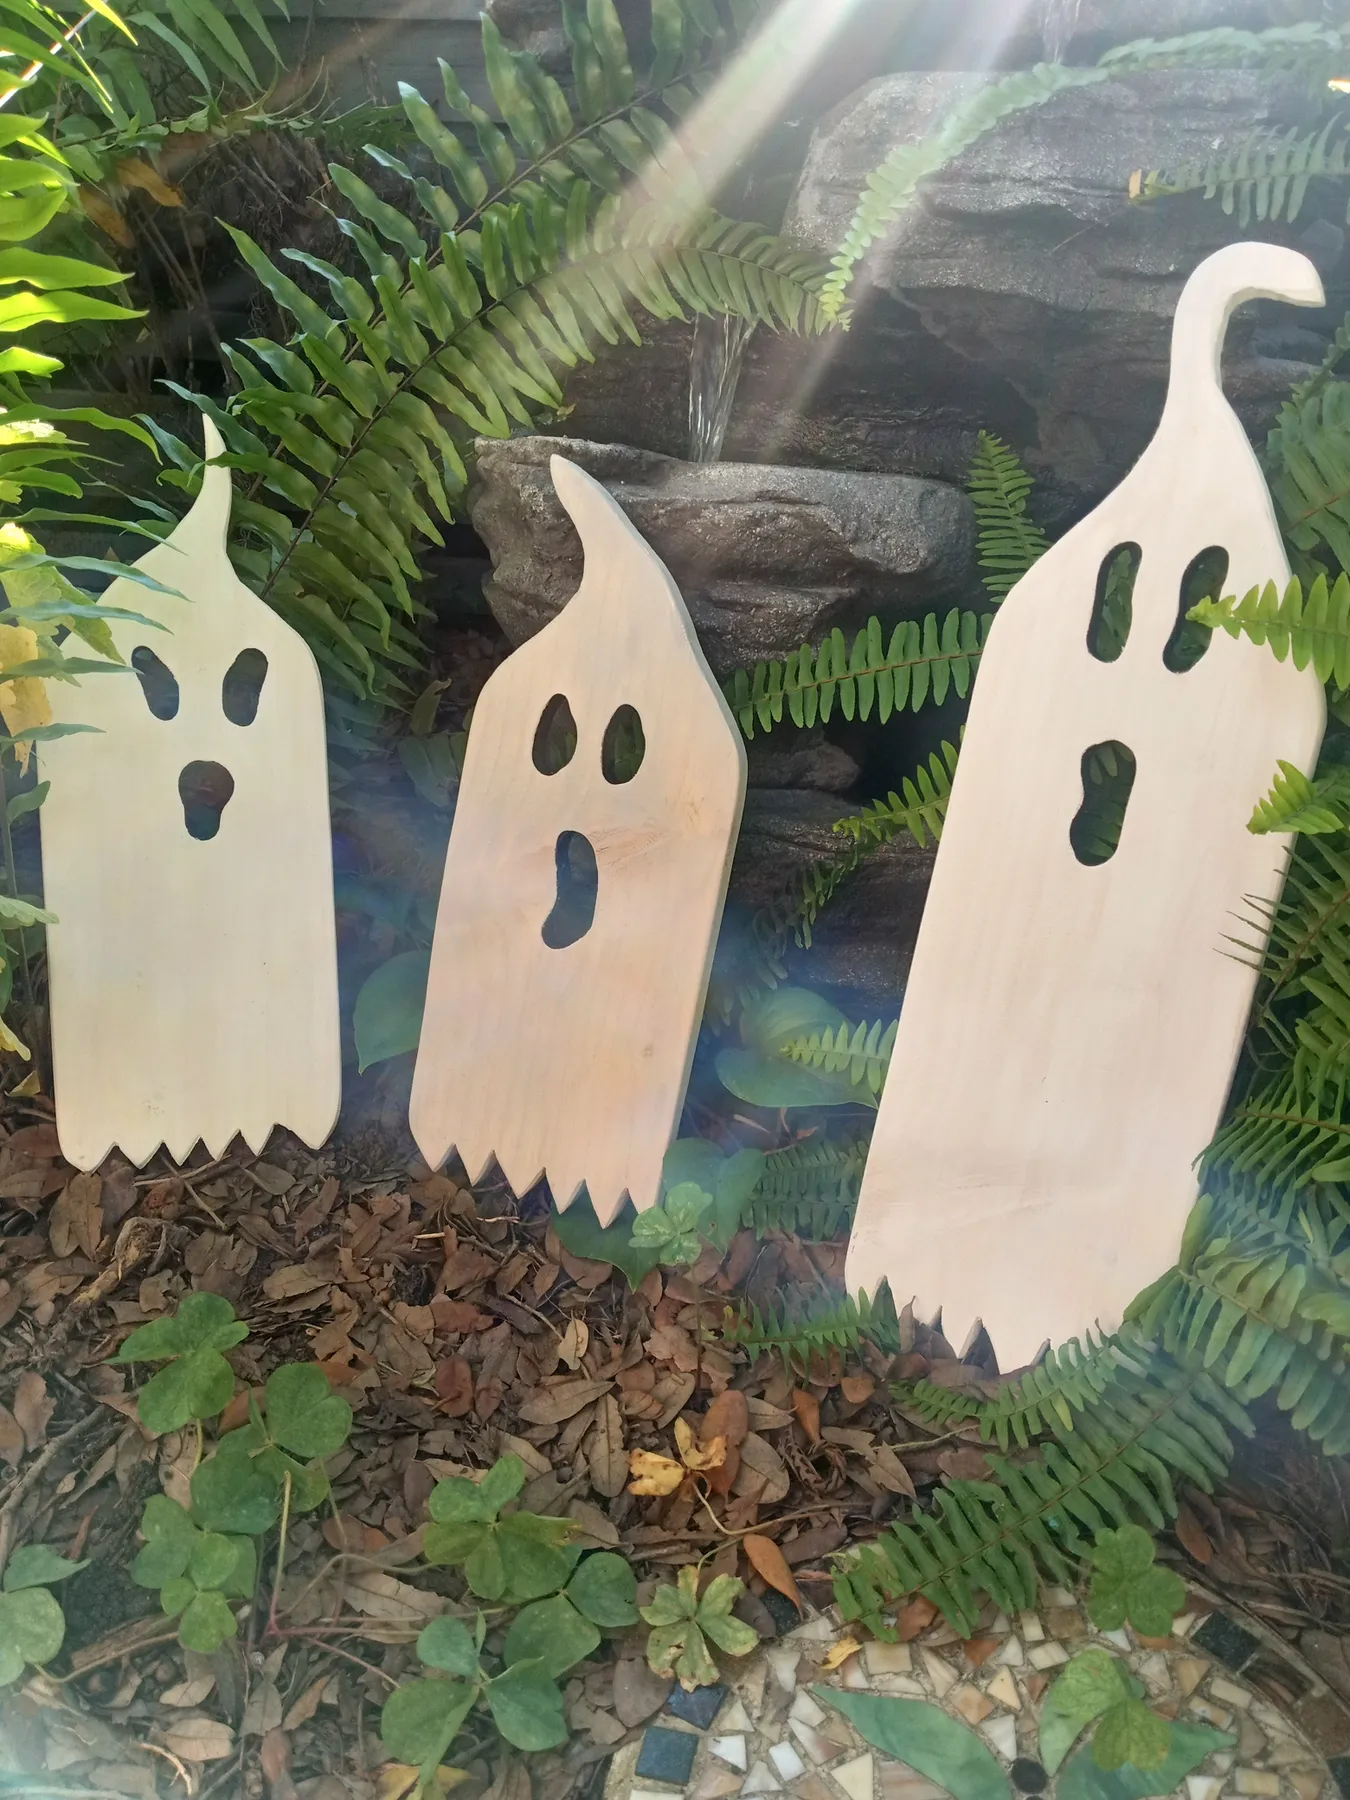
To get more than one year, seal all six sides with exterior spar urethane — two coats minimum, sanding lightly between — and store them flat indoors, off concrete. Otherwise accept them as genuinely seasonal and plan to repaint each fall. Nothing wrong with that; just don’t expect five years from an October weekend.
Pre-cut wooden shapes at Michaels or JOANN run $0.79 to $2.50 each, and a set of three blanks is usually under $8. Add craft acrylic in white and gray, a fine brush, and a matte exterior sealer and you’re at roughly $20 for three. The same blank-and-paint approach scales down beautifully into Christmas ornament cutouts.
The trade-off: hand-drawn faces are more varied and charming, but three identical pre-cuts reading the same is arguably more striking in a garden. Middle path — buy blanks, vary only the eyes.
9. The Felt Fisherman Doll With a Fish and a Lobster
Limbs that hold a pose need an armature. Run 20-gauge wire through each arm and leg, bend the ends into small loops, and anchor them at the shoulders and hips before stuffing. Now the fisherman can actually grip his catch instead of wearing it like a sticker.
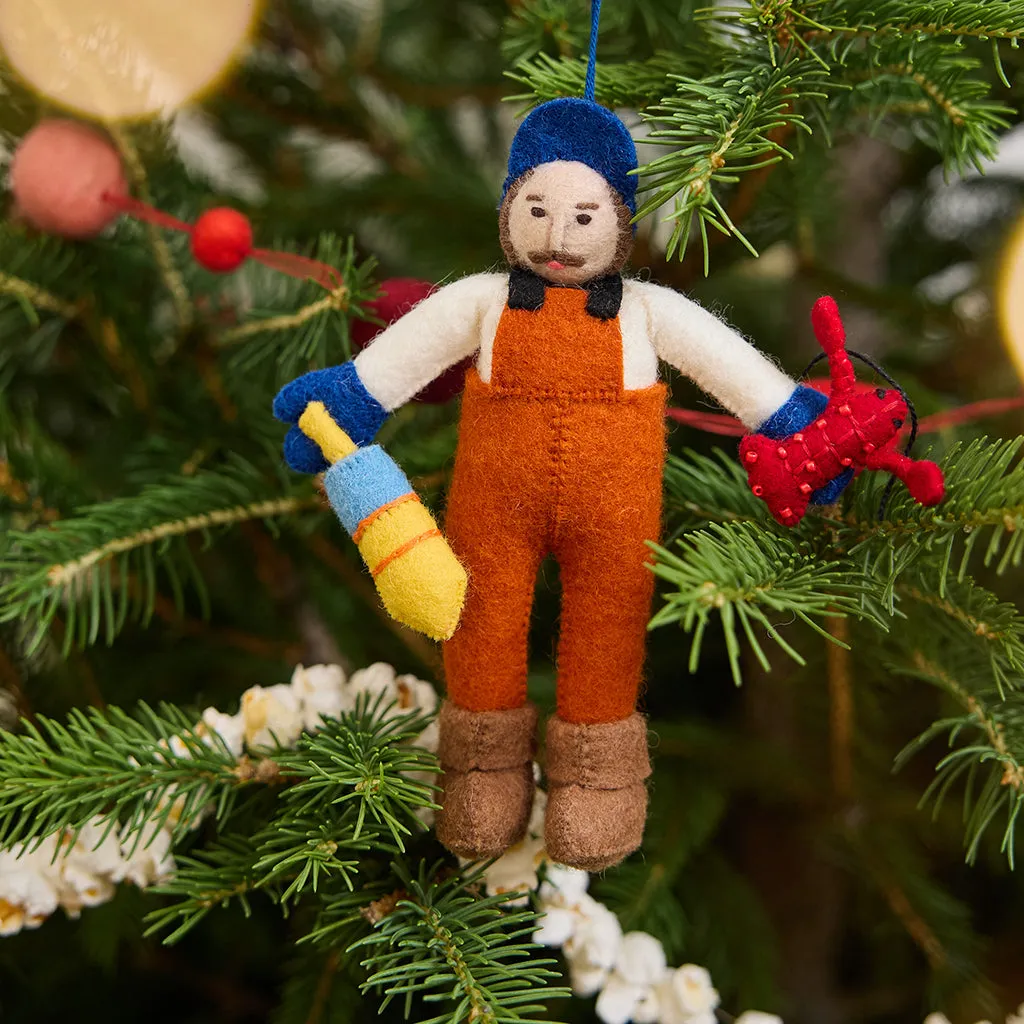
One more: build and dress the doll before closing the head seam. You will never get a hat to sit right on a face that’s already stitched shut.
This ornament is a story, not a shape, and that’s why it holds your eye longer than a plain bauble. The fish, the lobster, the orange overalls — every detail names a thing and implies a world.
It also uses proportion deliberately: the props are oversized relative to the body, which is exactly how children’s book illustration works. Tiny hands, enormous catch. If you’re designing your own character ornament, give it one prop that’s too big for it. That’s the trick.
10. A Botanical Sphere Built From Seed Pods
Building a botanical sphere is meditative and takes about two hours start to finish.

- Start with a 2-inch foam ball and a low-temp glue gun.
- Sort your seed pods or wood pieces by size so you work biggest to smallest.
- Glue a ring of pieces around the equator first, then build up and down in rings.
- Fill the poles last, wedging small pieces into the gaps.
- Push a wire loop into the top before the final row and secure it with a dab of glue.
Roughly $6 in supplies if you forage the botanicals yourself.
Dried botanical ornaments are fragile in a specific way: they shed. Expect a small crumble of husks at the bottom of the storage box every year, more if the box gets hot. Keep them out of attics and garages — sustained heat above 90 degrees makes glue let go and pods turn brittle. A climate-controlled closet and a padded box is ideal. Want the same organic look with zero shedding? A painted or felt-covered sphere gives you the silhouette without the upkeep.
11. An Owl Ornament Styled on an Articulated Wooden Hand
It isn’t the owl. It’s the articulated wooden hand holding it. That hand does something no ornament hook can: it introduces a human presence and an artist’s gesture, and it makes the whole arrangement read as a display rather than storage.
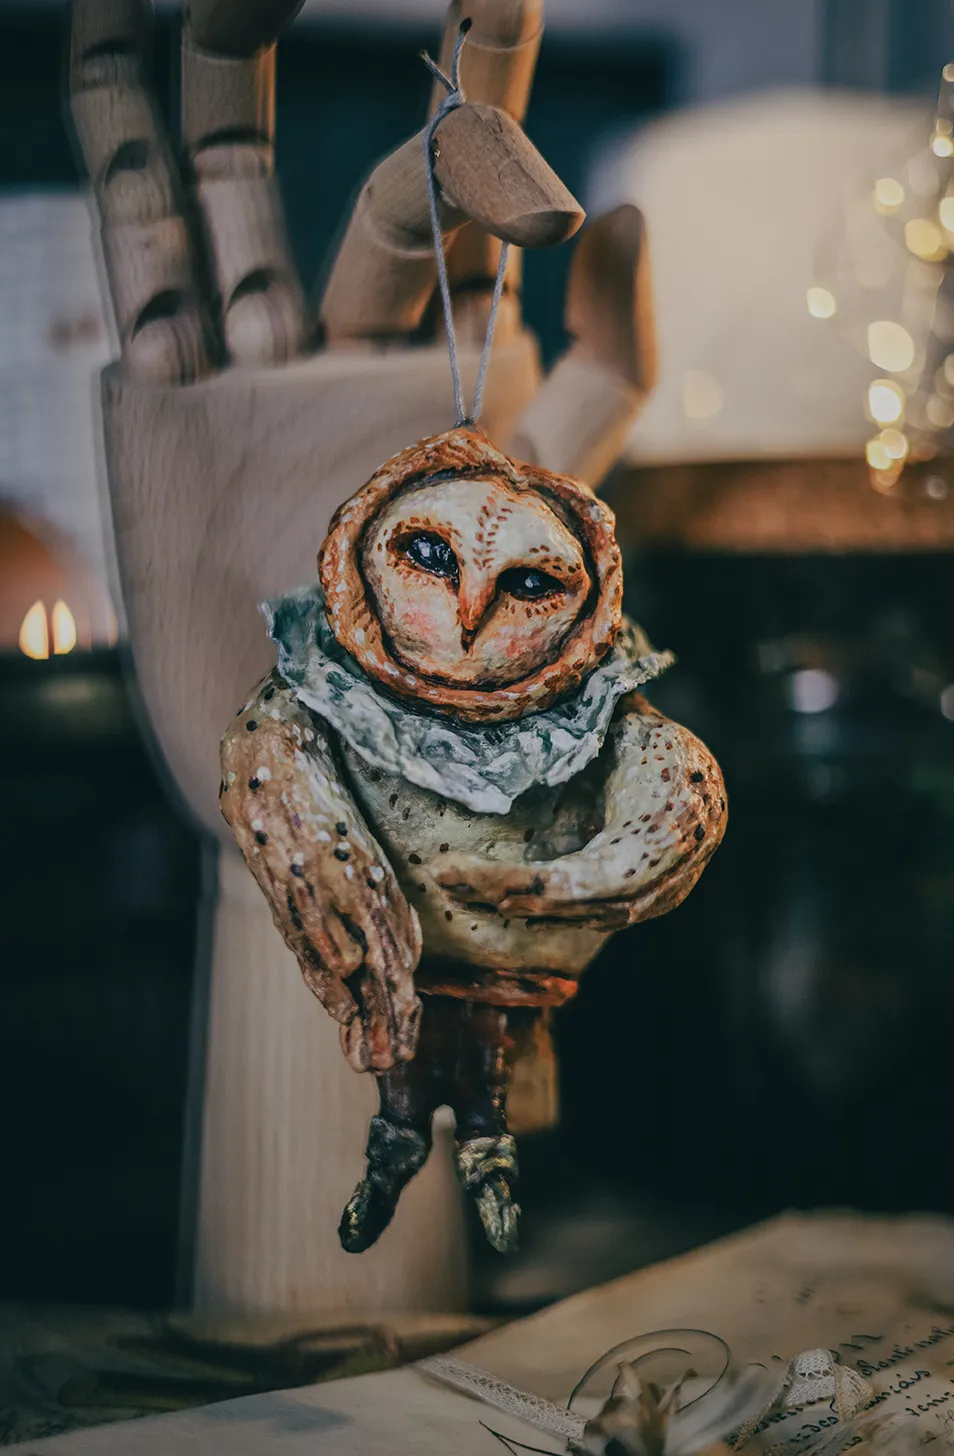
Without it, the owl is just hanging somewhere. With it, someone is presenting the owl. Completely different feeling, and the hand costs about $12 at any art supply store.
For a mantel or shelf arrangement, give yourself a 24- to 36-inch run and vary the height of what stands on it: a hand at 10 inches, a stack of books at 4 inches, a lace doily under the base for texture. The layering needs vertical variation or it flattens into a row.
If your mantel is under 48 inches wide, use one hand and one ornament — two competing hands read as clutter. Low ceilings do better with the whole vignette below eye level. Compare with Idea #14, which uses a flat wooden plaque instead of a sculptural stand.
12. Folded Paper Ornaments With Silver Glitter Accents
The palette is doing something smarter than it looks. It’s 50 percent warm white as the ground, 35 percent red as the pattern, 10 percent silver glitter for sparkle, and 5 percent dark green borrowed from the branches themselves.
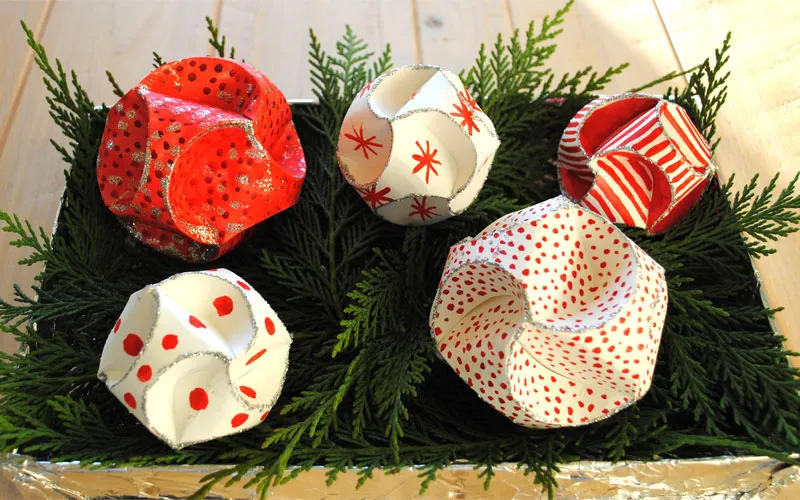
That last one matters. Pulling a color from your foliage into the ornament makes the whole arrangement feel like a set. Swap red for deep navy and silver for gold and you’ve got the same formula in a colder, more formal register — no pattern changes at all.
- Double-sided patterned paper pad, 12×12: $8–$14
- Fine silver glitter and a glue pen: $6–$10
- Ornament templates or a scoring board: $10–$18
- Baker’s twine or thin cord for hanging: $4–$6
- Low container with metallic foil tape: $6–$12
Total: $34–$60 for about twenty ornaments, which works out under $3 each.
Budget alternative: print free patterns on cardstock at home and add one line of glitter along a single fold instead of coating the surface. Around $10 total.
13. A Crochet Candy Cane on a Natural Pine Branch
Crocheted candy canes go crooked for one reason: there’s nothing inside them. Work a 6-inch tube in the round with single crochet, then slide a pipe cleaner or 18-gauge floral wire through before you close the ends. Now it holds a real hook shape instead of sagging into a comma.
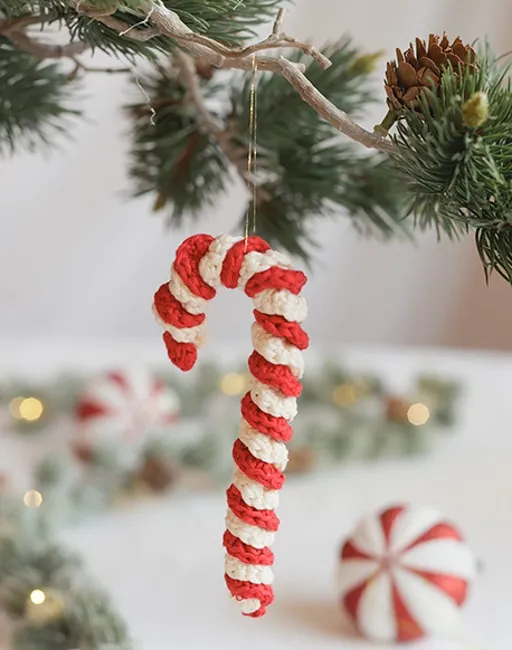
Stripe width matters too. Keep each color band to four or five rounds — fewer and it reads as a solid, more and it hides the candy cane reference entirely.
Crochet is in the middle of a genuine resurgence, and it isn’t just nostalgia. Yarn sales have climbed for several consecutive years, and the slow-craft pull is real: people want an evening’s work they can hold in their hands.
Ornaments are the perfect entry point because the commitment is tiny — an hour, a few yards of scrap yarn, no sizing to worry about. That low-stakes format is exactly why crochet ornaments keep circulating on Pinterest while bigger crochet projects stall out.
14. A Layered Wood Mason Jar Full of Wooden Wildflowers
Layered wood projects look complicated and are mostly about sequence.
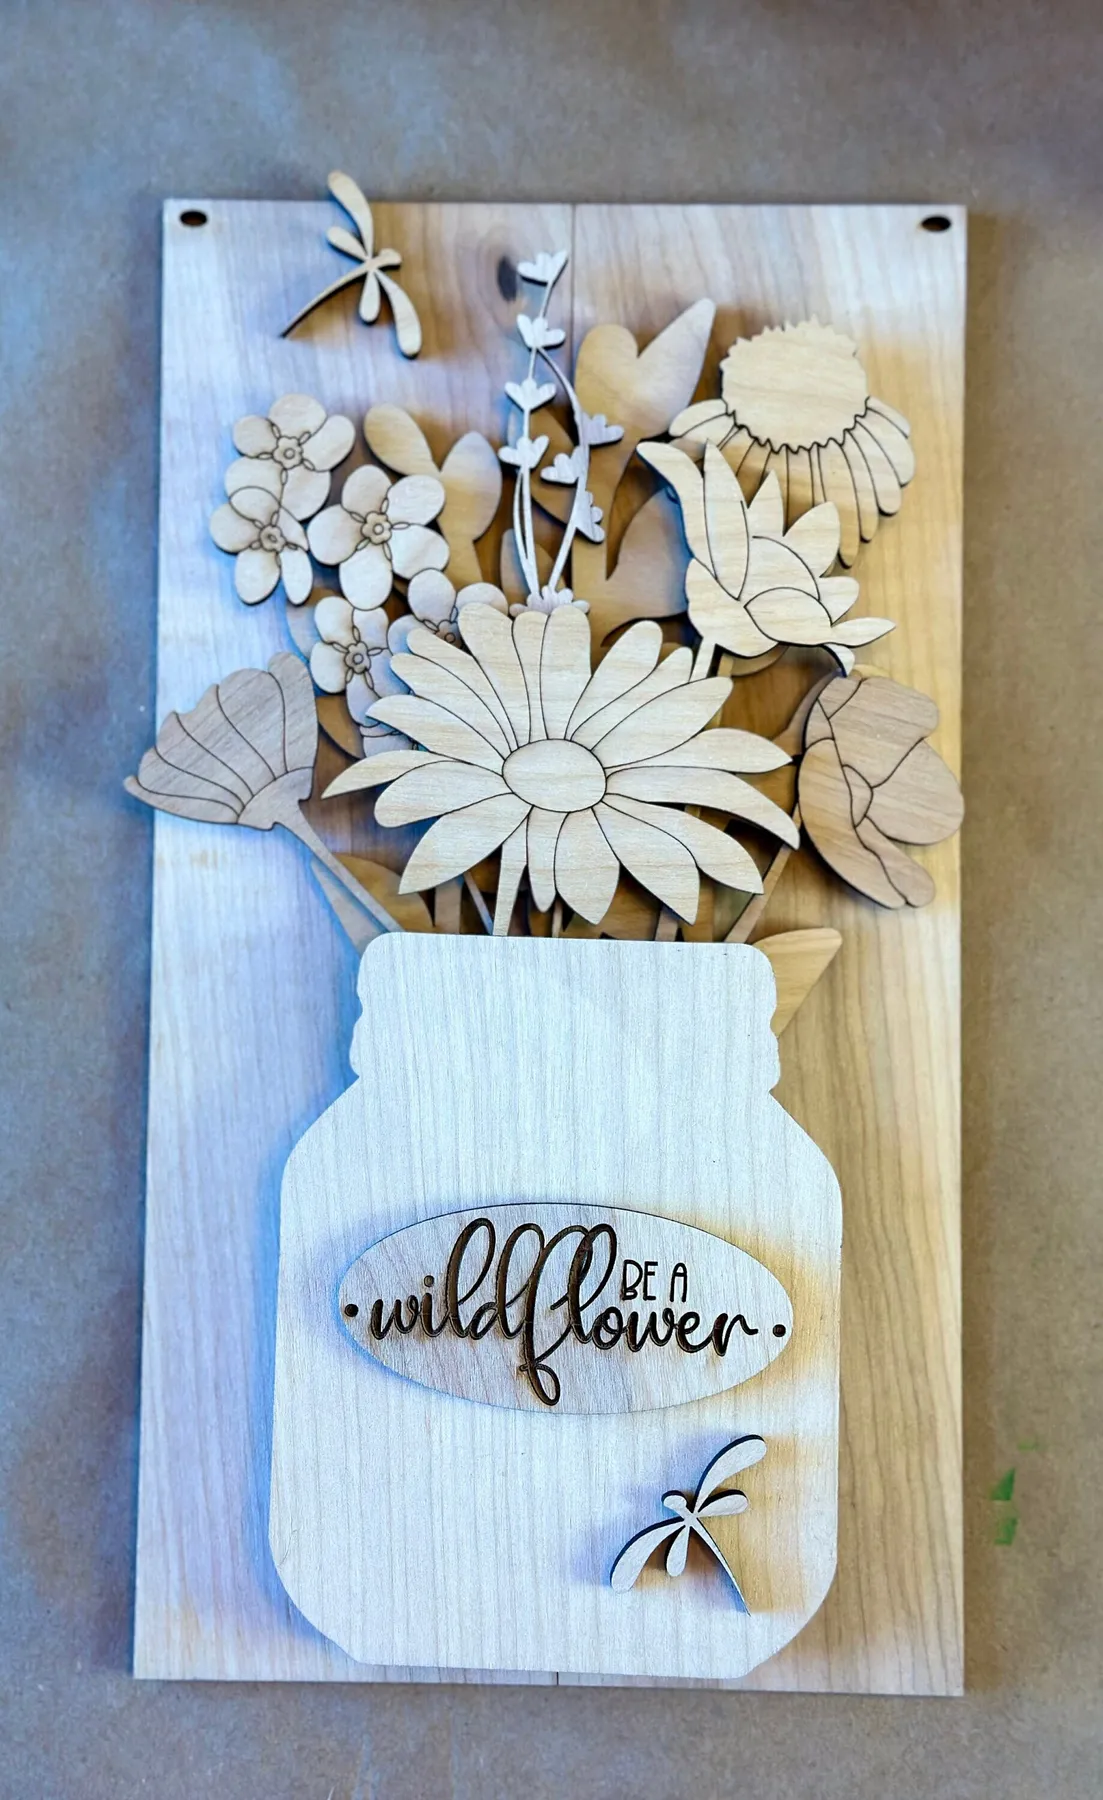
- Cut or buy the base plaque first and sand to 220 grit.
- Apply one thin coat of stain, or leave it raw if you want the pale look.
- Cut the mason jar shape, then the flowers in graduating sizes.
- Glue the largest layer down first and stack upward, using 1/8-inch foam spacers between jar and flowers for real shadow depth.
- Add the etched text last and seal with matte polycrylic.
About three hours with a scroll saw, or one hour with pre-cut shapes.
No scroll saw? This is still very doable. Michaels and JOANN sell birch blanks and mason jar shapes for $1.50 to $4 each, and Etsy sellers cut custom shapes for $8 to $15 with a one-week turnaround. Finish the whole plaque with a single $6 bottle of gel stain and craft glue instead of wood glue and you’re at roughly $30 for the piece. The layered-shadow effect comes from the spacers, not the saw.
15. Quilted Fabric Scrap Ornaments on a Crocheted Doily
Scrap fabric ornaments work because the scale is so small that pattern mixing becomes safe. At 4 inches wide, a calico print, a gingham, and a tiny check all read as texture rather than conflict — and the cream crocheted doily underneath gives those patterns a neutral place to land.
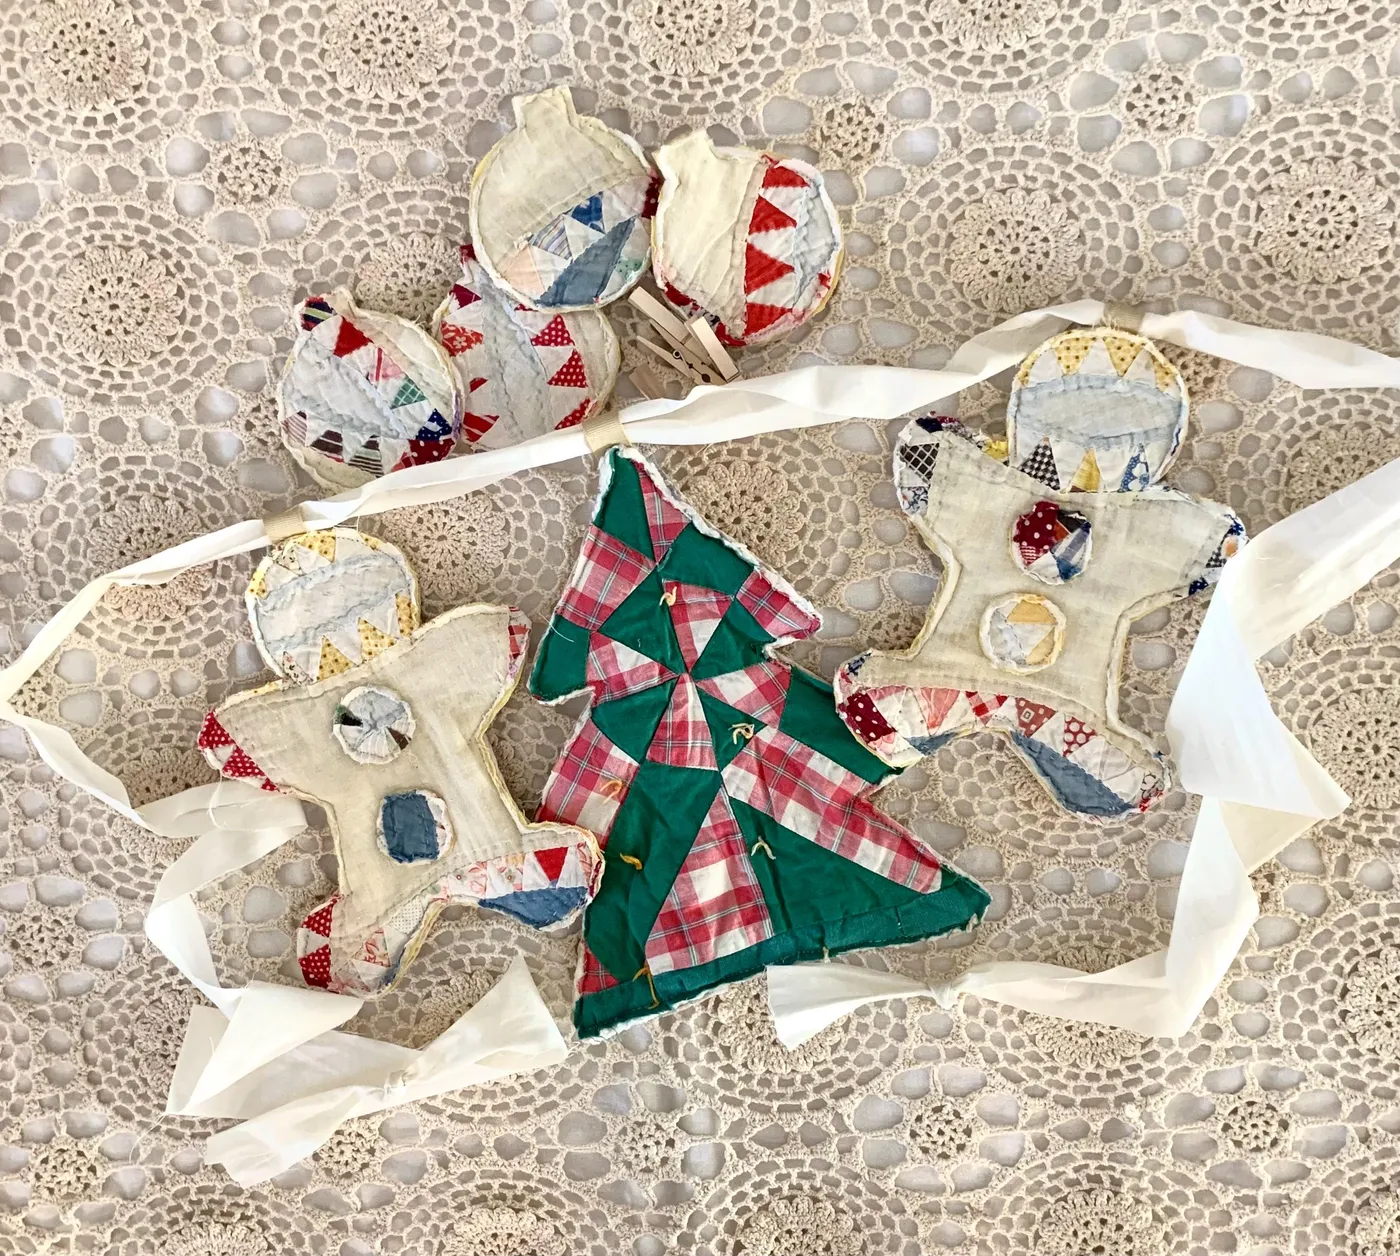
There’s also a nice material logic to it. Quilted fabric next to crochet next to satin ribbon is three textures but one mood: soft, matte, handmade. Nothing shiny competes for attention.
Fabric ornaments fade, and they fade unevenly. The red in a cotton print goes pink before the green goes anywhere, so after two or three seasons near a bright window you’ll notice the collection drifting toward pastel. Rotate their position on the tree each year and store them in a dark bin rather than a clear one. If fading does set in, a five-minute soak in fabric dye restores most cotton prints surprisingly well.
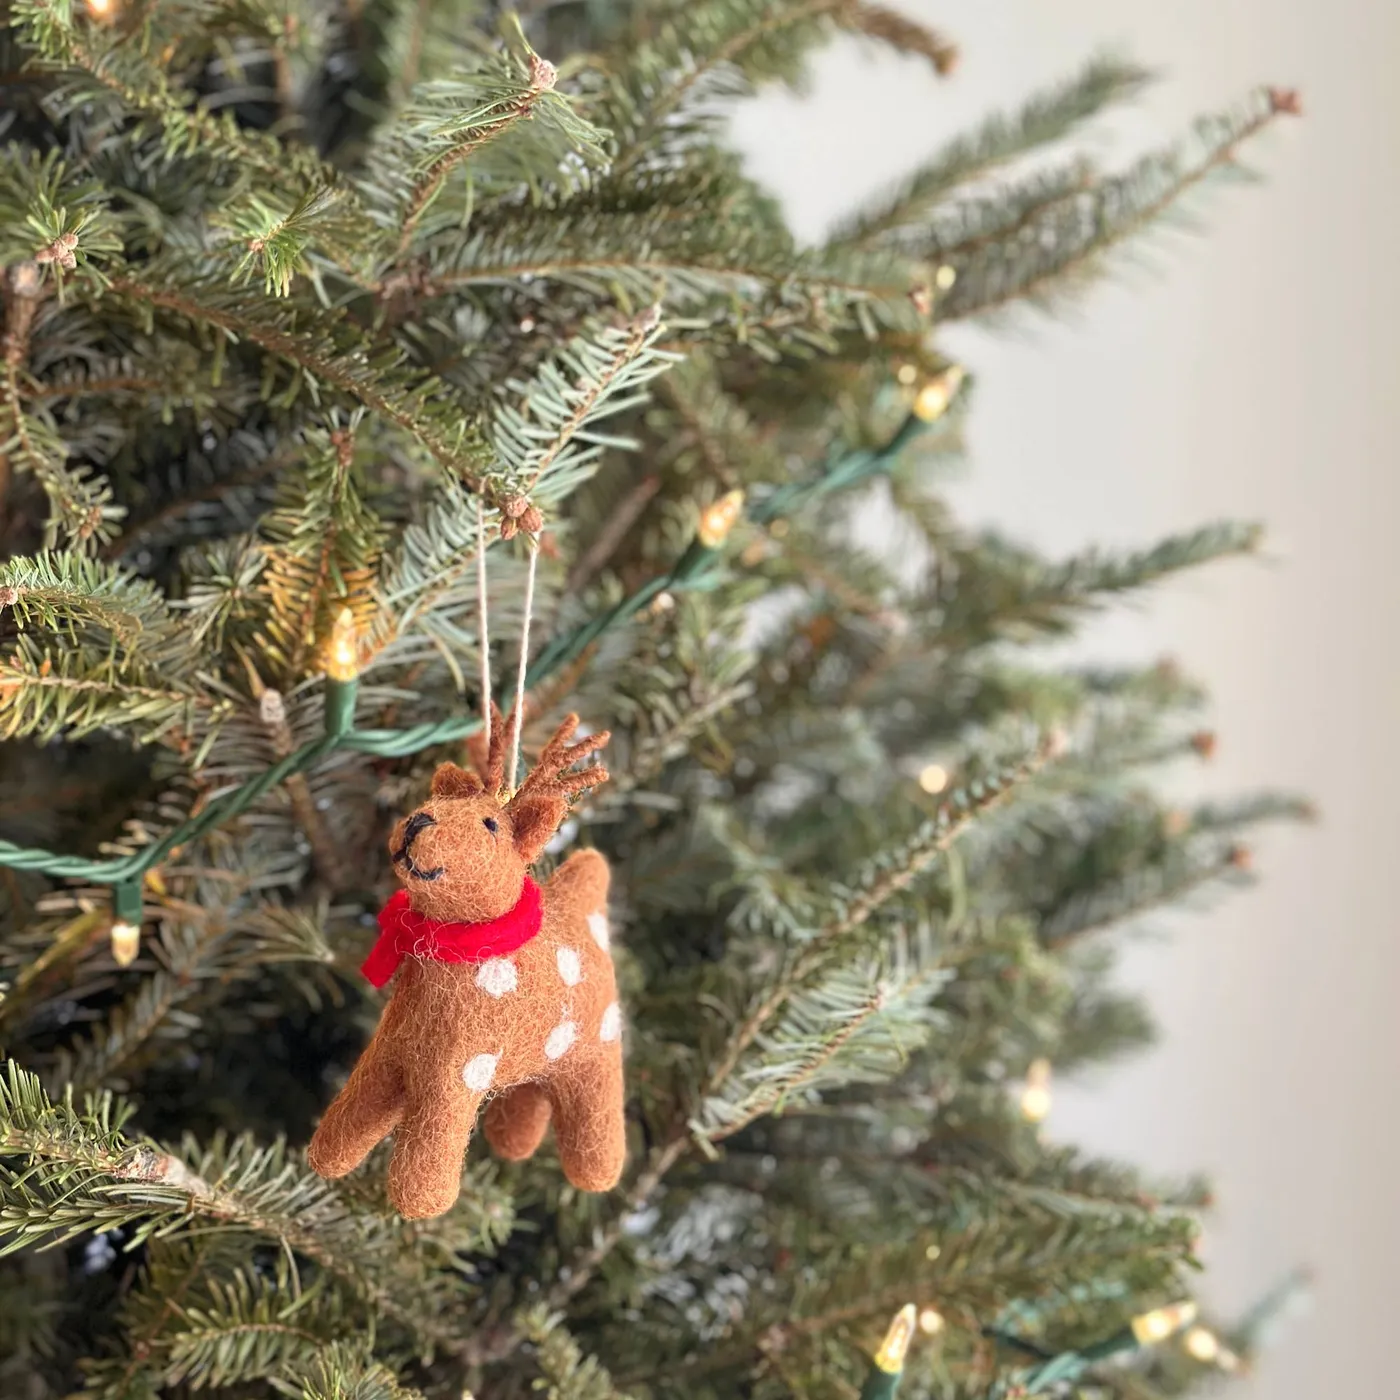
16. A Brown Felt Deer in a Little Red Scarf
Run through this before the first stitch:
- Measure your tree’s branch spacing. Anything closer than 2 inches won’t hold a 4-inch felt ornament without sagging.
- Weigh one finished ornament. Over 3 ounces and you need a wrapped wire hanger, not a jute loop.
- Check your light strand’s heat output. Warm LEDs are safe; older incandescent bulbs will cook felt over a season.
- Count your branch tips before committing to a batch — most 7-foot trees hold about 60 to 80 ornaments comfortably.
Small felt animals — deer, foxes, mice — sit best at 3 to 4 inches tall on trees 6 feet and up. Below that, a 4-inch deer dominates a 4-foot tree the way a dinner plate would dominate a coffee table.
On a tabletop tree, take the pattern down to 2 inches and hang in odd-numbered clusters of three. Odd numbers read as designed; even numbers read as a set. Mantel-sized vignettes, like the one in Idea #11, can go up to 5 inches with no problem at all.
17. A Paper Tube Creature With Big Orange Eyes
Paper tube ornaments photograph beautifully and are the least forgiving of the bunch. They dent. They warp if they spend a season in a humid room, and they will absolutely not survive being shoved into a bin with heavier ornaments.
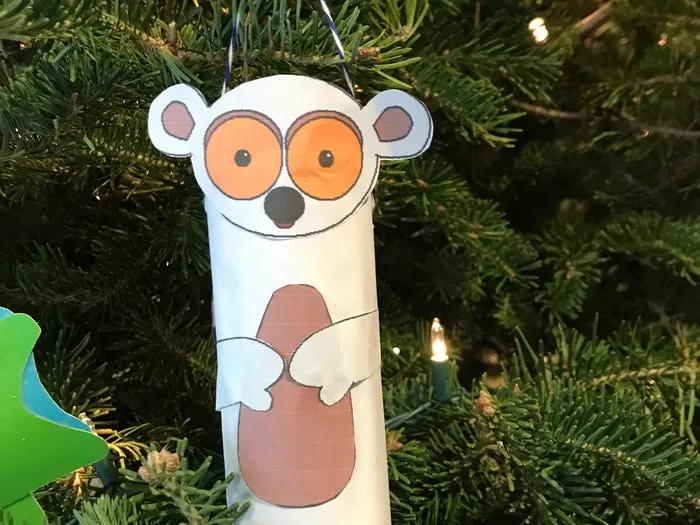
Two fixes: paint the inside of the tube as well as the outside, which stiffens it slightly, and store it upright in an egg carton or a divided box. Keep them off the lower branches if you run a humidifier.
The charm here is a single high-contrast feature on a quiet body: roughly 85 percent white, 10 percent orange, 5 percent grey and pink detail. That ratio is why the eyes carry the whole face.
Try it in reverse — a charcoal body with cream eyes — and you get something wry and a little rakish instead of sweet. Both work; they just sit differently on the tree. Keep the accent color consistent across a set of three and they’ll read as a collection rather than a craft project.
18. Velvet Ornaments and Golden Ribbon on a Patterned Wall
Strip away the ornaments and the lights and this tree still works, because of one element: the golden velvet ribbon.
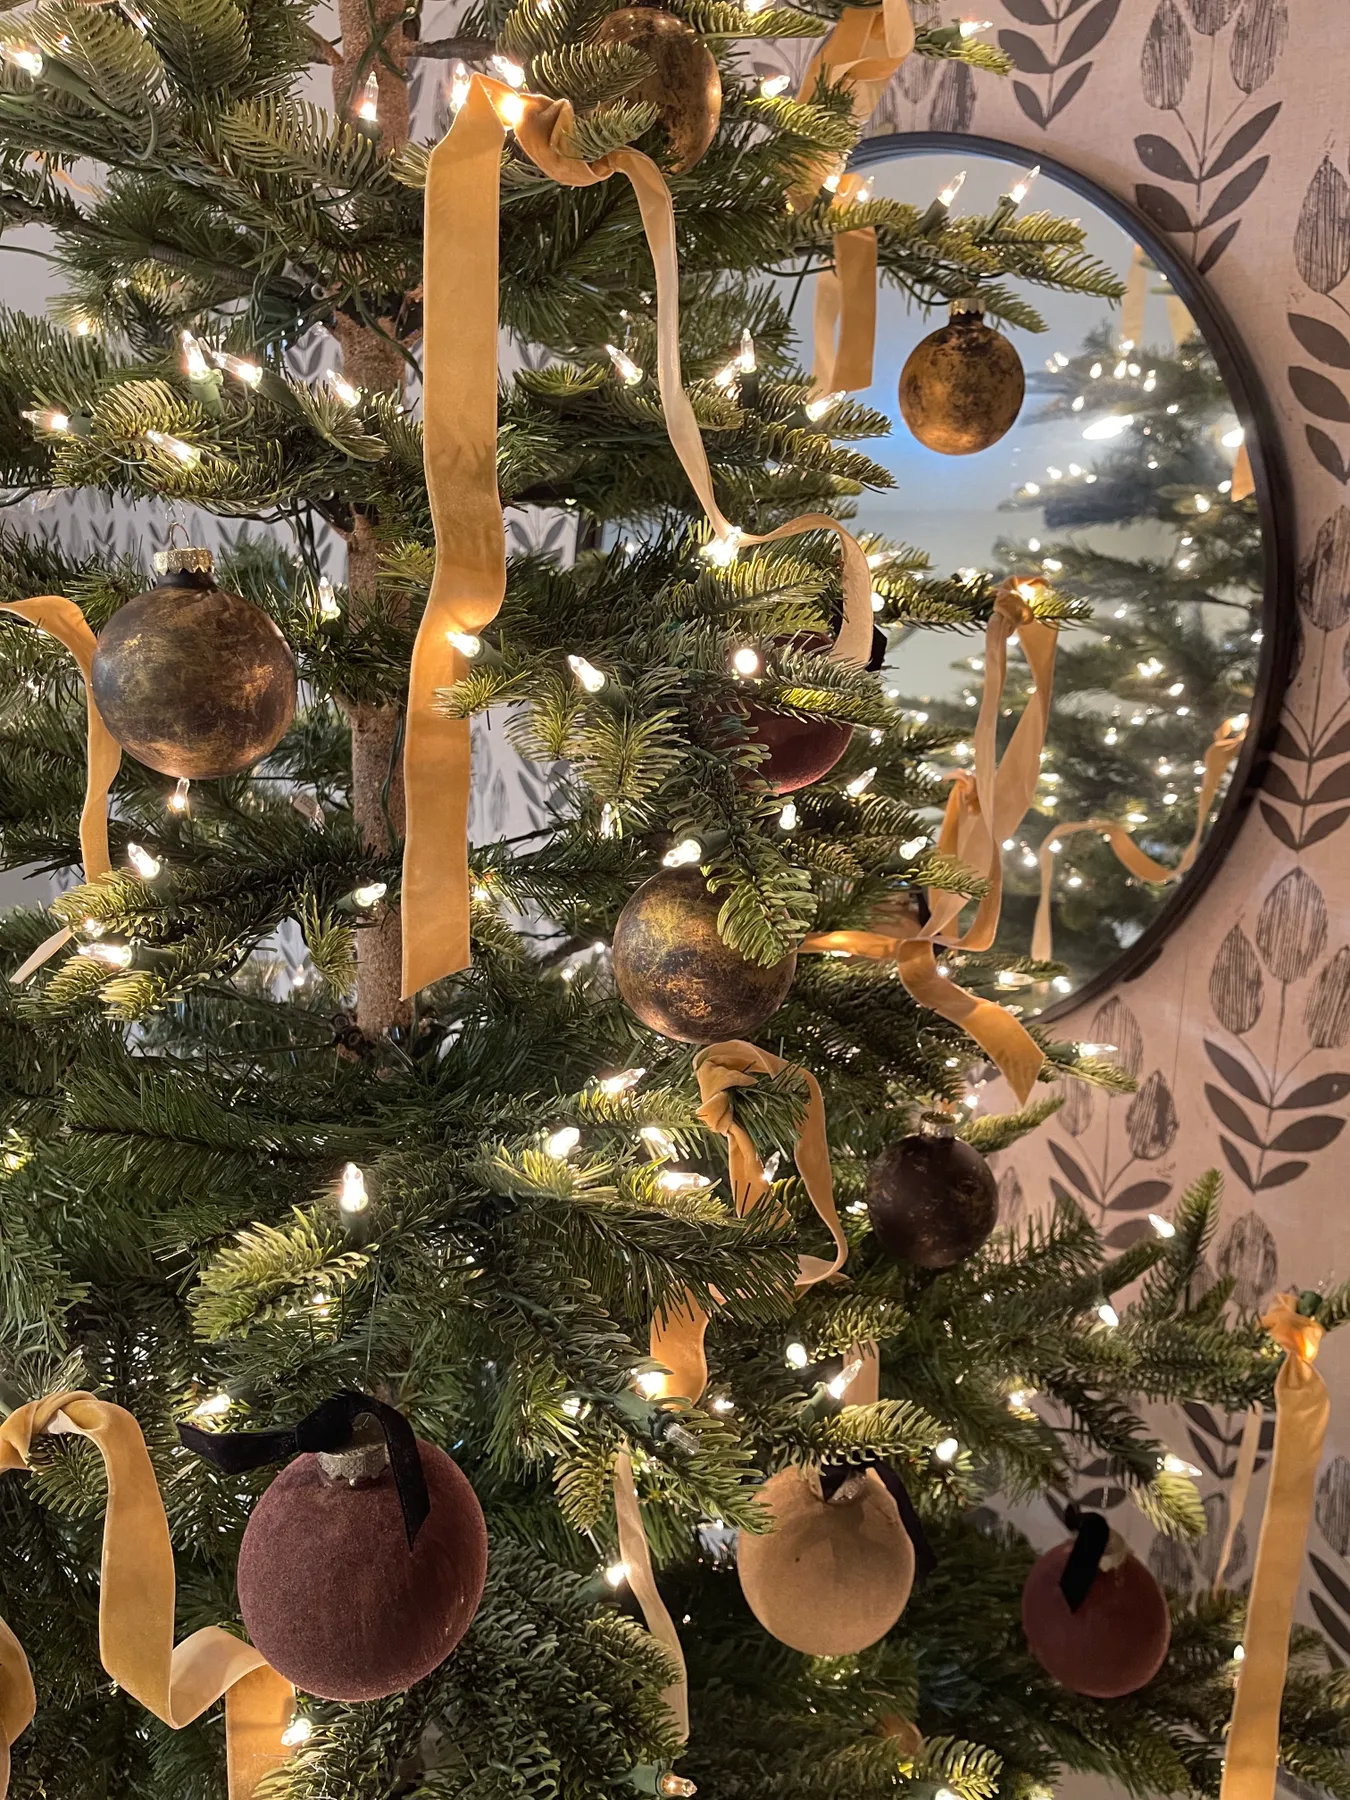
Ribbon is the cheapest way to add flow and verticality to a tree. Wired or velvet ribbon holds a soft S-curve down the branches, which pulls the eye from top to bottom and makes even a modest tree feel considered. Without it, you have a pile of nice ornaments with no throughline. A 10-yard roll at Michaels runs $12 to $20 and covers a 7-foot tree.
- Velvet-finish ornaments, sets of 12: $18–$30 each (three sets)
- Wired golden velvet ribbon, 10 yards: $12–$20
- Warm white string lights, 300 count: $15–$25
- Bronze and matte beige filler ornaments: $12–$25
- Black ribbon hangers: $5–$8
Total: $62–$108 for a full 7-foot tree — a fraction of a designer-decorated version.
Budget alternative: thrift velvet garments and cut them into strips for ribbon, and shop after-Christmas clearance for ornament sets, often 70 percent off.
19. A Craft Booth Full of Santa-Hatted Character Ornaments
Craft fairs and holiday markets have become the aspirational shopping experience of the past few years, and it shows in how people decorate: fewer matched sets, more “I found this at a booth in October.” Character ornaments with faces and hats — the kind that look like they belong to somebody — are riding that wave.
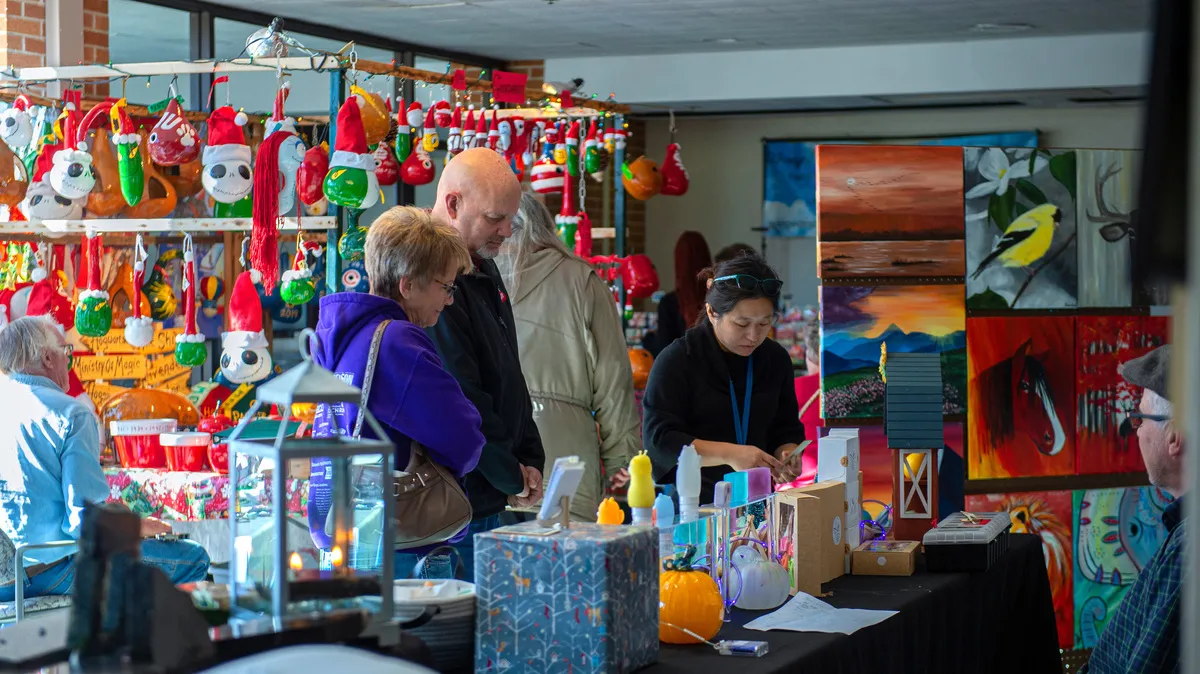
It’s a durable shift. As mass-market decor gets more generic, handmade and small-batch items carry a story a box of identical baubles can’t. Expect this to hold through 2026 and beyond.
You can build the market-stall look at home for under $50. Thrift a wooden crate or an old ladder shelf, run a strand of warm lights across the top, and clip ornaments and small framed prints to it with clothespins or S-hooks.
Facebook Marketplace is the goldmine — old display racks, crates, and shutters routinely go for $5 to $15. Mix in one item that isn’t an ornament, like a small metal lantern or a pumpkin-shaped piece, and the display stops looking like a store and starts looking like a booth.
20. Setting Up a Wooden Ornament Painting Station
Set up the station before anyone starts painting — it saves an hour of chaos.
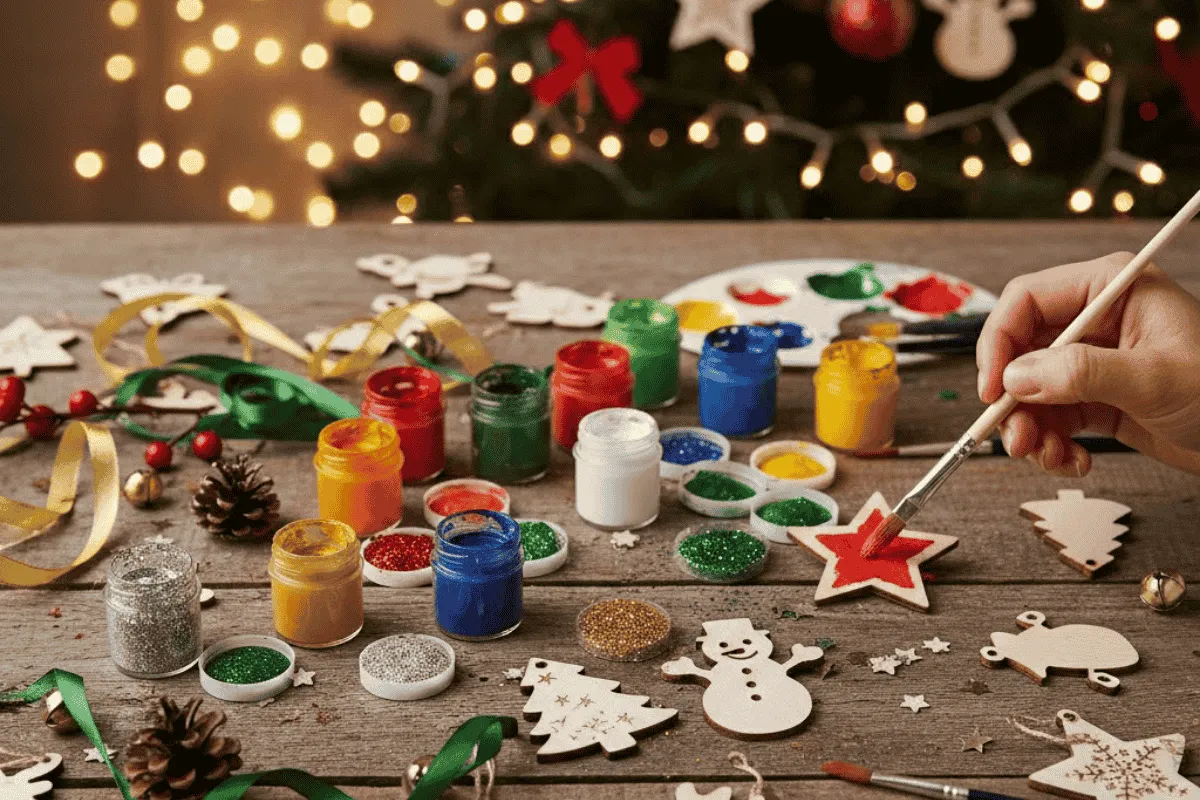
- Cover the table with kraft paper, taped down at the edges.
- Decant paint into small glass jars with lids and label each one.
- Give each painter one foam plate palette and two brushes — one flat, one round.
- Keep glitter in shallow tubs with dedicated spoons, never poured directly onto the project.
- Set finished pieces on a designated drying tray, not the table surface.
Fifteen minutes of setup, and cleanup drops from thirty minutes to five.
Two honest caveats about painted wood ornaments. First, gold and silver glitter are essentially permanent once they’re in your house — keep a lint roller nearby and work over paper, never carpet. Second, unsealed acrylic paint feels tacky against other ornaments in storage, and wood swells slightly with humidity. Two thin coats of matte acrylic sealer fix both for about $8 a can. Seal them the same weekend you paint, or you won’t get around to it.
21. Glossy Red and Green Light Bulb Ornaments With Glitter Bows
Light-bulb ornaments fail at the top. The metal base is where all the visual weight sits, and a plain twine loop tied around it looks improvised. Wrap the base with a small band of ribbon or felt first, then thread your hanger through that — the loop disappears and the ornament looks finished.
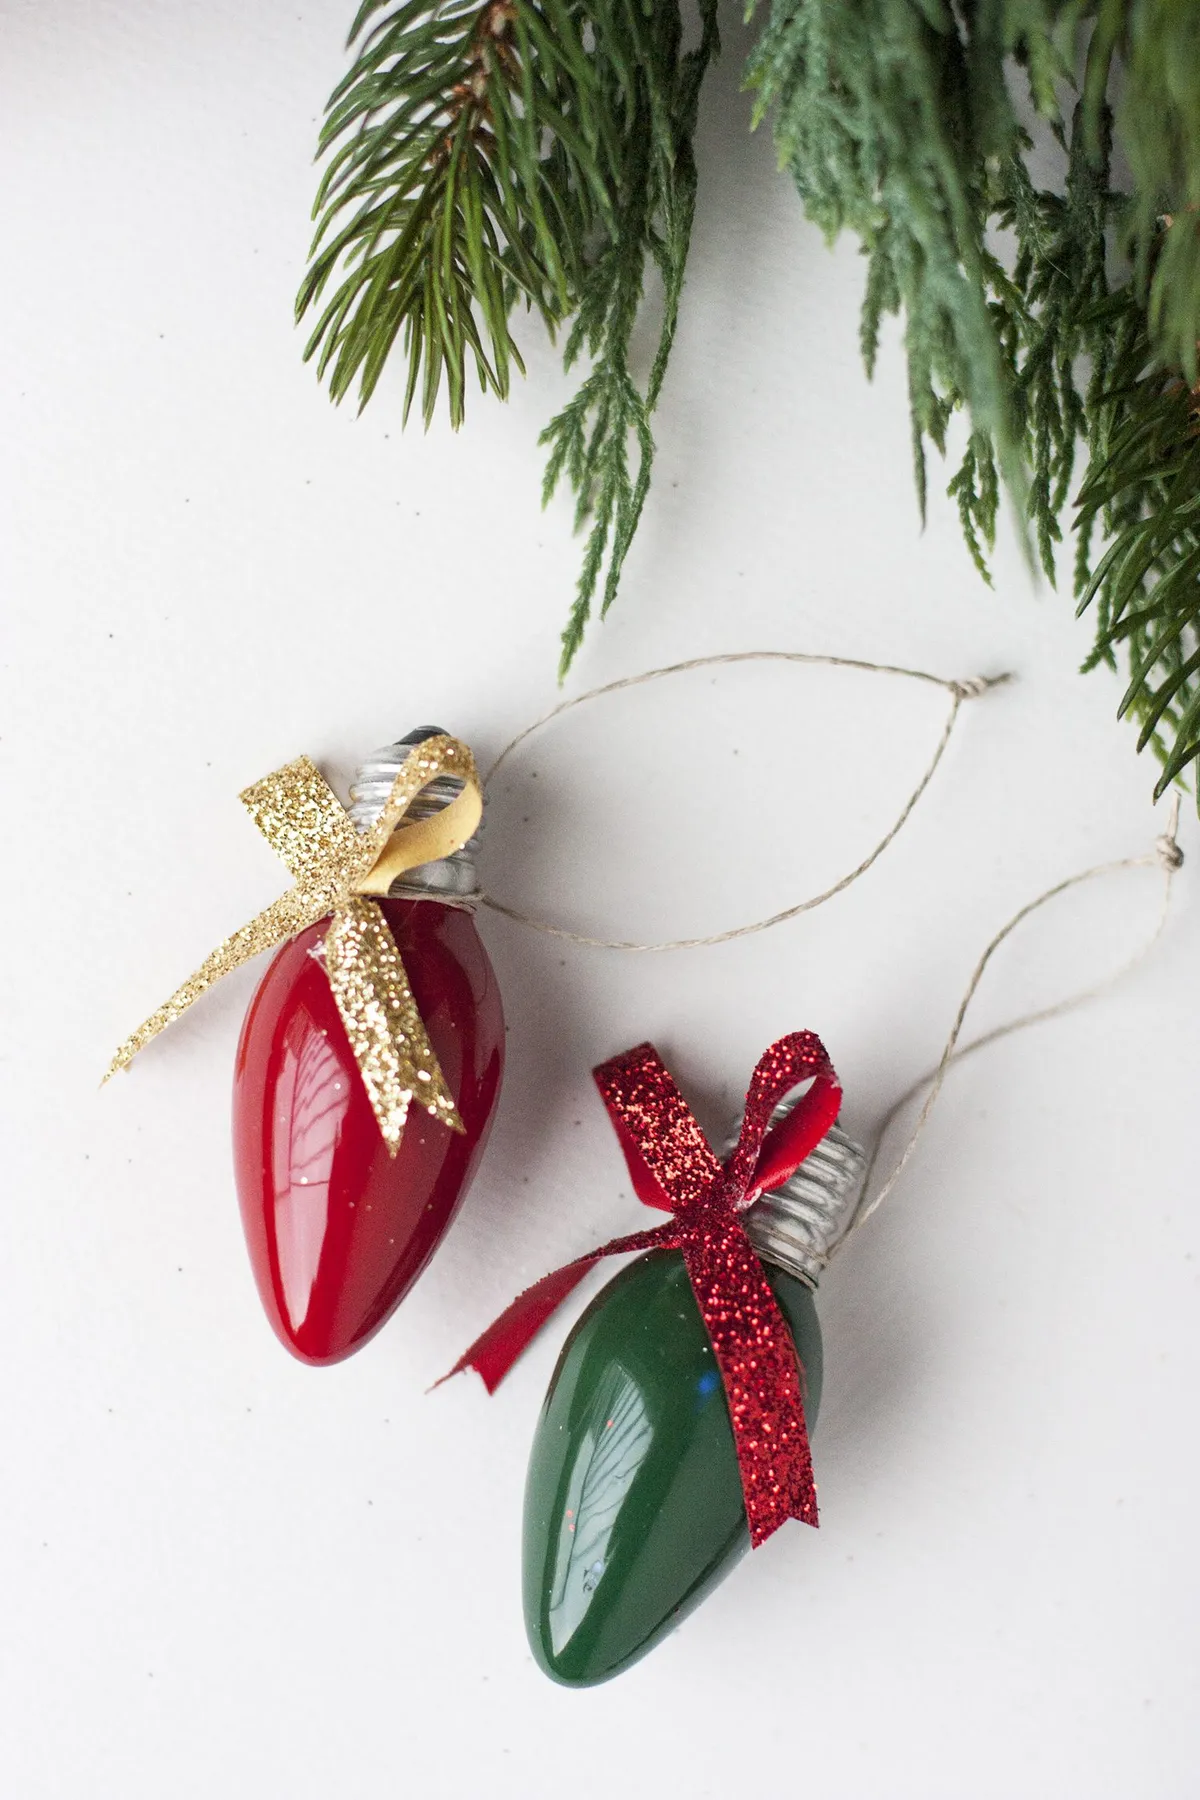
Bow sizing: keep the bow at about one-third of the ornament’s width. A bulb that’s 3 inches across wants a bow no bigger than an inch, or the sparkle overwhelms the shape.
Bulb ornaments are visually heavy, so they need room. On a 7-foot tree, use six to ten total, spaced at least 10 inches apart, concentrated in the middle and upper thirds. On a 4-foot tabletop tree, drop to three maximum and keep everything else tiny.
Tall ceilings can carry a 9-foot tree with bulbs up to 5 inches; standard 8-foot ceilings look better capped at 4. Compare with Idea #18, where smaller velvet ornaments let you hang far more per branch.
22. Rustic Brown Dough Ornaments With Berry Accents and Cinnamon
Cinnamon sticks. That sounds like a throwaway detail and it’s genuinely the thing that makes this collection memorable. Scent is the sense most holiday decor ignores, and a tray of cinnamon ornaments quietly perfumes a whole room every time someone walks past.

They also give you a warm brown vertical that breaks up all the round shapes. Take them away and you have pretty brown cutouts. Put them back and the whole display smells like a kitchen in December.
- Applesauce and cinnamon for dough ornaments: $6–$10
- Red berry picks or small bead clusters: $4–$8
- Red and white baker’s twine, two rolls: $5–$8
- Cinnamon sticks, 4 ounces: $5–$9
- Cookie cutters in tree, star, deer, and snowflake shapes: $8–$14
Total: $28–$49 for roughly two dozen ornaments — the dough itself costs pennies per piece. Compare the paper version in Idea #12 if you’d rather skip dough entirely.
Budget alternative: shape the dough with a knife and a drinking glass instead of cookie cutters. The rustic irregularity suits this look better than a perfect press.
23. A Ceramic Cat With Etched Botanicals and a Dangling Gold Bauble
The little golden bauble hanging below the cat is the whole idea. Stacking a second element under an ornament extends its silhouette vertically, which makes a small piece feel twice as substantial and creates a small, satisfying moment of discovery.
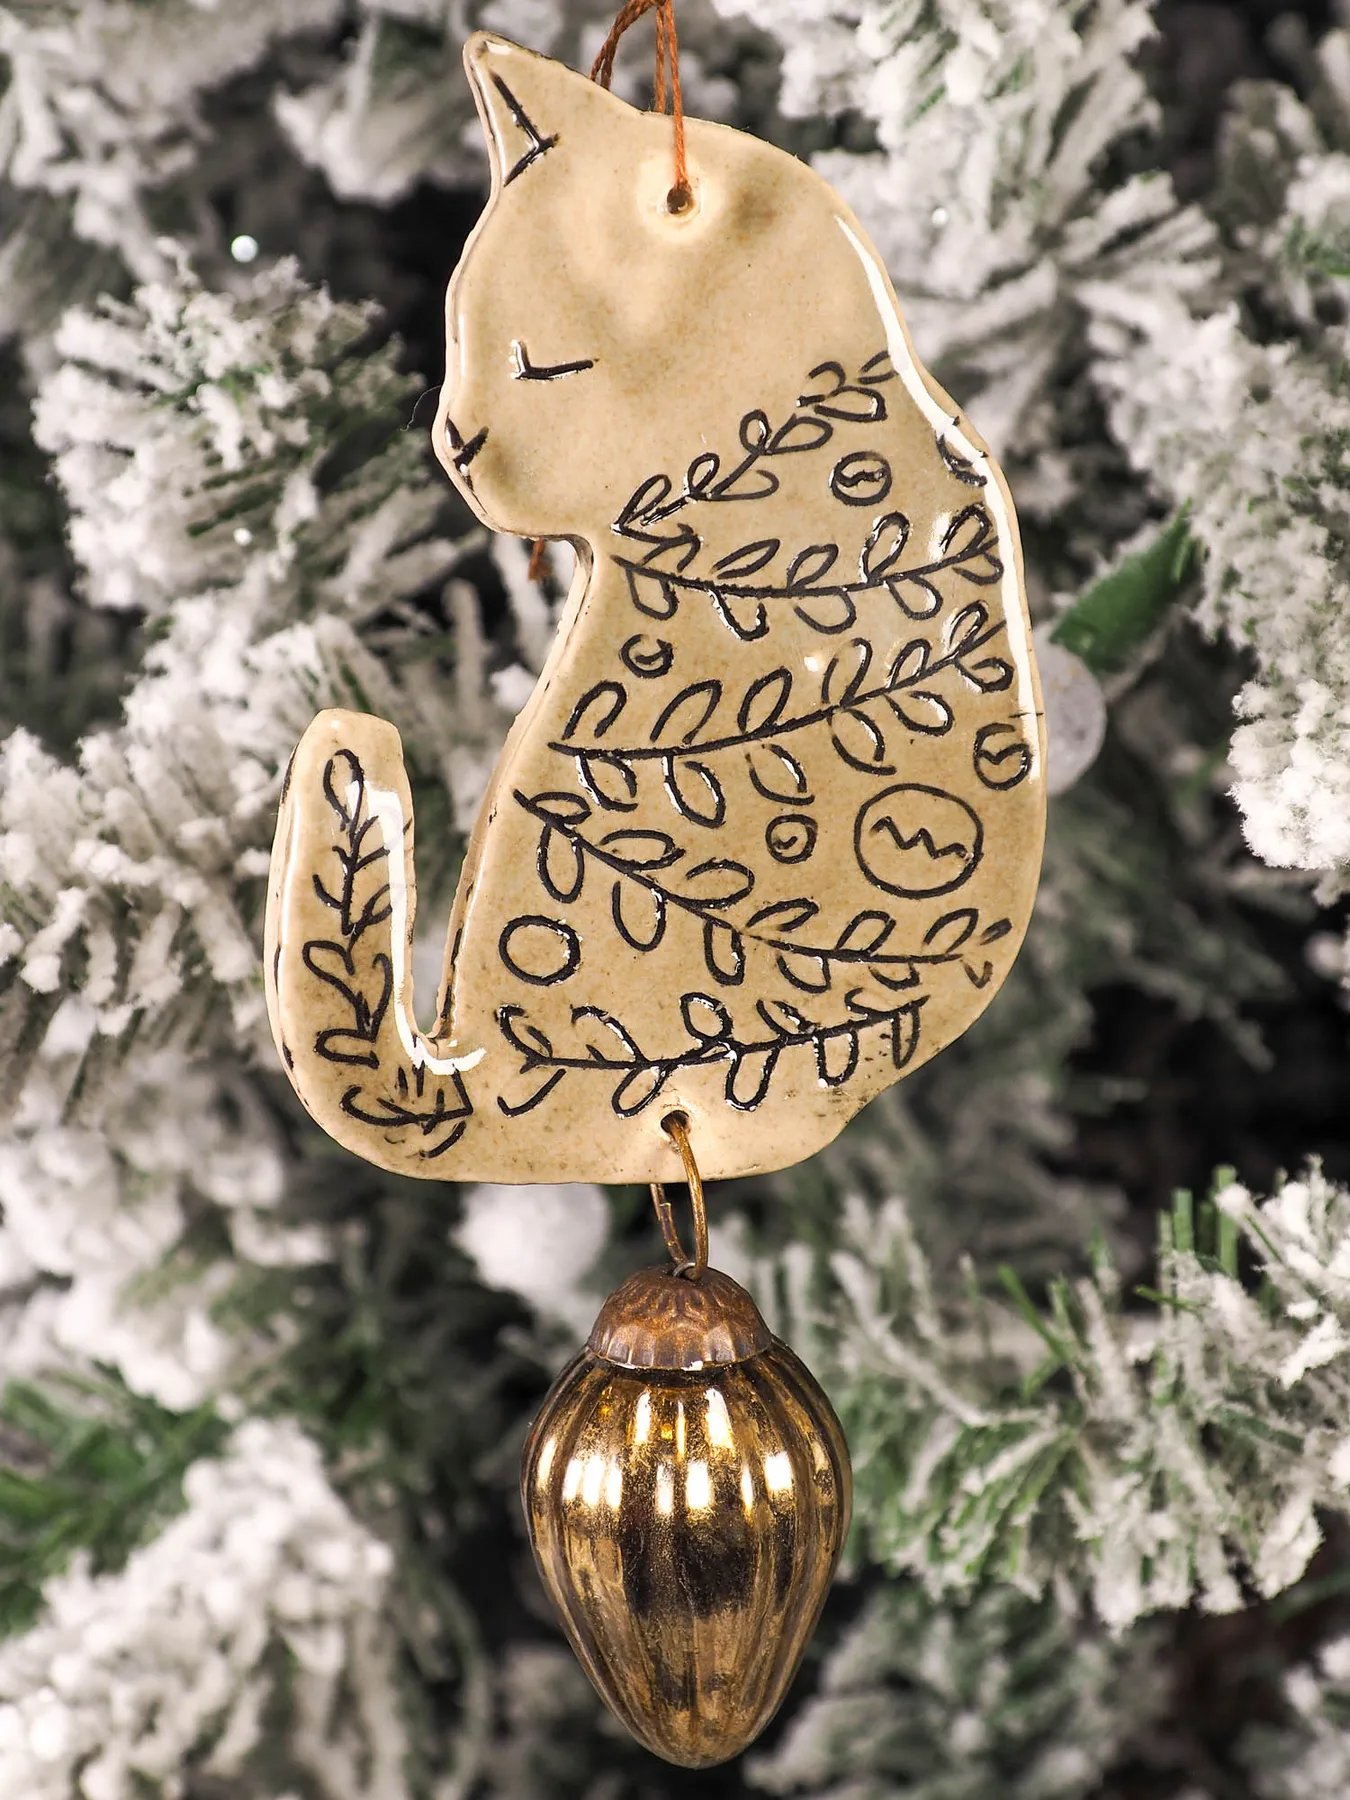
It also solves a real problem: ceramic ornaments are heavy and hang low, so the space beneath them usually goes to waste. A light dangle gives that dead space a job. Try it with a bead, a bell, or a small wooden tag.
- Weigh the finished ornament — ceramic over 4 ounces needs a doubled hanger loop.
- Choose a firm interior branch or a wooden dowel, never a spindly tip.
- Test the dangle length against the ornament’s height. Half the height is the sweet spot.
- Confirm your light strand won’t rest against the ceramic for hours — heat cracks glaze over time.
Real ceramic runs $30 to $60 from a studio potter. Air-dry clay gets you 90 percent of the look for about $12 a block, which makes six ornaments. Roll to a quarter inch, cut with a template, and press a botanical leaf into the surface while it’s soft. Sand, paint, and seal with a clear glaze spray — nobody’s inspecting at ornament distance.
24. A Petite Evergreen Wreath With a Rust Velvet Bow
Three elements, three very specific proportions: roughly 70 percent dark evergreen, 20 percent rust velvet, 10 percent white marble. That’s it — no third color, no ornament filler, no sparkle.
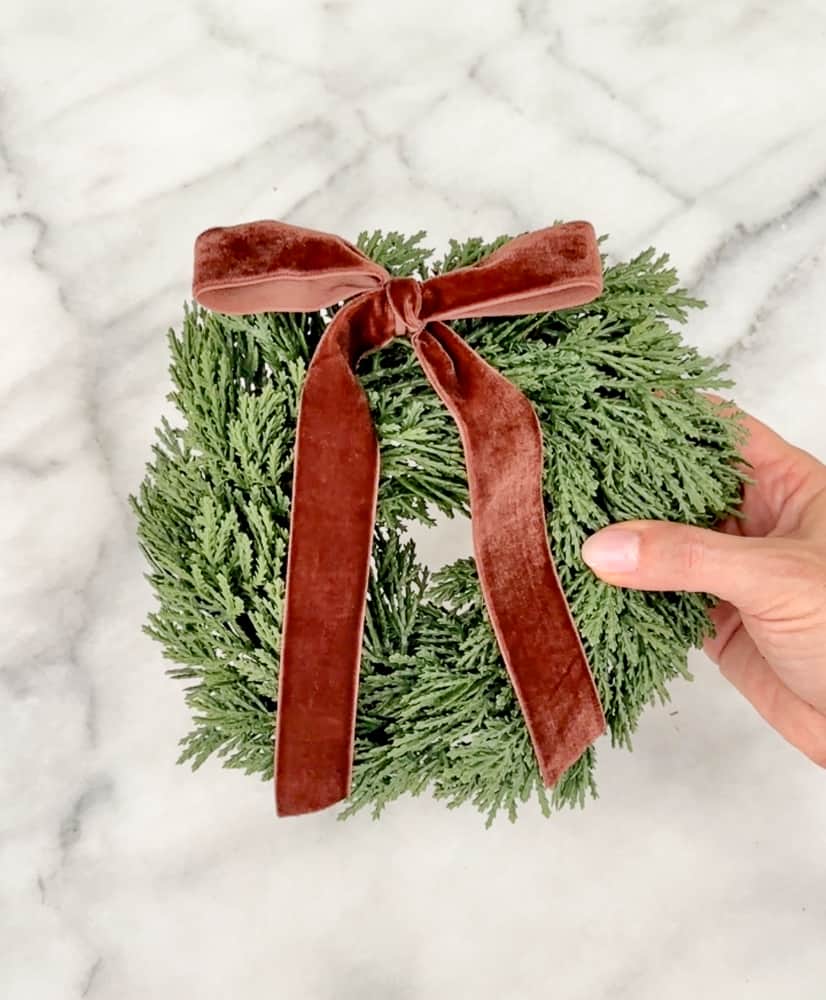
The restraint is what makes it feel expensive. Swap rust for deep aubergine and it turns formal; swap for olive and it goes relaxed. Keep the 70/20/10 split and you can move the whole thing from traditional to modern with one ribbon change.
Fresh evergreen wreaths drop needles for about three weeks and then keep dropping them. Expect a daily sweep, and expect the foliage to dry from the outside in unless you mist it every other day.
Want the same look without the upkeep? A faux evergreen wreath with a quality velvet bow gives you the dark green mass and the rust accent with zero maintenance — just a yearly dusting with a hair dryer on cool. Real wins on scent for two weeks; faux wins on everything after.
25. A Yarn-Wrapped Craft Stick Tree With Vintage Buttons
Everything in this ornament comes from a dollar store except the yarn. Craft sticks, buttons, baker’s twine, and burlap ribbon for a set of six runs about $9 total. Add one skein of chunky green yarn at $4 and you’re at roughly $2.20 per ornament.
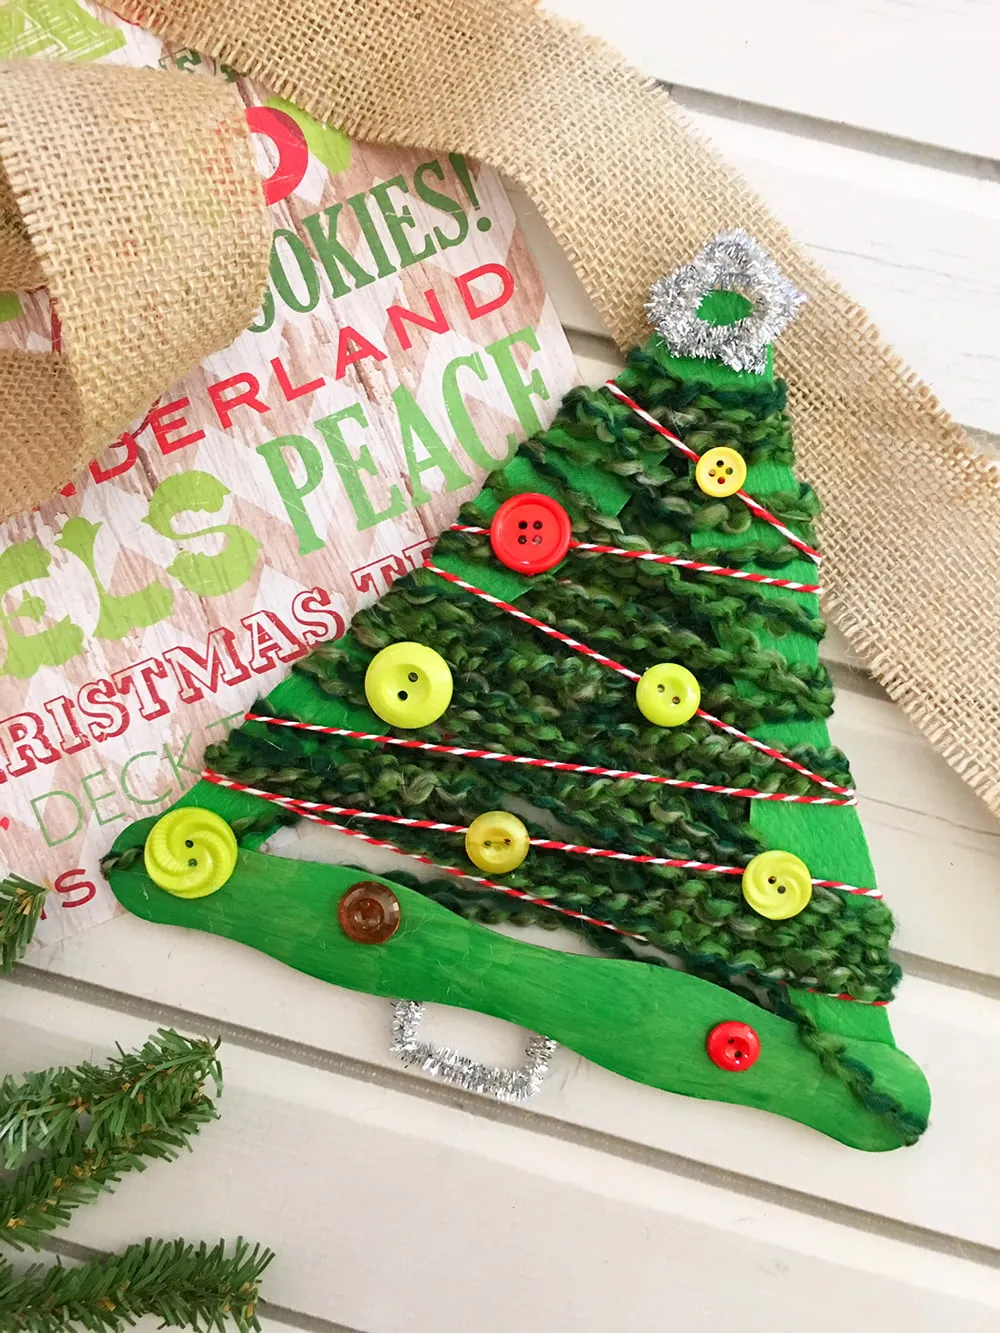
Want to upgrade the look without spending much? Swap plastic buttons for a thrifted wooden button card or a bag of mixed vintage buttons from Etsy. Buttons are one of those materials where old reads visibly better than new.
Wrapping is the entire technique, and it goes fast once you’ve done one.
- Glue three craft sticks into a triangle and let it set ten minutes.
- Secure the yarn tail on the back with a dot of glue before wrapping.
- Wrap tightly in one direction, pushing each row against the last, until the sticks are covered.
- Switch to baker’s twine for the final few rows to create a stripe near the base.
- Twist a silver pipe cleaner into a star and hot glue it to the top point.
- Glue buttons on last, in odd-numbered clusters of three or five.
About 25 minutes each, and a great project for kids over eight.
Twenty-Five Ornaments, One Very Good December
You don’t need a craft room, a scroll saw, or a fortune in supplies — most of what’s here starts with a few sheets of felt, some scrap yarn, and an evening you were going to spend scrolling anyway. Pick one project, make three, and let the collection grow year over year. The tree always looks better when half of what’s on it has a story.
📌 Pin your favorite ideas now so you can find them again when the craft store run happens.