
DIY advent calendars are having a major moment on Pinterest right now — and one look at the fabric trees, pegboard tags, and tiny numbered drawers explains why. We spent serious time browsing Etsy, Michaels, and Target to bring you only what’s worth your attention this year, from about $12 craft-paper versions to $260 heirloom-style wooden calendars. Inside you’ll find 29 curated ideas across rustic, traditional, whimsical, and modern-minimal styles, with budget and luxury versions compared side by side so you can pick your lane. In 2026, the shift is toward handmade, reusable, display-worthy holiday decor — pieces that earn their spot on the wall, not just for one December but for years. And stay until the end — we break down the most common mistakes that can ruin these looks. This post may contain affiliate links, which means we may earn a small commission at no cost to you. 📌 Save this to Pinterest for later — you’ll want to revisit these ideas.
1. Fabric Tree Calendar with Polka-Dot and Gingham Pockets
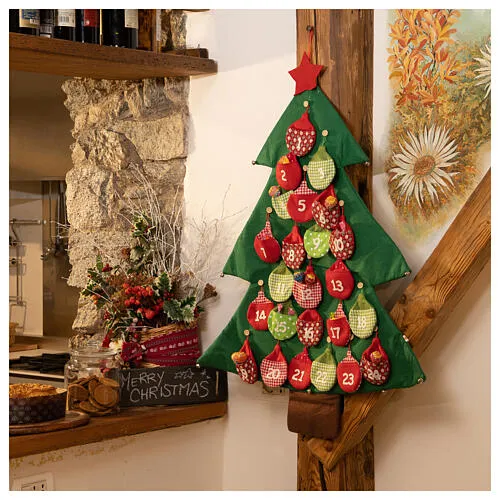
Recreating this kitchen-corner calendar is mostly a fabric-and-trim project. A ready-made tree panel runs $35–$65; felt, gingham, and polka-dot fabric add $18–$30; number stencils or iron-on digits $8–$14; a star topper and red berry foliage $12–$22; mounting rod and hardware $10–$18.
- Calendar base and pockets: $35–$65
- Fabric and number supplies: $26–$44
- Star topper and red berry sprigs: $12–$22
- Mounting rod and hardware: $10–$18
- Budget alternative: use a thrifted felt tree panel and cut pockets from an old wool skirt — saves 40–60%.
- Total: $83–$149
Hang the calendar so the bottom row sits 36 to 40 inches above the floor if kids will reach it. That keeps small hands from stretching, and a 48-inch tree still leaves the top row visible to adults. If your wall is paneled like this kitchen corner, predrill pilot holes and use a French cleat instead of a single nail — fabric calendars get pulled every morning.
2. Red House-Shaped Calendar with 24 Illustrated Drawers
Three things make this red house calendar work. First, the house silhouette gives a flat countdown real architecture, so it reads as decor before it reads as storage. Second, the 24 illustrated drawers create repetition with variety — your eye wants to scan every row. Third, the flocked tree behind it supplies a soft, high-contrast backdrop that makes the red pop without competing. Remove the tree and the calendar still works; remove the drawer illustrations and it flattens into a red box.
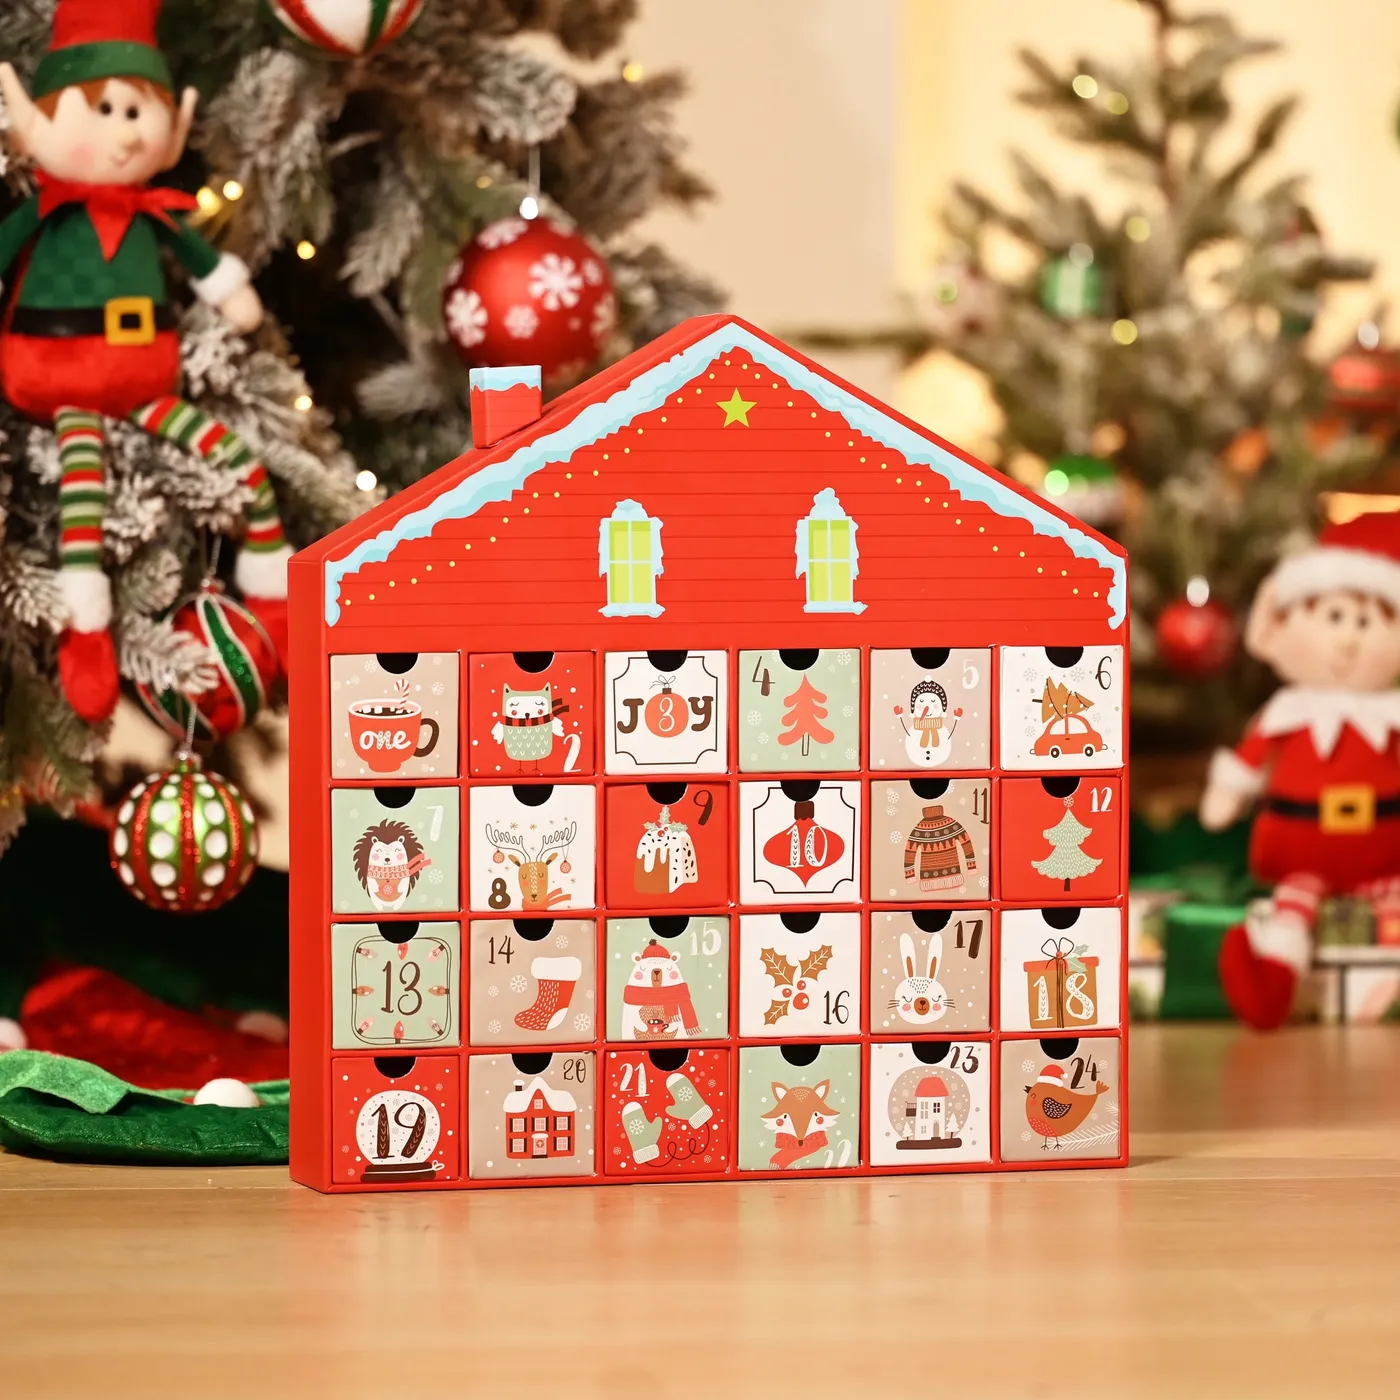
You can get this exact vibe without the boutique price. Start with a cardboard house calendar from Target or Michaels, about $15–$25, then paint the roof and add simple line drawings with a fine-tip marker. A small flocked tree from Facebook Marketplace often runs $20–$40, and dollar-store red and green ornaments finish it. Compare with Idea #22 for a more neutral white-and-gold version.
3. Illuminated Wooden Village Calendar on a Slatted Console
This village calendar needs a console at least 48 inches wide and 14 to 16 inches deep, with 30 inches of wall above it so the pine wreath and tree lights do not crowd the roofline. An entry nook or dining-room corner of roughly 30 to 50 square feet is plenty. If your kitchen window is the only available spot, a narrower hanging arrangement will serve you better.
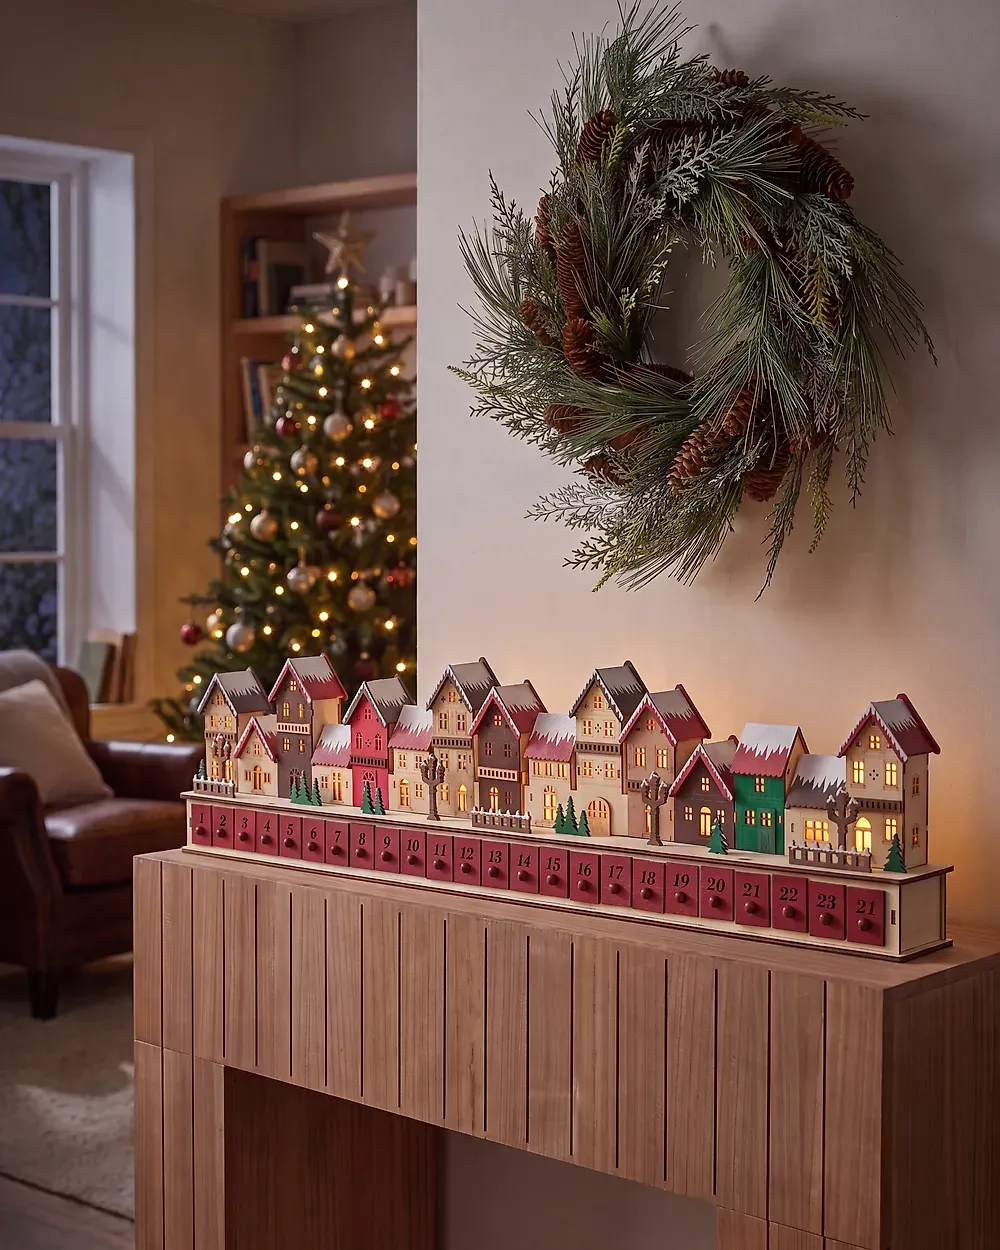
The one detail that makes this scene feel magical is the glow inside the little house windows. Without it, the calendar is a charming wooden object; with it, the village becomes a tiny world after dark. That is why the lights matter more than the wreath or the tree here — they give the calendar a second life in the evening, when everyone is actually home to enjoy it.
4. Pink Envelope Advent Board with Green Satin Ribbons
The formula is 60% light wood, 25% pink and red papers, 10% green ribbon, and 5% glossy baubles. Keep the wood tone pale and quiet so the envelopes can do the talking. To swap the palette, change the paper to blue and white and the ribbon to silver — the proportions stay identical. The green ribbon is doing the same job as a garden hedge: it separates the pinks without muting them.
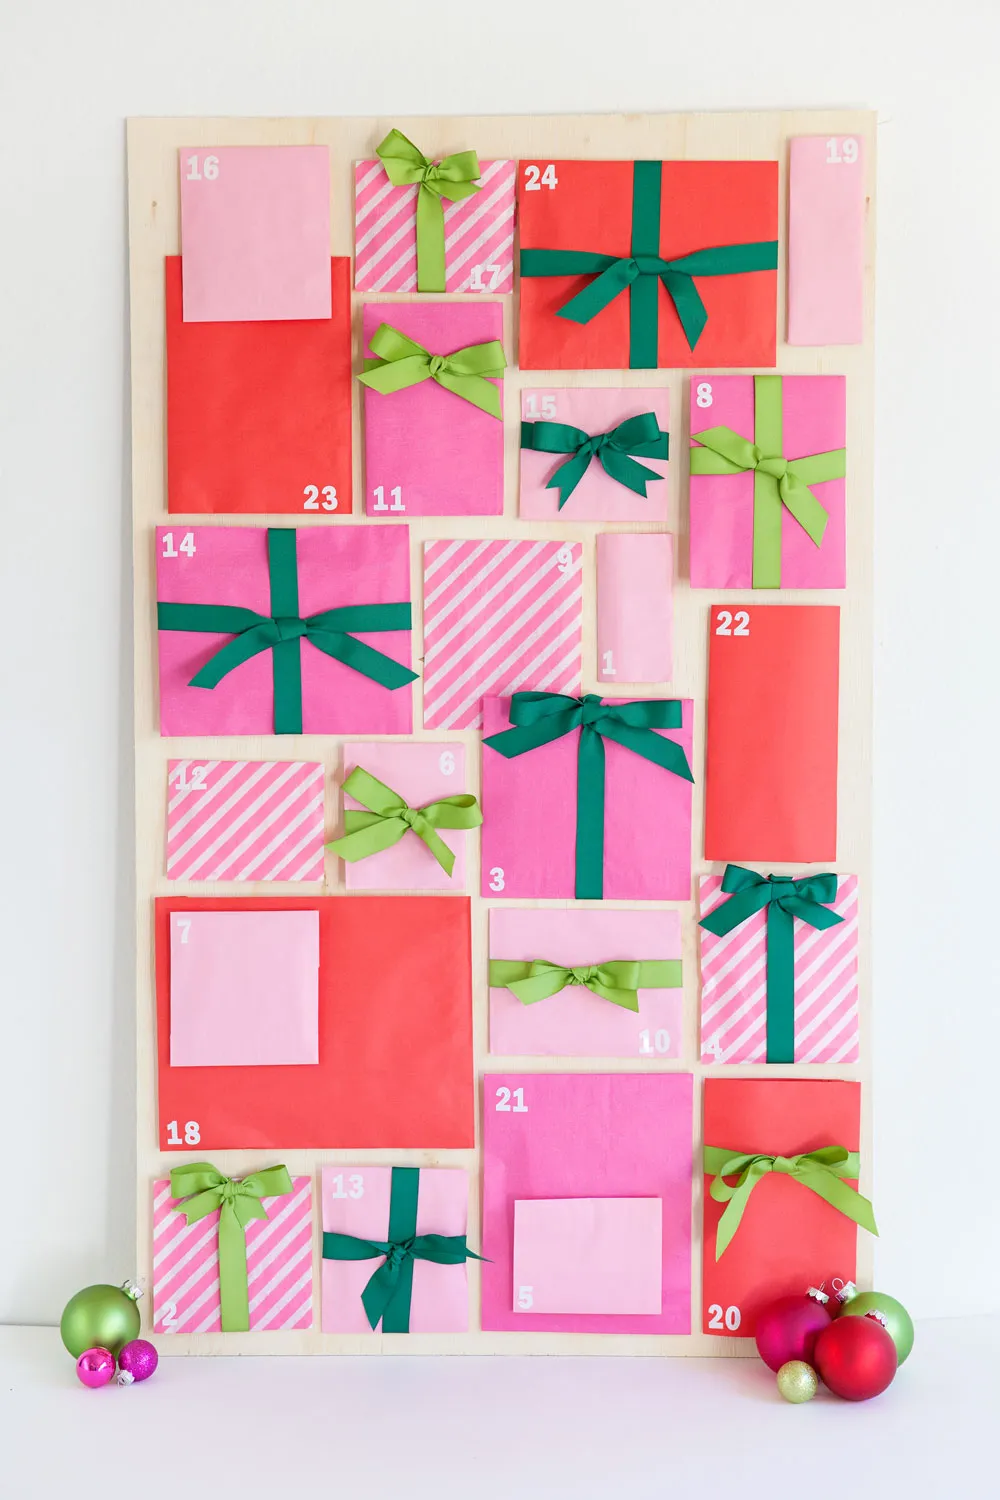
Paper envelopes look effortless until gravity joins the party. Use 110-lb cardstock or reinforce the flaps with double-sided tape, and avoid hanging this board in direct sun or above a radiator. If you have a cat, skip long ribbon tails — they are irresistible. And number the envelopes on the back as well as the front so refilling next year does not become a puzzle.
5. Garland-and-Burlap-Bag Calendar on a Paneled Wall
Make the garland rod first: (1) cut a 36-inch dowel, (2) sand and seal it, (3) attach two cup hooks 16 inches apart, (4) wind pine garland and lights around the rod, (5) tie 24 burlap bags with twine at staggered lengths. Time: about 45 minutes. Materials: $25–$40.
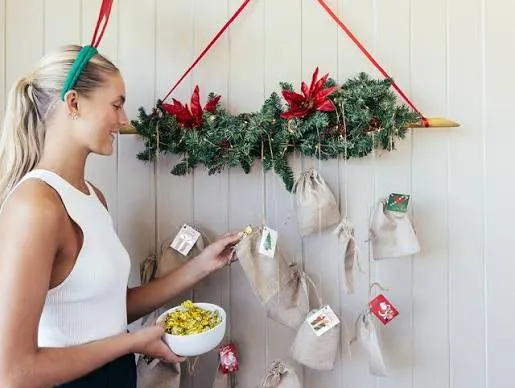
- Cut and seal a 36-inch dowel
- Attach two cup hooks 16 inches apart
- Wind garland and lights around the rod
- Tie 24 bags at staggered lengths
Stagger the bag lengths by 2 to 4 inches instead of lining them up. A perfectly level row reads like laundry; a soft cascade reads like a garland. Keep the longest bags at the center and shorten them toward the ends, and use one tag style so the numbers stay legible against the busy pine and poinsettia.
6. White Board Calendar with Watercolor Number Bags
This is the 2026 version of holiday crafting: watercolor numbers, natural twine, and a white board that can be reused once the bags come down. Pinterest has been pushing softer, handmade countdowns as part of the quiet-maximalism shift — less plastic, more paper texture, and decor that looks good in daylight, not just by tree light. It also photographs beautifully, which never hurts.
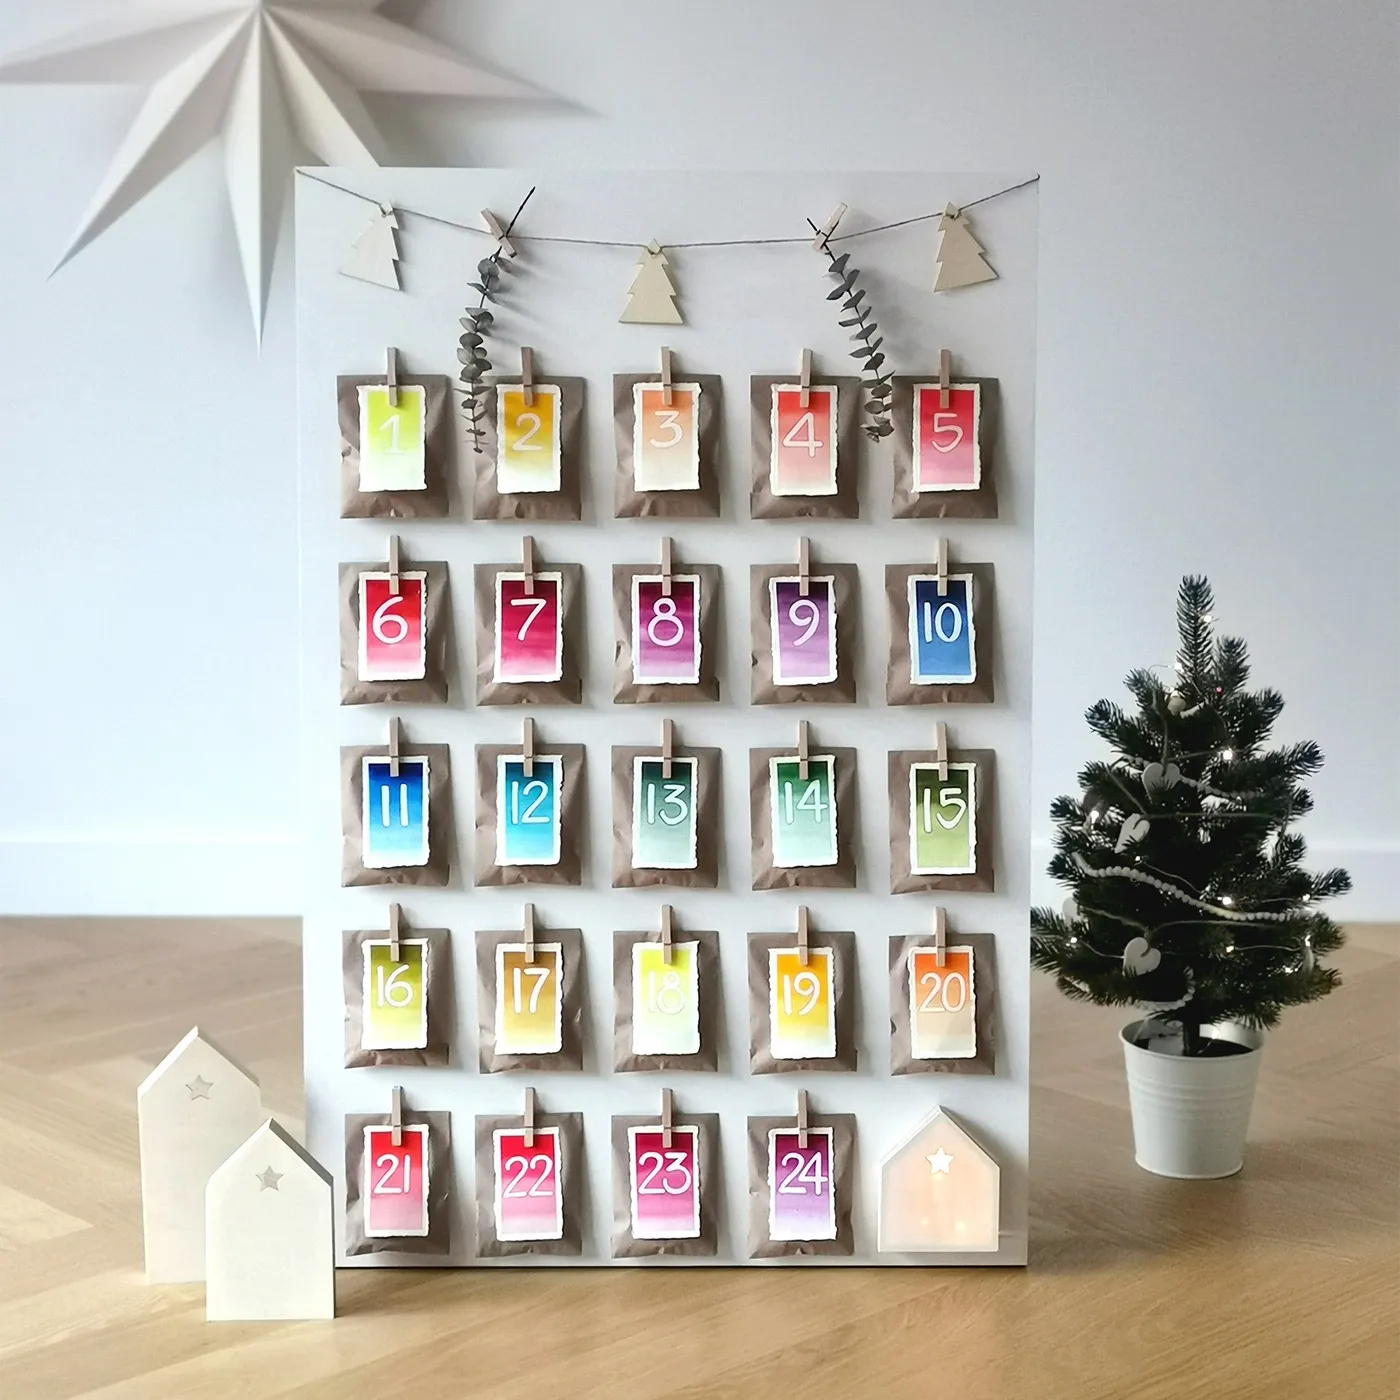
Skip the custom board and use a foam-core sheet from the dollar store, about $3. Kraft bags run $6–$10 for 24, watercolor cards $5–$8, and mini clothespins $3. A eucalyptus sprig from the grocery store costs $4 and dries nicely. This is the budget cousin of Idea #4 — same clipped-envelope rhythm, softer palette.
7. Green Felt Tree with Paper-Roll Pocket Countdown
To make the paper-roll pockets, cut cardboard tubes into 2.5-inch lengths, cover them with paper, then glue a 2-inch cardstock circle over one end. Leave the other end open and slide a tiny treat or activity slip inside. Number the circles, not the tubes, so you can rotate treats without peeling labels. A 1-inch foam brush and matte Mod Podge give the paper a clean, painted finish.
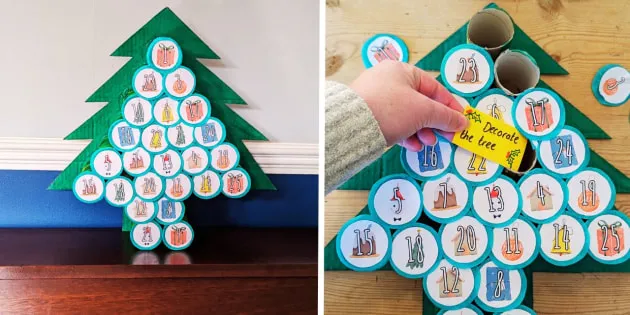
This tree shape works best on a wall at least 30 inches wide, because the finished calendar runs about 28 by 36 inches. It needs a clear ceiling height of 7 feet and should sit 4 to 6 inches above the nearest table or bench. A narrow hallway wall of 24 inches will feel cramped; a pantry door or the side of a cabinet is a better fit.
8. White House Calendar with Painted Windows and Moss Base
Preserved moss looks magical but does not love humidity. Keep this display away from steamy kitchen windows and mist it only if the package says to. If kids will play with the toy cars and figures, glue the trees down but leave the cars loose — otherwise the village gets rearranged daily. A tray underneath makes the whole scene easy to move for cleaning.
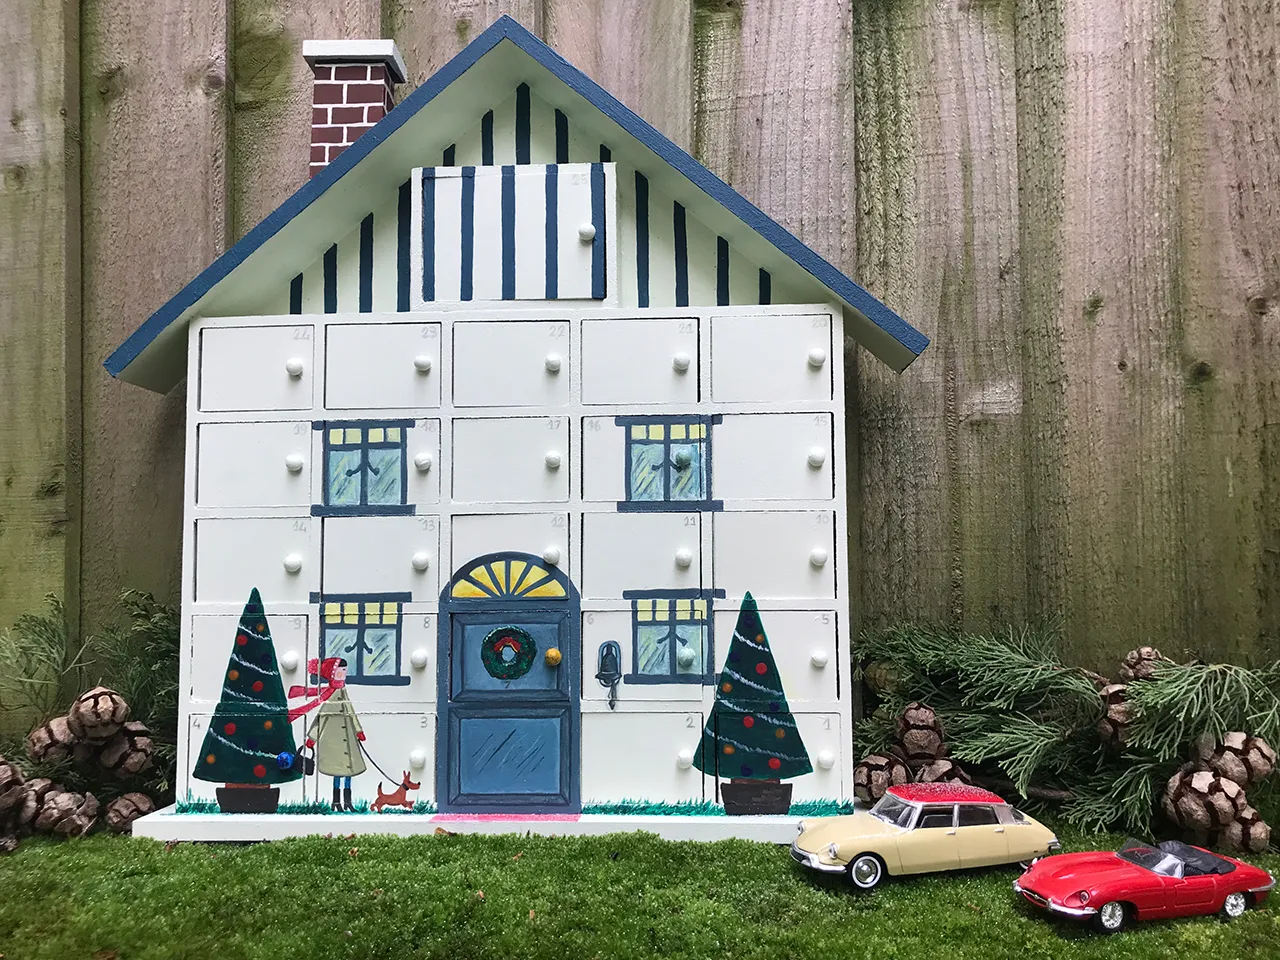
The charm here comes from scale contrast: a house-shaped calendar the size of a shoebox, tiny trees, and toy cars that make the whole thing read as a miniature world. The blue roof also gives the white house a crisp outline against the moss. Remove the moss base and it is just a drawer box; keep it and the calendar becomes a little story you want to touch.
9. Dark Green Tree Calendar with Illustrated Winter Drawers
The detail that elevates this tree is the mix of illustrated drawers and plaid drawers. The winter motifs — pinecones, boots, a cardinal, a sled — give each day a small surprise, while the plaid drawers keep the whole thing from feeling like a sticker sheet. The wooden knobs are the quiet hero: they make every drawer feel pullable, even before you fill it.
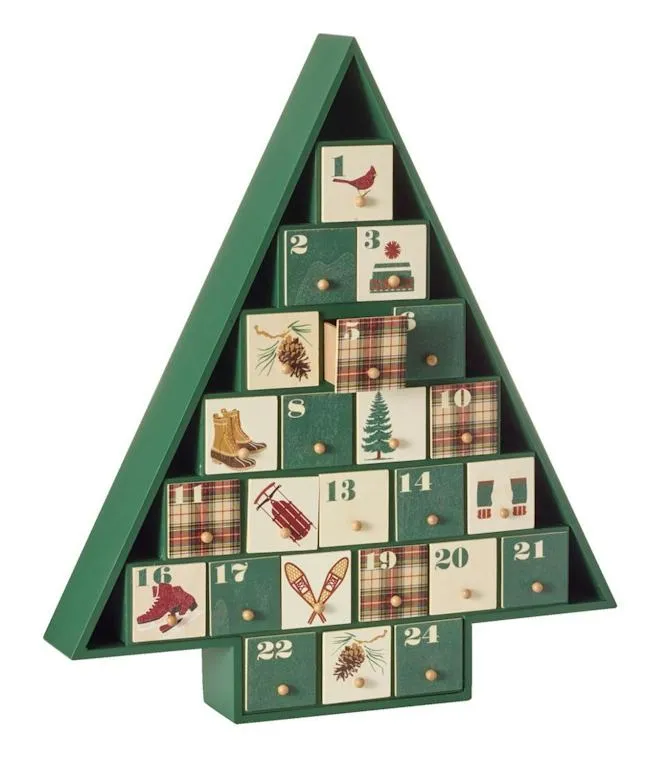
Paint a bare wooden tree calendar from a craft store, about $18–$25, in a dark green sample pot. Add small wooden knobs from the hardware aisle, $6 for 24, and print winter illustrations on sticker paper. A plaid ribbon wrapped around a few drawer fronts fakes the patterned drawers for almost nothing. The result is softer and less saturated than a traditional red-and-green calendar.
10. Cardboard Drawer Calendar Styled with Chocolates and Pine
Line each drawer with a mini cupcake liner before adding chocolates or tiny gifts. It keeps foil from scraping the cardboard and makes the drawer feel intentionally styled when someone opens it. If the calendar will be handled daily, reinforce the drawer sides with a strip of washi tape inside — it adds almost no bulk but stops the paper from splitting at the corners.
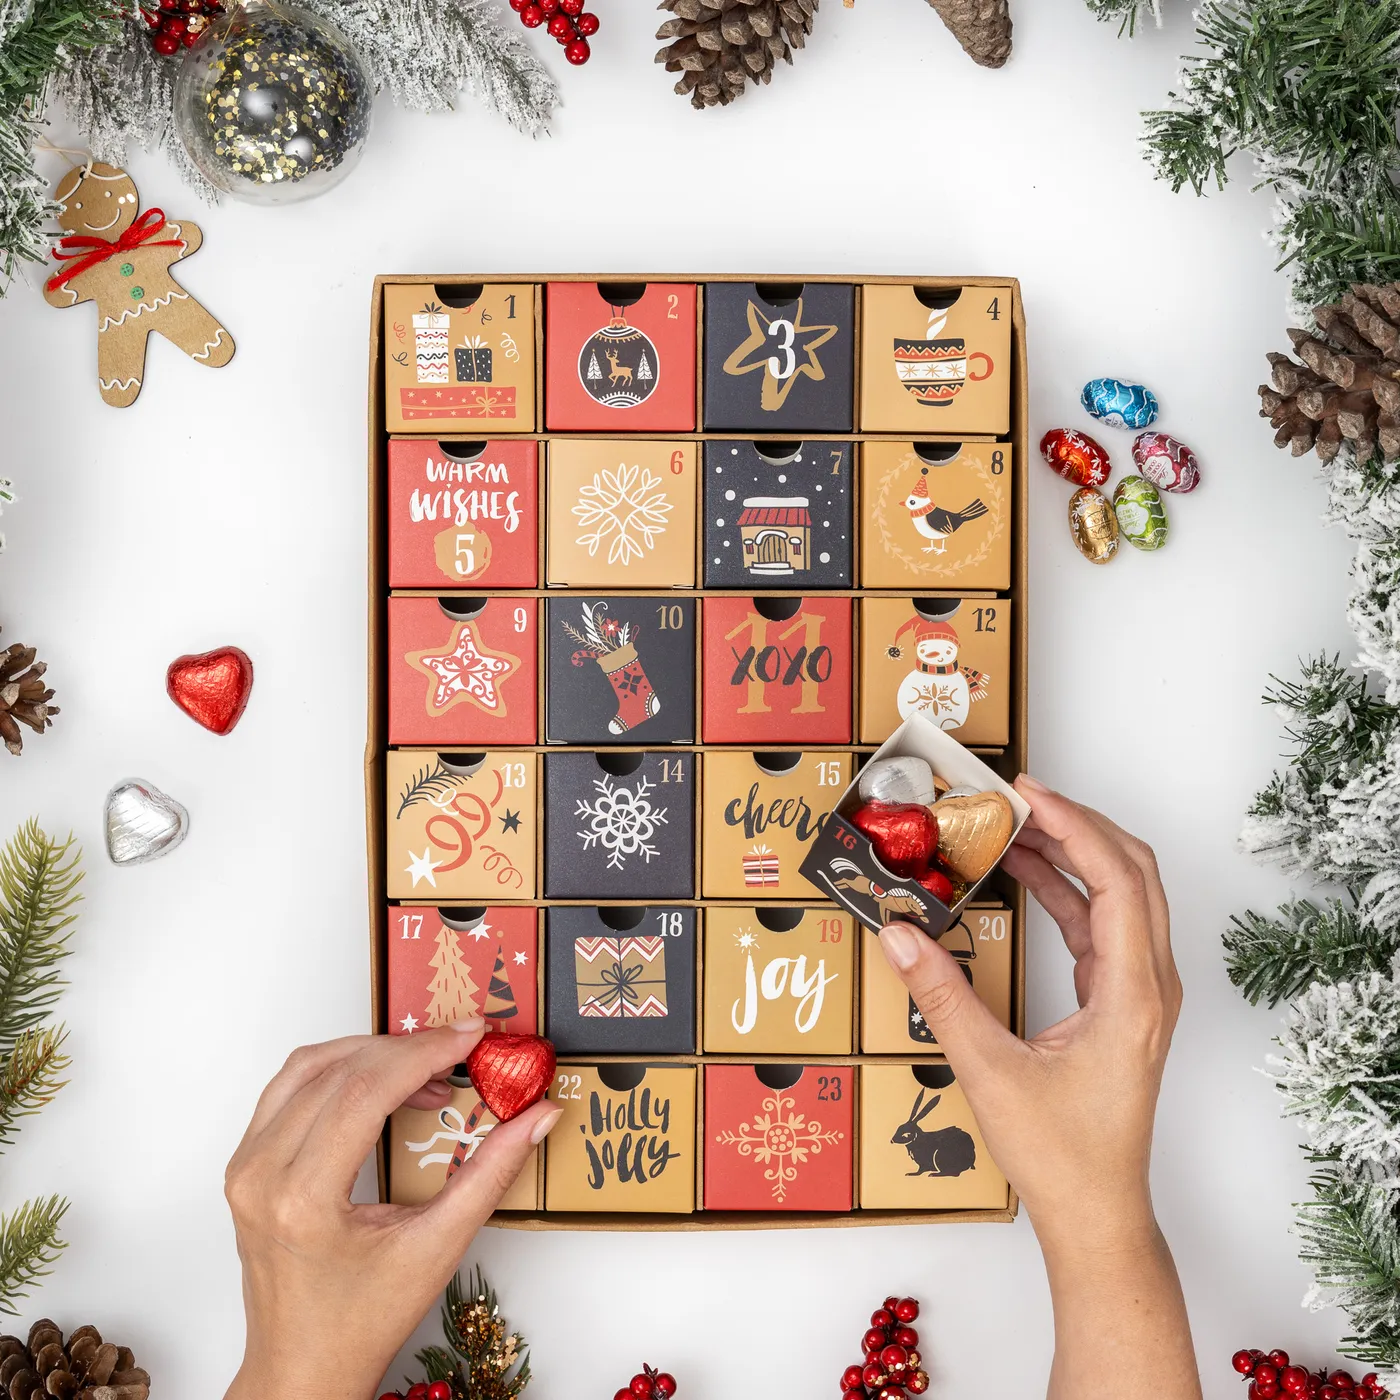
Cardboard calendars are charming and temporary. They dent, soften near steamy kitchens, and will not survive a basement flood. Plan on two to three seasons of use, and store it flat with the drawers empty and a silica packet nearby. If you want heirloom, choose wood; if you want low-stress, cardboard is honestly the easier yes.
11. White House Calendar with Bottle-Brush Trees and Art Supplies
Use 50% white, 30% dark wood, 15% sage green, and 5% warm light. The dark table anchors the white house, the sage bottle-brush trees keep it from looking like a wedding, and the fairy lights add the only sparkle. Swap sage for dusty blue and the scene becomes cooler; swap the dark wood for pale oak and it turns Scandinavian. The percentages stay the same.
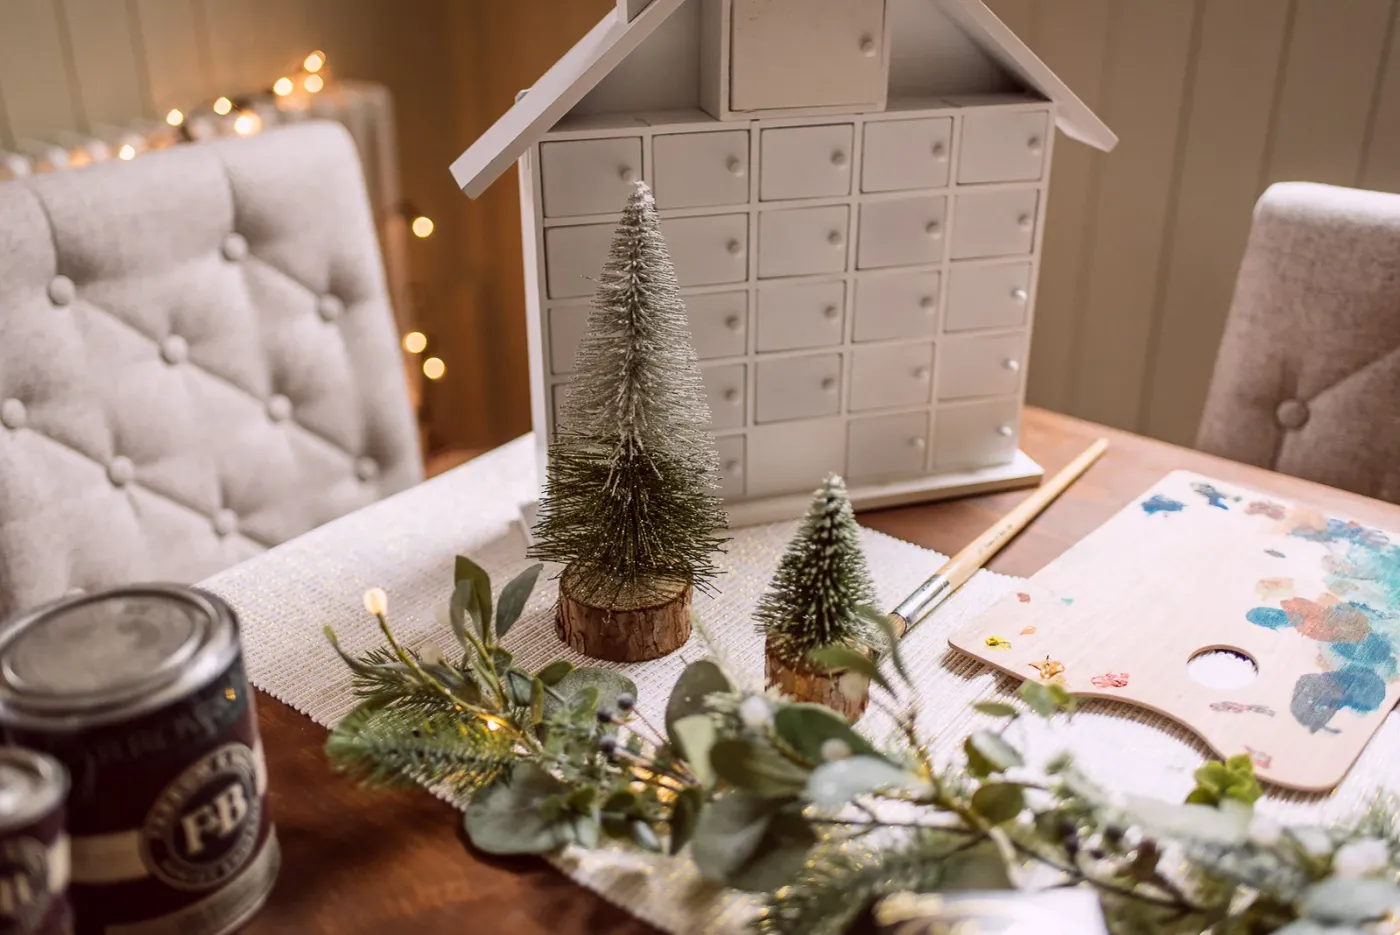
This tabletop setup wants a surface at least 36 inches wide and 20 inches deep, with 24 inches of chair clearance on the working side. It is a dining-room or entry-console idea, not a coffee-table one — the house plus trees plus palette needs room to breathe. For a narrower ledge, scale down to a single row of drawers and one bottle-brush tree.
12. Gingerbread House Boxes on Cloud Shelves with Pink Ribbons
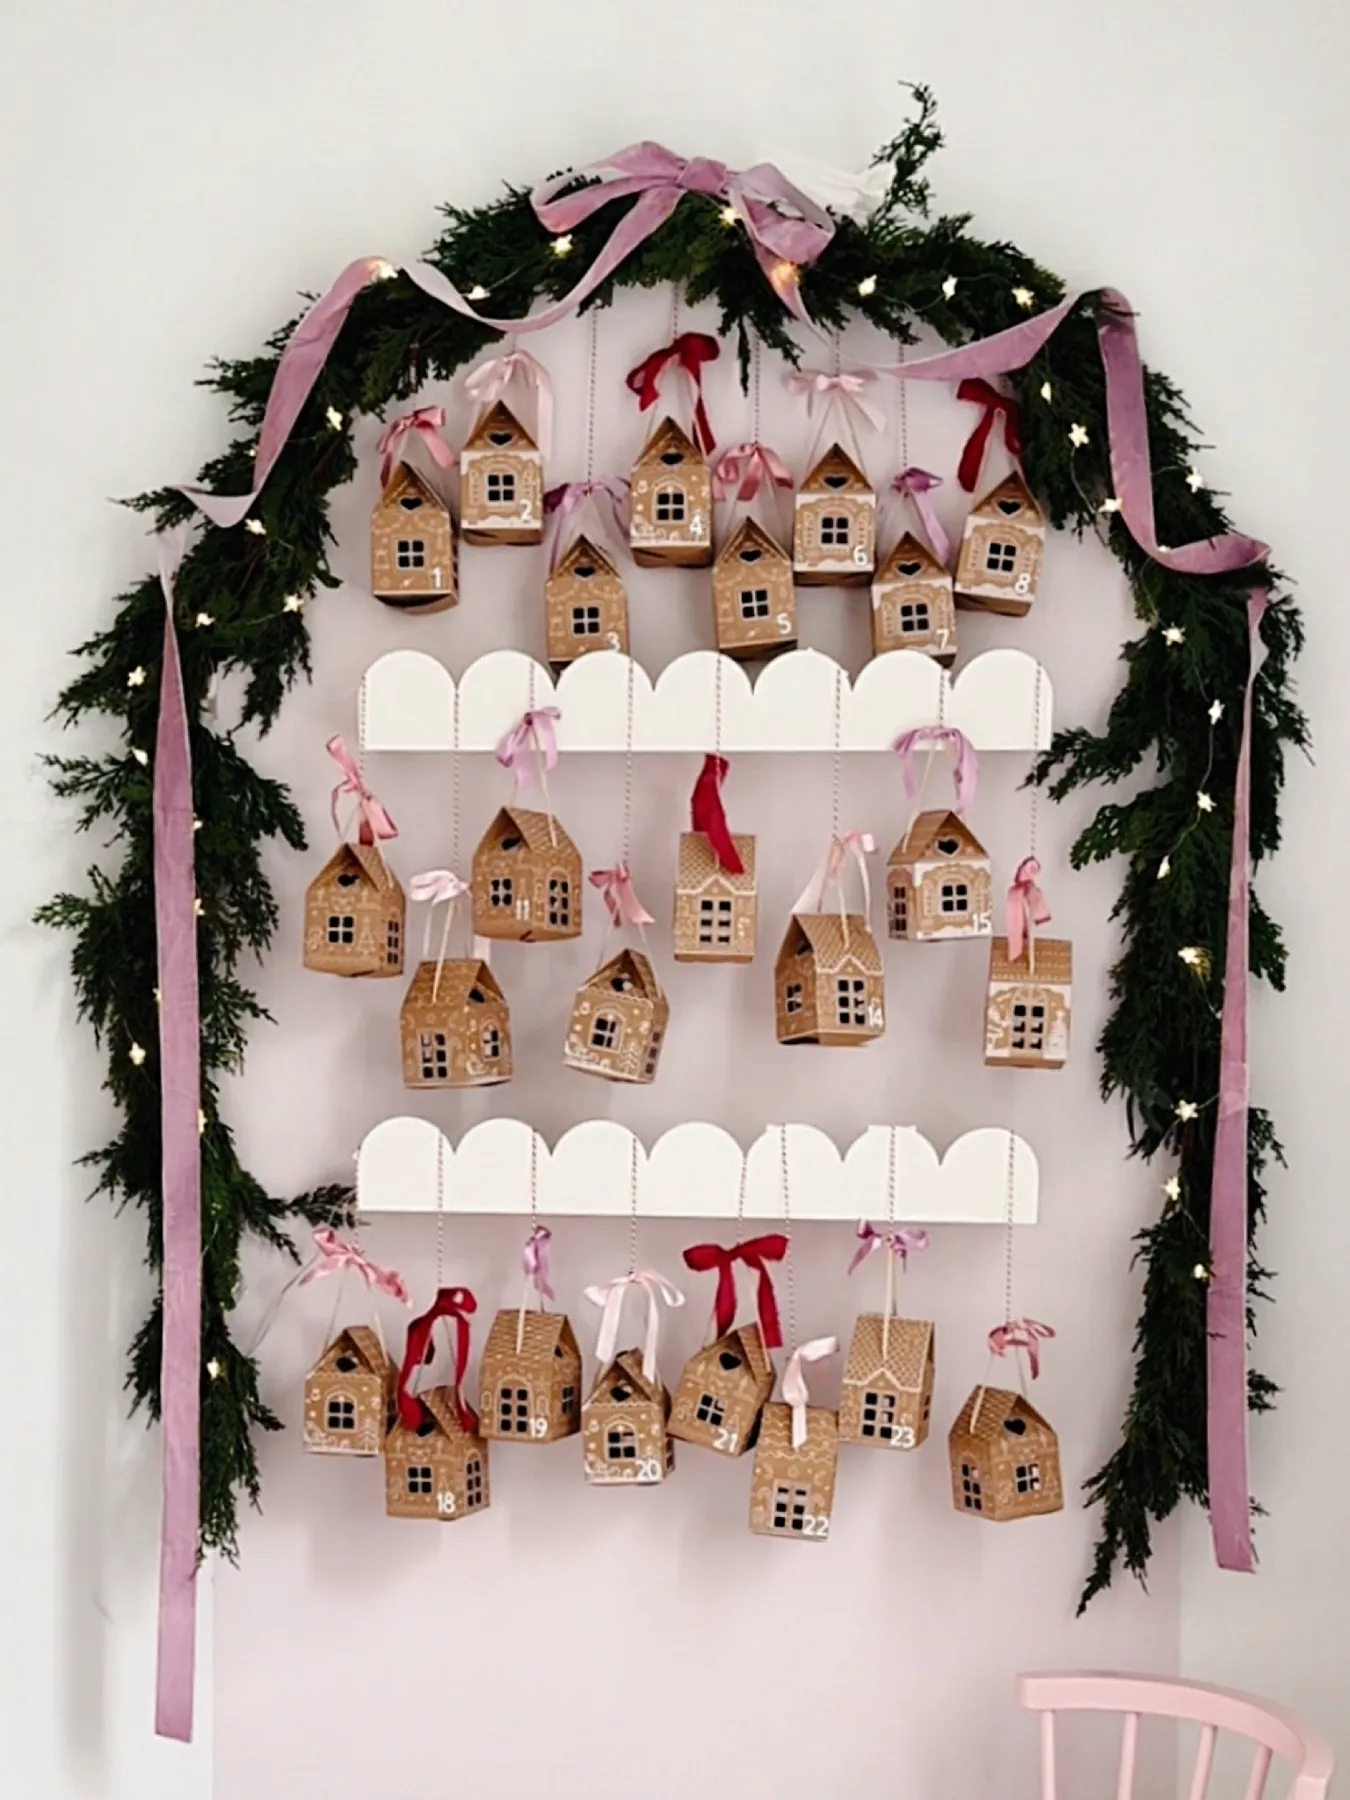
Hang three floating cloud shelves first, spacing them 10 to 12 inches apart on a level line. (1) Mark studs or use toggle anchors, (2) mount shelves, (3) attach pine garland with zip ties, (4) hang the 24 house boxes with ribbon loops, (5) weave in star lights last. Time: about 90 minutes. Materials: $45–$70.
- Mark and mount three shelves
- Attach garland with zip ties
- Hang numbered house boxes
- Weave in star lights
The cloud shelves are the one thing that makes this calendar feel like a scene instead of a grid. They soften the hard little house boxes and give the pink ribbons somewhere to drape. Remove them and you still have 24 cute houses; keep them and the whole wall reads as a whimsical village in the sky. That is the detail worth protecting.
13. Bare-Branch Advent Tree with Hanging White Bags
Branches in a glass vase look effortless, but they tip. Fill the vase one-third with marbles or polished stones before adding water, and keep the arrangement against a wall or in a corner where it will not get bumped. Use battery-operated fairy lights, not candles, and check that the bags are light enough that they do not slide down the branches. If you have cats, skip the dangling strings.
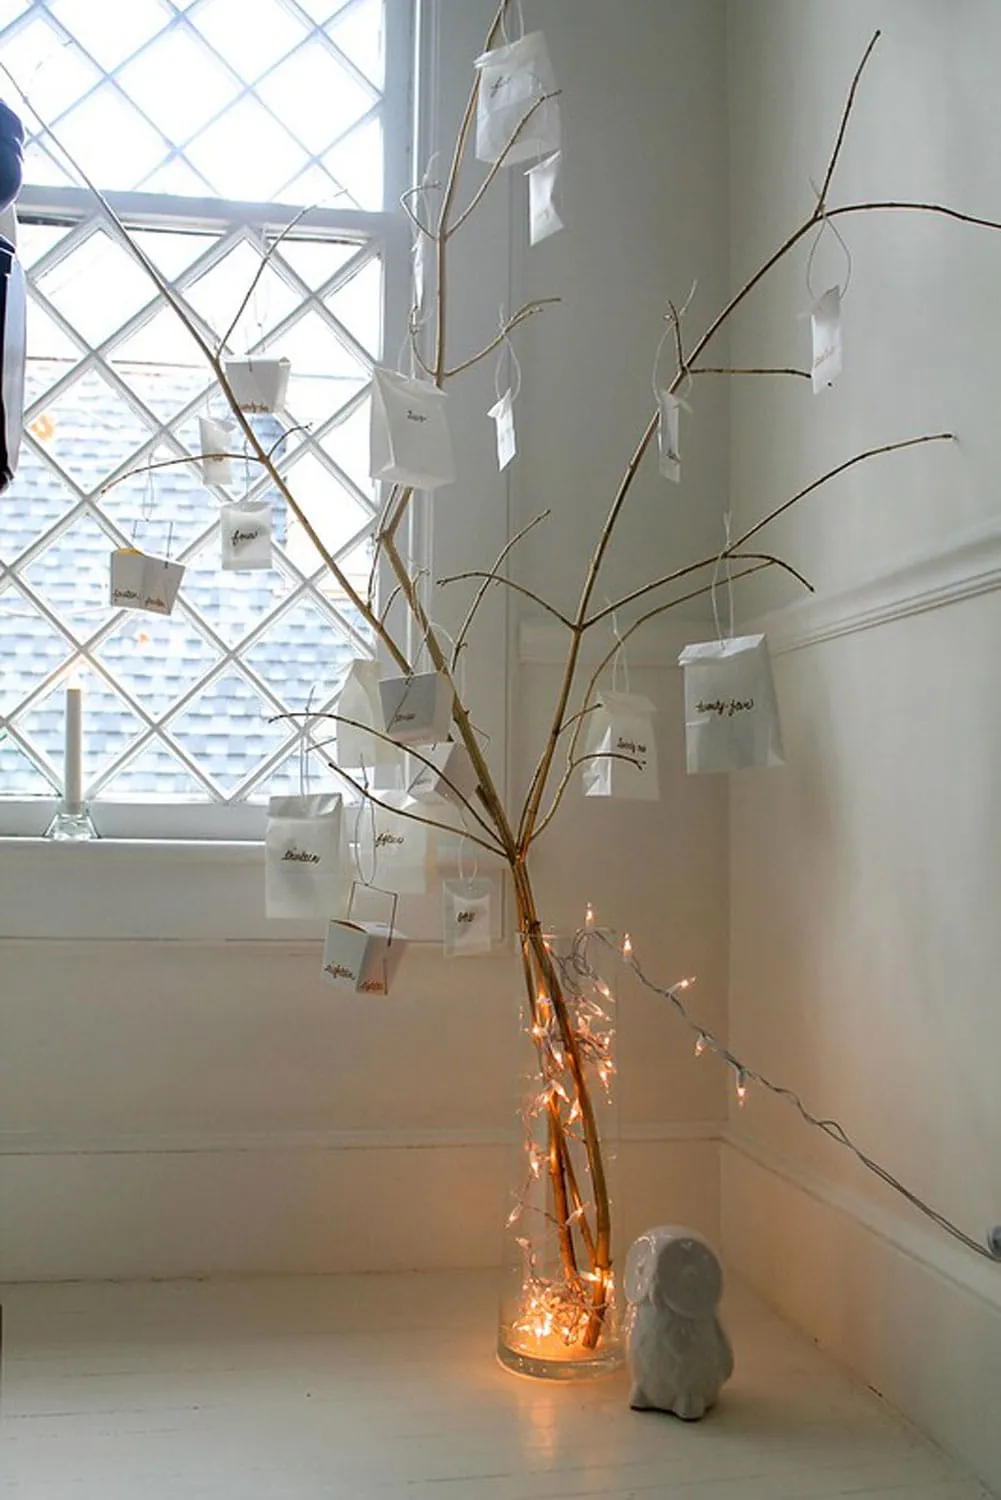
Thrift a clear glass vase for $4–$8, gather branches from your yard, and cut white paper bags from a roll of lunch bags. A string of battery fairy lights runs $6–$10, and a printable number set costs nothing. Total: about $12–$25. If you want a horizontal version, see Idea #24 for a branch-hung pouch countdown.
14. Neutral Fabric Pouches on a Wooden Dowel
For crisp gold numbers on fabric, use iron-on metallic transfer sheets rather than fabric paint. Print the numbers in reverse on transfer paper, cut close to the edges, and press for 15 seconds at 320°F. Space the pouches 3 inches apart on the dowel so the numbers stay readable when the pouches are full. A 1-inch dowel holds 24 small pouches without bowing.
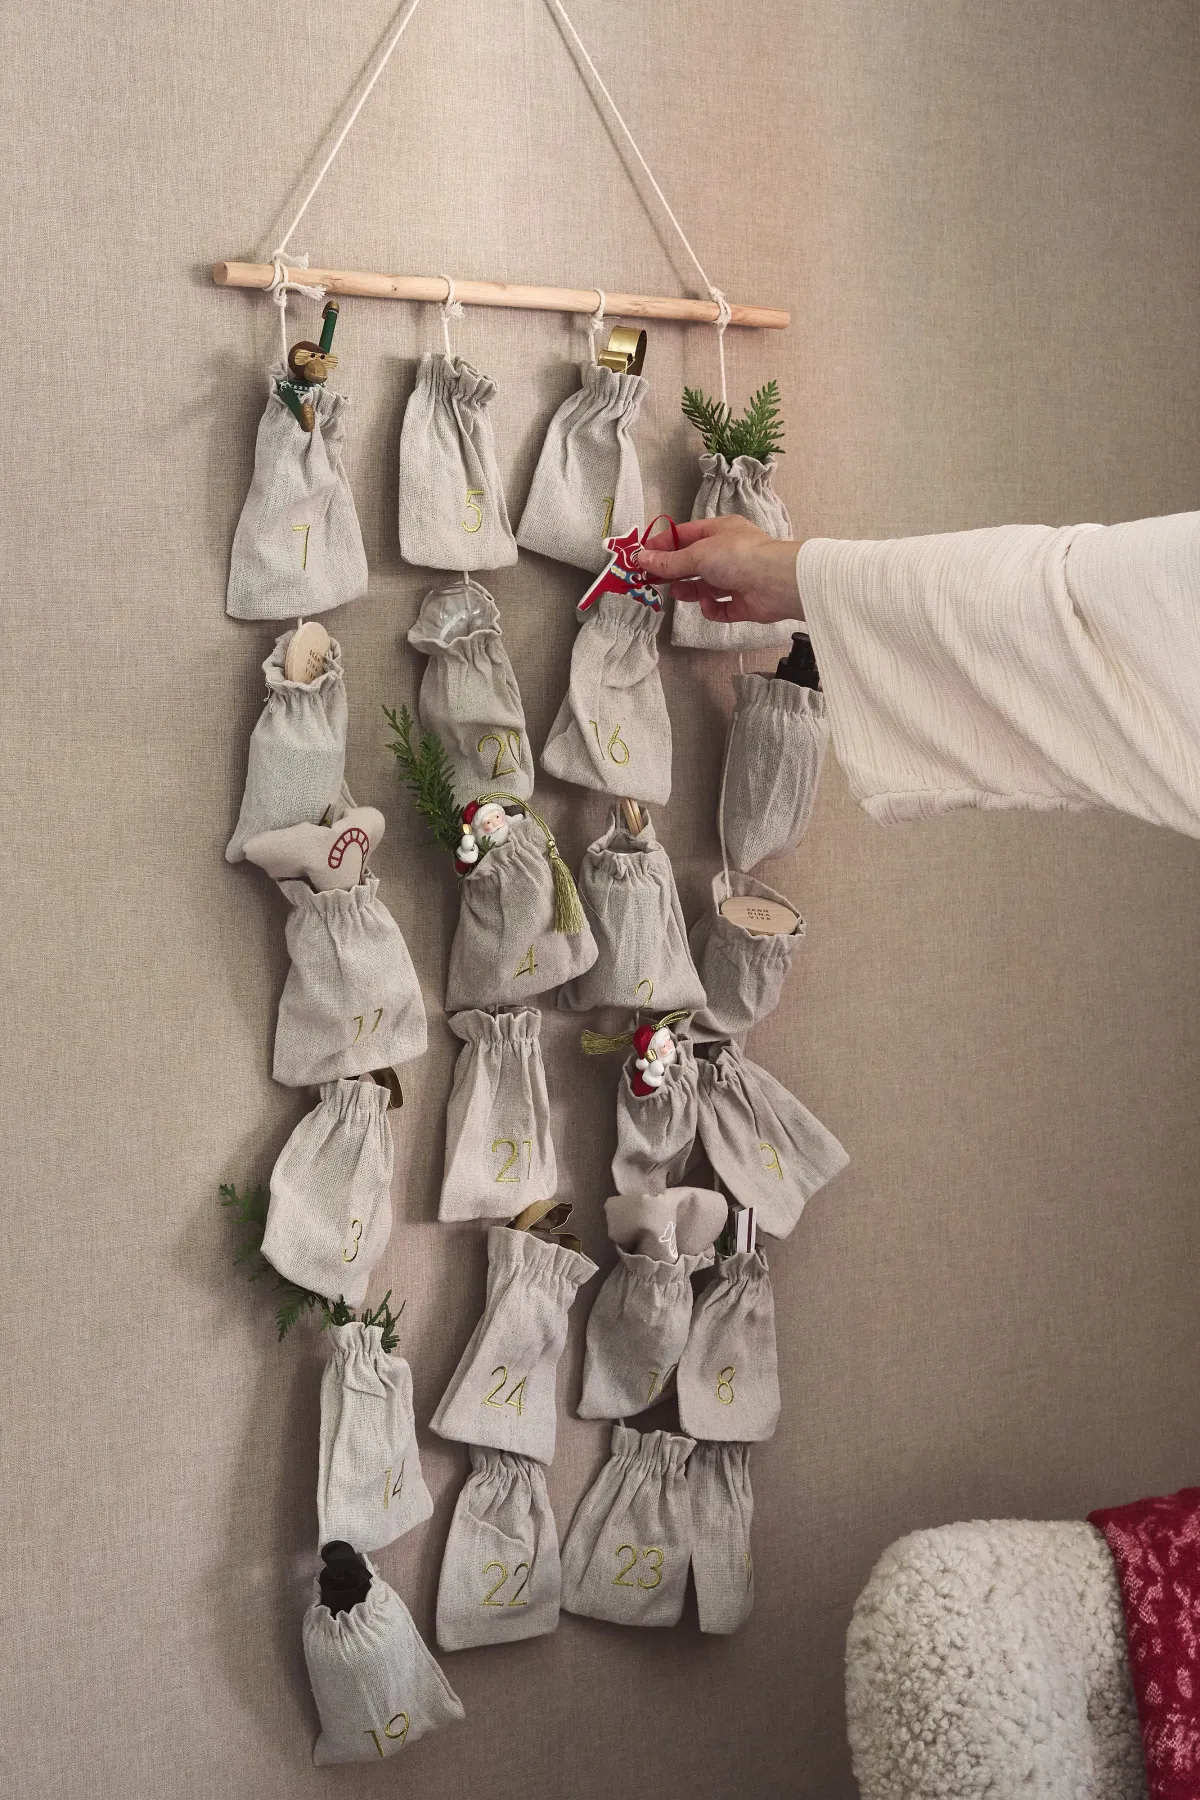
What makes this neutral calendar feel expensive is tonal layering, not contrast. The beige pouches sit against a textured beige wall, the light wood dowel echoes the wall tone, and the gold numbers add just enough shine to keep it from disappearing. It is a lesson in restraint: one material family, one metallic accent, and a handmade texture doing the heavy lifting.
15. Cream Fabric Calendar with Embroidered String Lights
Fabric calendars are washable in theory, fussy in practice. Spot-clean with a damp cloth and mild soap, and avoid soaking embroidered areas — the floss can bleed or fuzz. Keep it out of direct sun so the cream fabric does not yellow unevenly. If the calendar hangs in a busy hallway, expect the pocket edges to soften after a season; that is part of the handmade charm.
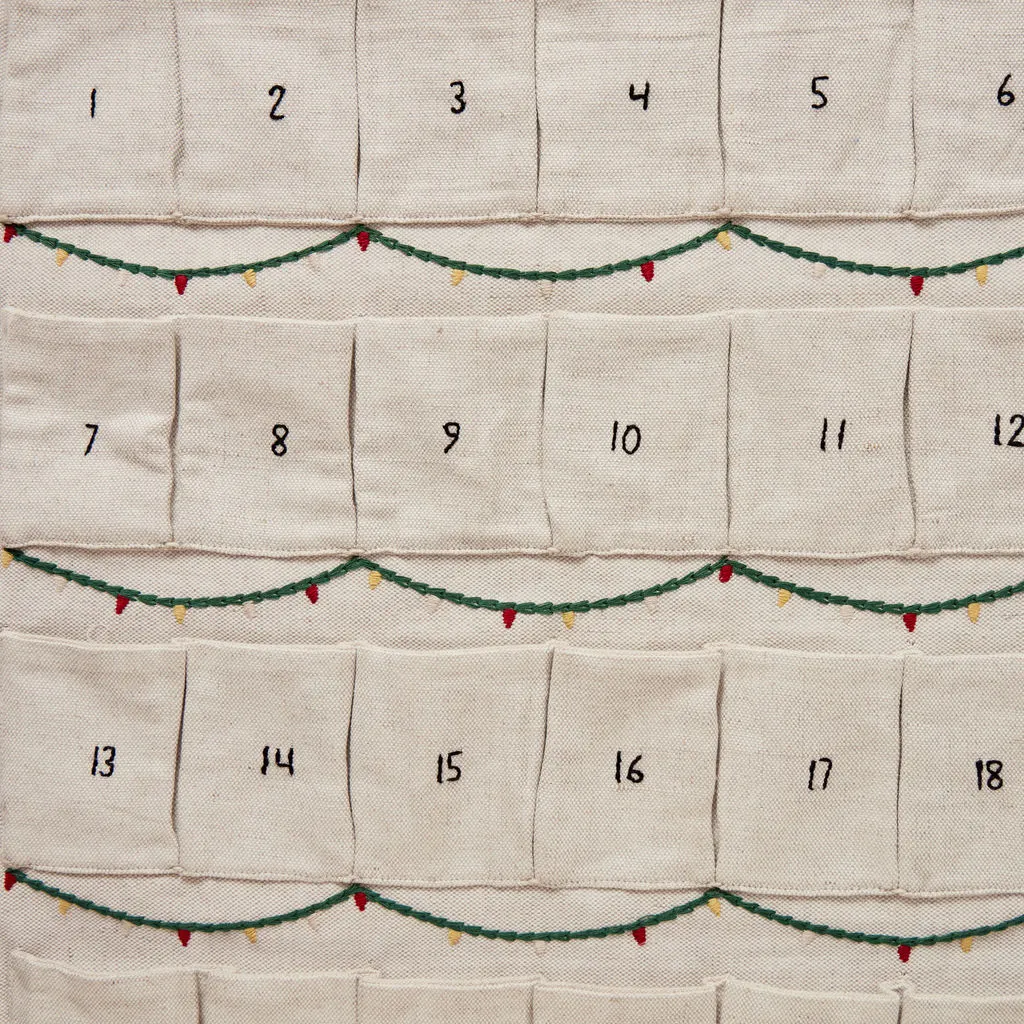
The palette math is 80% cream, 10% dark green, 7% red and yellow, and 3% black. That tiny black percentage is doing real work: it keeps the numbers legible and stops the embroidered lights from turning into candy. Swap the red and yellow bulbs for all-white floss and the same calendar becomes calm and wintery instead of playful.
16. Stacked Illustrated Advent Boxes on a Fluffy White Rug
Use plain cardboard boxes from a craft store, about $1–$2 each, and wrap the sides with patterned paper. Print a grid of numbers on sticker paper for the front. Stack them two high on a fuzzy rug or a thrifted sheepskin, and add a few red-wrapped gifts from the dollar store. Total: $15–$25. The blurry background gifts are optional; the stack is the star.
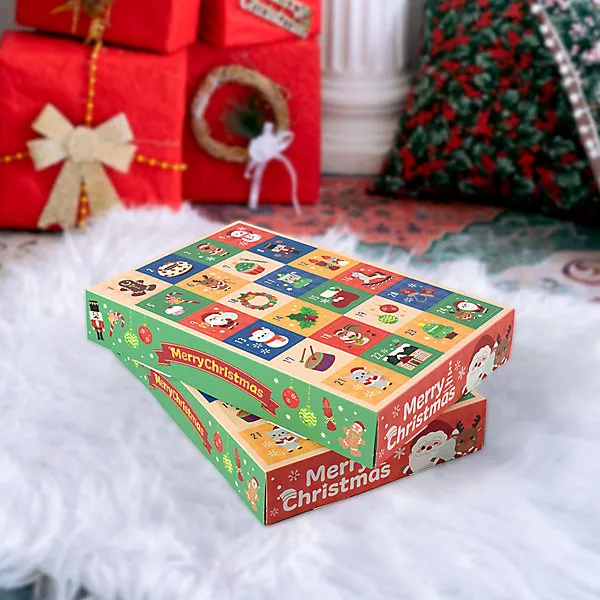
Stack no more than two boxes high and align the front edges. A tall stack looks like storage; a low, tight stack looks styled. Put the heaviest box on the bottom, and use double-sided tape between boxes so the top one does not slide when someone pulls a drawer. If you have toddlers, anchor the stack against a wall or skip it entirely.
17. Dark Pegboard Calendar with Kraft Tags and Pinecones
A 24-by-36-inch pegboard is the sweet spot for this idea. It fits 24 kraft tags in four rows of six with breathing room, and it works on a wall as narrow as 30 inches. Hang the board so the center sits at 60 inches from the floor, and leave 12 inches below for pinecones or a small shelf. For a darker, moodier version, try the same layout on a charcoal wall.
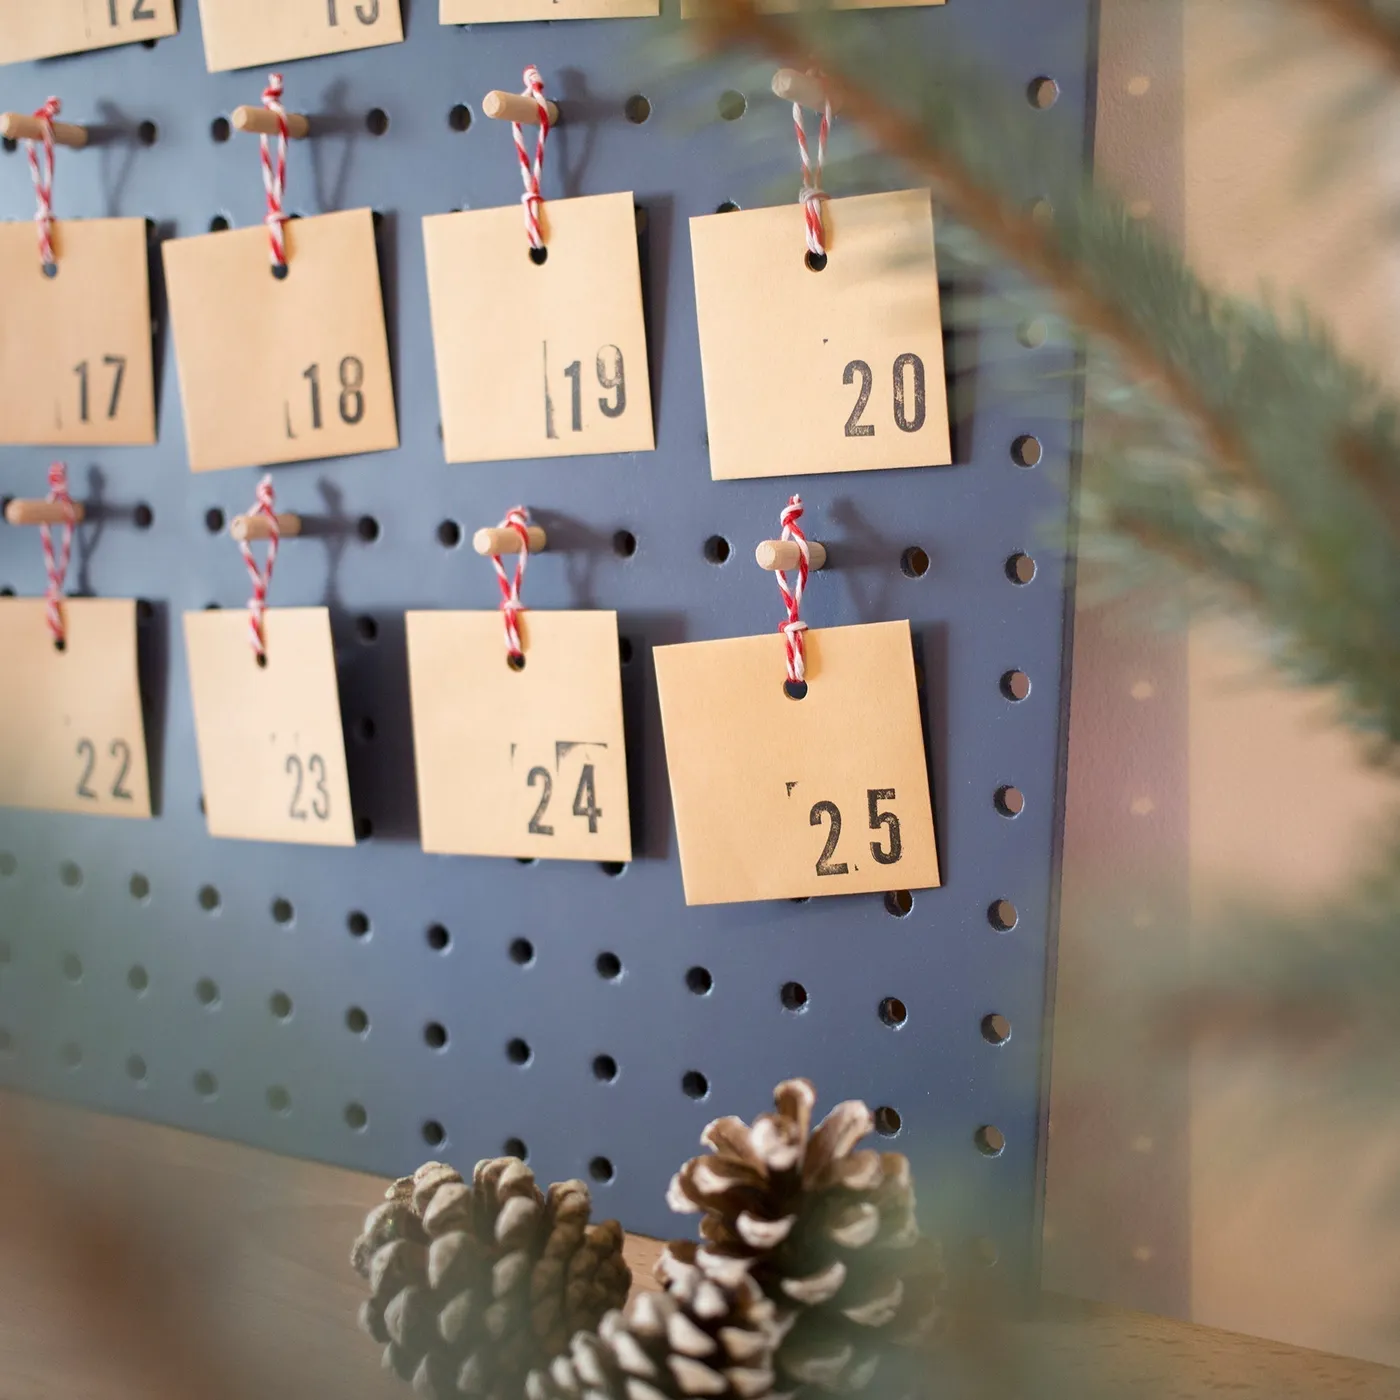
Pegboard pegs have a habit of popping out when you pull a tag. Secure each peg with a tiny dot of hot glue, or use pegboard hooks with a locking tab. Kraft tags also curl in humid rooms — press them under a book for an hour before hanging. And keep the board out of direct sun, or the red twine will fade to pink by New Year.
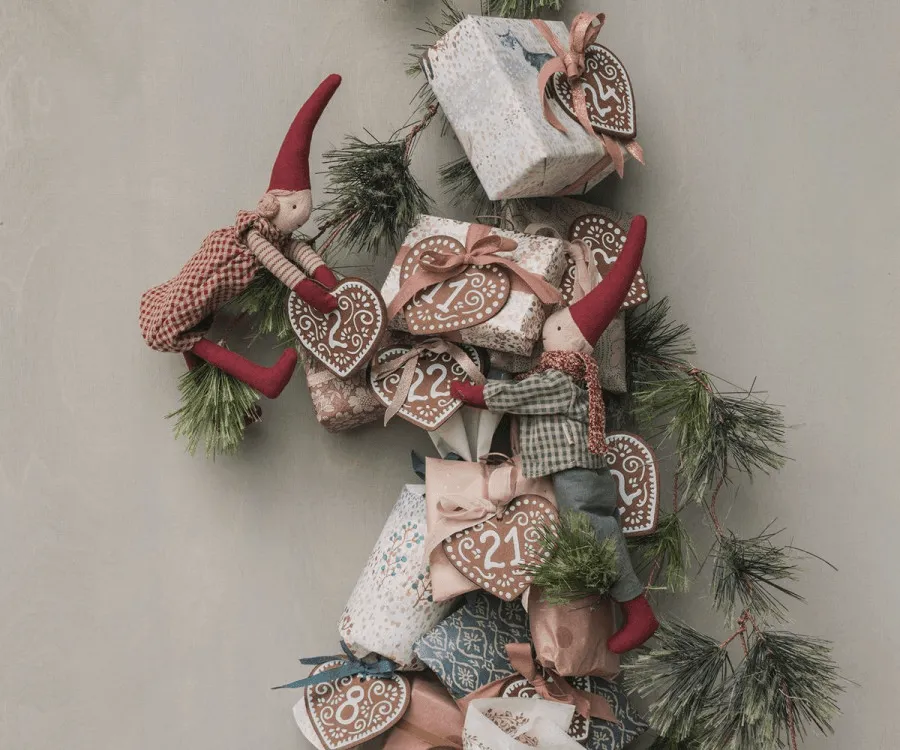
18. Gift-Parcel Calendar with Elf Dolls and Gingerbread Tags
Build the parcel wall in layers. (1) Lay out 24 small boxes on the floor first, varying sizes, (2) wrap each in patterned paper, (3) attach a heart tag with ribbon, (4) mount the largest parcels first, (5) fill gaps with faux pine, (6) add elf dolls last. Time: 2 hours. Materials: $50–$80 if you use existing boxes.
- Lay out and vary 24 boxes
- Wrap each in patterned paper
- Attach heart tags with ribbon
- Mount largest parcels first
- Fill gaps with faux pine
- Add elf dolls last
The magic is in the irregular rhythm: different parcel sizes, muted ribbons, and gingerbread tags instead of a tidy grid. It feels collected rather than bought. The elf dolls push it over the edge into storytelling, but the real structure is the pine garland — it holds the arrangement together and hides the mounting tape. Without the garland, the parcels look like they are floating.
19. Beige Fabric Calendar with Red Ribbon Bows and Activity Cards
Print the activity cards on 65-lb cardstock at 2.5 by 3.5 inches, then round the corners with a punch. Anything larger will buckle the fabric pocket. Keep the text to one line and one icon so kids can read it at a glance. If you want to reuse the calendar, laminate the cards or slip them into jewelry bags before tucking them in.
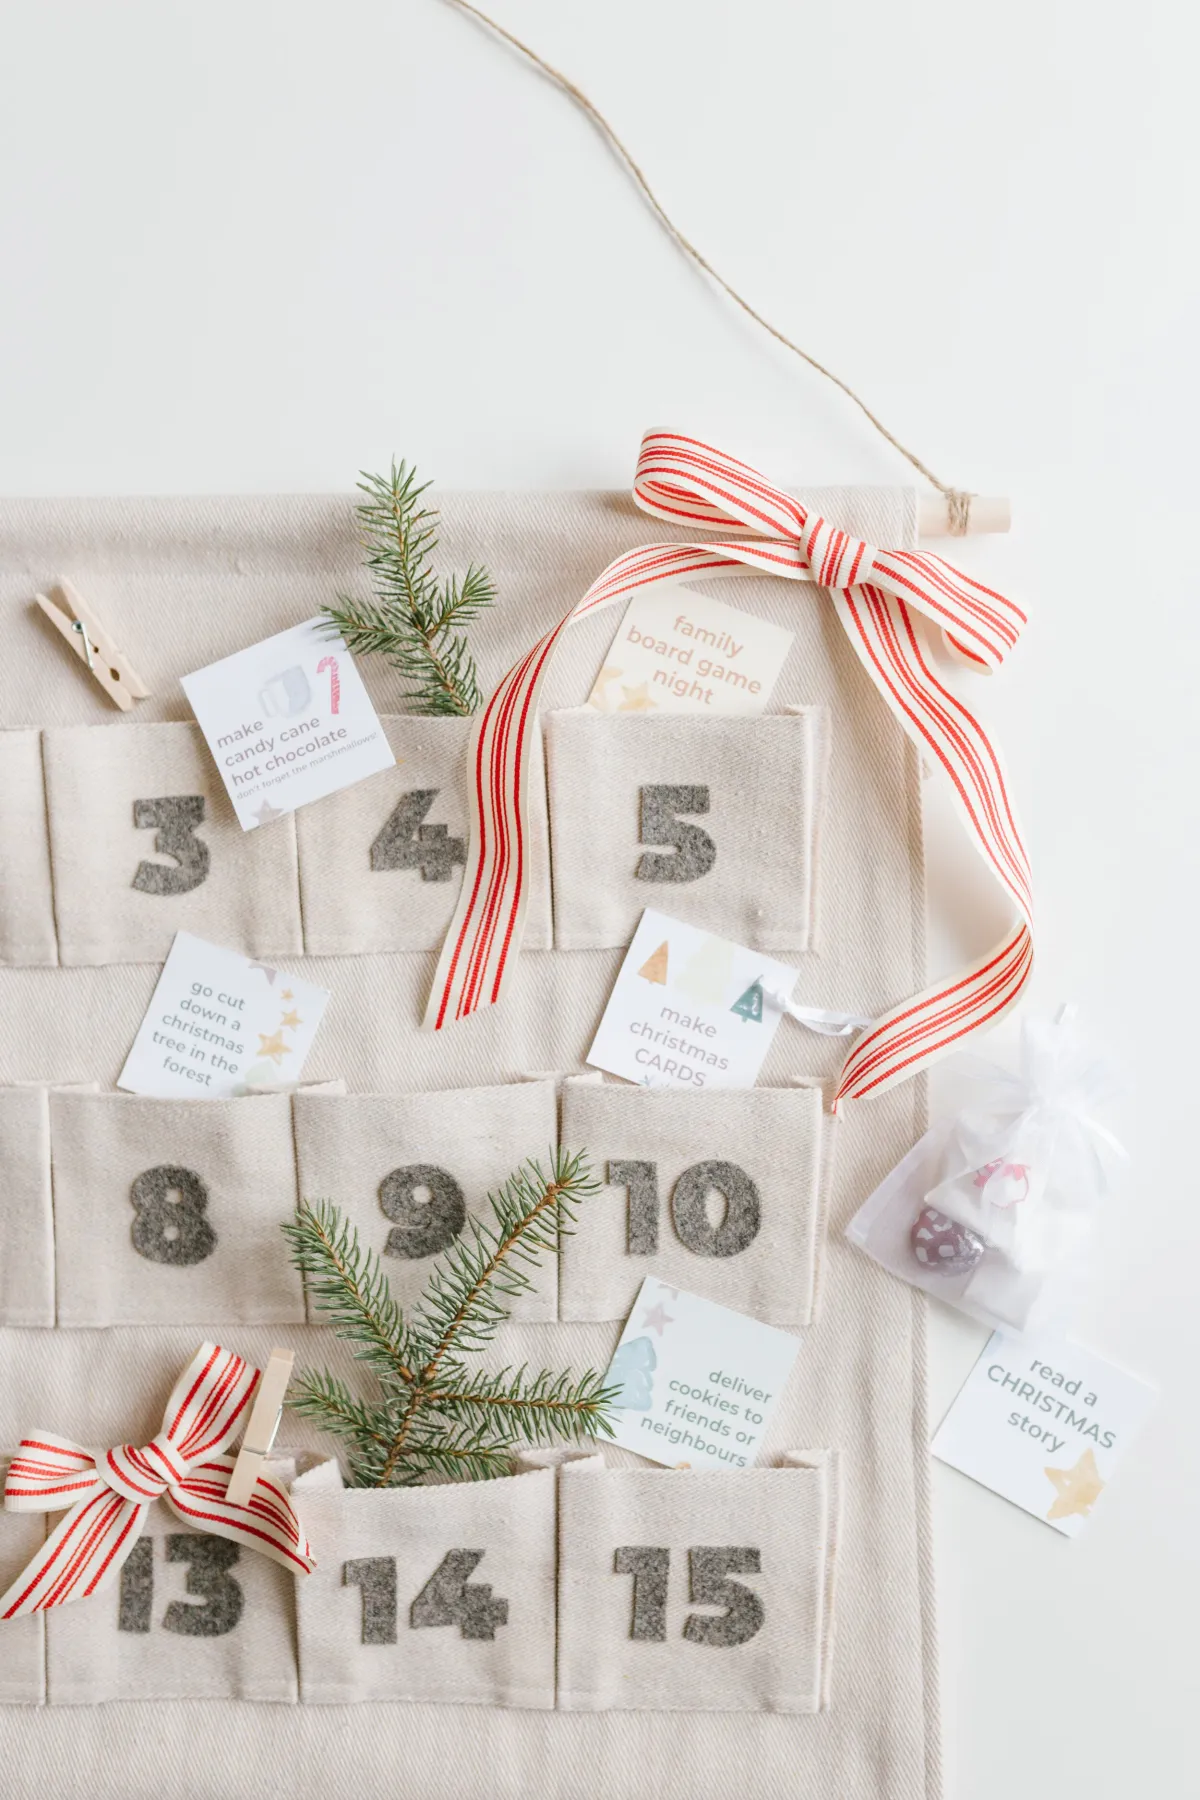
The red-and-white striped ribbon bows are the one element that turns a beige fabric calendar into a festive object. Without them, it reads as a quiet activity chart; with them, it has the energy of a candy cane. The fresh pine sprigs are a close second, but they will drop needles — the ribbon is the detail that lasts all December.
20. Red Wooden Tree Calendar with Alternating Illustrated Drawers
The color math is 45% deep red, 25% forest green, 20% white, and 10% brown wood. That brown percentage comes from the knobs and the table, and it keeps the red-green combination from feeling like a wrapping-paper aisle. Swap white for cream and the whole calendar warms up; swap forest green for teal and it turns mid-century. The proportions are what keep it cohesive.
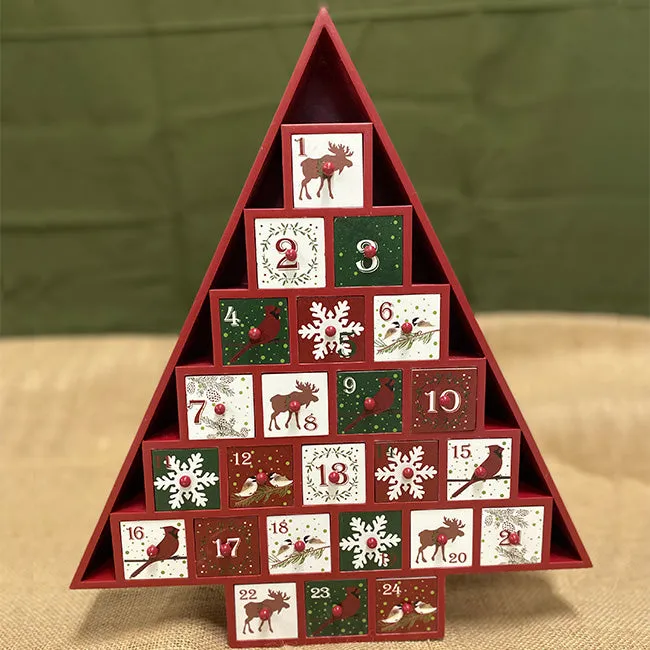
Twenty-four tiny drawers are a delight until you are refilling them at 11 p.m. Number both the drawer front and the inside of the drawer, and keep a master list on your phone. If kids will pull drawers daily, rub a little beeswax on the sides so they slide smoothly. And put the calendar somewhere with a lip or tray below — tiny toys roll.
21. Quilted Snowman Fabric Calendar with 24 Festive Squares
Quilted fabric calendars are having a moment because they hit two 2026 notes at once: heirloom craft and cozy maximalism. The patchwork grid gives you the advent structure, while the snowman scene makes it feel like a piece of holiday art you can hang in the living room. It is also a reaction against disposable paper calendars — people want something they can mend, not toss.
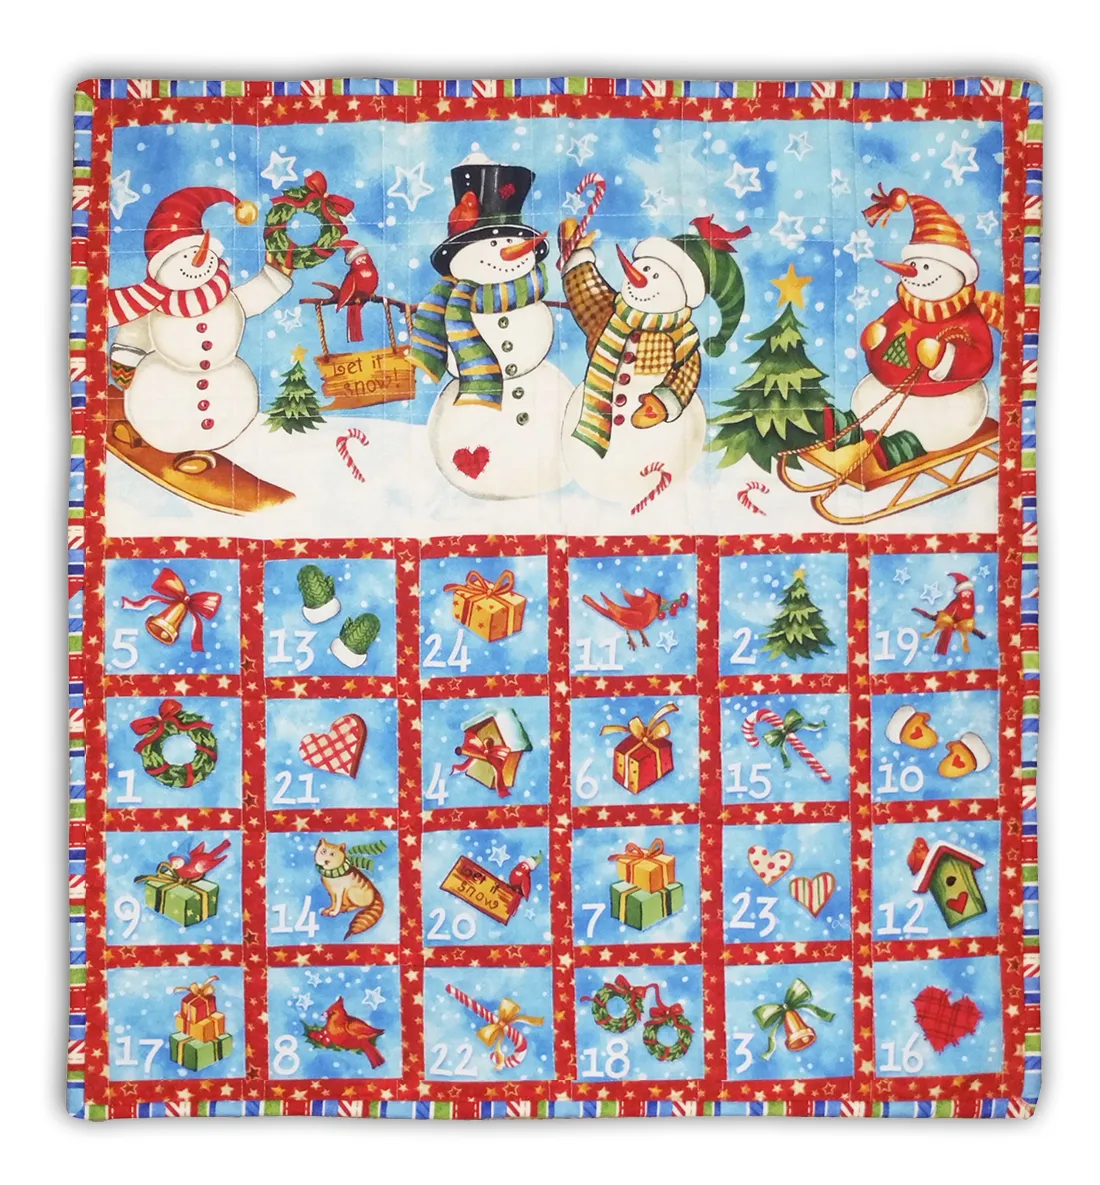
Buy a pre-quilted fabric panel or a fat quarter bundle, about $15–$25, and print the numbers on fabric transfer paper. Sew simple pockets or fuse them with heavyweight interfacing — no machine required. A red-and-white star ribbon finishes the edges. Total: $25–$40. This is the handmade version of Idea #15, with more color and a bigger story panel.
22. White House Calendar with a Miniature Village in the Peak
This house calendar is happiest on a dining table or sideboard at least 30 inches deep, because the peak village needs visual room behind it. Leave 18 inches of clearance from the chair backs, and do not tuck it against a wall — the little white houses disappear. If your table is narrow, scale down to a single row of drawers and one brush tree, like Idea #11.
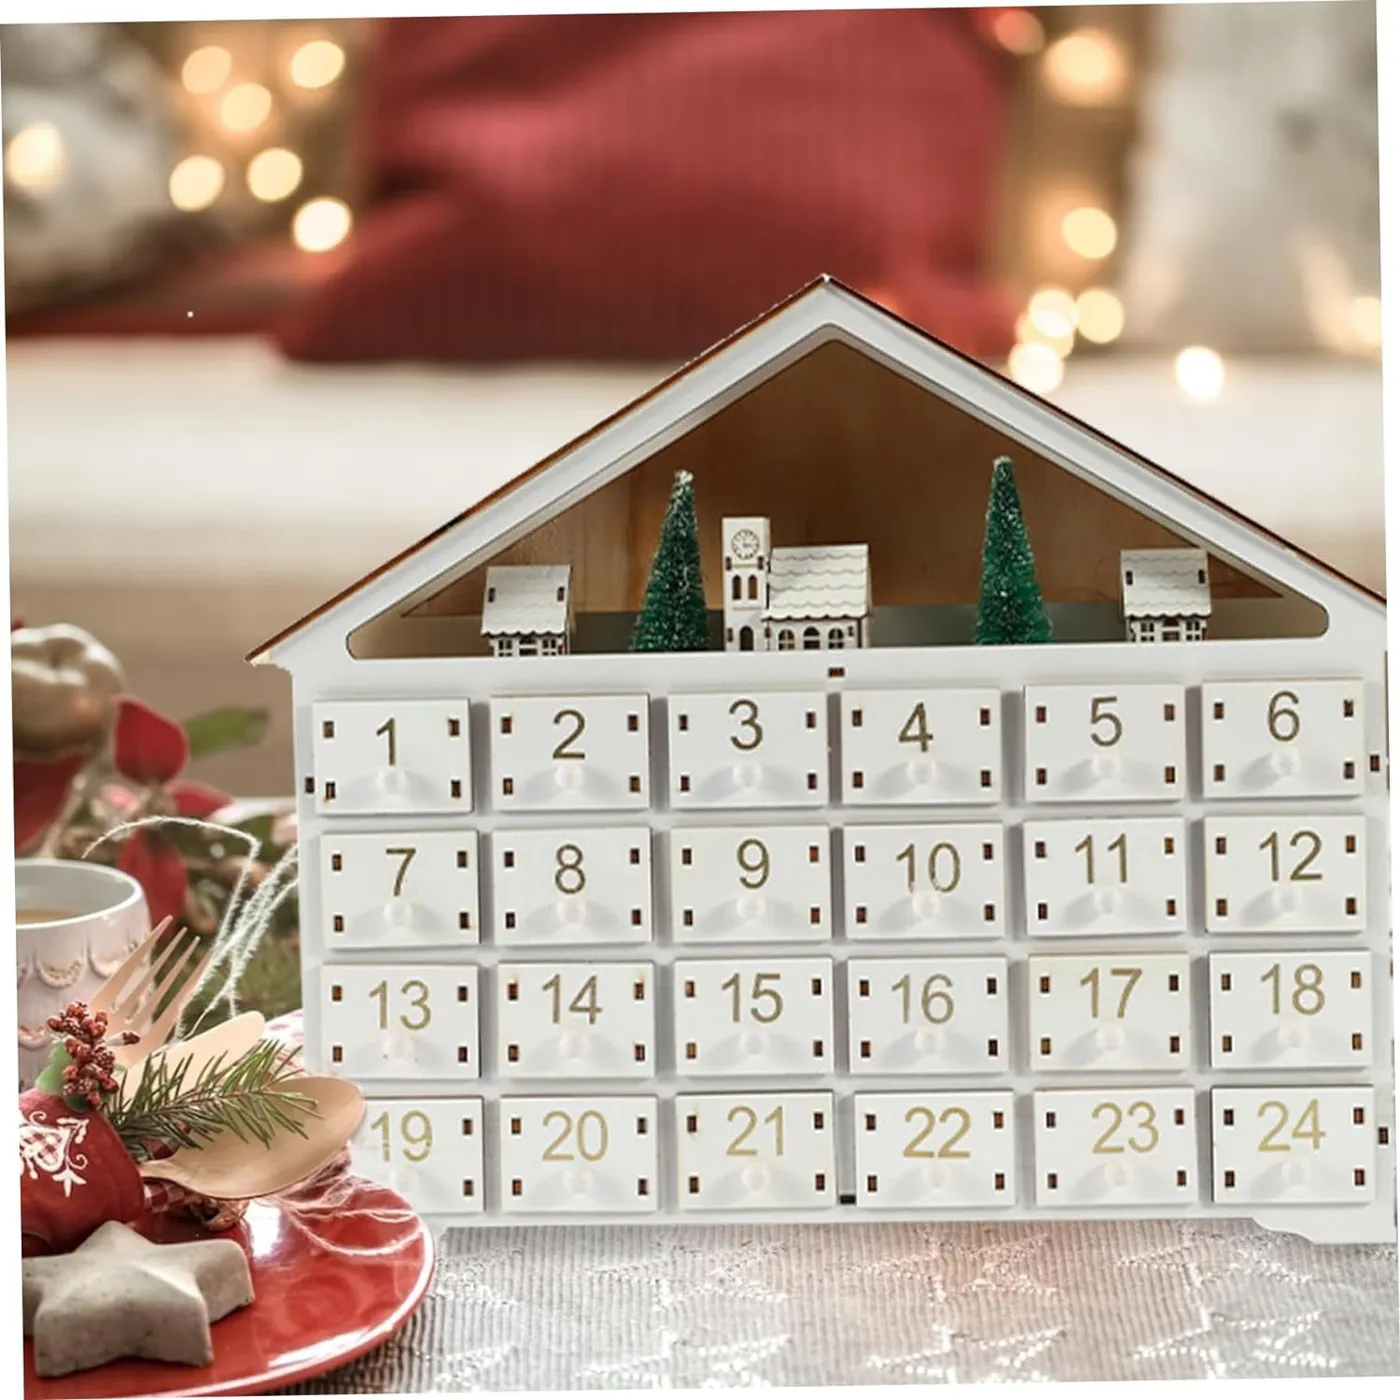
Gold numerals can look cheap if they are too shiny. Use rub-on transfers in a brushed gold, then seal them with a matte spray so they do not flake. Center each number on the drawer front with a ruler — a 1/8-inch drift is visible when 24 drawers are in a grid. If you cannot find transfers, a fine gold paint pen and a steady hand works.
23. Burlap Bag Calendar with Corrugated Tags and Star Lights
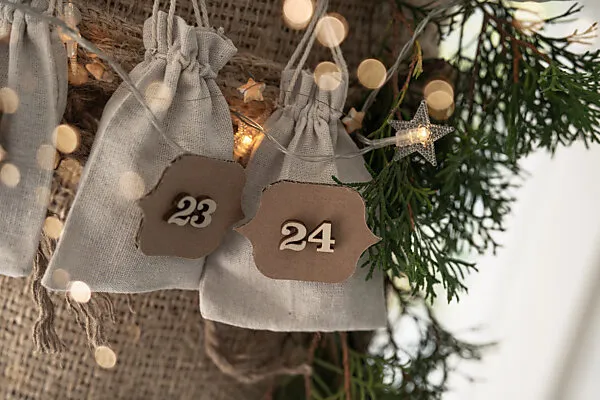
Make the tags in an afternoon. (1) Cut corrugated cardboard into 2-by-3-inch rectangles, (2) punch a hole in one corner, (3) paint or stencil a number, (4) tie with twine, (5) attach to each bag. Time: 1 hour for 24 tags. Materials: $10–$15 if you reuse shipping boxes.
- Cut corrugated rectangles
- Punch a corner hole
- Stencil or paint numbers
- Tie tags with twine
- Attach to each bag
Burlap and corrugated cardboard are rustic in the best way and sheddy in the worst. Expect a few fibers on the floor for the first week, and keep the display away from dark upholstery. The cardboard tags can bend if they get wet, so do not hang this in a steamy kitchen. Battery fairy lights are safer than plug-ins near fabric, and they last about 20 to 30 hours.
24. Branch-Hung Fabric Pouch Countdown with Twine
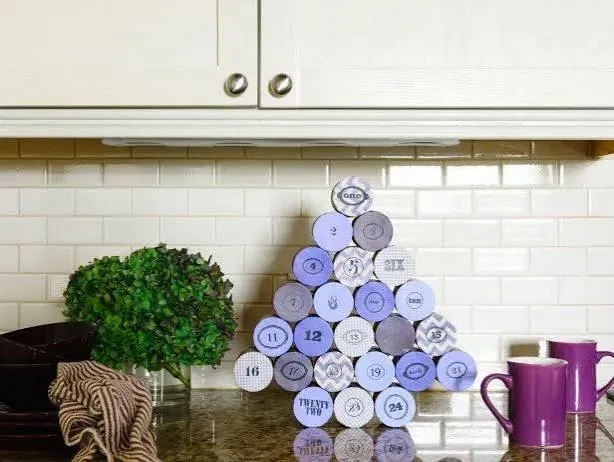
Before you drill or tie anything, check these five things.
- Branch length: at least 48 inches for 24 pouches without crowding
- Wall anchors: two secure points, not one nail
- Pouch weight: keep each under 4 ounces when filled
- Number visibility: tags should read from 5 feet away
- Light source: a nearby outlet or battery pack for fairy lights
If any answer is no, adjust before hanging.
Balance the branch by hanging the heaviest pouches closest to the center and the lightest at the ends. A branch with all the weight on one side will rotate or sag, no matter how strong the anchor. Use two strings per pouch if it holds a gift, and tie a small loop rather than a knot so you can slide the pouch to adjust spacing.
25. Deep Red Box Calendar with Gold Illustrations by the Fire
The deep red boxes with gold illustrations are the anchor, but the fireplace glow is what makes the scene feel expensive. The boxes are matte, the gold is small and scattered, and the warm light behind them does the rest. Remove the fire and you have a nice calendar on a coffee table; keep it and the countdown becomes part of the evening ritual.
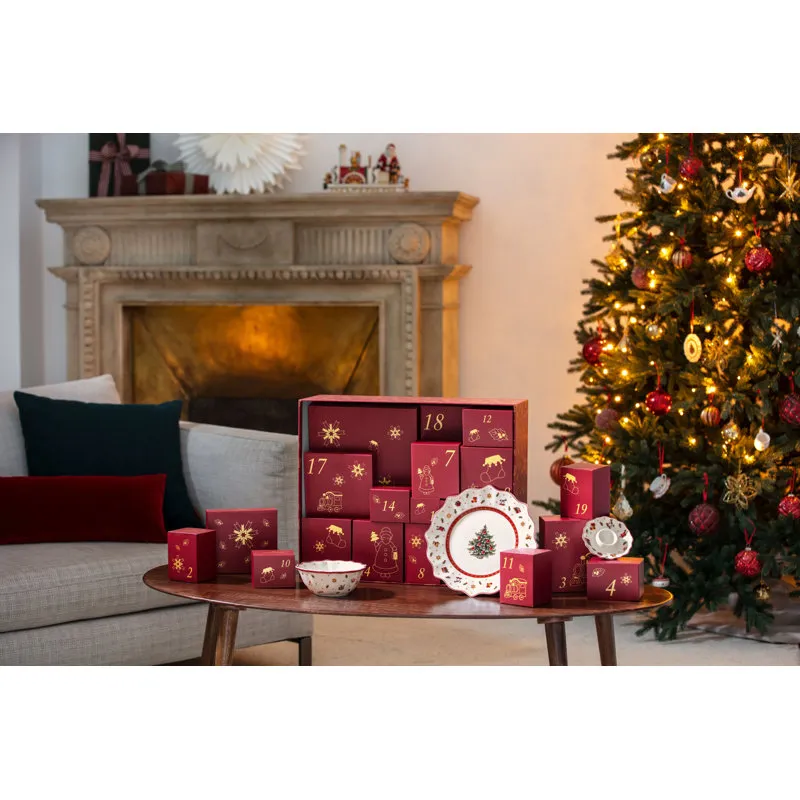
This works because the palette is saturated but controlled: deep red, forest green, beige, and warm brown, with gold used as a highlight rather than a color. The sofa pillows echo the tree and calendar without matching exactly. The stone fireplace adds texture and a cool neutral, which keeps all that red from turning syrupy.
26. Fabric Garland Calendar with Stockings and Numbered Pouches
This garland calendar is a scrap-fabric dream. Fabric stockings and pouches: $20–$35; red string and wooden clothespins: $6–$10; number patches or embroidery: $8–$15; small treats: $20–$40; optional mini wreath: $8–$12.

- Fabric stockings and pouches: $20–$35
- String and clothespins: $6–$10
- Number patches or embroidery: $8–$15
- Treats and tiny gifts: $20–$40
- Budget alternative: cut stockings from felt scraps and use fabric marker numbers — saves about 50%.
- Total: $54–$112
Fabric garlands are forgiving to make and fussy to store. Keep the stockings and pouches flat in a labeled bin, and do not stack anything heavy on top or the number patches will crease. If you use real treats, avoid chocolate near a radiator or sunny window. And check the string tension before hanging — fabric gets heavier when filled.
27. Brown Paper Bag Calendar with Chalk Numbers on Dark Wall
Grocery-store brown paper bags are the whole trick. Cut them down to 6-by-8 inches, fold the tops, and write numbers with a white chalk marker. Baker’s twine runs $3, clothespins $2, and a thick rope from the hardware store $6. Total: under $15 for 24 bags. If you already have a dark wall, the chalk numbers look intentional; on white walls, use black marker instead.
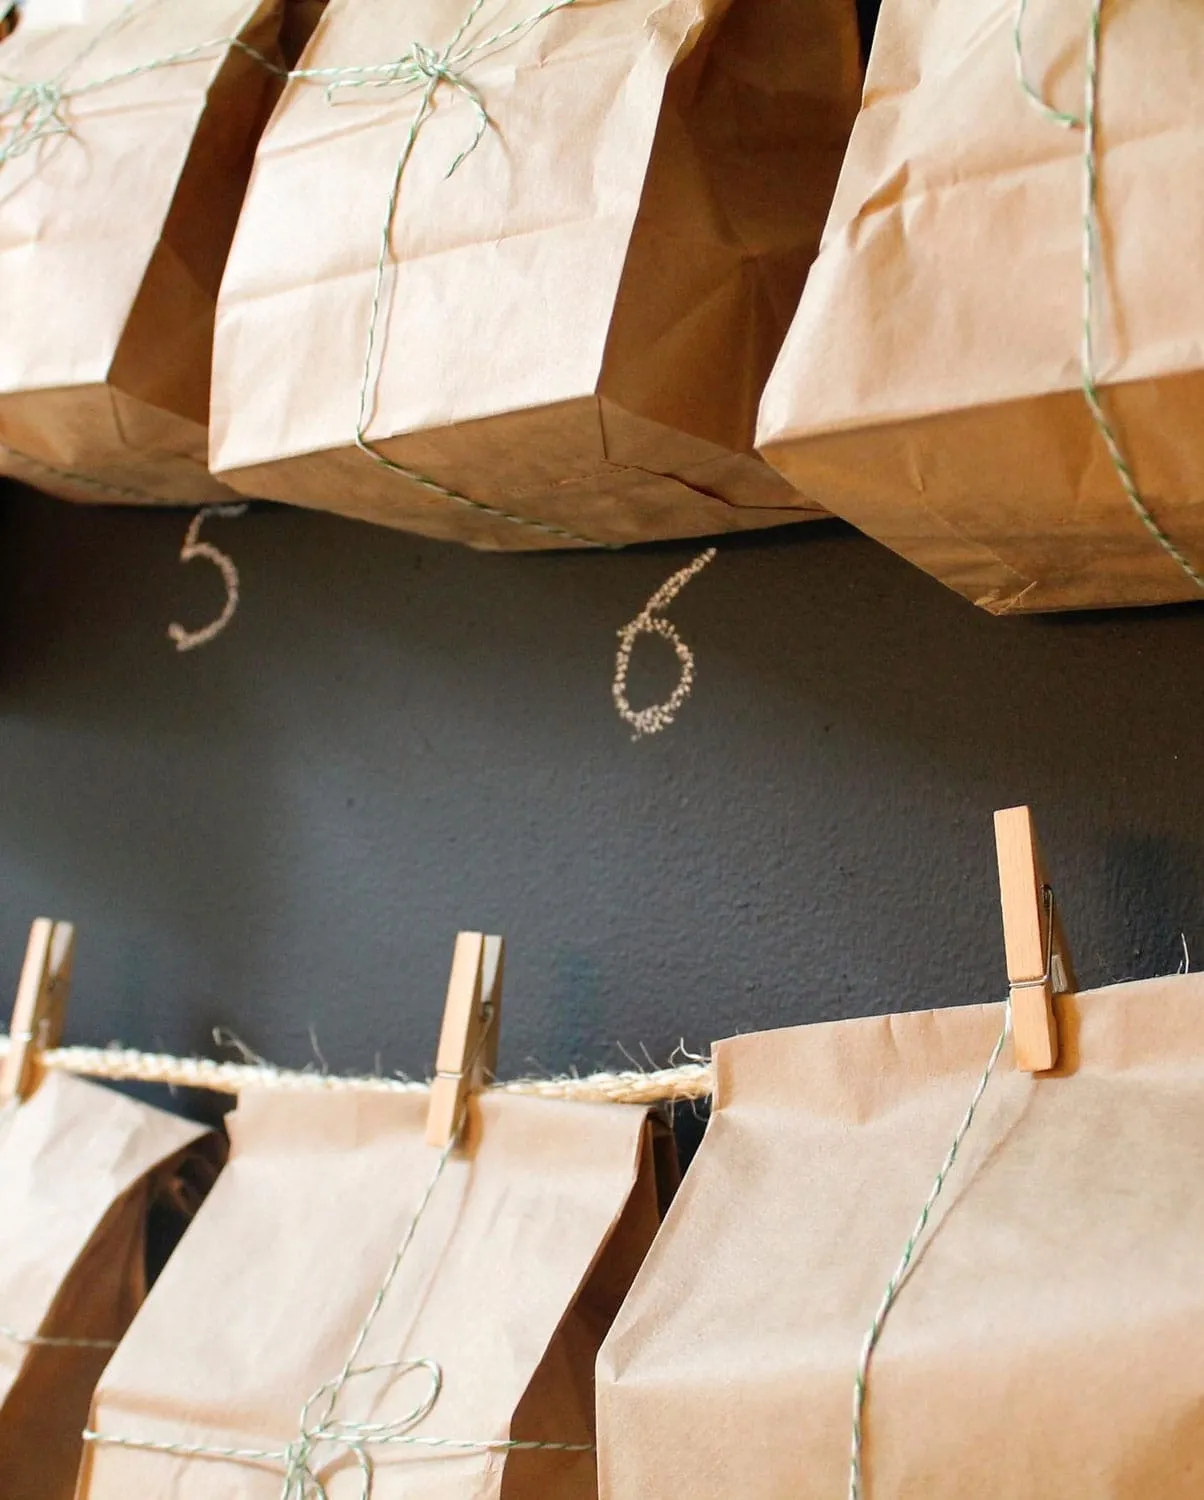
The formula is 70% kraft brown, 20% dark gray, and 10% green and white. The dark wall makes the humble paper bags look styled, and the green-and-white twine adds just enough holiday signal. Swap the dark gray wall for charcoal paint and the kraft stays warm; swap the twine for red ribbon and the whole thing becomes more traditional.
28. Kitchen Window Calendar with Evergreen Garland and Heart Ornaments
Hang the calendar from the shelf, not the window trim. (1) Measure the shelf depth and width, (2) attach two rope loops with cup hooks underneath, (3) tie the calendar at the top corners, (4) add garland along the shelf, (5) weave in lights last. Time: 30 minutes. Materials: $15–$25 if you reuse the garland.

- Measure shelf depth and width
- Attach two cup hooks underneath
- Tie calendar at top corners
- Add garland along shelf
- Weave in lights last
This kitchen window setup needs a shelf at least 36 inches wide and a counter depth of 24 inches so kids can stand back without bumping the calendar. The calendar itself should hang 12 to 18 inches above the counter, low enough for small hands but high enough to clear a cereal bowl. For a console version, see Idea #3.
29. Red Pyramid Calendar with Moose, Cardinals, and Snowflakes
A pyramid calendar needs a flat, stable base. Set it on a tray or a piece of non-slip liner, and keep the bottom row slightly forward so it does not tip when a drawer is pulled. If the drawers are stiff, rub a candle stub along the sides — not the fronts, or the illustrations will smear. Number the back of each drawer too.
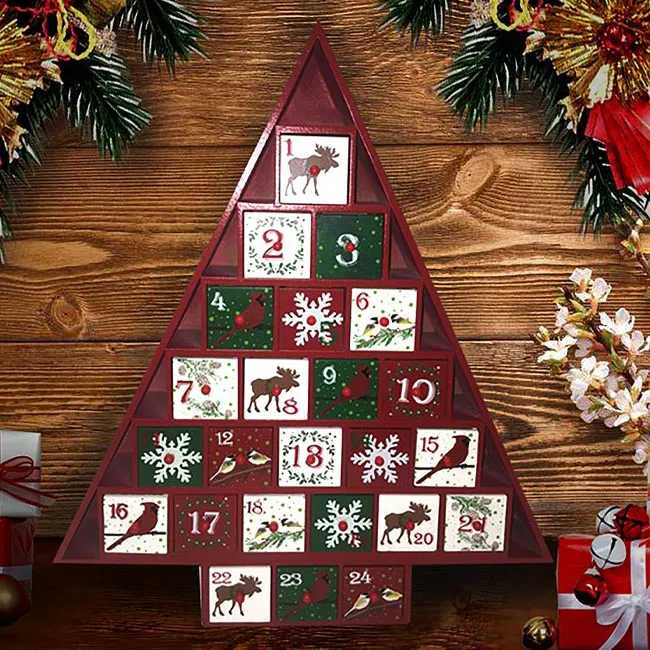
The alternating drawer fronts are the one thing that keeps this pyramid from reading as a solid red block. Dark red, forest green, and white break up the shape, while the moose, cardinals, and snowflakes give each row a different rhythm. Without that alternation, the 24 drawers blur together; with it, you can actually find day 17.
Make December Feel Like a Countdown, Not a To-Do List
The best advent calendars are the ones you actually want to look at for 24 days straight — not the ones you assemble in a panic on November 30. Pick one idea, gather your supplies, and let the countdown be a little ritual instead of one more holiday task. 📌 Pin your favorite version now so you can find it when the wrapping paper comes out.