
You’ve got a screenshot folder full of vintage Christmas trees and no real idea which one will actually work in your living room. That’s exactly why we gathered 29 real Shiny Brite trees, ornament collections, and tabletop vignettes — the kind of photos people save on Pinterest and then never quite figure out how to copy.
We spent serious time digging through Ruby Lane, Mercari, Etsy, and Lulu and Georgia to bring you only what’s worth your attention this year — vintage glass sets from $8 up to $1,400, plus plenty of modern lookalikes that cost a fraction of that. (Quick note: some links here are affiliate links, and they never change what you pay.)
Inside you’ll find mid-century pastel trees, silver tinsel displays, mercury glass maximalism, and small ornament vignettes you can set up on a console tonight. And stay until the end — we break down the most common mistakes that can ruin these looks.
📌 Save this to Pinterest for later — you’ll want to revisit these ideas.
1. A Full-Size Shiny Brite Tree in the Living Room
Glass ornaments don’t just decorate a room — they multiply light. A dense Shiny Brite tree puts hundreds of tiny convex mirrors in front of your lamps, so the glow spreads sideways into the room instead of pooling under the branches. The second principle at work is repetition: one cap-and-loop silhouette, repeated fifty times, in wildly different colors. That combination is what keeps a maximalist tree from reading as chaos.
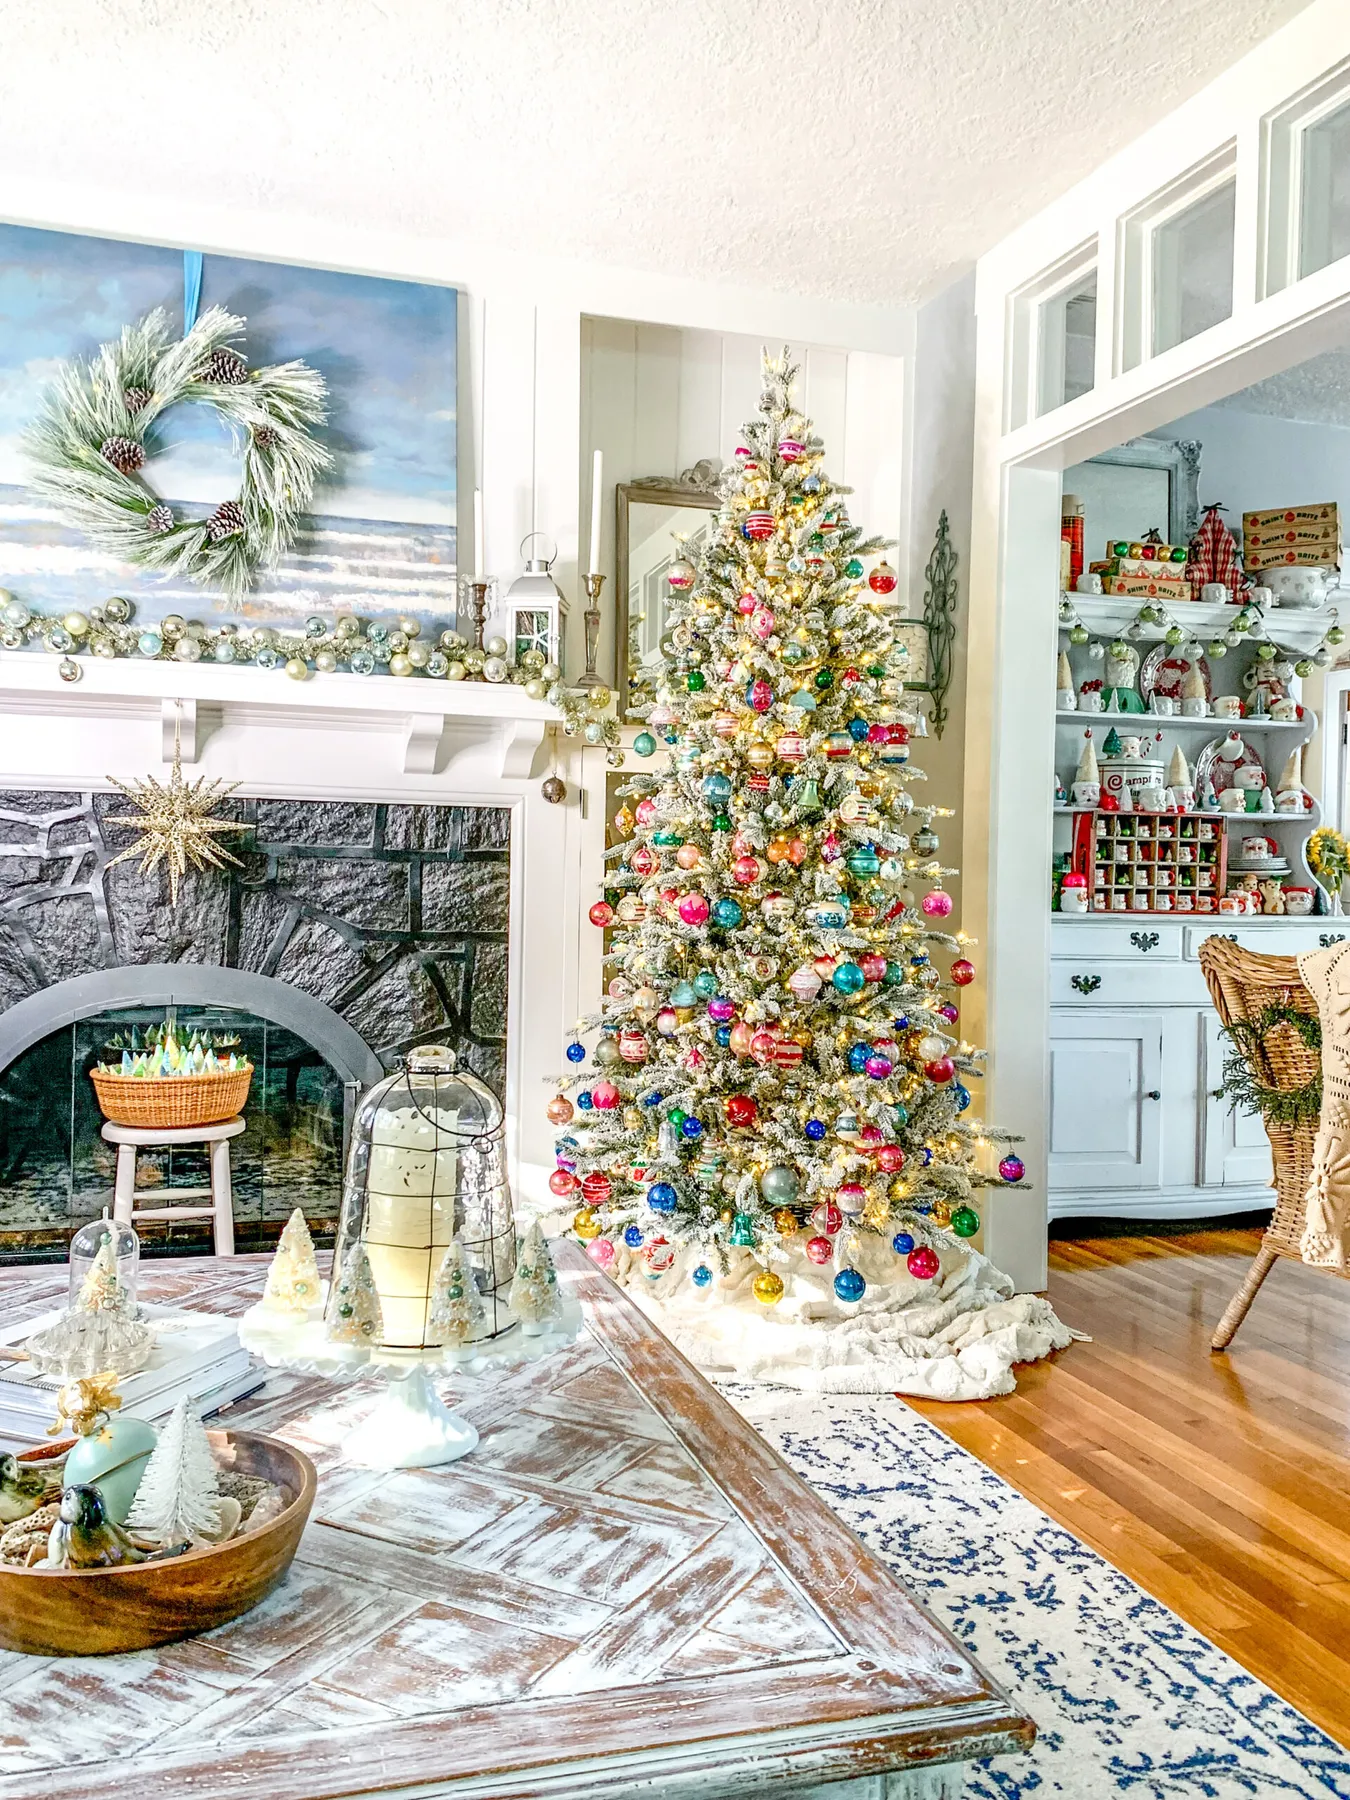
This look wants room to breathe. Under about 150 square feet, a 7.5-foot tree starts to feel like a wall of glass instead of a focal point. Nine-foot ceilings give you clearance for a topper plus a few inches of air above it. Squeezed into a smaller apartment, scale down to a 5- or 6-foot tree on a console — same density of glass, a third of the footprint, and it still reads as the room’s centerpiece.
Density matters more than ornament quality. For a 7.5-foot tree with a five-foot base, plan on 150 to 200 ornaments — roughly 60 percent vintage glass and 40 percent filler in solid colors that echo the glass caps. Drop below 120 and bare branches show through the color story, which is the single thing that separates a collected tree from a decorated one. Buy filler first, vintage second.
2. Silver Tinsel Tree Dressed in Fuchsia and Teal
Here’s the recipe: 55 percent silver tinsel as the base, 30 percent saturated glass in fuchsia and teal, 10 percent white softness from that fluffy feather skirt, and 5 percent mercury glass for reflection. Swap fuchsia for persimmon and teal for cobalt and the exact same formula gives you a completely different holiday. The tinsel is the neutral here — treat it the way you’d treat white paint.
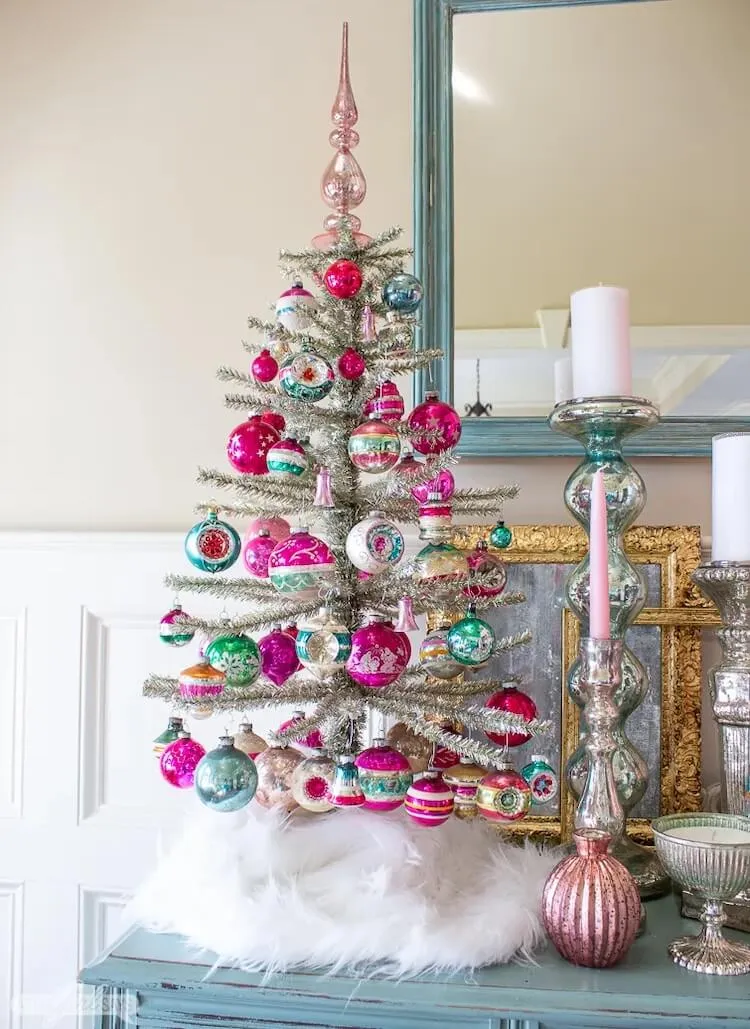
That pink glass finial on top is the reason this reads as designed rather than just decorated. It’s the punctuation mark — the single spot of color that stops the silver and tells your eye where the composition ends. Remove it and you have a pretty tinsel tree. Keep it and you have a vignette. A reproduction topper in a matching glass tone does the same job for under $10.
3. Red Glass Baubles with Hand-Painted Gold Starbursts
You can add that gold starburst to plain red glass ornaments in one afternoon.
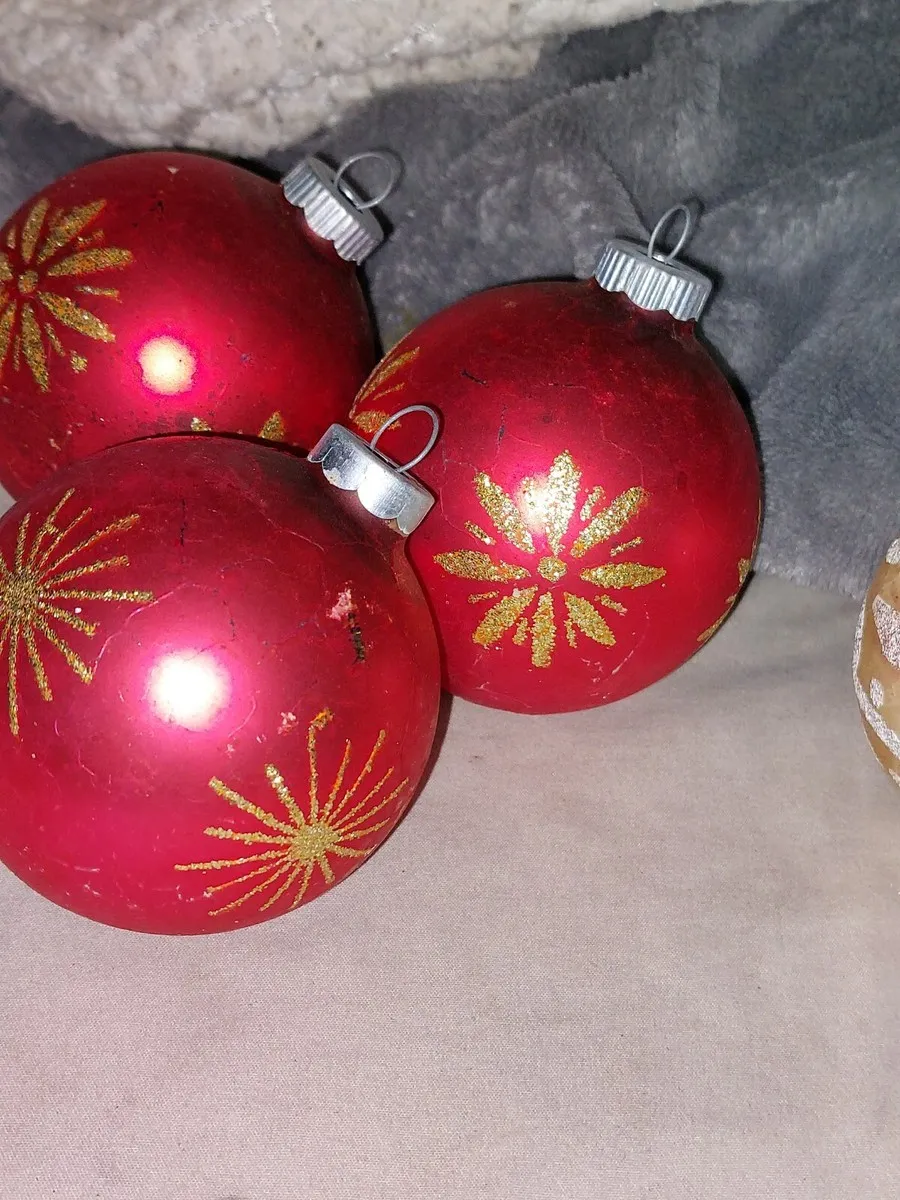
- Wipe each ornament with rubbing alcohol and let it dry fully.
- Mark the center point with a pencil dot.
- Draw eight evenly spaced rays outward with a fine gold glitter glue pen.
- Rest it loop-up in an egg carton and cure for 24 hours.
- Seal with a matte acrylic spray so it survives handling.
Roughly 20 minutes per ornament once you find the rhythm, and about $12 in materials.
Real 1950s red-and-gold starburst ornaments run $18 to $45 apiece when you find them singly. For a fifth of that, pick up plain red glass balls at Target or Walmart in a six-pack for around $12 and add one gold starburst per ornament with a glitter pen. You’ll spend under $25 for a set that reads vintage from three feet away — and honestly, that’s where most guests are standing. If you’d rather hunt the real thing, the buying rules in Idea #11 will save you some heartbreak.
4. Ombre Rainbow Glass Ornaments, Straight from Mid-Century
Ombre rainbow sets are the reason mid-century Shiny Brite has gotten genuinely expensive again. A decade ago you could buy a graduated run for $40; in 2026, complete rainbow sets in the original box regularly list in the hundreds on Ruby Lane. The grandmillennial and vintage-maximalist wave is driving it — people want color that looks collected, not coordinated. Sets like this hold value because they’re period, not trending.
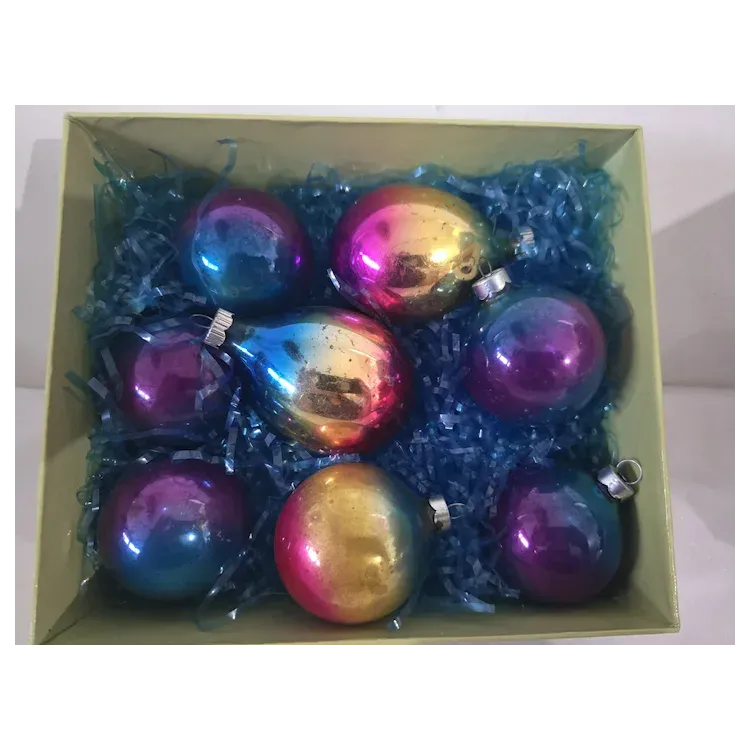
Hang an ombre set in runs, never in speckles. Sort every ornament into color piles first, then work in bands of five to seven per hue — that’s what makes the gradient read from across the room. A seven-foot tree will take roughly twelve to fourteen color bands, which is what a full rainbow set gives you. Do the sorting on the floor and it’s a two-hour job instead of three weekends.
5. Tinsel, Treated Like a Family Heirloom
If your tinsel came out of a relative’s attic, check what it’s made of before you drape it near kids or pets. Tinsel made before the 1970s was often lead foil — heavy, gorgeous, and genuinely not something a toddler should mouth. Wash your hands after handling it, keep it out of reach, and consider displaying the old strands under a glass cloche instead of on the tree. It honestly looks better that way.
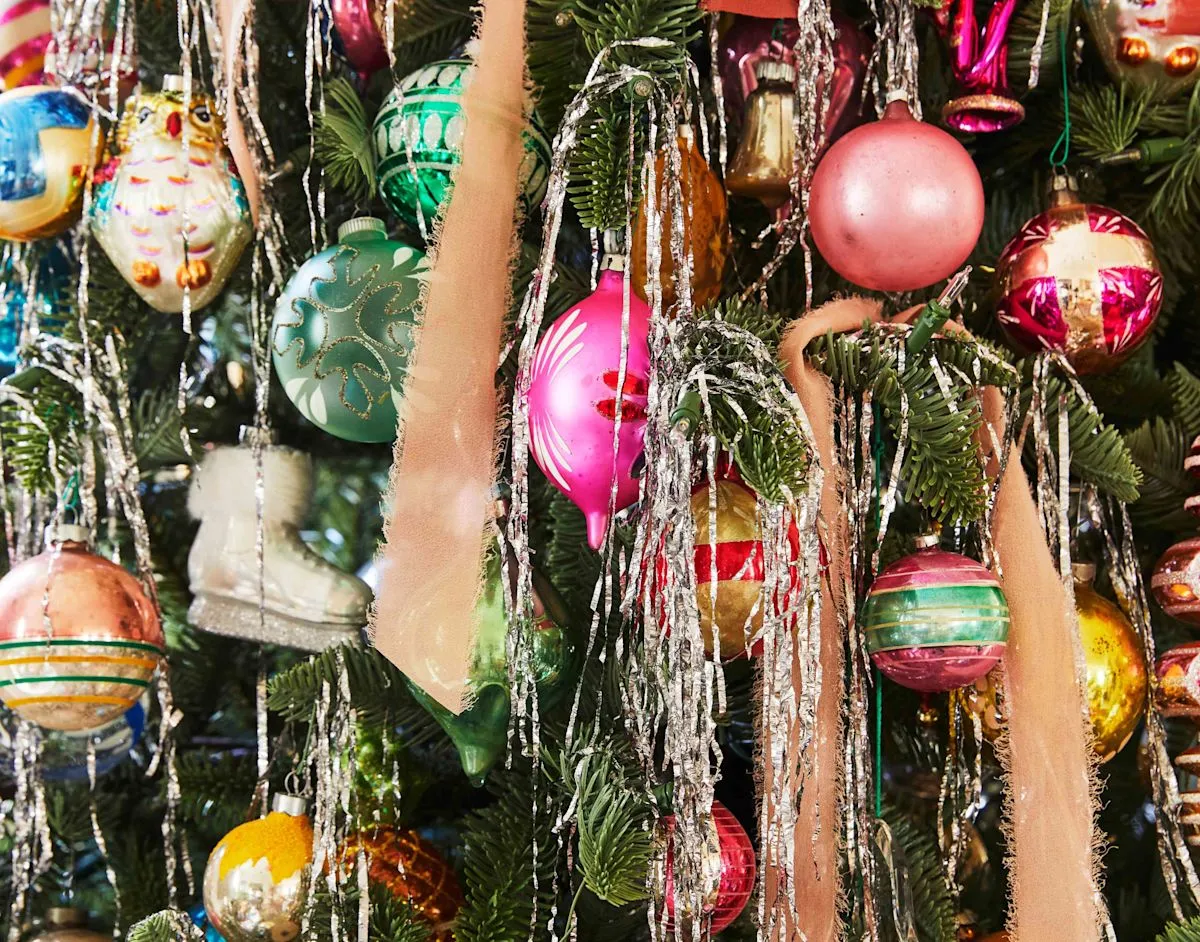
Tinsel sheds. That’s not a defect, it’s physics — and once it’s in the carpet, it lives there until spring. Store strands looped loosely in tissue or wrapped around a cardboard tube, never balled up, or you’ll spend December untangling instead of decorating. Expect to retire a strand or two a season. A soft brush vacuum attachment handles the fallout; a crevice tool just pushes it deeper.
Take the tinsel away and this tree has nothing holding its glass together. The strands blur the gaps between ornaments, catch the light, and give bright vintage color something to sit on. It’s the cheapest element on the tree and the one doing the most structural work. A single box of tinsel changes the whole read.
6. Stenciled Shiny Brites Strung Into a Garland
- Vintage stenciled ornaments, 12-piece set: $60–$220
- Original or reproduction display box: $15–$45
- Vintage glass bead garland, 9 feet: $25–$70
- Wired ribbon for hanging: $6–$14
- Replacement caps and hooks: $8–$15
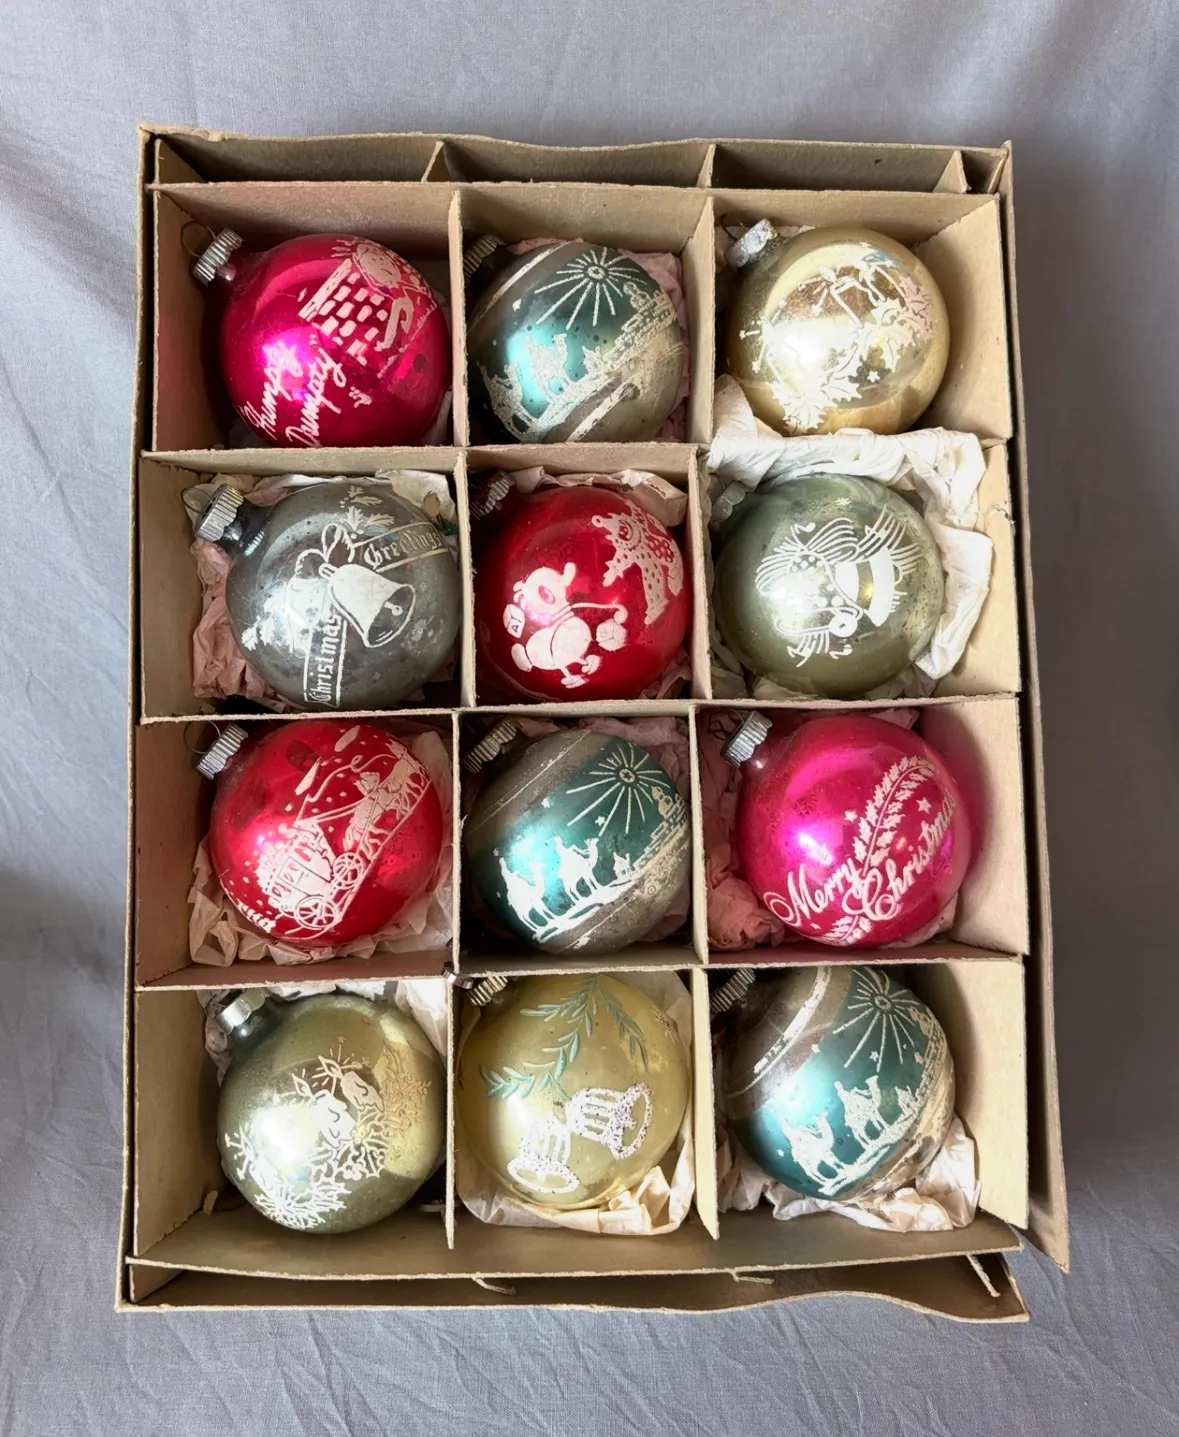
Total: roughly $115 to $365, depending on how patient a shopper you are.
Budget version: modern stencil-look ornaments in a 12-pack run $20–$30, and a craft-store bead garland is about $12.
Drape math is where most garlands go wrong. For a six-foot mantel, use nine feet of garland pulled into three swags about twelve inches deep — that gives you the sag without the flat, taut look. Space stenciled ornaments one per swag so each gets its own moment. For a doorway, add six inches of garland per foot of opening to cover the corners, and pin the ends with cup hooks rather than nails so you can adjust after the first look.
7. Icicle Ornaments Resting on Dark Teal Velvet
Two things are carrying this arrangement. First, material contrast: matte, light-absorbing teal velvet underneath high-gloss glass. Without that matte ground, the glass just reads as glass. Second, orientation — these elongated pieces are laid horizontally, the opposite of how they’re meant to hang, and that’s exactly why they read as objects rather than decorations. Lying down, you actually see the stripes and the tapered ends.
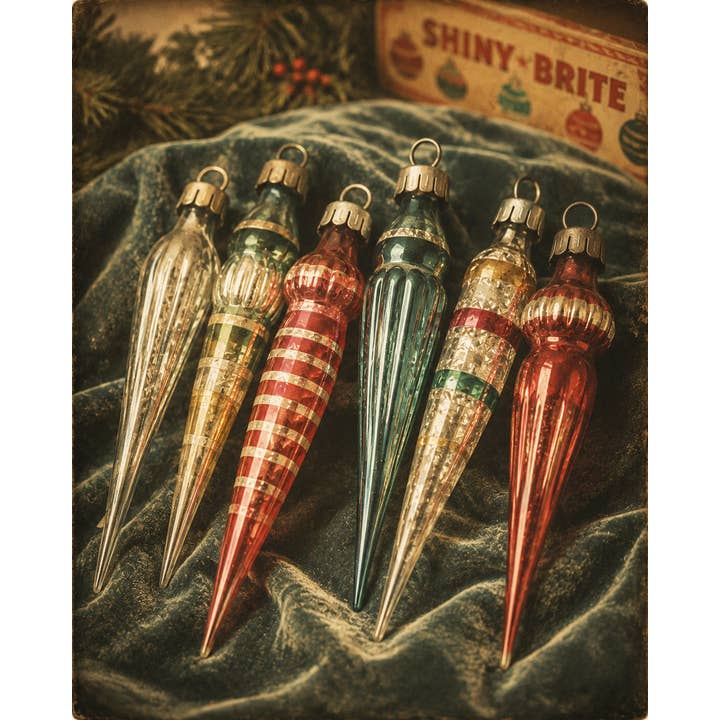
Hanging long icicle ornaments so they don’t knock together:
- Hang them only on outer branches with nothing else within four inches.
- Set the hook so the taper points straight down, not angled into the tree.
- Group them in odd numbers near the tree’s vertical midline.
- Keep the longest pieces in the bottom third, where clearance is greatest.
- Anchor a swinging cap with a short twist of floral wire.
Ten minutes, and no materials beyond what you already have.
8. Glossy Teal Ornaments with Frosted Silver Tulips
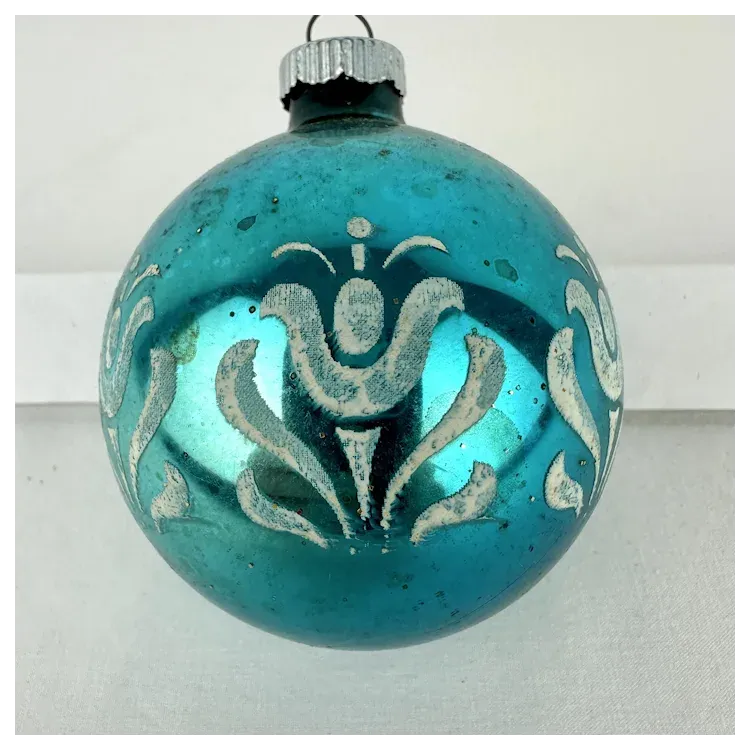
The frosted silver tulip is everything. On plain glossy teal, these ornaments would be pretty but anonymous. That matte-etched pattern sits on top of a mirror finish, so the piece reads matte from one angle and wet-shiny from another — two finishes in one object. It’s the detail that dates them to the mid-century, when stencil and etch work was standard, and it’s the part reproductions still get wrong.
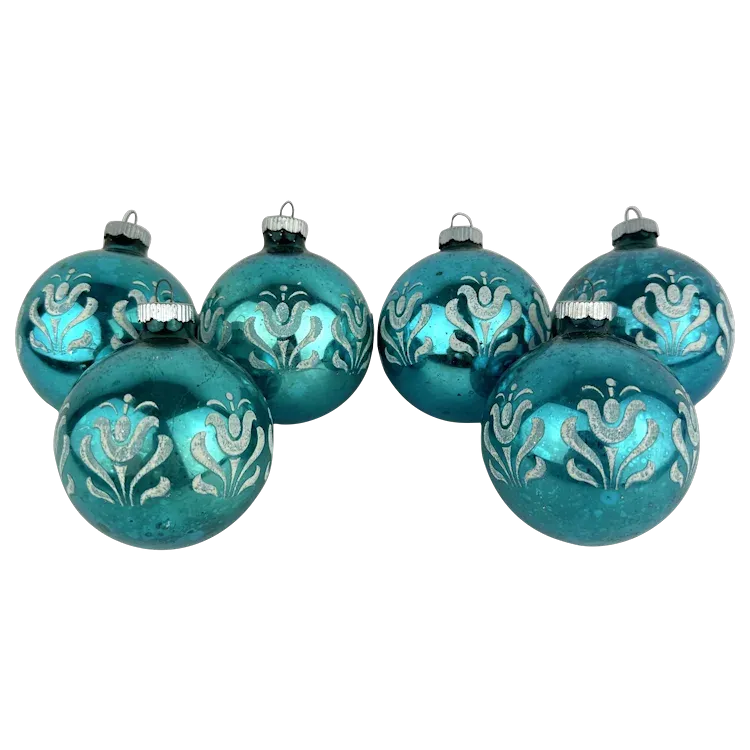
Break it down: 70 percent high-gloss teal, 20 percent matte silver pattern, 10 percent deep black for contrast. The black isn’t a color here — it’s the frame. Swap teal for merlot and silver for champagne and the formula holds perfectly. Or run it as 70 percent icy blue, 20 percent white frost, 10 percent charcoal. Keep the glossy share above 60 percent or the whole tree starts to look dusty.
9. A Lace Doily Tray of Reflector Ornaments
Indented ‘reflector’ ornaments are the best-value vintage buy out there, and they’re almost always displayed wrong. The indent doubles the piece’s apparent light, but only when it’s catching a direct source — so place reflectors at eye level near a lamp or window, never tucked toward the back of the tree. Before styling, press the lace doily flat with a low iron over a towel. Wrinkles undo the whole effect.
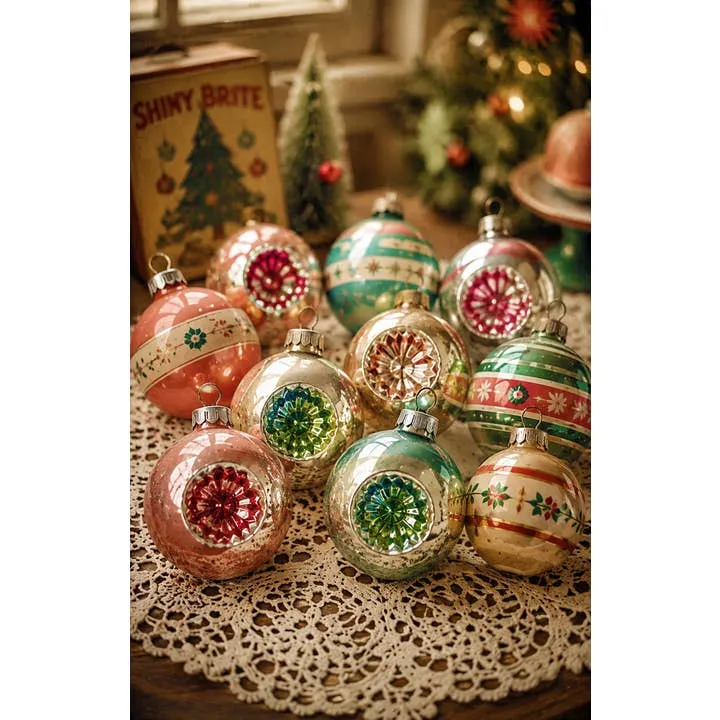
This is a console or sideboard vignette, not a mantel display. It works best on a surface 30 to 36 inches wide with at least eight inches of depth for the doily plus ornaments. Anything narrower and the display box and bottle brush trees get shoved off. Put a small riser under the back row — two or three inches — so pieces step up instead of flattening out. Twelve to sixteen ornaments is the sweet spot.
Tabletop ornament styling has quietly become the biggest holiday shift of the last two years. People in small apartments with no room for a tree still want the ritual, and a tray of vintage glass delivers it in about a square foot. Searches for ornament display ideas keep climbing, and it’s easy to see why — it’s the least expensive way to put a real collection on view.
10. A Wooden Desk Turned Ornament Sorting Station
Handmade ornaments cost almost nothing if you batch them. A 12-pack of clear glass or papier-mâché blanks at Michaels runs $10 to $15, and the craft aisle covers the rest: glitter, ribbon, tiny bells, paint pens. Budget $2 to $4 per finished piece against $15 to $40 for comparable vintage. Facebook Marketplace and estate sales are the other half of the equation — boxed lots often land under $3 per ornament. The value markers in Idea #15 will help you tell which lots are worth grabbing.
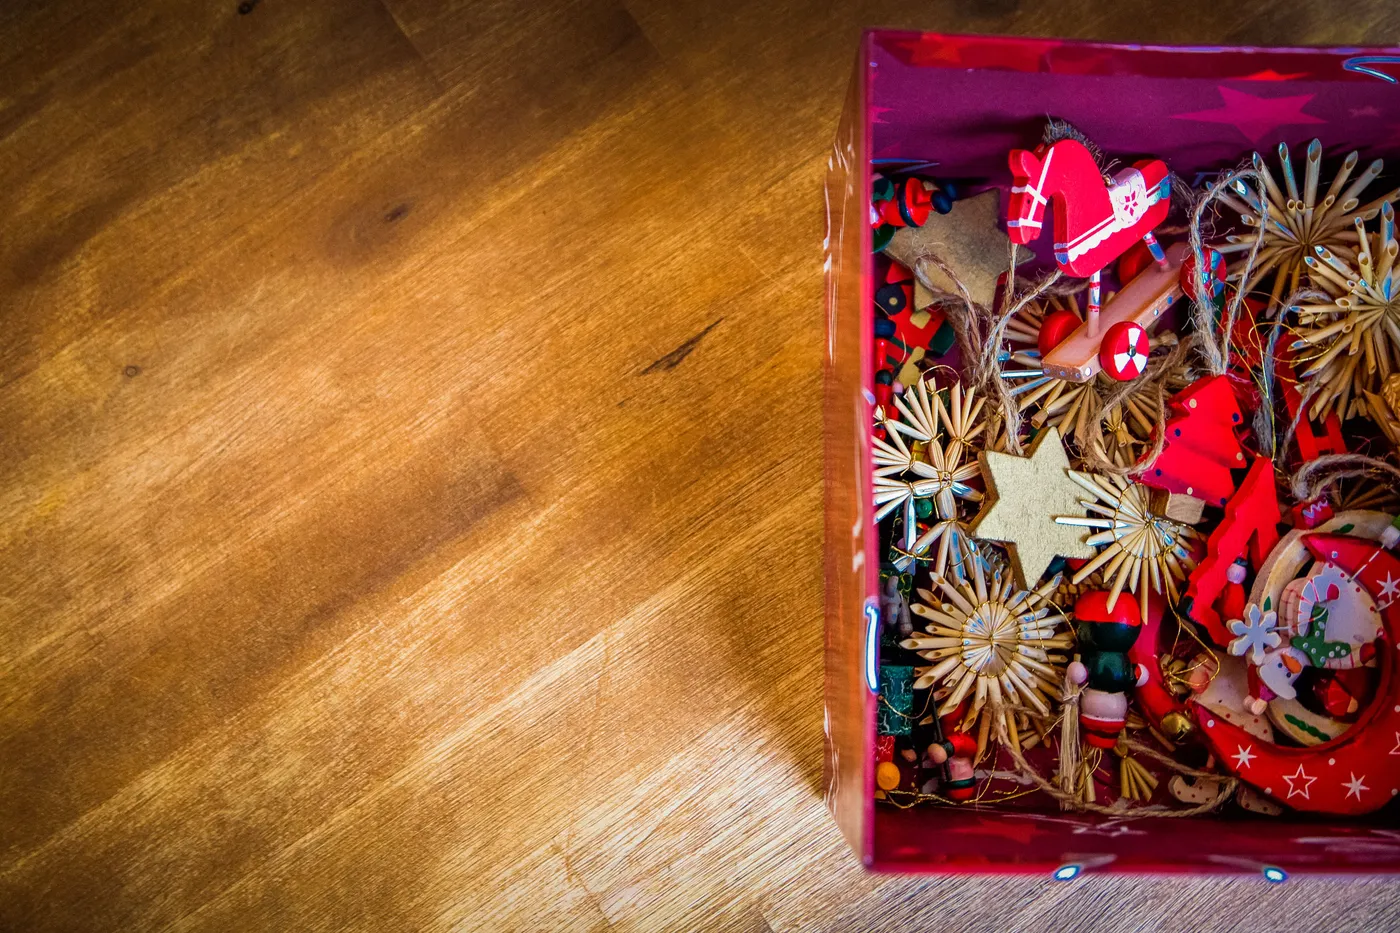
- Ornament blanks, 12-pack: $10–$15
- Acrylic paint and glitter pens: $12–$20
- Ribbon and twine for caps: $5–$9
- Fabric-lined storage box: $8–$18
- Round wooden sorting tray: $10–$25
Total: about $45 to $87 for a full handmade set. That’s less than two vintage stenciled ornaments in good condition, and you get twelve pieces you can actually let kids handle.
11. One Oversized Shiny Brite, Bought Like a Collector
- Ask the seller for a close photo of the cap — the stamp dates it.
- Get the exact height in inches, not the word ‘large.’ Vintage jumbo ranges from four to eight inches.
- Check whether the listing photo shows the piece’s best side or its worst.
- Compare the price against three completed sold listings, not current asks.
- Set your ceiling before you open the listing.
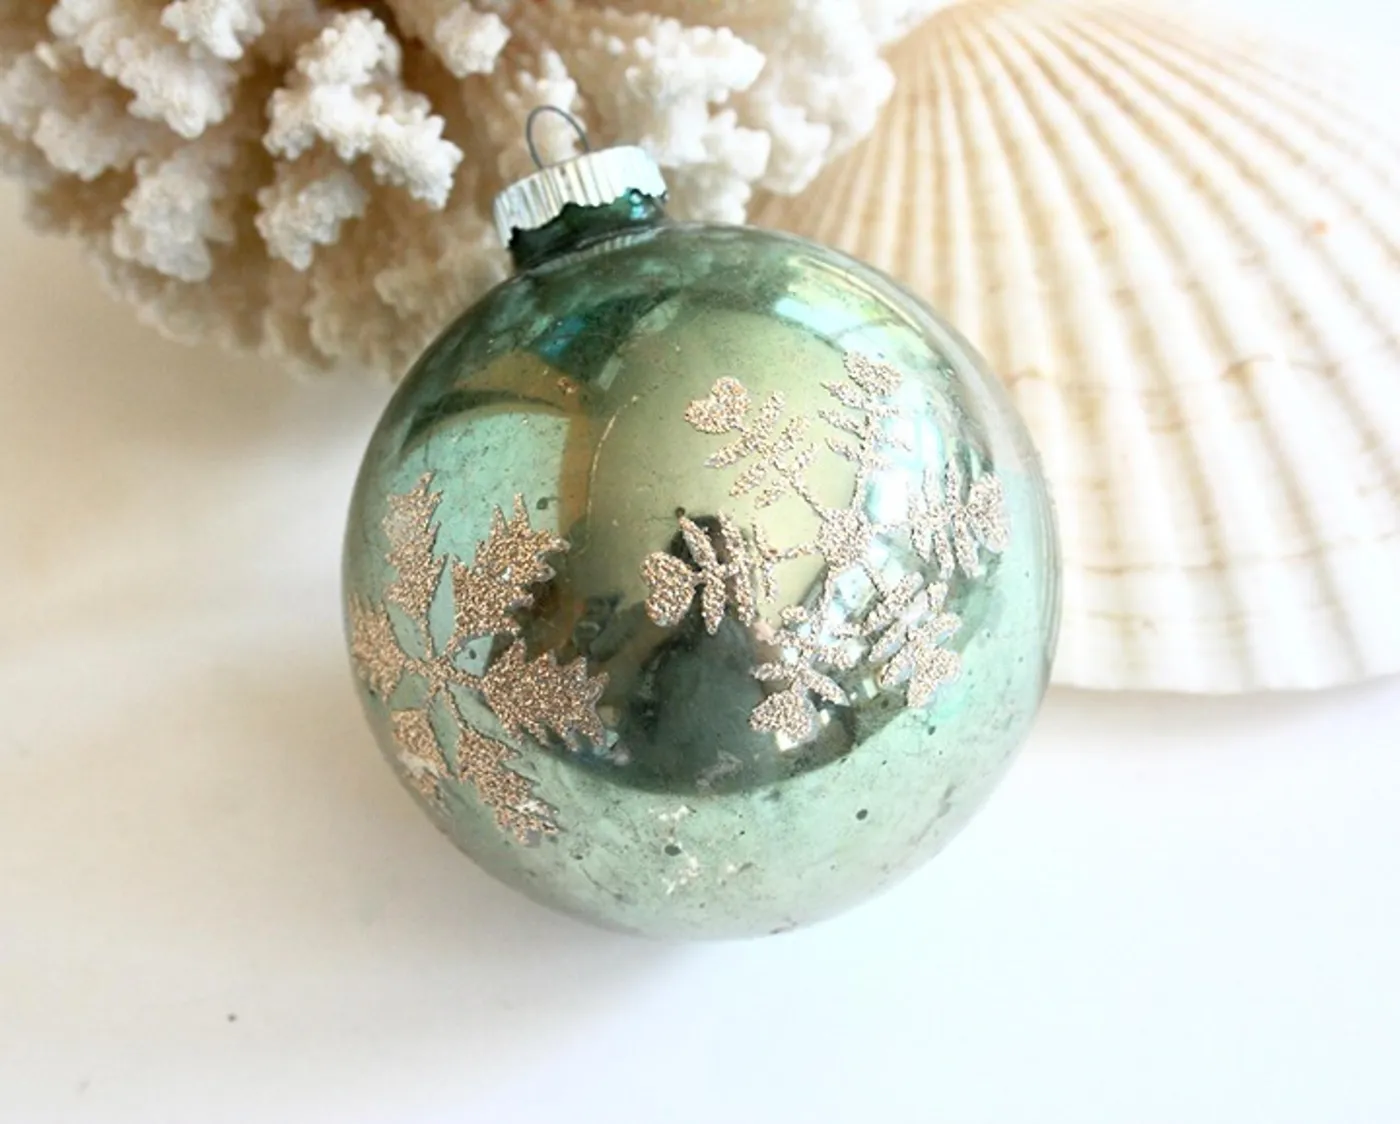
Vintage glass arrives broken more often than people expect, and not every seller packs carefully. Ask for double-boxing in bubble wrap with the ornament suspended, not resting on the bottom. Watch for repainted pieces sold as originals — the tell is paint that creeps over the metal cap. And if you’re buying one oversized statement piece, remember a flimsy branch won’t hold it; plan on a wire loop or a small stand.
12. Vintage-Look Ornaments That Actually Pass for Old
Reproduction vintage-look ornaments have gotten genuinely good, and 2026 is the year they stopped being a compromise. The giveaway used to be a hard candy gloss that no real vintage piece has. The better makers have switched to satin and slightly dulled lacquers, and now they sit comfortably next to genuine glass. Buy them for the back of the tree and any spot a toddler can reach.
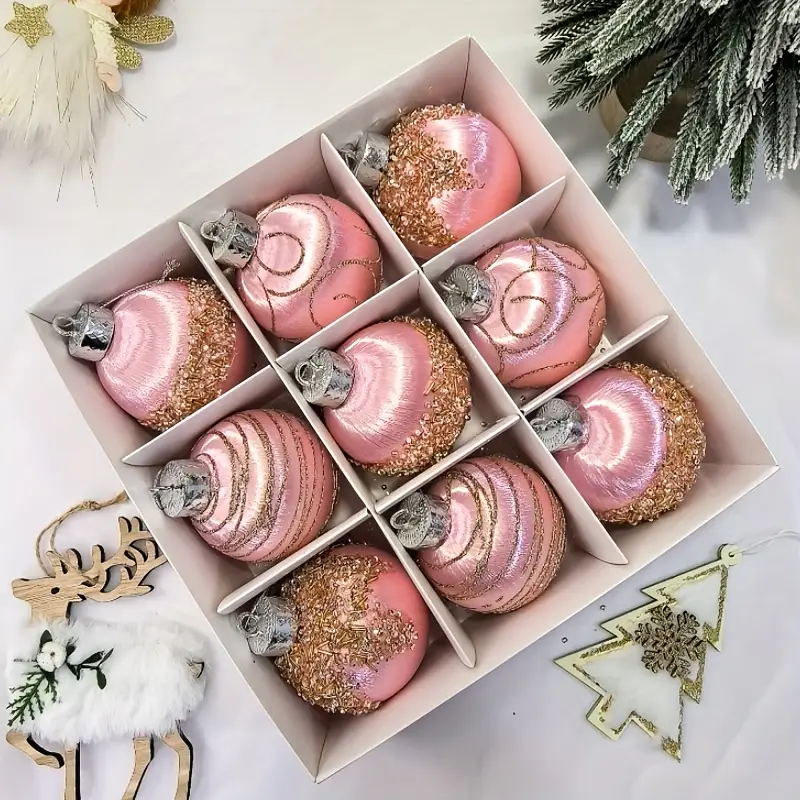
It’s the finish, not the color. A reproduction in the right shade of green still looks new if it’s mirror-glossy; the same piece with a satin, slightly uneven surface reads sixty years old from across the room. When you blend old and new, buy fewer pieces and pay attention to sheen. A light buff with 0000 steel wool knocks the shine off a too-glossy new ornament — wipe it clean afterward.
13. Pink and Rose Gold Ornaments in a Divided Box
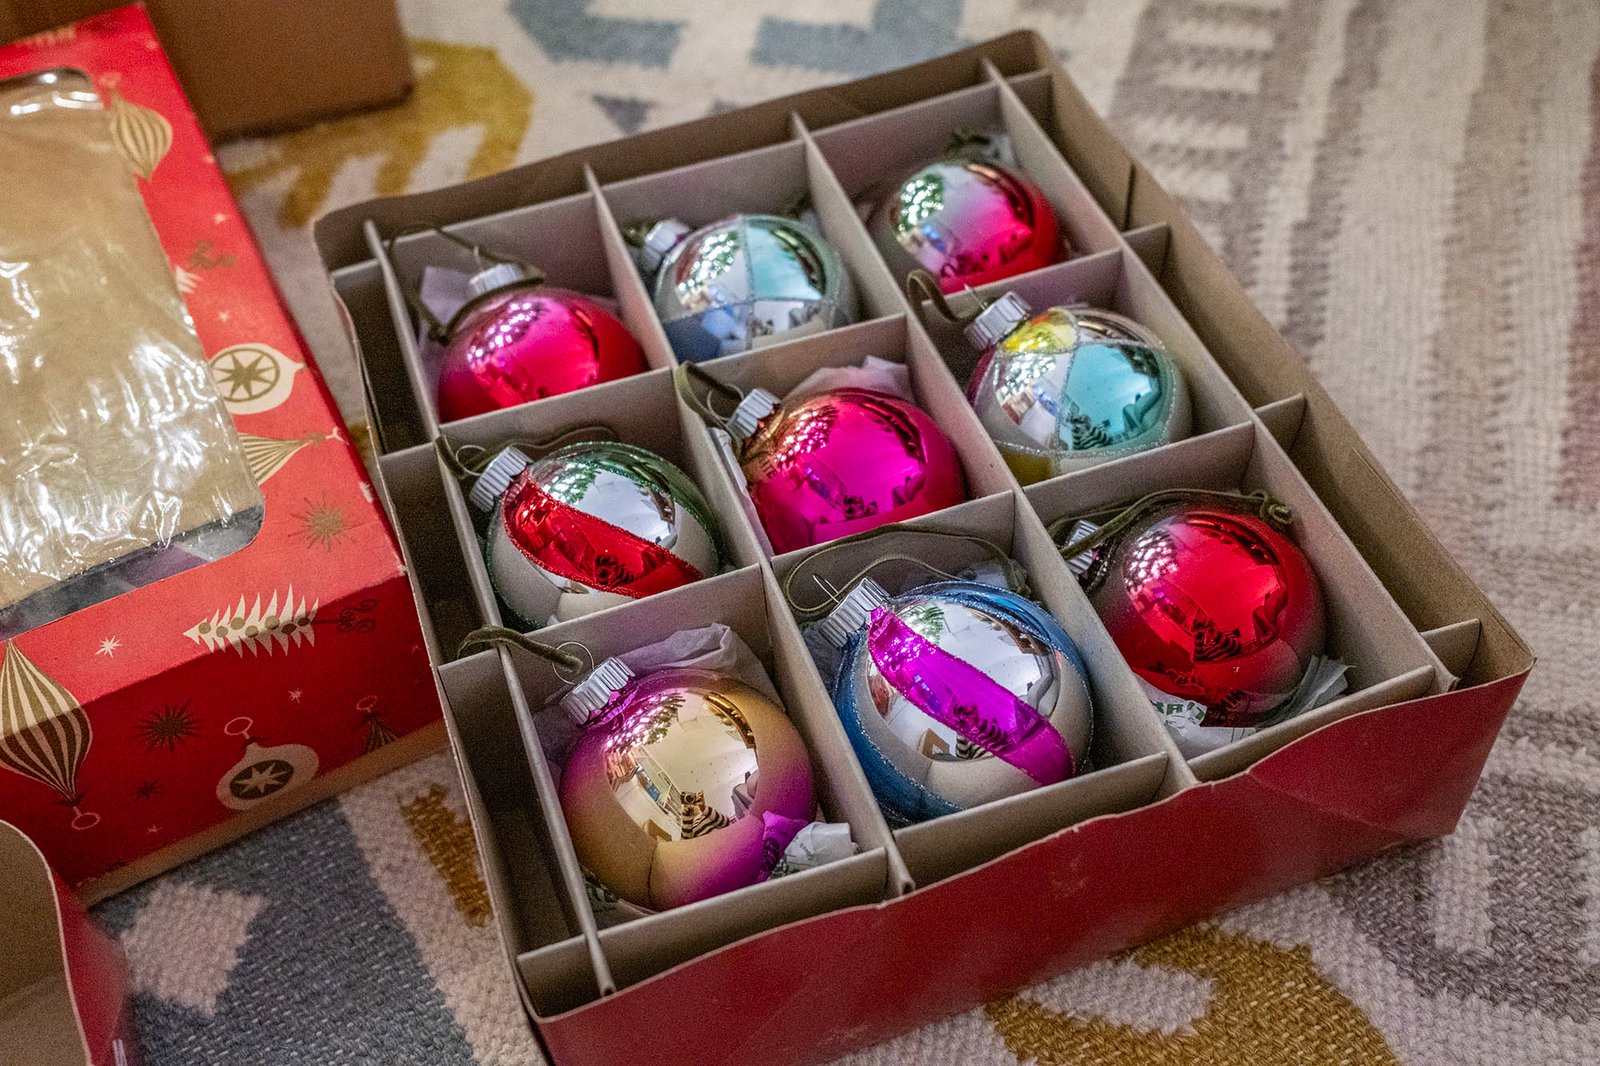
The formula is 60 percent blush pink, 30 percent rose gold, and 10 percent evergreen for the one cool note. That last 10 percent does more work than it looks — without green in the frame, pink and gold slide straight into bridal territory. Swap blush for champagne and rose gold for antique brass for a warmer, less candy version. The divided box matters too: nine ornaments, evenly spaced, is a composition rather than storage.
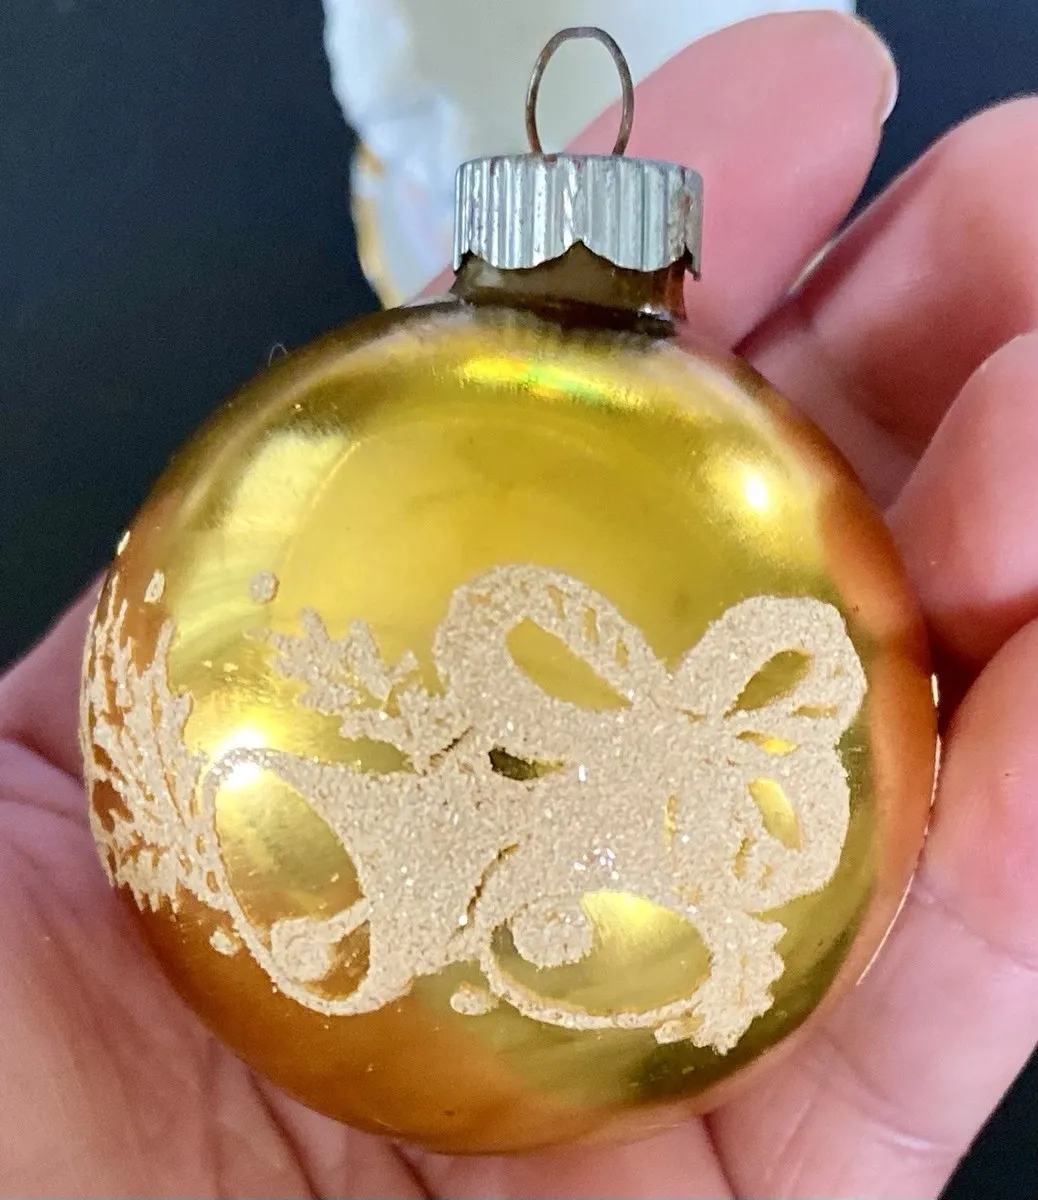
Beaded and glittered ornaments shed, and they shed hardest in the first season. Store them in a divided box with the beaded halves facing up, and never stack anything on top. Skip the tissue-and-bin method — the bead texture snags and the glitter migrates onto everything else. Expect a fine dusting on the shelf every December; a lint roller lifts it better than a cloth, which just smears it around.
14. What Your Shiny Brite Box Says About Its Value
Value lives in the box, not the ornaments. A complete set of twelve in an intact original Shiny Brite box with the insert can list at $150 to $400; the same twelve loose bring $60 to $120. Watch for the script logo versus the block logo, ‘Made in U.S.A.’ versus ‘West Germany,’ and whether the inner divider survived. Dealers pay a premium for sets and almost nothing for singles.
- Vintage boxed set, 12 ornaments: $150–$400
- Loose stenciled ornaments, each: $6–$25
- Acid-free tissue and archival box: $12–$30
- Wall rack or display stand: $18–$60
- Replacement caps and hangers: $6–$15
Total for a display-ready collection: about $190 to $530. You can shave that in half by buying a mixed box and building your own set from it — slower, but the result looks more collected anyway.
Don’t hang your most valuable pieces on the tree. Heat, direct sun, and one cat’s tail have ended more collections than bad storage ever has. The best ornaments in any collection belong in a cabinet or on a wall rack, where they get seen and stay intact. If you must hang them, put them high and out of the traffic path, and use wire loops instead of seventy-year-old original caps.
15. Three Tinsel Mini Trees with Color-Matched Lights
Notice each tree’s lights match its tinsel color instead of running warm white across all three. That’s the entire trick. Color-matching turns three inexpensive objects into a set with a system, and it lets the gold tree in the middle act as a neutral anchor between two saturated companions. The artificial snow underneath does the same job a tablecloth does — kills the reflection and gives the bases somewhere to sit.
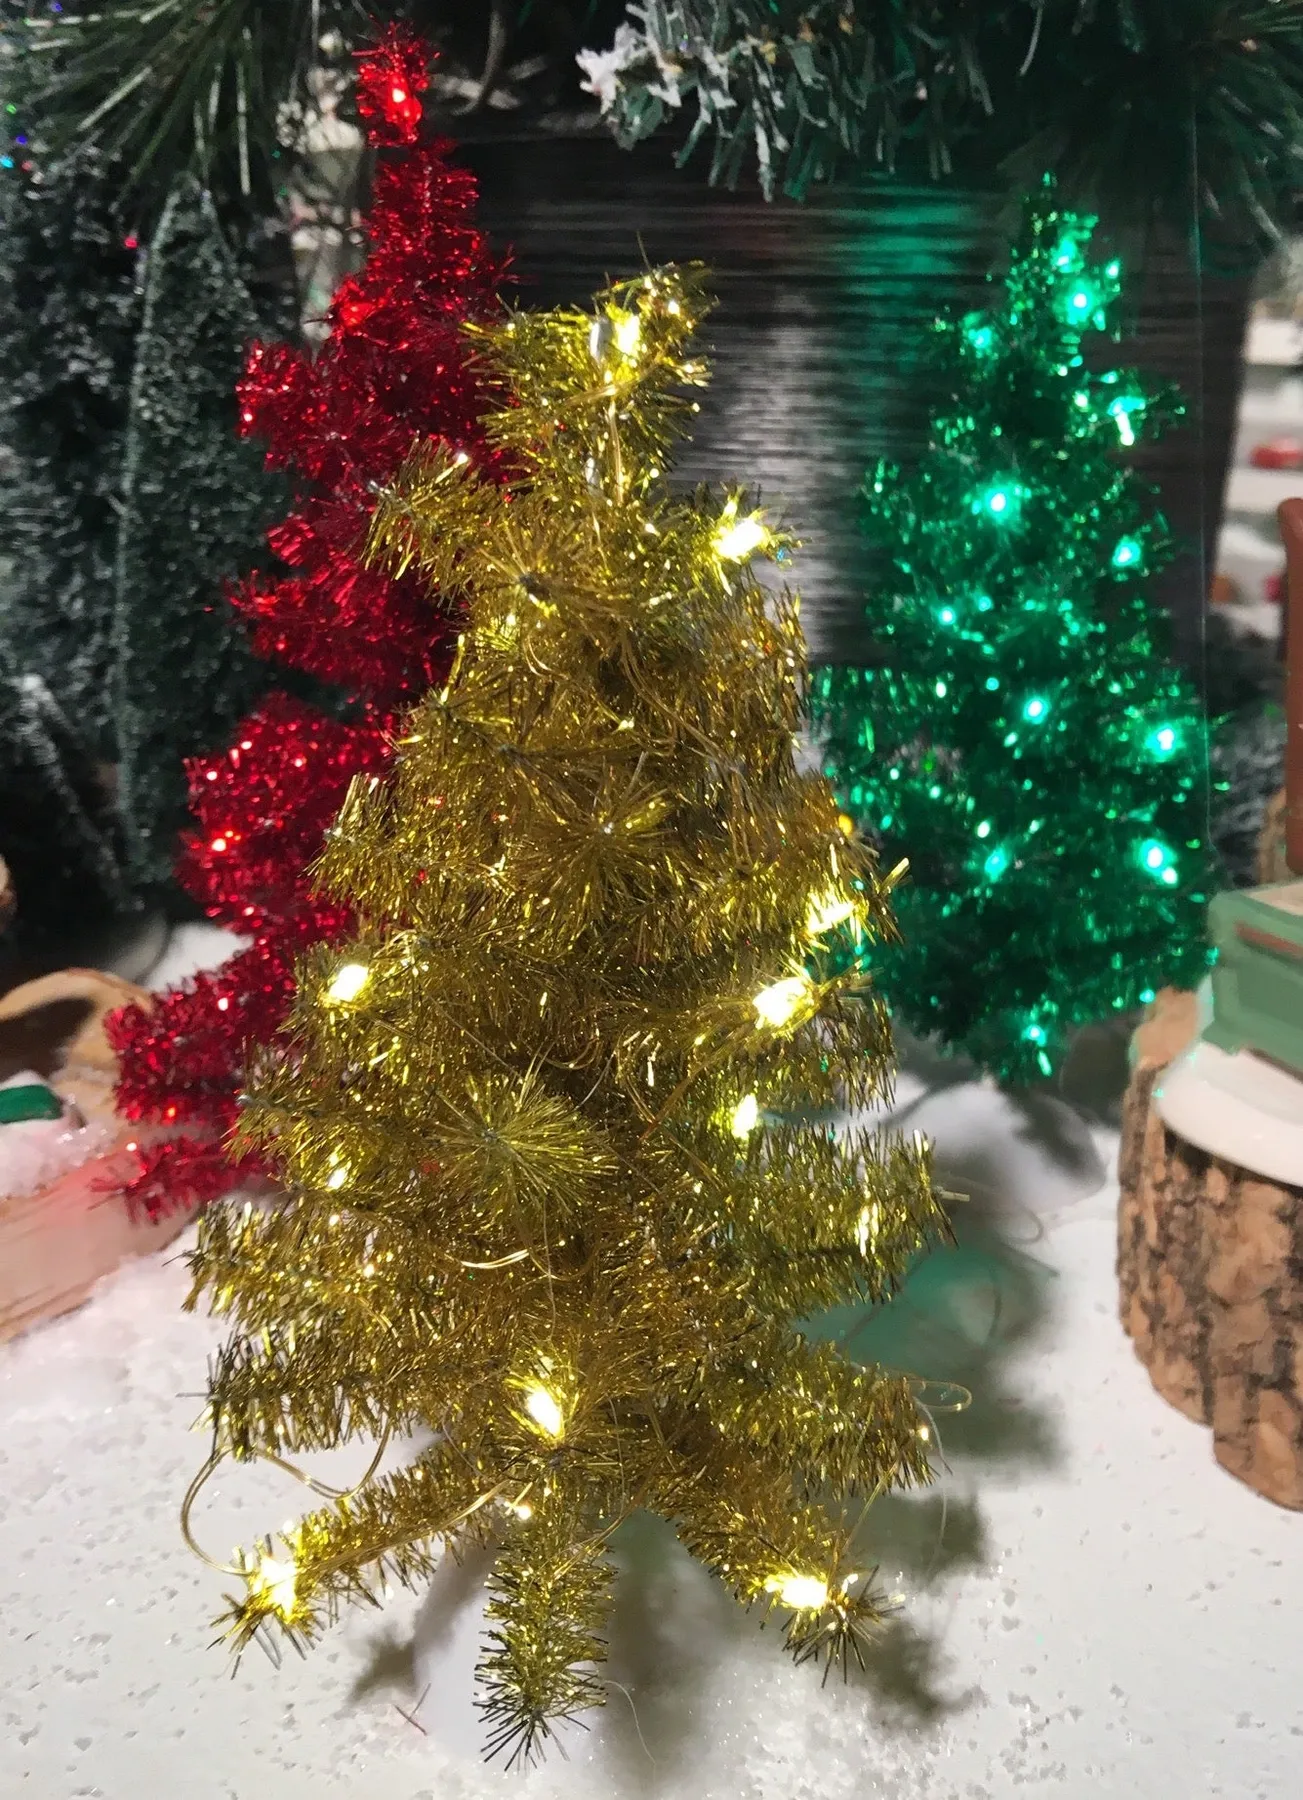
These are 12- to 18-inch trees, so they need a little runway: 24 to 30 inches of surface for three, and anything tighter makes the snow look accidental. Windowsills, entry consoles, and bathroom vanities all work. On a deeper surface, set them in a triangle instead of a row and they read as one arrangement rather than a lineup. Skip them on floating shelves under six inches deep.
16. Six Stenciled Shiny Brites, Displayed as a Set
Building a snow-dusted base for a small tree or display:
- Line a tray with parchment so the snow doesn’t bond to the surface.
- Spread a half-inch layer of faux snow, then break the flat top with your fingers.
- Press the tree base in and rotate slightly until it sits level.
- Add a light second dusting over the base to hide the seam.
- Finish with a thin sprinkle along the front edge only.
About 15 minutes and $8 to $15 in faux snow, depending on tray size.
Six stenciled Shiny Brites in good condition run $50 to $130 on Ruby Lane. For less, watch boxed lots on Facebook Marketplace — mixed boxes often work out to $3 to $8 per ornament, and you only need two stencils in the batch to carry the set. Walmart and Target also sell stencil-look glass six-packs around $15. Nobody is inspecting your tree with a magnifying glass, and the display does most of the work anyway.
17. A Peeling Green Ornament That Earned Its Patina
The peeling paint is the design, not the damage. Where the green has flaked away, the silver underneath reflects — so the ornament is lit from within by its own wear. No reproduction fakes that convincingly, which is why collectors sometimes pay more for a beautifully aged piece than a pristine one in the same color. If you find one like this, don’t clean it, don’t repaint it, don’t fix it.
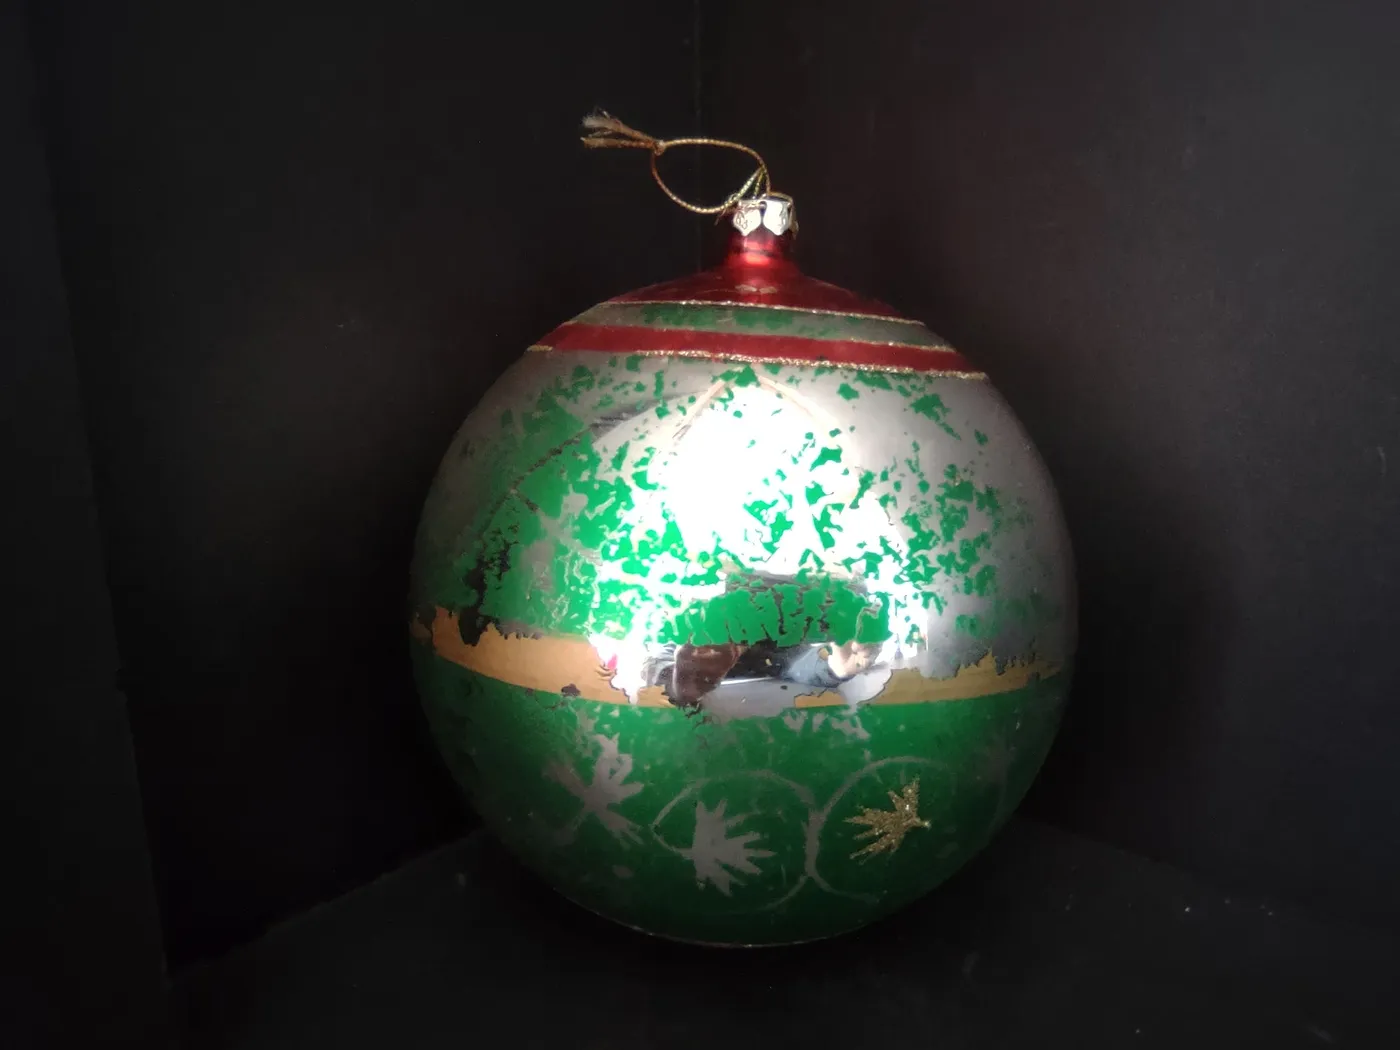
Two principles are at play. First, contrast of finish: chalky, degrading green sitting on genuinely mirror-bright silver. Second, the red and gold stripes near the neck act as a visual anchor — they hold your eye at the top so the peeling section reads as intentional rather than messy. Same reason weathered furniture works. The eye needs one intact element before it trusts the rest.
18. Frosted Teardrop with a Teal Starburst Center
Frosted white as the base, one crisp teal starburst as the focal point, a single pink band as the accent. That’s roughly 70 percent white, 20 percent teal, 10 percent pink — and those proportions are why it reads delicate instead of busy. Swap the teal for sapphire and the pink for coral and the formula survives. Push the starburst share past 30 percent and the whole thing turns loud. For a bolder version of the same color, Idea #8 runs teal at full saturation.
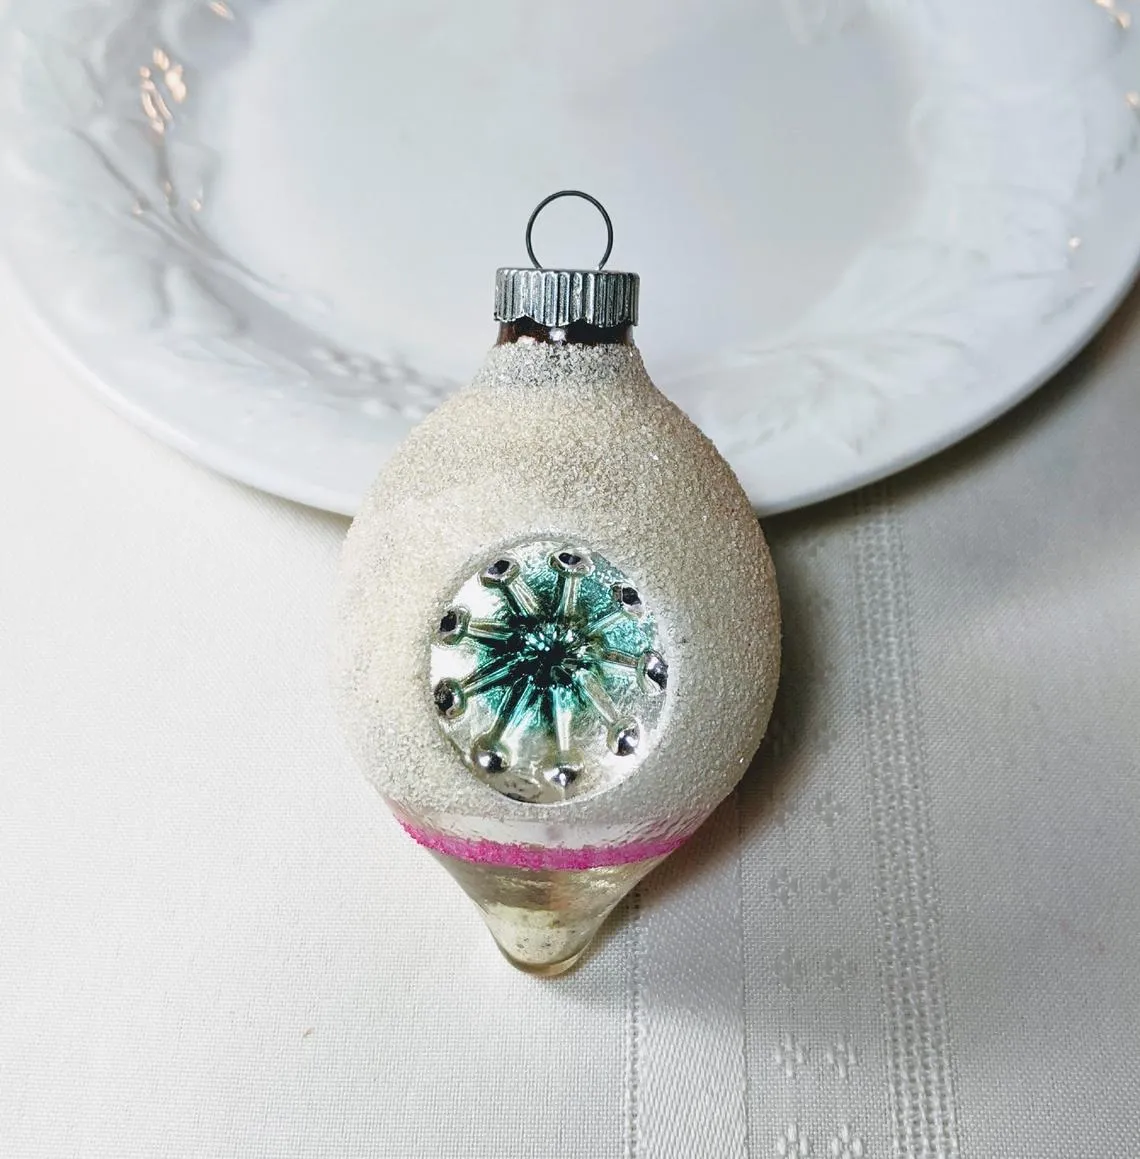
Styling a teardrop ornament so the indent actually shows:
- Set it on white linen, not a colored cloth, so the frosted surface has contrast.
- Lean it slightly back so the indentation faces the light, not the camera.
- Place a small white plate behind it to bounce light into the shadow side.
- Shoot from about a 30-degree angle rather than straight on.
- Move the piece, not the light, until the starburst reads.
19. A Fuchsia Glass Santa on a Gold Stand
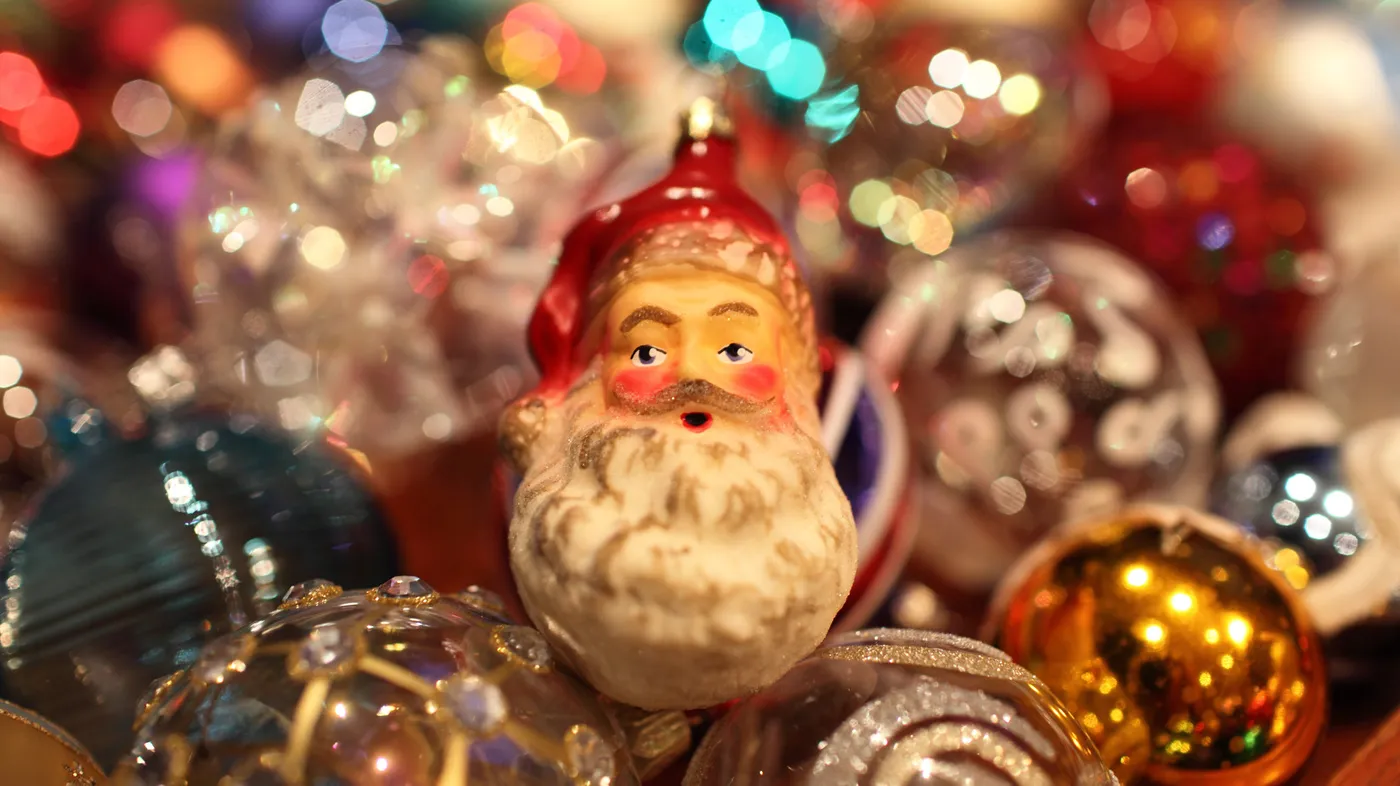
Single ornaments on stands are the most underrated styling tool in holiday decor. Put one at eye level on a console, a shelf, or a stack of books and you get the same color payoff as a whole tree in a fraction of the space. The key is a metal stand with a weighted base — a cheap wire holder lets the piece tip. Group two or three at different heights instead of lining them up in a row.
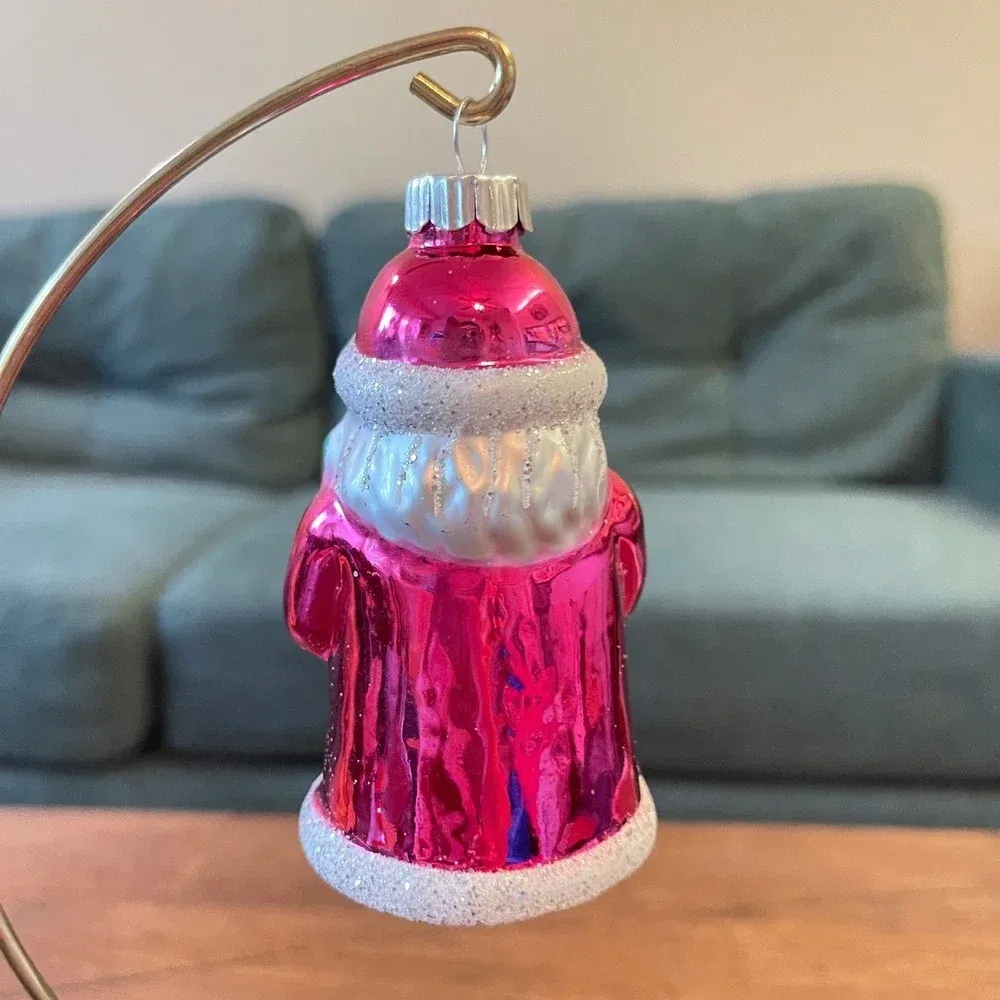
A vintage fuchsia glass Santa figure can run $40 to $90, and a gold display stand adds another $10 to $25. Walmart and Target sell glass Santa ornaments for $6 to $12 each, and a small brass-toned stand — or a vintage candlestick holder — does the same job for under $10. Total: around $20. The color does the heavy lifting here, not the age of the glass, so check thrift stores for brass candlesticks at two dollars apiece.
20. Candy Cane ’26 Ornaments on Red Ribbon
- Measure your branch spacing before choosing a ribbon width.
- Confirm the year stamp on the ornament matches the year you’re marking.
- Check that your ribbon is wired, not flat — flat ribbon droops.
- Decide whether the set hangs together or as single feature pieces.
- Have a shallow, divided box ready for storage before the season ends.
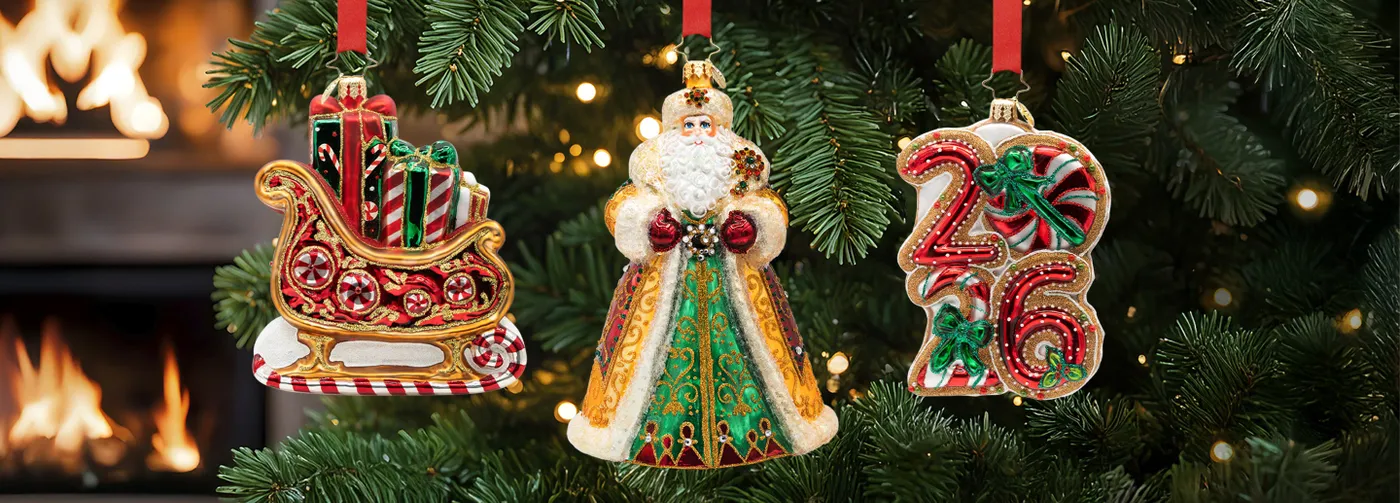
Dated keepsake ornaments are lovely until you have twelve years of them and a tree that looks like a timeline. Pick a lane: either the dated pieces get their own small tree or a dedicated branch cluster, or you stop collecting them. Also worth knowing — glass keepsakes on red satin ribbon swing hard in a draft. Tie them off with a knot at the cap instead of a loose loop, or you’ll be sweeping glass by New Year’s.
21. Frosted Glass Ornaments Piled in an Aged Silver Bowl
- Aged silver or pewter bowl, 10–12 inches: $18–$70
- Vintage frosted ornaments, 12 pieces: $60–$180
- White textured runner or frosted tray: $15–$40
- Preservation pouches for the off-season: $10–$20
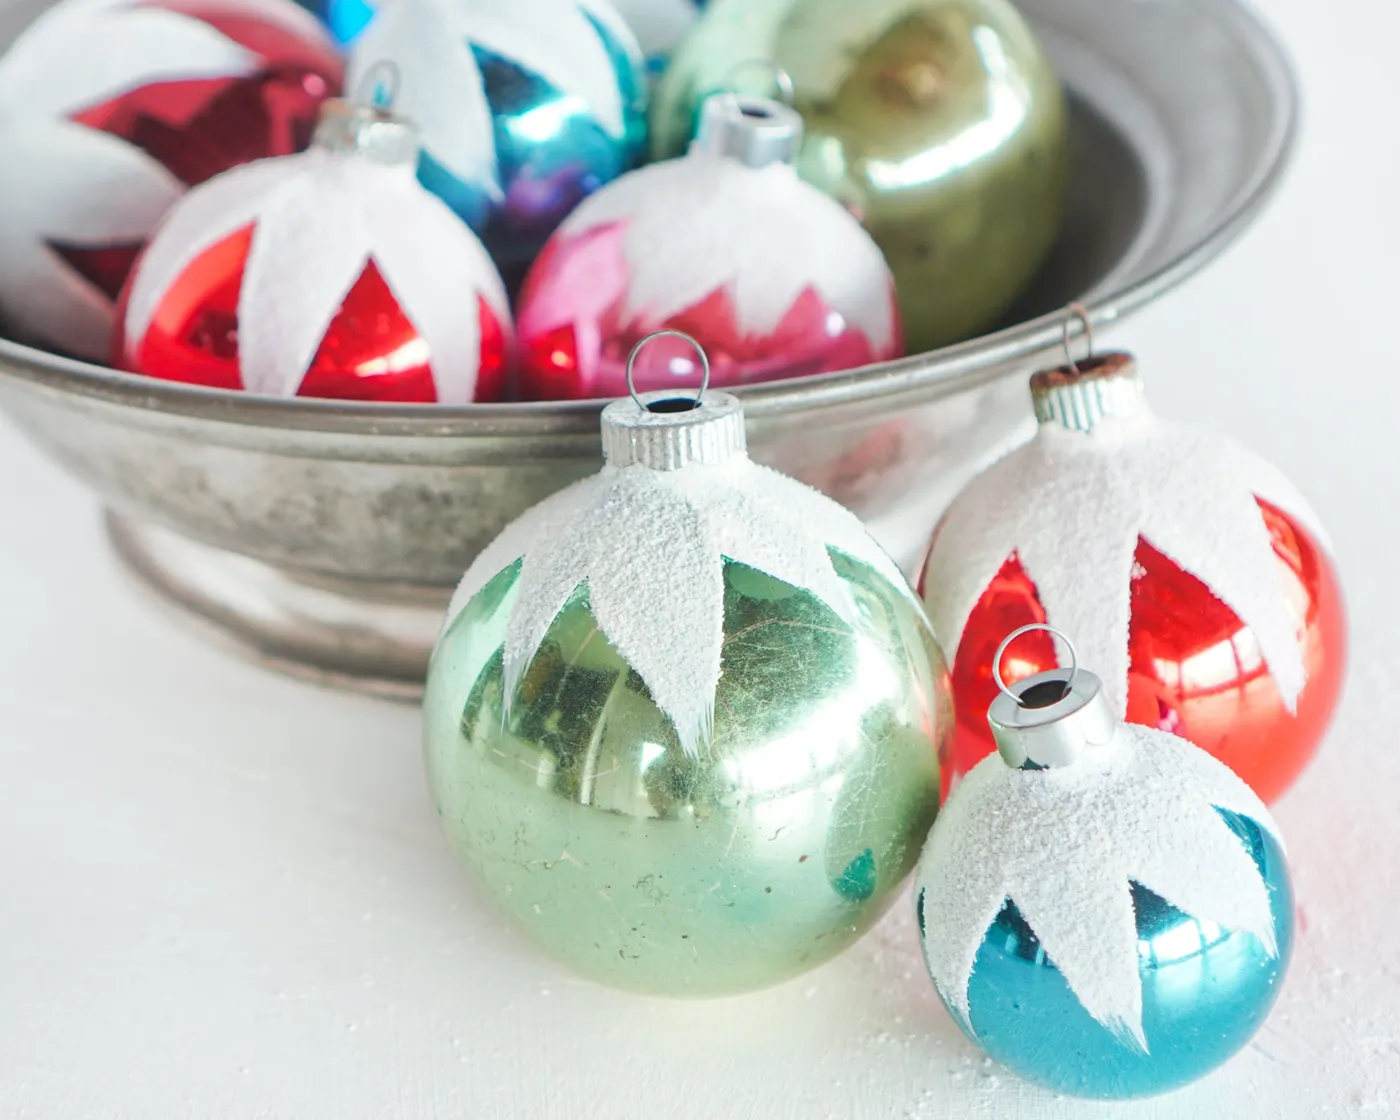
Total: about $105 to $310. Budget version: a brushed-steel bowl from IKEA at $15 plus a dozen modern frosted-glass ornaments for about $20 gets you 80 percent of the look for under $40.
This bowl arrangement is happiest on a dining table or sideboard with at least 48 inches of width — it needs negative space around it or it turns into clutter. A ten- to twelve-inch bowl holds twelve to sixteen three-inch ornaments comfortably. On a narrow console under 14 inches deep, drop to an eight-inch bowl and eight ornaments. Skip it on a coffee table where drinks are moving around.
22. A Silver Mosaic Poinsettia on a Lit Evergreen
That oversized mirrored poinsettia is the entire event. Everything else on this tree — the dense green branches, the warm white fairy lights — exists to make that one silver bloom pop. It’s scale doing the work: a single ornament three or four times larger than the rest creates a focal point your eye finds instantly. Cluster the small ornaments around it and thin them out as you move away.
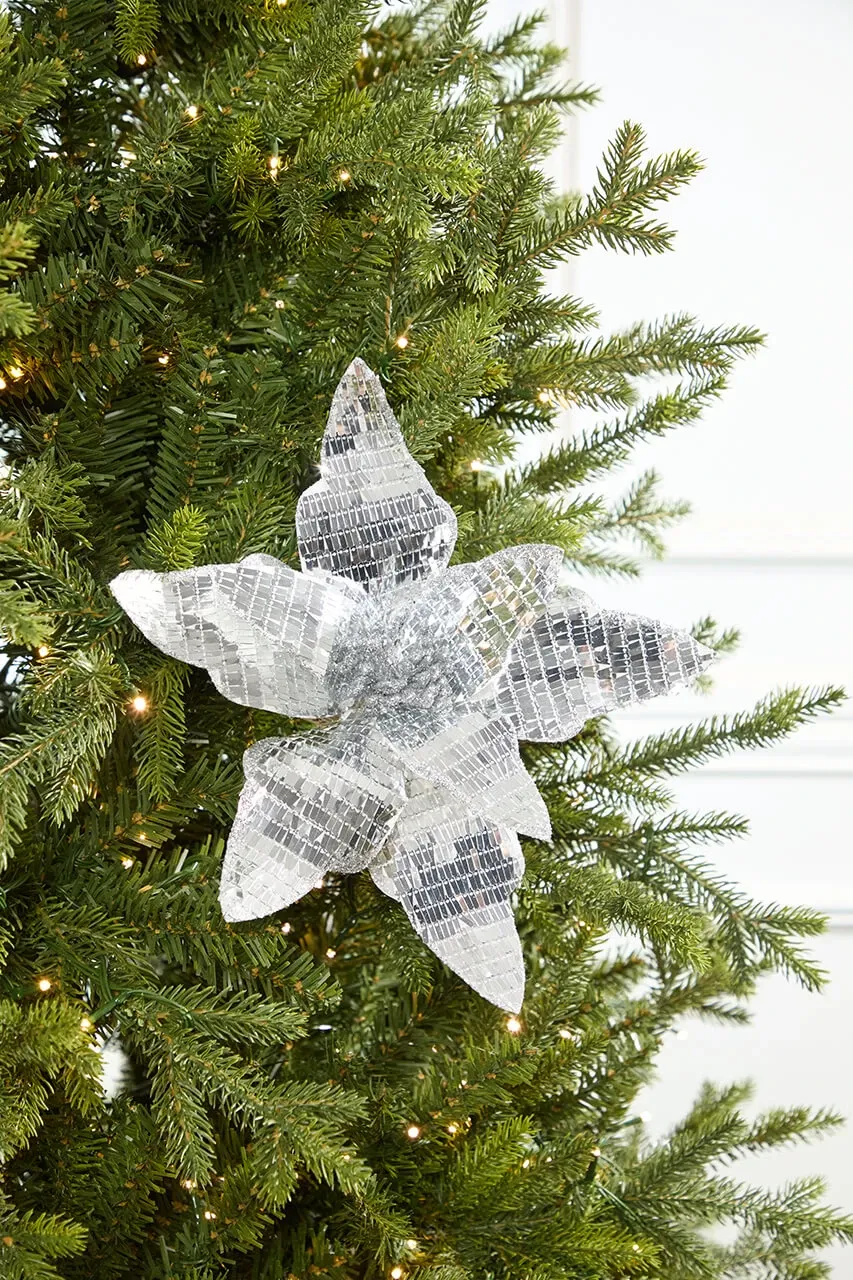
Oversized single-statement ornaments have been climbing for a few seasons, and 2026 is when they went mainstream. The appeal is practical: one large piece gives you a decorated-looking tree with a fraction of the ornament count, which matters if you’re buying vintage glass by the piece instead of by the box. Mosaic and mirrored finishes photograph especially well, which is why they’re all over Pinterest right now.
23. Golden Tinsel Tree Beside Its Original Shiny Brite Box
Tinsel trees are not a long-term investment. Gold tinsel dulls with dust and sunlight, and once the sheen goes, no amount of cleaning brings it back. Plan on three to five seasons of display use. Store it upright in a bag rather than squashing it flat, and dust it with a soft brush or a hair dryer on cool from a distance. Tinsel that’s been crushed never fluffs back.
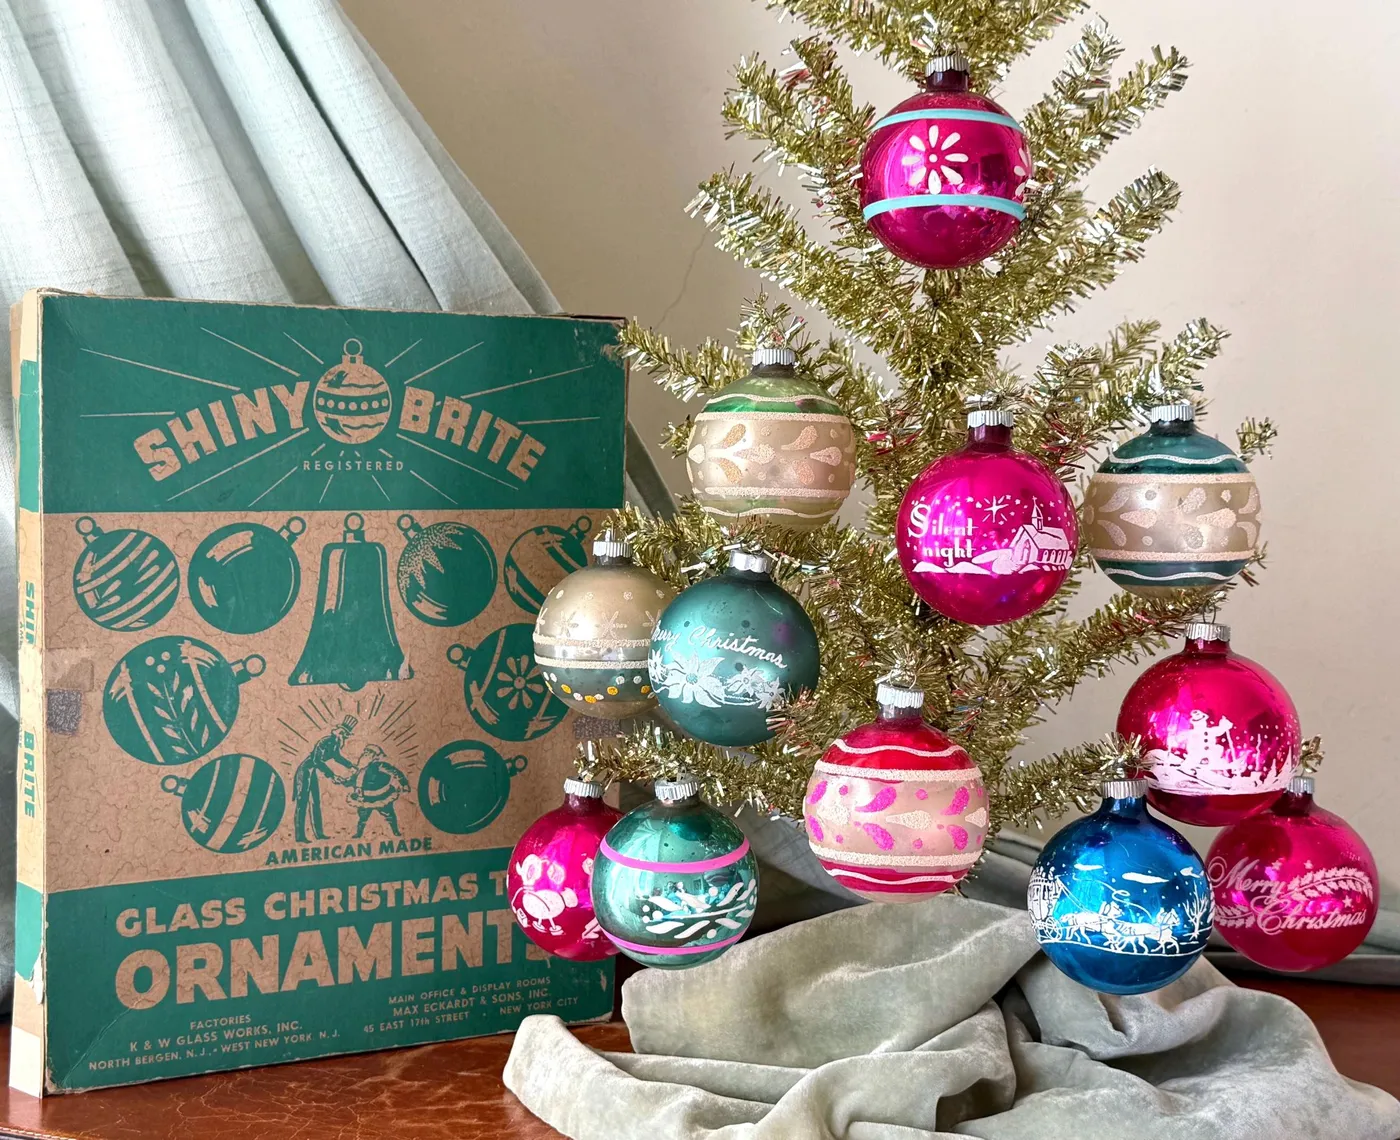
Two things make this vignette work. The drape of light green velvet under the tree creates a soft, matte ground that makes gold tinsel look richer than it is. And the cardboard Shiny Brite box isn’t hidden away in storage — it’s part of the composition, which tells the viewer these ornaments were collected, not bought as a set. Displaying the packaging is a legitimate design move. For the same idea handled with more restraint, see Idea #16.
24. White-Painted Ornaments Against Faded Floral Fabric
White-painted glass ornaments are the most fragile category in vintage Christmas. That paint sits on the surface, not under glaze, and it flakes if you look at it wrong — which is exactly why you see them held in photographs instead of hanging. Handle them by the cap only, never the painted body, and keep them off a tree where branches rub. A shallow display box beats a tree branch every time.
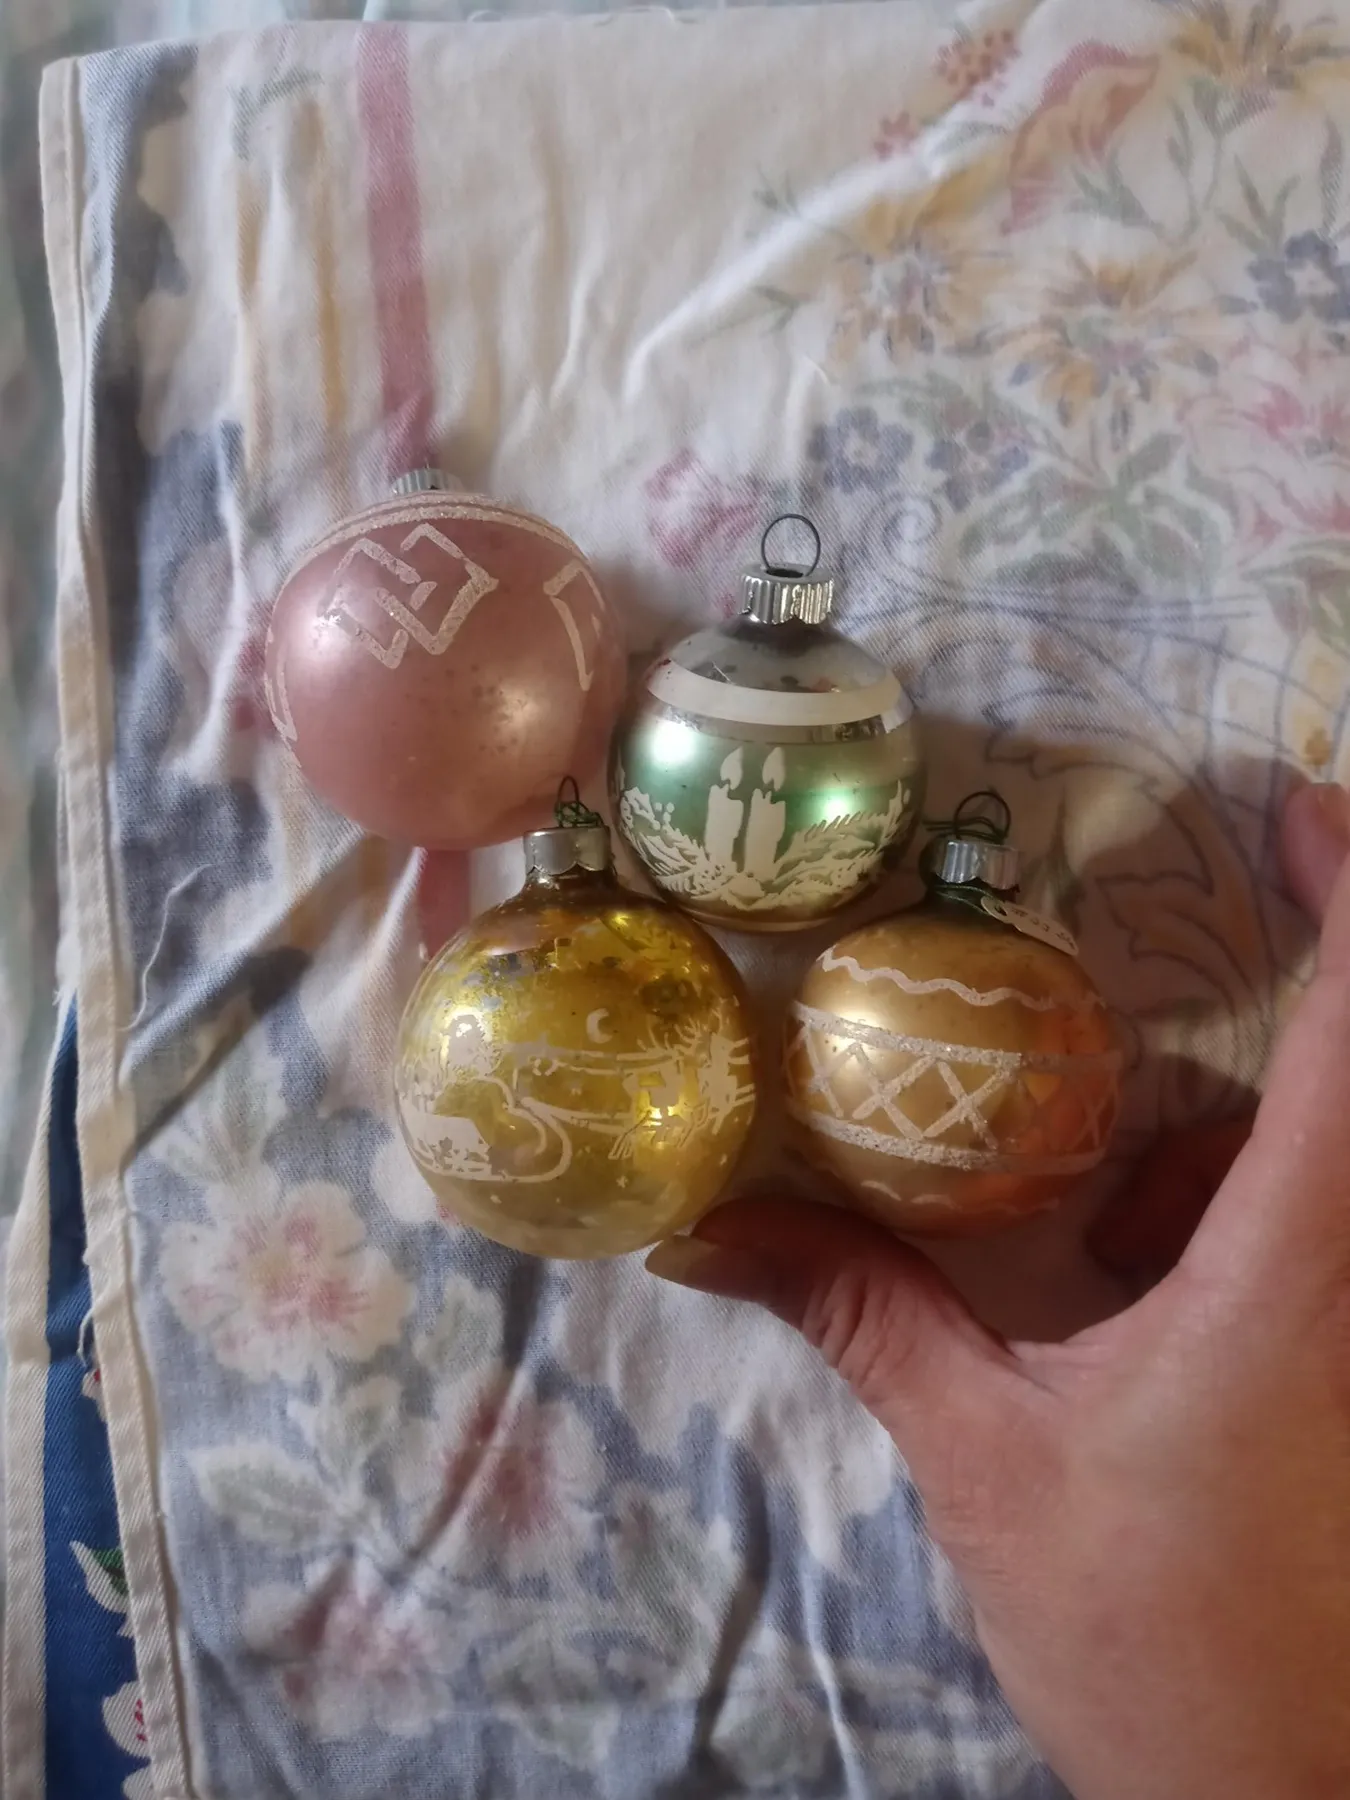
When you display or photograph painted ornaments, put them against something with a print, not a solid. The faded floral fabric behind these four gives the eye a reference scale and makes the white details read as crisp. A solid background flattens white-on-glass patterns into a smear. Thrift stores and estate sales are full of old floral napkins and tablecloths that cost two dollars and do this job perfectly.
25. A Whole Tree of Vintage Baubles, Nothing Else
This tree is essentially one ingredient in three finishes: 70 percent vintage glass in mixed bright color, 20 percent warm white light, 10 percent bare greenery showing through. No ribbon, no picks, no sprays. The restraint is what makes it look like a collection instead of a craft store. If you want to add anything, add a second light strand in the same warm temperature — never a new color family.
Building a tree like this from scratch is expensive. Building it over three years isn’t. Budget $60 to $100 a year on boxed lots and estate sales, and by year four you’ll have 150 pieces that cost about $3 each instead of $15. Start with a solid color base of modern glass balls for $20, then let the vintage pieces accumulate on top. The mix is what sells it anyway — nobody’s tree was collected in one weekend.
26. Modern Designer Ornaments That Read Vintage
- Designer ornament set, 6 pieces: $95–$220
- Coordinating ribbon or hangers: $10–$22
- Lined storage box: $18–$40
- Shipping and handling on oversize pieces: $12–$30
Total: about $135 to $312 for one designer set. A comparable vintage-look set from Target or Walmart runs $18 to $35 — the color story is nearly identical, and only you will know.
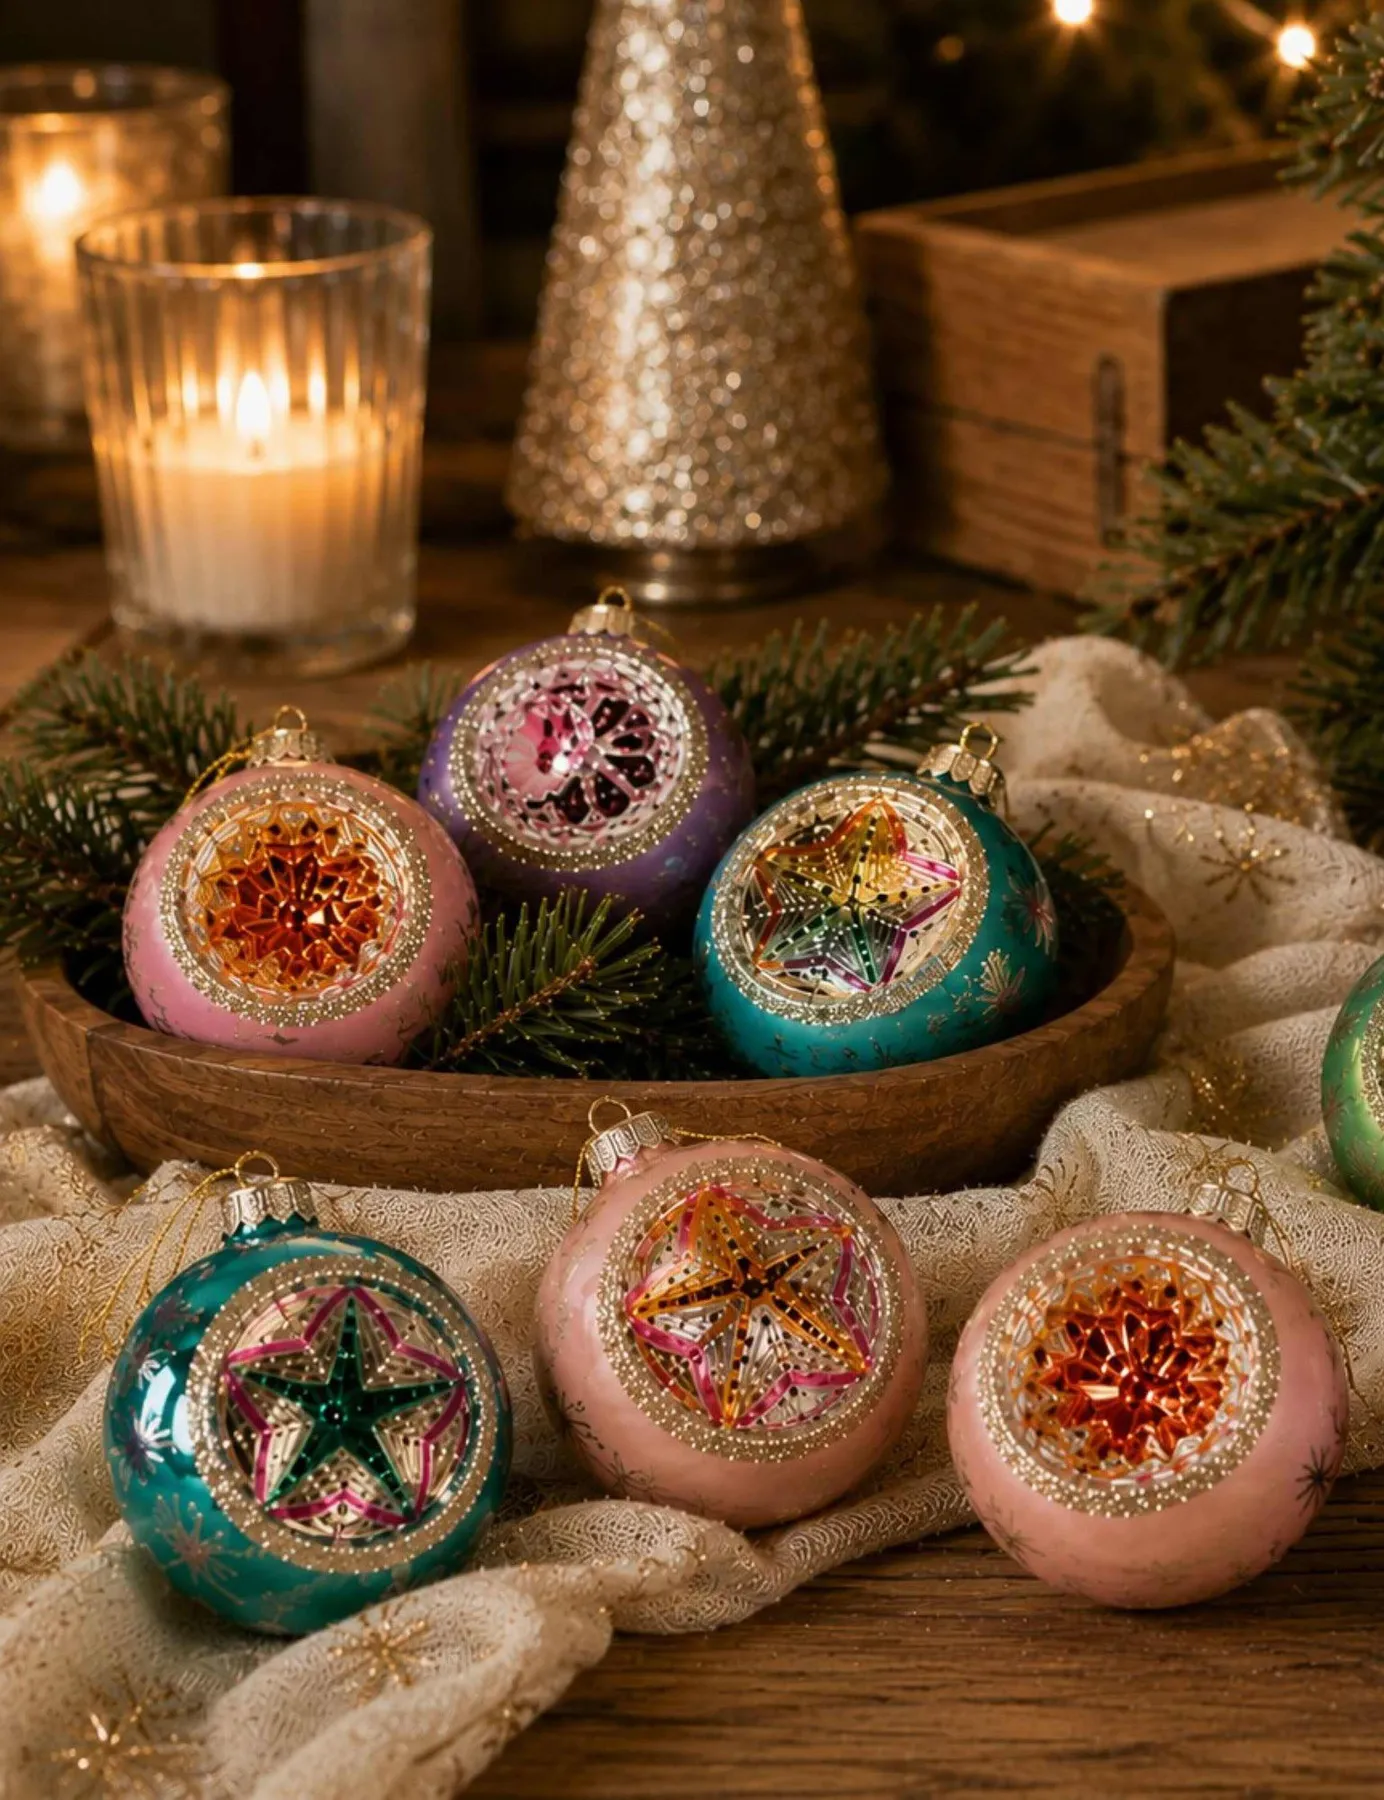
Modern designer ornaments earn their price in two places: color accuracy and finish consistency. If you’re buying them, buy a set, not singles — three pieces from the same collection read as intentional, three pieces from three collections read as leftovers. Check the sheen level across every piece before you hang them. Compare with Idea #2, which layers saturated glass over silver tinsel for a very different mood.
27. A Light Green Ornament with a Merry Christmas Banner
The light green body is the surprise here. Put that woman graphic and gold Merry Christmas banner on a red or gold ornament and it’s just another holiday piece. On soft green, it reads as a collectible — the graphic has room to breathe and the pink pleated skirt gets a complementary backdrop instead of a fight. Color choice is doing more work than the illustration is, which is a useful lesson if you’re painting your own: put the graphic on the unexpected ground.
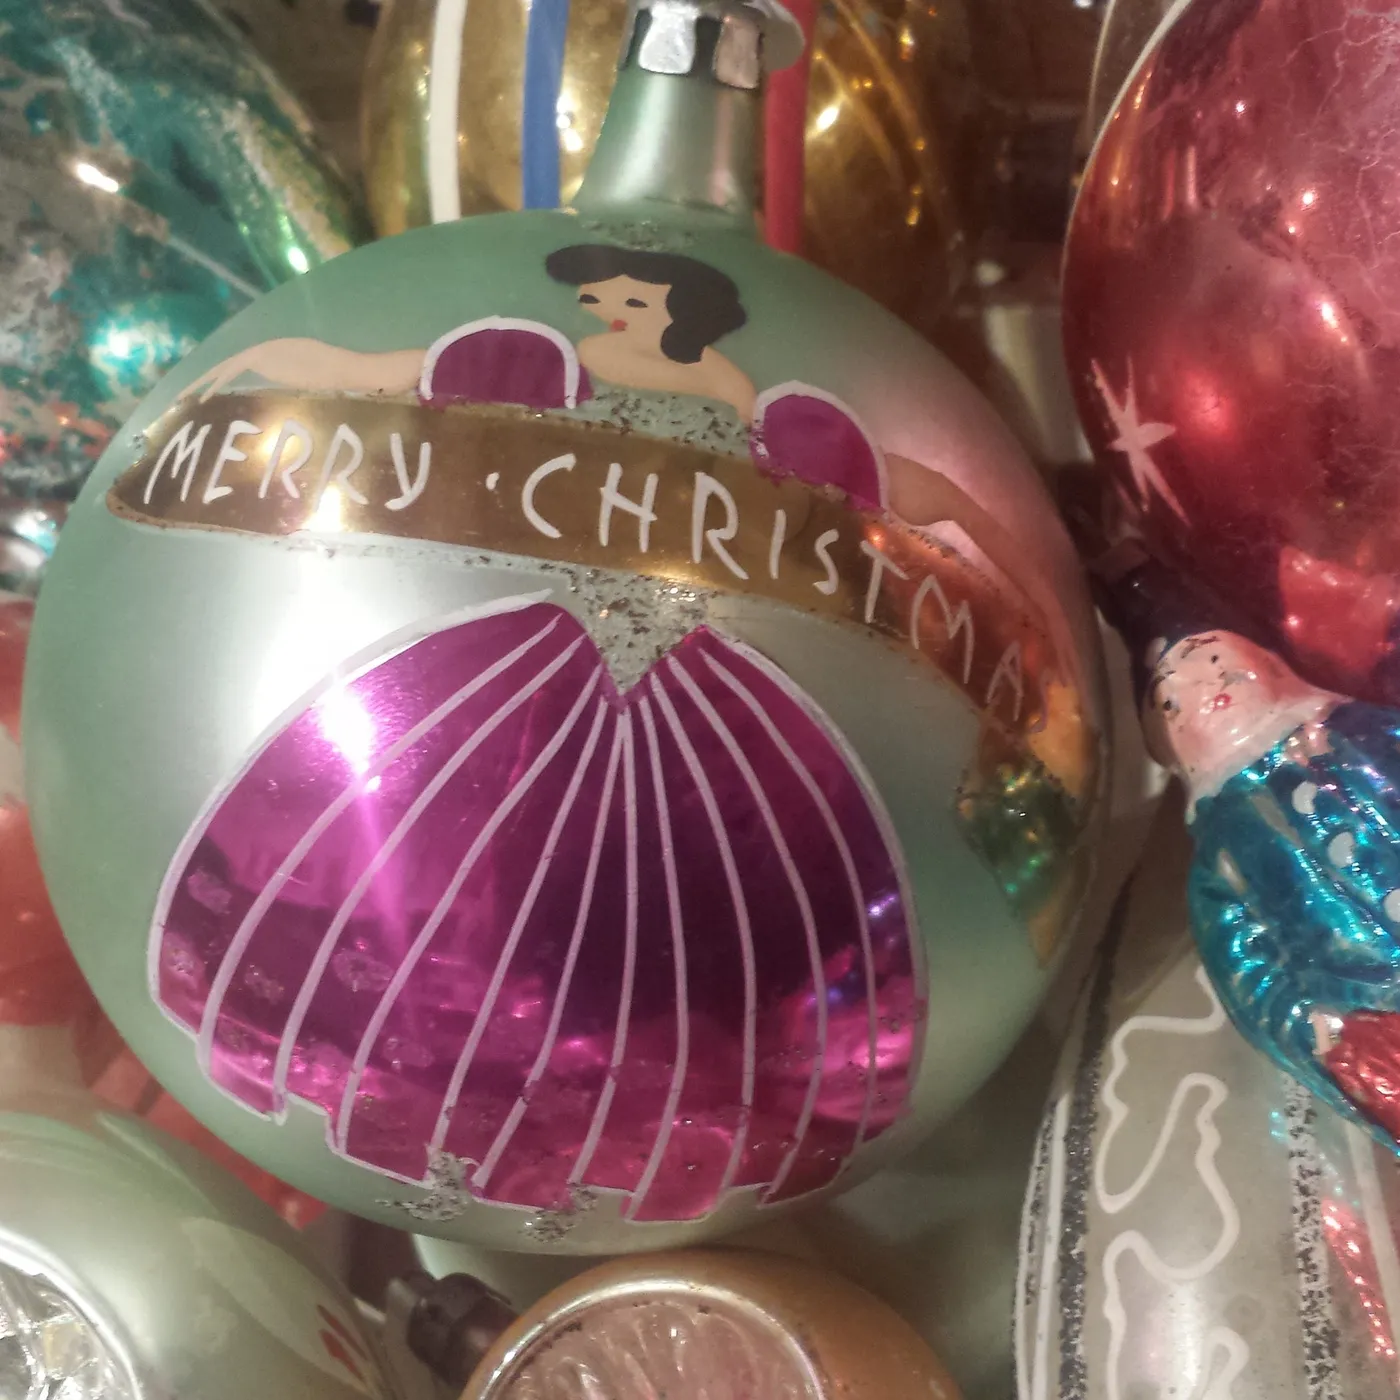
A large graphic ornament needs to be seen from a few feet away, which means a tree at least six feet tall or a display shelf at eye level. On a three-foot tabletop tree, a five-inch graphic piece overwhelms everything around it. Keep graphic ornaments to one per branch cluster. If your tree is compact, a bowl or tray arrangement handles oversized pieces far better than branches do.
28. One Green and White Ornament, Hung Just Right
- Check the branch strength where you plan to hang — thin tips sag under glass.
- Confirm your hanger matches the cap size; vintage caps are smaller than modern ones.
- Note which direction the light hits so the painted side faces the room.
- Have a soft cloth nearby — glass chips are easier to spot on fabric than carpet.
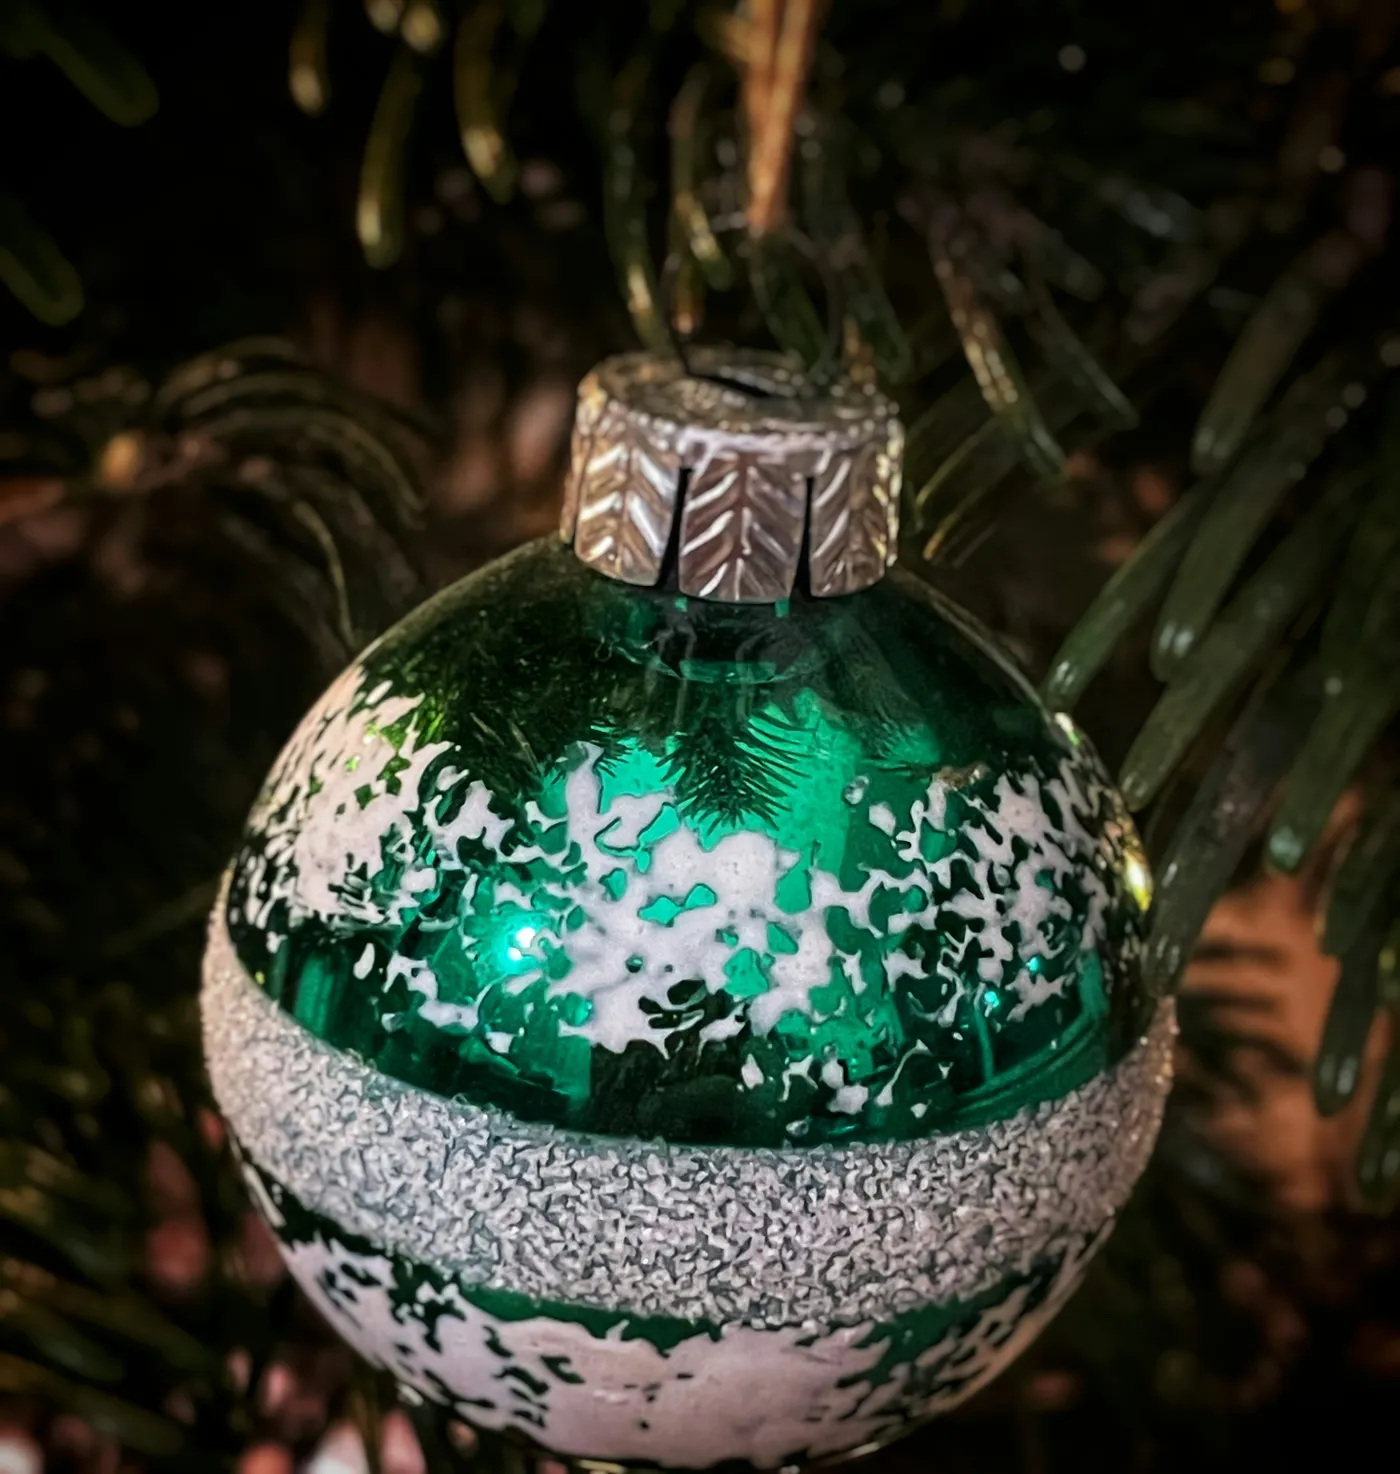
Green and white painted ornaments show every fingerprint and every chip. The white sections yellow slightly over decades, especially in sunlight, and there’s no fixing that once it starts. Store them face-up in a single layer with acid-free tissue between pieces, and never let them touch each other. If you want the same palette without the anxiety, a modern hand-painted ornament gives you the colors and forgives a lot more.
29. A Golden Bird Ornament Clipped to the Branches
Clip-on bird ornaments are wonderful and slightly dangerous. That metal clip grips a branch hard enough to stay put, but it also bites into the needles, and on a tinsel or vintage tree it can leave a visible dent. Clip them to the woody part of the branch near the trunk, not out on the tips. Keep them above tail height if you have cats — jeweled bodies are the first things to go missing. A few more handling rules live in the mistakes section at the end of this guide.
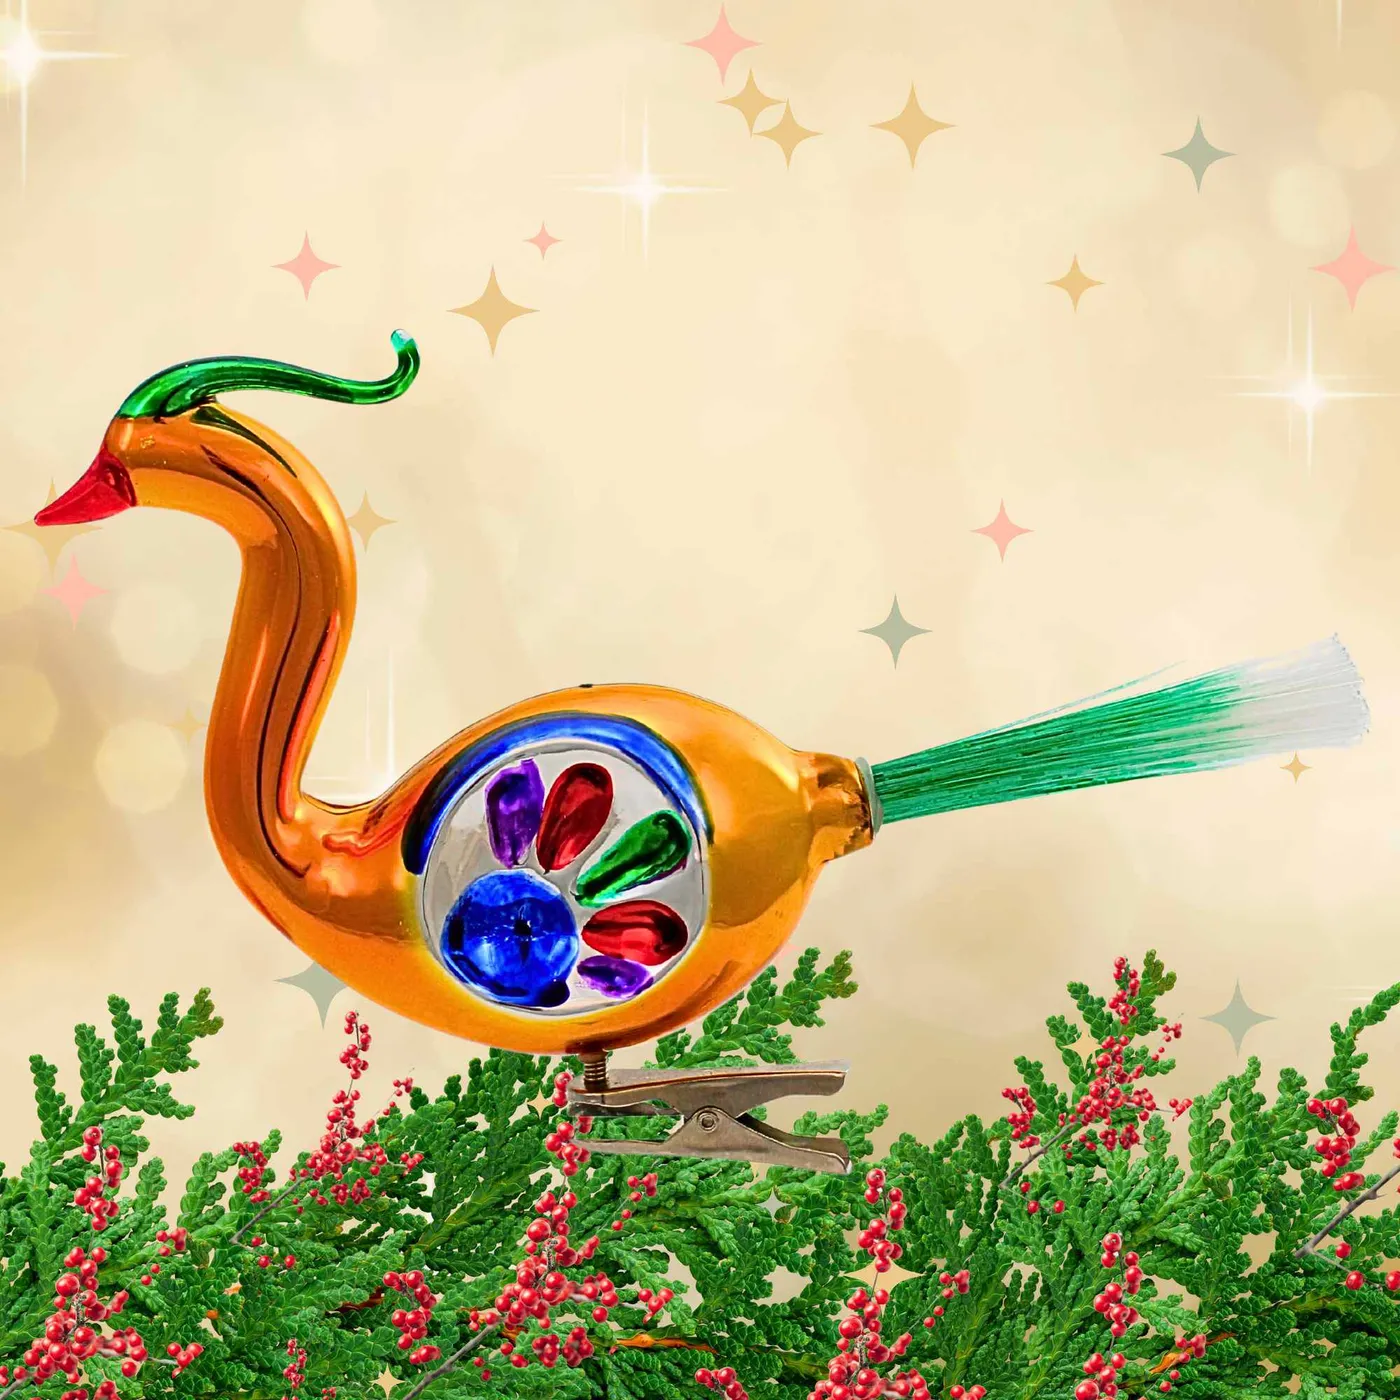
Getting a clip-on ornament to sit at the right angle:
- Find a branch with a flat, woody section at least a quarter inch thick.
- Open the clip fully and slide it on from the side, not the top.
- Rotate the ornament until the jeweled body faces the room.
- Add a small twist of floral wire behind the clip to stop slipping.
- Check that the tail clears the branch below it.
Your Vintage Tree Starts With One Good Box
You don’t need to recreate a photo from a magazine — you need one box of ornaments, one honest look at your branch strength, and a weekend to let it happen. Start with the pieces you already have, add a strand of warm white light, and let the collection grow over a few Decembers.
📌 Pin this guide now so it’s waiting for you next November, when the good vintage sets go fast.