
Salt dough is having a quiet, glitter-dusted comeback on Pinterest right now — and the 2026 version looks nothing like the lumpy kindergarten ornaments you remember.
We spent a few long evenings scrolling Etsy, Michael’s, Amazon, Target, and a handful of very good independent makers to pull together the 32 ideas actually worth your flour, salt, and water this year — from about $6 in pantry supplies to $180 for a finished, gift-boxed set. Inside you’ll find rustic natural stars, pastel hand-painted Santas, cocoa-brown ornaments with gold ribbon, fully glittered snowmen, and budget swaps lined up next to the luxury version so you can see exactly what the extra money buys. Salt dough is the rare trend where the handmade version genuinely beats the store-bought one, and Pinterest has noticed.
And stay until the end — we break down the most common mistakes that can ruin these looks. 📌 Save this to Pinterest for later — you’ll want to revisit these ideas.
1. Muted Salt Dough Stars and Bells on a Bare Pine Branch
The thing that makes this branch read as designed rather than homemade is the color story: pale butter yellow, dusty rose, soft grey, warm tan, all sitting at the same low saturation. Swap those for primary red and green and you get a Sunday school craft. Keep them and even a slightly lumpy bell looks deliberate. Notice that the only saturated color in the frame is the pine itself — the needles do all the contrast work, which is exactly why the ornaments never have to shout.

Hang to a two-size rule: cut your shapes at roughly 2.5 inches and 3.5 inches, nothing in between. Cluster in odd numbers — three small, one large — and leave 4 to 5 inches of bare branch between clusters. Texture matters as much as silhouette, so press a fork tine or a small star cutter lightly into the surface before it dries; those depressions catch light and give flat dough a reason to look expensive.
2. Scalloped Dough Discs With Pressed Buttons and Heart Stamps
The sequence that keeps buttons from popping out in the oven:
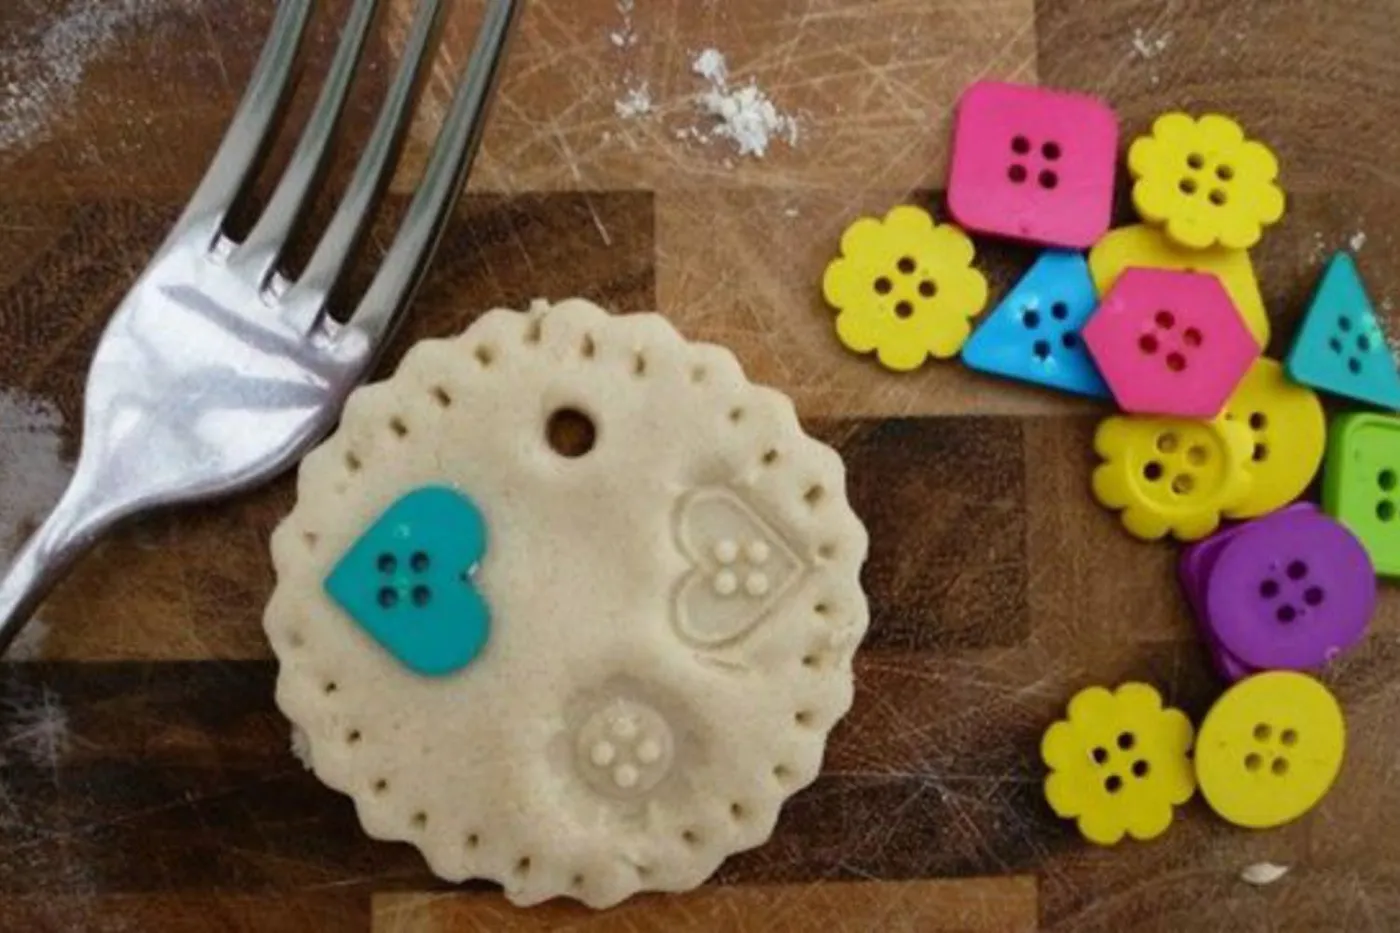
- Roll the dough just under 1/4 inch thick and cut a scalloped round.
- Press the button in while the dough is soft, but leave it standing about 2mm proud so it casts a shadow.
- Use the back of a fork to press heart and dot patterns around the rim.
- Poke the hanging hole with a skewer held at a slight angle.
- Dry at 200°F for 90 minutes, then let them cool inside the oven.
About two and a half hours, most of it hands-off. Materials stay under $8 if the button jar is already yours.
The ratio is roughly 80% pale uncolored dough, 15% bright plastic, 5% metal. That’s why it feels playful instead of chaotic — the buttons are the only real color in the frame, so three or four of them go a very long way. Swap the teal heart for cherry red and the whole ornament turns traditional. Swap the pale dough for cocoa and you land somewhere darker and more grown-up. Keep the ratio and you can change every other variable.
3. A Braided Dough Wreath With Satin Ribbon and Holly Sprigs
Three principles are stacked here, all doing different jobs. Orientation first: a wreath is the only ornament shape that reads as a circle from across the room, so it breaks up a tree full of stars and trees. Then the braid — that twisted rope texture is the entire reason a flat dough ring doesn’t look like a bagel, because it gives the eye something to follow. And finally the wide satin bow at the bottom, the one glossy surface in an otherwise chalky composition. It works like a full stop.
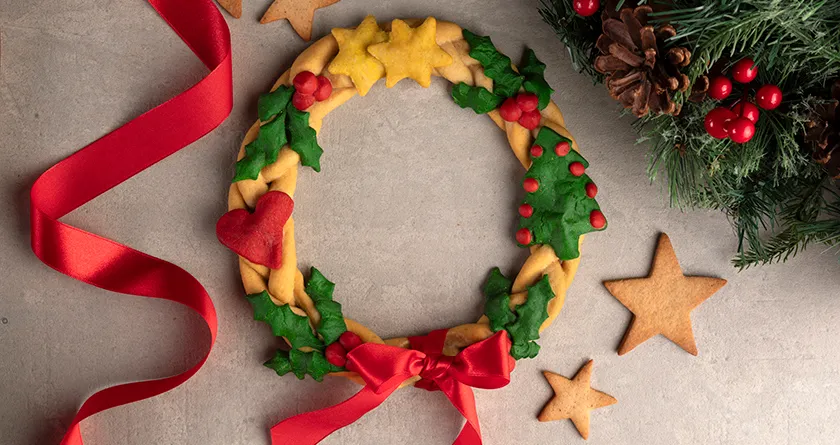
What one wreath actually costs from scratch:
- Flour, salt, water, cinnamon: $3–$5
- Gel food color in red, green, yellow: $8–$14
- 1.5-inch red satin ribbon, 3 yards: $6–$12
- Faux holly, berries, mini pinecones: $5–$10
- Clear matte sealer: $7–$11
Total: $29–$52. Budget alternative: swap the gel colors for a $3 craft acrylic set and pull the holly picks from a dollar store — that’s about $18 for the same silhouette.
This shape needs room to breathe. A wreath over about 8 inches across wants a tree that’s 6 feet or taller, and at least 30 inches of branch span around it, or it swallows everything near it. On a 4-foot tabletop tree, scale down to roughly 5 inches wide and drop the ribbon to 1 inch. In a small apartment with a pencil tree, skip this one entirely and spend your afternoon on Idea #8 — same dough, a fraction of the visual weight.
4. Pastel-Painted Santas and Gingerbread Men in a Childlike Hand
Count the palette: white base, pale pink, light blue, muted sage, warm orange-brown. Five colors, all hovering around 60% saturation, and not one true red in the bunch. The formula runs roughly 70% white dough plus 25% pastel paint plus 5% warm brown shadow. Swap the sage for dusty lilac and the mood turns sweeter; swap it for charcoal and the whole set grows up fast. The one thing you can’t change is the shared value — nothing here is darker than a mid-tone.
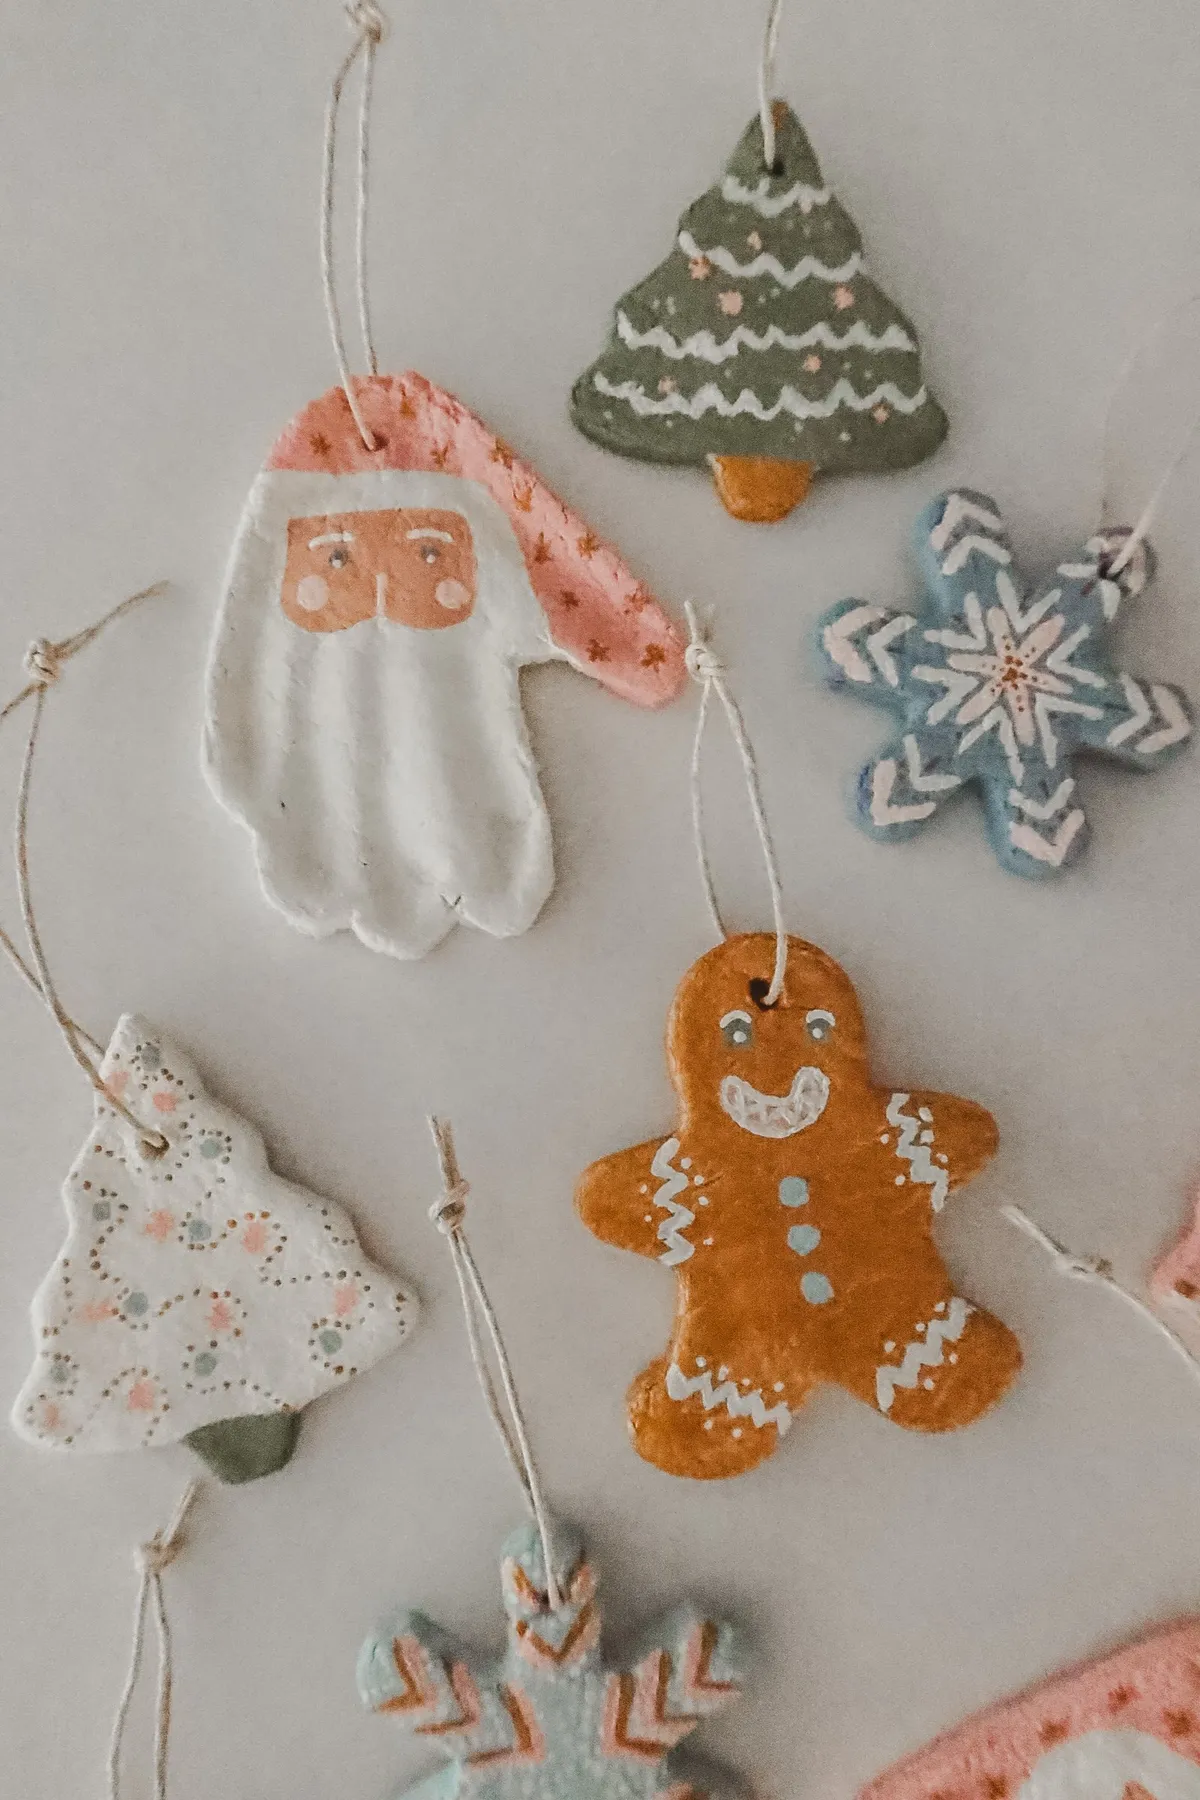
Childlike painting is much harder to fake than it looks. Adults tend to get too neat — the cheeks go perfectly round, the outlines get even — and suddenly it reads as a craft kit instead of something a person made. Paint fast, use one brush, and don’t correct your wobbles. Two practical notes: matte sealer is non-negotiable on painted dough, or the acrylic scuffs off by season two, and keep painted pieces on the upper branches if there’s a toddler in the house.
5. Swirled Marbled Paint on Simple Star Cutouts
That marbled swirl doesn’t need a technique, it needs you to stop mixing. Load a flat brush with red on one corner and green on the other, drag it through yellow once on the palette, and never clean it between ornaments. Three things worth knowing before you start:
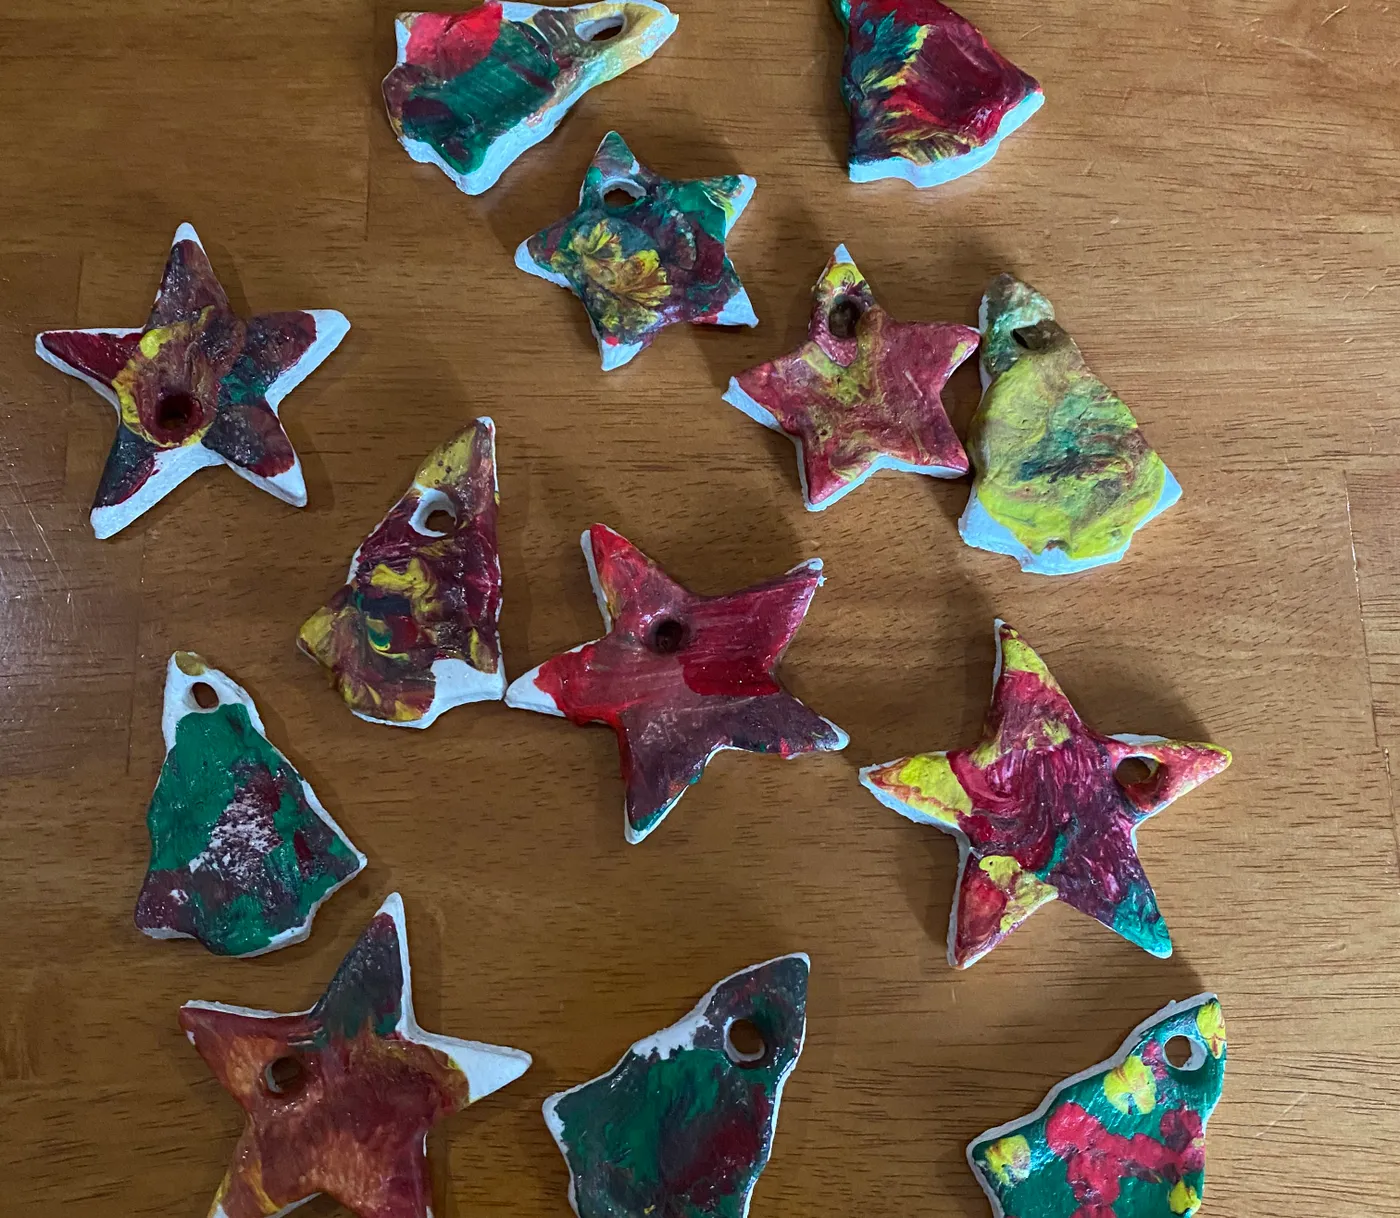
- Start on a fully dry white base coat, or the colors mud together.
- Load two colors on opposite ends of the brush, not blended in the middle.
- Finish with two thin coats of matte sealer instead of one thick one.
Fifteen ornaments on one table is the actual design move. A single swirled star is a nice craft project; fifteen of them in the same three colors and the same wobbly hand becomes a collection, and collections are what make a tree look curated instead of decorated. The hanging holes sit slightly off-center. The shapes aren’t symmetrical. That consistency of imperfection is exactly what you lose the moment you buy a matching set.
6. Dough Ornaments Styled as Gifts in Wooden and Kraft Boxes
Skip the engraved box. Target sells kraft gift boxes with window lids for $4–$6, and Michael’s has plain wooden cigar boxes for around $8 that a wood-burning pen turns into something personal in twenty minutes. Facebook Marketplace is full of old jewelry boxes for $3 that just need a coat of wax. Add $3 of twine and a sprig from the yard and you’ve spent $12 total — for a gift that reads like $45. Compare with Idea #9, where fabric wrapping does the same heavy lifting.
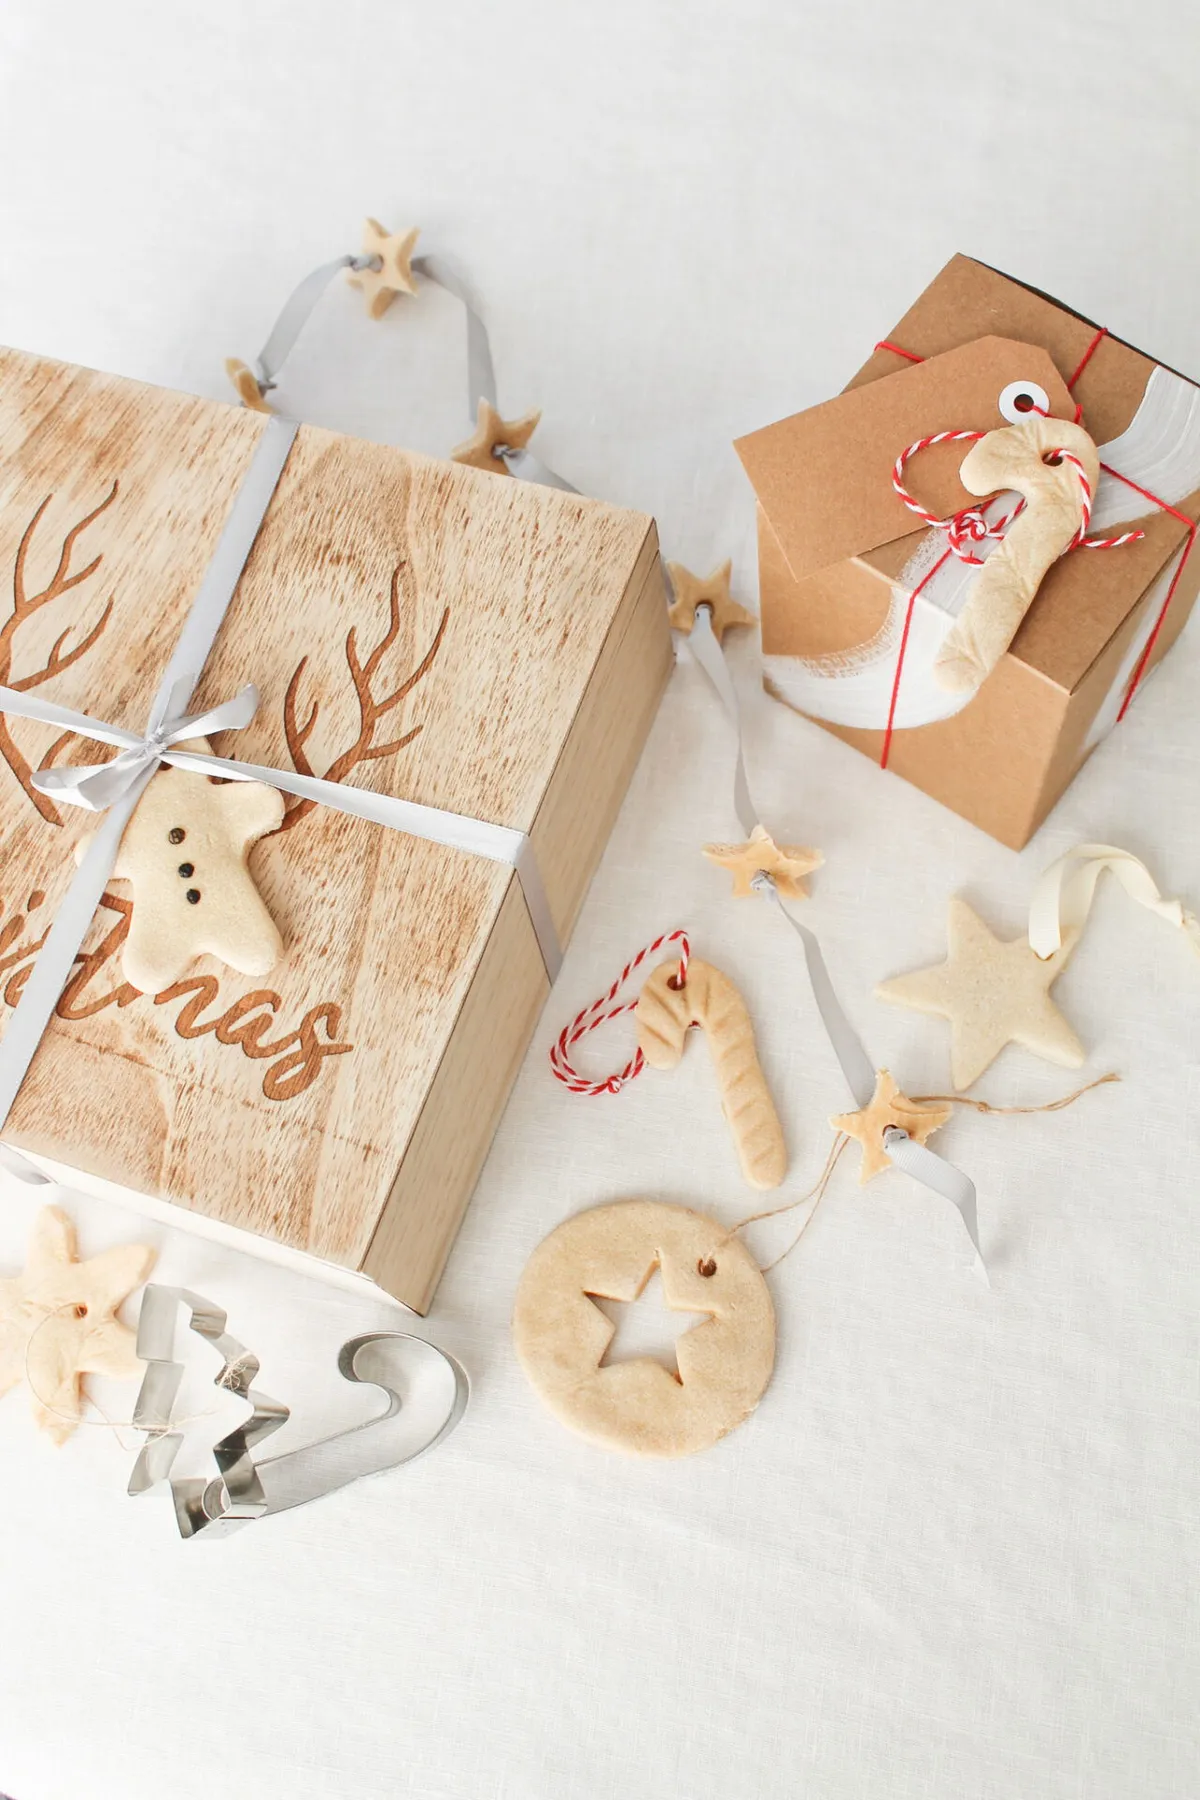
Packaging that survives the car ride:
- Line the box with linen or tissue so the dough isn’t rattling on bare wood.
- Nest each ornament in a loop of twine tied to the lid, not loose in the bottom.
- Tuck a cookie cutter in beside them as the extra — it doubles as part of the gift.
- Write the drying date on the kraft tag; people keep these things for decades.
Fifteen minutes per box, around $1.50 in materials.
7. Dark Gold Stars With Embossed Snowflakes
Warm metallics have been quietly replacing cool silver for a couple of years now, and 2026 is the year dark antique gold fully took over the tree. It’s a backlash against the bright, high-shine ornaments that dominated the last decade — people want something that looks like it came out of a drawer, not a blister pack. The staying power is real, too. Gold reads as heirloom in a way that rose-gold-plated anything never did.
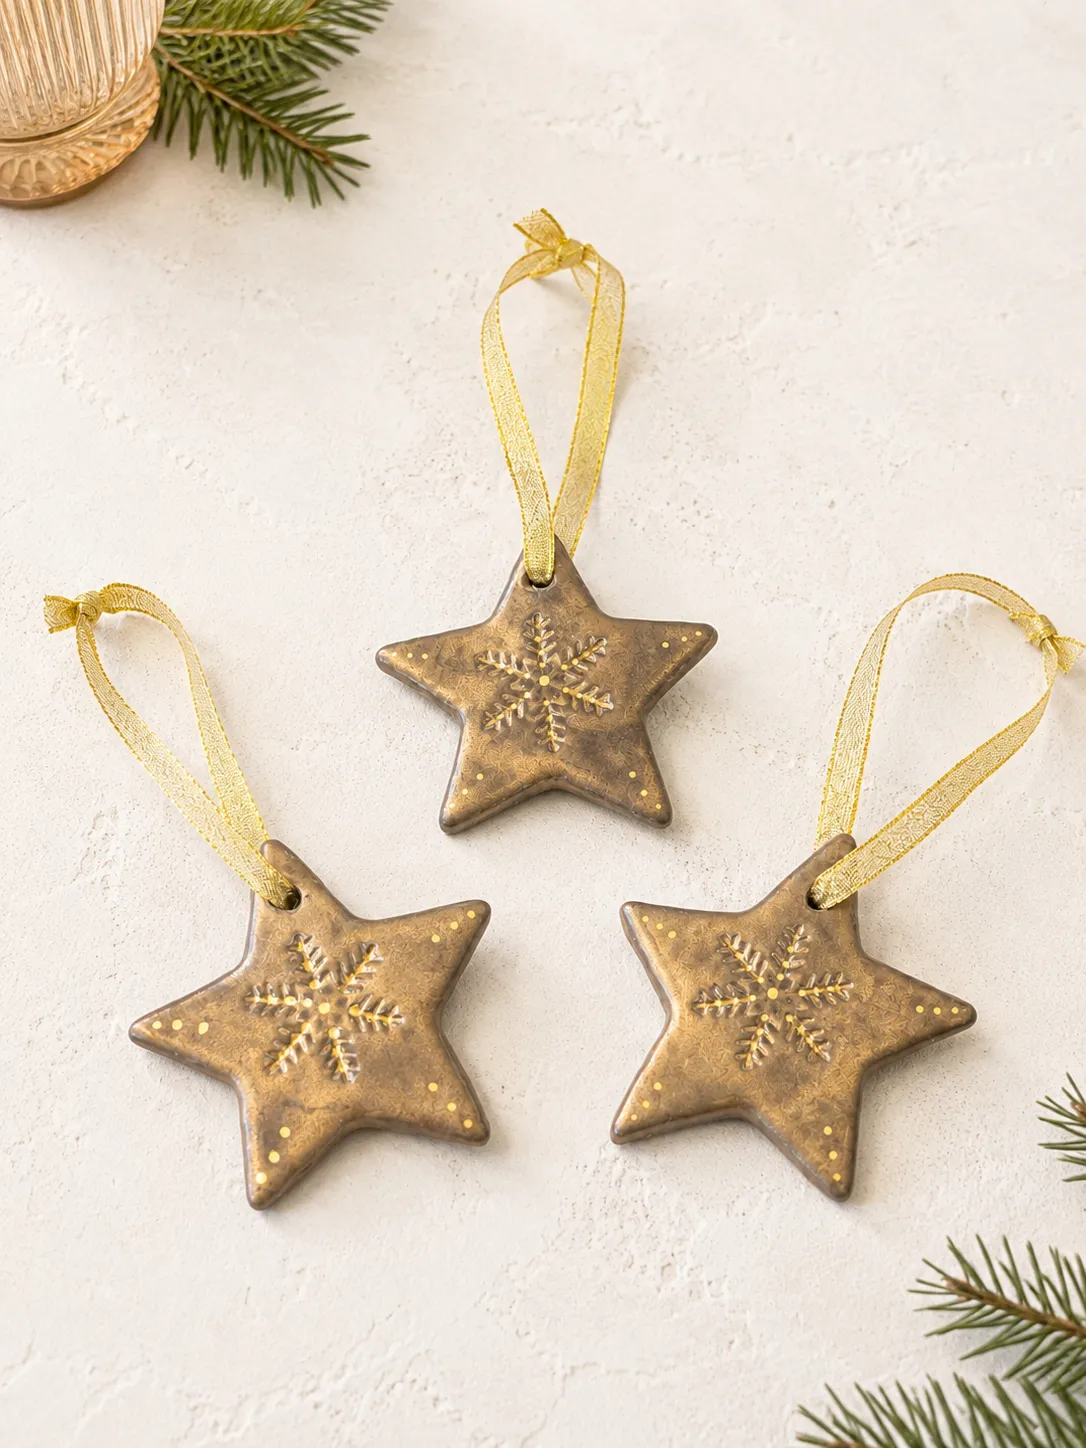
For an antique gold that doesn’t look spray-painted, work in three passes. Base coat the dried dough in flat black acrylic and let it cure overnight. Brush on a gold wax or gilding paste, then wipe most of it back off with a rag — you want it clinging to the raised snowflake and the edges, not sitting in the recesses. Buff the high points with a soft cloth. The black left in the low spots is what makes it look like metal instead of paint.
8. Minimal Tree and Star Cutouts on White Marble
Four ornaments, one small surface, and a lot of white space is a formula that works almost anywhere — but it’s genuinely ideal for apartments under 500 square feet, where a full tree isn’t happening. It suits a 4 to 5 foot tree, a tabletop branch, or even a length of wire on a wall. Ceiling height doesn’t matter here. What matters is the surface: marble, a white tray, a pale linen runner. On dark wood, the whole thing loses its hush.
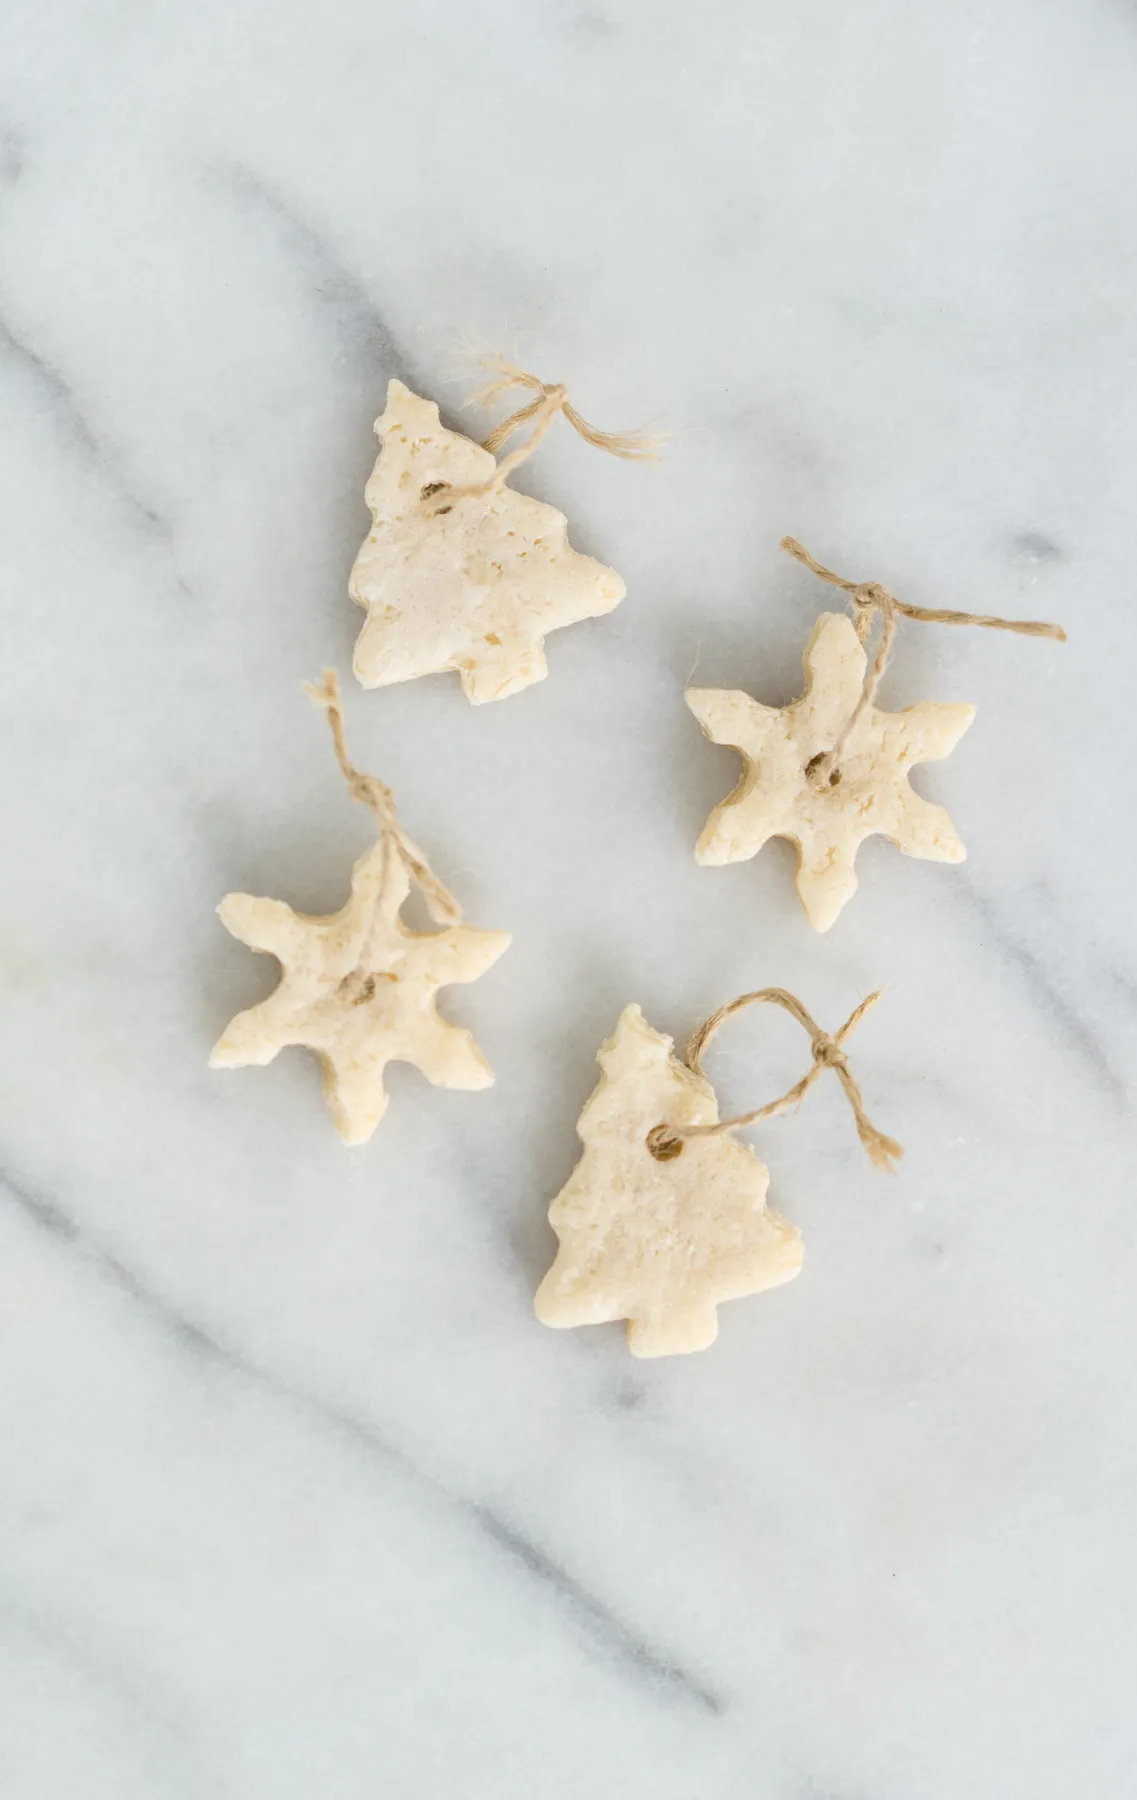
Restraint is doing all the work. Two shapes, repeated — tree and six-pointed star — create rhythm without clutter, and the off-white-on-white pairing means the shadows cast by the twine loops become the actual decorative element. Pull the twine and hang these on green wire hooks and you’d lose about 80% of the charm. The natural jute is the only texture in the frame, which is why a marble surface doesn’t feel cold.
Total spend on this look: about $6. Flour, salt, water, and a length of jute you probably already have in a drawer. If you want the marble staging without the marble slab, a $9 roll of marble-pattern contact paper over a bookshelf does the job for photographs. The most expensive thing in this look is the surface, not the ornaments.
9. A Single White Moose Ornament in a Rustic Craft Flat Lay
Making a shaped ornament without a cutter:
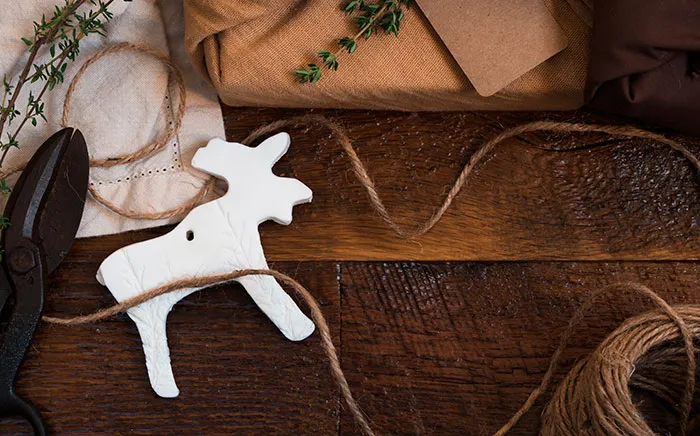
- Print a moose silhouette at 4 inches wide and cut it out of card stock.
- Roll dough to 1/4 inch, lay the template on top, and trace with a skewer.
- Cut freehand with a paring knife, or hand a plastic knife to the kids.
- Reinforce the antler tips with a thin strip of dough pressed onto the back.
- Poke the hole, dry low, and sand the edges with 220-grit once cool.
Twenty minutes of hands-on time, less than $2 in materials per ornament.
Two honest warnings. First, thin protrusions — antlers, legs, star points — are where salt dough fails, and it usually fails in the oven, not on the tree. Keep any narrow section at least 3/8 inch thick and reinforce it from behind. Second, that dark wood surface is beautiful for photos and brutal for cleanup; flour dust finds every grain line. Lay down a linen cloth you can shake out, and photograph before you start gluing things.
10. A White Angel With a Gold Heart Cutout
The gold heart isn’t decoration — it’s a hole. Removing material from the center of the angel gives the eye somewhere to land and lets the tree lights show through, which is why this ornament looks lit from within. Replace it with a painted heart and you’d have a flat white angel with a nice face. The twisted gold cord at the top matters too: it echoes the metallic of the heart and makes the whole thing feel finished rather than assembled.

Metallic finishes on dough are the first thing to go. Gold acrylic over a sealed surface will last a few seasons if you store it flat in tissue; gold leaf or wax will dull and pick up fingerprints within two or three years, and there’s no touching it up without it showing. Expect to refresh it every other season with a light buff. If that sounds like too much, paint the heart in a matte mustard acrylic instead — slightly less glamorous, far more forgiving.
11. Child Handprints on Round Discs, Tied With White Satin
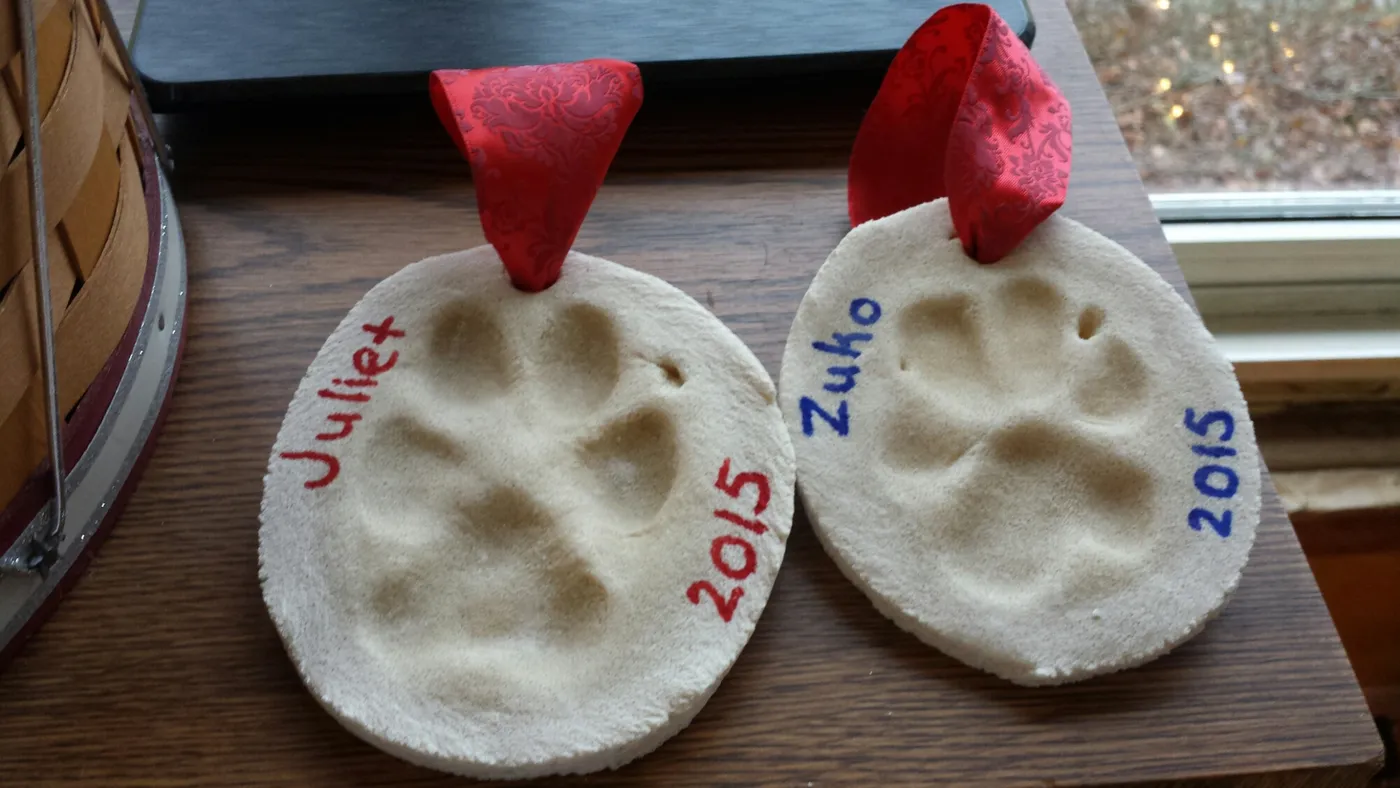
Handprints fail for one reason: people press once and lift. Press the palm firmly, then press the four fingers down in sequence from pinky to index, then the thumb last and pointing outward. On a 3-inch round, aim for the hand to fill about 70% of the disc — leave a clear margin all the way around or the print runs off the edge. If the dough springs back, roll it slightly thicker, around 3/8 inch, and try again.
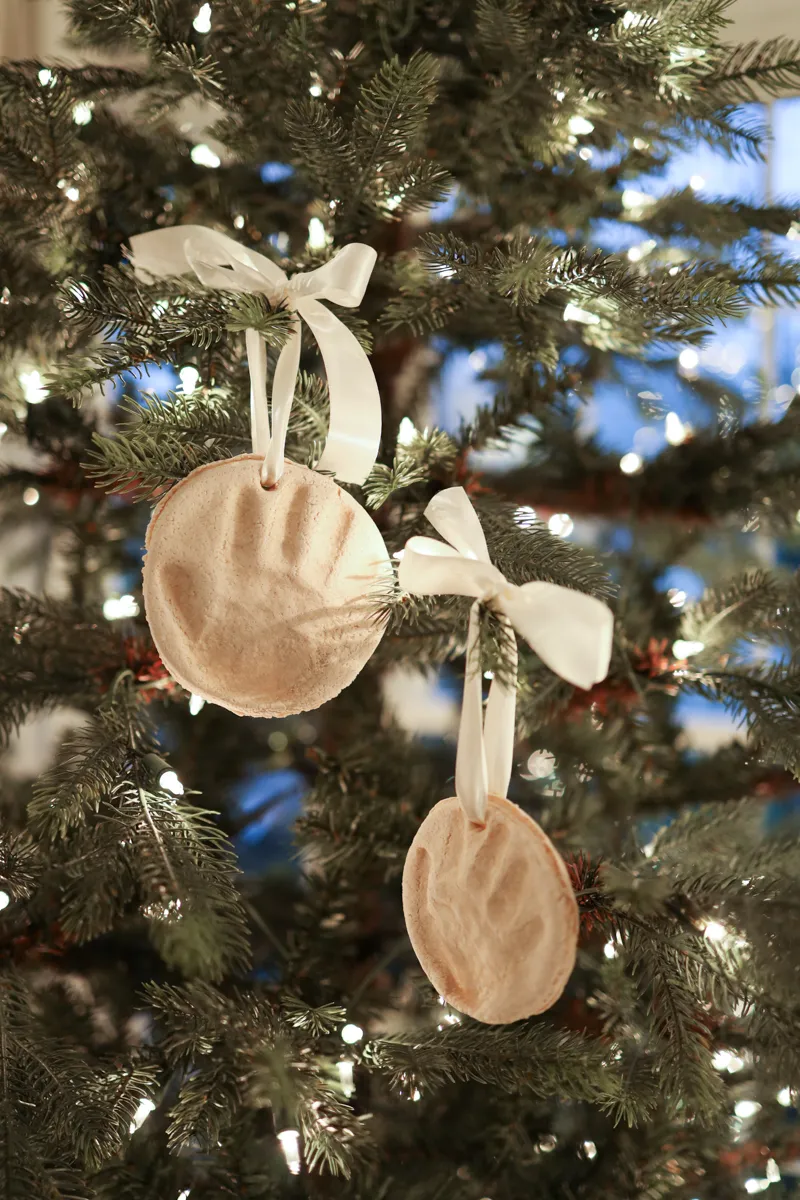
Two ornaments, one afternoon:
- Flour, salt, water: $2
- White satin ribbon, 2 yards: $3–$6
- Matte sealer (shared across your whole batch): $8–$11
- Fine sandpaper, 220-grit: $2
- Optional date stamp or fine-tip pen: $4–$7
Total: $19–$28, and the ribbon and sealer cover a dozen more ornaments. Budget swap: plain cotton kitchen twine at $1.50 instead of satin, which honestly suits the nubby dough texture better.
12. Irregular Handprint Discs With Red Gingham Ribbon
Gingham is the cheapest nostalgia you can buy. A 5-yard spool of red-and-white check ribbon runs about $2 at Walmart and $3 at a craft store, and it’s enough for a dozen ornaments. Thrift stores sell old sewing ribbon by the bag for a dollar. If you want the look without the ribbon hunt, buy one $4 bandana and cut it into half-inch strips — same check, softer drape, and the frayed edges actually help here.
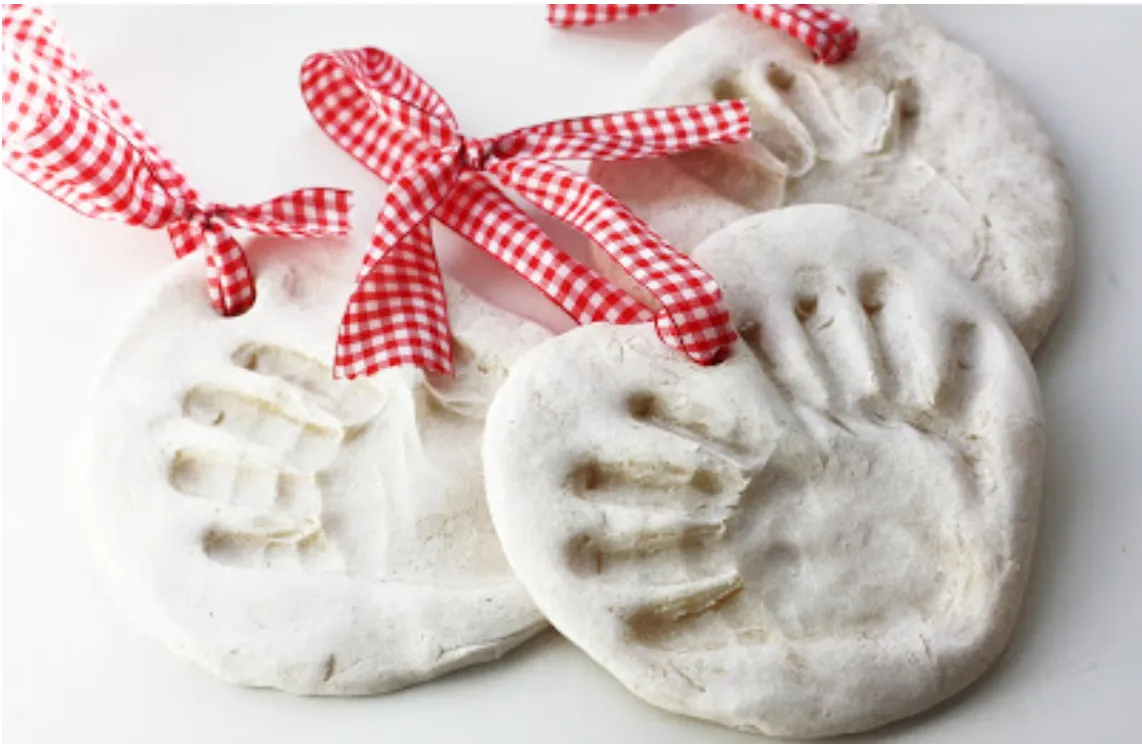
The palette math: 90% off-white dough, 8% red-and-white check, 2% shadow. That’s it. The gingham is the only pattern in the room, which is why it can be as loud as it wants without tipping into Christmas-sweater territory — one pattern, one accent, everything else quiet. Swap the gingham for forest green velvet and the mood goes formal. Swap it for brown twine and it goes full cabin. Compare with Idea #11, where the same disc gets a satin upgrade.
13. A Glitter-Hatted Santa Held in a Small Hand
Glitter is a commitment. Even sealed glitter sheds, and the red stuff travels — it will be on your floor in February. Seal these with two coats of spray polyurethane, outside, and let them cure a full 48 hours before they touch anything. Also worth knowing: glitter on dough tends to dull after a season in a hot attic. Store these in a climate-controlled closet, not a garage. Kids will still love them, and honestly that’s the point.
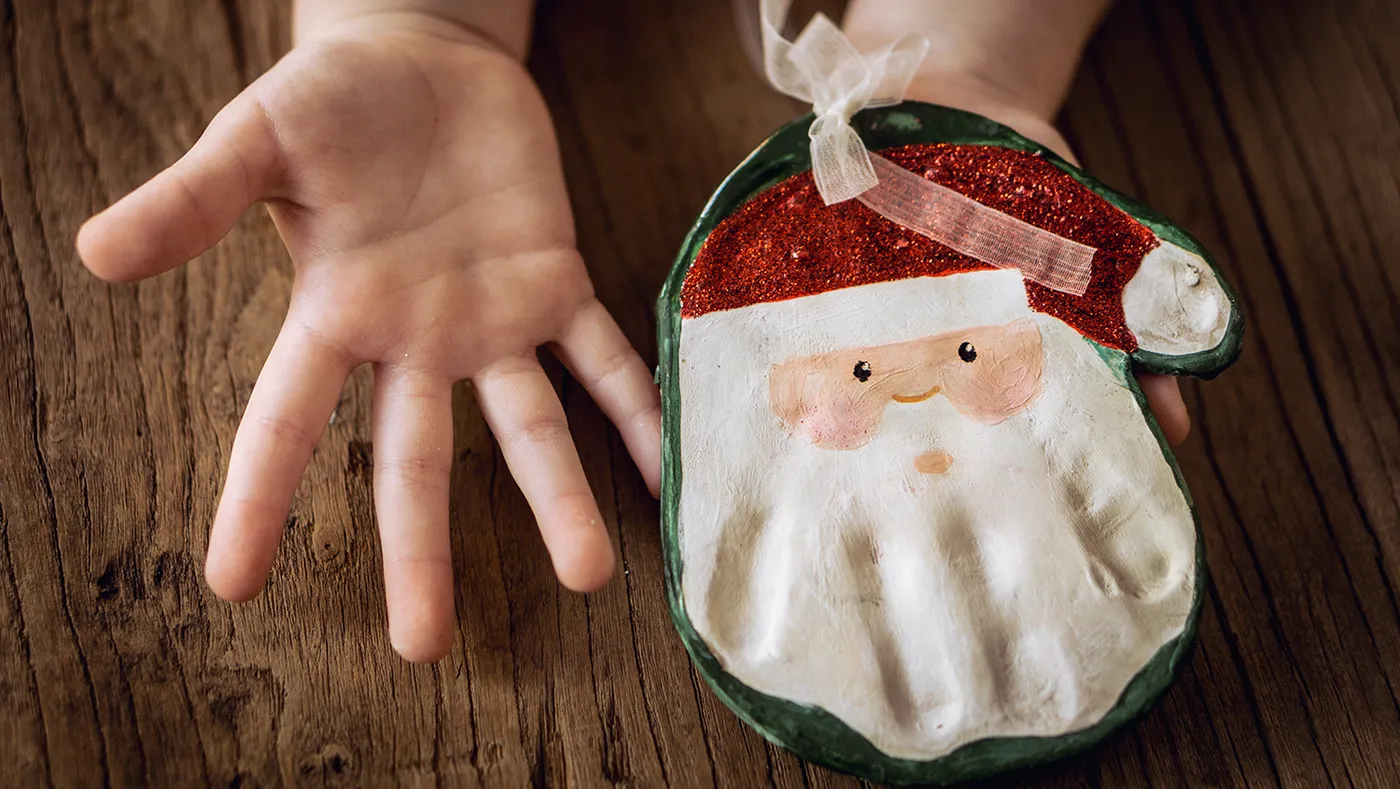
Check these before you commit to a glitter batch:
- Is there a well-ventilated outdoor spot for two spray coats?
- Do you have 48 hours of cure time before these go on the tree?
- Are the kids old enough to keep loose glitter out of their mouths?
- Is your storage climate-controlled rather than a garage or shed?
14. A 2026 Dated Star With a Painted Mini Wreath
Painting a mini wreath on a star:
- Base coat in white and let it dry fully — two thin coats, one hour apart.
- Load a small round brush with dark green and keep the bristles almost dry.
- Paint the wreath with short dabs in a circle, not one continuous stroke.
- Add red berries with the handle end of the brush while the green is tacky.
- Write the year in black with a fine-tip paint pen once everything is bone dry.
Dated ornaments have quietly become one of the most-saved personalization ideas on Pinterest, and the 2026 version is the smallest possible statement: a year, in black, nothing else. It’s a reaction to the maximalist name-and-photo baubles of the 2010s. What keeps this from feeling like a souvenir is the scale — the 2026 is about as wide as the wreath it sits under, not the whole ornament.
15. Stamped Stars and Hearts, Red Accents on Evergreen
You don’t need a stamp collection. A metal thimble makes a dot grid, the end of a wooden spoon makes a perfect circle, a chopstick makes a tiny dimple, and a plastic fork makes ribbed lines. Press to about 1/8 inch depth, no deeper, or the dough tears at the edges. Do it while the surface is freshly rolled and still cool — stamping dried dough just cracks it.
The red is applied to almost nothing. Look closely: the rim of a star, a single dot on a heart, one painted band on a circle. That restraint is what separates this from the cookie-cutter ornaments down the street — the cream dough stays the dominant color and the red functions as punctuation rather than paint. Lose it and you have a perfectly nice monochrome set. Add more and you have a candy cane.
16. A Stack of Personalized Handprint Discs Beside a Jar of Markers
Two things are happening. The stack itself is a scale trick — a pile of round discs at 3 inches and 4 inches gives the eye somewhere to cascade, which is far more interesting than a single flat ornament laid out for a photo. And the jar of markers isn’t decoration, it’s evidence. It tells you these are still in progress, still being added to, still a living thing on the table. That’s the difference between a craft photo and a still life.
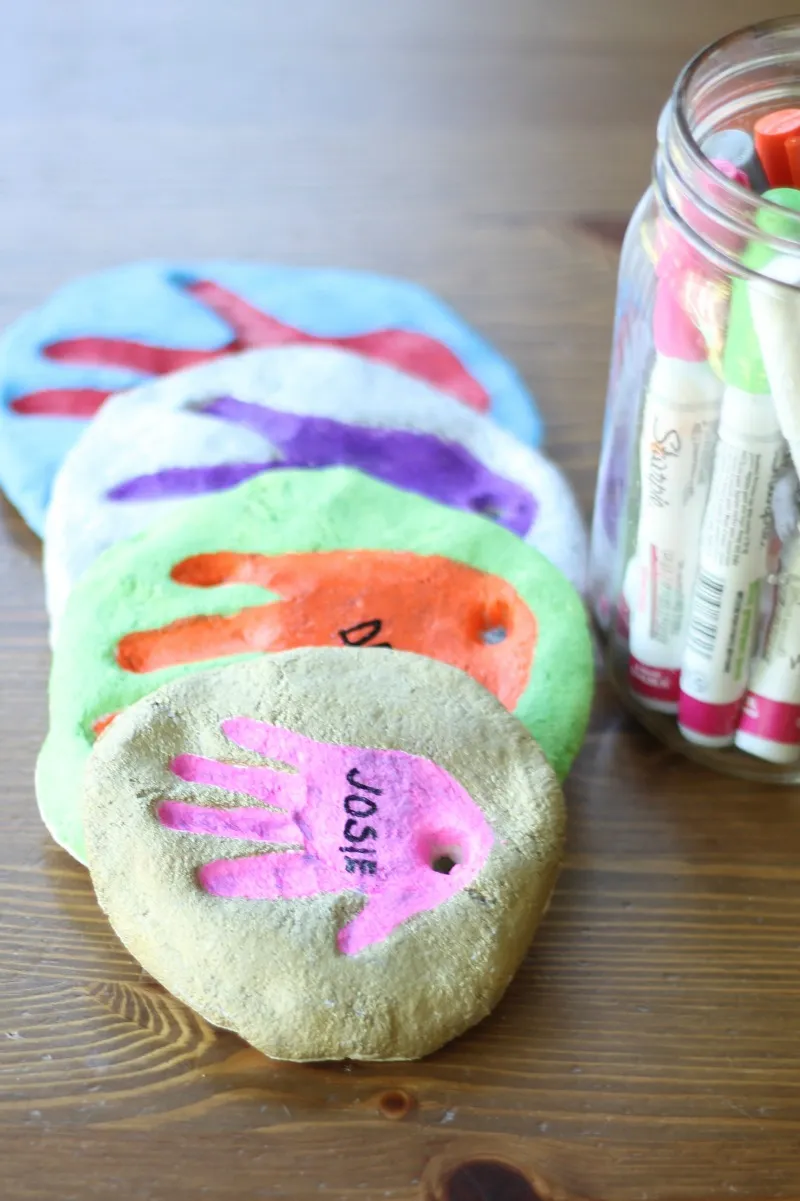
Rough rule for a 7-foot tree: three to five handprint ornaments per child reads as meaningful; more than eight starts to read as a collection. On a 4-foot tree, two per child is plenty and the discs should drop to 2.5 inches wide. This grouping works on a side table of any size — 18 inches of surface is enough — which is why it’s the one to copy if floor space is tight.
17. Speckled Snowflakes With Raised Spiral Swirls
The speckle is a one-ingredient change: a teaspoon of instant coffee or finely ground pepper worked through the dough before rolling. That’s it. The proportion that matters is 95% cream dough, 4% brown speckle, 1% white highlight on the raised swirls. Swap the coffee for cinnamon and you get a warmer, redder fleck. Swap it for black tea and the speckle nearly disappears — fine, if that’s your taste, but you lose the whole reason to make these.
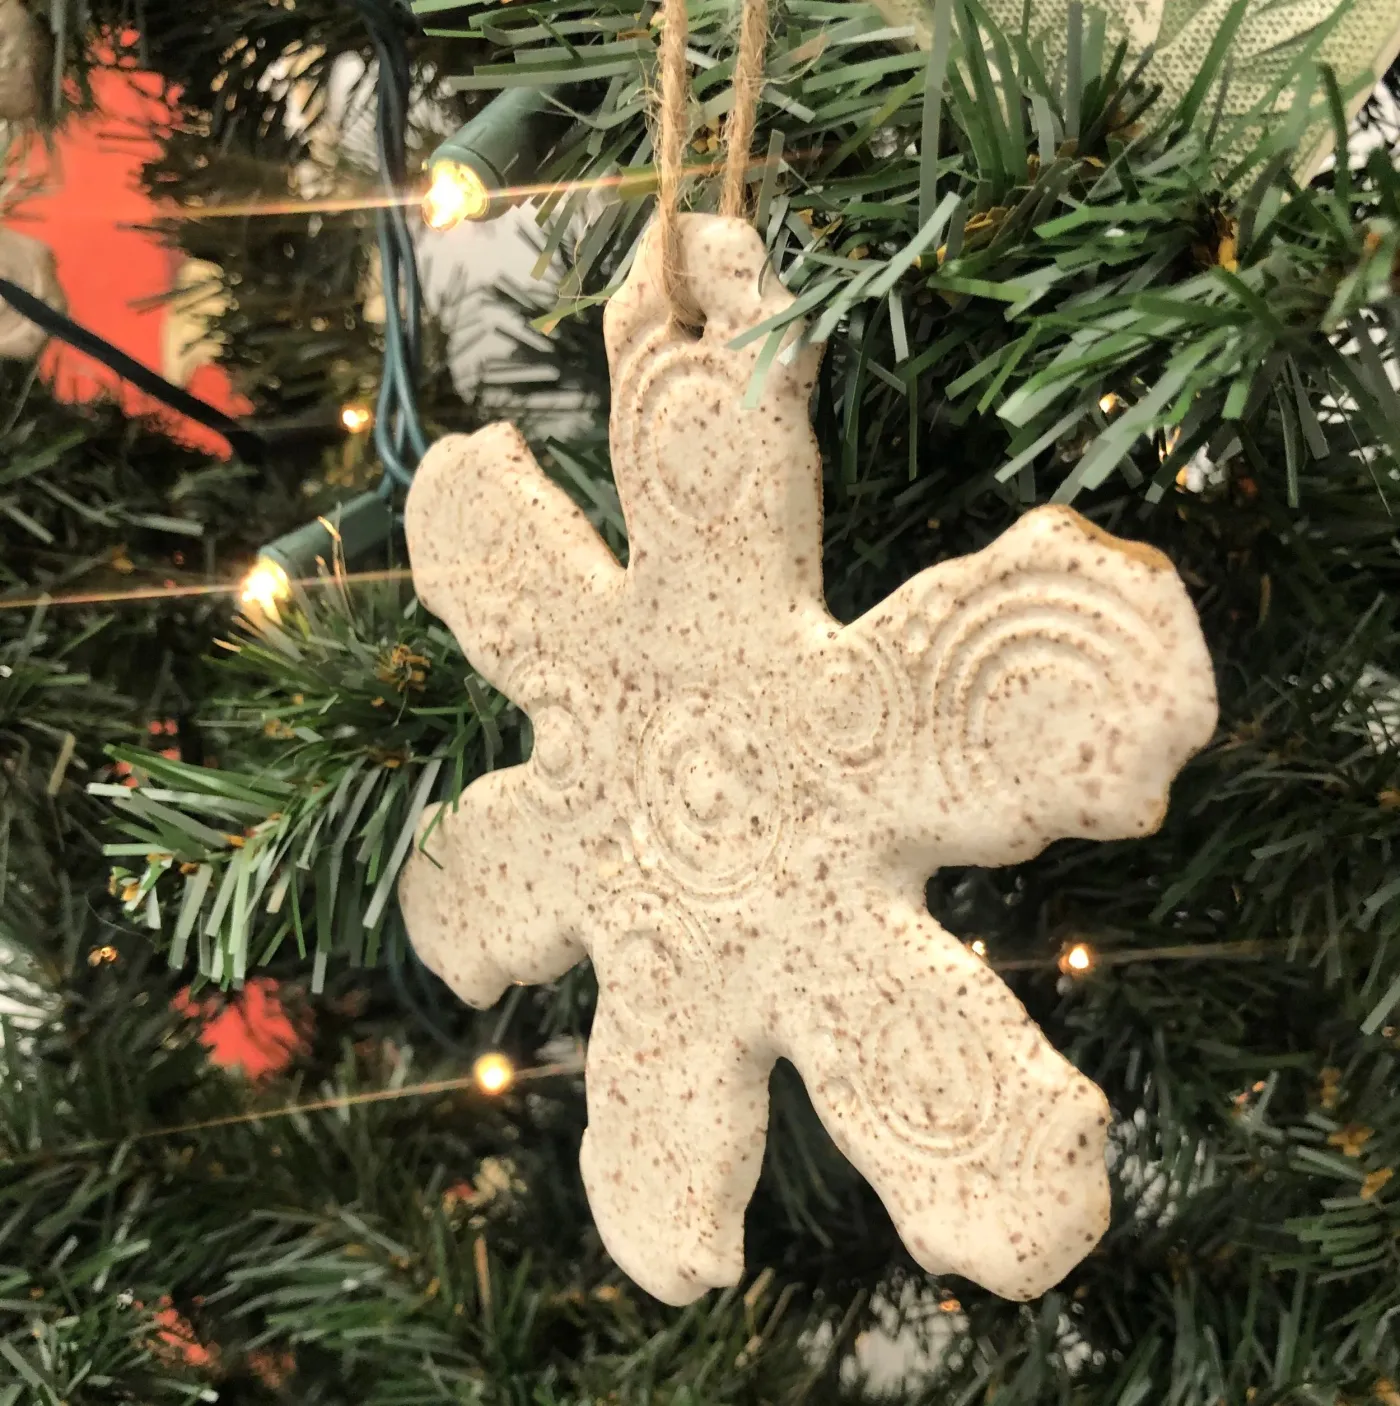
Getting raised swirls to hold their shape comes down to how you build them. Roll thin coils, around 1/8 inch, and press them onto a freshly cut base with a dab of water so they fuse in the oven.
- Build the swirls before the base has dried at all; dry edges won’t bond.
- Keep coil ends tucked under, never sitting proud on the surface.
- Bake at 200°F, not 300°F — high heat puffs the coils and flattens them.
About 15 extra minutes per ornament.
18. A Fully Glittered Snowman With Two Green Buttons
A fully glittered ornament from a boutique runs $18–$30. Yours costs about $2. A jar of fine silver glitter is $4 and covers a dozen snowmen. The trick is glue, not glitter — brush on mod podge in sections and pour the glitter over a coffee filter so you can reuse the overflow. Michael’s and Walmart both stock red craft glitter at $2 a jar for the hat and scarf. Twenty ornaments for under $15 is completely doable. It’s the same silhouette as Idea #20, gone maximalist.
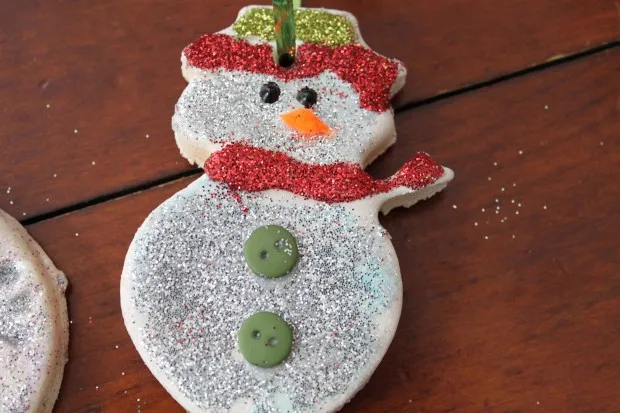
This is the high-maintenance one, and you should know that going in. Sealed glitter loses its sparkle after roughly three seasons as the clear coat yellows, and there’s no fixing it except re-gluing. The olive green buttons are also the first thing to fall off — reattach with E6000, not hot glue, which fails in cold storage. Plan on a ten-minute repair session every December and you’ll be fine.
19. Five Star Cutouts, a Jar of Sealer, and a Paintbrush
Sealing is what turns dough into something that survives a decade:
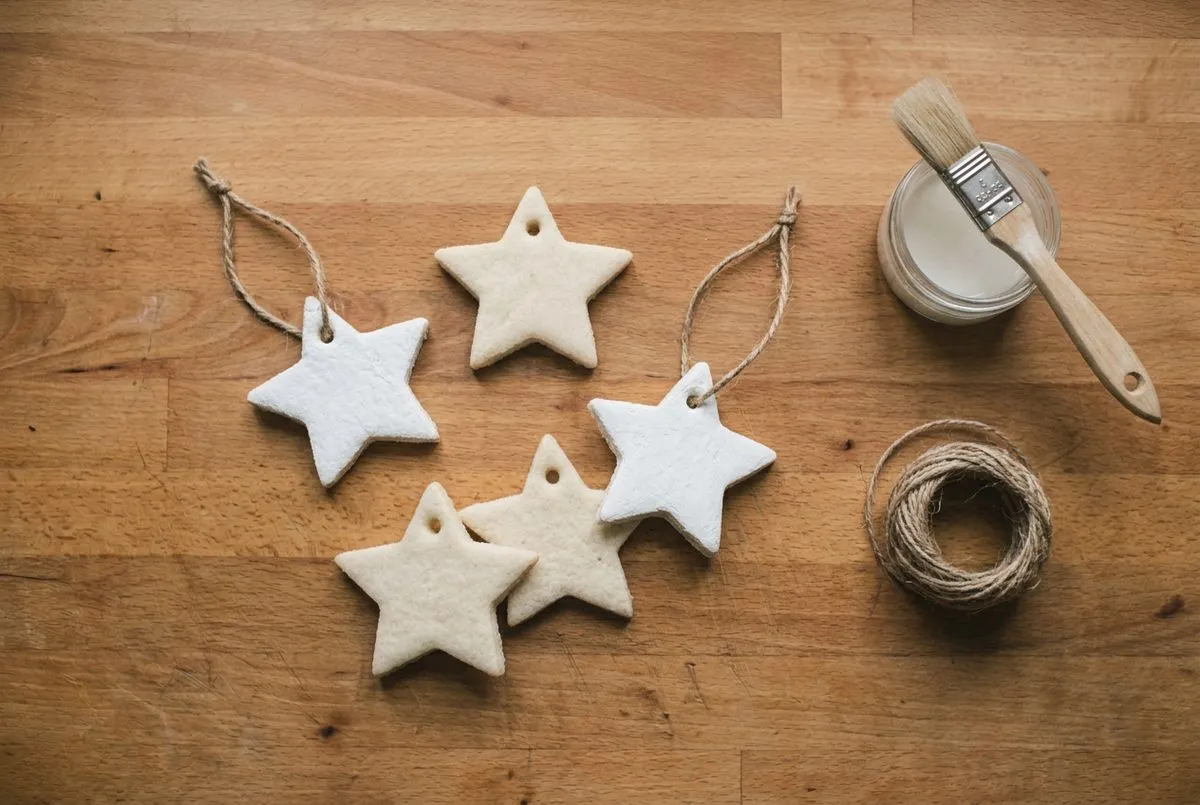
- Sand the cooled ornaments with 220-grit until the edges feel smooth, not scratchy.
- Dust with a dry brush — sealer traps every particle of flour.
- Brush on a thin coat of matte sealer and let it dry 30 minutes.
- Apply a second thin coat, paying attention to the hanging hole and edges.
- Let them cure 24 hours before threading any twine through.
Twenty minutes of hands-on work, about $10 in sealer for a full batch.
Quick check before you open the jar:
- Are the ornaments bone dry? Sealing damp dough traps moisture and it molds.
- Is your sealer matte, not gloss? Gloss makes dough look plastic.
- Do you have a dust-free spot to dry them for 24 hours?
- Have you tested the sealer on one spare star first?
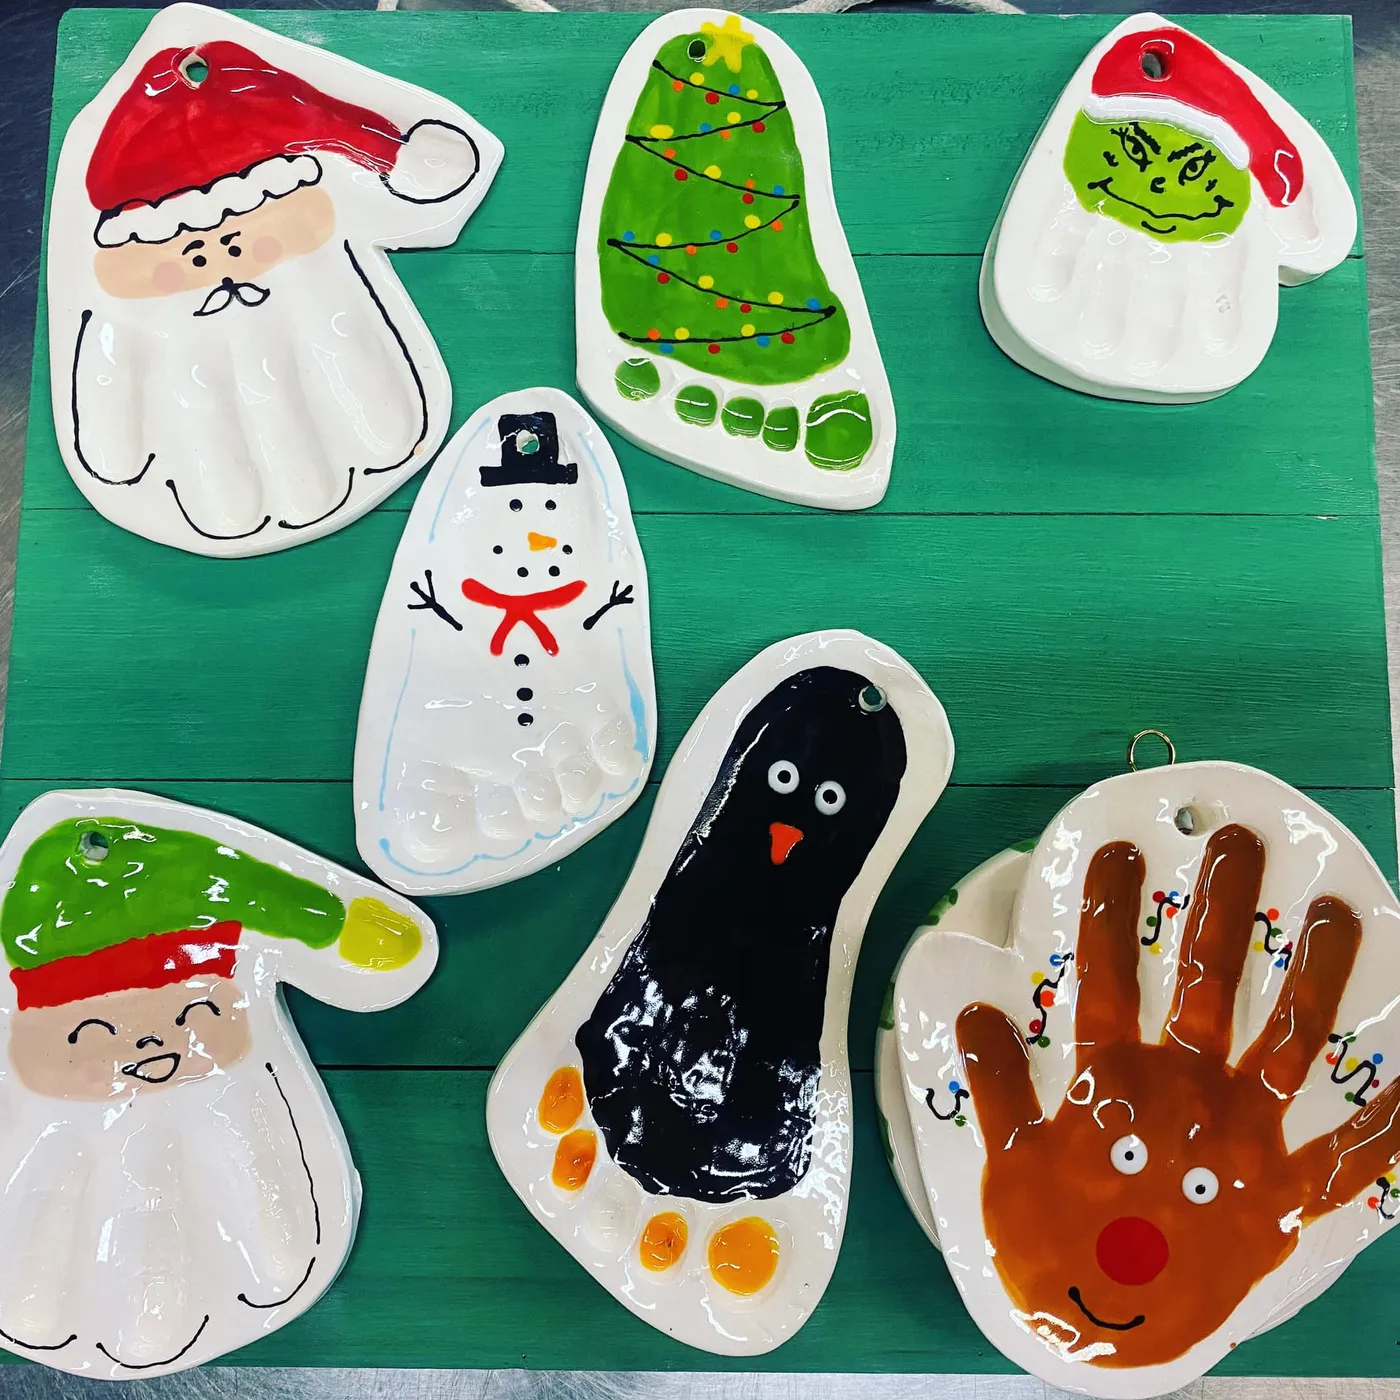
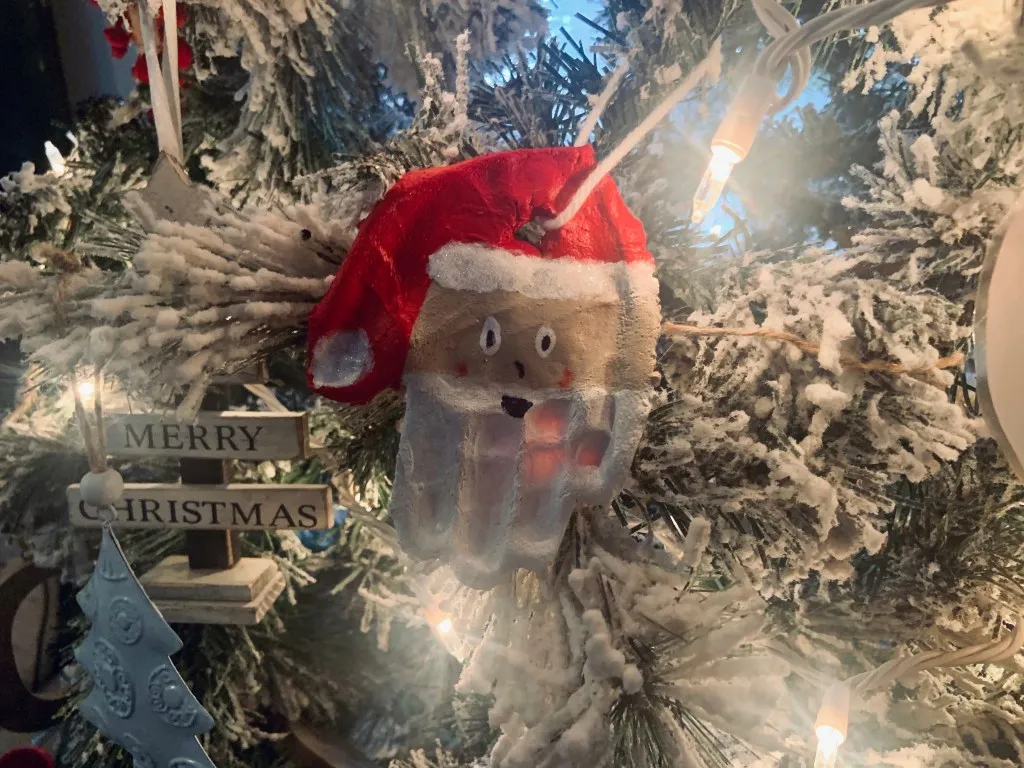
20. Handprint Santa Faces With Googly Eyes
Googly eyes are a trap, and I say that with affection. They photograph beautifully and they look slightly unhinged by candlelight, which some people love and some people do not. Glue them with E6000, never hot glue — the plastic backs pop off in a cold attic. Also, the handprint beard only reads as a beard if you’re deliberate about which part of the palm you use. Press the palm for the beard, the fingers for the hat brim.
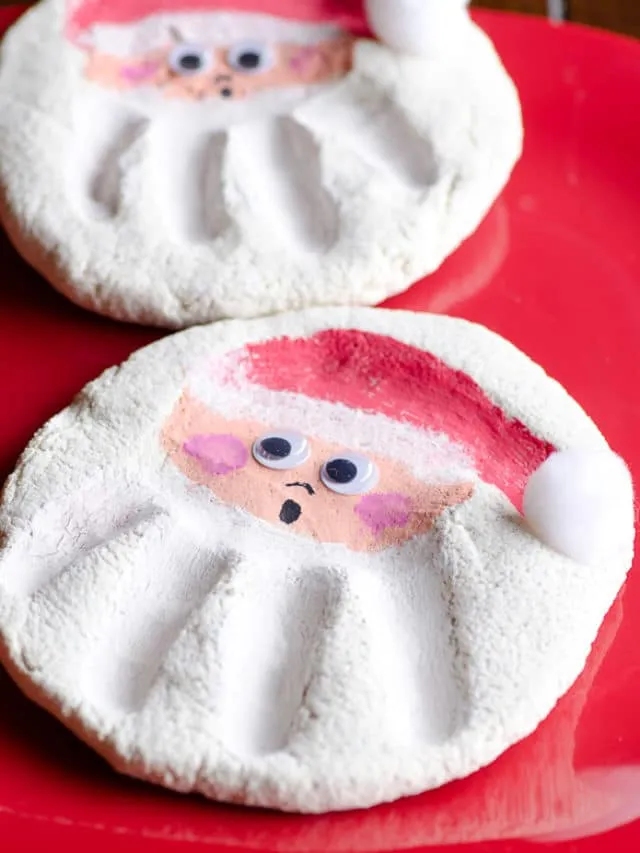
The joke lands because the form is sincere. Two round discs, honest salt dough texture, a real handprint pressed in — and then googly eyes on top. If the base were perfect, the eyes would feel like vandalism. Because the base is lumpy and hand-shaped, the eyes feel like a punchline the whole family is in on. The red surface underneath does one more thing: it bounces warm light up into the white beard.
21. A Trio: Green Wreath, Tan Snowflake, Orange Glitter Star
The trio works because each ornament is a different finish. One is flat matte, one carries silver glitter only on its center, one is fully glittered orange. Three textures, one color temperature. Glitter all three and you get a craft-store set; glitter none and they disappear into the tree. That single glittered accent in the middle is the fulcrum the whole grouping balances on.
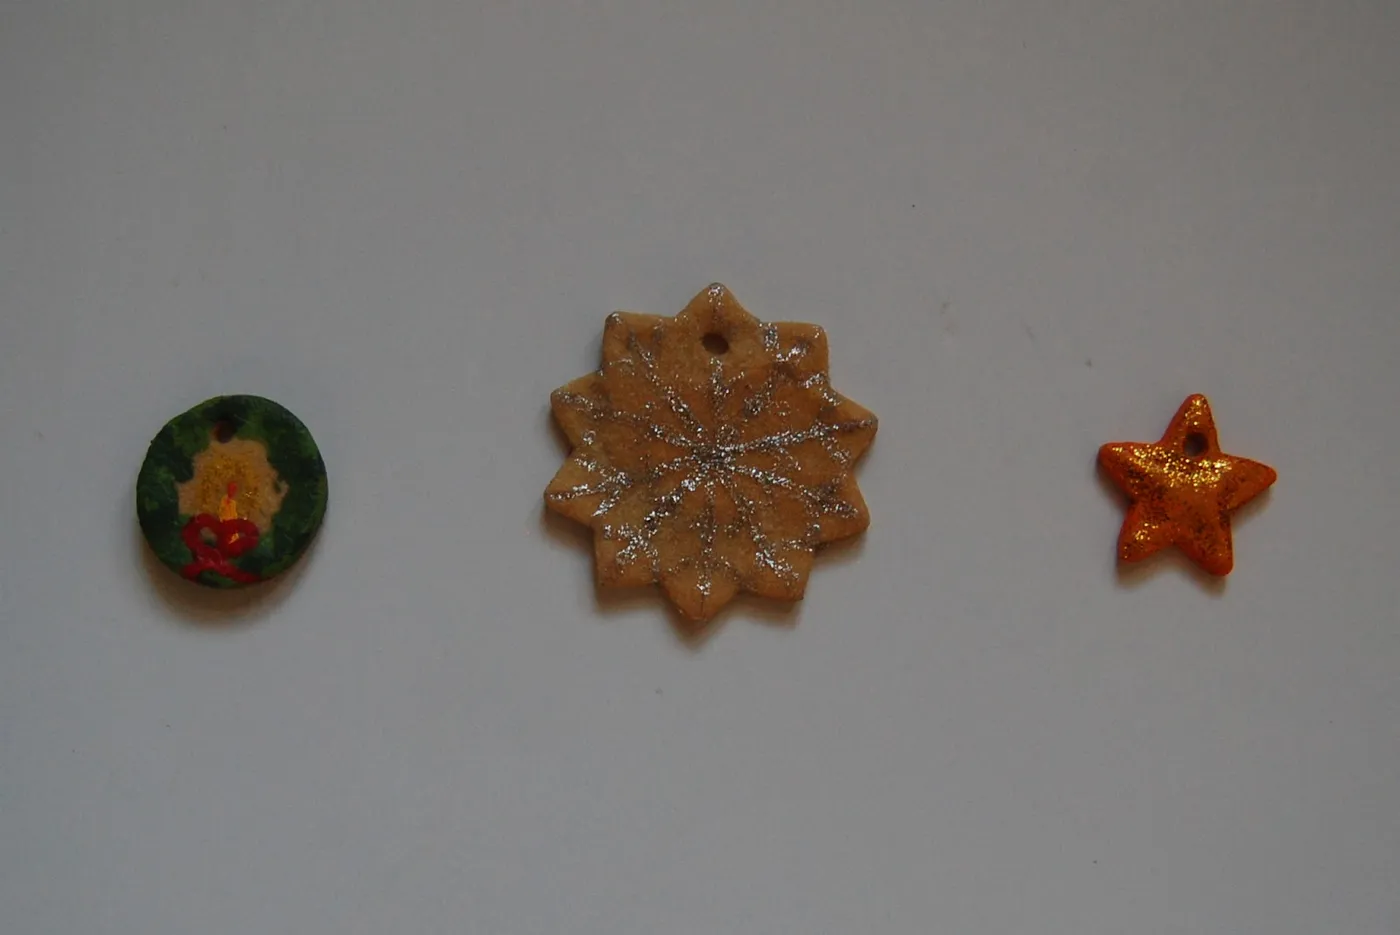
The formula: 60% solid green and tan, 30% unglittered white space, 10% silver and orange glitter. Notice the glitter never covers more than about a third of any one ornament — it’s an accent, not a coating. Swap silver for gold and the trio warms up instantly. Swap the orange star for navy and you get a much more grown-up, almost coastal palette without changing a single shape.
Three ornaments, realistically:
- Dough ingredients: $2
- Craft acrylic in green, yellow, tan, red: $6–$10
- Silver and orange glitter, two small jars: $5–$8
- Mod podge: $5–$8
- Twine or ribbon: $2–$4
Total: $20–$32, and every supply stretches across 15+ ornaments. Budget version: skip the orange glitter and use a metallic gold nail polish you already own on that one small star.
22. Cocoa-Dark Stars Strung on Red-and-White Striped Twine
For a true cocoa brown, don’t reach for brown food gel — it goes purple. Use two tablespoons of cocoa powder in place of the same amount of flour, plus a teaspoon of instant espresso for depth. The dough will smell like a bakery and bake to a milk-chocolate matte that no paint can copy. Roll it a touch thicker, 3/8 inch, because cocoa dough dries more brittle than plain.
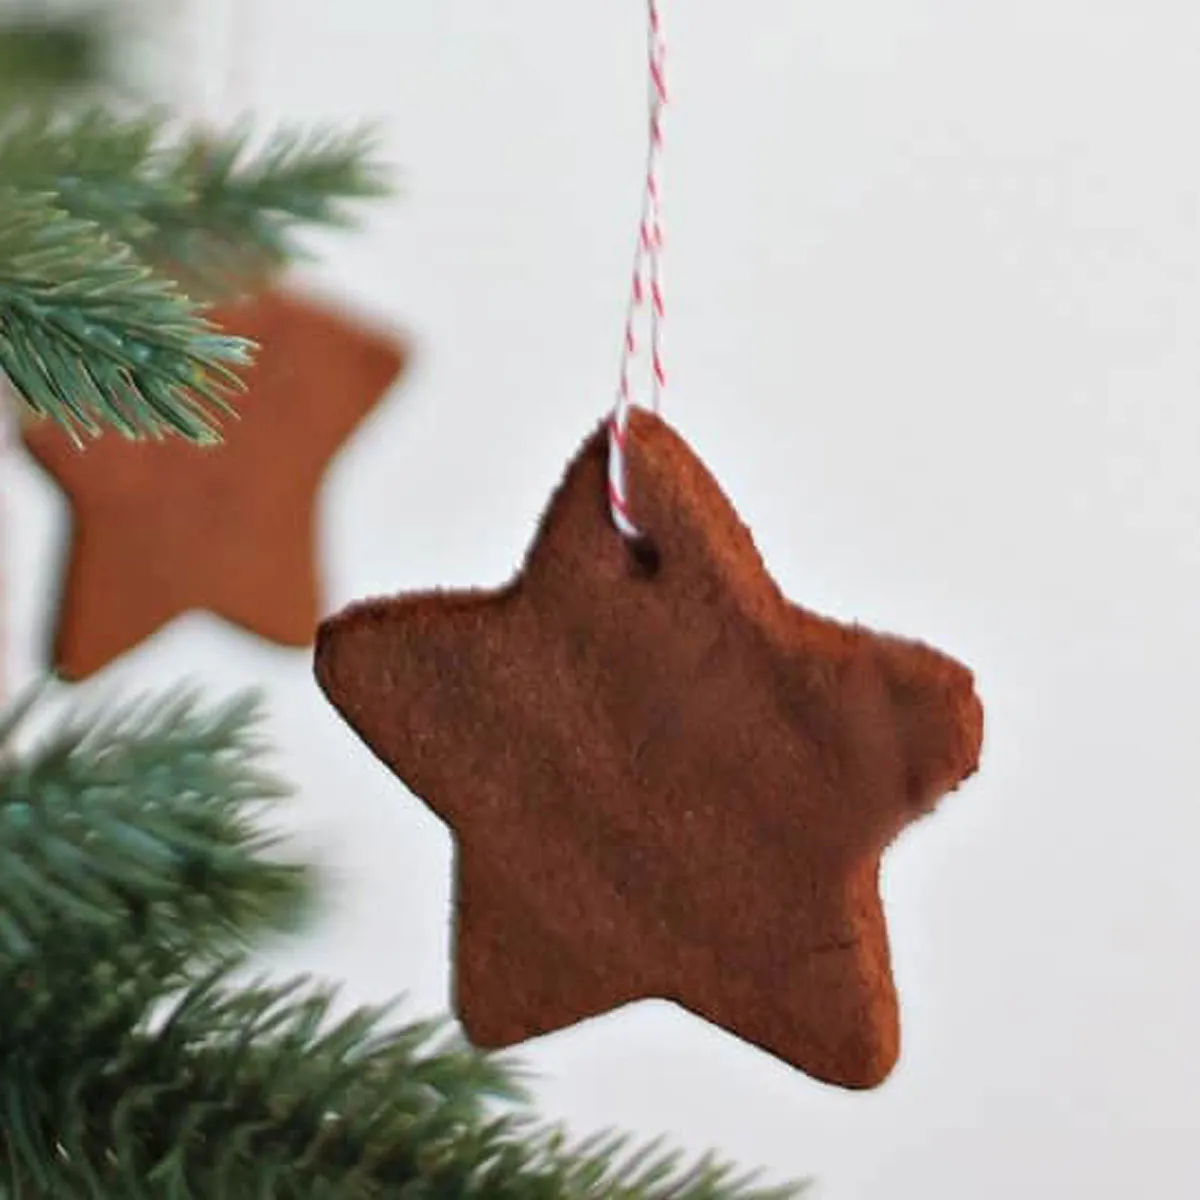
The red-and-white striped string is the whole personality of this ornament and it costs about $1.50 for a spool at Walmart or a dollar store gift-wrap aisle. If you can’t find it, cut thin strips from a striped paper straw and thread them — surprisingly sturdy, and it reads the same at arm’s length. Twine is the safer choice, but it’s also the choice everyone makes. For the natural version of this shape, see Idea #25.
23. Flocked Branches With Felt and Painted Ornaments
Handmade-looking tree decor has been climbing since 2023 and it peaked in 2026, mostly as a reaction to AI-generated everything. People want objects that visibly took hands and time. Flocked branches are part of the same story — they soften the green so the felt and painted pieces sit on top instead of fighting the needles. This is the rare trend with real staying power, because it isn’t a look so much as a preference for evidence of work.
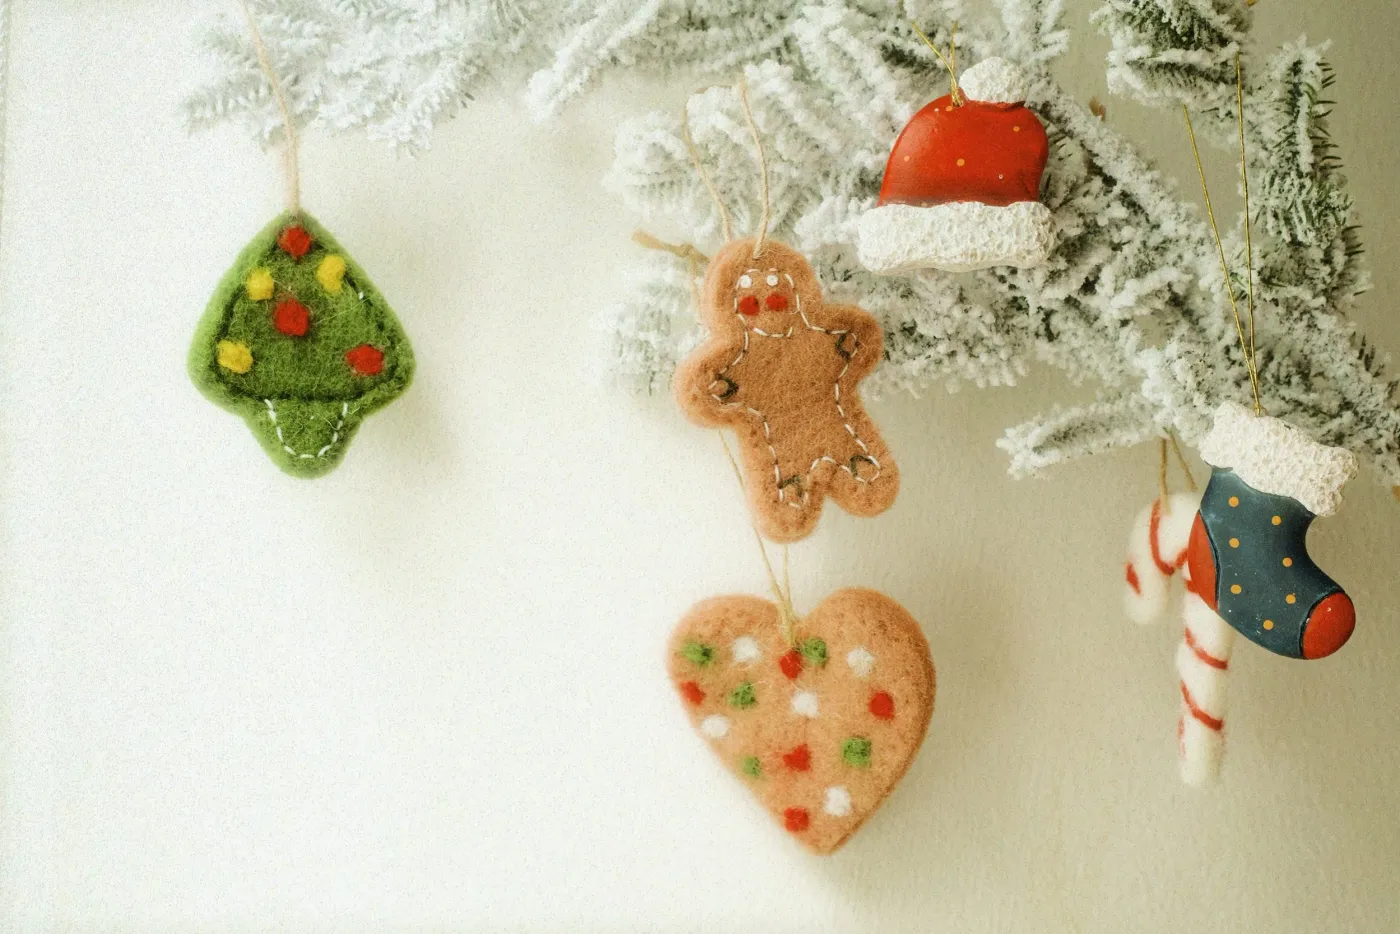
Mixing materials is what keeps a themed tree from looking like a store display. Felt gives you a soft matte shape, glazed ceramic gives you a hard highlight, and the candy cane adds a tiny stripe. Three textures, all within the same two-inch size range, so nothing competes. And the flocking is doing quiet labor: it lifts the whole palette two shades lighter, which is why red and blue feel festive here instead of heavy.
24. Teal and Lime Glitter Handprints on a Baking Sheet
Getting glitter to stay where you put it:
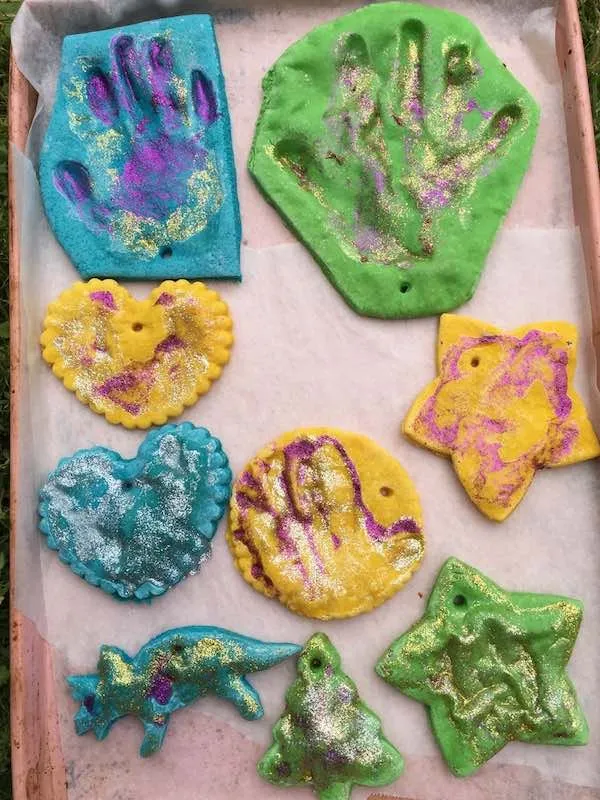
- Paint the base colors first and let them dry completely — glitter over wet paint clumps.
- Brush mod podge only where you want glitter, in thin sections.
- Hold the ornament over a coffee filter and sprinkle; don’t dip.
- Tap off the excess and let it sit 20 minutes before the second coat.
- Seal with two light passes of spray acrylic, outdoors.
Fifteen minutes per ornament, and the coffee filter saves you half a jar of glitter.
A parchment-lined baking sheet is the right place to dry these — and the wrong place to leave them. Salt dough picks up the parchment texture on the underside if it’s still soft, so flip after two hours. Teal and lime look fantastic in February and slightly exhausting in December, so keep them to one accent piece per branch. Keep the glitter and the rolling pin in separate rooms for the rest of the day.
25. Dark Dough Medallions Dusted With Flour and Gold Ribbon
Dark dough reads heavier than pale dough, which means it needs more light around it to work. These look best on a tree over 6 feet, or on a dark table where at least one warm lamp is in the frame. In a small room with a 4-foot tree, use them sparingly — three or four — and pair them with something reflective. Compare with Idea #22: same cocoa dough, completely different weight class.
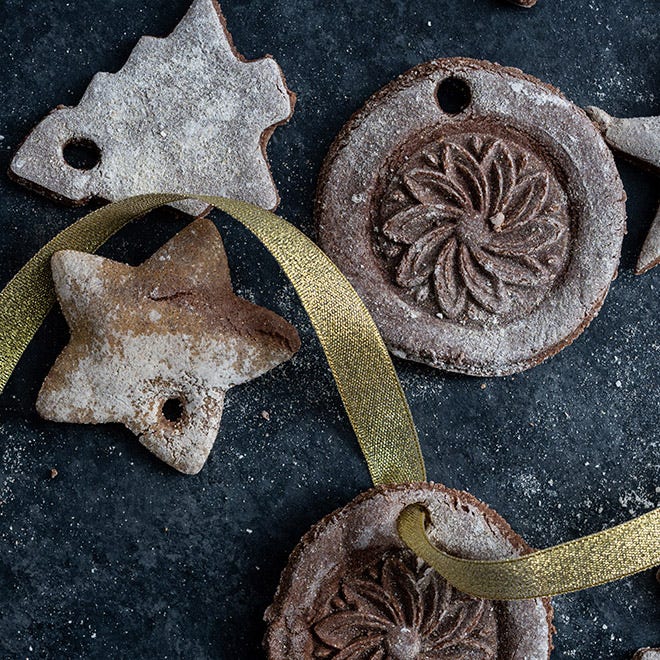
That dusting of white powder is the entire idea. Without it, these are dark brown ornaments on a dark surface — invisible. With it, they look like they were just pulled from a floured counter, or like the first snow settled on them. It’s also completely free. Leave a little on, and don’t brush it off evenly; patchy reads as real, uniform reads as deliberate.
26. A Cream Felt Star Among Pinecones and Dried Orange
The composition is 50% cream and white, 30% forest green, 15% natural brown, 5% copper. That copper sphere is doing the work of a metallic even though it’s tiny, because it’s the one surface that reflects rather than absorbs. Swap copper for brass and the arrangement gets warmer. Swap it for brushed silver and the whole thing turns crisp and wintry. The 50/30/15 split stays the same either way.
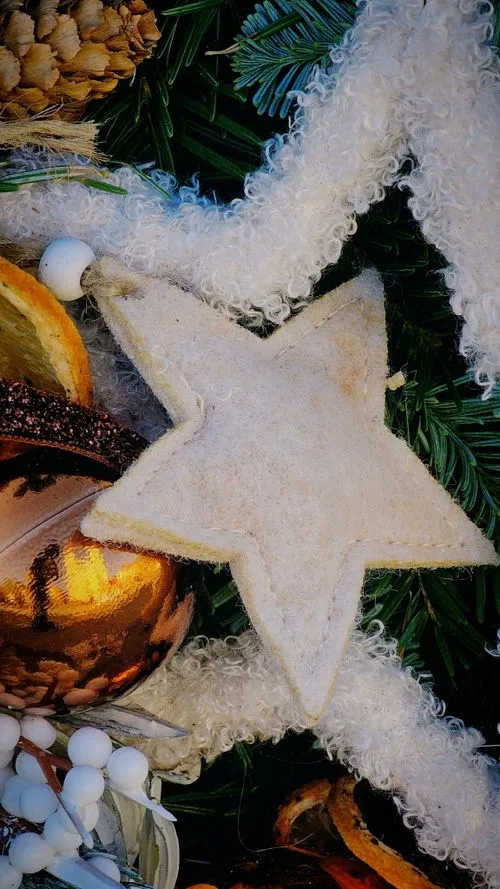
If you’re building this look as a centerpiece:
- Felt star (or a dough version): $3–$8
- Fresh greenery cuttings: $0–$12
- Pinecones, foraged: $0
- Dried orange slices, one bag: $6–$9
- Copper ornament, single: $5–$12
- Curly white garland, 3 feet: $8–$14
Total: $22–$55. Budget version: dry your own orange slices at 200°F for three hours and forage the pinecones — that drops you under $20.
Dried citrus and fresh greenery are a two-week look at best. Orange slices go brittle and fade within a month, and pine needles drop the moment the room dries out. If you want this on the table all season, swap the fresh cuttings for a good faux cedar garland and the orange for a dried-look resin slice. Keep real greenery away from open flame, because it goes up fast.
27. Flat White Stars and Little Houses on Weathered Wood
White ornaments on weathered wood work because they’re the only light thing in the frame. The wood brings the grain, the pinecones bring the volume, and the flat white pieces bring the negative space — three jobs, zero overlap. The house shapes matter more than you’d think: they give the composition a horizon line, so the stars have something to sit above instead of floating. It’s the same reason a shelf needs one square object.

Hang ornaments for a flat lay so they look suspended, not dropped. Thread the baker’s twine, then tape the ends out of frame so each piece sits at a slight angle:
- Vary the angle by 15 to 20 degrees, never perfectly upright.
- Keep the largest piece off-center — about a third in from an edge.
- Group the pinecones in a triangle, not a line.
Two minutes of arranging, and it’s the difference between a catalog shot and a snapshot.
28. A Textured White Bird Among Star and Round Ornaments
These work at almost any scale because they’re small and unbroken by color. Realistically, one to two ornaments per 12 inches of branch keeps the greenery visible — go denser and the branch disappears. A display this light needs a wall of at least 3 feet wide to feel intentional, or a tabletop of 20 inches. In a narrow entryway, hang three and stop.
Unsealed salt dough in a humid room is a countdown clock. If these are going anywhere near a kitchen, a bathroom, or a front door that opens to weather, seal them — two coats, edges included. Textured surfaces hold dust in every dimple, so plan on a soft-brush pass each December. The red berries are the other weak point; real ones dry and drop, so use faux or accept a light sprinkle of debris under the branch.
29. A Mixed Dozen: Painted Santa, Bare Gnomes, Black Ribbons
Filling a whole tree with handmade ornaments, honestly:
- Flour, salt, cocoa, spices: $8
- Craft acrylic set, 12 colors: $10–$16
- Black ribbon, 10 yards: $5–$9
- Matte sealer, one can: $9–$13
- Sandpaper and skewers: $4
Total: $36–$50 for roughly 30 ornaments — about $1.50 each, against $8–$15 apiece at a craft fair. Budget version: skip the acrylic set and paint with three colors only. Fewer choices, better results.
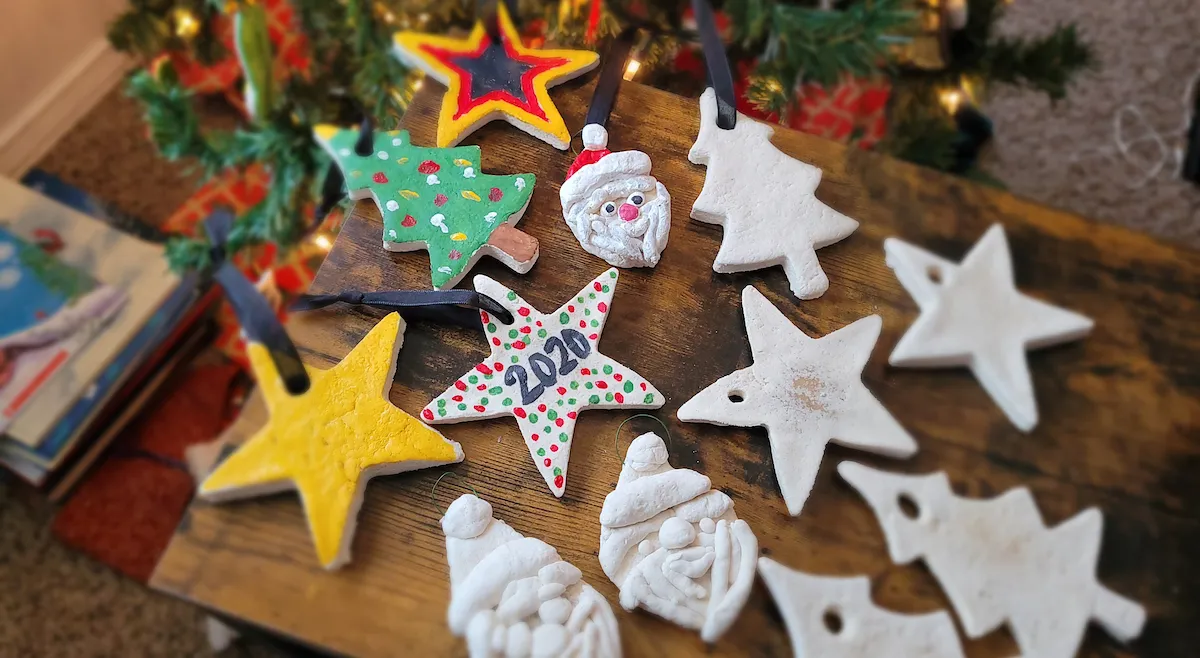
The look that costs nothing is the one where you leave half the batch unpainted. Bare cream dough next to one fully painted Santa is more interesting than a tree of identical finished pieces, and it’s the version in Idea #5 turned up louder. Use black ribbon instead of red — it’s cheaper, it photographs better against green, and it makes the bright painted pieces look chosen rather than accumulated. You’ll also sidestep the hook mistake we cover at the end.
30. Named Handprint Ornaments on Slatted Wood
Before you press a single hand:
- Has everyone eaten? A hungry four-year-old presses too hard.
- Do you have the correct spelling, in writing, from the parent?
- Is the disc at least 3 inches across so the name fits beside the print?
- Are you using an acrylic paint pen that won’t fade to purple?
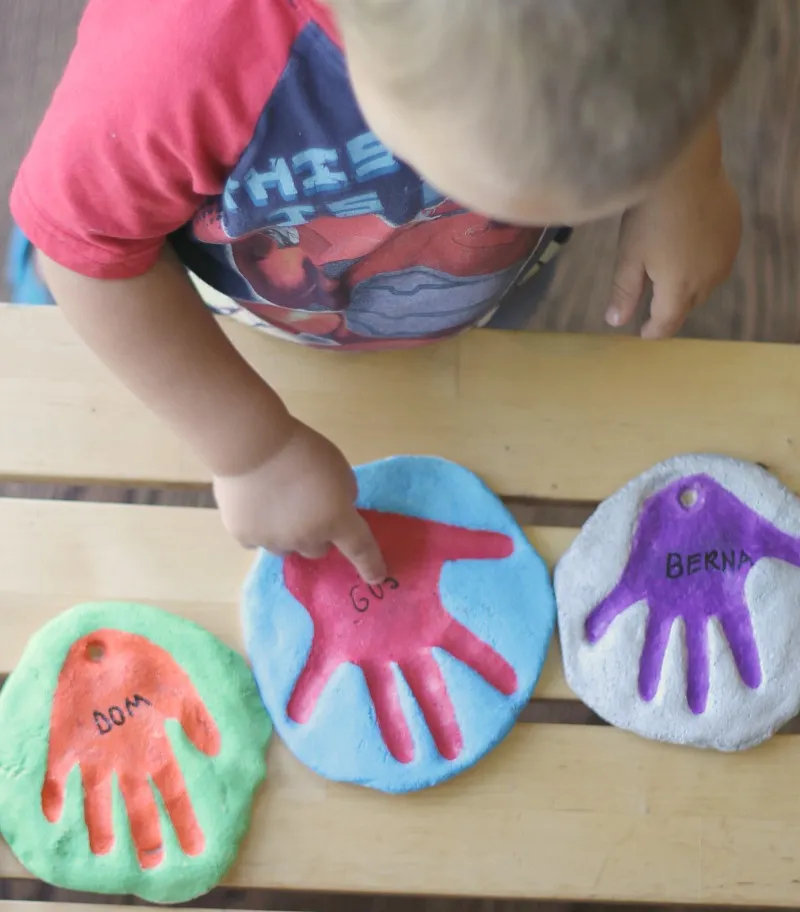
Three discs on a slatted surface is a composition; five is a pile. If you’re displaying a set, work in threes and vary the disc size slightly — 3 inch, 3.5 inch, 4 inch. On a shelf, the group needs about 16 inches of width to sit comfortably with air around it. For a bigger family, split into two groups of three rather than one group of six; the eye reads it faster. Same trick as Idea #16, just tidier.
31. Close-Up on a Hand-Painted Santa Face With Black Outlines
Black outlines are unforgiving. One shaky line across a Santa face and the whole ornament looks nervous, and you can’t sand paint off dough without wrecking the seal. Practice the face on paper first — three or four times, with the same pen you’ll use. And paint the beard last, not first; white over beige covers cleanly, but beige over white never does. Small order of operations, big difference in the result.
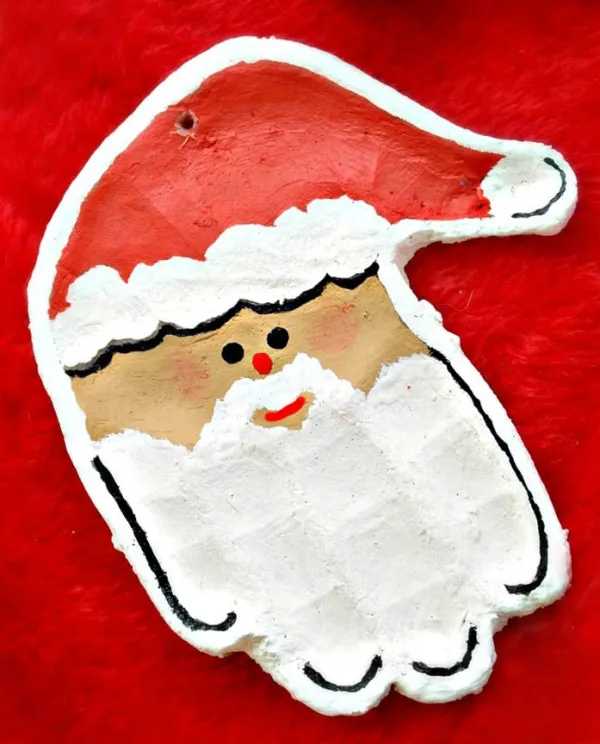
The matte texture is what sells this. A glossy Santa reads as plastic; this one has a slightly chalky surface where the paint sinks into the grain of the dough, and that’s the entire charm. The hole at the top, off-center and a little rough, does the same work — it says a person made this. Sand it smooth and seal it to a shine and you’d have a nice ornament and nothing more.
32. Dark Cocoa Dough Rolled Out Under Silver Cutters
Working with dark dough, start to finish:
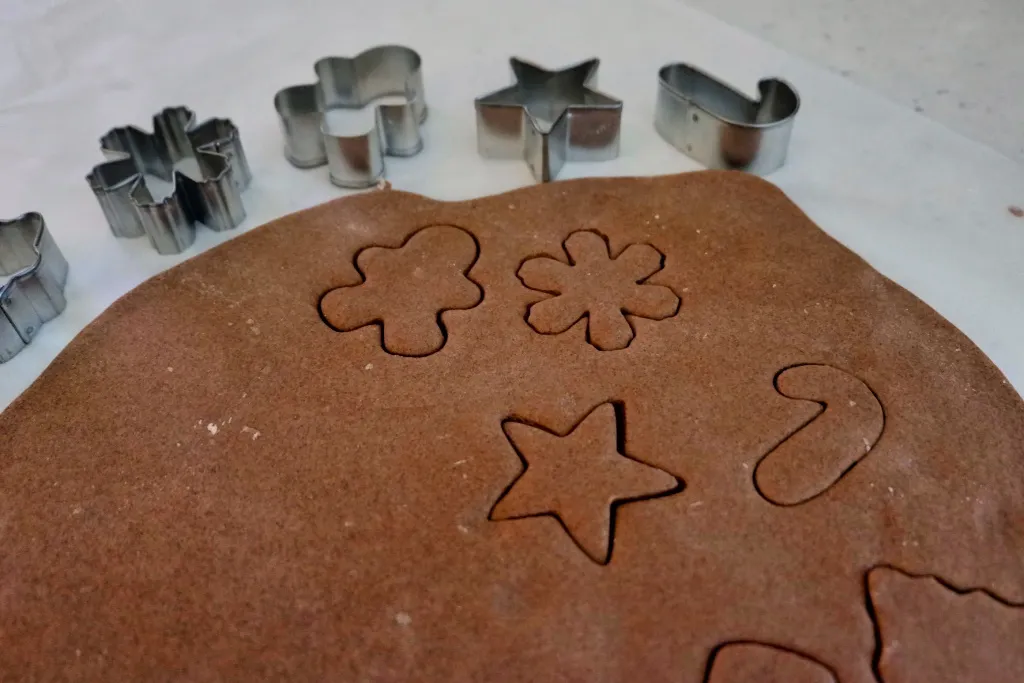
- Whisk the cocoa into the dry flour before you add any water — lumps never come out.
- Add water a tablespoon at a time; cocoa dough goes from crumbly to sticky fast.
- Roll between two sheets of parchment to 1/4 inch, no extra flour needed.
- Cut with metal cutters and lift with a thin spatula, not your fingers.
- Chill the cut shapes 15 minutes before baking to hold sharp edges.
Twenty-five minutes hands-on, about $2 in ingredients for two dozen.
Metal cookie cutters are the one place I’d tell you to spend. A $12 set of nested stainless shapes from a restaurant supply store will outlast three plastic sets from a dollar store, and the thin ones cut cleanly through cocoa dough where the thick plastic ones just squash it. That said, a $3 plastic star and a knife handle work fine for a first batch. Skip the embossing mats — a fork and a chopstick cover 80% of the texture you see here.
Your Flour, Salt, and Water Era Starts Now
Salt dough is one of the few trends on Pinterest where the version you make on a Tuesday night genuinely beats the one you can buy — imperfect edges, slightly wobbly handprints, and all. Pick one ratio from this list, buy four dollars of supplies, and see what happens on your own tree this year.
📌 Save this to Pinterest now so you have the palette math and the mistake list ready when the flour comes out.