
You know the feeling when you spot a jar full of fairy lights on Pinterest at 11pm and suddenly you own eleven mason jars? Same. Mason jar Christmas crafts have quietly become the most-saved holiday project on the platform three years running, and 2026’s versions are better than the glitter-glue era we all survived.
We spent real time combing through Target, Etsy, Walmart, and IKEA listings — plus an unreasonable number of creator posts — to pull together 33 ideas that actually hold up in a real living room. Everything here falls between $3 and $85, and budget and luxury versions are compared side by side so you can see exactly where the money goes.
You’ll find farmhouse rustic, cottage-core cozy, vintage whimsy, and a warmer, moodier minimalist take on the whole thing. This year the shift is toward low-glow lighting and jewel-tone glass rather than bright red-and-green everything — which is exactly why these jars are suddenly showing up on mantels that would never have allowed a mason jar before.
And stay until the end — we break down the most common mistakes that can ruin these looks. This post contains affiliate links, and if you buy through them we may earn a small commission at no cost to you.
📌 Save this to Pinterest for later — you’ll want to revisit these ideas.
1. Quilted Red Glass Jars That Glow From Within
The element doing all the heavy lifting here isn’t the buffalo check bows or the frosted pinecones — it’s the light inside. Take that away and you have three red jars on a board. Keep it, and the arrangement reads like a miniature hearth. The diamond quilting is what makes it work: the faceted glass catches the glow and scatters it across the wood grain, so the jars appear to hover just above the surface instead of sitting on it.
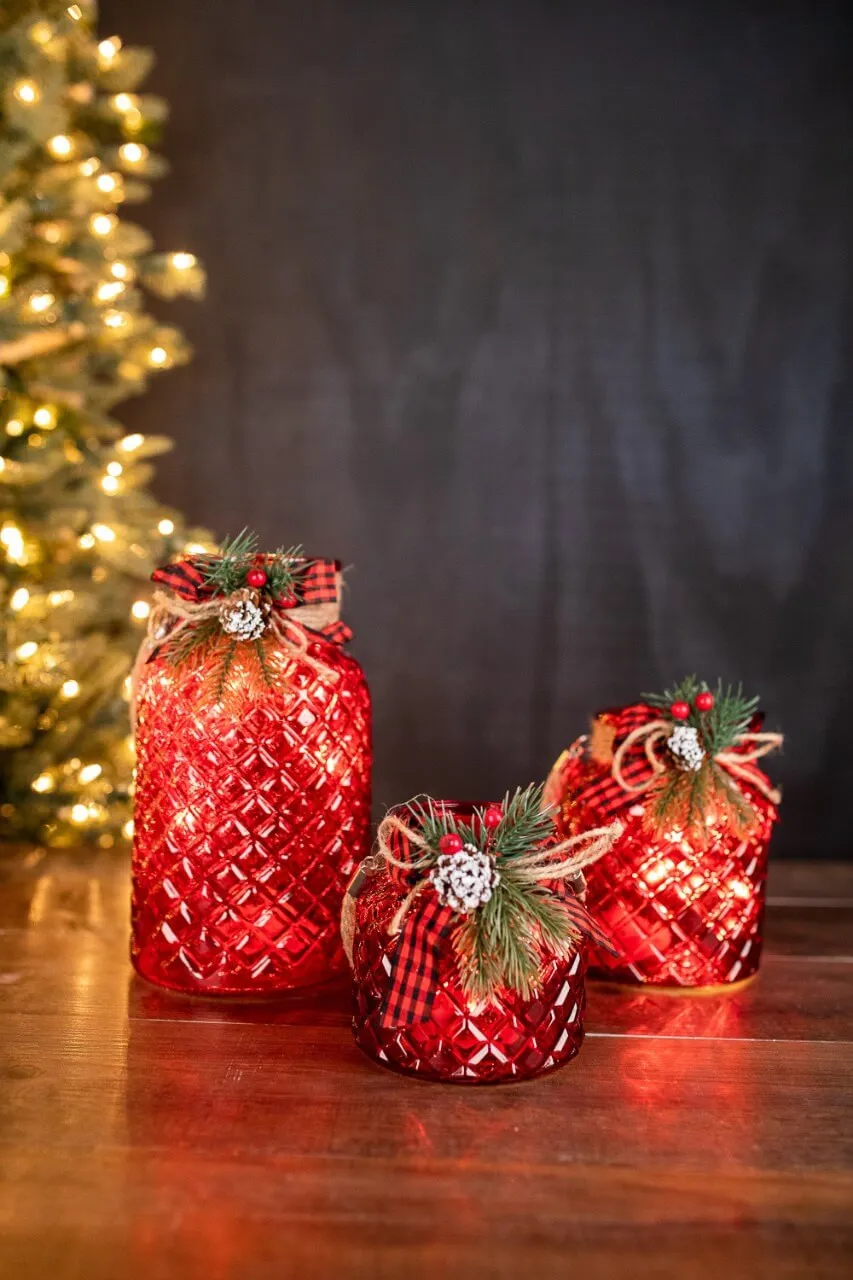
Second-best decision: three different heights. A matched set of identical jars would read as inventory. Staggered silhouettes give the eye somewhere to travel and back.
Here’s what the trio actually costs to assemble:
- Three quilted or textured glass jars: $12–$28
- Warm white battery fairy lights, three sets: $9–$18
- Buffalo check ribbon, jute twine, faux pine sprigs: $8–$16
- Frosted pinecones and red berry picks: $6–$14
- Red glass tint or spray paint: $7–$12
Total: $42–$88 for the complete trio. Cut that by half by thrifting plain clear jars at $1–$2 each, skipping the red tint, and letting a red ribbon plus one pinecone carry the color story instead. You’ll land around $22.
2. White Painted JOY Jars With Burlap Bands
Cut your burlap bands 3 inches tall and pull four or five horizontal threads off each raw edge before you stencil — the fringe is what makes it look hand-cut instead of trimmer-cut. Then stencil with a stiff brush and barely any paint: load it, then pounce it three times on a paper towel until it’s nearly dry. Wet paint on burlap travels sideways along the weave, and once it bleeds you can’t fix it. Two dry passes always beat one heavy one.
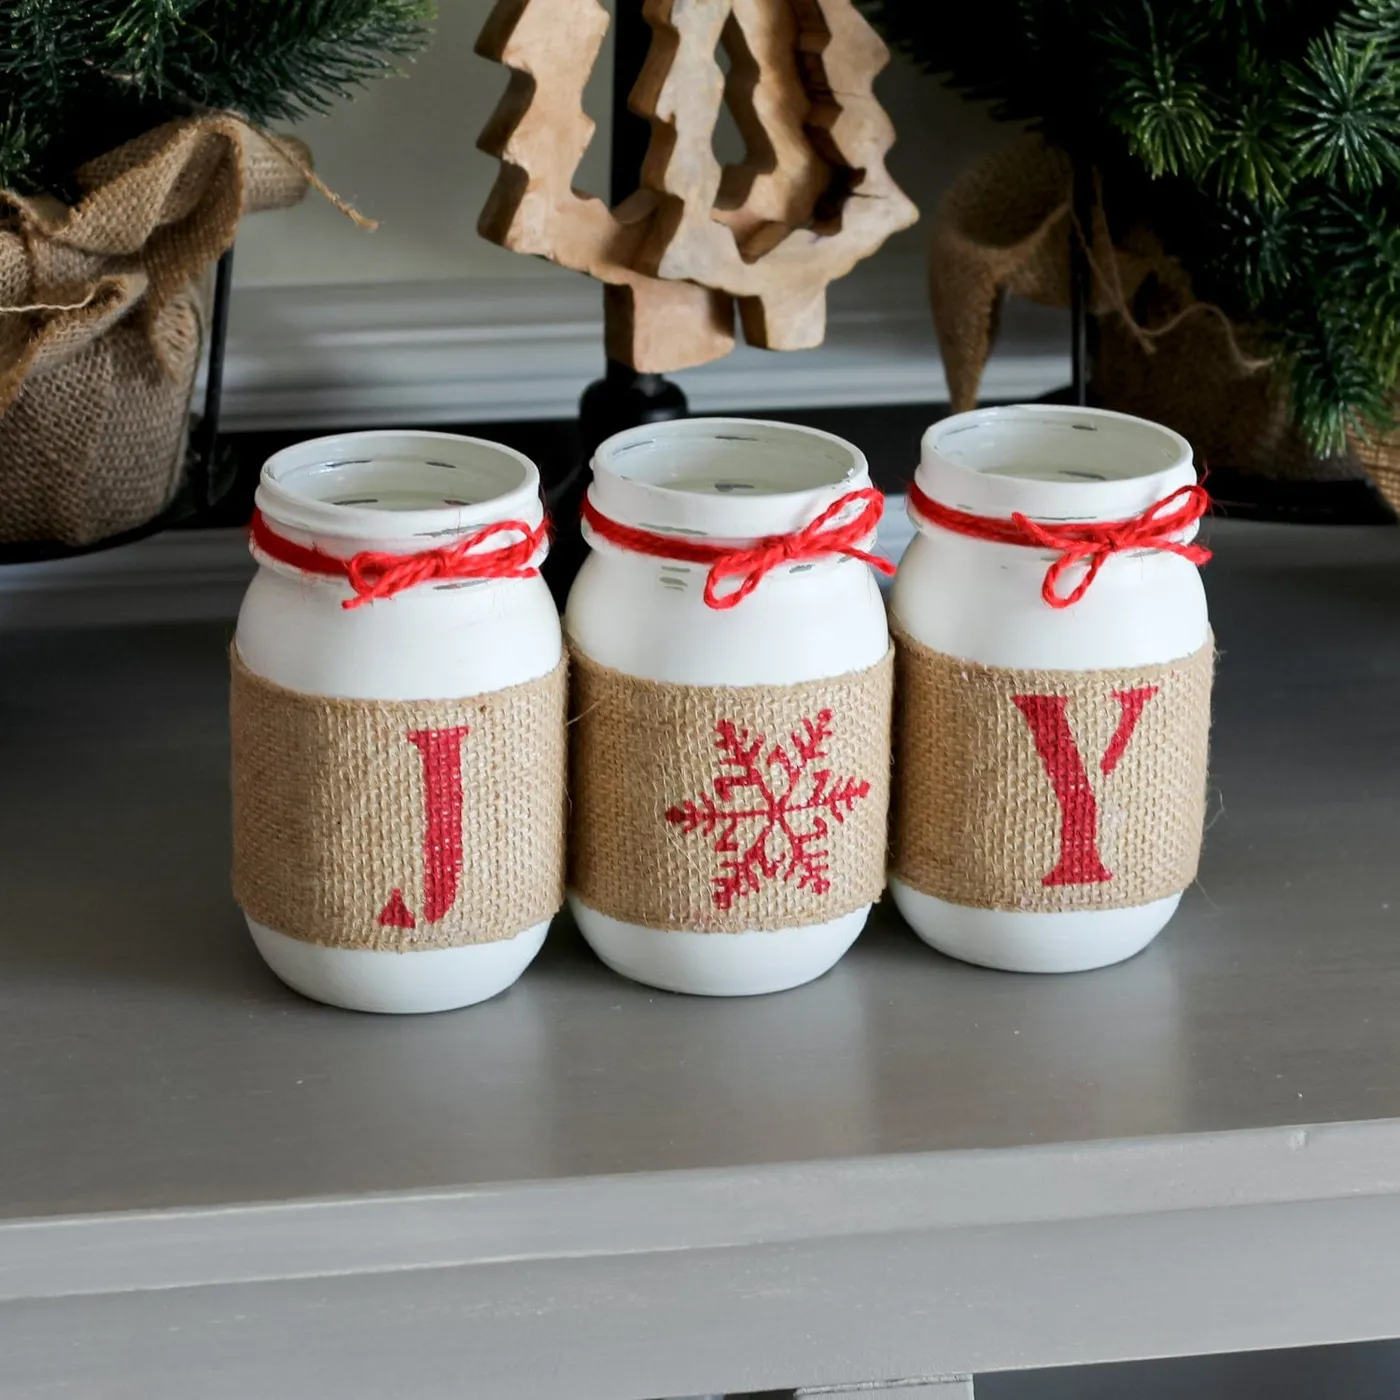
The formula is roughly 55% warm white, 25% burlap tan, 15% bright red, 5% green. Swap the red for navy and the same jars go coastal; swap the white paint for sage and you get cottage without changing a single measurement. The background earns its keep too — the wooden cutout trees and the small potted pines wrapped in burlap repeat the band material, which is why the group photographs as one scene rather than three separate crafts lined up on a gray table.
3. Snow-Frosted Jars With Glowing Interiors
Three things are happening at once, and all of them are about contrast. Temperature first: cold, chalky frost outside, warm amber light inside — your eye reads that as cozy before your brain catches up. Then texture: matte frosted glass against clear glass, resting in a loose bed of fake snow that grounds the trio so it doesn’t float. And scale — three heights with the tallest in the middle, so the group reads as one silhouette instead of three objects. The wood slice riser in Idea #9 takes the same idea and trades the fake snow for real pine.
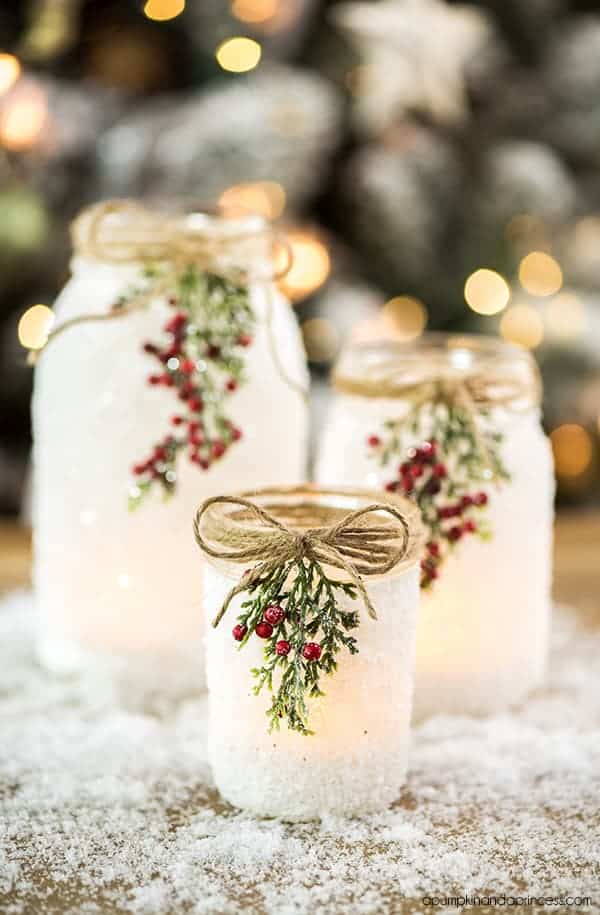
Frosted finishes are the fussiest thing in this whole craft. Spray frost and Epsom-salt coatings shed a fine white dust for the first week, and they cannot be rinsed — water strips the texture right off. Dust them with a dry, soft makeup brush instead, and store them wrapped in tissue, never stacked. Expect to touch up a bald patch every season or two. If you want the look without the shedding, buy jars that come frosted or etched from the factory.
4. Four Frosted Lanterns, Four Different Colors
Four jars, four colored glows, and the whole set can come in under $25. Dollar-store mason jars run about $1.25 each, solar or battery fairy lights come six to a pack for $8, and printable silhouette files sell for $3–$5 on Etsy — print them at home and cut them out yourself. Frosted glass spray is roughly $7 and covers all four jars. Compare that to a set of pre-made lit lanterns at $60–$90 for four, and the DIY version wins walking away.
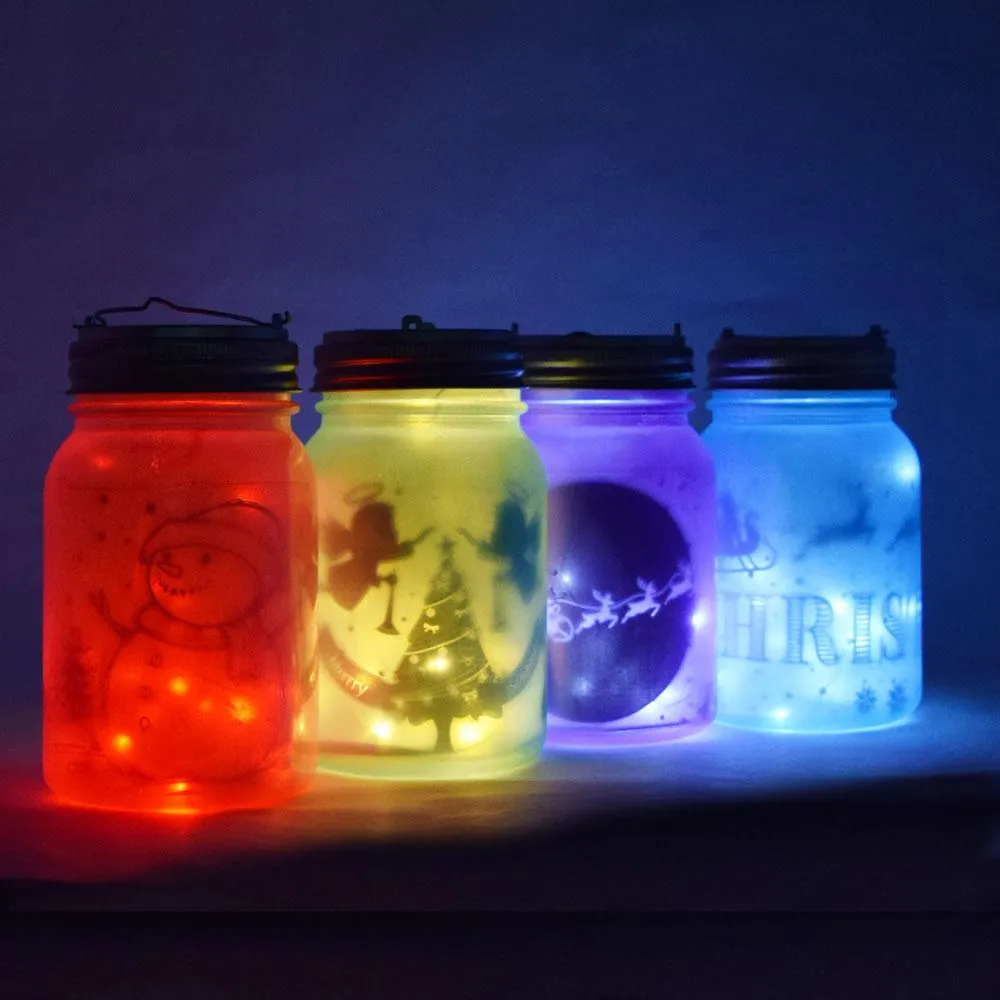
Apply each silhouette at the widest point of the jar, which on a standard pint lands about 1.5 inches below the neck — go lower and the light throws a shadow across your tabletop instead of through the design. Press them down with removable adhesive dots rather than permanent glue, so you can peel the snowman off in January and reuse the jar for something else. And give each colored strand its own switch. One shared battery pack means one shared color.
5. Layered Snowflake Jar Gift With a Paper Cutout
- Cut three snowflakes from cardstock in descending sizes — 4 inch, 3 inch, 2 inch — using the same pattern so the layers nest.
- Brush the largest layer with a thin coat of fine glitter and let it dry flat for 20 minutes.
- Stack the layers on foam adhesive dots so each one floats about 1/8 inch above the last.
- Attach the finished snowflake to the front of the jar with a removable glue dot, centered at the widest point.
- Tie jute twine around the neck in a single bow, keeping the tails uneven for a hand-tied look.
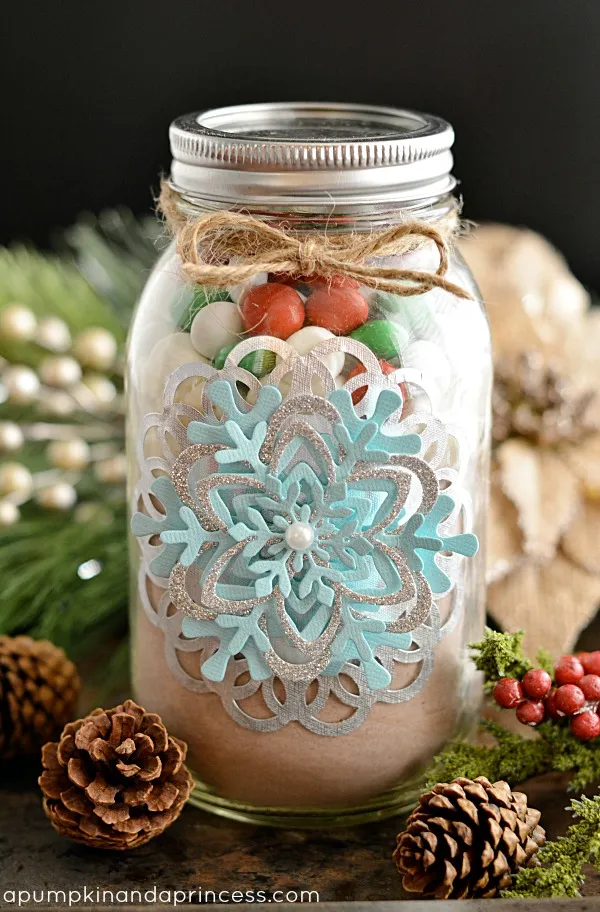
Time: about 30 minutes. Materials: $4–$7. If the jar is a gift, loop the twine long enough to hang over the lid instead of tying it off.
If the jar holds a drink mix or candy, keep every bit of adhesive on the outside of the glass — glued paper touching food is the one thing that turns a cute gift into a bad idea. Glitter is the other consideration: seal the sparkle with a light mist of clear matte sealer, or you’ll be finding flecks on the recipient’s counter for a month. And skip the snowflake entirely on any jar that will be washed and refilled.
6. Purple-Glow Silhouette Jar With a Moonlit Scene
Take away the purple light and this is just another frosted jar with a scene glued to it. The color is the entire idea — it turns a pinecone-and-snowman craft into something that looks like a winter window at midnight, and it lets the dark reindeer and tree silhouettes read as actual shapes instead of dark smudges. Warm white light would flatten the whole scene into a warm blur. It also means placement matters: on a bright shelf the purple goes pink and the flying reindeer disappear entirely.
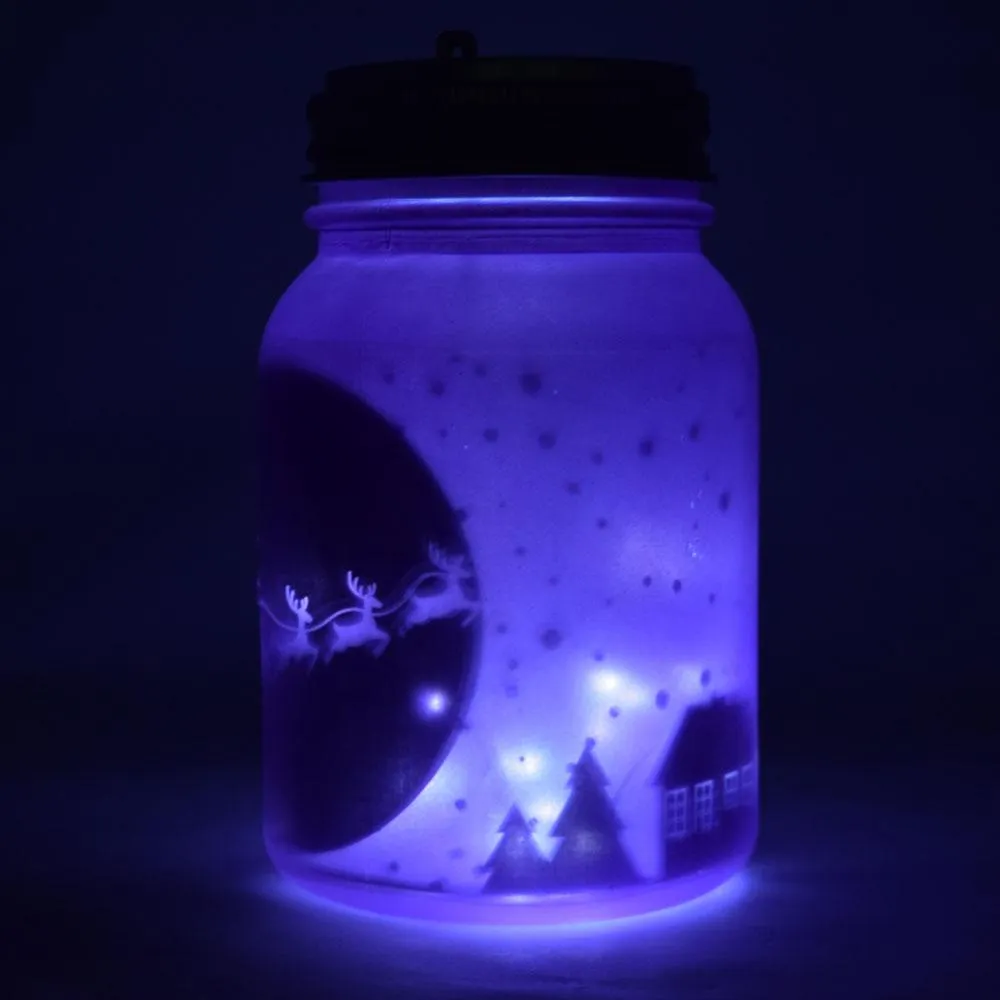
Colored-glow jars are having a moment because holiday decorating has shifted toward mood lighting over maximal color. Store displays this season lean on deepened palettes — plum, midnight blue, burgundy — rather than bright red and kelly green, and saves for moody Christmas decor have climbed steadily since 2023. It’s a style with real staying power, because these jars work all winter rather than just through December, and changing the light color is a $4 decision instead of a repaint.
7. Hand-Painted Candy Cane Stripe Jars on a White Tray
The recipe here is roughly 55% white, 30% red, 15% green pine. That ratio is why the tray still feels calm even though candy cane stripes are loud — the white jars and the white tray do all the quieting. Swap the red for forest green and you get a completely different mood with identical proportions; swap it for brushed gold and the group turns glam. One striped jar carries the composition, and the solid jars are the reason it doesn’t become a circus.
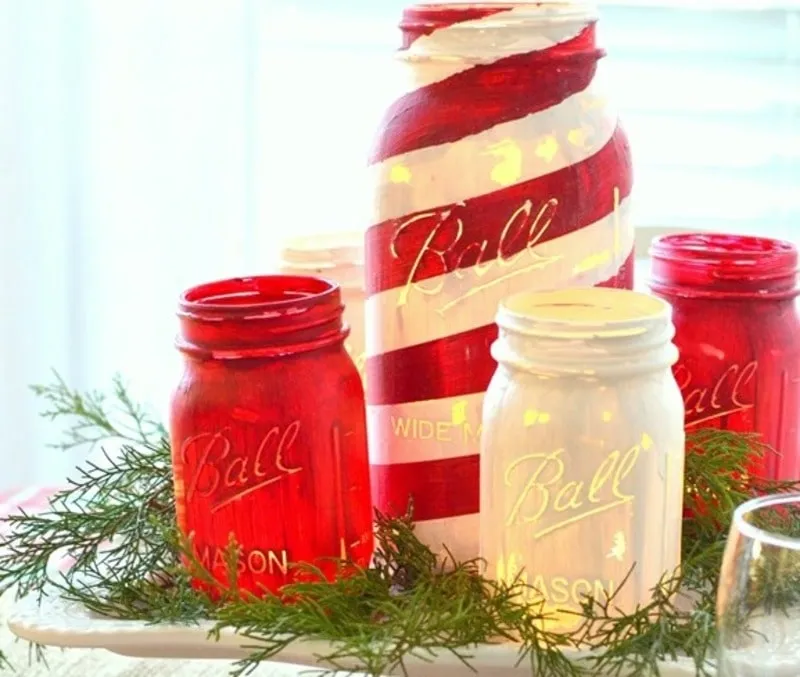
- Ball mason jars, three sizes: $9–$15
- Red and white enamel or acrylic craft paint: $6–$12
- Painter’s tape for the stripes: $3–$5
- Fresh or faux evergreen sprigs: $4–$10
- White tray (thrifted is perfect): $5–$18
Total: $27–$60. Thrifted jars at $1 each plus one bottle of red and one of white gets you the same look for about $14 — and the pine needles around the base are free if you already have a tree.
8. Frosted Green Tree-Cutout Candle Jar With Jingle Bell
Leave at least 2 inches of open air between the top of the candle and the tree design, and keep the design itself below that line. If the flame burns higher than the cutout, all you see from across the room is a bright blob with a tree-shaped shadow underneath it. A 3-inch pillar in a quart jar is the right proportion; anything taller crowds the glass. Set the jar on a coaster too — a warm base is the fastest way to cloud a frosted finish.
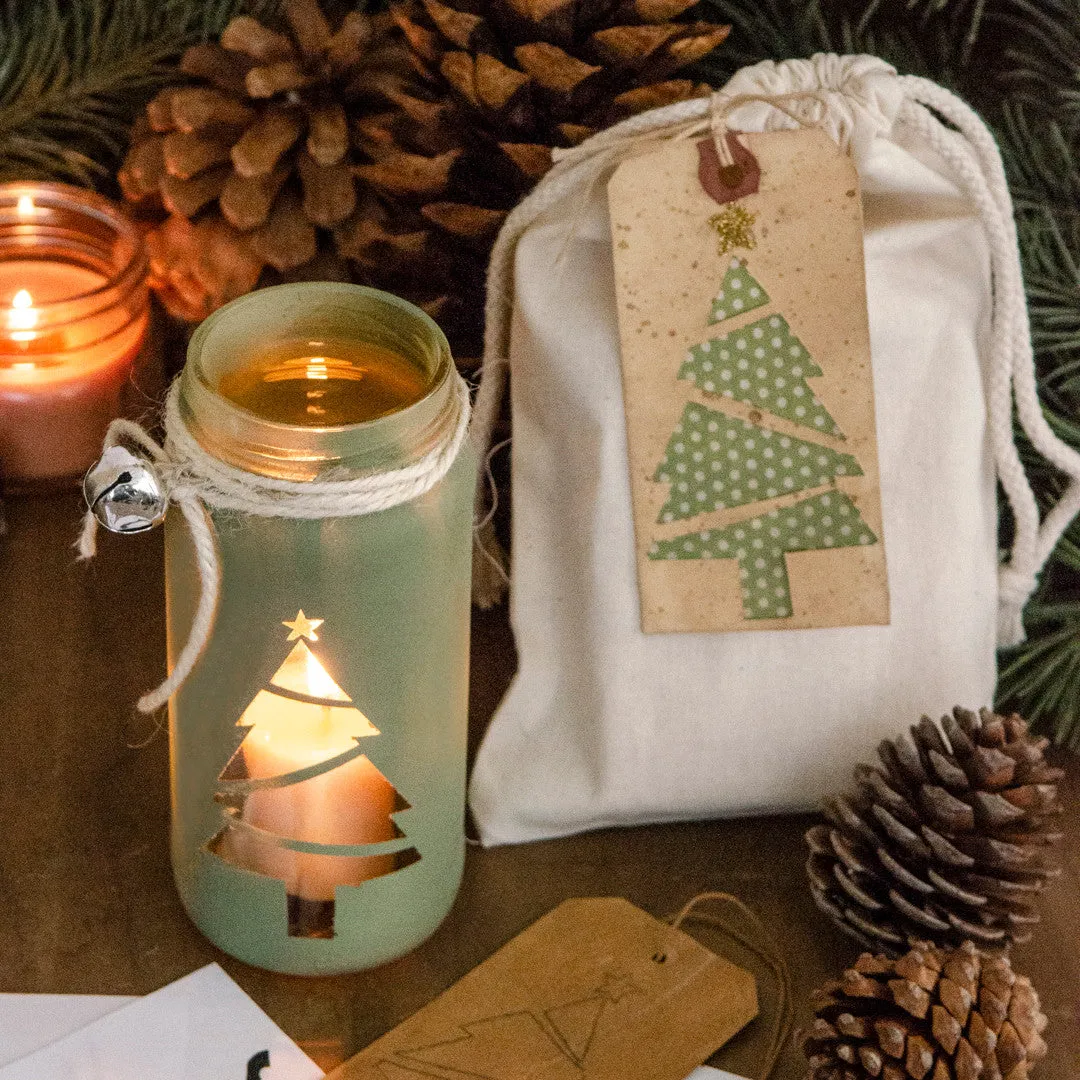
- Tape a 2.5-inch tree stencil to the front of a clean, bone-dry jar with painter’s tape.
- Apply glass etching cream in a thick, even layer with a foam brush, pressing into the stencil corners.
- Wait 15 minutes. Longer isn’t better — the edges go cloudy and the tree loses its shape.
- Rinse under cool water and peel the stencil while the glass is still wet.
- Dry fully, then tie twine at the neck and thread a single silver jingle bell onto one tail.
Time: 25 minutes plus drying. Materials: $8–$12, and one tub of etching cream covers about a dozen more jars.
9. Berry and Twine Jars Styled on a Wood Slice
That wood slice is doing more work than it looks like it is, and it’s also the piece most likely to go wrong. Fresh-cut rounds crack as they dry and can grow a fuzzy white mold if they sit somewhere damp — let them cure two to three weeks in a dry room, then seal both faces with two coats of polyurethane. If you’d rather skip the wood entirely, the white tray in Idea #7 does the same grounding job without the curing time.
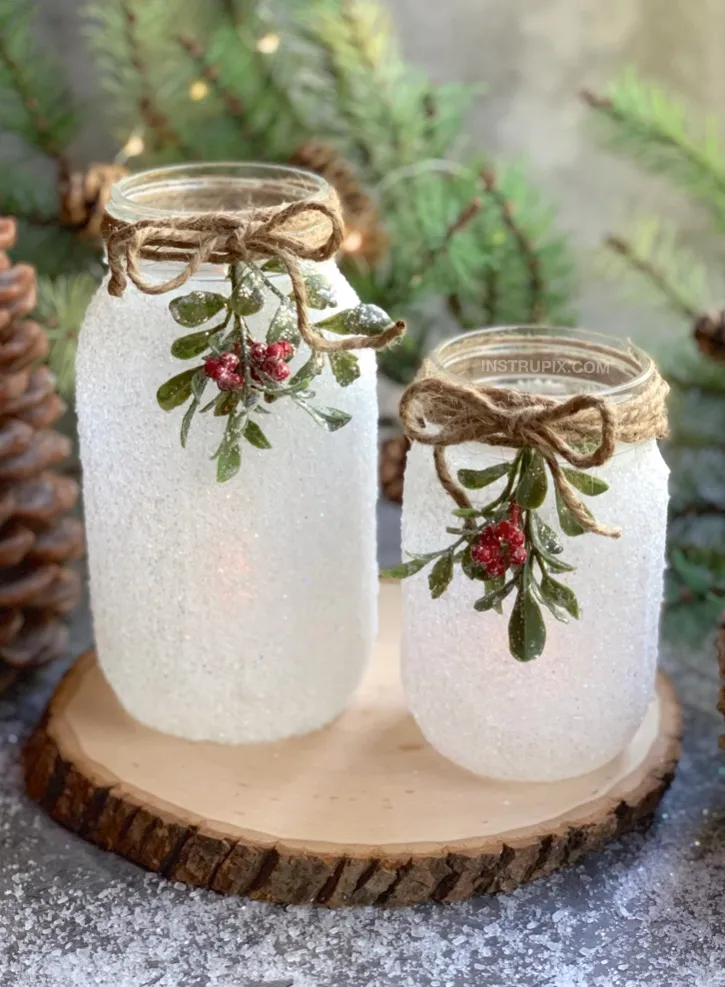
Two jars, not three, and they don’t match — that’s deliberate. The taller one carries a heavier frost texture, the shorter one is smoother, and together they read as a pair instead of a set. The twine bows and the wood slice are the same brown, which pulls your eye downward and makes the whole arrangement feel anchored. One repeated motif — green sprig plus red berries — is what keeps it from sliding into clutter. One idea said twice beats four ideas said once.
10. Solar-Powered Glow Jars for the Evening Table
Solar jar lids are the cheapest upgrade in this entire guide — about $8 for a two-pack — and they mean no cords, no batteries to swap, and no outlet hunting. Pair them with thrifted jars at $1–$2 each and you’ve built this for $12. The mesh table isn’t the point; any dark surface works. Just skip frosted glass here. Clear glass passes more light, and the solar panel needs the jar’s mouth pointed at the sky for a few hours to actually charge.
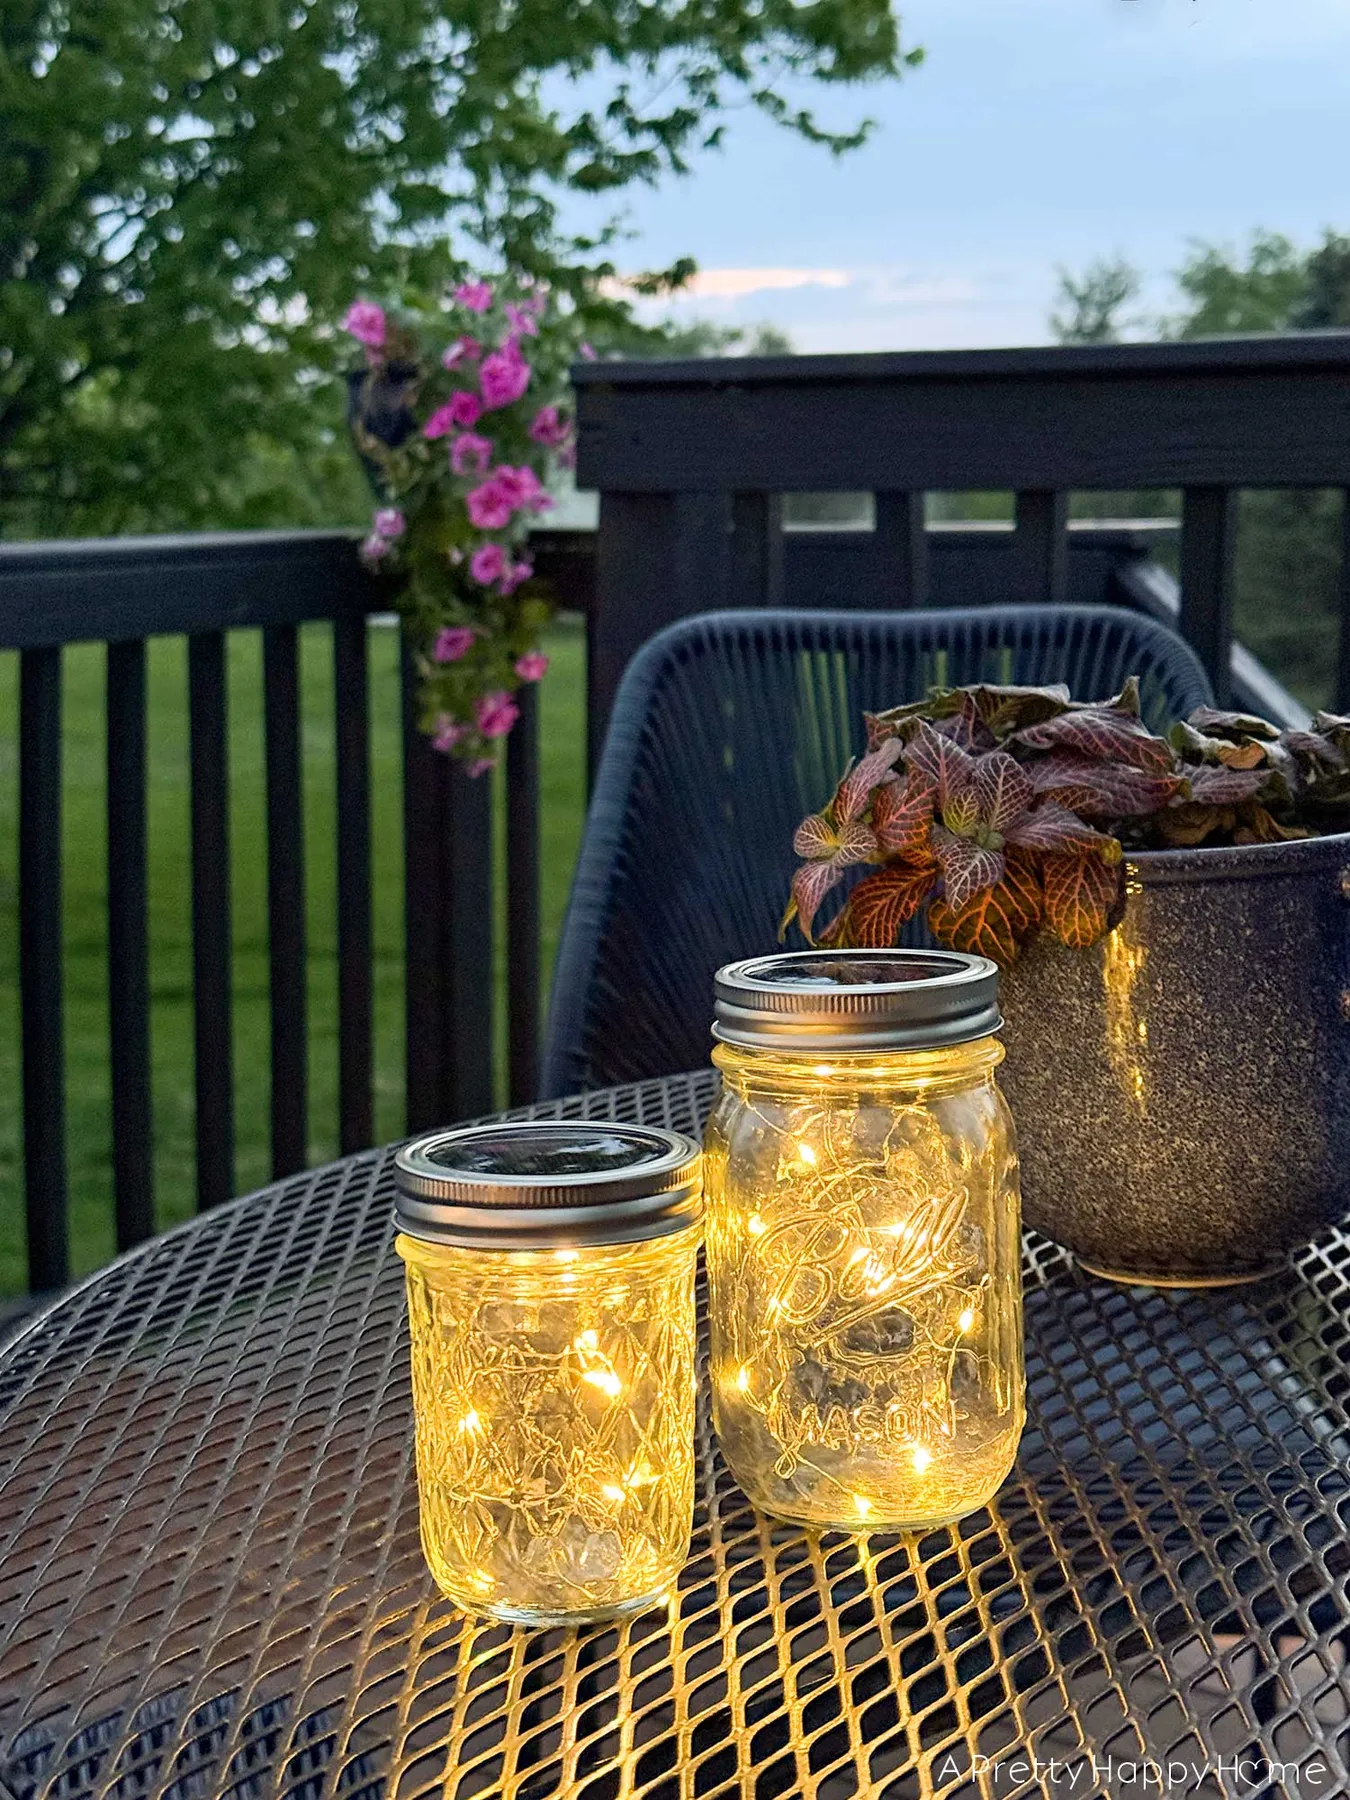
Two jars is the right count for a table up to 48 inches across. On a 60-inch rectangular table, go with three spaced evenly and keep them at least 18 inches from the nearest plate so nobody’s elbow catches a jar of glass. A 32-inch bistro table takes one. If you’re working with a genuinely large dining room, look at the centerpiece in Idea #22 instead — same warmth, more presence.
11. Button-Faced Snowman Jar With a Buffalo Plaid Bow
The three black buttons are the snowman. Everything else — the white paint, the plaid bow, the bottlebrush tree on the plate — is decoration arranged around them. Pull the buttons and you have a plain white jar wearing a ribbon, which is a fine craft but not a character. Scale matters more than you’d expect: buttons under 3/4 inch vanish from across the room, and anything over 1 inch starts reading as cartoon. Three in a straight vertical line, evenly spaced, centered on the front.
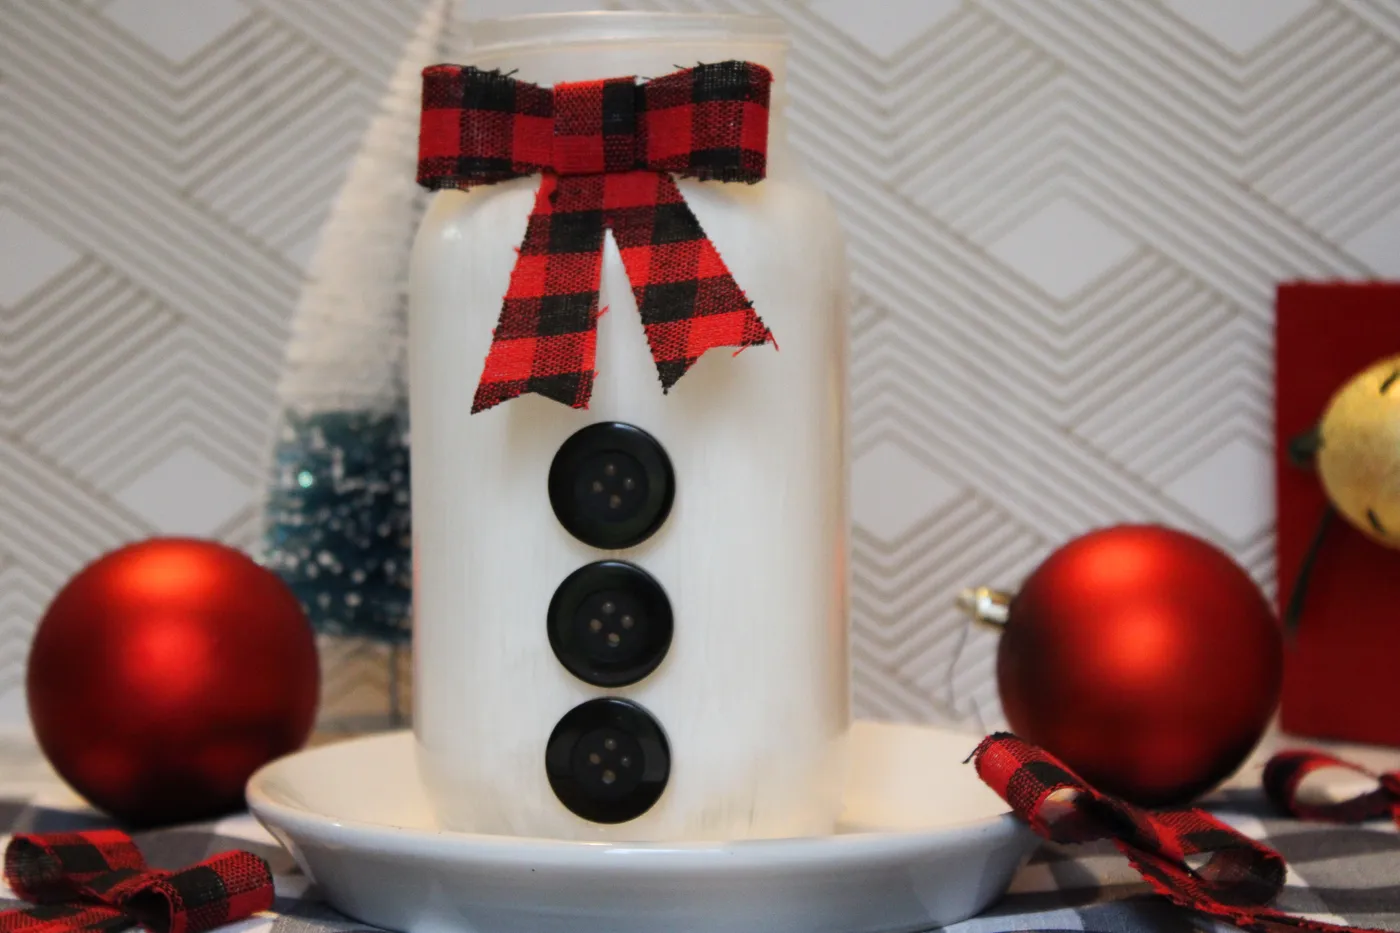
- Measure your jar first — 16-ounce jars run about 5 inches tall and fit a three-button stack perfectly.
- Check button size: 3/4 inch to 1 inch reads best from across a room.
- Cut the plaid fabric on the bias so the bow drapes instead of sticking straight out.
- Let the final paint coat cure a full 24 hours before gluing anything to the surface.
12. Green, Amber, and Clear Jars Full of Fairy Lights
Fairy-light jars are the lowest-maintenance thing in this guide until the strand dies, and it will. Cheap LED strands last two to three seasons before the wire at the battery pack frays — the break is almost always there, not in the lights themselves. Buy strands with replaceable batteries and keep the pack somewhere you can reach without unloading a whole display. Dust the glass monthly with a dry cloth; never wet-wipe a jar that has a wire handle attached. Budget $10–$15 every couple of years for replacements.
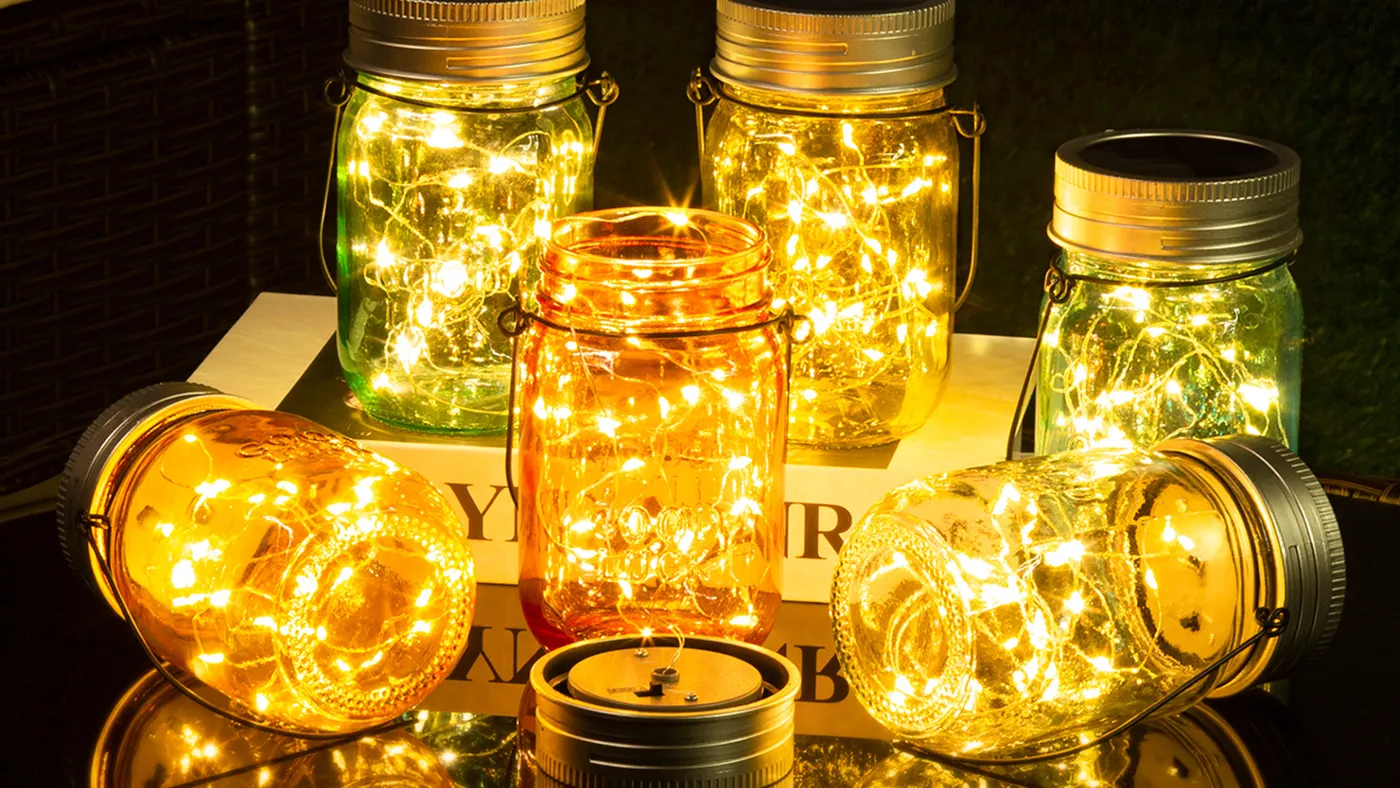
Run one 10-foot strand across all five jars instead of buying five separate packs. You’ll deal with a single battery set instead of five, and the output stays consistent because every jar draws from the same source. Thread the strand up into one jar, loop it over the rim, and drop it into the next. For the jars lying on their sides, tuck the battery pack underneath — the dark reflective surface hides it, and the light bounces off the table for free.
13. Cranberry and Water Jar Topped With a Lit Candle
- Fill a clean quart jar three-quarters full with distilled water.
- Lower the frosted bottlebrush tree in first — it sinks and anchors the bottom of the scene.
- Add cranberries a few at a time until they float in a loose ring near the surface.
- Set the lit candle at the mouth of the jar, checking that it clears the water line by an inch.
- Let everything settle for 10 minutes; the berries drift, and you want to see the final arrangement before you commit to a spot.
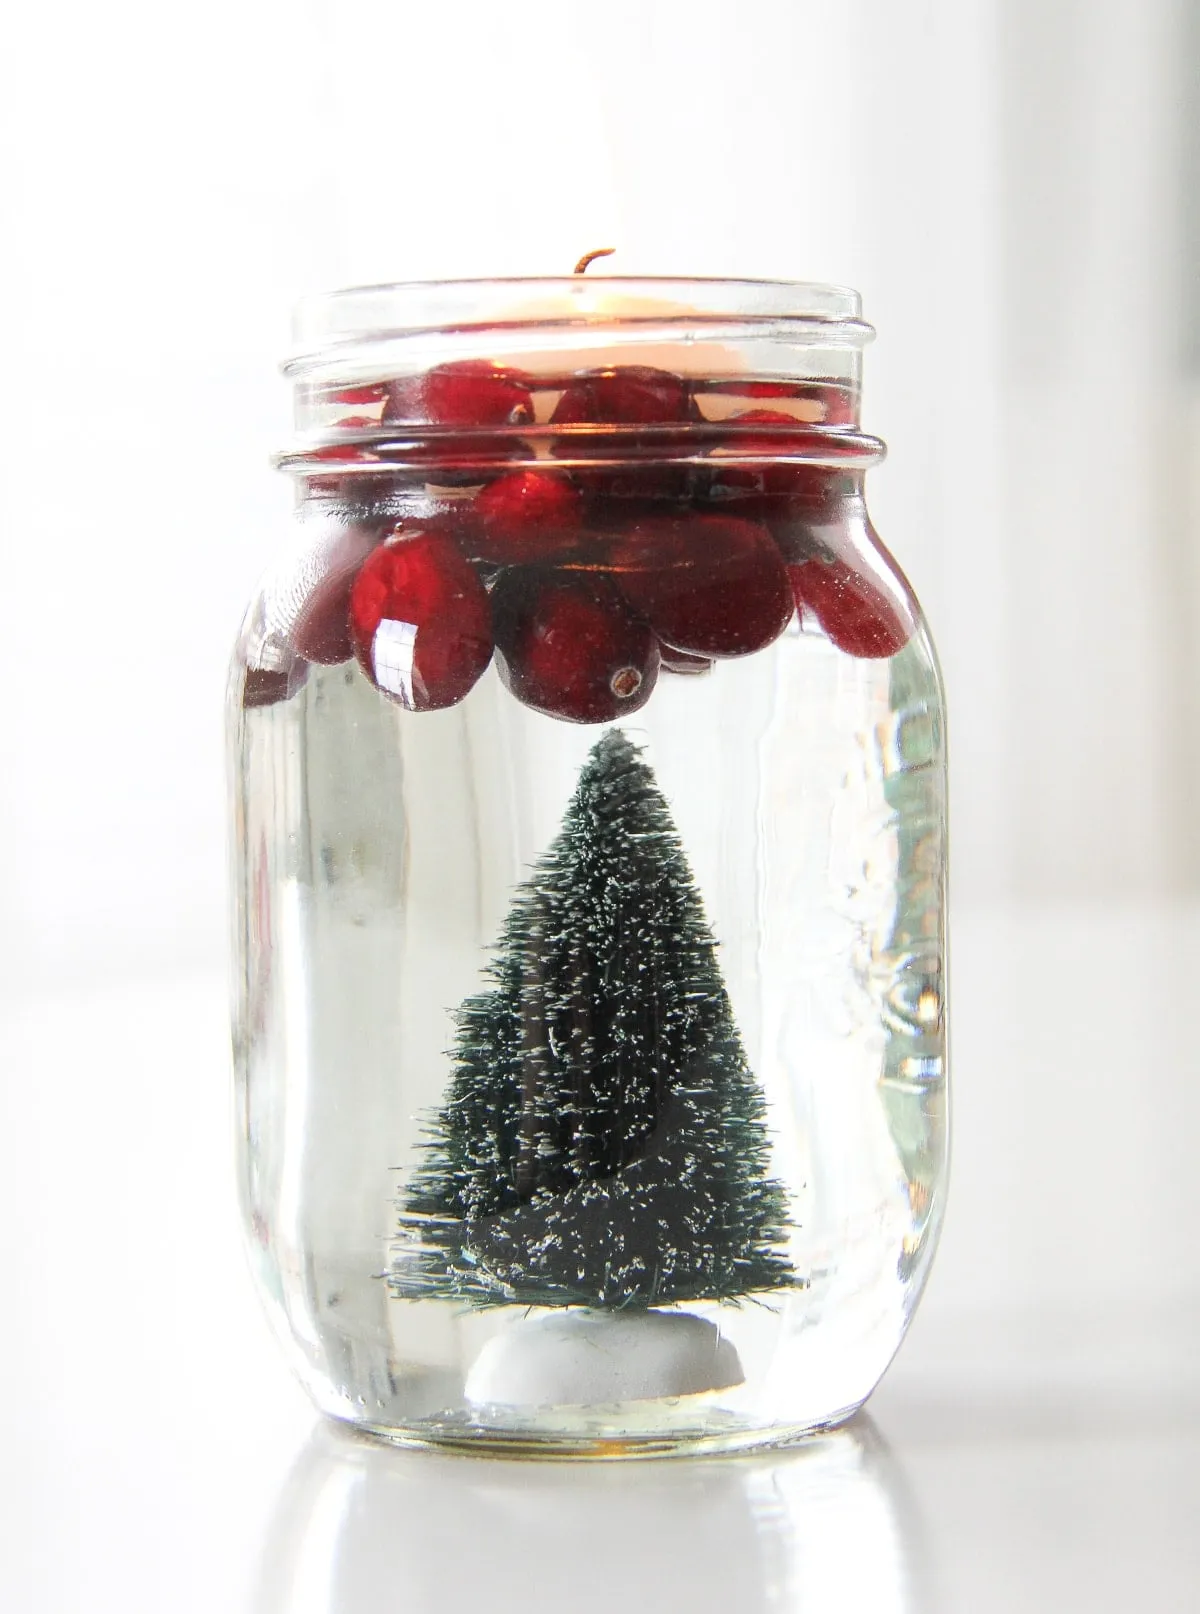
Time: 10 minutes. The cranberries are the only thing here that expires, so plan to build this the day before you’re showing it off.
- Clear quart mason jar with lid: $3–$6
- Miniature frosted bottlebrush tree: $2–$5
- Fresh cranberries, one bag: $3–$4
- Candle for the jar’s mouth: $2–$6
- Distilled water (tap water clouds the glass): $1–$2
Total: $11–$23 per jar. The budget version drops the tree and uses a handful of cranberries with a single floating candle in a thrifted jar — about $6.
14. Mixing Frosted, Clear, and Painted Jars in One Group
A group of jars works on the same rules as a gallery wall. Roughly 60% of the group should share a finish — frosted or painted — with 25% clear glass to give the eye somewhere to rest and 15% of something shiny, usually a lid or a ribbon. Keep at least one thing consistent across every jar: the twine, the jar shape, or the light color. Change everything and it reads as a pile. Change one thing and it reads as a collection.
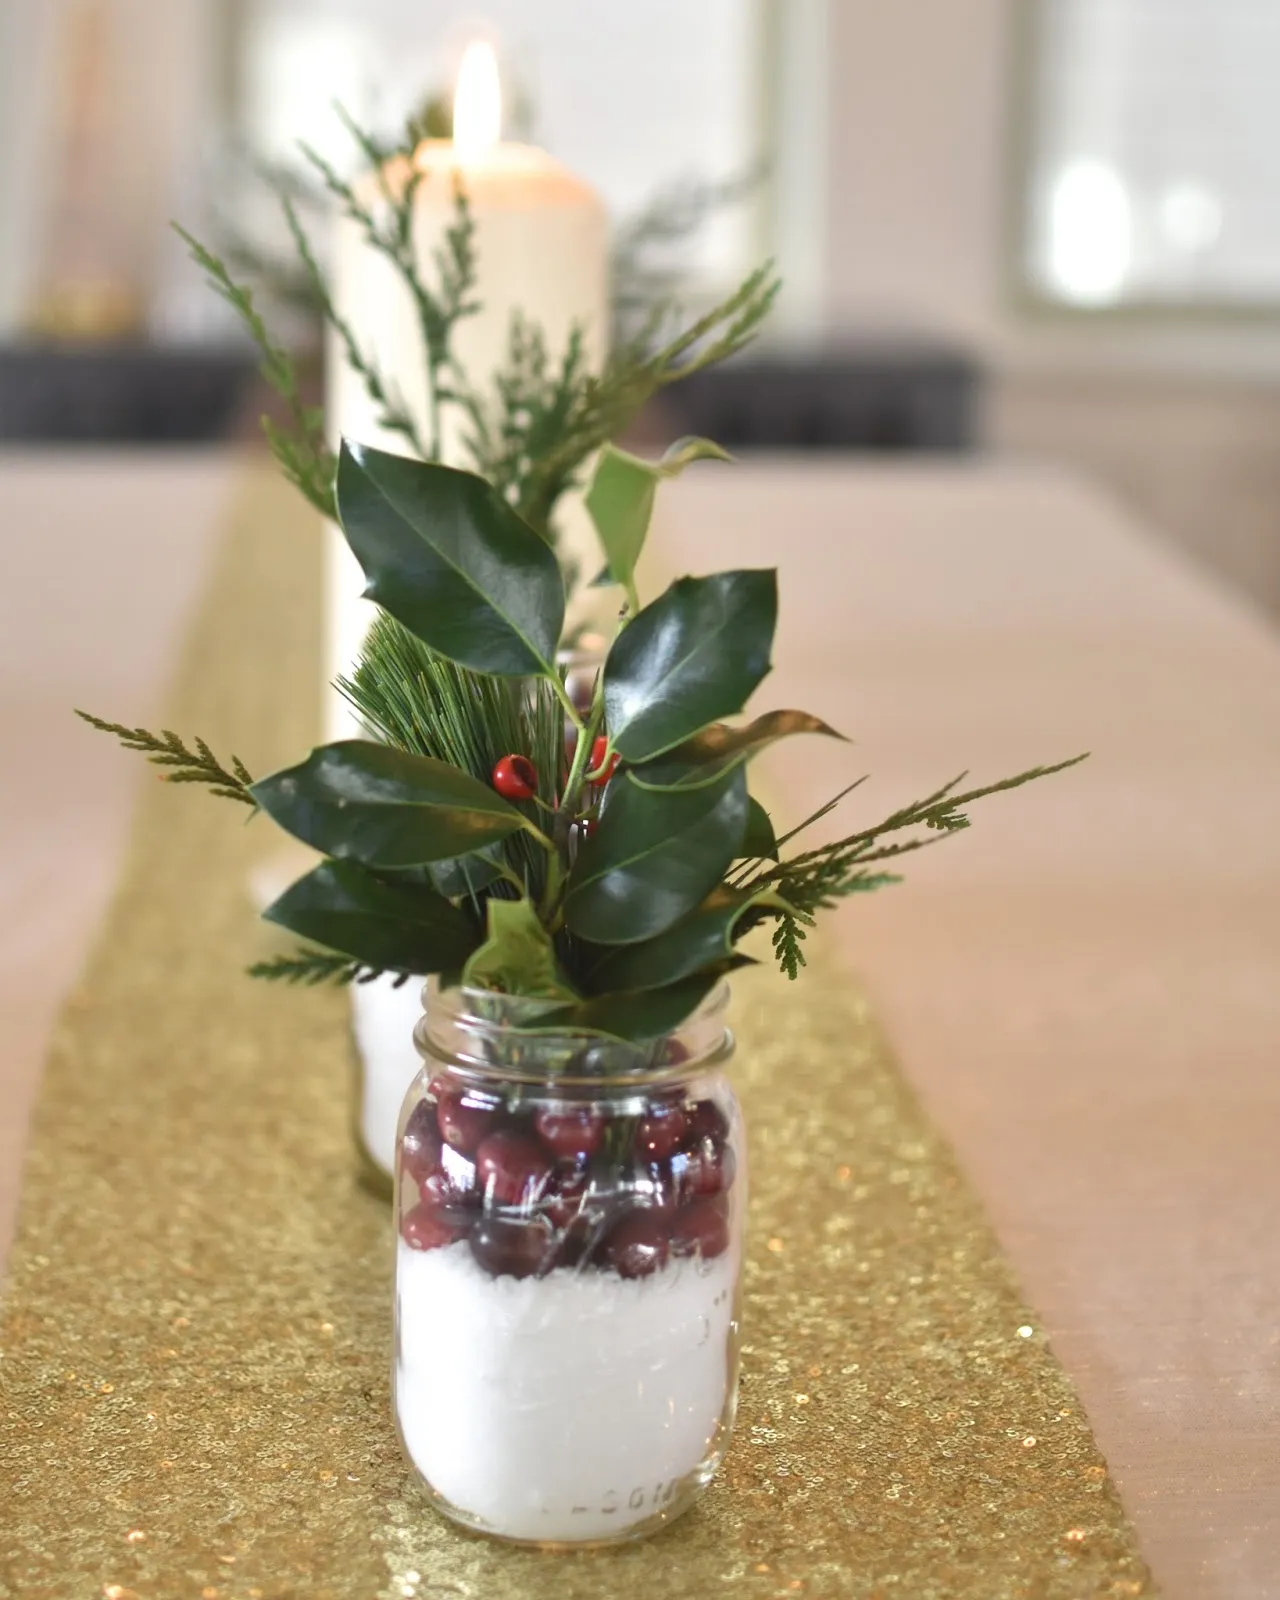
Mixed jars go wrong in one specific way: uneven light. If three jars glow warm and two sit dark, the dark ones look broken rather than intentional. Either light all of them or leave all of them unlit — there’s no middle. Check your heights too. A group where every jar is within half an inch of the last looks like an accident, not a decision. Aim for at least a 1.5-inch spread between shortest and tallest.
15. Thrifted Jars, Modern Styling, Whole Shelf Transformed
Mason jar crafts spent a decade as farmhouse shorthand, and in 2026 they’ve drifted somewhere more interesting: jewel tones, dimmable warm lighting, and a much tighter edit. Thrifted glass is the reason. Searches for secondhand glassware and thrifted Christmas decor have grown every year since 2022, and jars are the easiest thing in the store to find — most shops price them between 50 cents and $2. The look matured because the sourcing did.
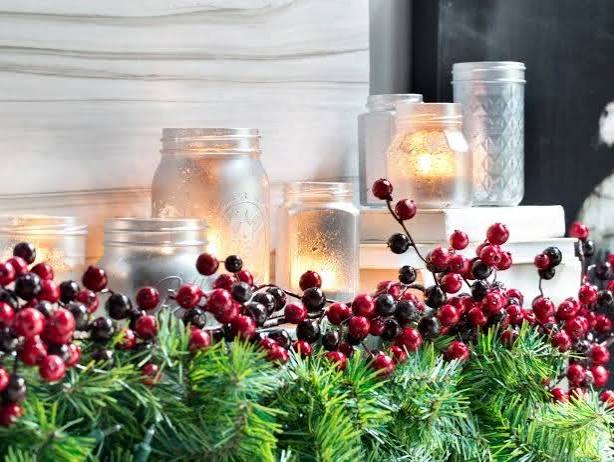
Twelve dollars gets you a full shelf. Six thrifted jars at $1–$2 each, one $6 bag of jute twine, a $4 spool of ribbon, and a $5 bag of pinecones from the dollar store. Add battery fairy lights at $8 if you want the glow. That’s the entire supply list for a shelf that looks collected rather than purchased. Estate sales are even better — the old blue and green glass jars read as vintage for free.
16. Backlit Deer Silhouette Jar on a Snow Base
Keep the faux snow base to about half an inch — enough to bounce light up onto the deer silhouette, not enough to bury the bottom of the insert. The insert should sit on the snow rather than hover above it, so the trees and the deer have a horizon line to stand on. And use a warm bulb, not daylight white. Warm light makes the gold rim glow; a cool white bulb turns the whole scene gray and the gold reads like dirty silver.
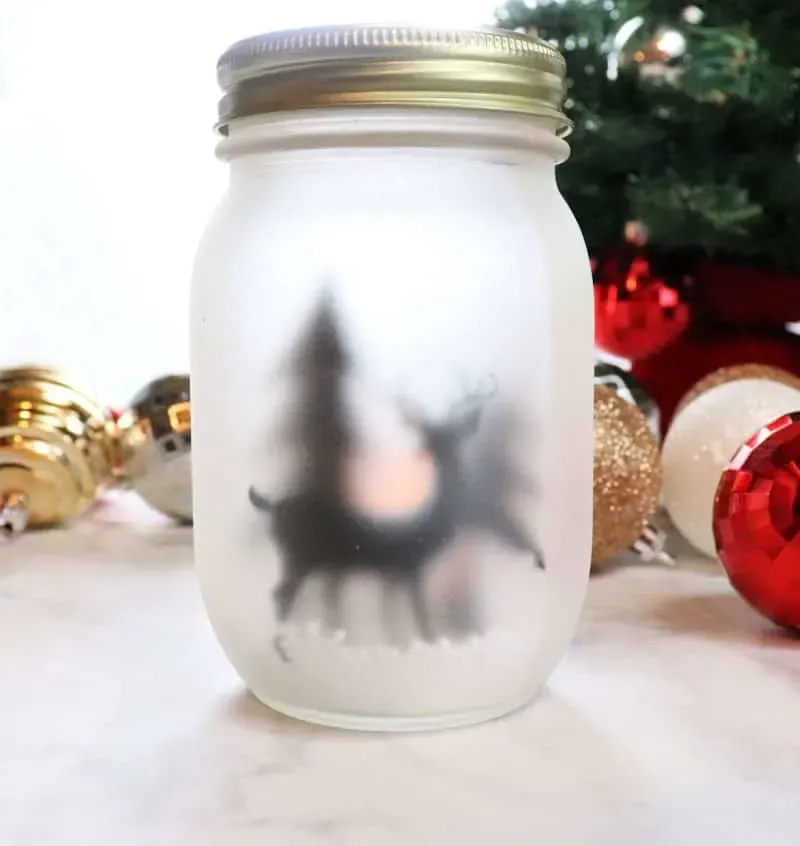
This is a silhouette, and silhouettes only work when the contrast is hard. Dark deer against a glowing backdrop gives you instant depth — your eye reads distance even though everything involved is two inches behind glass. The frosted exterior does something separate: it softens the light so the scene looks lit from far away rather than from a bulb resting inches behind the deer. Without the frost you’d see the LED itself, and the illusion collapses.
17. Faux Snow Jars With Mini Trees and Bead Garlands
Jars in the 4-to-7-inch range are the workhorse size. Three of them fill a 5-foot shelf or a standard 60-inch mantel without crowding; on a narrow 32-inch console, stop at two and let the wooden bead garland be the third element. If your mantel sits at 54 inches under a standard 8-foot ceiling, keep the tallest jar under 9 inches so it doesn’t fight whatever hangs above it. For a taller, more architectural treatment, see the mantel row in Idea #23.
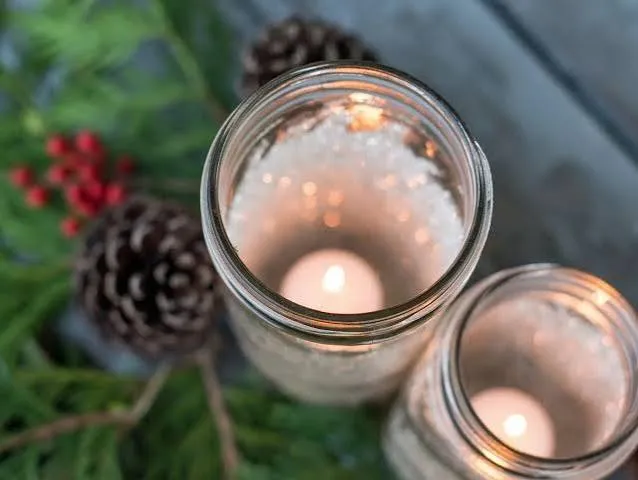
- Pour half an inch of faux snow into a clean, dry jar and tap it level.
- Set the bottlebrush tree on the snow, pressing it down slightly so it stands without wobbling.
- Add a pinch more snow around the base to hide the stem.
- Tie jute twine at the neck in a single bow with uneven tails.
- Drape the bead garland between jars, not over them — beads across the front hide the trees.
Time: 15 minutes for three jars. Materials run $6–$12, and one bag of faux snow covers about eight jars.
18. Stenciled Burlap Bands That Spell JOY
- Three mason jars, thrifted or new: $3–$12
- White chalk-finish paint: $7–$12
- Burlap ribbon, 3 inches wide: $5–$9
- Red fabric paint and a letter stencil set: $6–$14
- Red baker’s twine: $3–$5
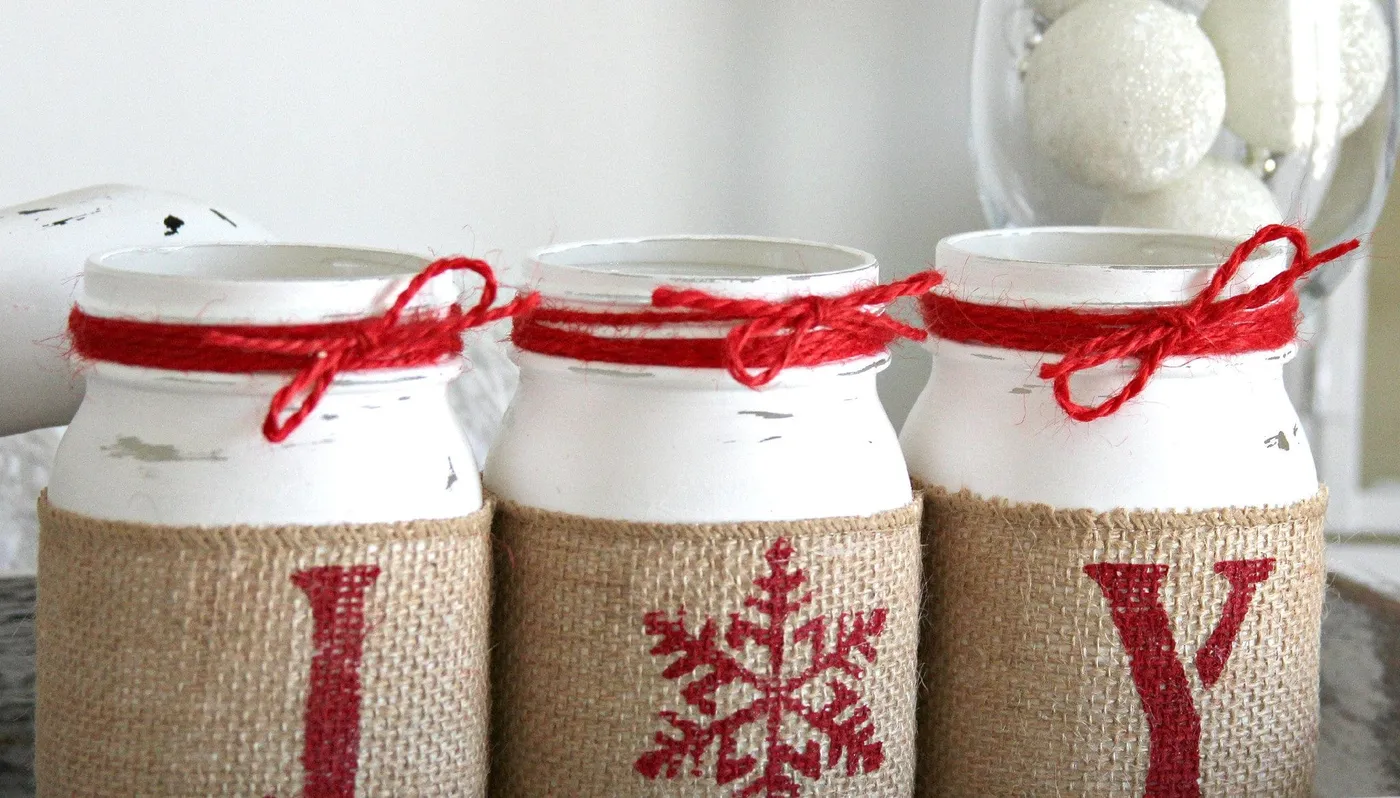
Total: $24–$52. The budget route drops the stencil set completely — print a JOY template, cut it from cardstock, and use it as a mask with red paint you already own. That lands the project around $15.
Burlap sheds, and it sheds most on the day you’re photographing it. Shake each band outside, seal the cut edges with a thin line of fabric glue, and don’t set these on a white tablecloth until the fibers stop dropping. The other trap is stencil bleed — burlap has a loose weave, so paint travels along the threads. This is the simpler sibling of Idea #2, and the same rule applies to both: dry brush, two passes, no exceptions.
19. A Santa Suit Jar Filled With Foil-Wrapped Chocolate
The fluffy white trim at the rim is what turns a red jar into a Santa. Without it you have a red cylinder with a black stripe and a gold square, which could be anything. It’s also the piece that makes the jar feel soft — everything else is flat paint and hard edges, and one strip of cotton or faux fur breaks the whole thing open. Glue it so it overhangs the rim slightly. A trim that sits flush looks like a lid.
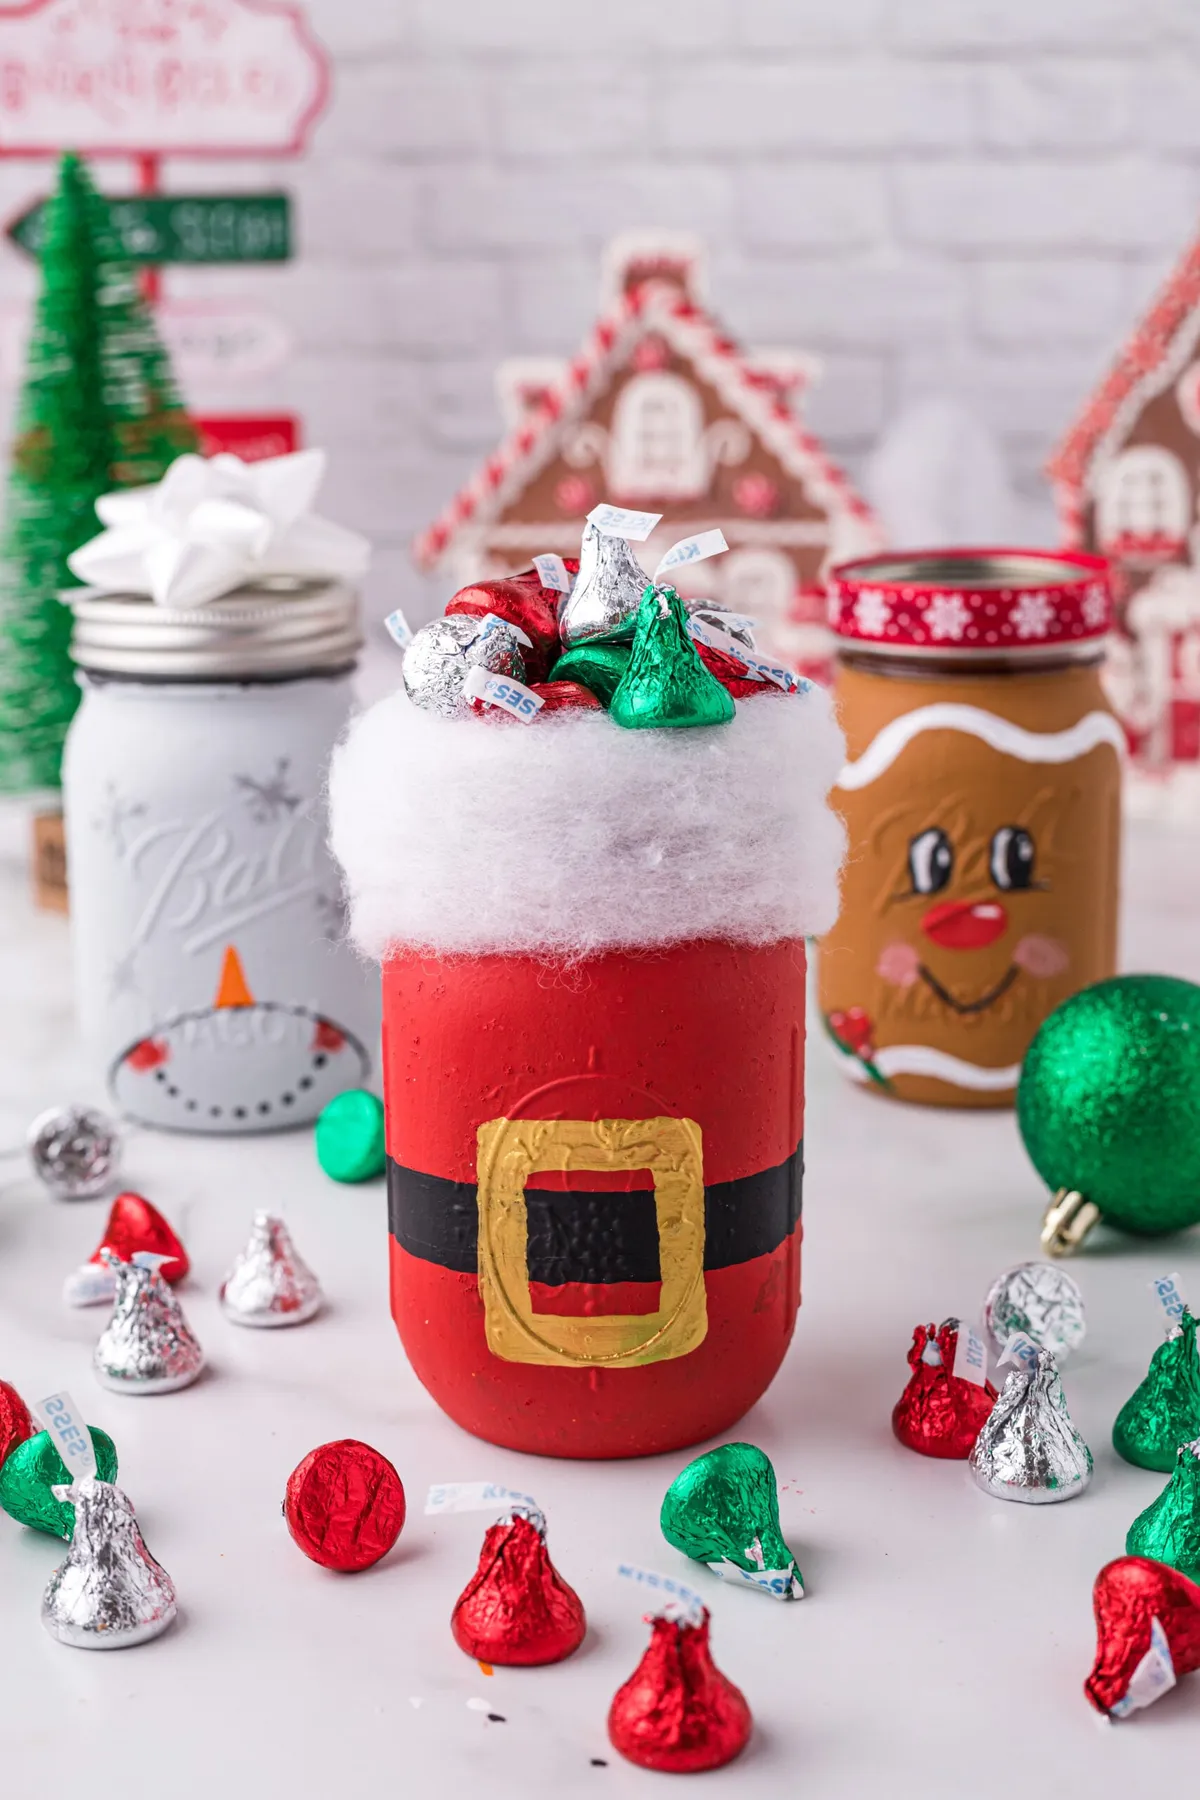
Center the black belt band exactly at the jar’s widest point, which on a quart jar is roughly 2 inches up from the base. Below that line the glass curves inward and the belt looks like it’s sliding off. Paint the buckle in two coats of metallic gold with a fine liner brush, letting the first coat dry completely — gold over red pulls pink if you rush. Same rule applies to the snowman and gingerbread jars flanking it.
20. Fabric-Topped Lid in Red Snowflake Print
This is a five-dollar craft, and most of that is the jar. A fat quarter of red snowflake cotton runs $2–$3 and covers four lids; a thrifted jar is a dollar. Cut a 5-inch square per lid, lay it over the metal insert, screw the band down over the fabric, and trim the corners so nothing pokes out. Compare that to decorative lidded jars at $15–$25 each, and you can make a matching set of six for the price of one.
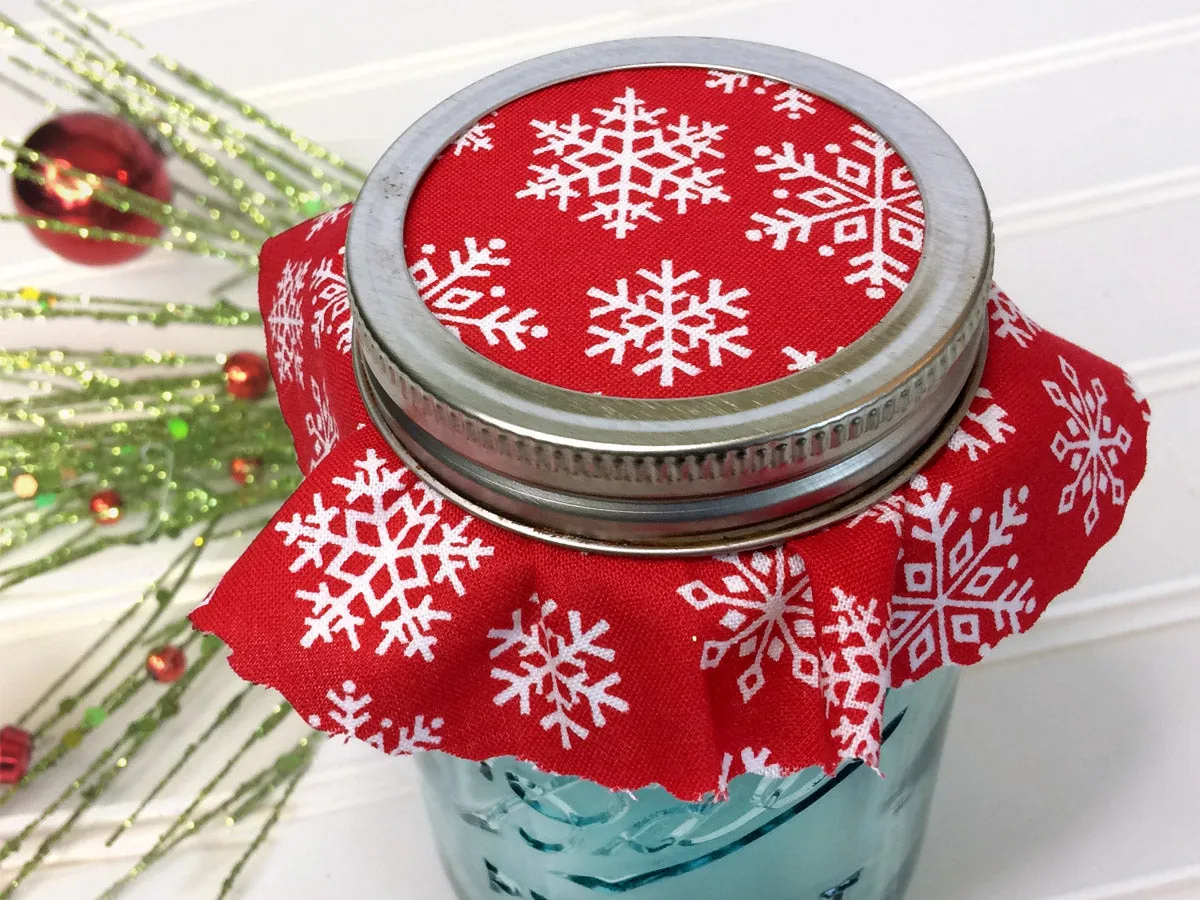
Roughly 50% red print, 25% aqua glass, 15% silver hardware, 10% green tinsel. The aqua is the surprise in the mix — it’s why this reads vintage instead of purely Christmas, and it’s the part people compliment. Swap the aqua for clear glass and the same fabric goes traditional; swap it for amber and the whole thing turns antique. Keep the band polished silver either way, since dull metal drags down the red fabric sitting right above it.
21. Googly-Eyed Reindeer Jar Kids Can Make
Set expectations on the antlers. Pipe cleaners anchored to a metal lid with hot glue hold fine, but they wobble, and a kid who grabs the jar by the antlers will pull them right off. Glue the antlers to the lid first, let them set five minutes, then attach the paper wrap. Googly eyes actually stay on better with white school glue than hot glue — hot glue melts the plastic backing and leaves a foggy spot. And keep the treats wrapped; loose candy in a paper-lined jar picks up glue smell.
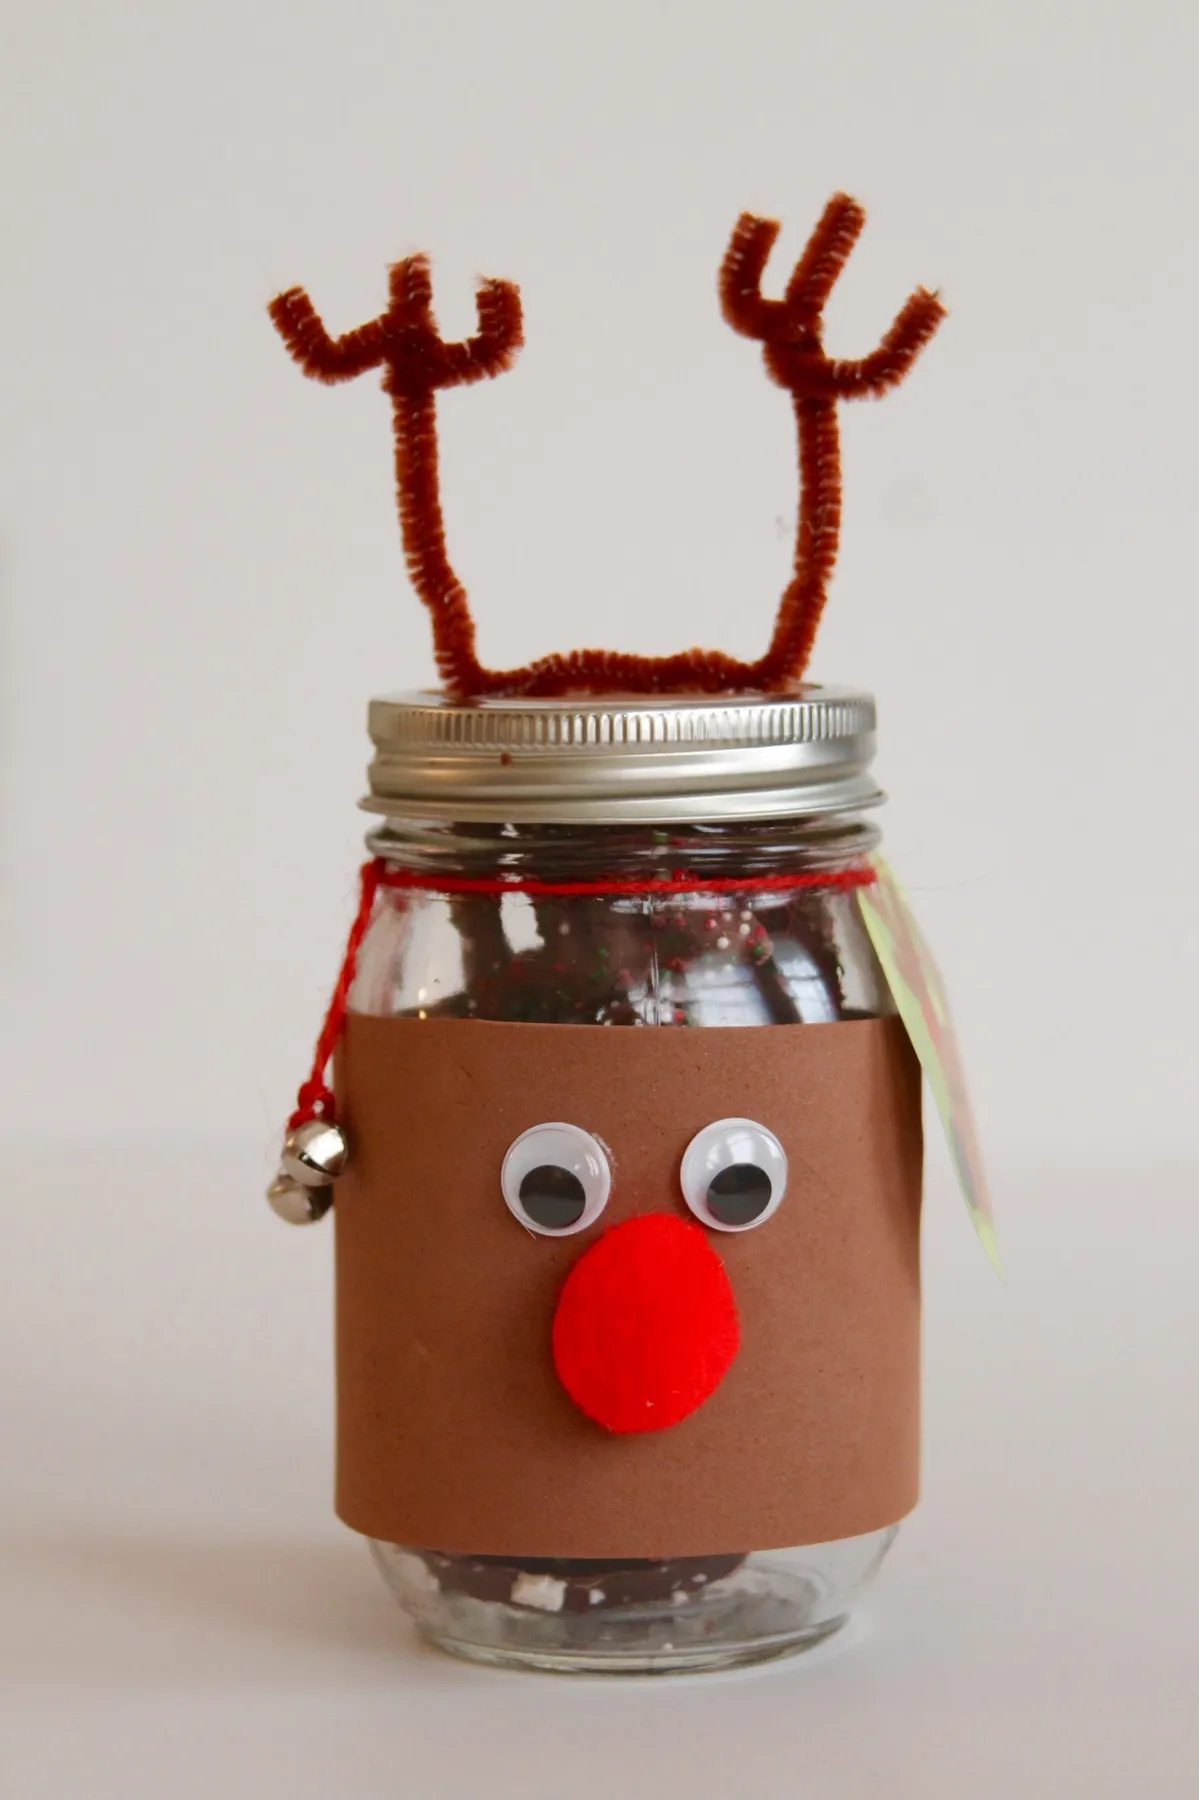
- Wrap brown construction paper around the jar’s middle and tape at the back — don’t cover the whole jar.
- Glue two googly eyes above the paper wrap, about an inch apart.
- Add a red pom-pom nose centered below the eyes.
- Twist two brown pipe cleaners into antler shapes and hot glue them to the top of the lid.
- Wait five minutes, then fill the jar with wrapped treats and screw the lid on.
Time: 20 minutes. Cost: $4–$8, most of which is the candy.
22. Floating Candle, Submerged Foliage, Cranberries on Top
Three layers, three different weights of color, all inside one column of water. The green stays down, the red floats, the white candle sits on top — that vertical order is what makes it look composed instead of stirred. Water does something no other material can here: it refracts the foliage so the leaves look deeper and softer than they actually are, and it makes the flame appear twice, once on the wick and once on the surface. Take the water away and it’s a jar of leaves.
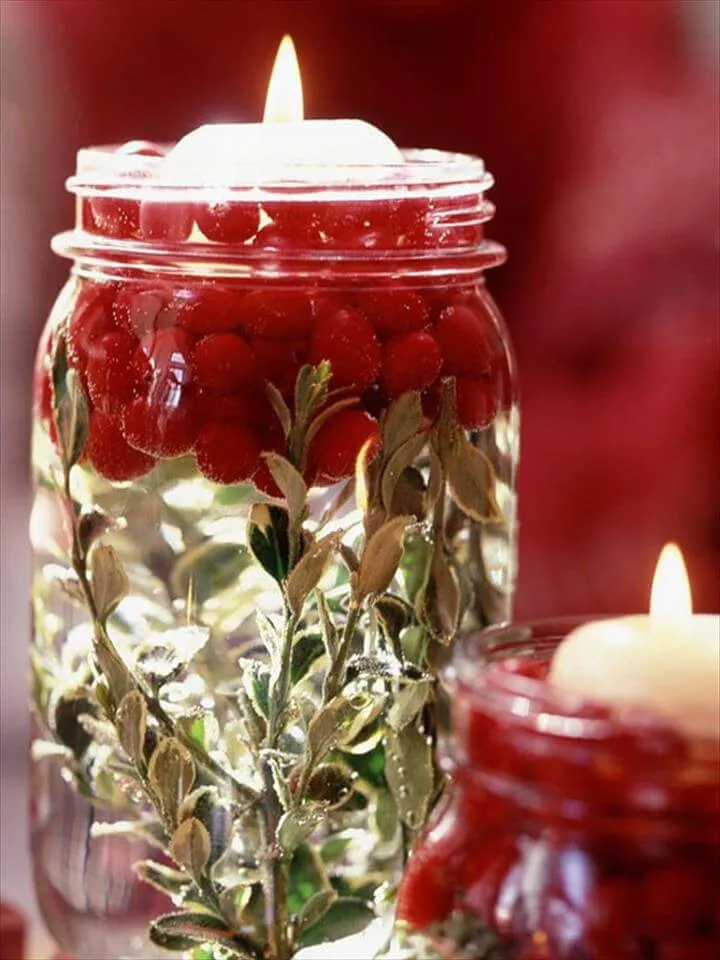
This one needs breathing room. Ten to twelve inches tall is the ceiling for a 36-inch round table; go taller and you’ll be shifting it every time someone reaches for the salt. On a 48-inch round, three spaced 12 inches apart works beautifully. Compare with Idea #13, which uses the same cranberry-and-water idea but sets the candle at the jar’s mouth — better for a narrow console where you want the flame higher up.
23. Mantel Row of Matte White Jars With One Glitter Red
Five jars on a mantel, four matte white and one glitter red. The red goes third from the left, not on an end — an odd slot keeps the eye moving and stops the row from reading as a color gradient. Space them 3 to 4 inches apart so the frosted branches can flare without tangling, and stagger the heights by at least an inch. If all five were white the row would be serene but forgettable. The one red jar is what makes you look twice.
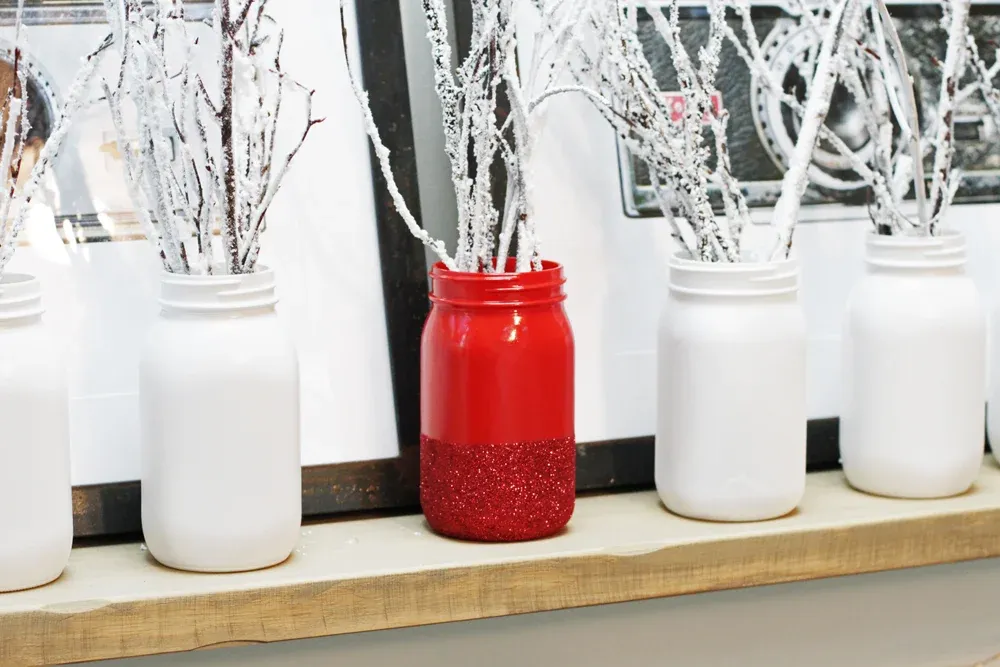
Glitter is the maintenance story. A dipped jar sheds for weeks, and once it’s on the mantel the flecks end up on everything below — candles, frames, whatever you’ve stacked underneath. Seal a glitter-dipped jar with two coats of clear matte sealer and it stops shedding almost entirely. The matte white jars are easier, though chalk paint scuffs since it has no protective finish; a damp cloth and a light touch handles most marks. Store them upright with tissue between, never stacked.
24. One Red Ribbon on a Windowsill Jar
- Check which way the window faces — south and west light will fade a red satin ribbon inside a season.
- Confirm the sill is deep enough for the jar plus 2 inches of clearance from the glass.
- Decide where the string light cord will run before you set anything down.
- Make sure the sill isn’t sitting directly over a heat vent; warm air curls glass-hung ribbon in a week.

The one risk with a jar on a windowsill is that you built the glow for a spot that’s bright all day. A single red ribbon against a snowy view is genuinely lovely at 7am, but a lit jar there at noon looks like nothing at all. This is a dusk object. If you want the effect to work around the clock, move it to a shelf with no direct light and let the red ribbon carry the color on its own.
25. Mini Jar Lanterns Hanging in the Tree
- Drill a 1/8-inch hole in the center of each lid, or use a lid that already has a hanger hole.
- Bend a 12-inch length of 18-gauge craft wire into a hook and thread it through the hole from underneath.
- Twist the wire ends together inside the lid so the hanger can’t pull through.
- Coil two feet of warm fairy lights inside the jar, keeping the battery pack outside and clipped to a branch.
- Screw the lid on and hang the jar 6 to 8 inches below a branch so it doesn’t swing into the needles.
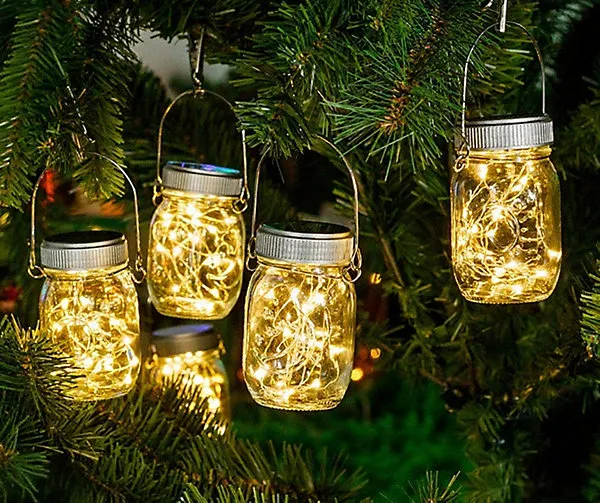
Time: 10 minutes per jar. Materials: $2–$4 each with thrifted jars and a shared light strand.
Mini jars are the cheapest version of this whole hobby. Four-ounce jars run about $1 apiece in craft-store multi-packs, and the wire is a $3 spool that makes twenty hangers. If you already own a fairy light strand, you can hang six ornaments for under $12. Skip the per-jar battery packs — run one strand and hide the pack at the trunk, then you’re only swapping one set of batteries in January.
26. Floating Candle Centerpiece With a Sunken Mini Tree
Think of it as 50% clear water and glass, 25% green foliage, 15% red cranberries, 10% white candle. The proportions matter less than the layering — heavier elements sink, lighter ones rise, and nothing occupies the middle band of the jar. That empty middle is the design. Fill it in and the whole thing becomes a jar of stuff. Swap cranberries for pomegranate seeds and the formula holds; swap the miniature tree for a sprig of rosemary and it holds too.
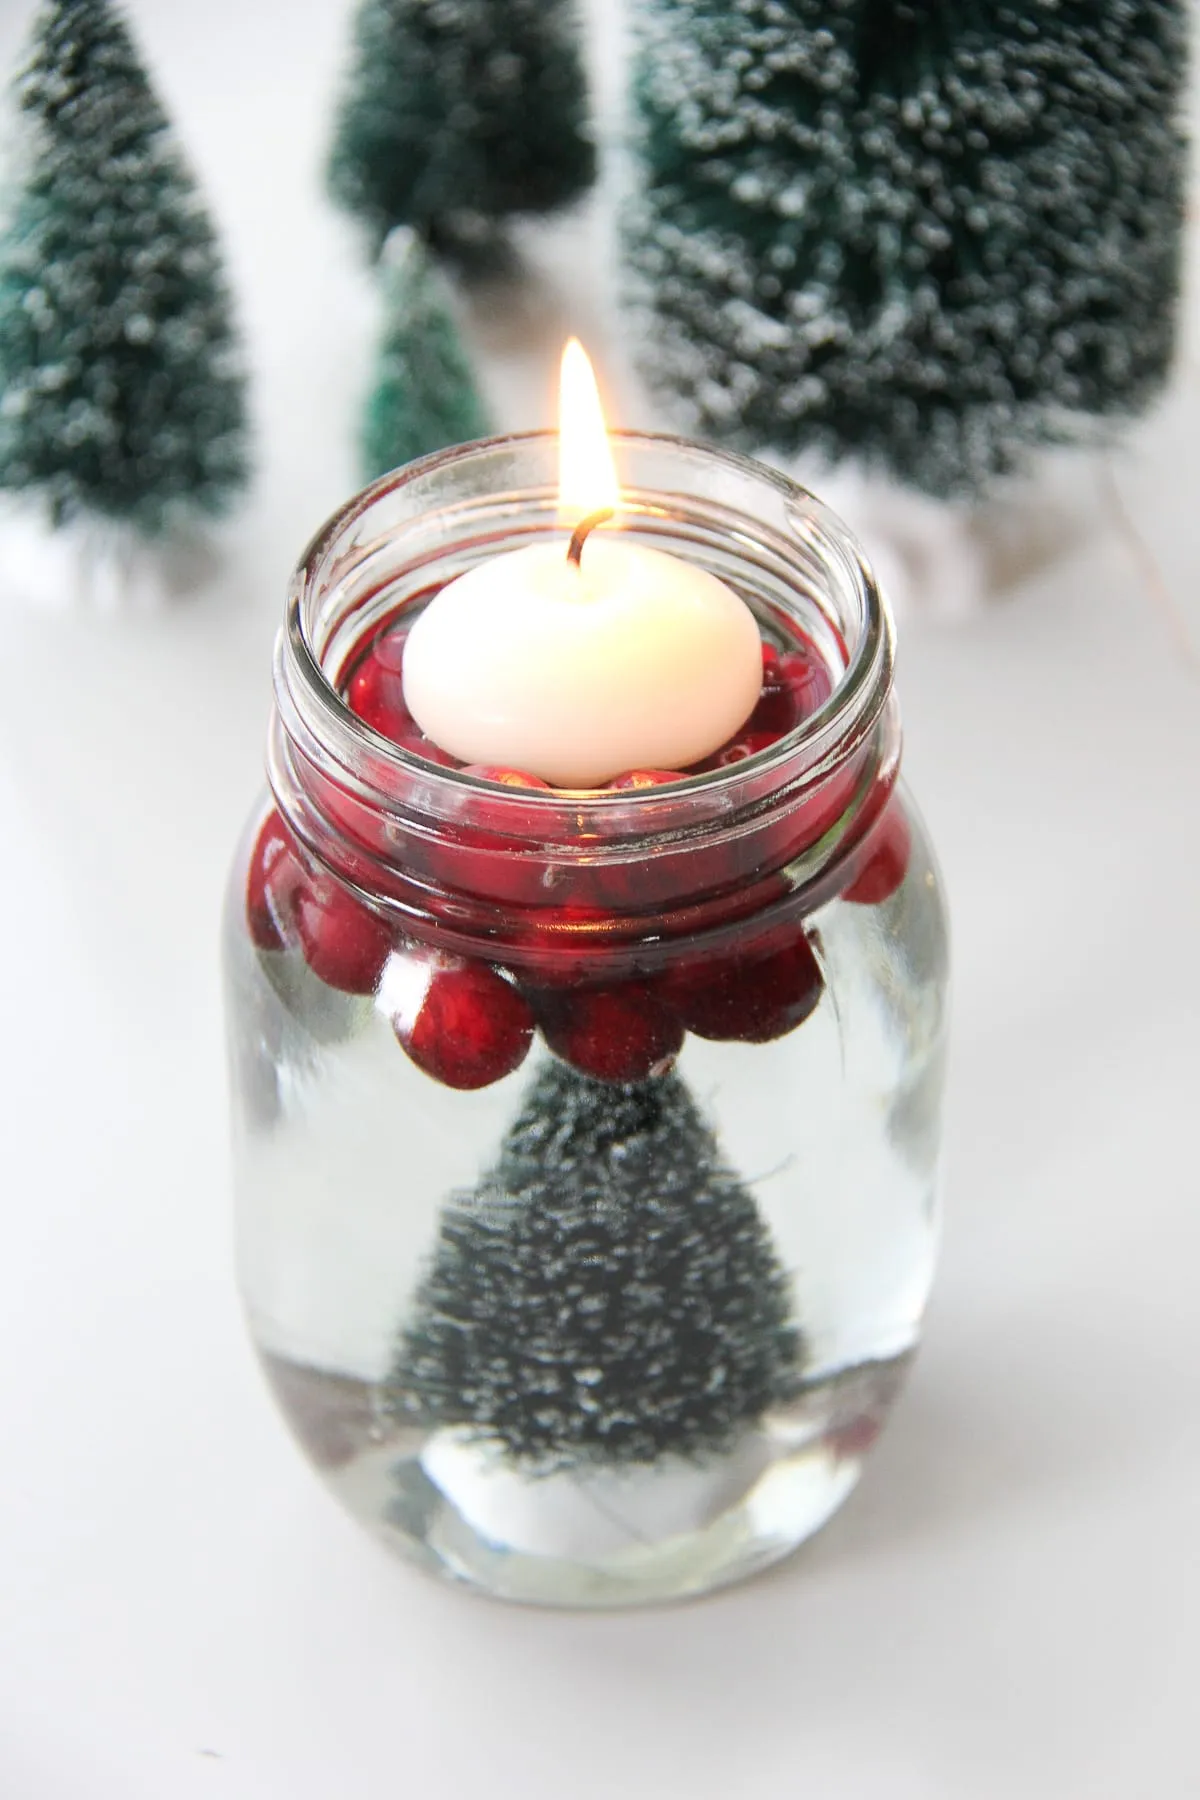
The floating candle is the difference between a craft and a centerpiece. Water, cranberries, and a sunken tree are pretty enough, but they sit perfectly still — the candle is the only element in the jar that moves. Its flame reflects on the glass, drifts a quarter inch when someone walks past, and throws that soft wobble onto the frosted trees behind it. Idea #22 uses the same water-and-candle trick with leafy stems; this one swaps in a miniature tree for a taller, more structured shape.
27. A Rustic Lidded Jar Vignette With Ribbon and Pine
A jar filled with small decorative items looks great in photos and terrible in person if you overstuff it. Anything past two-thirds full reads as a jar of scraps, and once the lid goes on you can’t rearrange a thing. Leave visible glass around the contents so the eye has somewhere to rest. And if you’re using real pinecones, bake them at 200°F for 30 minutes first — the ones you find outside carry sap, and occasionally tiny passengers.
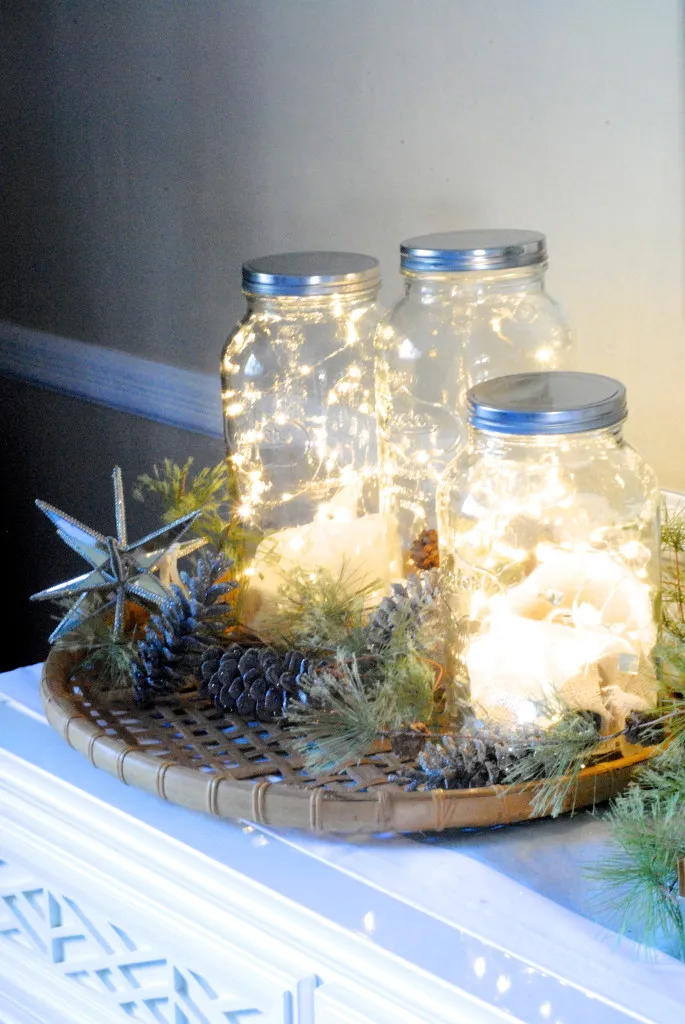
The lidded jar vignette is part of a broader move toward collected tabletop styling — grouping a few meaningful objects instead of filling every surface. It’s the same instinct behind the cottage-core resurgence and the slow drift away from perfectly matched sets. Rustic lids, jute ribbon, and foraged greenery all point the same direction: things that look found rather than bought. That’s why this style keeps working year after year while trendier crafts cycle out in two seasons.
28. A White Jar Bouquet With a Snowman Peeking Out
Build the arrangement in three heights: pine boughs first as the base, then the pink rose at the center, then the white poinsettia slightly lower and off to one side. The snowman ornament goes in last, and it should sit forward of the greenery so it reads as a character in the arrangement rather than a hidden bauble. Cut every stem at a 45-degree angle and press floral foam into the jar’s mouth — artificial stems in an open jar without foam will lean within a day.
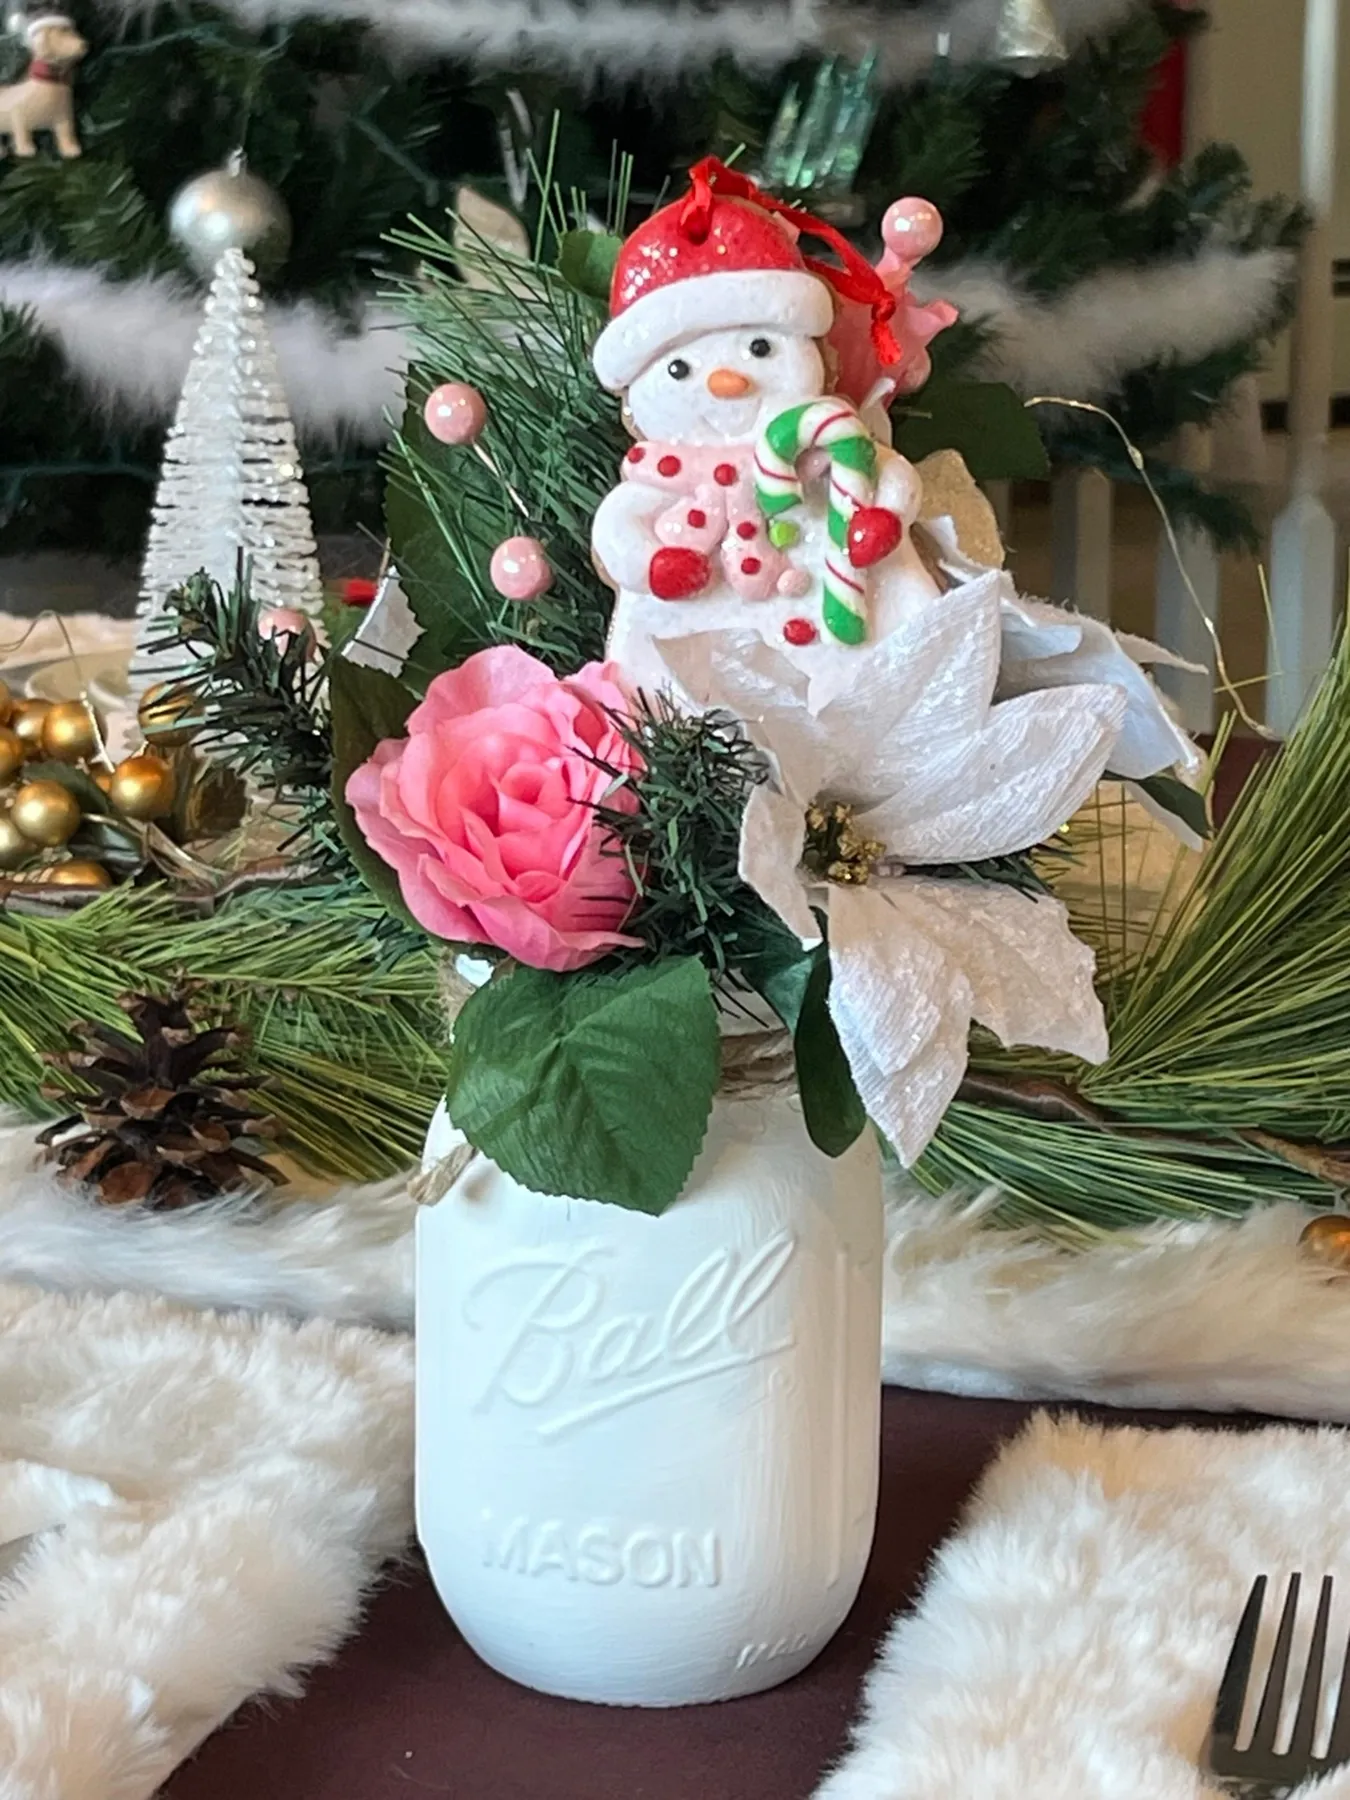
A quart jar bouquet tops out around 14 inches tall and 10 inches wide, which is right for a 40-to-48-inch dining table. On a 30-inch entry console, drop to a pint jar and cut the stems shorter so the silhouette stays under 10 inches. The faux fur and pine branches around the base want about 6 inches of table depth; less than that and they hang off the edge. On a deep mantel, spread three smaller versions rather than one big one.
29. Silhouette Decal Jars Lit From Inside
The decals do two jobs at once: they block light and they cast it. Where a jar is plain, the glow is even and flat; where a silhouette sits, light pushes around it and throws a faint shadow onto the surface below. That shadow is the reason these read as lanterns instead of glow sticks — your eye picks up depth it can’t quite explain. Group them at staggered heights with pine branches tucked between, and the whole shelf gains that same layered quality for free.
Printable vinyl decals are the trick here — a $4 digital file plus a sheet of printable vinyl gets you a dozen silhouettes, and craft-store jars run $1–$2 apiece. Fairy lights from a big-box store are about $6 for a two-pack. Total for four finished jars: roughly $18. Compare that to the pre-lit lantern sets in Idea #4 at $60–$90, and you’ve saved enough to make four more.
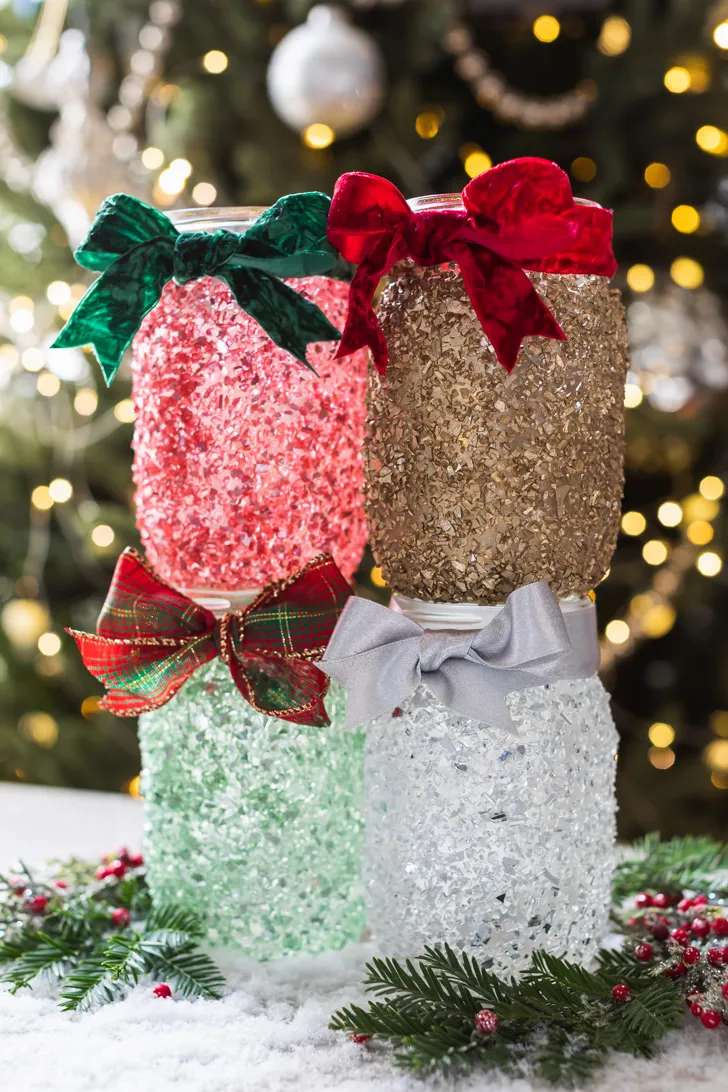
30. Crushed-Glass Glitter Jars With Mismatched Bows
- Four mason jars, thrifted: $4–$8
- Mod Podge and fine glitter: $9–$14
- Crushed glass or German glass glitter: $8–$16
- Velvet and satin ribbon in four colors: $8–$14
- Faux evergreen sprigs and red berry picks: $5–$10
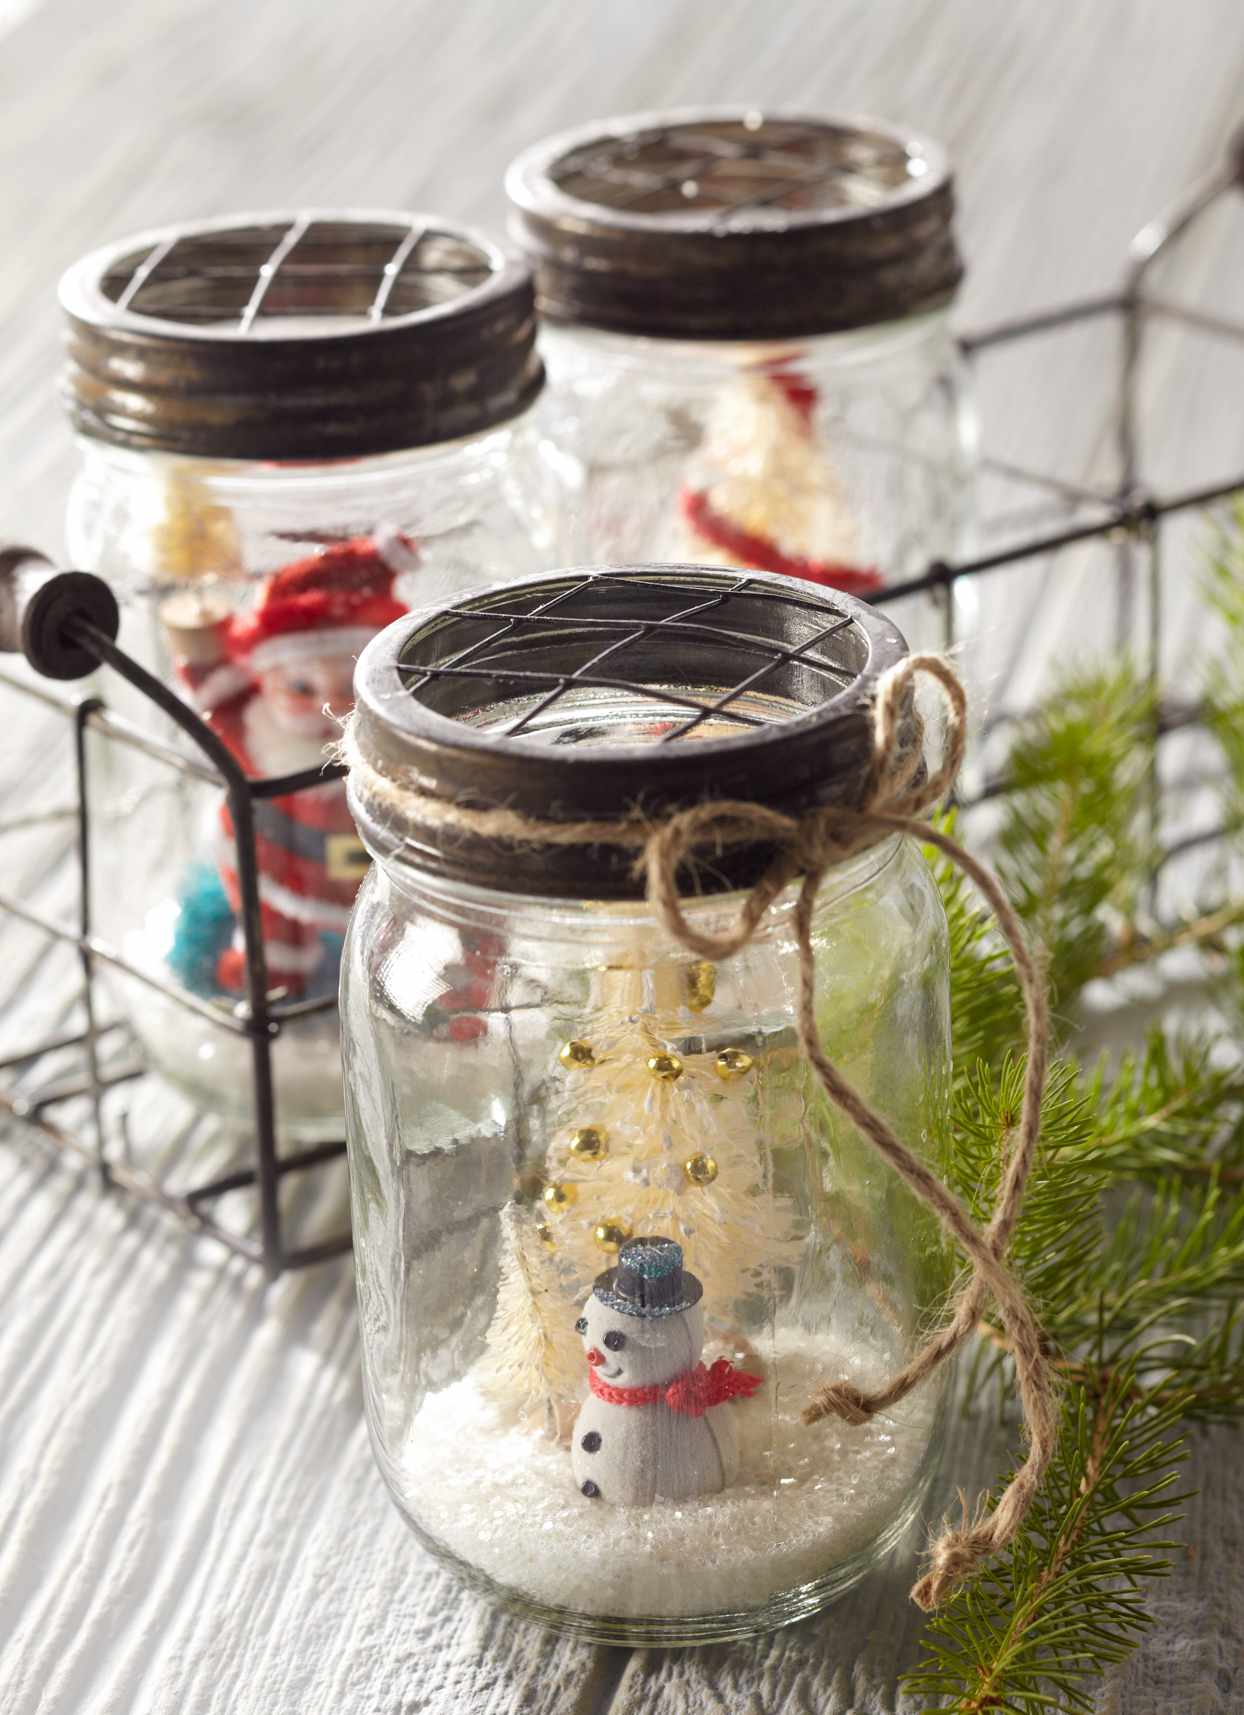
Total: $34–$62 for the set of four. Skip the crushed glass — it’s the priciest line item — and do two coats of fine glitter over Mod Podge instead. You’ll spend about $18 and get ninety percent of the sparkle.
Four jars, four different bows: green velvet, red satin, plaid, and silver. Deliberate mismatch is what keeps a glitter set from looking like a store display; matching bows push it straight toward kit. Keep the ribbon widths consistent at 1.5 inches so the variety reads as a choice rather than chaos. Coat the finished jar in clear matte sealer before you tie anything on — sealer over ribbon leaves a dull film.
31. An Upside-Down Jar With a Molten Glow
Flipping the jar is the whole move. Upright, this is a covered jar with a texture on it. Upside down, the metal lid becomes a base and the heavily textured end becomes a dome, which is why the light pools at the bottom and looks like something burning inside. Without that inversion, the glow would sit at the top and the texture would just look like a mess of wax. The translucent coating is the second half of the trick — it does nothing on its own, but it scatters light into that soft, molten core.
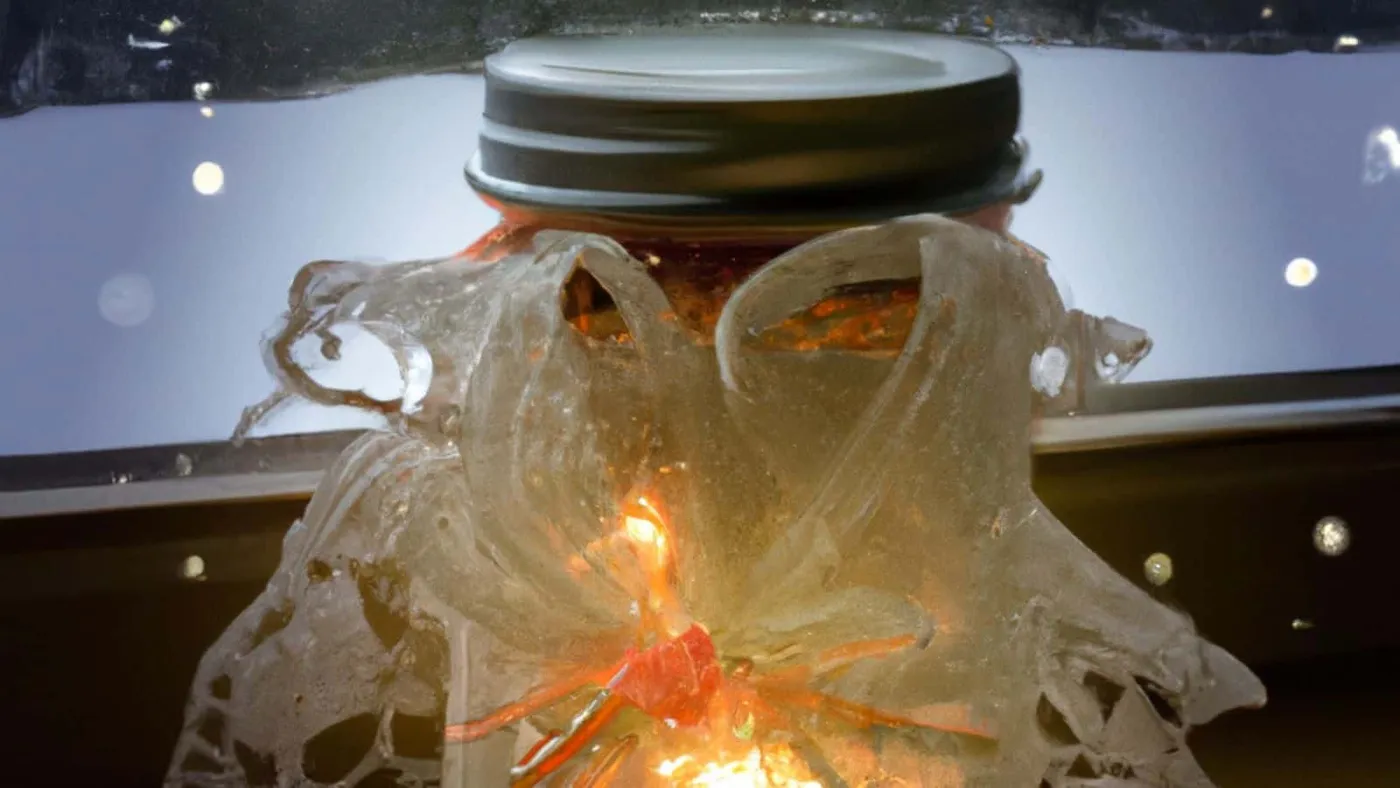
Textured translucent coatings are usually tissue paper or wax over Mod Podge, and both soften in warm rooms. Keep this one away from radiators and sunny windowsills, or the surface goes tacky and picks up dust permanently. Never put a real flame inside — the coating is the issue, not the glass, so battery LEDs only. If the texture yellows after a couple of seasons, a fresh coat of Mod Podge and one sheet of tissue paper restores it in 20 minutes.
32. Polka Dot Votives Paired With Red Roses
- Frost the jars first — light coats of spray frost from 10 inches away, three passes.
- Let them dry 30 minutes, then add polka dots using a pencil eraser dipped in white acrylic.
- Paint small snowflakes on one or two jars only, keeping the third plain for contrast.
- Drop a votive or tea light into each jar and light two of the three.
- Set the jars on weathered wood and place a clear vase of red roses and greenery just behind them.
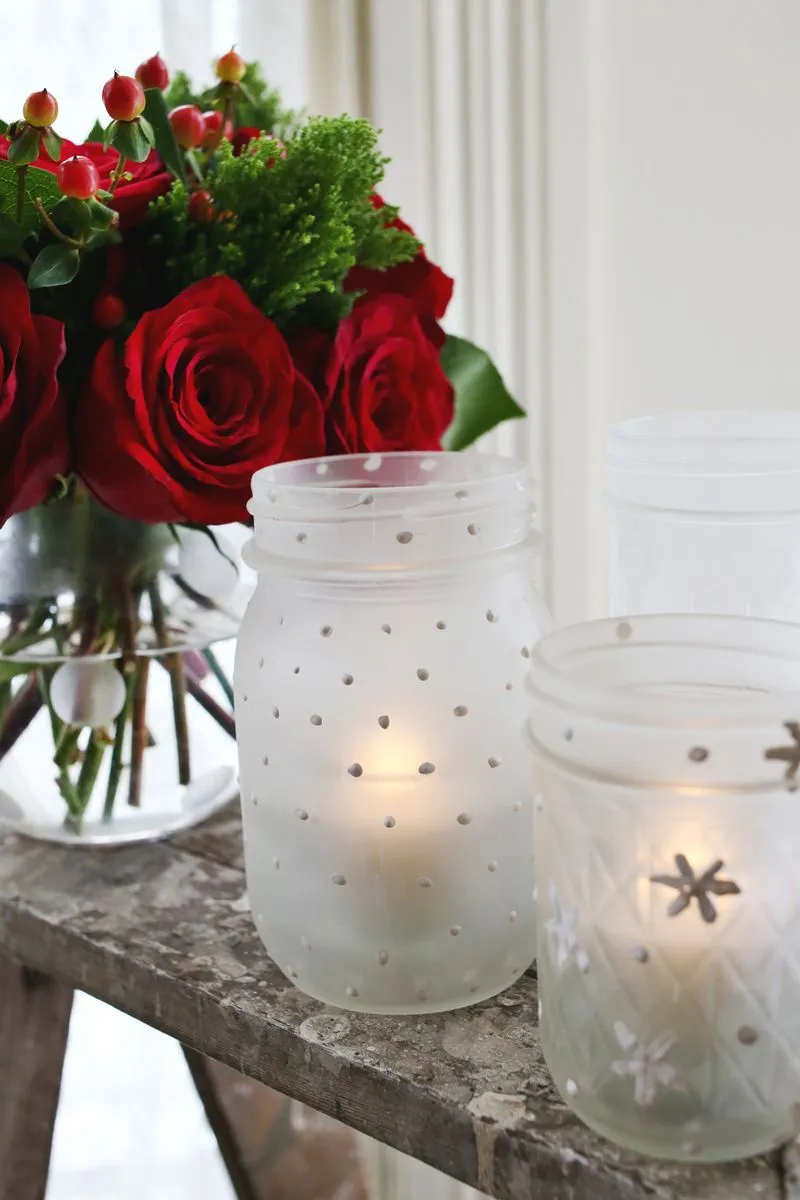
Time: 45 minutes plus drying. Materials: $10–$18, and one can of spray frost covers six jars.
Roses are the expensive part and also the fragile part. Three stems last about five days in a cool room — less near a candle, because heat shortens vase life fast. Keep the arrangement at least 10 inches from the lit jars, or switch to a hardier stem like carnations or winterberry. And keep the frost off the jar’s interior: a coating inside a vessel that will hold a flame is a bad combination, since it can cook off.
33. Tealight Jars With Twisted Wire Handles
These work best in a row of five to seven along a table, a step, or a porch rail — small jars at 4 inches tall need repetition to feel like a design instead of a leftover. Skip them for large rooms where a single 4-inch object disappears; the centerpiece in Idea #26 is the better scale for a big dining table. In a tight space, three jars on a 24-inch shelf is plenty, and the wire handles mean you can hang them instead if surface space is the problem.
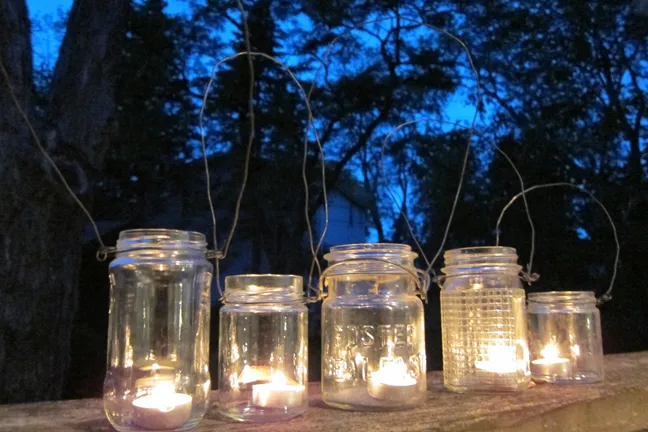
- Check the jar rims — thick, uneven glass is prone to chipping when wire is tightened.
- Use 16- or 18-gauge wire; anything thinner bends flat under the weight of a glass jar.
- Set tealights on a bed of sand or coarse salt so they don’t shift when a jar swings.
- Plan the spacing before you light anything; five jars need about 5 feet to look intentional.
Go Rinse Out a Few Jars — Your Holiday Shelf Is Waiting
Start with the cranberry-and-water jar if you only try one thing this season — ten minutes, twelve dollars, and it looks like you fussed for an hour. Then build outward, one jar at a time, until the shelf actually says what you want it to say.
📌 Save this to Pinterest for later — next December you’ll be glad you did.