
Still scrolling through outdoor lighting photos at 11pm, saving houses that glow like something out of a magazine, and wondering why your own porch light looks so sad?
We spent serious time browsing Wayfair, Amazon, Lamps Plus, and Home Depot to bring you only what’s worth your attention this year — every idea below is genuinely buildable, whether you’re spending $15 on a couple of warm bulbs or $1,200 on a full low-voltage system.
Inside you’ll find 29 curated exterior lighting ideas, from dark modern farmhouse uplighting to warm Craftsman path lights and sleek linear sconces on white stucco. Budget and luxury versions sit side by side, so you can see exactly what your money buys.
In 2026 the shift is toward warmer color temperatures, hidden fixtures, and lighting that flatters the architecture instead of outlining it. And stay until the end — we break down the most common mistakes that can ruin these looks.
📌 Save this to Pinterest for later — you’ll want to revisit these ideas.
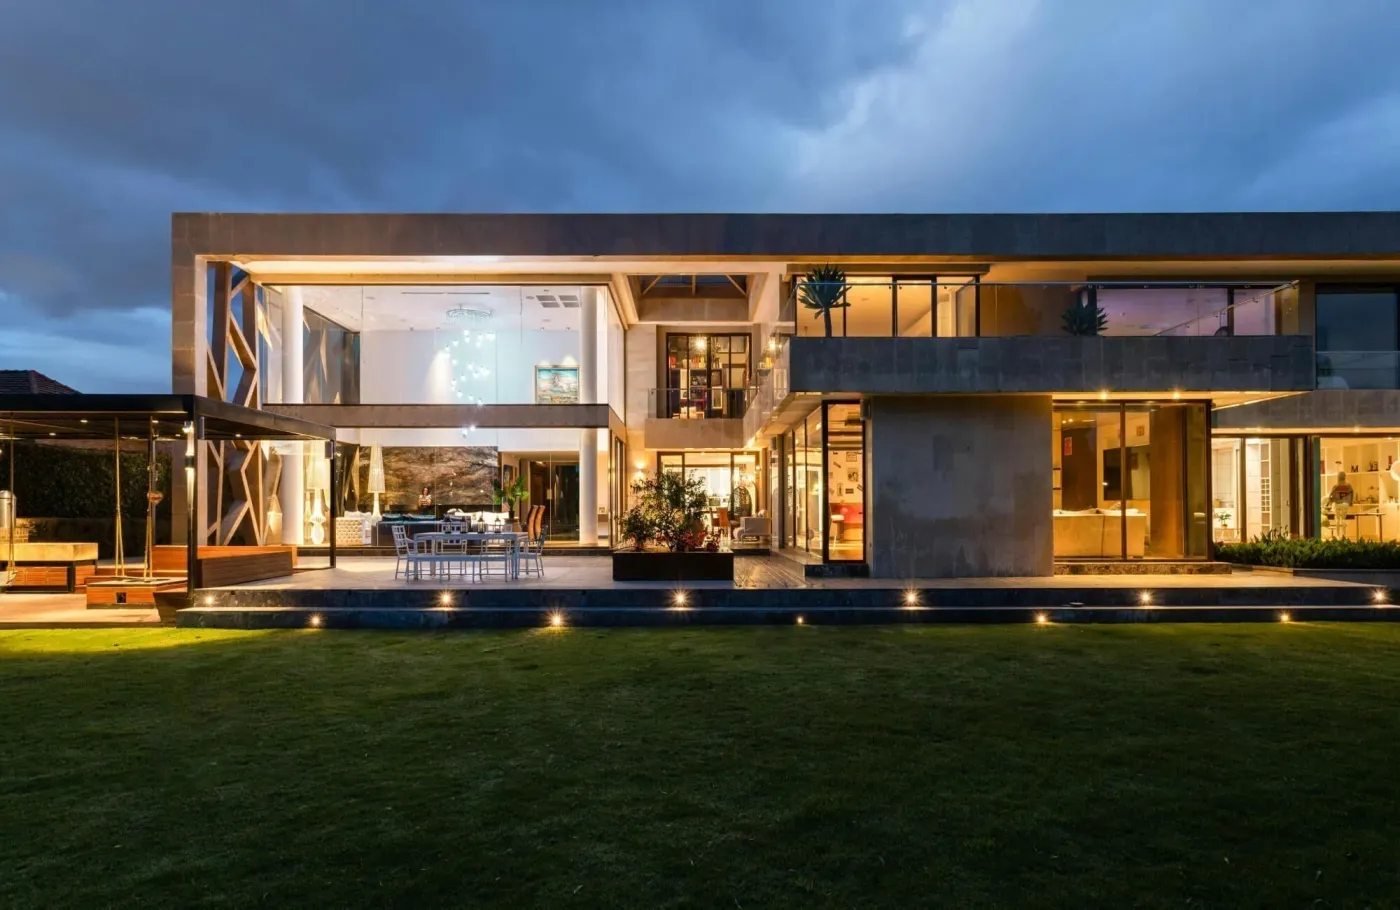
1. A Contemporary Facade That Glows as One Clean Shape
A good contemporary lighting scheme doesn’t decorate a facade — it edits it. Instead of picking out every window and corner, the light washes broad surfaces so the house reads as one calm silhouette after dark. That restraint is what separates a home that looks expensive at night from one that looks busy. When your eye isn’t jumping between a dozen bright spots, it settles on the architecture itself: the proportions, the roofline, the way the building sits on its lot.
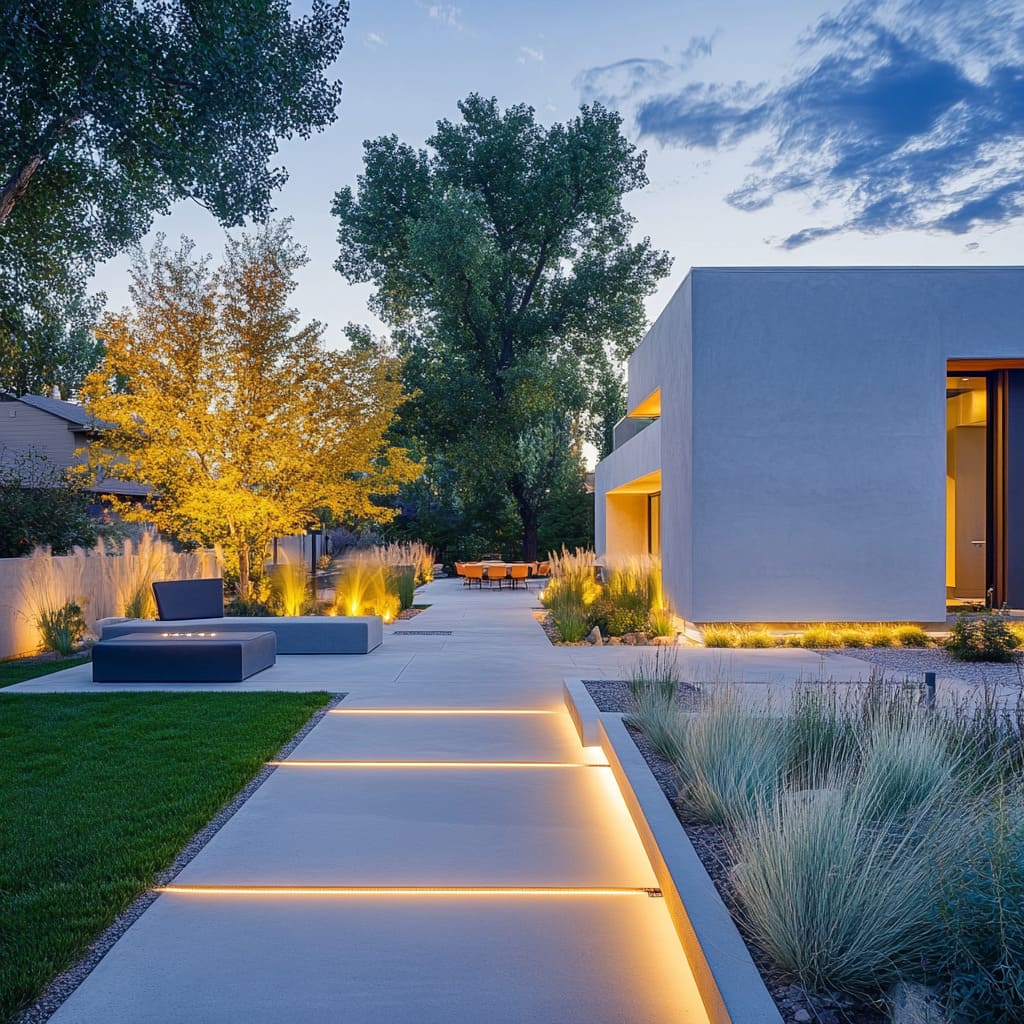
Contemporary facade lighting has quietly become the default look in new-build photography, which is why it’s all over Pinterest right now. Buyers scrolling listings started noticing that the best homes photograph beautifully after sunset, and that changed what people want from their own exteriors. The 2026 version is warmer than the cool-white LED look of a few years ago and far more hidden — no visible bulb, no glare, just the wall doing the glowing.
2. Charcoal Board-and-Batten With Warm Ground Uplights
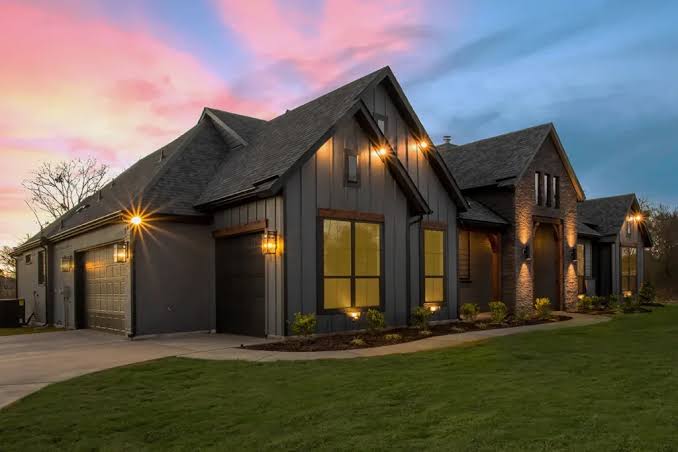
The element you can’t lose here is the row of warm ground-level uplights aimed at the siding and the stone. Take those away and the house still looks good — it just goes flat, a dark shape with two glowing sconces stuck on it like an afterthought. The uplights turn the board and batten into texture and make the stone read as stone instead of shadow. The soffit cans and sconces are supporting cast; the ground layer is the star.
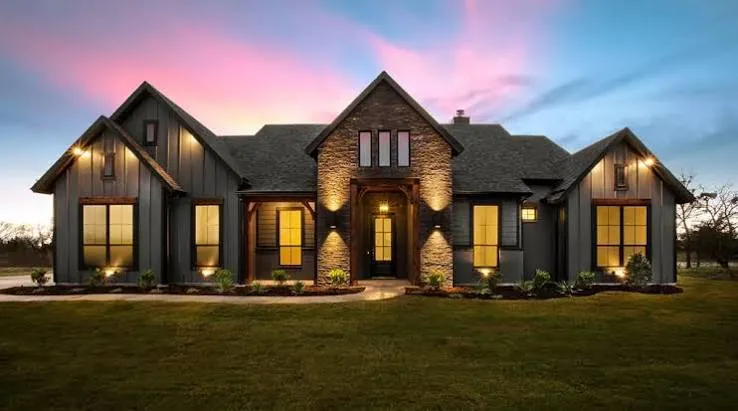
- Ground-level well lights, 6–8 fixtures: $150–$500
- Low-voltage transformer and cable: $180–$600
- Wall sconces flanking the entry, pair: $120–$450
- Recessed soffit lights, 4–6: $120–$500
- Professional install: $600–$1,800
Total: $1,170–$3,850. Budget alternative: keep the two sconces and four well lights aimed only at the stone, and skip the soffit cans for now — that lands near $500–$900 and still reads dramatic from the street.
3. Craftsman Curb Appeal With Curved Path Lights and Uplit Trees
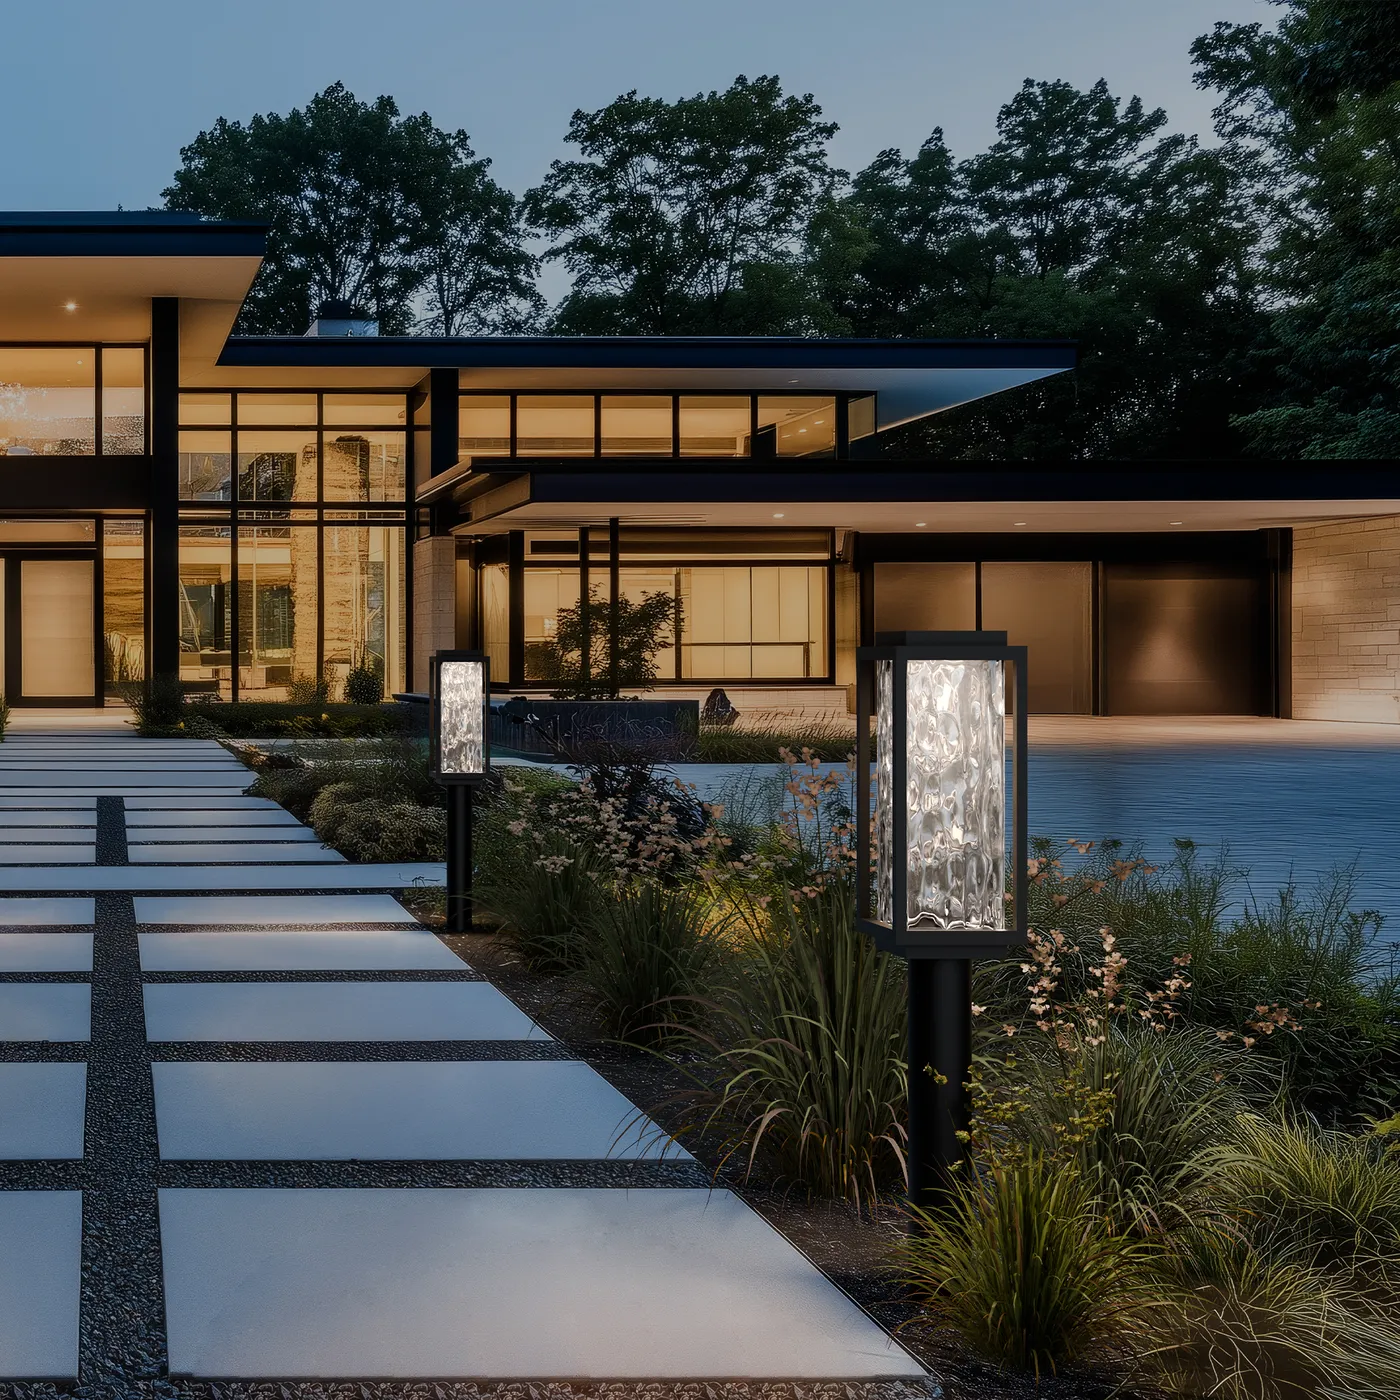
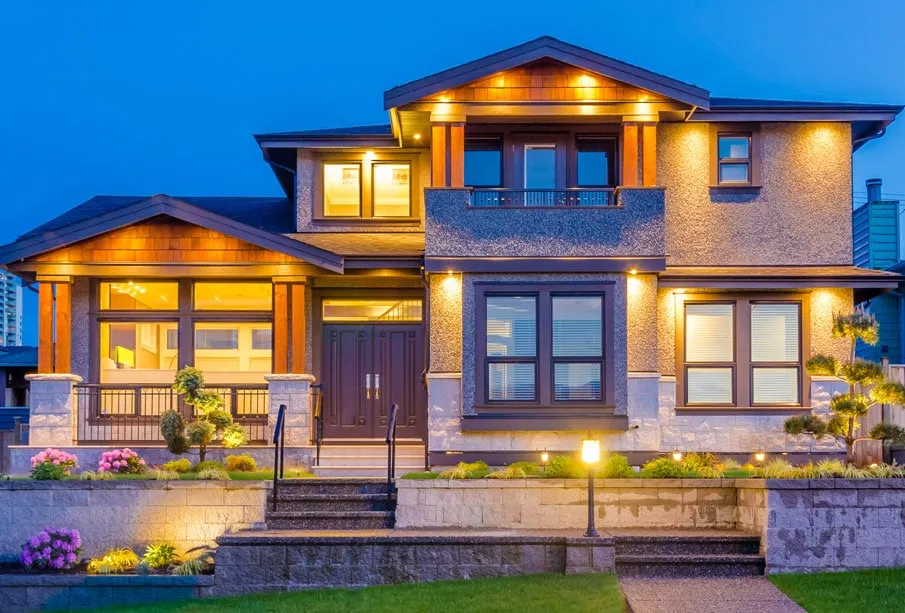
Path lights live or die by spacing. Set them 6–8 feet apart so the pools of light actually overlap — gaps between fixtures read as mistakes, not style. Keep each one 12–15 inches back from the walkway edge so you’re lighting the path and not the grass beside it, and cap the height at 18–24 inches. Anything taller starts lighting your neighbor’s windows. Keep every lamp in the run at 2700K, because two temperatures on one path is the fastest way to make a new system look ten years old.
![22 Outdoor Lighting Ideas for Your Backyard [2026] | Govee US](https://milorien.com/wp-content/uploads/2026/10/22-outdoor-lighting-ideas-for-your-backy-3.webp)
Everything here works because light is layered at three heights. Path and step lights handle the ground and keep the walk safe; porch sconces and window glow sit at eye level and make the house feel lived in; tree uplights reach into the canopy and give the scene a ceiling. Where a white brick house leans on a few big dramatic uplights (see Idea #15), a Craftsman wins with a hundred small, quiet sources instead.
4. Red Brick Layered With Eave Downlights and Up-Down Sconces
The formula here runs about 60% soft ambient, 25% vertical accent, 10% guidance, 5% decorative. Ambient is the recessed eave downlights washing the brick; vertical is the up-down sconces painting those tall strokes along the wall; guidance is the integrated path lights; decorative is the slatted lanterns sitting in the beds. Swap the brick for siding and the math still holds — the light just spreads softer. Drop to three layers and the whole thing flattens out fast.
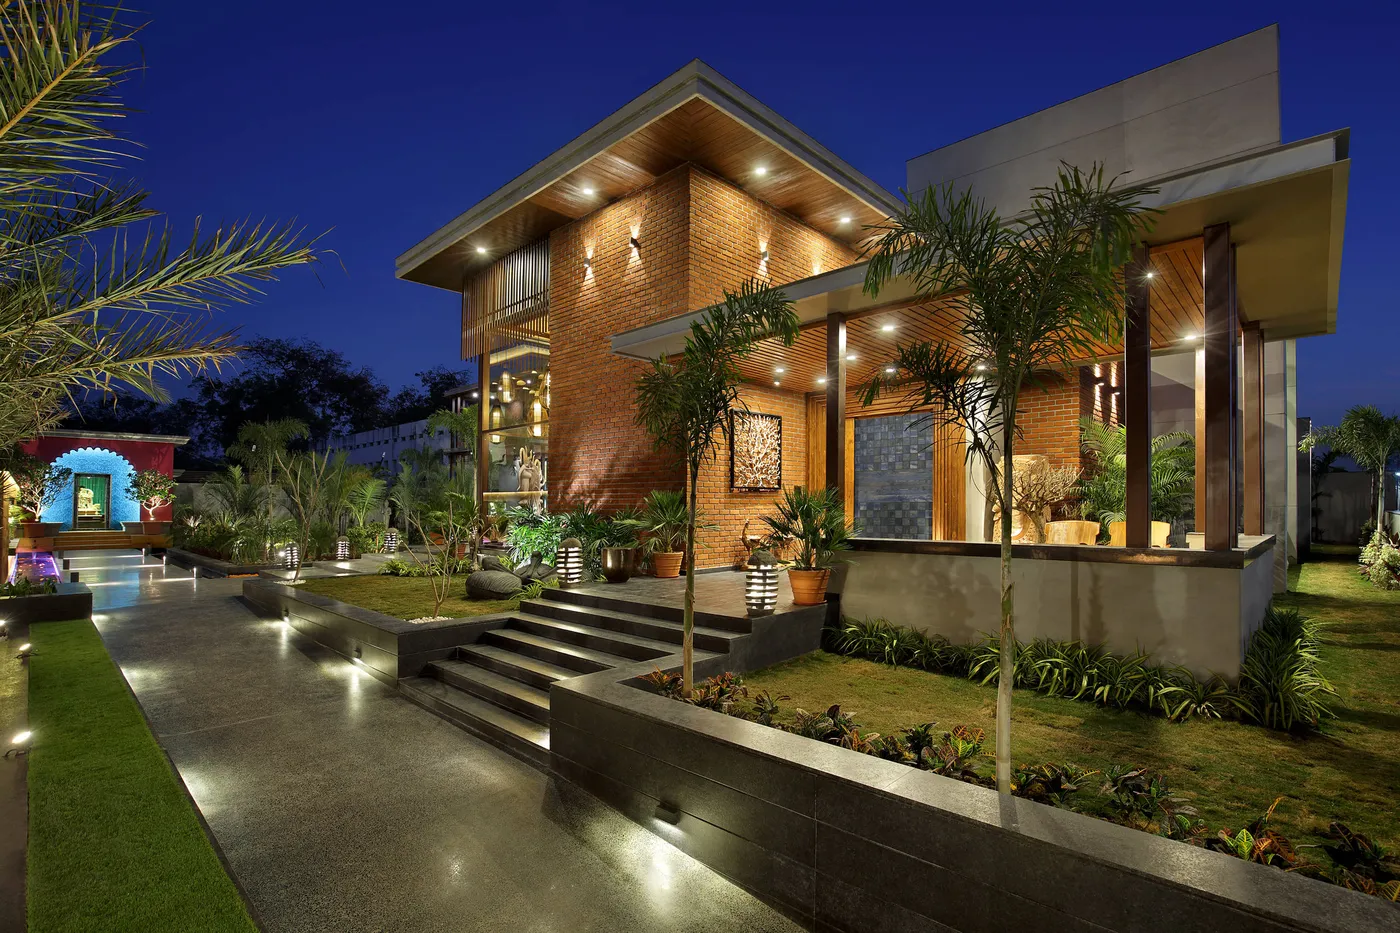
You don’t need architectural-grade fixtures for this. Home Depot’s Hampton Bay and Amazon’s budget aluminum sconces run $30–$60 each instead of $150–$400, and a six-pack of stake lights for the beds is around $45. Skip the integrated path lights and use $25 solar bollards instead. Realistic total: $250–$450 versus $2,000+ for the designer version. The one upgrade worth paying for is the transformer — cheap ones hum and die in year three.
5. Tiered Entry Steps Wrapped in Hidden LED Strip Light
- Measure the nosing on every step and add 10% for waste.
- Buy IP67 strip inside an aluminum channel — bare adhesive tape peels by summer.
- Clean and dry the surface, then mount the channel about 3/4 inch back from the front edge.
- Stay at 2700–3000K and keep the run under 80% of the transformer’s rated load.
- Wire to a dusk-to-dawn sensor or smart switch, then walk the steps at night from the bottom.
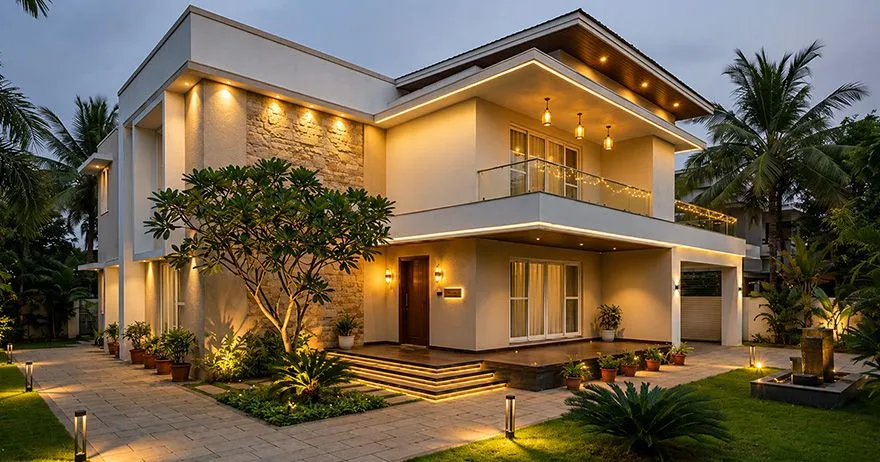
Time: 2–4 hours for four to six steps. Materials: about $90–$250.
Strip lighting is the least forgiving product in outdoor lighting. Mounted too far forward, you get visible dots and a band of glare that makes the steps harder to read, not easier. Mounted with tape alone, it lifts at the first cold snap. Keep it in a channel, keep it dimmable, and keep it warm — cool white strip under a step looks like a phone lying on the ground.
6. Stacked Stone Entry Framed by Tall Vertical Sconces
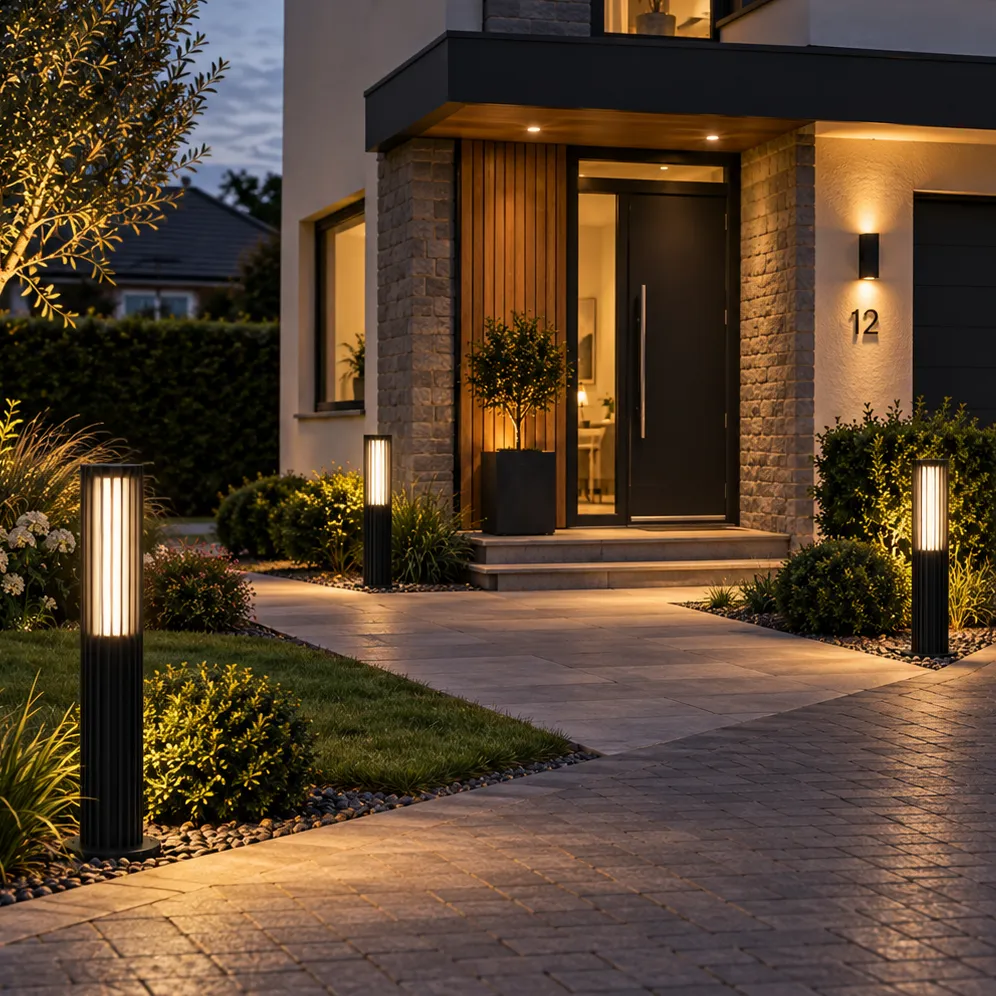
This scheme wants a facade at least 24 feet wide and an entry recessed 4 feet or more — that’s what lets the vertical sconces read as a pair rather than two lonely rectangles. Bollards spaced 8–10 feet apart along a path feel intentional; at 4 feet they look nervous. If your front wall is short and flat, skip this and borrow the three-sconce rhythm in Idea #10, which is built for tighter facades.
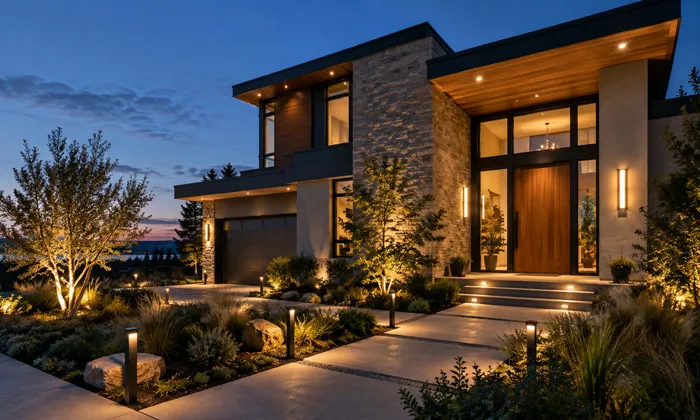
Bollard lights are where budgets quietly explode — landscape-grade versions run $120–$250 each. Home Depot and Amazon sell aluminum bollards for $25–$45 that look nearly identical at night, and solar versions start around $18. The stacked stone doesn’t need spa-grade uplights either; a $40 well light with a warm LED lamp does the job. Realistic total for a similar effect: $400–$700 instead of $2,500.
7. Deck Steps Glowing Above a Fire Pit Lounge
The integrated LED strip on each deck step is the thing. Without it, the deck reads as one dark mass and the fire pit becomes the only visible object — pretty, but floating in nothing. With it, the levels stack up, the stairs become safe without a single visible fixture, and the flames get a soft warm runway leading toward them. It’s also the cheapest part of the whole build, which is the best kind of hero element.
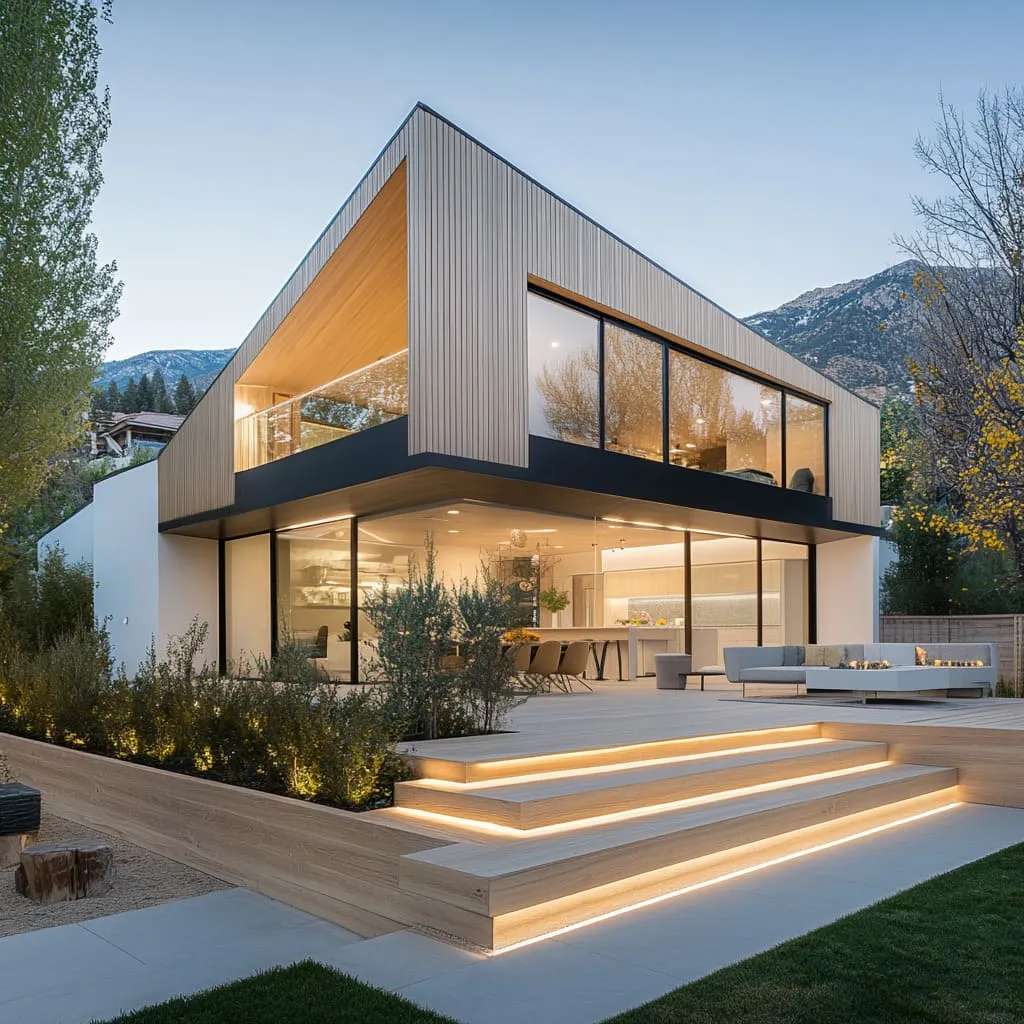
- Set planter uplights 12–18 inches from the shrubs so light grazes the leaves instead of frying them.
- Aim each fixture up and slightly across, never straight ahead.
- Keep every lamp at 2700K so the firelight isn’t fighting a cooler bulb.
- Put the planters and the uplights on separate switches — some nights you want the fire alone.
- Check the effect from the far end of the deck, which is where you’ll actually sit.
Time: 1–2 hours. Cost: $60–$180 for two to four well lights and a transformer.
8. A Slatted Wood Ceiling and One Black Lantern by the Door
For an entry like this one, hang the lantern so its center sits 66–72 inches above the landing, and size it at roughly one-third the width of the door. Smaller and it disappears; larger and it looks like it’s guarding a castle. Then set your ground wash lights 12–18 inches out from the stone wall and aim them straight up. Closer than that and you get a hot spot; farther and the light dies before it reaches the second course of stone.
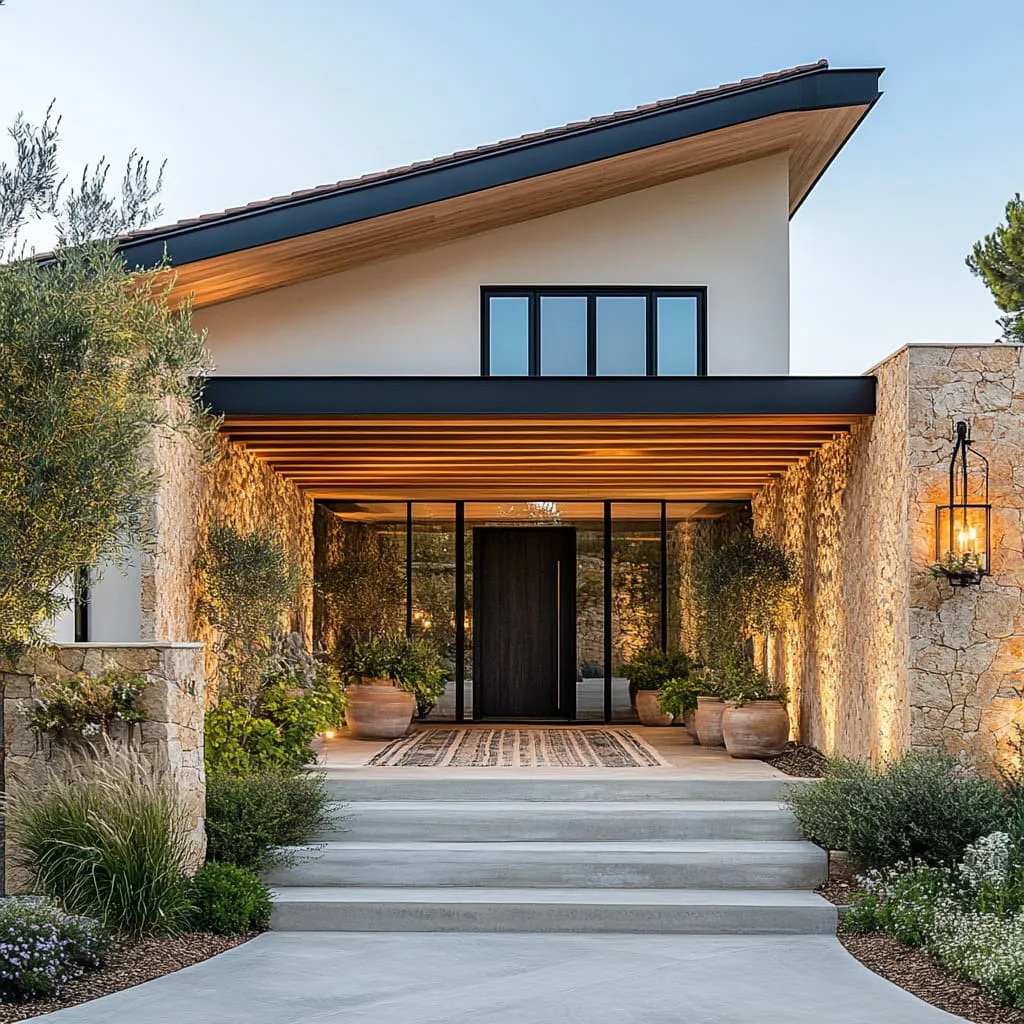
Ground wash lights buried near a planting bed collect mulch, spiders, and condensation, so plan on pulling the lens and wiping it quarterly — five minutes each, or the light turns hazy and yellow. The slatted wood ceiling above wants a fresh seal every two to three years depending on your climate. Stacked stone itself is nearly maintenance-free; just don’t pressure-wash it at 3,000 psi or you’ll blow out the mortar joints.
9. Lighting That Treats the Whole Exterior as One Composition
Homeowners have stopped buying lights one at a time. In 2026 the thing designers are selling isn’t fixtures, it’s a lighting plan — a single drawing that decides where light goes on the house, the hardscape, and the planting all at once. That’s why new builds photograph so well after dark and older homes often look like a collection of accidents. Pinterest is full of these images because they’re the ones people actually stop scrolling for.
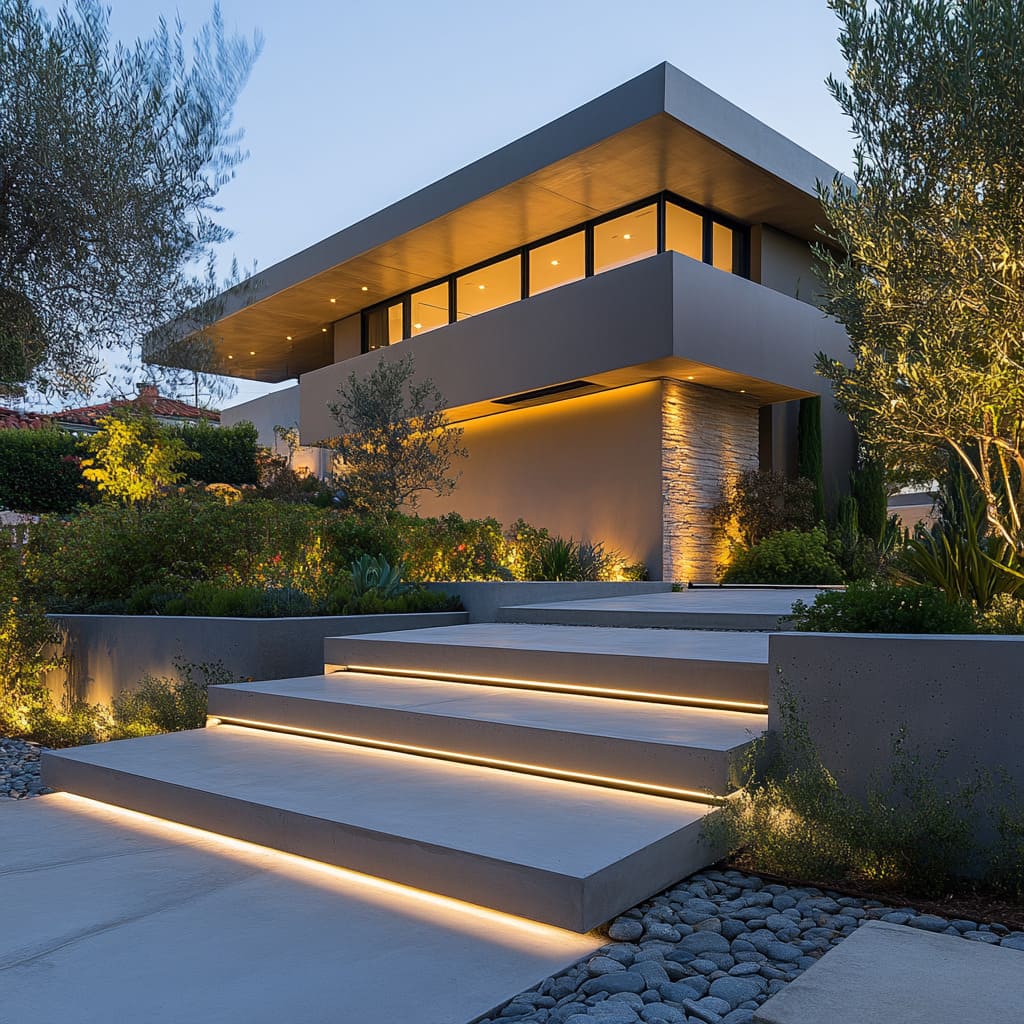
Three principles do the heavy lifting. First, one color temperature everywhere — 2700K across the facade, the garden, and the driveway — so nothing looks bolted on. Second, rhythm: light repeats at regular intervals instead of clustering. Third, contrast: bright pools against genuinely unlit space, which is what makes a house feel designed rather than floodlit. Light everything evenly and you’ve built a parking lot.
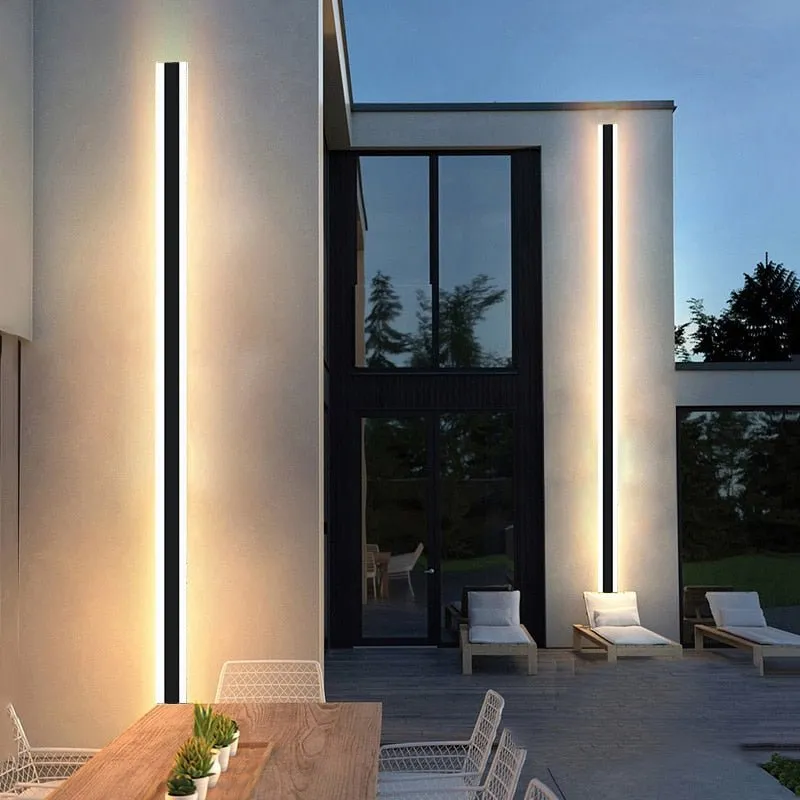
10. Three Tall Black Sconces on a Plain Grey Wall
Three tall rectangles need run to breathe. Ideally you’re working with a wall 18–24 feet long and 9 feet or more from ground to eave, because roughly 6–8 feet between fixtures is what makes them look deliberate. On a shorter wall, two is the right number. This is also what makes it read so differently from the stone entry in Idea #6: same vertical instinct, but that one uses one tall pair as a frame instead of a repeating rhythm.
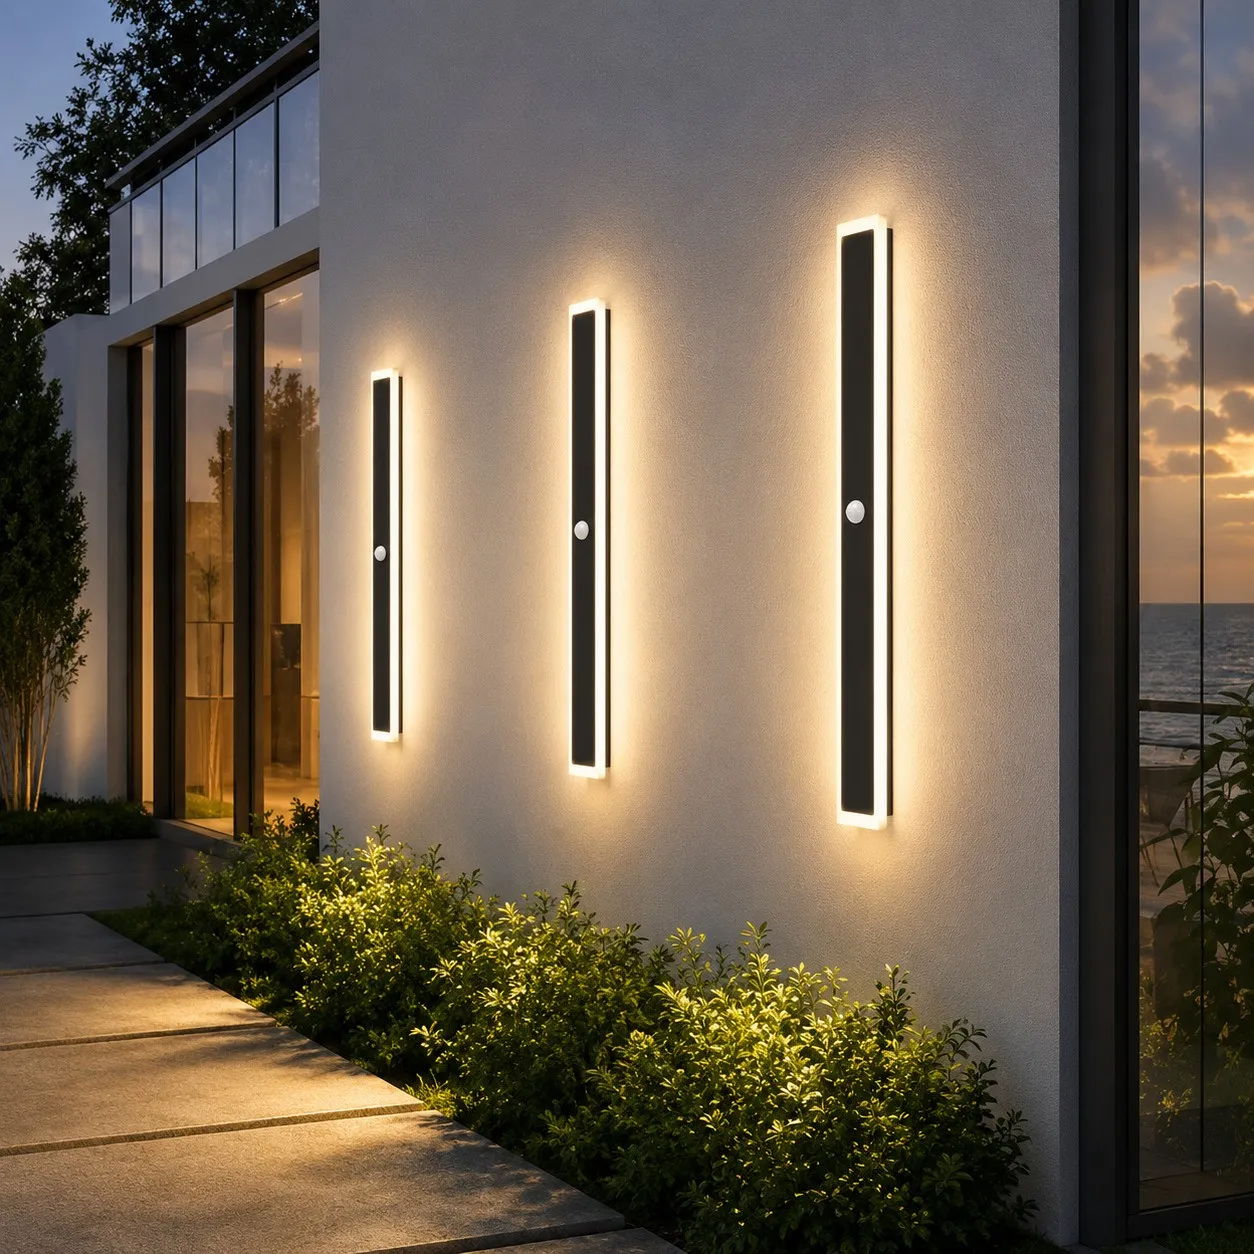
Vertical sconces look wrong at door height. Line the fixture up so its midpoint sits around 60–66 inches — roughly eye level — and keep at least 4 feet from any corner so the wall doesn’t feel crowded. Stay 3 feet clear of a door swing, or the light bounces off the frame and throws a glare band. Mount them so wiring enters from behind, not through a visible j-box on clean stucco.
11. Stacked Stone Picked Out by Warm Ground Uplights
- Four to six ground uplights: $120–$420
- Transformer and low-voltage cable: $90–$300
- Grey patio tile or paver refresh: $300–$1,200
- Decorative white gravel, 2–3 yards: $120–$400
- Install and aiming: $400–$1,100
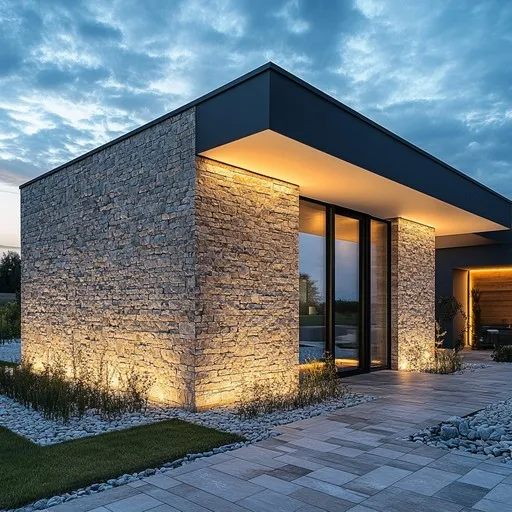
Total: $1,030–$3,420. Budget alternative: keep two uplights on the most visible section of stone, use bagged gravel from a big-box store at $6 a bag, and aim everything yourself on a Saturday evening — under $400 all in.
Read the light here as 65% stone wash, 20% ground plane, 15% accent. The stone gets the biggest share because texture is the point — stacked stone lit from below looks like it’s holding heat. The grey tile and white gravel need just enough to feel like a path, not a runway. And note the restraint: nothing points at the dark roofline at all. Swap stone for brick and you’d flip to 50/25/25, since brick soaks up more light.
12. Security and Ambience From One Sensible Lighting Plan
Security lighting and ambience lighting are usually terrible roommates. Floodlights at full brightness kill every beautiful thing you just built, and dim mood lighting won’t stop anyone who’s determined. The workable compromise is zones: keep the decorative layer on a schedule, and put motion sensors on two or three targeted spots only — not a wall of light. Aim sensors at the approach paths, never at your neighbor’s bedroom window, or you’ll be hearing about it.
- Walk the property at 9pm and note where it’s genuinely dark versus just unlit.
- Check for outdoor outlets within reach of each zone — a new circuit runs $200–$600.
- Confirm transformer capacity before you plan to add fixtures later.
- Decide which zones go on motion sensors and which stay on a schedule.
- Look at your house from the street, not just from the porch.
13. Cream Siding, Brick, and One Spotlighted Shade Tree
Big deciduous trees are the easiest dramatic win in exterior lighting, but placement matters more than wattage. Set the fixture 2–3 feet from the trunk so the bark doesn’t go flat white, and aim it about two-thirds up into the canopy — that’s where leaves catch light and glow. On a tree over 30 feet tall, use two fixtures on opposite sides. One $45 well light aimed well beats four aimed badly, every single time.
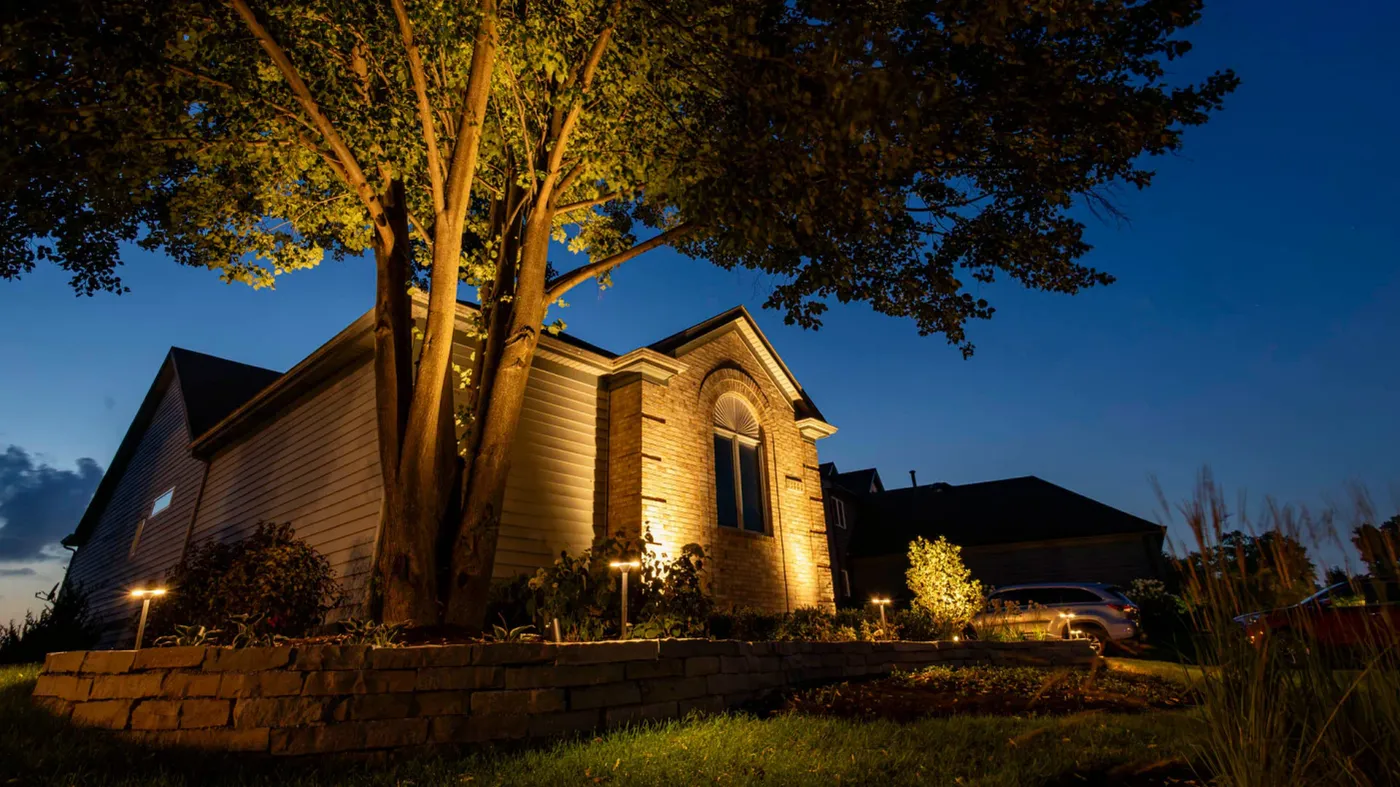
This front yard splits roughly 45% house wash, 30% tree and planting, 25% path and wall accents. The house takes the biggest share because it’s the subject; the tree gets a lot because it’s the emotional moment; the stake lights along the retaining wall get just enough to trace a line. If your tree is smaller, flip to 50/20/30 and lean harder on the path — the eye needs somewhere to travel.
14. Roof Gable Strip Lights Above Stone Pillars
- Measure each gable run and add 10% — never splice a strip in a visible spot.
- Use IP65 or higher strip inside an aluminum channel with a diffuser cover.
- Hide the channel behind the fascia lip so the source is invisible from the driveway.
- Stay at 2700–3000K and keep each run under 30 feet before adding a new power feed.
- Have a licensed electrician handle anything that connects to line voltage.
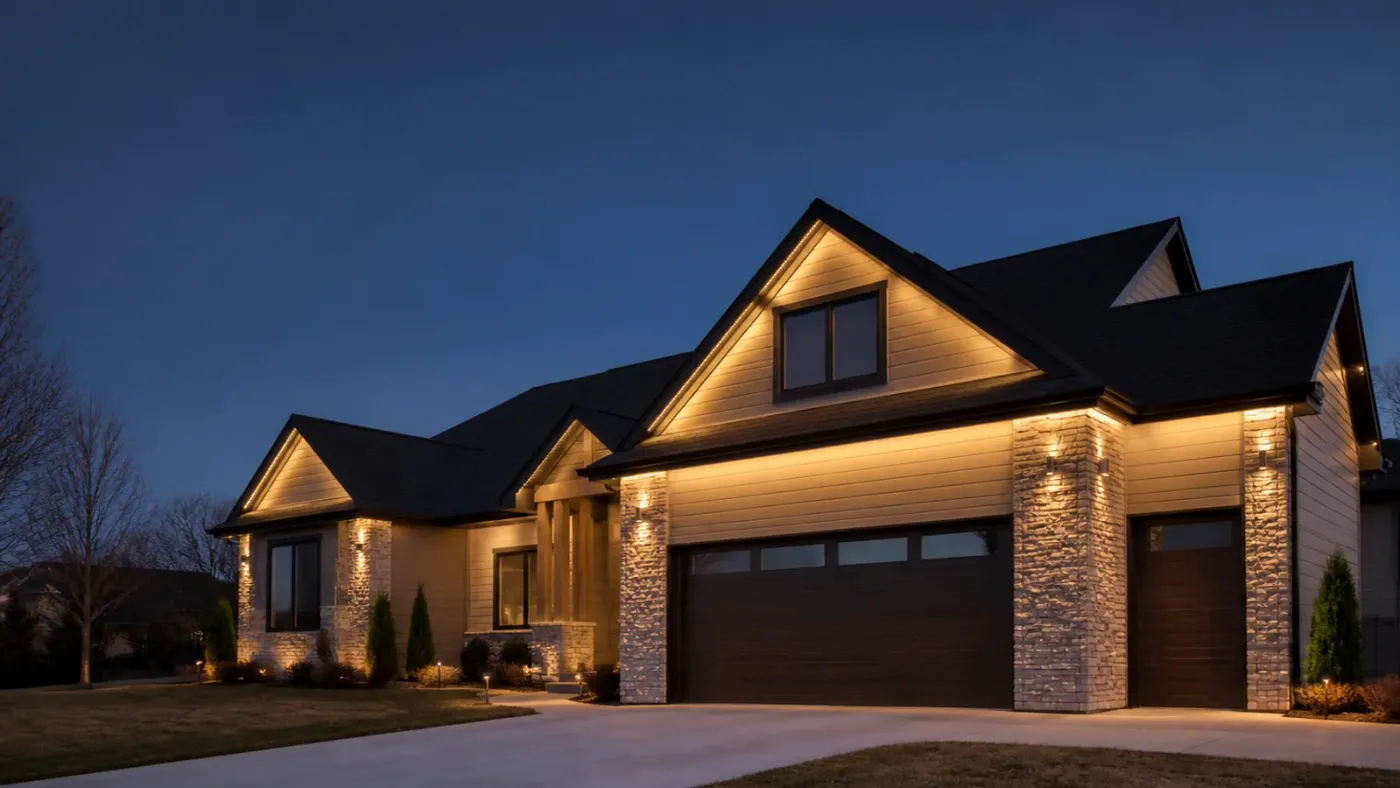
Time: about a day for a two-story home. Materials: $300–$900.
Custom-cut architectural strip is lovely and expensive. A 16-foot IP65 LED strip kit from Amazon runs $20–$45 and gets you 85% of the look if you hide it properly behind the fascia. Up-down sconces on the stone piers? Home Depot’s sub-$60 aluminum options are fine outdoors as long as they’re rated IP44 or better. Similar dusk effect: $250–$600 instead of $2,500–$5,000.
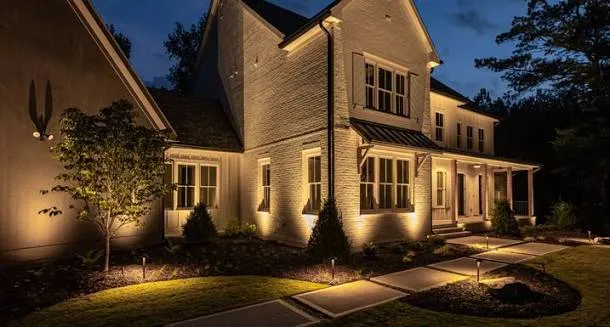
15. White Brick Gables Washed in Warm Uplight
Two things make this work. The first is texture — white brick lit from below throws tiny shadows across every mortar line, so a flat wall suddenly has grain. The second is contrast with the dark roof and window frames, which stops the house from becoming one bright blob. Compare it with the white brick home a couple of ideas down (Idea #16), where the drama comes from trees instead — same palette, very different energy.
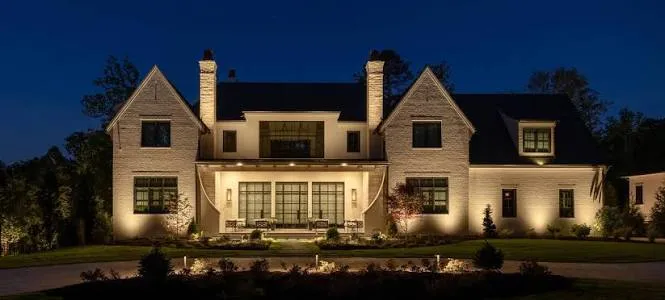
This is a big-house scheme and it needs the room. Multi-gable facades with a covered porch generally want 70–80 feet of frontage and a setback of 40 feet or more before the uplights read as washes instead of spotlights. Space ground uplights 6–8 feet apart along the base, and light the porch ceiling separately so the covered area doesn’t go black. On a smaller home, cut to four uplights and skip the chimney accents entirely.
16. Crepe Myrtles Glowing Pink Against White Brick
The two uplighted crepe myrtles are what turn a nice white brick house into a photograph. Remove them and you still have good facade lighting — you just lose the frame, the height, and the pink. Trees give the composition a foreground and a middle ground, and those blooms pick up warm light in a way brick never will. If your yard has two trees anywhere near the front, this is the single best place to spend your lighting budget.
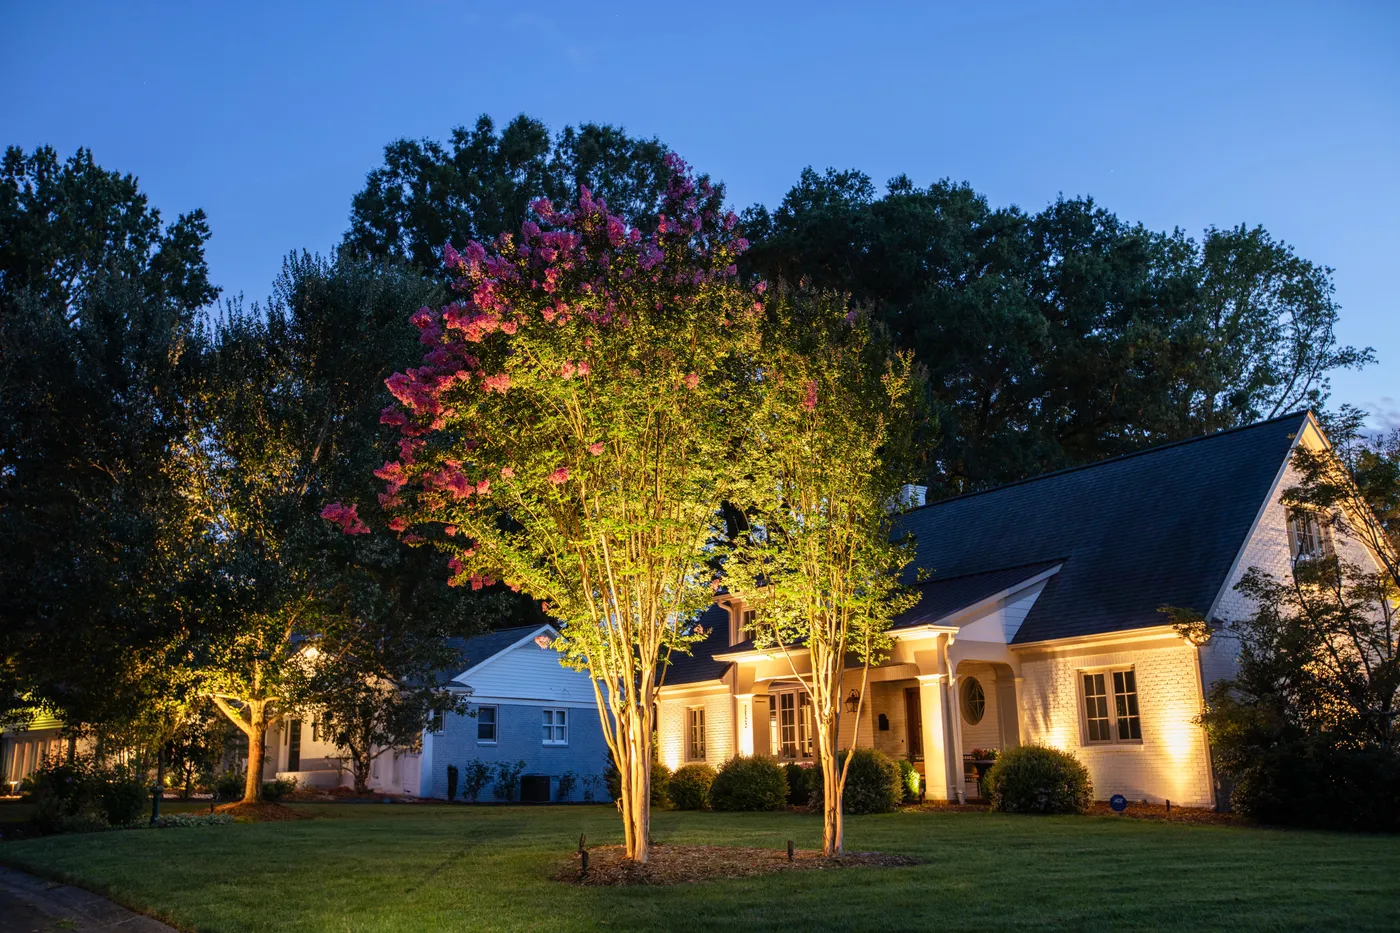
- Two tree uplights with warm lamps: $80–$260
- Four to six facade uplights: $120–$420
- Transformer and cable: $90–$300
- Low path lights along the beds: $90–$280
- Install, if you hire it out: $400–$1,200
Total: $780–$2,460. Budget alternative: start with the two tree uplights only. Two $40 well lights and a $70 transformer change how the whole front of the house feels — under $200, with the facade layer saved for next spring.
17. Wall Lights That Carry the Entire Scheme
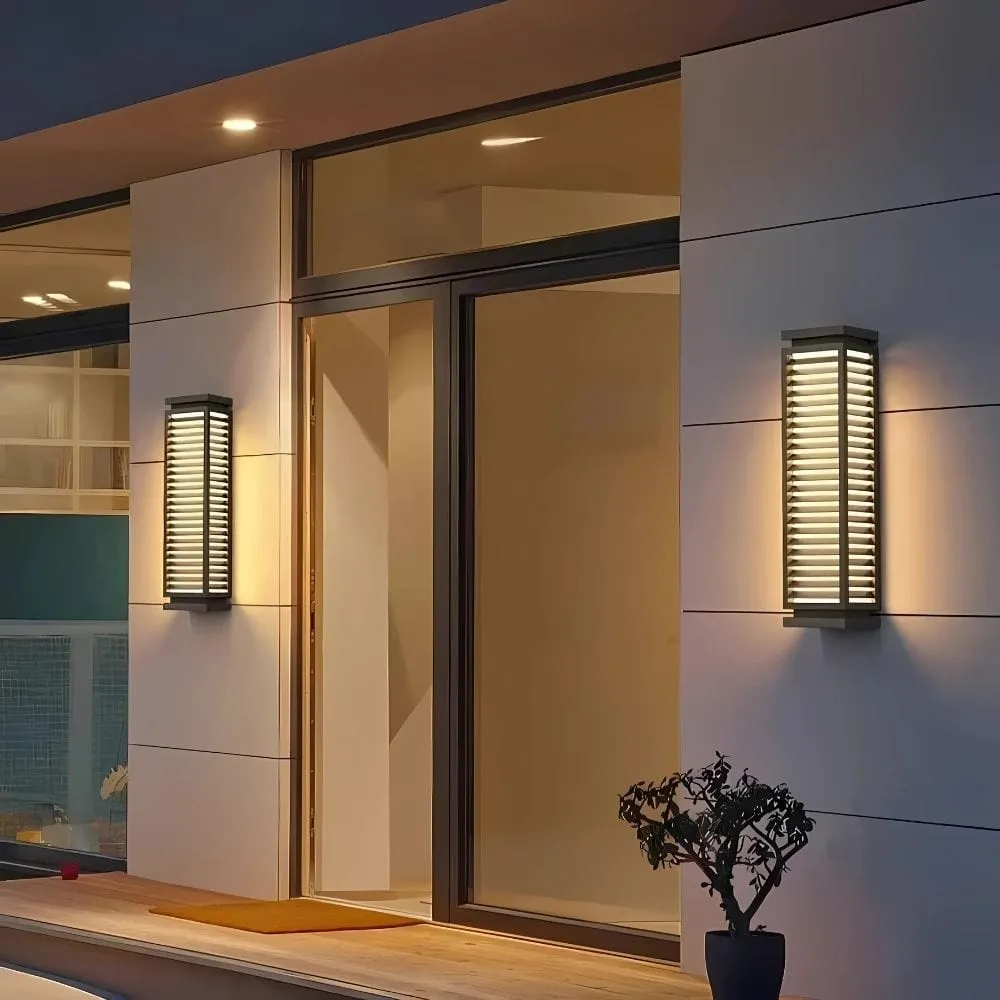
If wall lights are doing the heavy lifting, you need more of them than you think. On a plain front elevation, four to six sconces across 30 feet gives even coverage; two will leave dark bands between them. Mount at a consistent height, keep the same finish, and make sure each one throws light both up and down — a down-only wall light leaves the upper facade dead and makes the house look shorter than it is.
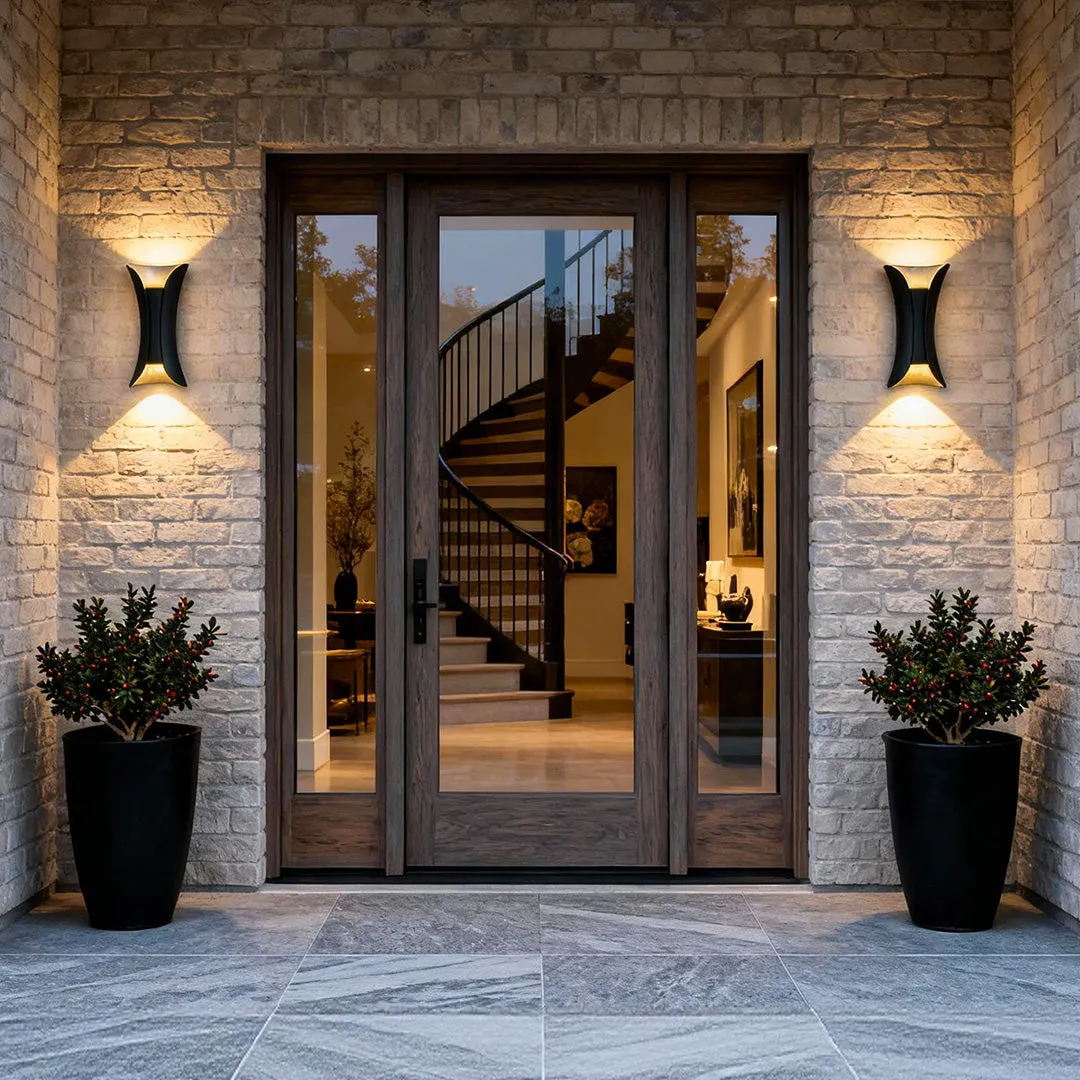
Wall lights alone almost never light the ground, and that’s the complaint we hear most: pretty glow up top, pitch-black steps below. Add at least two ground-level sources — path lights or flush step lights — before you buy a fourth sconce. Also check the glare from inside. A wall light mounted near a window becomes a bright smear on your own glass every night.
18. IP65 Wall Lamps for a Clean Contemporary Facade
On a contemporary facade the split is different: about 70% wall wash, 20% accent, 10% path. Clean lines mean you can’t hide sloppy lighting behind decor — one hot spot and the whole wall reads as a mistake. Keep everything at 2700–3000K, use the same finish on every fixture, and resist the urge to add uplights at the base. On a truly minimal facade, less lighting is the entire design.
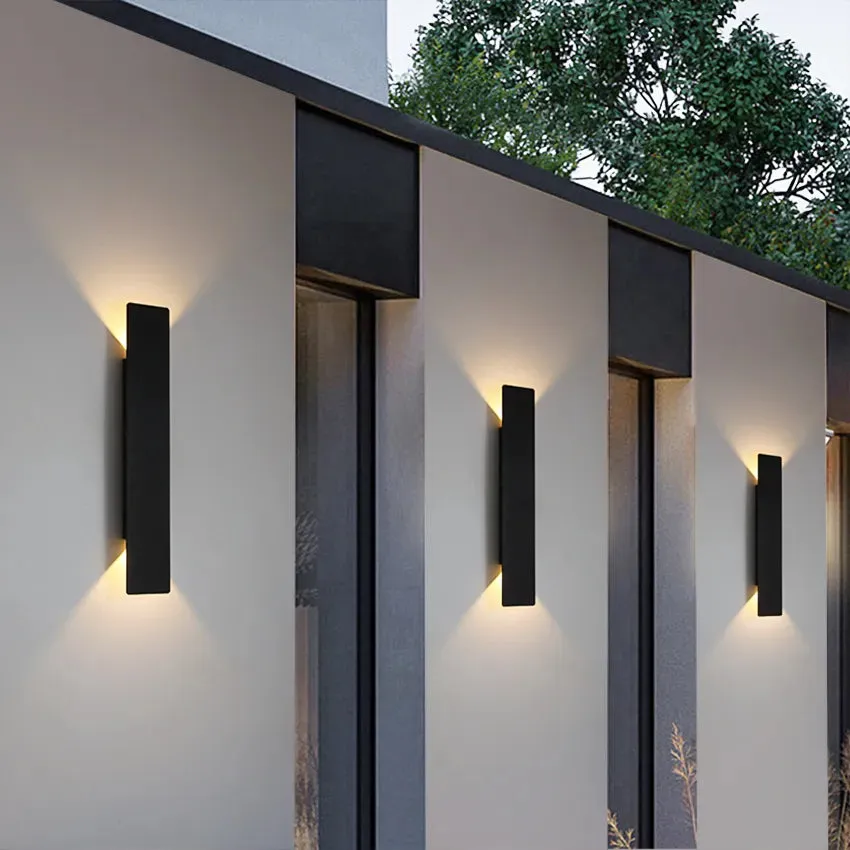
The unglamorous hero here is the IP65 rating. It’s what lets a slim wall lamp sit fully exposed to rain, salt air, and hose water without fogging from the inside out — and fogged fixtures are exactly what makes outdoor lighting look cheap after two winters. IP44 handles splashes; IP65 handles direct spray. If you live anywhere with real weather, that rating matters more than the shape of the fixture.
19. Exterior Lighting That Makes Stairs Safe After Dark
Outdoor stairs generally run 3–4 feet wide with 6–8 inch risers, and that’s the sweet spot for step lighting: one fixture per riser on wide stairs, or one per side every three to four steps on narrower ones. If your treads are shallower than 11 inches, keep the light low and recessed or it glares straight into your eyes on the way down. Steep garden steps on a slope need light at both the top and the bottom landing.
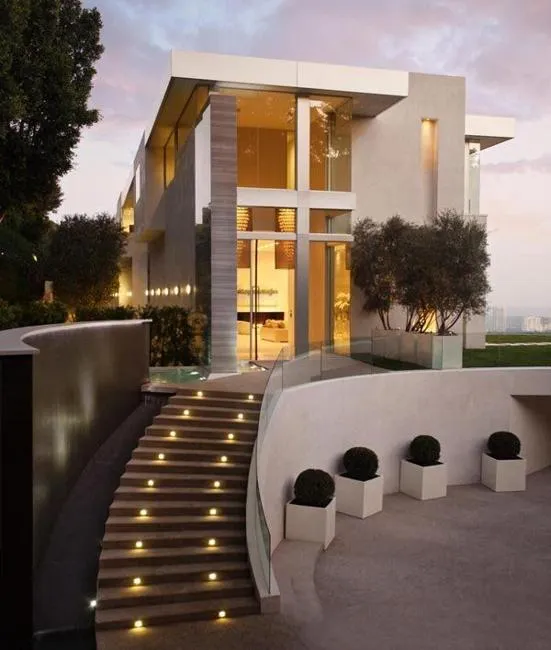
Step lights take abuse: feet, snow shovels, standing water, freeze-thaw cycles. Recessed models with a gasketed lens last longest; surface-mounted ones collect water behind them. Expect to reseal or replace lenses every three to five years, and check the wiring connections each fall — water wicking into a connector is the number one reason a step light dies mid-winter.
20. Illuminated Concrete Steps and a Square Fire Pit
- Integrated step lights, 6–10: $180–$600
- Exterior wall sconces, pair: $120–$450
- Landscape uplights, 4–6: $120–$480
- Square fire pit: $300–$1,500
- Concrete pavers with pebble joints: $800–$3,500
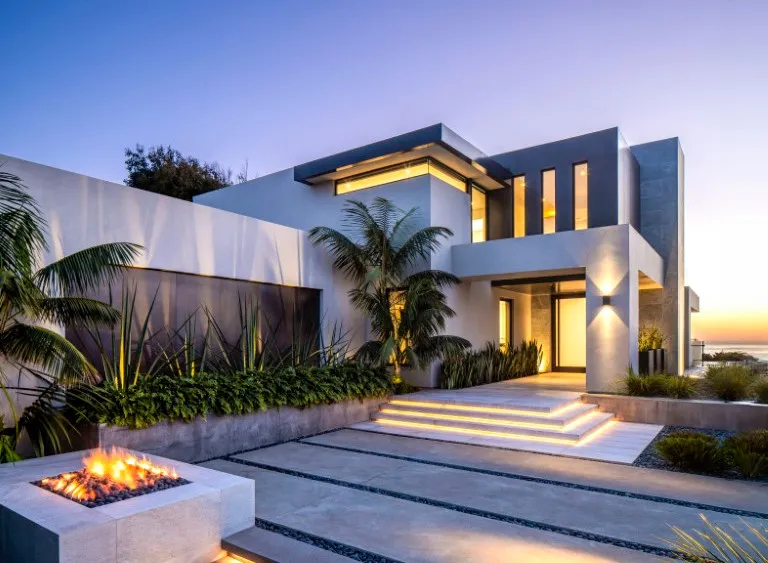
Total: $1,520–$6,530. Budget alternative: skip the paver driveway for now, use a $150 steel fire pit, and spend the savings on step lights — those are the fixtures that make the architecture read at night.
It comes down to repetition and one warm focal point. The horizontal lines of the steps, the roofline, and the paver joints all repeat, and the lighting follows those lines instead of fighting them. Then the fire pit breaks the pattern with soft, moving, orange light that no LED imitates. Compare with the deck version in Idea #7 — same trick, warmer materials, more firelight.
21. Three Linear Sconces and a Stone Path Through Grass
In-ground path lights set into a lawn are a mowing hazard, plain and simple. Either set them flush and accept that you’ll be trimming around them, or use stake lights at the edge of the bed where the mower doesn’t reach. On white stucco, watch the glare too: three bright linear sconces on a pale wall can double the perceived brightness, so dim them to about 60% and let the stone pavers and the lawn do the rest.
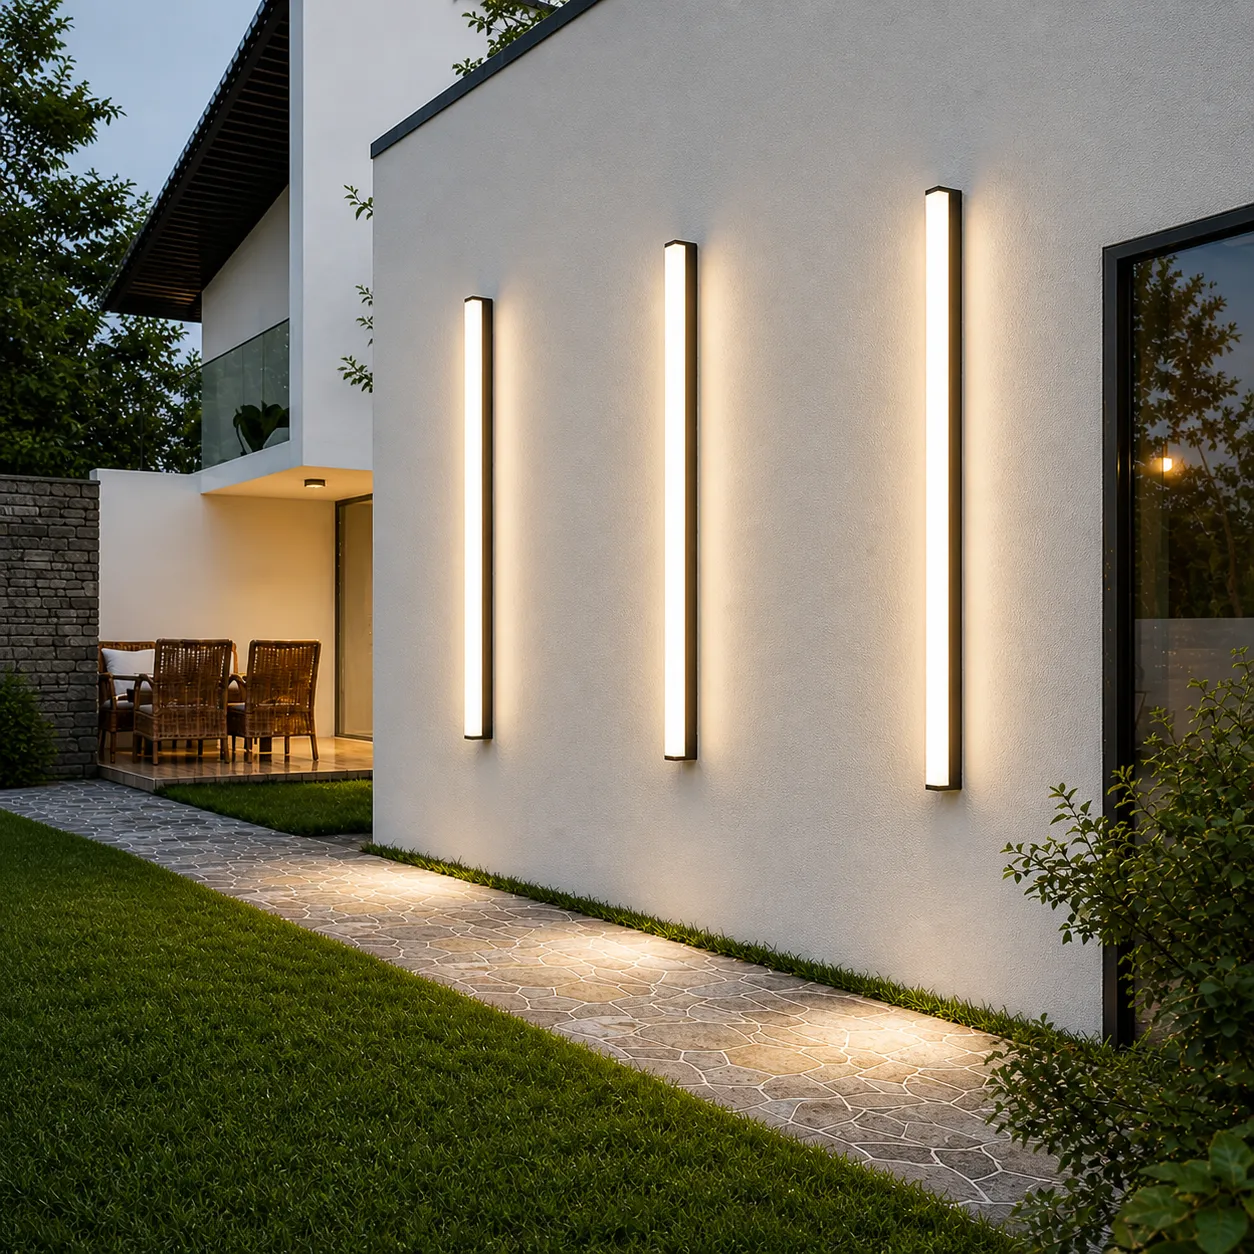
Call it 40% vertical, 35% path, 25% landscape. The three linear sconces carry the vertical layer and set the rhythm; the recessed in-ground lights trace the pavers toward the patio; the landscape share is barely there, just enough to keep the grass from going black. Swap white stucco for wood siding and you can push to 50% vertical — pale surfaces reflect, dark ones absorb.
22. One Lighting Scheme That Suits Modern and Traditional Homes
When a house mixes modern and traditional details, keep the fixtures neutral. Simple cylinders, rectangles, and lanterns in one matte finish look right on almost anything; anything fussy or ornate dates the facade instantly. Use 2700K lamps at 90 CRI or higher — high CRI is what makes stone look like stone instead of grey mush — and keep every fixture at the same height across the whole front.
This approach scales down better than it scales up. It works from a 20-foot cottage frontage to a 40-foot colonial without changing the strategy: two sconces flanking the entry, four to six ground uplights along the base, path lights every 6–8 feet. Under 1,500 square feet, use four uplights maximum. On a two-story facade, add a soffit layer, because uplights alone stop about two-thirds of the way up the wall.
Almost none of this look comes from the price tag. Amazon and Home Depot sell matte black sconces for $35–$70 a pair; a five-pack of warm well lights runs $60–$90; a 120W transformer is $70. That’s a full front-of-house scheme for $250–$450. Put the savings into a dimmer and a second zone — control changes the result more than the fixtures do.
23. What Luxury Outdoor Lighting Actually Buys You
Luxury outdoor lighting in 2026 mostly means two things: integrated LED fixtures with no visible lamp, and control systems that run everything from your phone. Designers are specifying muted finishes — bronze, matte black, brushed aluminum — because fixtures have to look good at 2pm, not just at 10pm. The trend is also pushing warmer color temperatures; the icy 4000K look that was standard a decade ago now reads industrial rather than upscale.
Roughly 80% of the luxury look is layout, not price. Basic aluminum fixtures at $30–$80 each, aimed the way a designer would aim them, outperform $400 fixtures aimed badly. The two places to spend: an IP65-rated transformer with room for expansion, and a smart dimmer. Total: $400–$800 for a front elevation that reads as expensive from the curb.
24. Sleek Wall Lights That Disappear by Day
- Choose fixtures rated IP65 if they’re fully exposed, IP44 under a porch or soffit.
- Match the finish to your window frames so the fixtures vanish in daylight.
- Mount so the light source faces up and down, never straight out at eye level.
- Keep dark finishes away from sprinkler heads — hard water spots etch powder coat.
- Test one fixture at night before ordering the rest.
Time: 1–2 hours per fixture. Cost: $40–$180 each.
Sleek dark fixtures are beautiful until your sprinklers hit them. Water spots show on matte black like nothing else, and once powder coat is etched there’s no polishing it out. Move the sprinkler heads or add a drip line so they don’t spray the wall. Same principle as the step strips in Idea #5: the best outdoor light is the source you can’t see.
25. The Maintenance Routine Your Outdoor Lights Actually Need
- Map which circuit or transformer feeds each zone before you need to.
- Confirm every fixture is reachable without a tall ladder — you’ll be up there twice a year.
- Note the brand and color temperature of each lamp so replacements match.
- Check whether your transformer has capacity for the fixtures you plan to add.
- Pick a maintenance weekend each spring and fall, and put it in your calendar.
Label everything. Write the fixture brand, wattage, and color temperature on the inside of the transformer door, and label the breaker. Six months from now, when one path light dies, that sticker saves you from buying the wrong lamp and ending up with one cool-white fixture sitting in a warm-white run. It happens constantly, and it’s the most visible lighting mistake on any residential street.
26. Plan the Lighting Before You Buy a Single Fixture
The most important thing in any exterior lighting project is the paper it’s drawn on. A simple sketch of your facade with each fixture marked — and the reason for it — prevents the two classic disasters: too many fixtures, and fixtures bought one at a time over three years. You don’t need software. A photo of your house, a pencil, and twenty minutes standing on the driveway at dusk will tell you more than any catalog will.
A workable default for a single-family front: 40% facade wash, 30% ground and path, 20% landscape accents, and 10% reserved for a focal point like a specimen tree. That reserved tenth is the part most people skip, and it’s the part that makes a house memorable. Mostly hardscape out front? Move 10% from landscape into the path layer. Mostly planting? Do the reverse.
27. Garden and Facade Lighting With a Luxury Finish
- Designer-grade facade fixtures, 6–8: $900–$3,200
- Garden and specimen uplights: $400–$1,600
- Smart transformer and control system: $250–$900
- Professional aiming and programming: $400–$1,200
- Wiring and installation: $1,200–$4,000
Total: $3,150–$10,900. Budget alternative: keep the same layout but use mid-range fixtures — $1,200–$2,500 all in — and spend one evening aiming everything yourself. Layout is the luxury; the fixtures are just hardware.
Garden lighting has moved past the two-spotlights-on-a-shrub era. In 2026 people treat planting like architecture: grazing tree trunks, washing tall grasses, uplighting specimen plants the way a museum lights sculpture. It’s a habit borrowed from commercial landscape design, and it’s why the best-lit homes now look layered from the sidewalk all the way to the back fence.
28. Contemporary Facades and the Light That Suits Them
Contemporary facades with long horizontal lines need width to work with. This style of lighting — wall washes, hidden strips, minimal fixtures — reads best on frontages of 40 feet or more with 10-foot ceilings on the main level. On a narrow contemporary infill lot, cut the fixture count and lean on the entry: two sconces and two uplights, done properly, beat eight fixtures crammed into 20 feet.
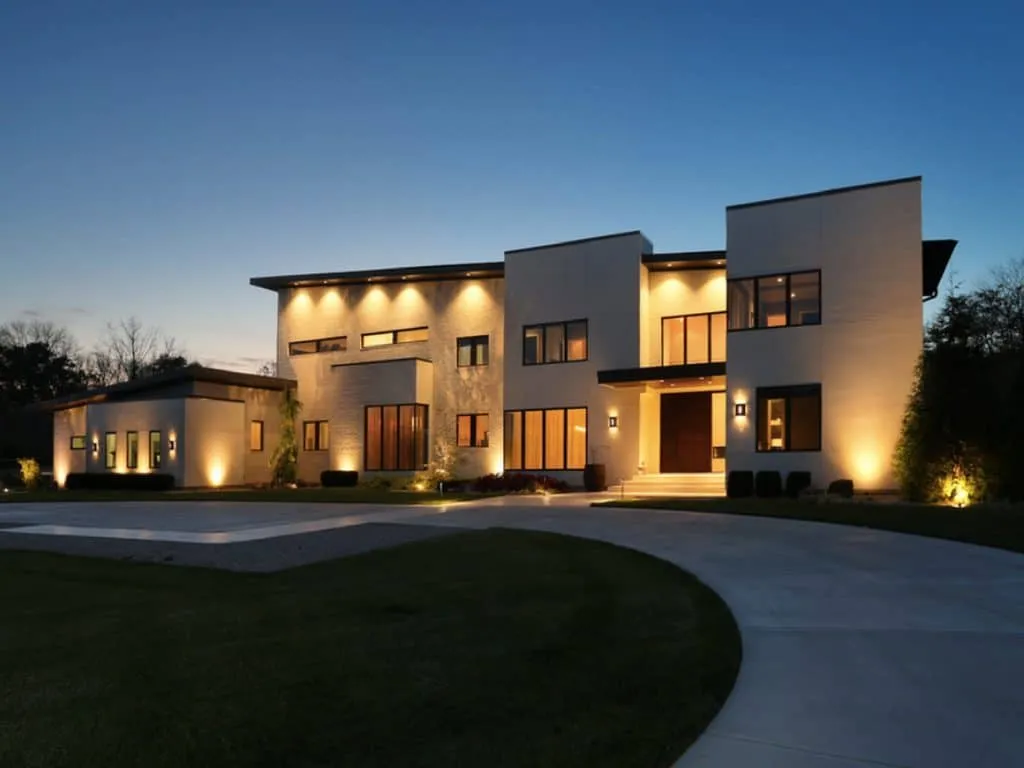
Clean stucco and smooth panels show every lighting flaw. One misaimed uplight leaves a hard-edged scallop you can’t unsee, and cross-aimed fixtures create a bright X across the wall. Aim them parallel to the wall face, test at night, and adjust in small increments. Also light the ground — contemporary facades go black at the base when every fixture is mounted up high.
29. Keeping Outdoor Fixtures Alive Through Every Season
- Check for water pooling around fixtures after heavy rain — drainage first, fixtures second.
- Test that each zone still works after the first hard freeze.
- Inspect lens covers for cracks or hazing before winter arrives.
- Verify the transformer is plugged into a GFCI outlet.
- Know your lamp model numbers before you need replacements.
Most outdoor lighting failures aren’t bulb failures — they’re water failures. Connectors corrode, gaskets dry out, and water finds the lowest point in the run. Walk your zones twice a year with the lights on and look for dimming, flickering, or a fixture that’s quietly given up. An annual ten-minute inspection and a $12 tube of dielectric grease gets you a decade out of a decent system instead of four years.
Your House Deserves to Look Good After Dark
Good exterior lighting isn’t about buying more fixtures — it’s about aiming fewer of them better, keeping one warm temperature across the whole property, and putting light where you actually look. Start with the two or three zones you see from the street, live with it for a few weeks, then add from there.
If you try one of these ideas, pin a before-and-after — the nighttime shots are always the ones people save. 📌 Save this guide to Pinterest so it’s waiting when you’re ready to order.